

Leatt Products
Words Lester Perry
Images Jamie Fox
RRP $90—Trail 1.0 Short Sleeve Top | $160—Trail 2.0 Shorts | $230—ReaFlex Hybrid UltraLite Knee Guards
$370—Enduro 2.0 Convertible Helmet
Distributor BikeCorp
Leatt is a brand founded on a quest to offer the highest possible protection, through rigorous research, testing and development. Grown from an idea sparked by Dr Chris Leatt’s mission to protect his then four-year-old son from injury while riding motorbikes, Leatt has become a global leader in research-backed protective gear.
After witnessing the death of fellow rider and friend, Alan Selby, from a suspected neck injury in a motorbike accident, Dr Leatt set about working on a solution to avoid neck injuries that are all too common in bike sports. A few years later, Leatt the brand came to be, hitting the market with a neck brace. This revolutionary neck brace quickly became a global phenomenon and was soon adopted for mountain bike use.
In 2015, Leatt launched its first range of mountain bike helmets, and, by 2020, the band dove headlong into the MTB world, offering head-to-toe safety and gear solutions. Now in its 20th year, and with numerous design awards and industry accolades, Leatt recently began a new chapter here in New Zealand. With a new distributor now in place, we’re sure to see this storied brand continue going from strength to strength, becoming a more dominant player locally.

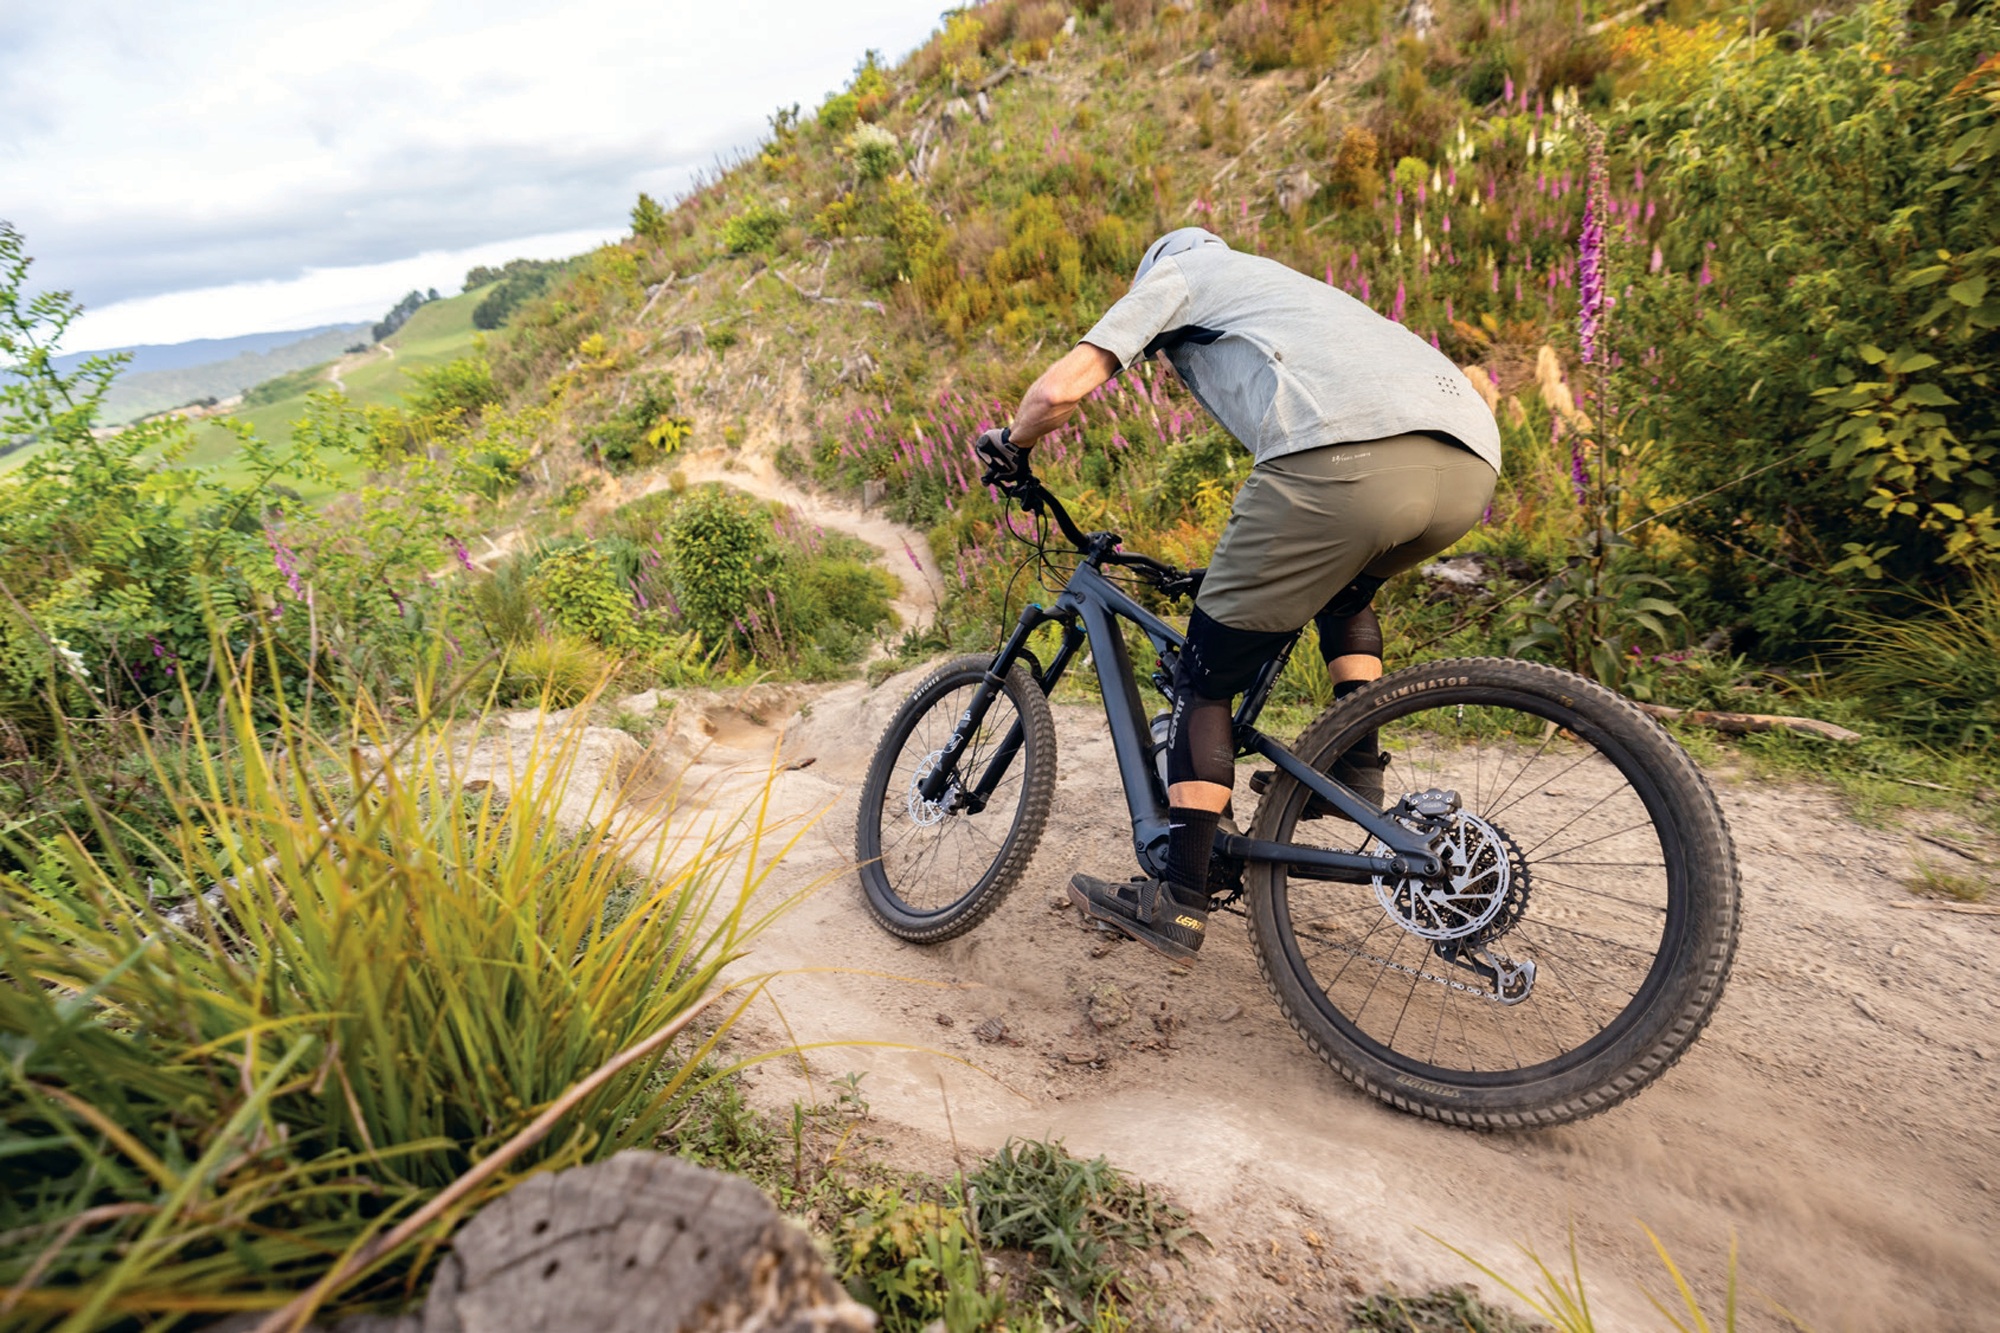
Trail 2.0 Shorts
As with jerseys, we’ve recently seen an influx of riding shorts that do the job but, much like my school report card said; “could do better”. The truth is, most of us are happy to stay in our lane and have no idea what we’re missing out on elsewhere, not keen to branch out from the norm and try a different brand of gear for fear of not liking it.
At first glance, I was unsure about everything going on with the Trail 2.0 shorts. “Is this overkill?” I thought to myself, looking at all the pockets and panelled fabric.
Sizing-wise, I’m a medium or 32” in any type of short and, true to form, the Leatt Trail 2.0 in the medium is spot on for me. With no tension on the hook & loop adjusters on each hip, they’re just right in the waist and, on the off chance I lose some weight, I’ll be able to cinch these up to keep the fit perfect. The length is a little longer than other trail-focused shorts in the market, but it sits nicely over the top of a kneepad and midway down my kneecaps.
The fit is somewhat slim and has a tailored, pre-curved silhouette to suit the riding position of the ‘trail’ riding they’re intended for. The mid-height crotch keeps it from snagging on the saddle, and a double dome snap closure and zipped fly keep the shorts in place and give critical access when needed. Two deep hip pockets ensure what you put in them stays in them, and a zippered cargo pocket on the right thigh has space for anything that won’t fit in the hip pockets. I’ve been surprised at how much I’ve put the extra storage to use, stashing food or a GoPro in there, which in the past would have either been left behind or crammed uncomfortably into a hip pocket. The pocket bags are attached to the outer fabric at their deepest point, keeping them in place so they don’t jump around while riding.
The fabric of these shorts is a lightweight polyester weave with 360° stretch, and most seams are double-row stitched for durability. Key wear areas around the knees and between the legs use a marginally heavier version for increased durability. A softer fabric is used on the inside of the waistband, ensuring comfort against the skin. The inside of each thigh has a small row of laser-cut ventilation, which helps keep things breezy.
The Trail 2.0 shorts come with a snap-in liner short. The main fabric is a mesh weave to keep things drafty, and there’s a nice silicon-backed gripper on the bottom of each leg. Many liners I’ve had supplied with shorts have ended up in the bin after a couple of rides, the chamois being of low quality and ultimately uncomfortable—often leaving me with some decent chafed patches on my undercarriage (don’t ask!). In a couple of cases, literal cuts in my buttocks from the chamois edge! Fortunately, that’s not the case with the Trail 2.0 shorts, which fit well. Even though I initially thought it might be too small, the Dual Density Berenis Chamois is comfortable for lengthy periods, and my undercarriage has no complaints.
What don’t I rate? Given the shape, pockets, and the two weights of fabric used across the short, there are a lot of seams. Granted, almost all of them are a double-row, reinforced type, so there’s probably nothing to be concerned about. However, more seams mean more possibility of one becoming damaged and potentially coming apart during a crash or due to long-term wear. So far, I haven’t seen any issues, but time will tell how the shorts hold up.
All in all, this is a banger pair of shorts. I’ve found the cut comfortable, the storage is excellent, and the liner gets a big tick of approval.
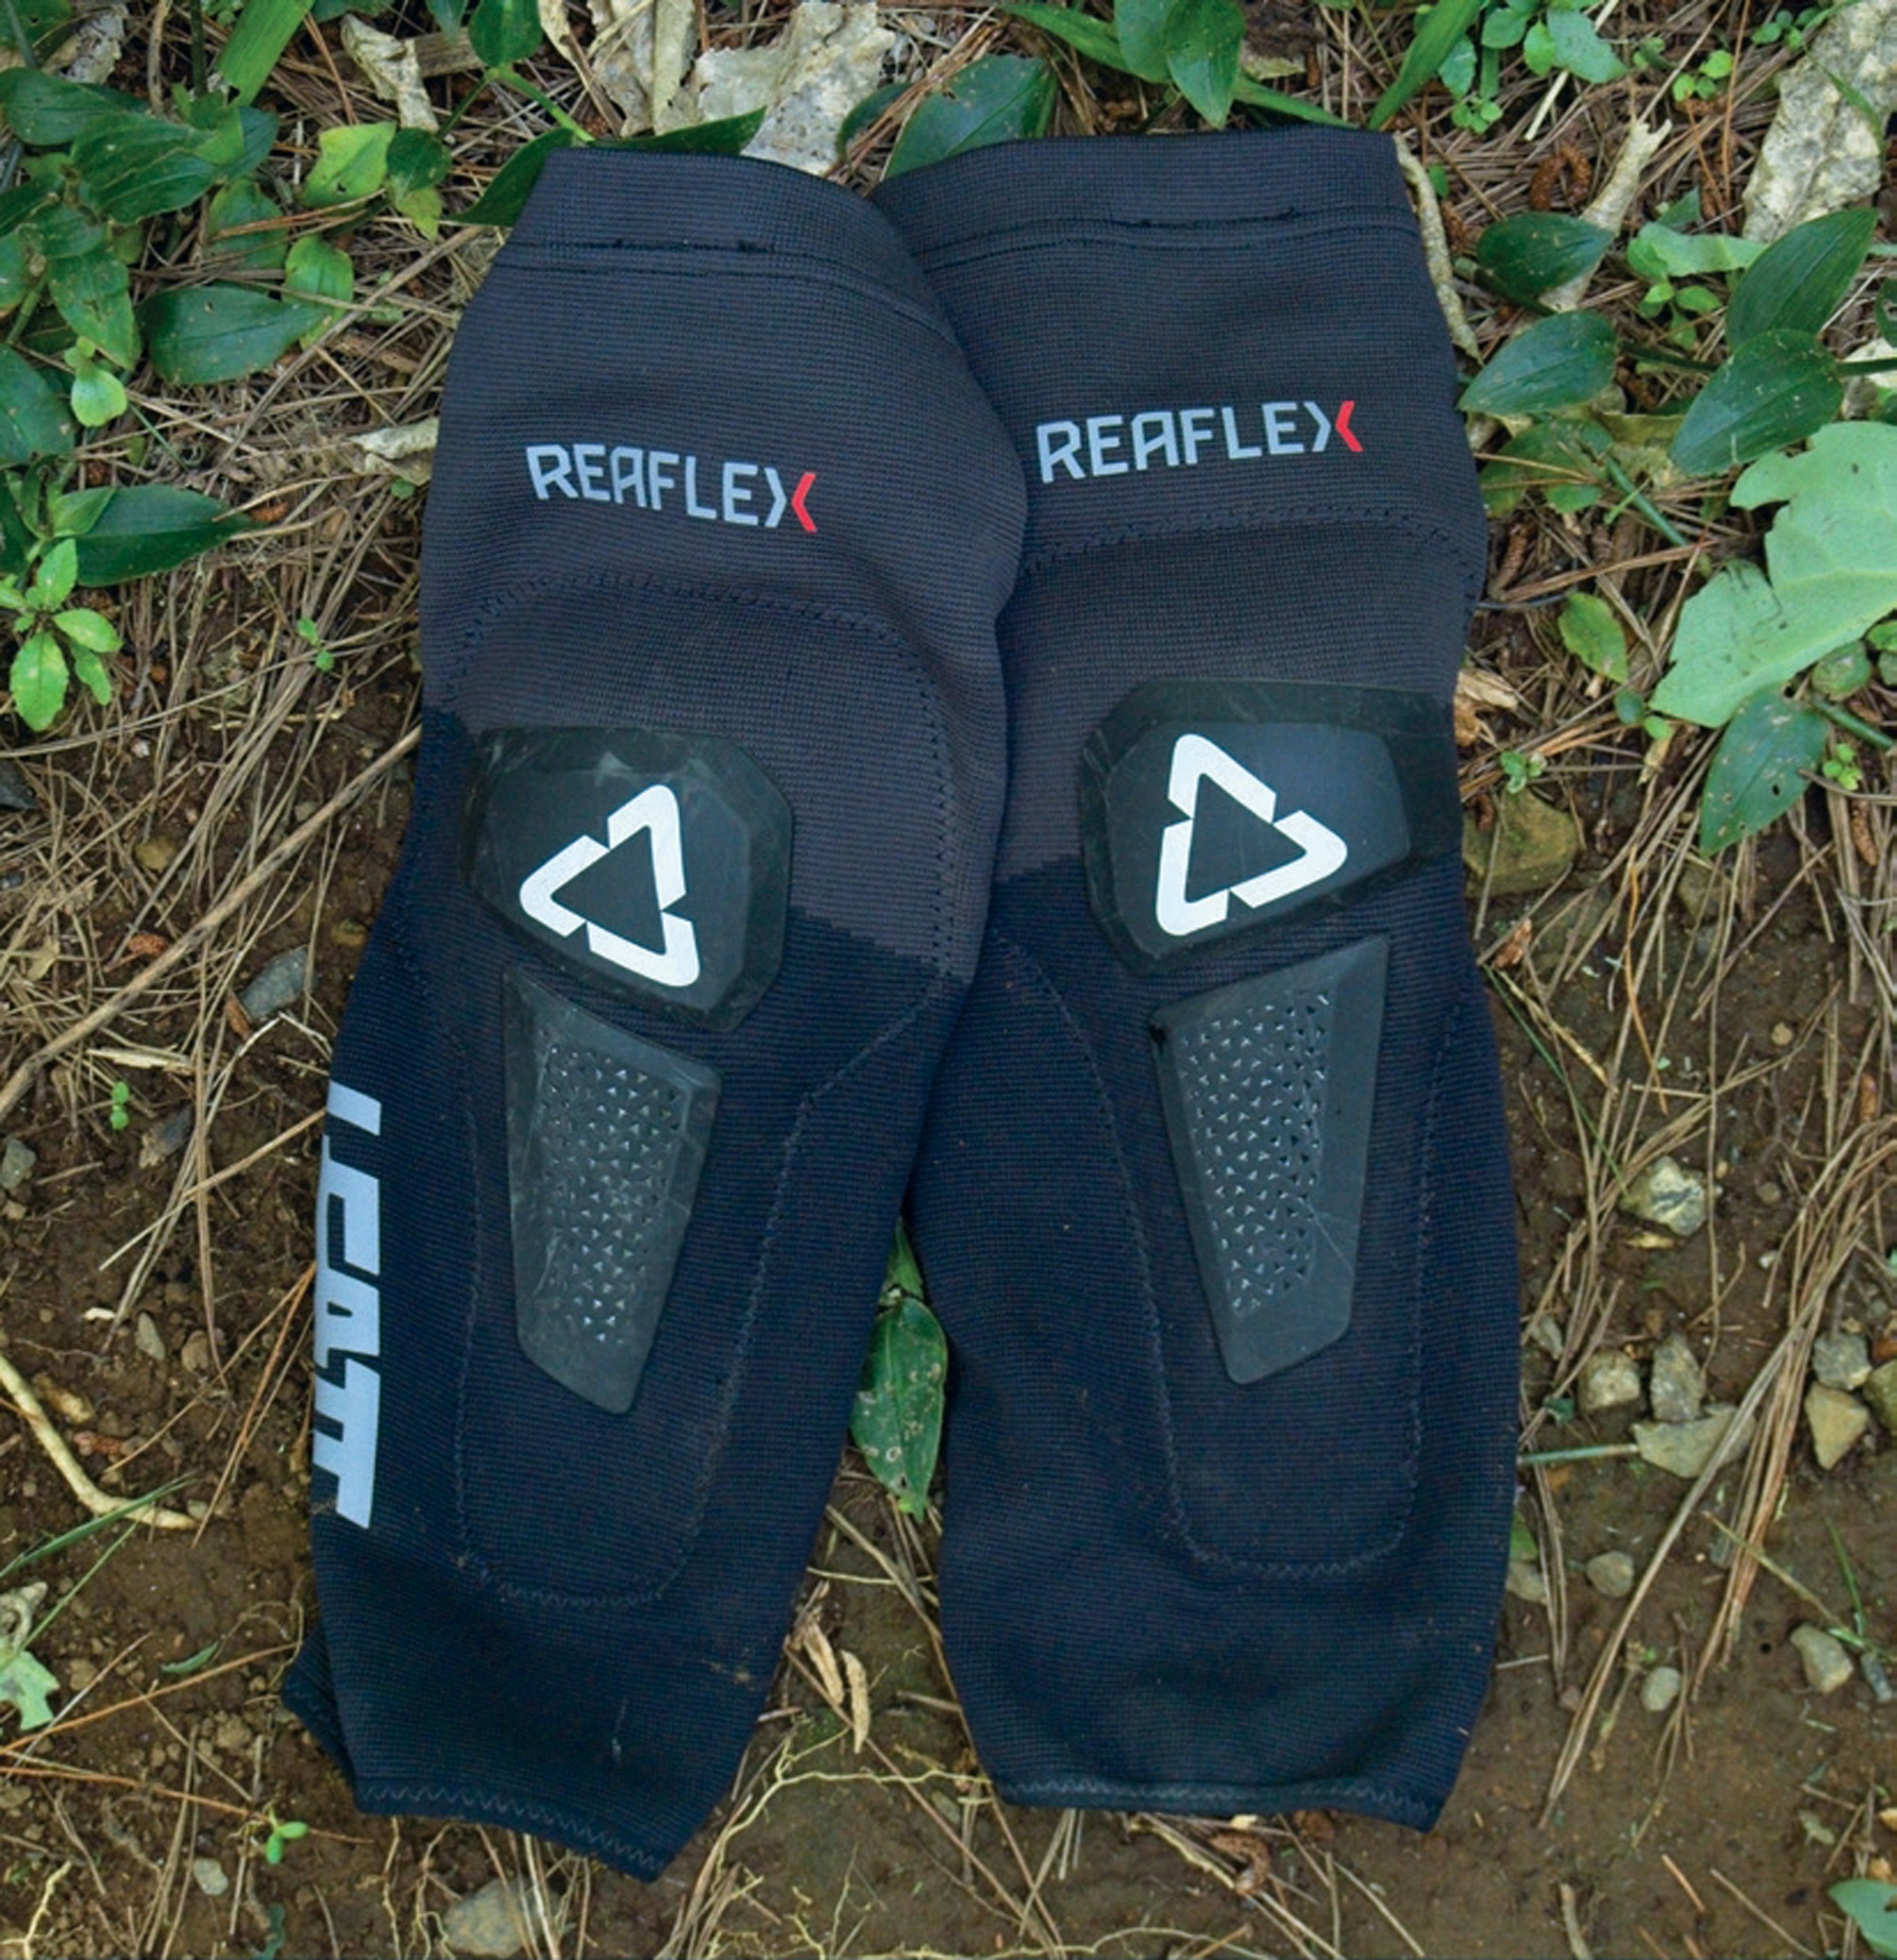
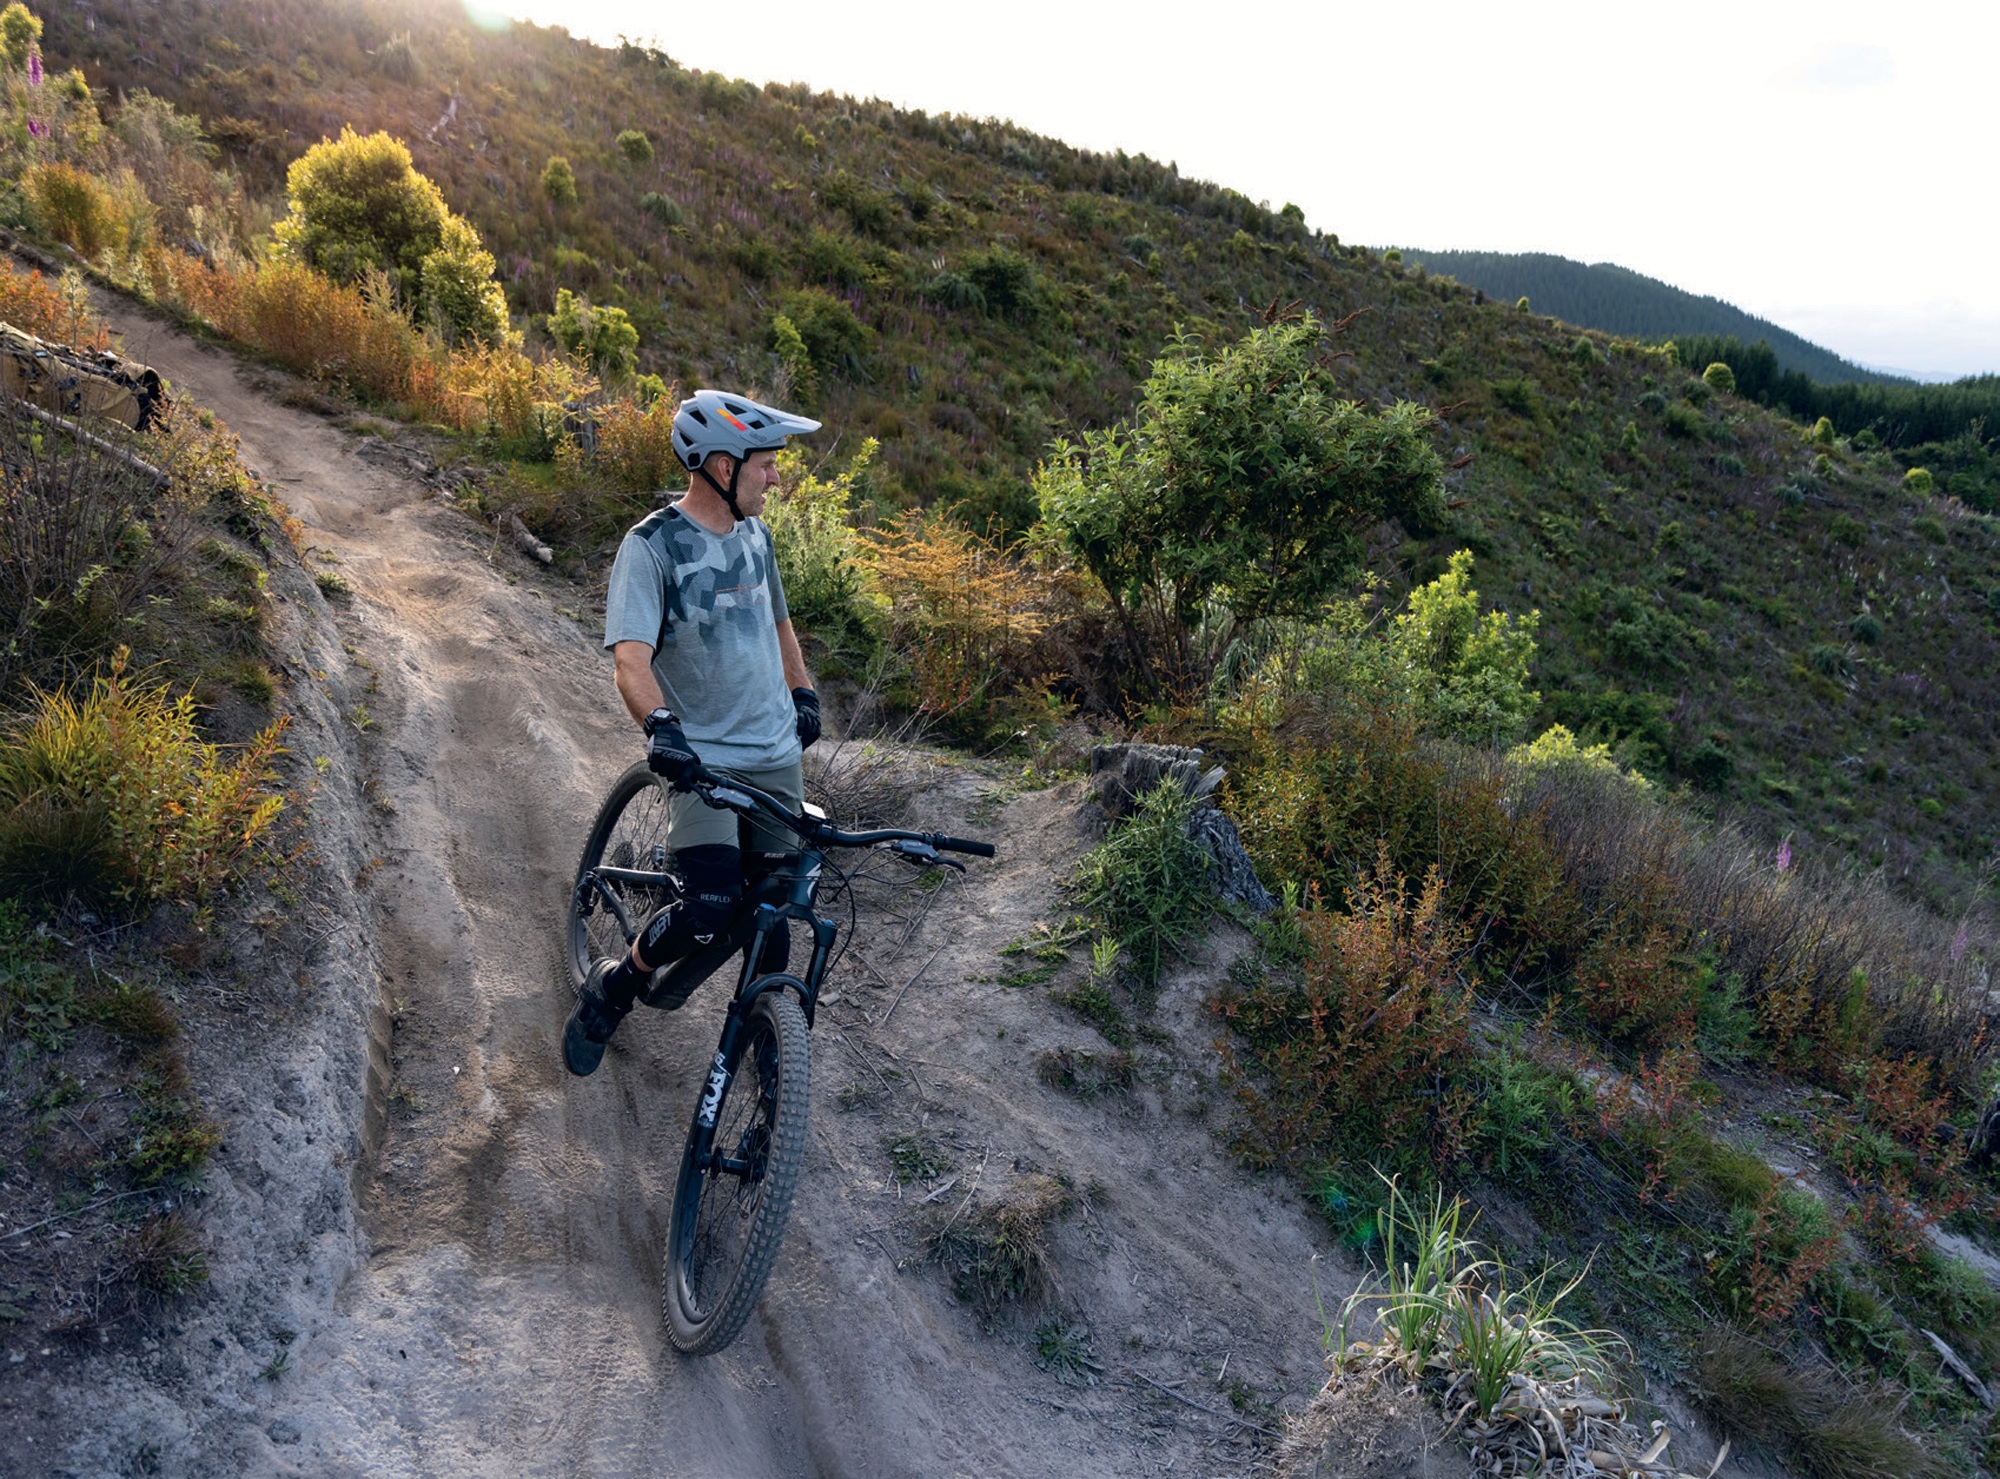
ReaFlex Hybrid UltraLite Knee Guards
Ever since a fateful day three years ago, I’ve worn knee pads of some description almost every time I’m on a bike. Late one afternoon, on a local trail I’d ridden a hundred times, probably more, my bike pitched over and fully committed to a corner. Halfway through the bend, the trail was freshly resurfaced with rotten rock and what was once a grippy turn I could blast through without a thought, was now a loose, jagged surface just waiting for some flesh. Unlucky for me, I was its victim. I had a nasty contaminant-filled gash in my knee, a scrub out at the hospital, a bunch of stitches followed by a few bags of IV antibiotics, and a few weeks off the bike in mid-summer, no less. I’d learned the lesson several times over the years, but this metaphorical straw broke the camel’s back and taught me once and for all. Knee pads are now a must-have on most rides.
The Reaflex Hybrid UltraLite Knee Guards are slip-on knee protection, focused on protecting while out for a pedal, rather than a heavier focus on pure gravity with less pedalling. The guards meet a CE impact certification of one out of a possible two, meaning more protective guards are available, but these do the job as advertised. On the Leatt safety scale, these reach a score of 12 of a possible 25, putting them in the middle of the Leatt range.
The main fabric through the front two thirds of the guards is lightweight (although not as light as some) and sock-like, with a good amount of perforation to aid airflow. The rear third of the guard is ‘AirMesh’, a moisture-wicking, lightweight mesh that helps with breathability. The top cuff features a non-slip silicone printed grip to help keep them in place.
The main padding is provided by ‘ReaFlex impact gel’. It’s soft and pliable while pedalling, and hardens under impact. The outer layer has knee cap and upper shin protection, helping to distribute impact and deflect and slide during a crash.
Although Leatt sells these as “super slim and lightweight”, they’re a fraction bulkier than other “super slim” offerings. Still, the difference in bulk and the gnat’s hair of extra weight is simply because these guards offer more protection than others in this “super slim” category. The ReaFlex impact gel wraps around the knee cap a tad more than some other lightweight guards, although the actual sides of the knee don’t get any padding aside from the sleeve fabric. You’d want to step up to the ReaFlex UltraLite PRO Knee Guards to get this extra side protection.
As with other Leatt products, subtle details make a noticeable difference in the function of these guards. In this case, above the calf is a soft, rubber-backed strip incorporated into the rear mesh. Not only does this offer an element of reinforcement to the lightweight mesh, but it effectively grips above the calf and helps lock the guards in place, not only due to the friction of the rubber, but it works as a ‘cuff’ that sits on top of the wearer’s calf. It works well, and you’ll never know it’s there, although you’d know the difference if it wasn’t.
The fit is comfortable and cosy, and the stretch of the fabric provides an even tension down the entirety of the guards. They breathe well, and I’d put them on par with other similar guards I’ve used. They are not exceptional, but certainly better than heavier weight, bulkier knee pads. Compared to my knobbly knees, I’ve got large calves and quads; even with my lumps and bumps, the guards are comfortable, and there is no pinching, bunching or tight spots while pedalling. My slightly abnormal leg shape (I jest) means the top cuff on all knee pads slides down a little while riding, eventually finding a spot lower down my thigh than I’d like; these ReaFlex’s are no different. They fit fine and work as they should but, like the rest, the cuff ends up lower than I’d like, and there’s no magic sauce to keep them where they should ideally be. My solution is to tuck the cuff of the guards under a liner short leg to keep everything in place.
With five sizes on offer, from small to double- extra-large, there should be a size to suit everyone. A quick measure-up and comparison to Leatt’s size chart gives prospective buyers confidence in their choice.
I rate the Hybrid UltraLite Knee Guards as a level up from most other lightweight offerings. The fit is spot-on and comfortable. There’s an excellent level of protection on offer, considering how light they are, and the outer shells add an extra element of protection that most lightweight guards don’t have.
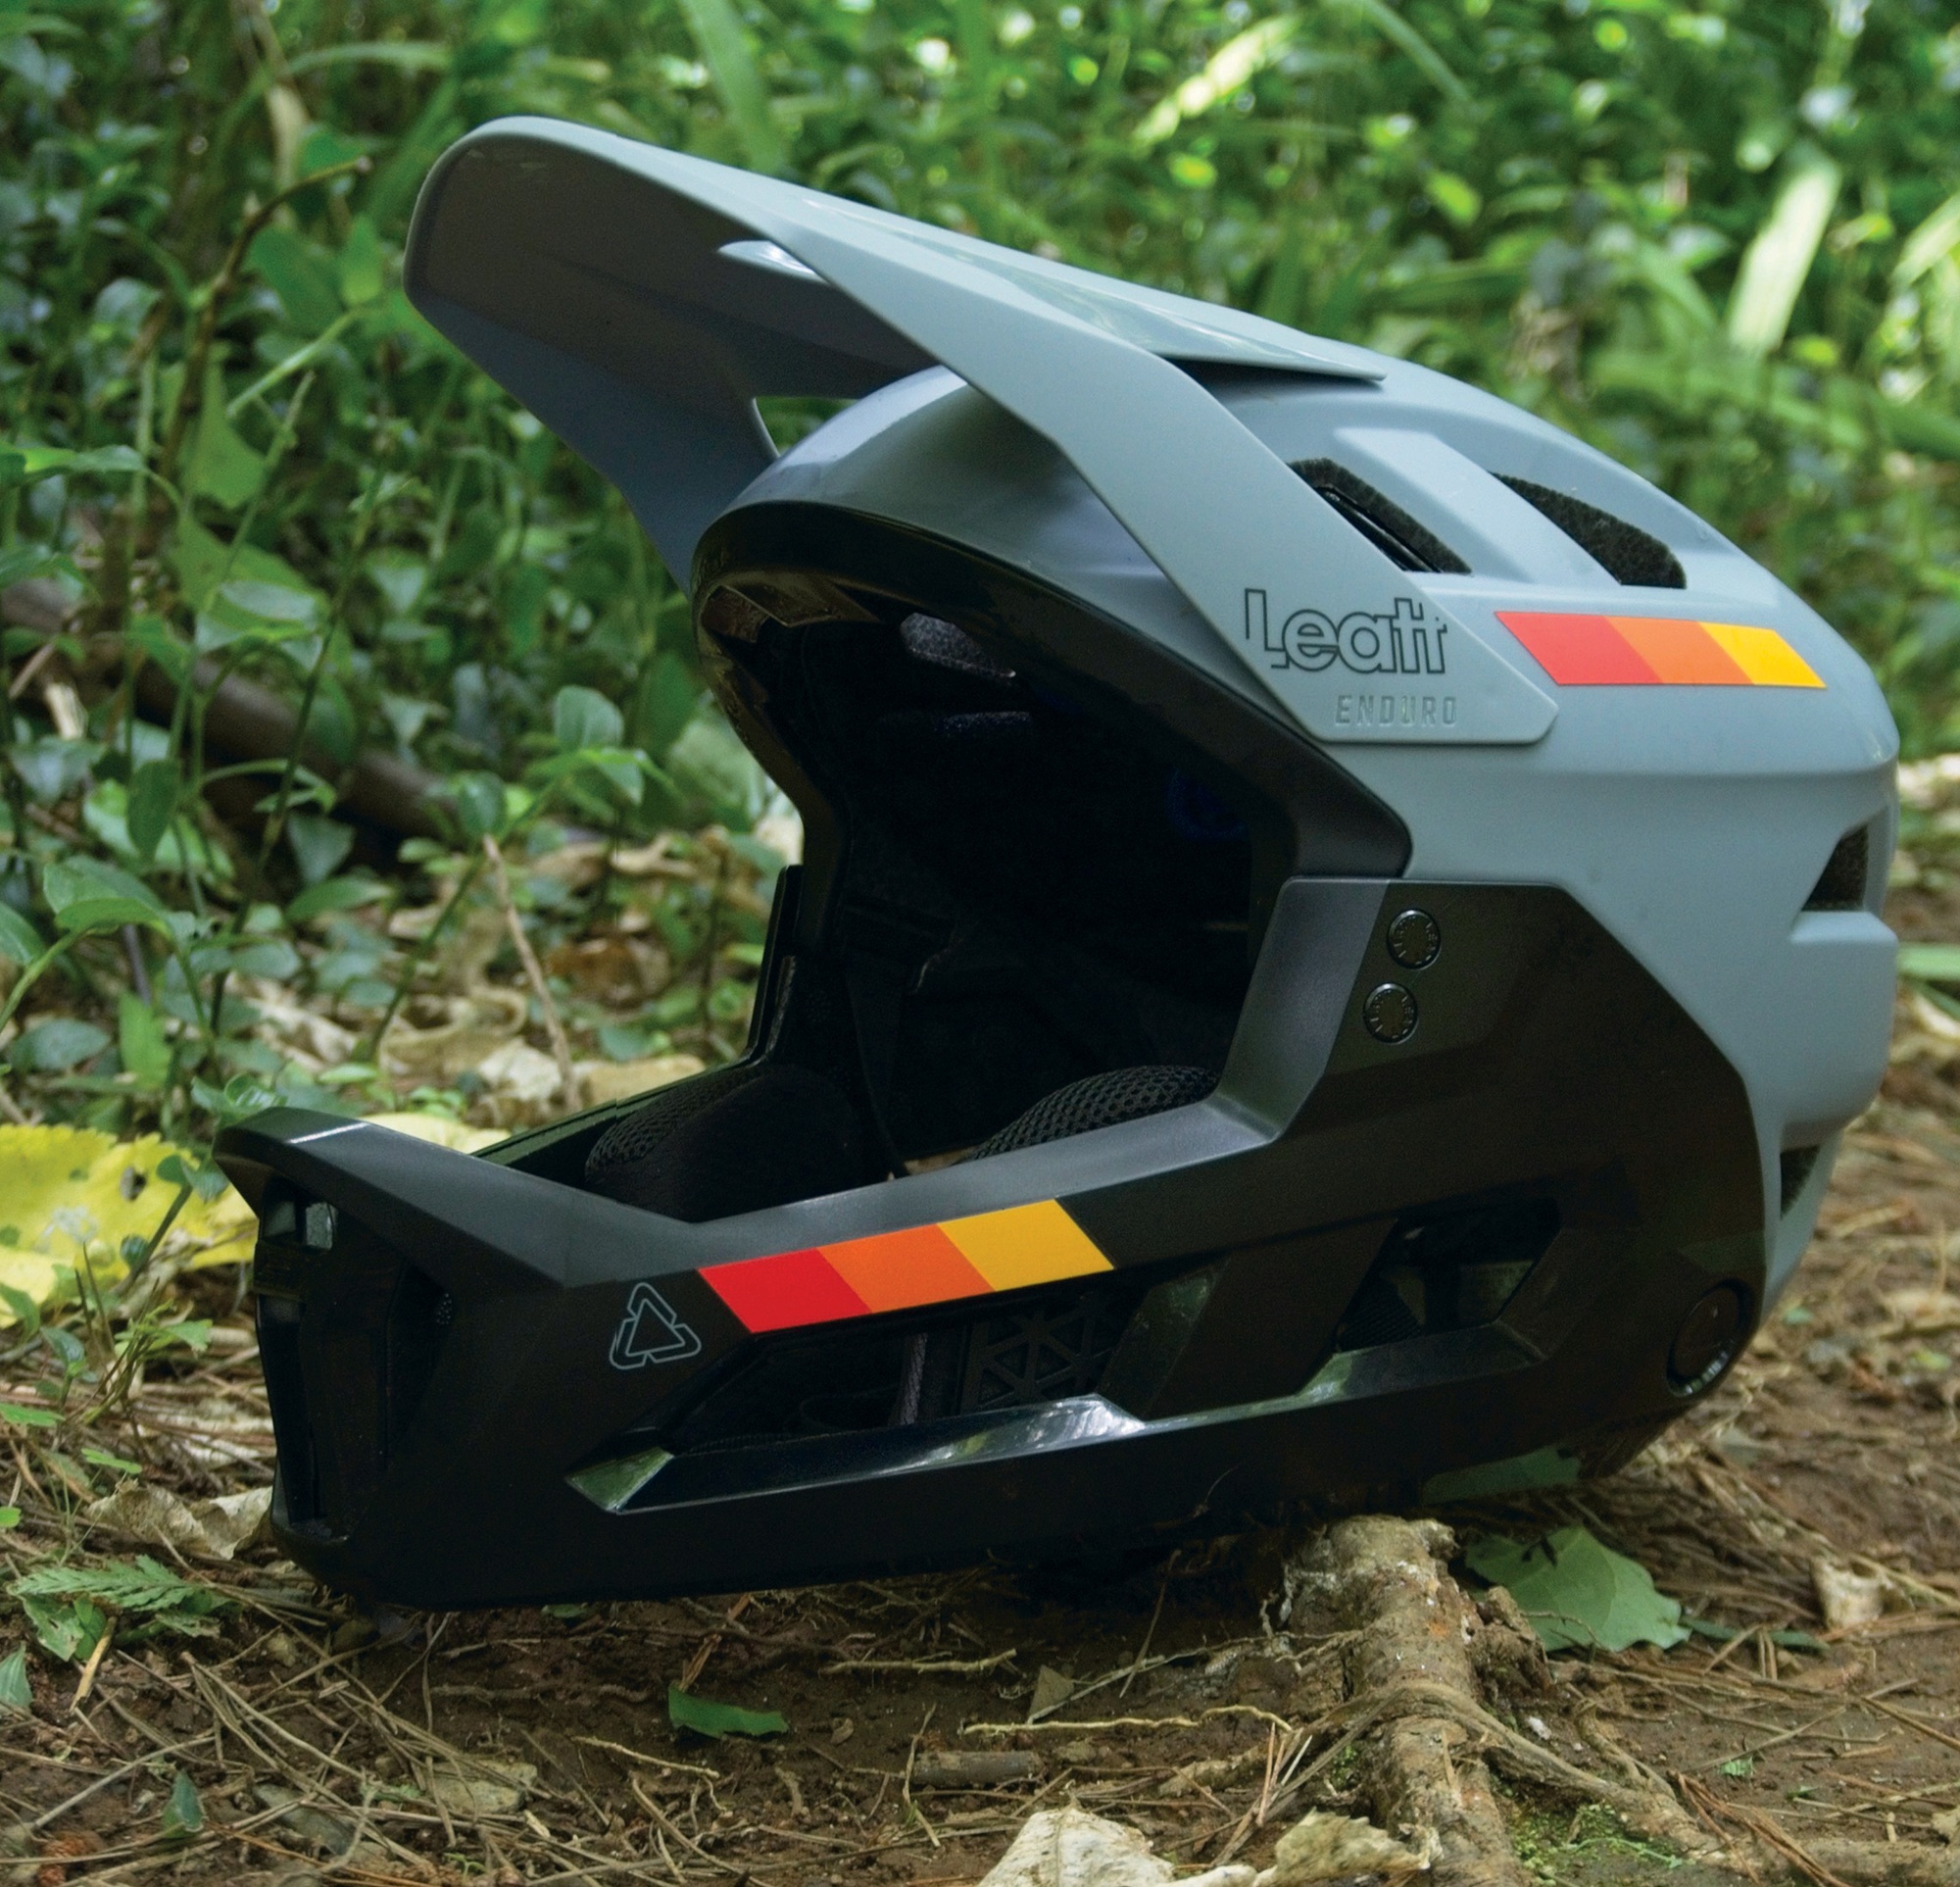
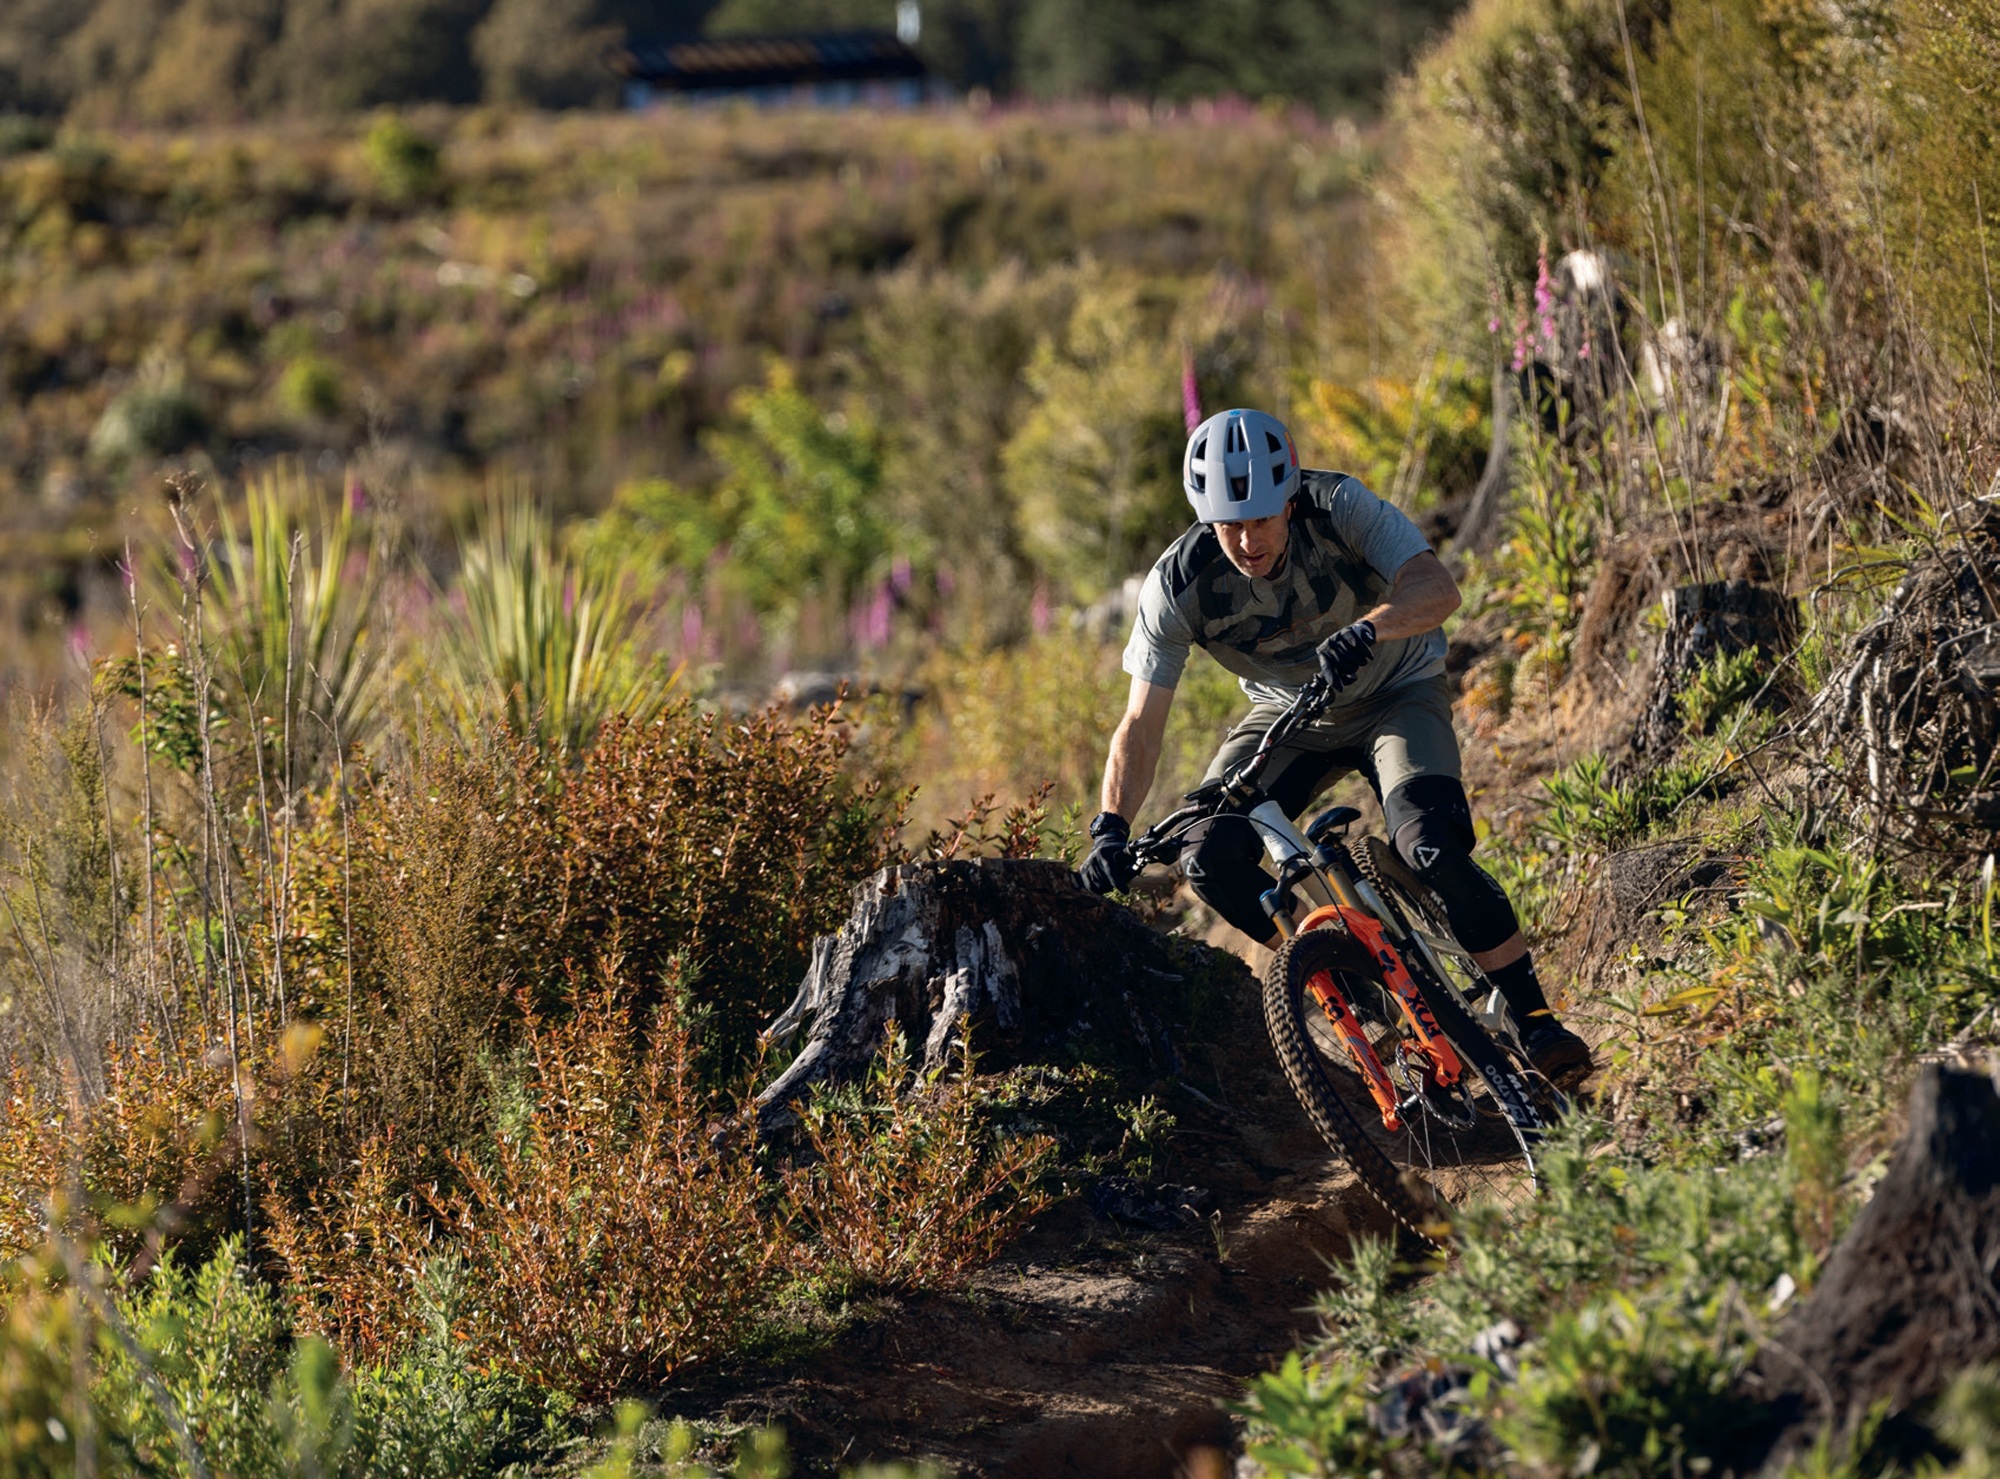
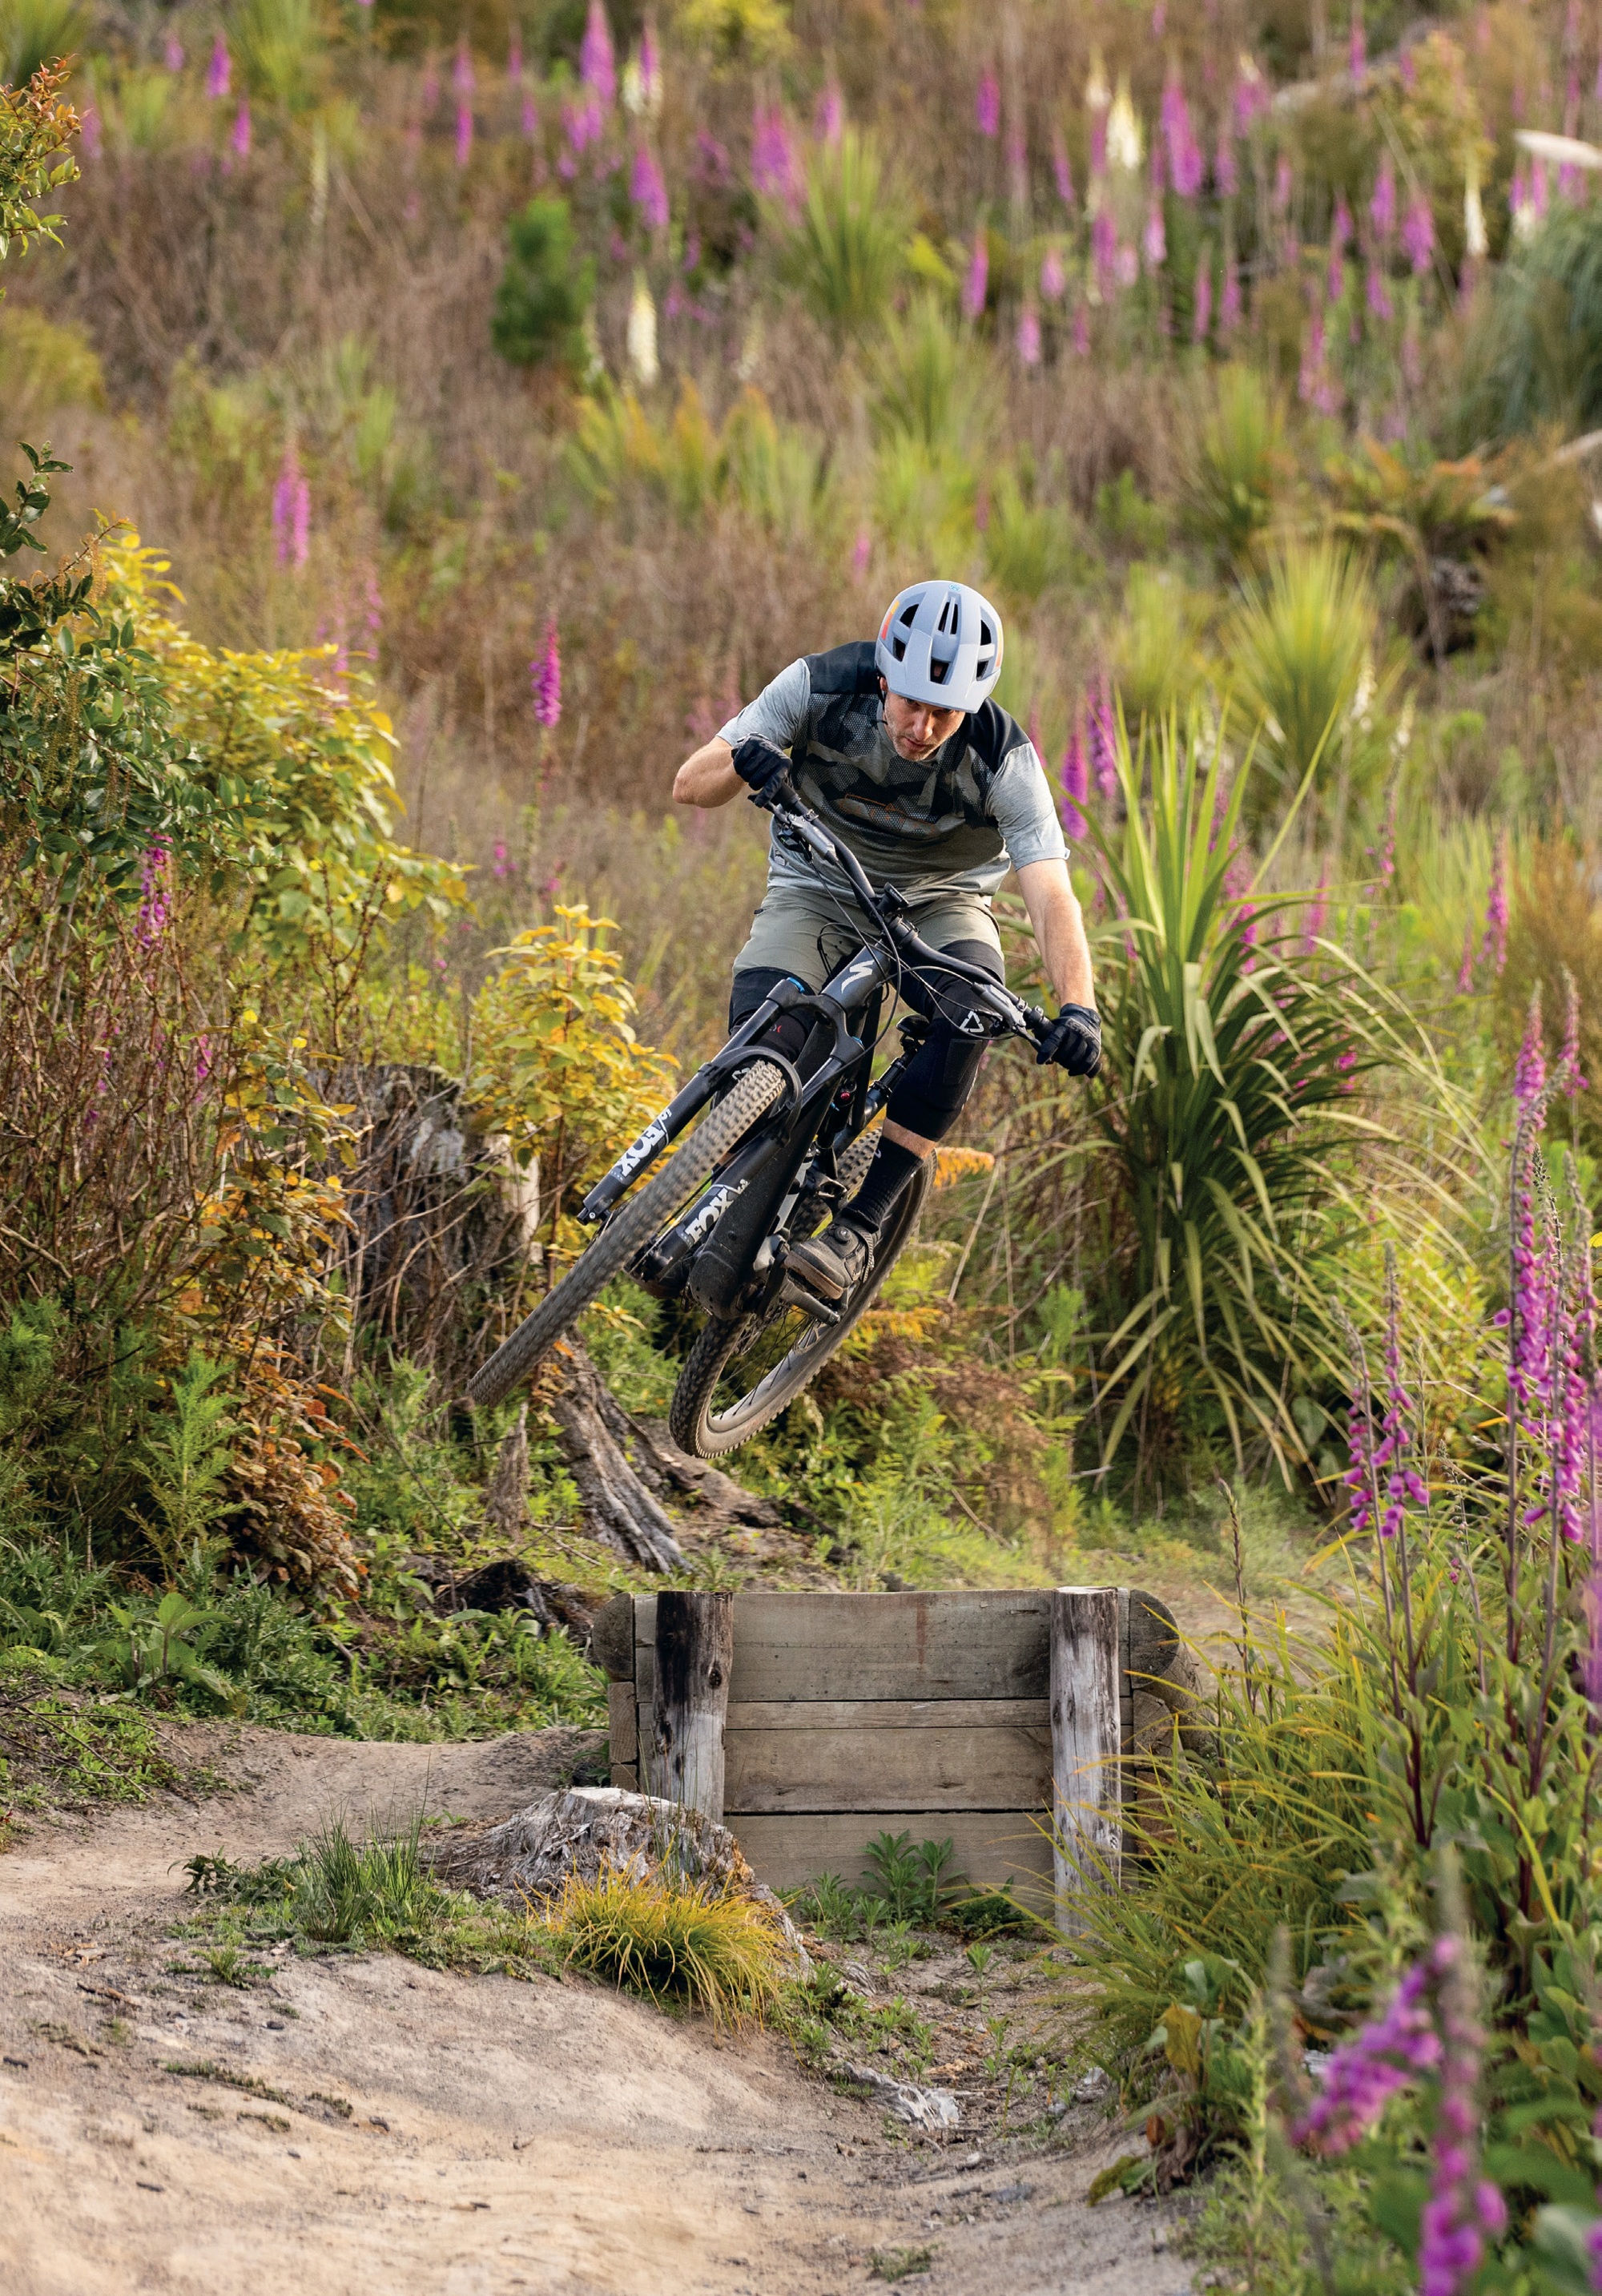
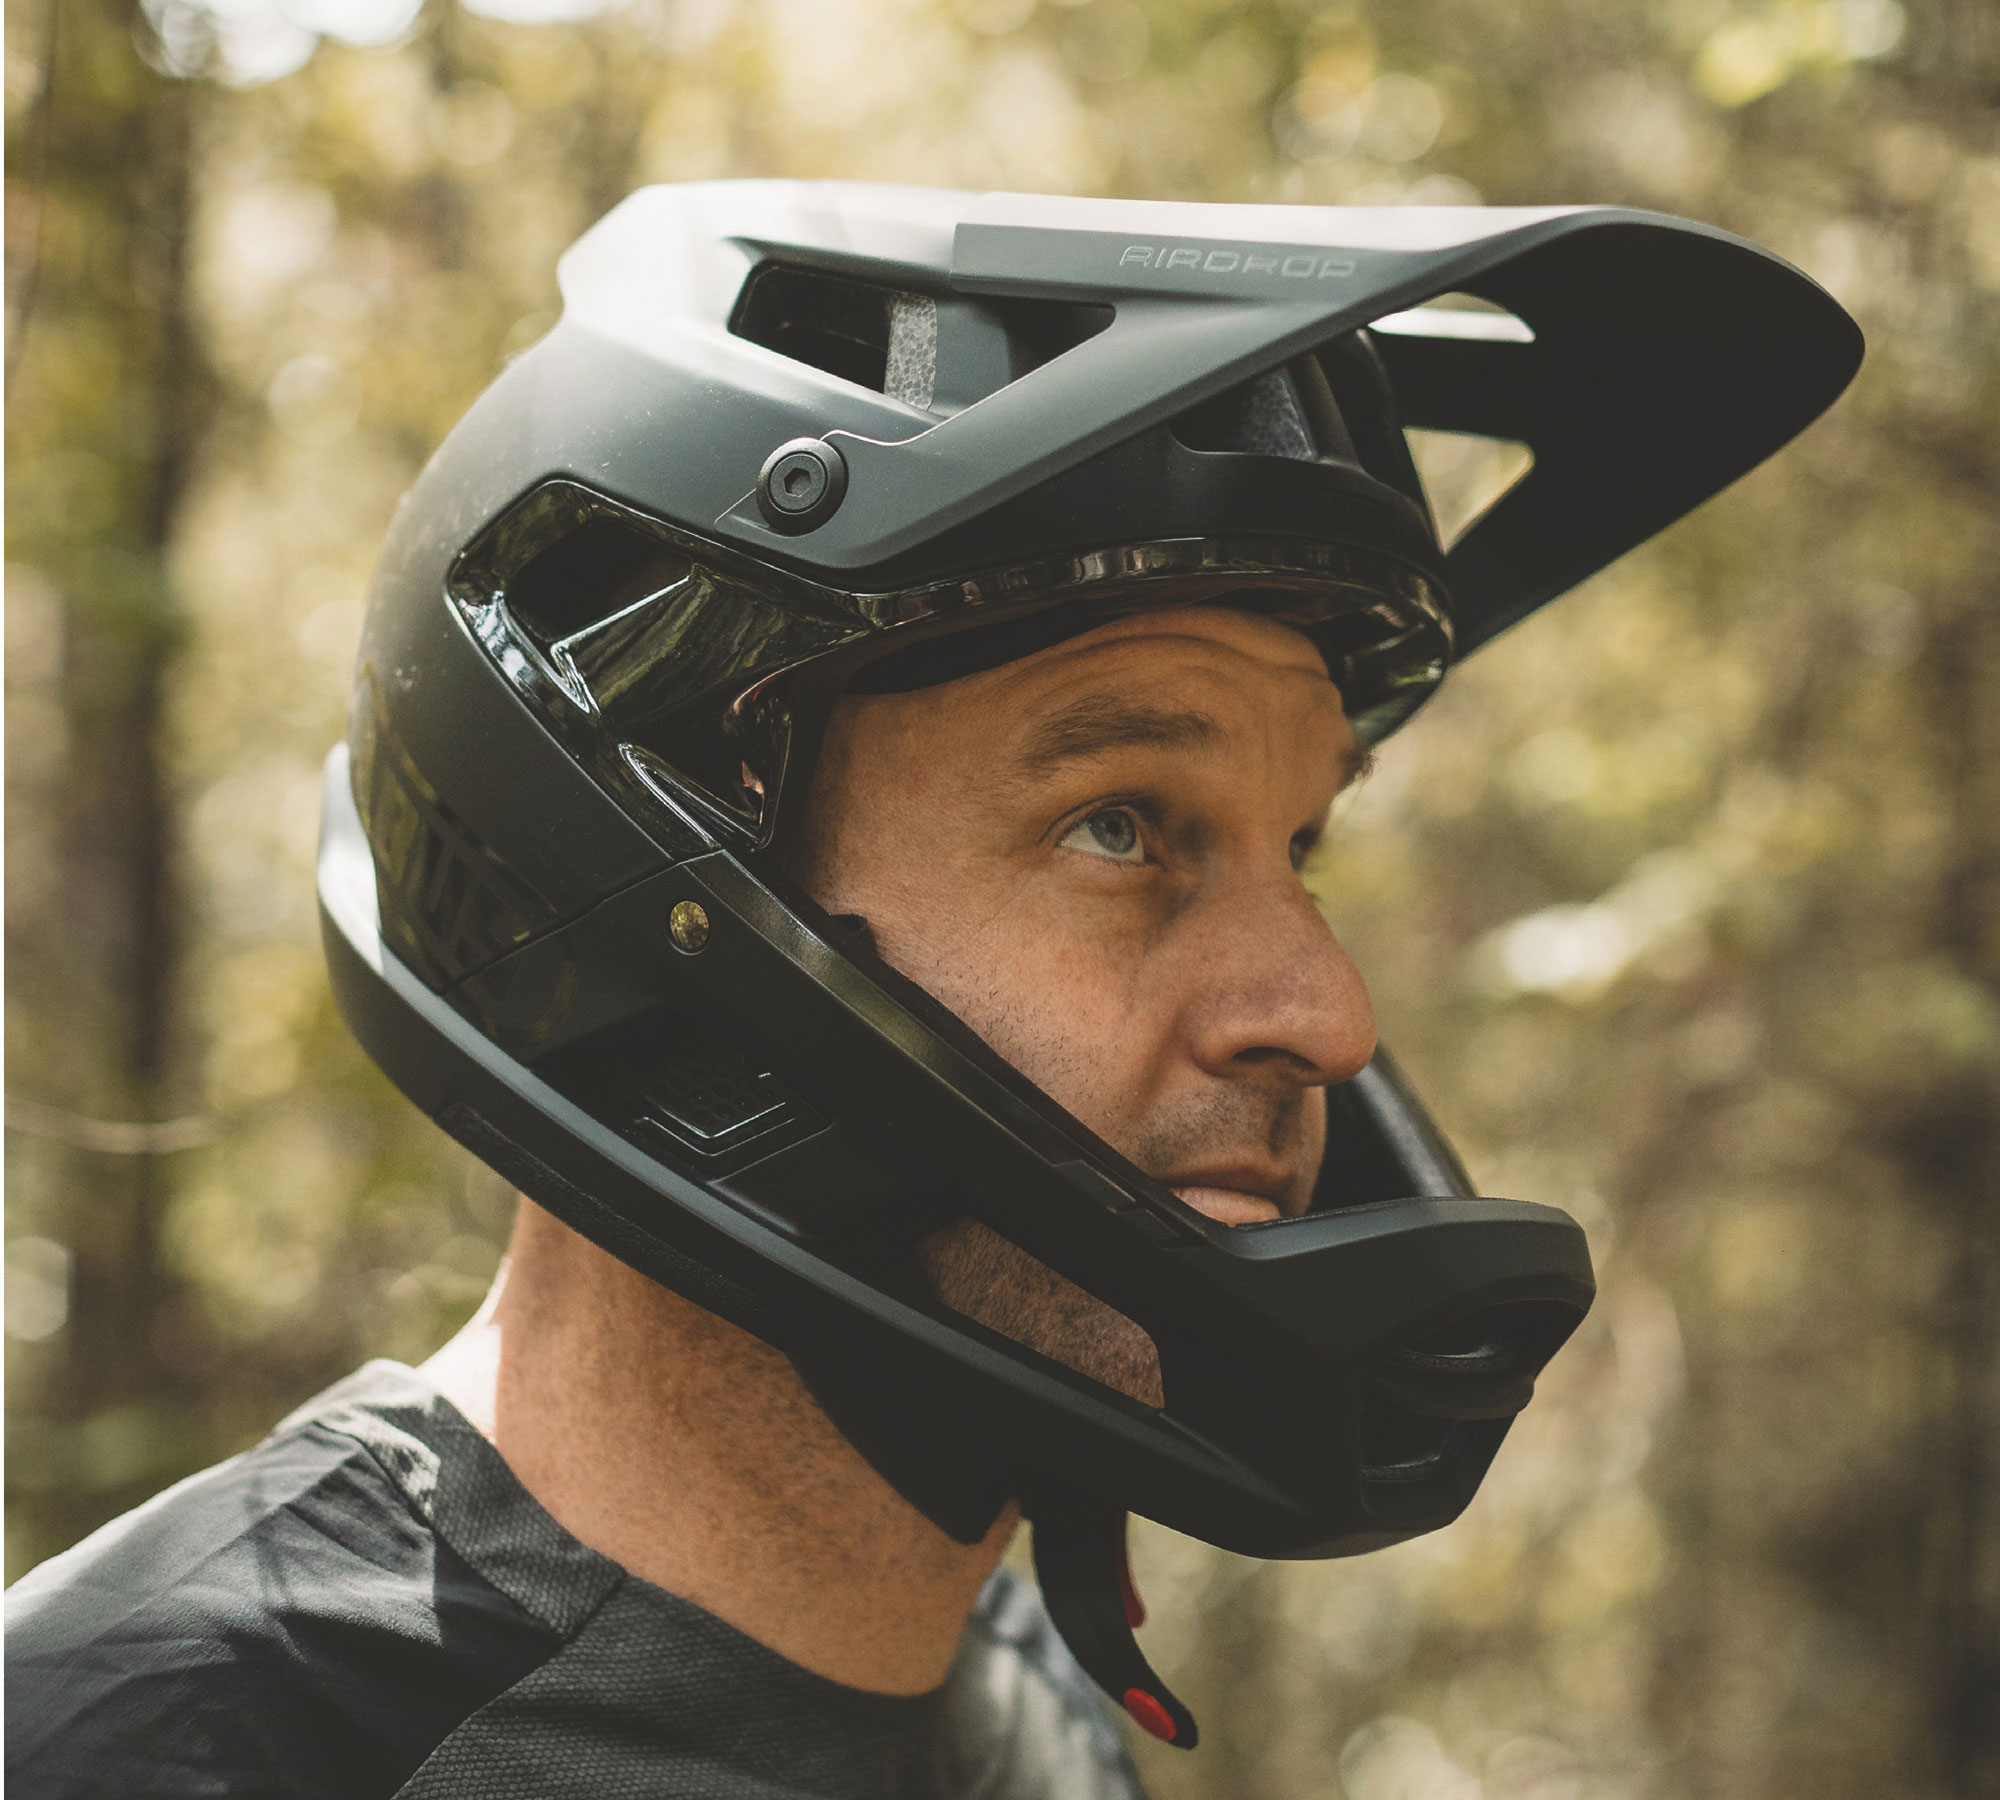
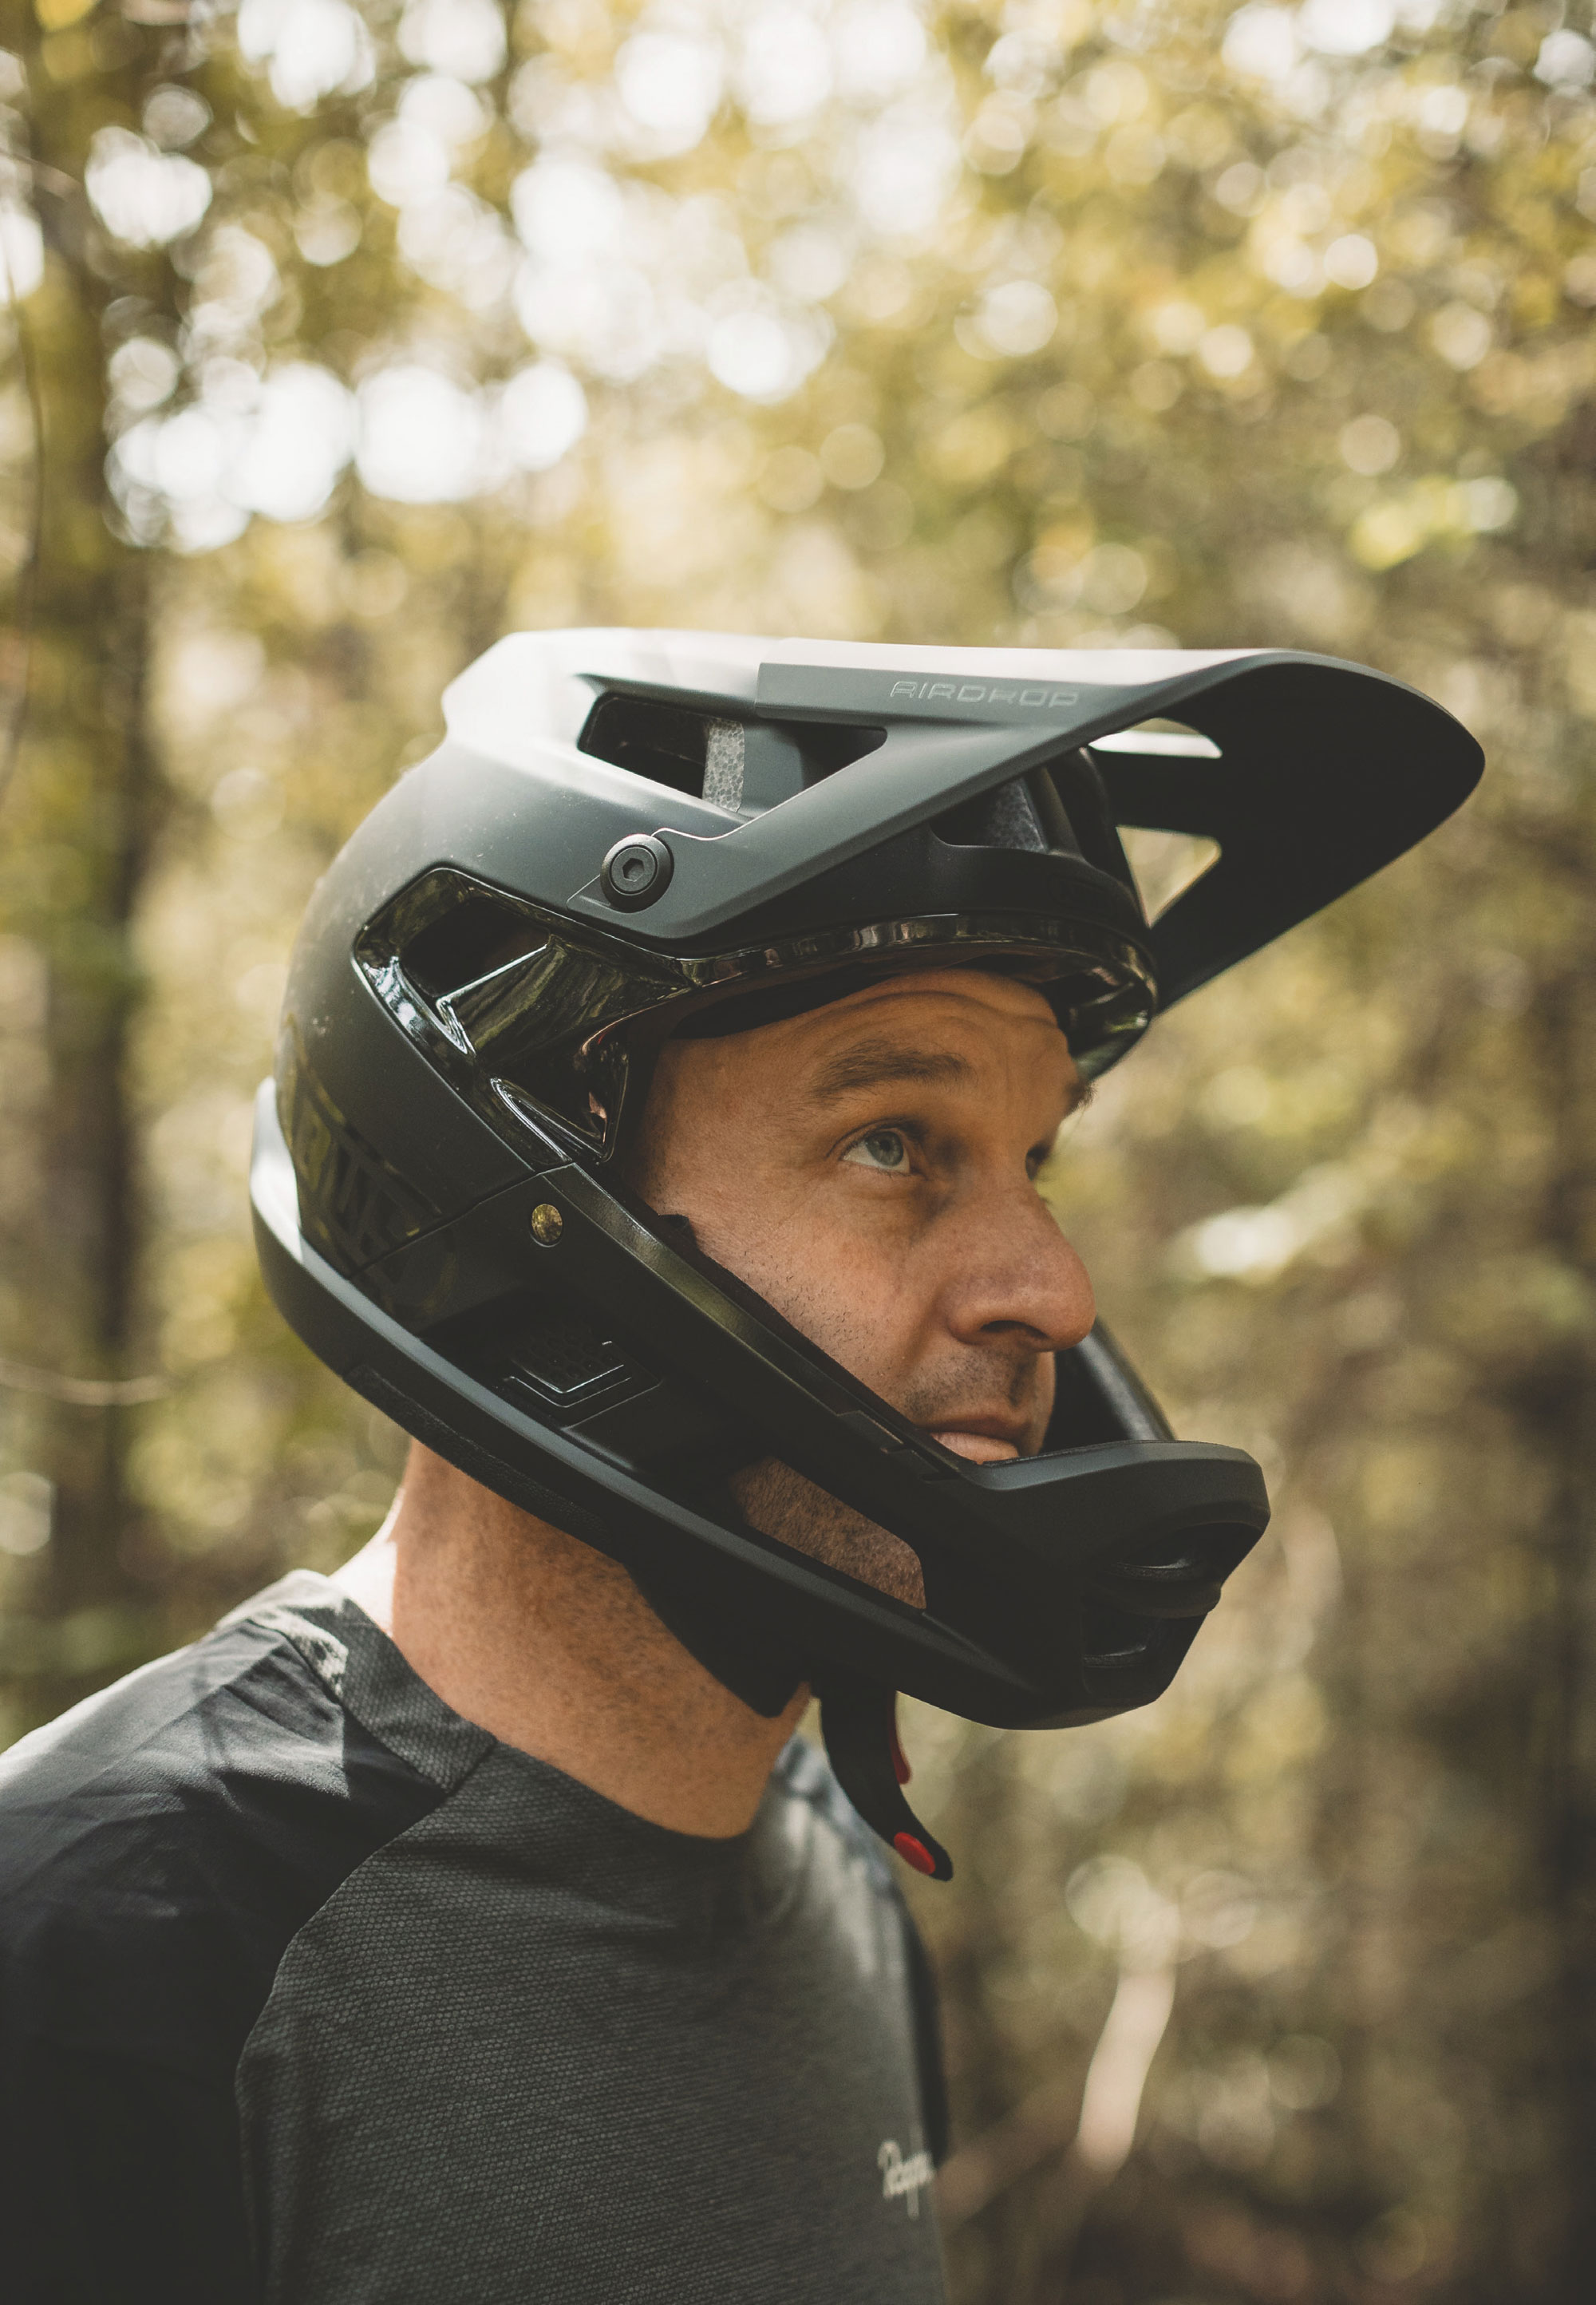
Enduro 2.0 Convertible Helmet
Protecting your body begins at the top. If your head takes a bad enough impact, it doesn’t matter how unharmed the rest of you may be; without a functional brain, you’ll be on the sidelines while your buddies are out enjoying their rides. As concussion becomes a more widely talked about subject, and awareness is at an all-time high, people are taking more interest in what their helmet offers regarding protection. Rather than settling for something that passes a minimum safety standard, many of us are now looking for something that surpasses standards, offering the maximum protection, not just a sticker that says it’s safe enough. Never has there been a more important reason to invest in your head than if you’re riding an eMTB. With a bike that weighs over 20kg, and often up to 30kg, you sure want to ensure your head and face are well protected in case that big rig lands on you.
Full-face helmets have their place but don’t suit every scenario, trail system or ride. Enter the Leatt Enduro 2.0 convertible—a versatile helmet designed to cover all bases from cruisy rollers in open-face mode to gnarly steeps with the chin bar attached. The Enduro 2.0 is at home in most situations—it’s up to you how you dress it; chin bar on, or off.
The main helmet comprises a lightweight polymer shell with Leatt’s patented 360° Turbine Technology fitted (more on that in a bit). Securing the helmet firmly in place is a FidLock buckle and a classic ratcheted dial adjuster on the back, with three vertical positions to get the fit just right.
The 360° Turbine Technology is a crucial technology across Leatt’s helmet line. It’s a group of small disc-shaped rubber ‘turbines’ that twist and compress to decrease peak brain acceleration by up to a claimed 30% at impact speeds associated with concussion, and to reduce peak brain rotational acceleration by up to 40%.
The peak is adjustable and suits the overall styling of the helmet. There’s enough vertical adjustment to put it in the highest setting and have your goggles on your forehead for a climb if that’s how you roll. The visor will break away if you clip it on a low-hanging branch or during a rag-doll of a crash, popping off to save torsional forces being transmitted to your head and neck; safety first, safety second.
The shell has 20 vents to keep the draft flowing and, even at slow speeds, I’ve been impressed with how well it breathes. Strategically placed rear vents double as a sunglasses dock and do their job as they should.
The chin bar is simple to remove and refit with a button on either side just below the ears. Firmly press the button on each side and the chin bar releases. Reverse the process to re-fit it while ensuring the two locators up by the temples line up correctly, and Bob’s your uncle. The chin bar passes ASTM impact testing, offering confidence that it’s up to the task. It’s a sturdy system and is firm once in place, integrating exceptionally with the main helmet, offering some comfort that it will stay put in a crash and protect your face.
Putting the helmet on once the chin bar is in place is noisy. A lot of creaking comes from the junction between the helmet and the chin bar. Fortunately, once the helmet is on, the noise disappears, although it was pretty disconcerting the first time I put it on!
Given the extra engineering and structure required to incorporate the removal mechanism and chin bar safely, the Enduro 2.0 in open-face mode is a touch heavier than regular open-face helmets at 409g in a medium size. The chin bar itself doesn’t weigh much at all at 245g and, once fitted and in full-face mode, the helmet’s complete setup weighs 654g, putting it at the lighter end of convertible helmets.
The Enduro 2.0 is comfy on my head, and the padding is quite thick compared to similar helmets. There are no hard points anywhere, and the overall shell looks normal when worn; no giant mushroom here. Before wearing it, I thought the Turbines might touch my head while riding, but I haven’t noticed this. This helmet gets a big tick on the comfort front. As with anything fit-related, different head shapes suit different helmets, so I’d recommend trying before you buy or at least checking returns policies when purchasing online.
When it comes to testing the actual safety of the Enduro 2.0, alongside the legal safety standards they meet, I can only rely on Leatt’s testing and their force reduction claims; some heady statistics proved not only in Leatt’s research lab but also by people I’ve met who have firsthand experience with the safety of Leatt helmets.
I’d recommend the Leatt Enduro 2.0 convertible helmet to anyone doing all sorts of riding, perhaps travelling to unfamiliar areas to ride and not sure what to expect. You’ll have the right helmet for the task wherever you end up. If your riding crew decide to do a lengthy trail ride: Chin bar off and open-face mode. A last-minute decision to punch out shuttled laps? Chin bar on and full-face mode engaged. For eMTB riders, adding a chin bar is an absolute no-brainer, but there’s still the versatility to run the helmet without the chin bar for a cruisy lap with the kids or a nip to the shops.

CamelBak H.A.W.G Pro 20
Words Lester Perry
Images Henry Jaine
RRP $299
Distributor Southern Approach
There’s a particular style of trip where bike bags strapped to your frame either aren’t suitable for the route you’re attempting or simply don’t provide enough capacity for the required gear.
When Kieran Bennett and I took on our ‘Starevall or Bust’ two-day mission in the summer of 2024, we had an Aeroe handlebar cradle and dry bag each. That was handy — but with the trail being steep and technical in many places, the option for a rear rack was off the cards, and frame bags would have had to be custom made for our full-suspension rigs (and even then, wouldn’t provide the capacity we needed). CamelBak’s range of Packs was the answer — in my case, the H.A.W.G Pro 20, while Kieran went with a similar, but smaller, MULE Pro 14.
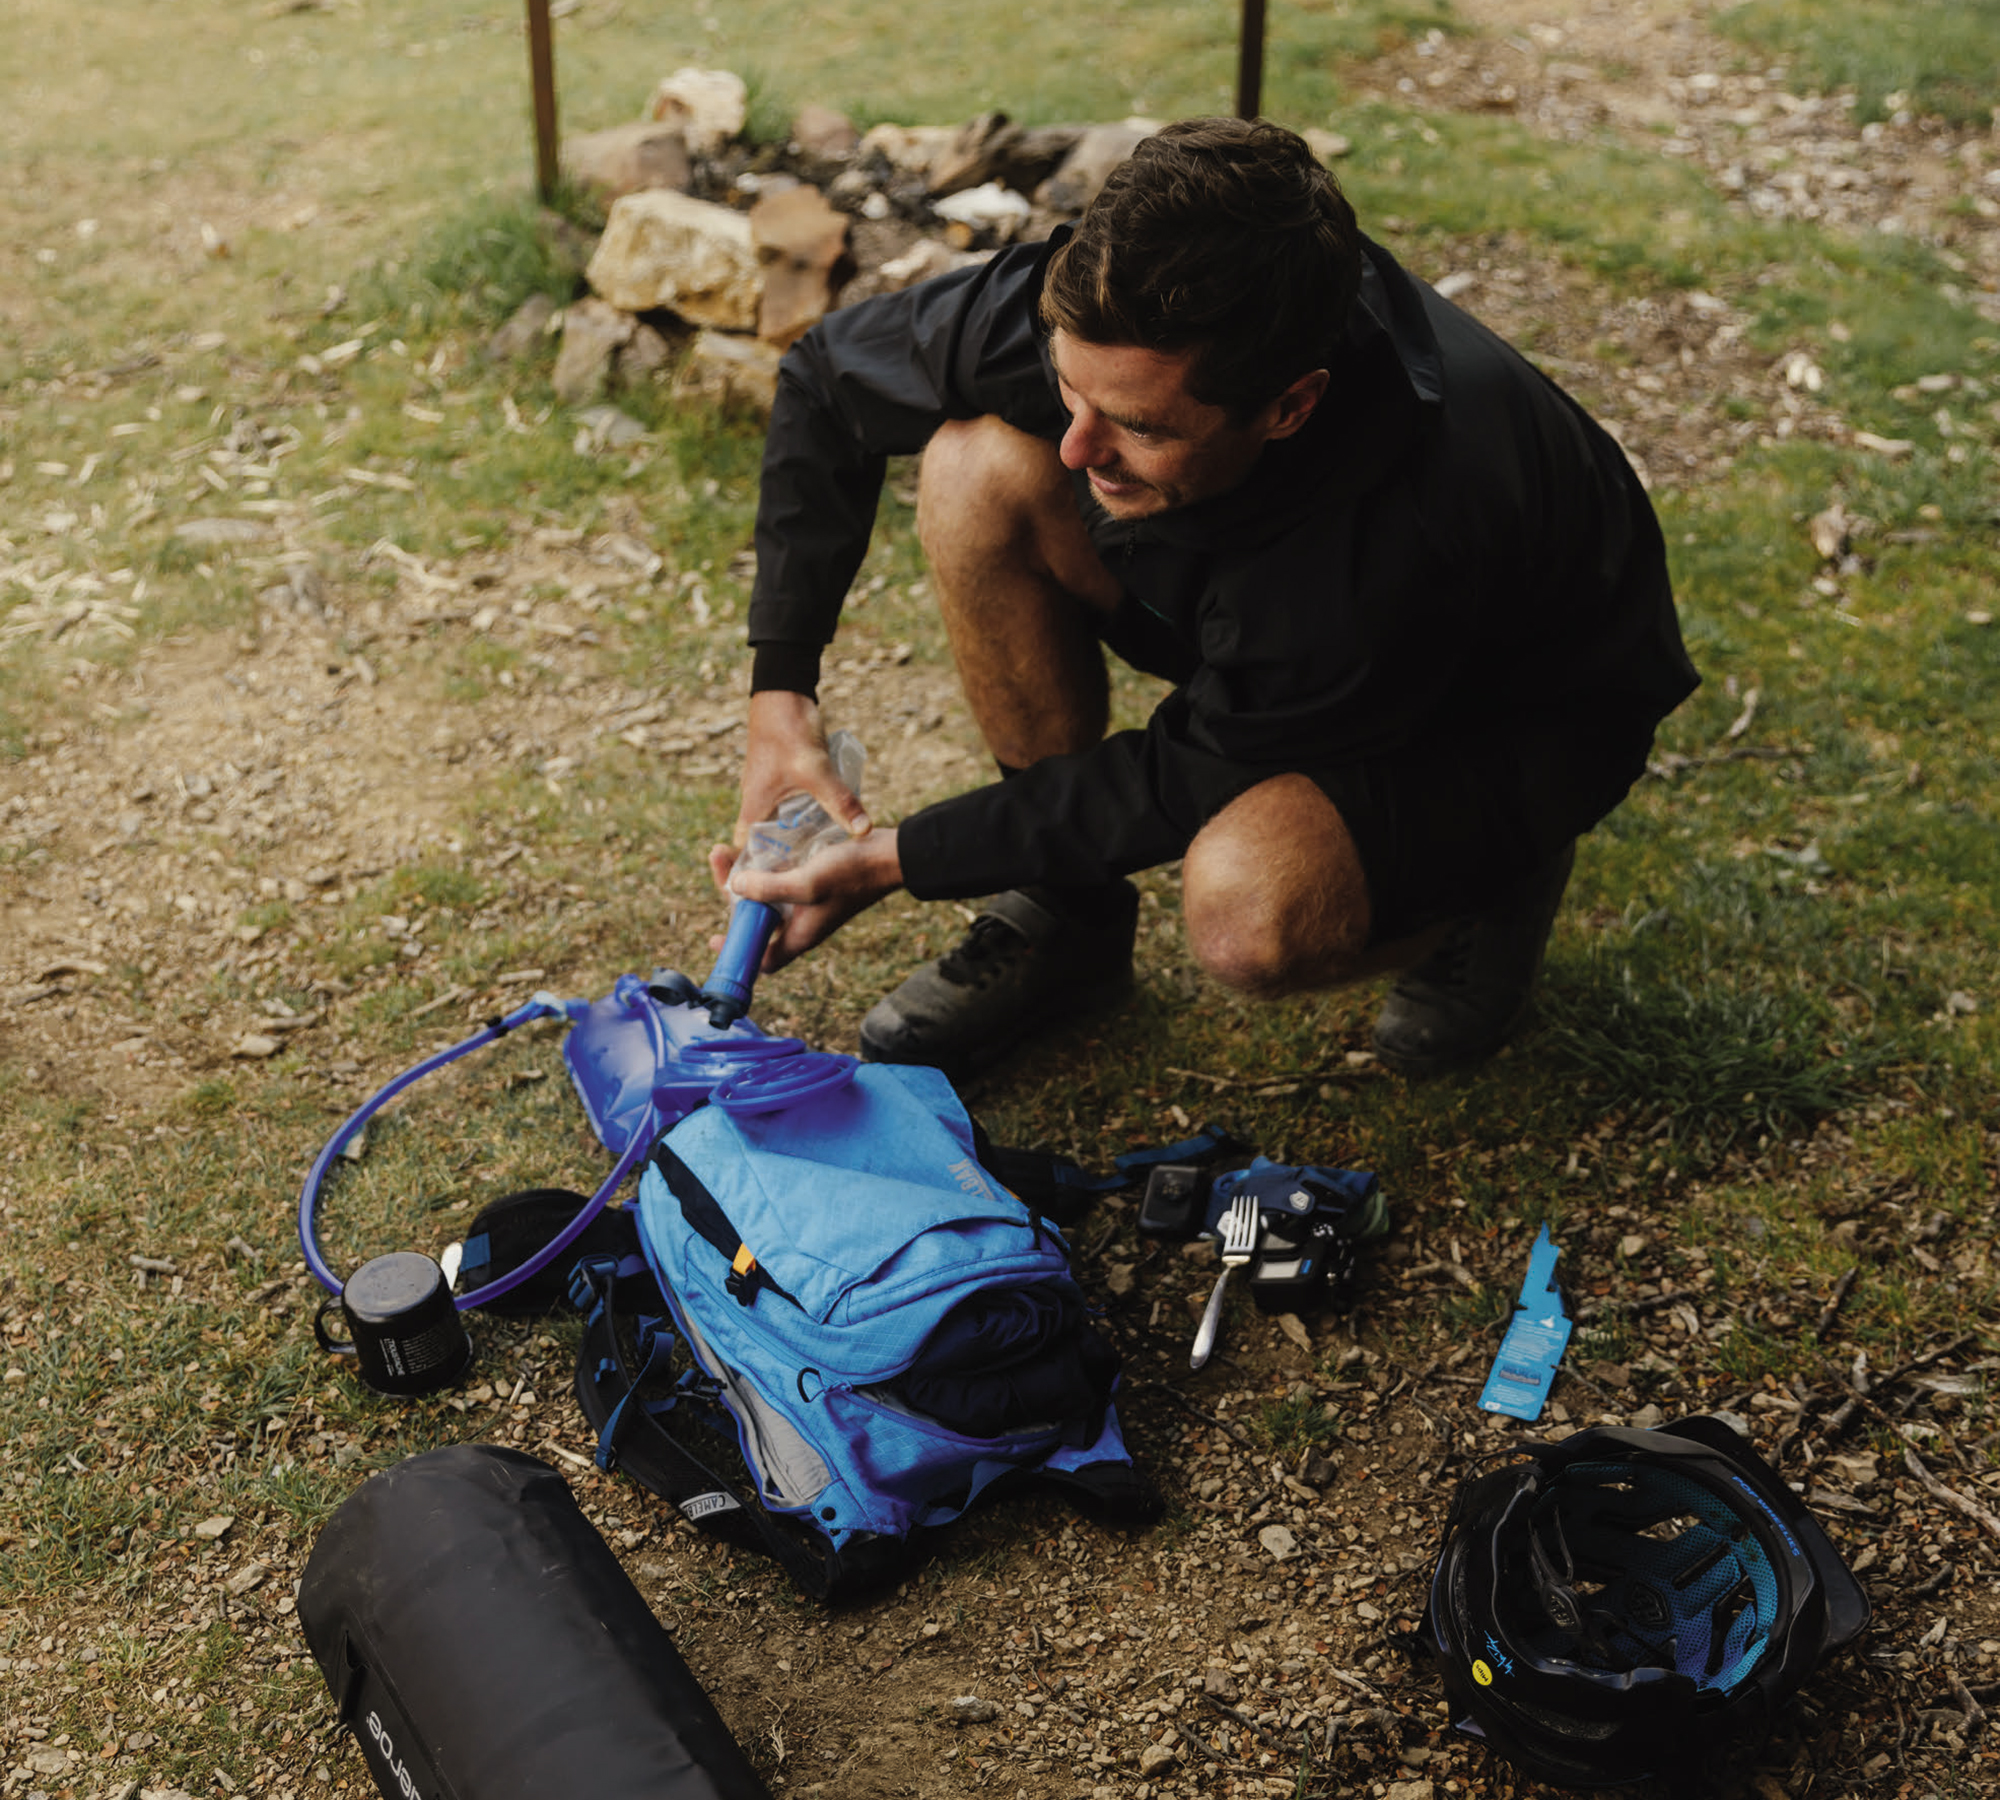
The H.A.W.G pack is designed precisely with missions like ours in mind. Twenty litres capacity, supplied with a 3-litre bladder, and room for another if needed. I opted for a single 3L bladder and a water filter, which, if you’ve read the trip report, you’ll know was a necessity!
Stowage is split into three main areas; nearest to the body is the hydration bladder sleeve. Outside of this, another large ‘full’ pocket features two large internal pockets, one of which is designed to hold a spare eBike battery if you’re that way inclined. In this section, there was enough capacity for me to stow a dry Merino top, a pair of shorts and a couple of freeze-dried meals. A smaller zipped pocket is on the left side of the back panel, down near the waist belt, although I didn’t use it on our trip. It would be ideal for smaller bits you may need to take with you but do not necessarily need easy access to — for example, a wallet or passport.
The next layer out has a medium-sized pocket featuring a couple of smaller zipped mesh pockets to store little items — in my case, tools and spares behind the zips, and some snacks in the main compartment. Across the top, there’s a fleece-lined pocket that is ideal for stowing glasses – and is large enough for goggles.
The outside of the pack features a stretch compartment, ideal for items that you might need quick access to — in my case, a jacket and bag of trail mix, and a First Aid Kit that we fortunately never required. The clips on either side have small hooks to clip helmet straps to for carrying.
Weight is supported on the hips with a sturdy waist belt and, handily, there’s a zipped pocket on each side for quick access to gear when you don’t want to remove the pack to access. There’s a good amount of room in these pockets. I stashed a disposable camera on the left side for quick access and, on the right, I had some lollies, a multi-tool and a tyre plugger.
The H.A.W.G Pro is the first pack I’ve used with the Air Support Pro Back Panel — a 3D mesh back and harness that supports the bulk of the pack, holding it away from your body as much as is feasible, allowing for maximal airflow between the wearer and the pack. Although it’s still noticeably warmer than no pack, thanks to the Air Support back panel, it feels much cooler than some smaller, more traditional packs I’ve used. The back panel provides a level of rigidity to the whole system and, combined with the harness setup (including the sternum strap), secures the entire pack nicely. It’s well supported, even while fully loaded and tackling rough terrain. Thanks to the secure fit and rigidity, the top of the pack works well for resting the bike on while carrying over hike-a-bike sections — something we spent hours doing while hiking up Mt Starveall.
Two straps wrap around the base of the pack and, once cinched down, they help compress the load, helping keep everything in place; handily, they’re long enough to strap on more gear. In my case, I secured my Thermarest Sleeping Mat to the base and saved valuable volume in the pack itself. There’s myriad uses for these simple straps: tent poles, rolled-up jackets, or (most importantly) baguettes — the possibilities are endless.
The pack is supplied with a snazzy little tool roll and, while it’s great in theory, I found I couldn’t get my preferred selection of tools and bits to play nicely with it. The tool roll stayed home while on the Starveall mission, and I brought my small tool bag along.
As far as hydration goes, I can’t fault the 3-litre ‘Crux’ bladder. Although I’m not a super fan of the huge screw top, it does the trick and is long forgotten once it’s tucked safely into the pack. CamelBak redeemed themselves with their market-leading (in my opinion) bite valve and “magnetic tube trap” that keeps the drinking hose nicely secure when not in use, and snaps easily back into place.
The only niggle I’ve found with the H.A.W.G is on the outer stretch compartment. The clips that secure each side and help compress the load are not a traditional bag clip design, I assume, to allow for the helmet hooks. More than once, I had issues getting the clip to close correctly on my first attempt; unless the clips are aligned perfectly, one side can stick out and not be clicked into place correctly. This led to the clips popping open a few times on our trip. It’s annoying but not the end of the world. With some attention, they work fine and are secure when clipped correctly.
When all’s said and done, I’m a big fan of the CamelBak H.A.W.G and its versatility. It’s large enough for an overnighter, and once cinched down, it’s compact and lightweight enough for just a few hours in the backcountry without feeling like you’re carrying a flappy, half empty pack.
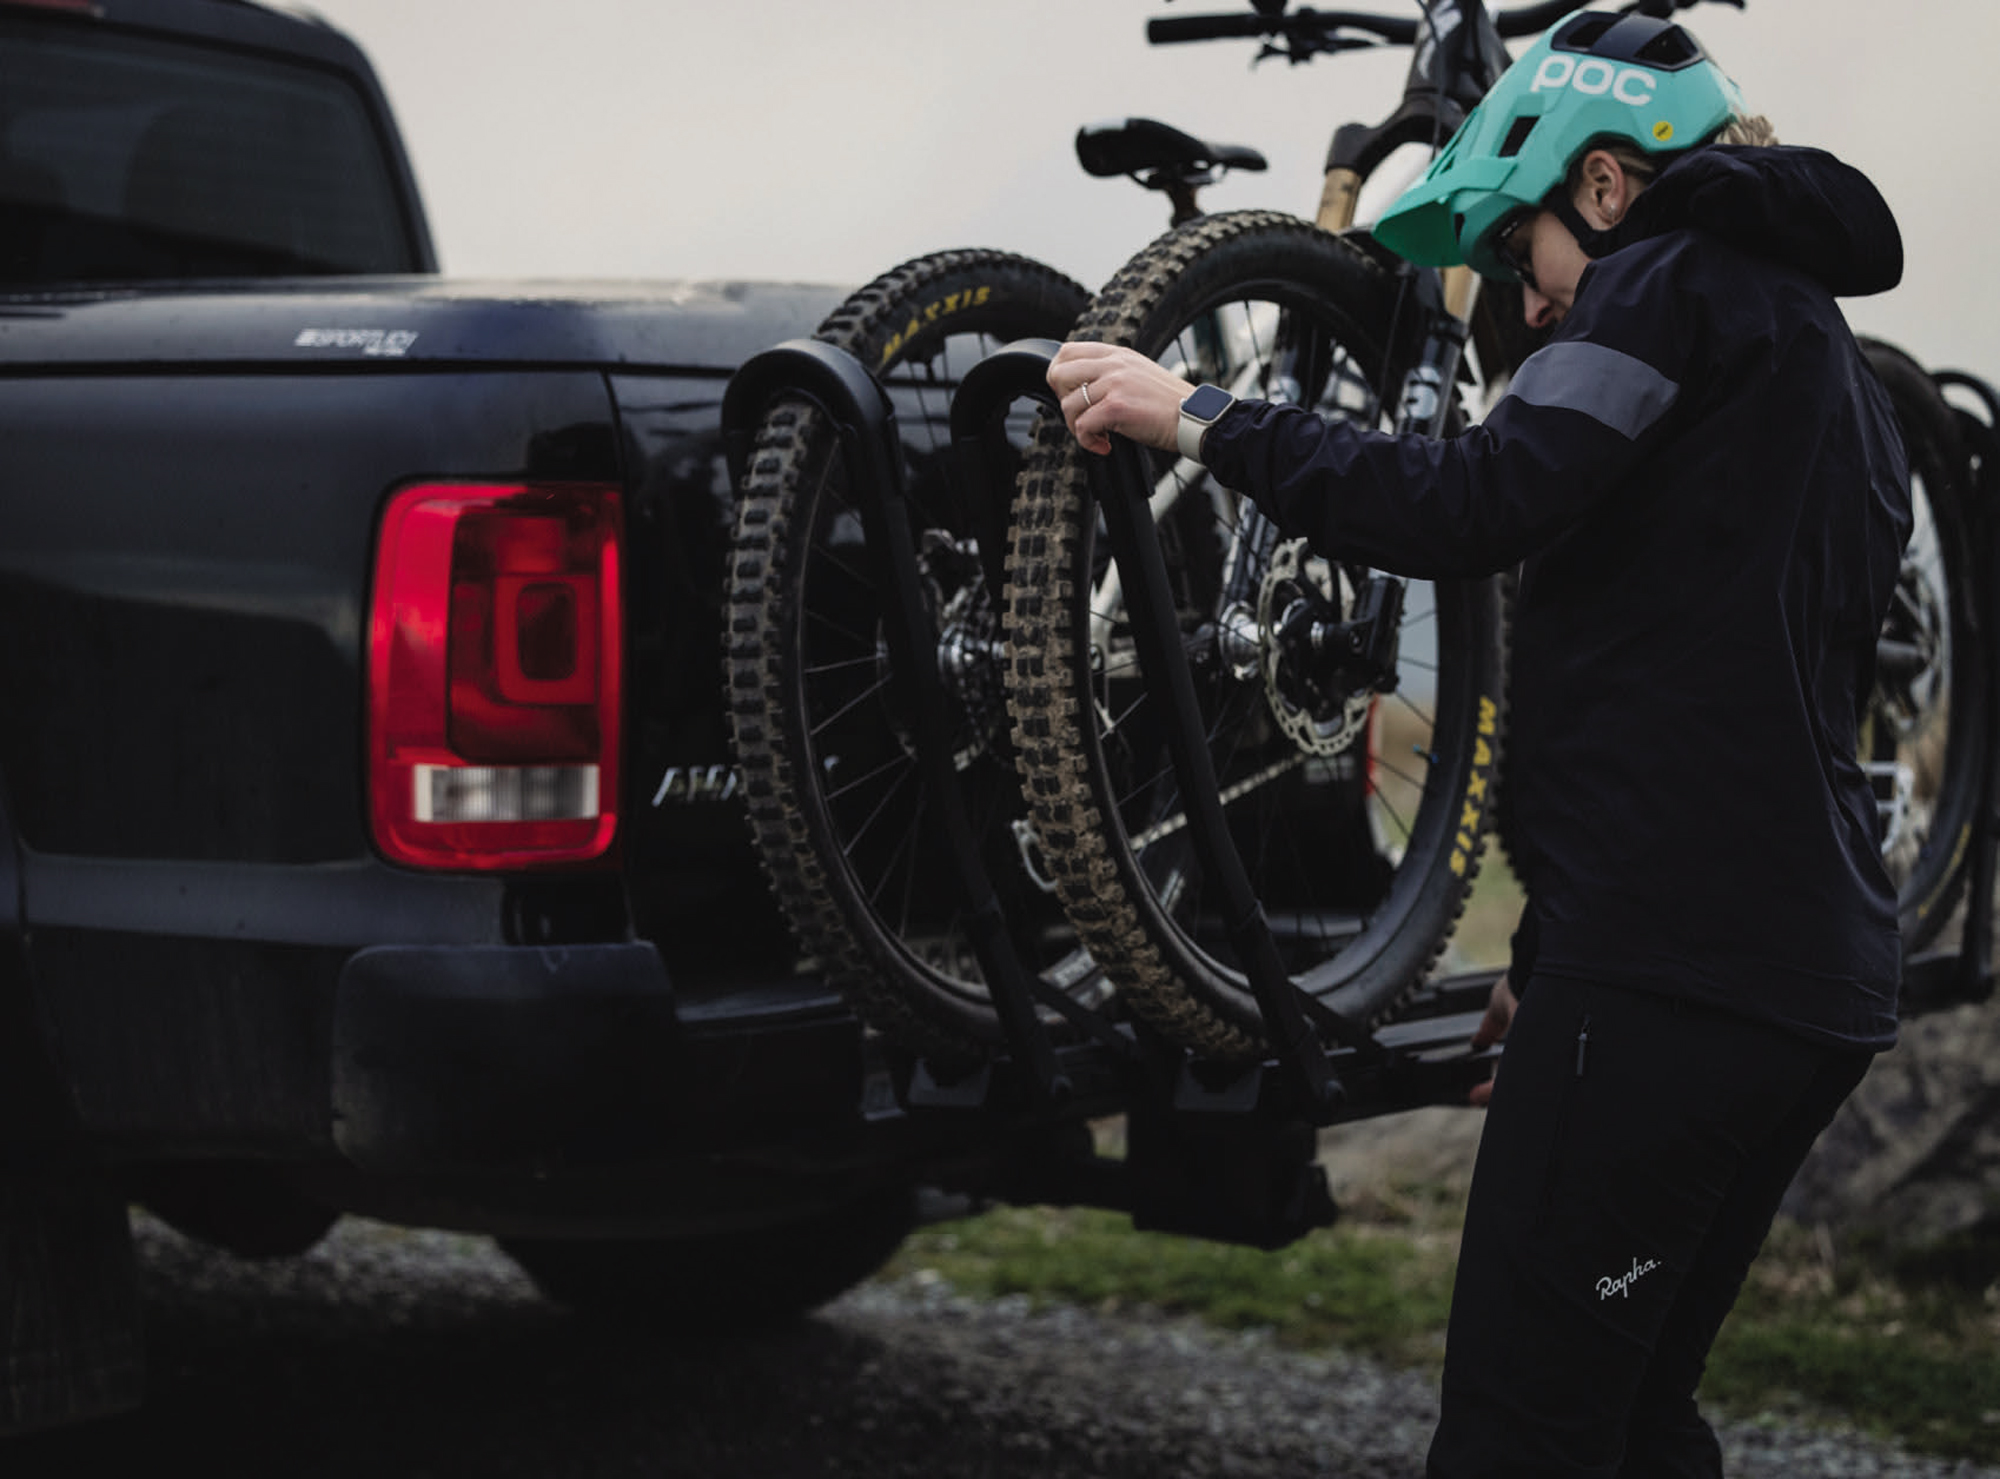
Inno Tire Hold HD Rack
Words & Images Cameron Mackenzie
RRP $1249
Distributor Racks NZ
The concept of a platform bike rack is nothing new, with many of today’s mainstay manufacturers producing several different models each.
Whilst common, there’s seems to be a new brand on the block every other month, each offering a bigger, beefier and “better” option than the other guy – and Inno’s no exception. Up until recently, Inno is a brand I’d not heard of, let alone knew was available in the local market, but I quickly took notice when I stumbled upon their latest Tire Hold HD rack, offering what looked to be a significantly sturdier rack than anything else I’d seen thus far.
Bike racks have been a pain point of mine over the last few years – never seeming to get more than two years out of a Yakima rack before it bends, breaks and/or rusts past the point of safe use. Whilst the way I use it – leaving it attached to the back of my truck year-round and lapping the country in search of the perfect MTB photo – may be a hard life for a rack, they’re a tool, and I expect more. I mean, who has the time or strength to be lifting their 25+kg rack on and off the car and into the garage for storage between weekend Woodhill trips?
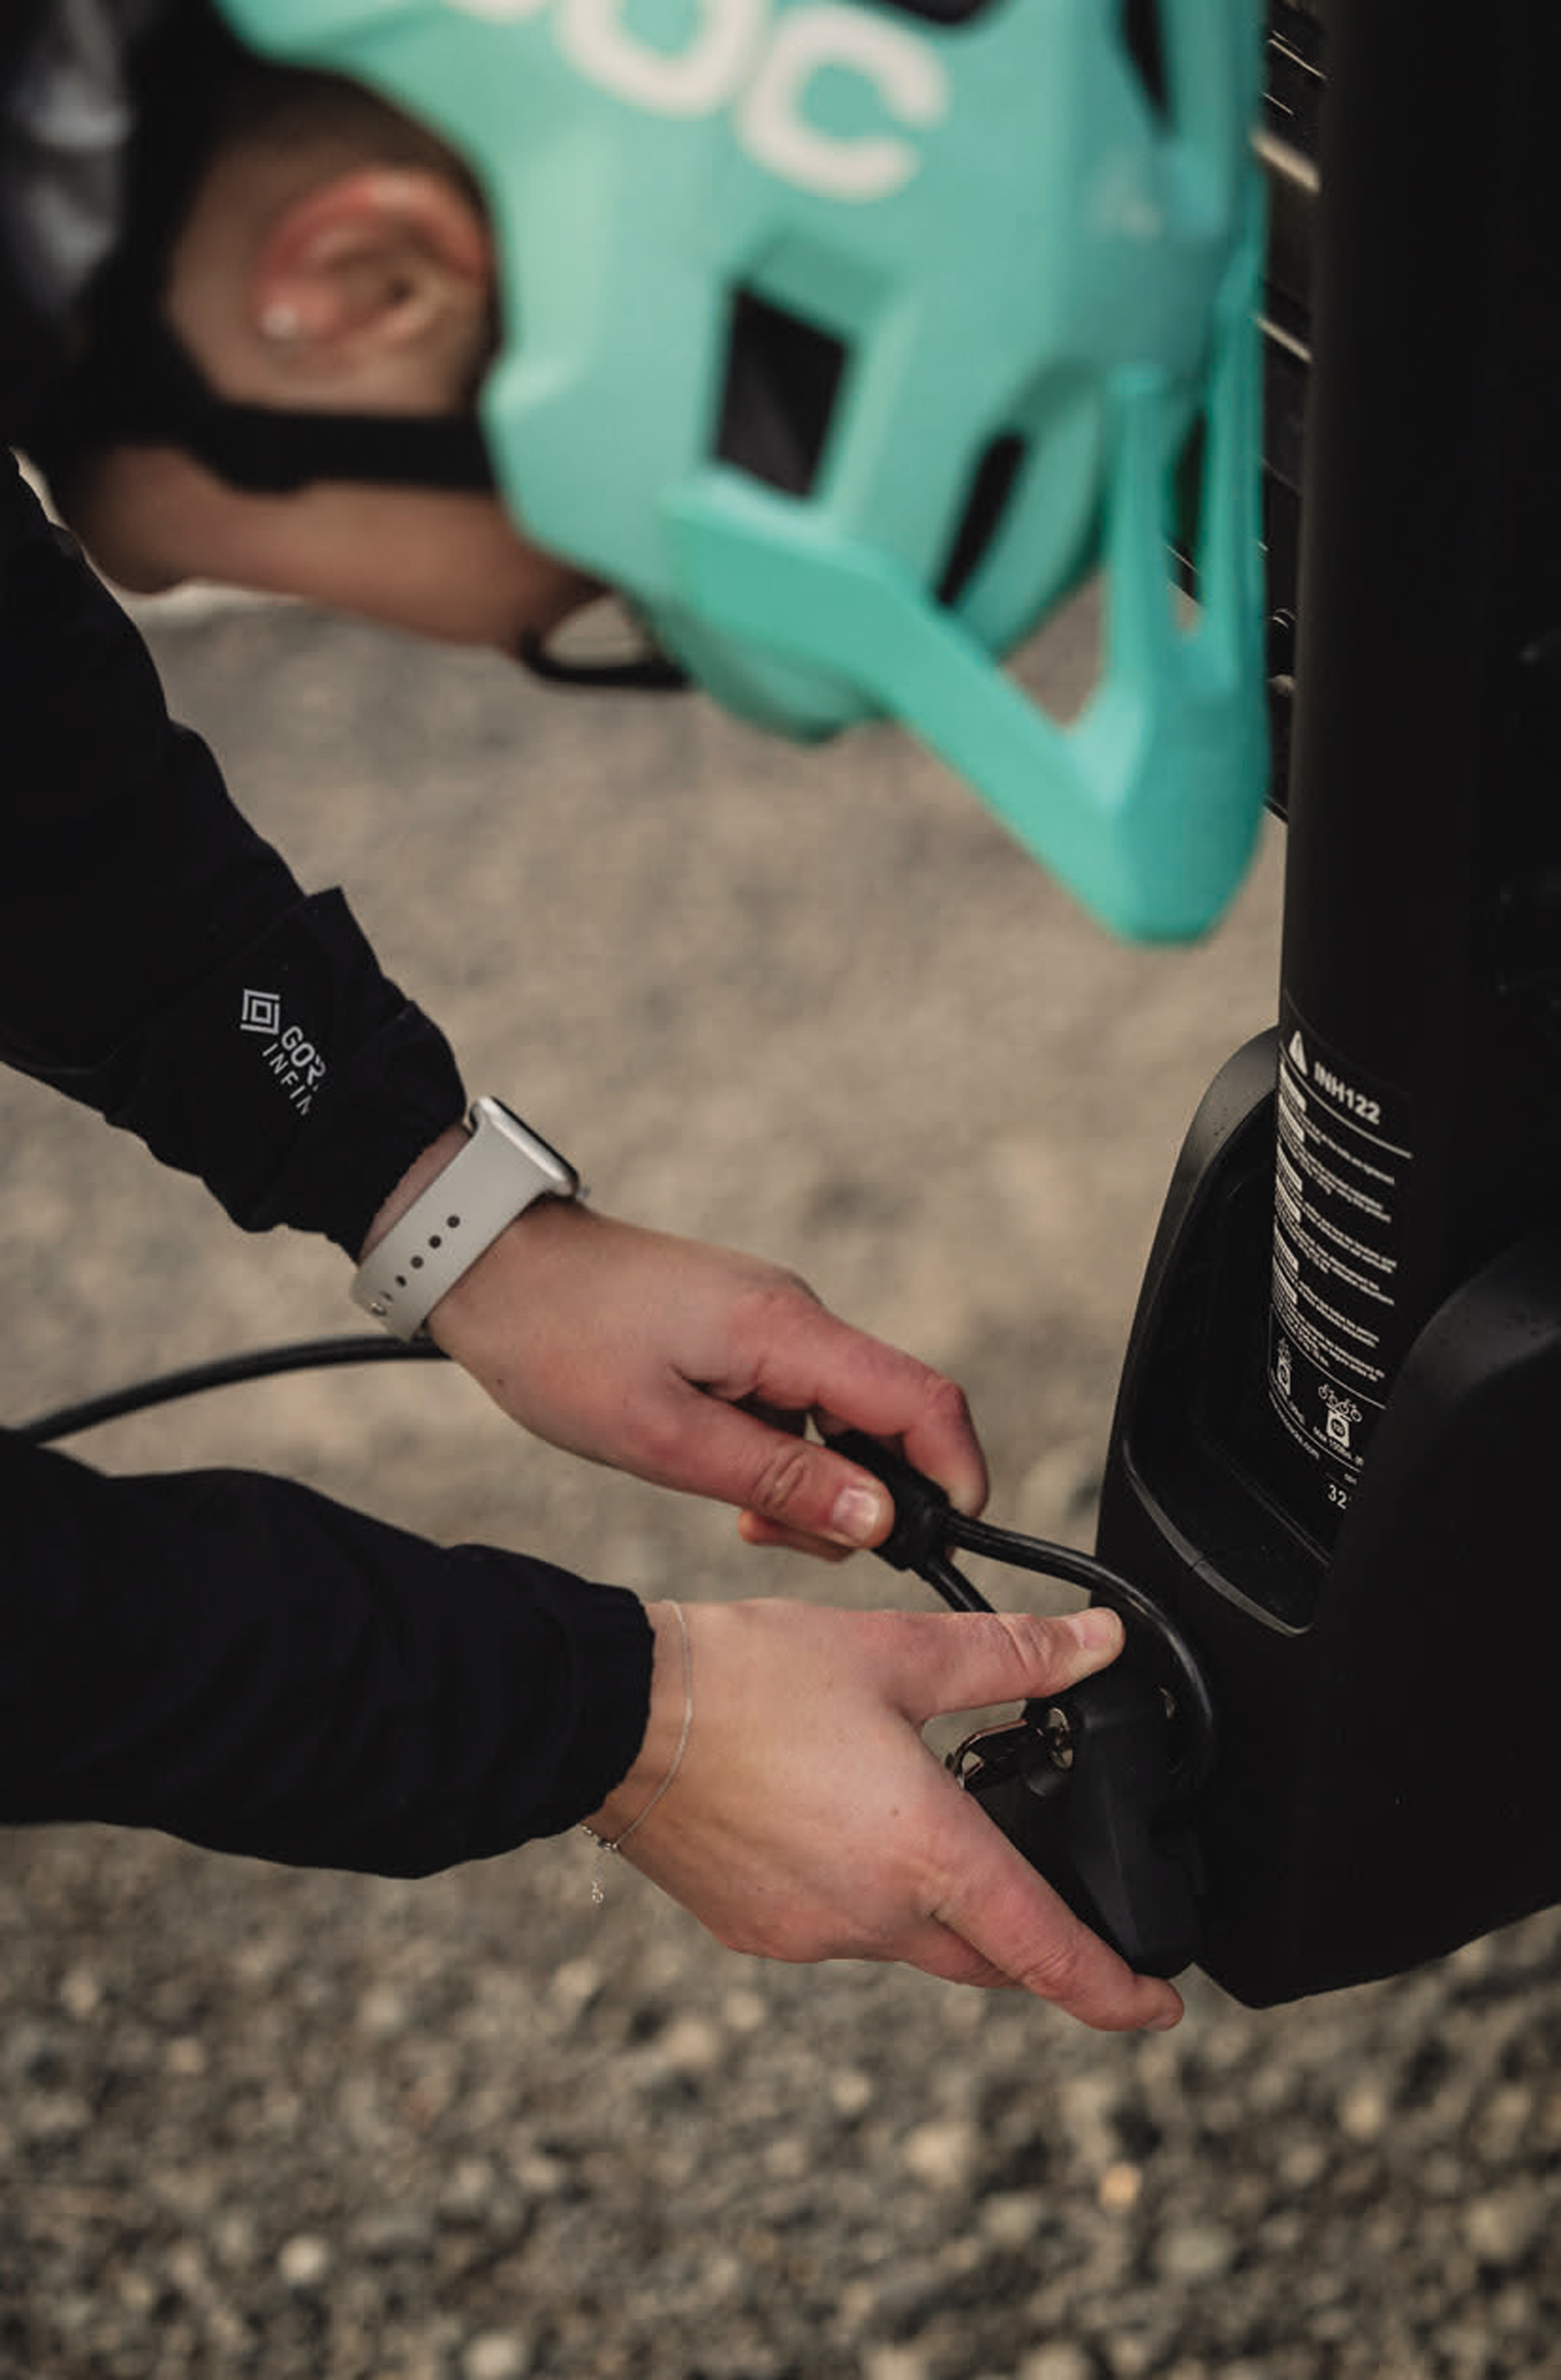
Inno’s latest offering, the Tire Hold HD rack, steps things up, offering large weight carrying capabilities, a wide range of tyre size compatibility, and a design that removes any frame contact – one which, up until 2015, was unavailable on a rack outside of the US.
Fitting Inno’s rack onto my truck was a relatively straightforward affair, although, it did require a few small mods to make it all play nice. The rack features a little depth stopper that helps hold the hitch in the same place – presumably for easy alignment as you take it in and out – which I had to remove in order to get the pin holes to align. Their locking pin has a moulded plastic handle, but is of such a size that it prevented it from being able to be threaded in. Removing the plastic handle from the bolt (albeit forcefully) sorted the problem, and it now threads in easily utilising the 8mm hex key head.
As my bike quiver has evolved, so too have my requirements for a bike rack, so the idea of a rack built largely out of aluminium, with the ability to carry up to 34kgs per bike, hold strong and handle off-road use held big appeal.
The strength of the rack is clear when looking at the size of the hardware and pivots featured throughout. The main pivot, which allows the rack to fold, features no-play and is actuated by a smooth and easily accessed grab-handle at the further-most end of the rack. Whilst elements of the plastic components used throughout make me a little nervous, the cowling encasing the main pivot is a welcome sight, helping to keep a lot of the nasty road grime and dust away from one of the key parts of this system.
Loading bikes is where this system shines. With the way in which the ratcheting arms work, the arms stay put once extended, allowing for one arm to be set in position, a bike rolled or placed up against said arm, and the last arm folded up and tensioned using one hand.
Unloading requires a little more coordination and the use of both hands. I find you need to pull the arm back towards the centre of your bike to take the pressure off of the ratchet, and have your other hand depress the release switch on the tray. My only gripe with this is that the ratchet mechanism requires you to keep the level pressed in whilst you slide the arm back, at times leading to you ending up in some creative body positions.
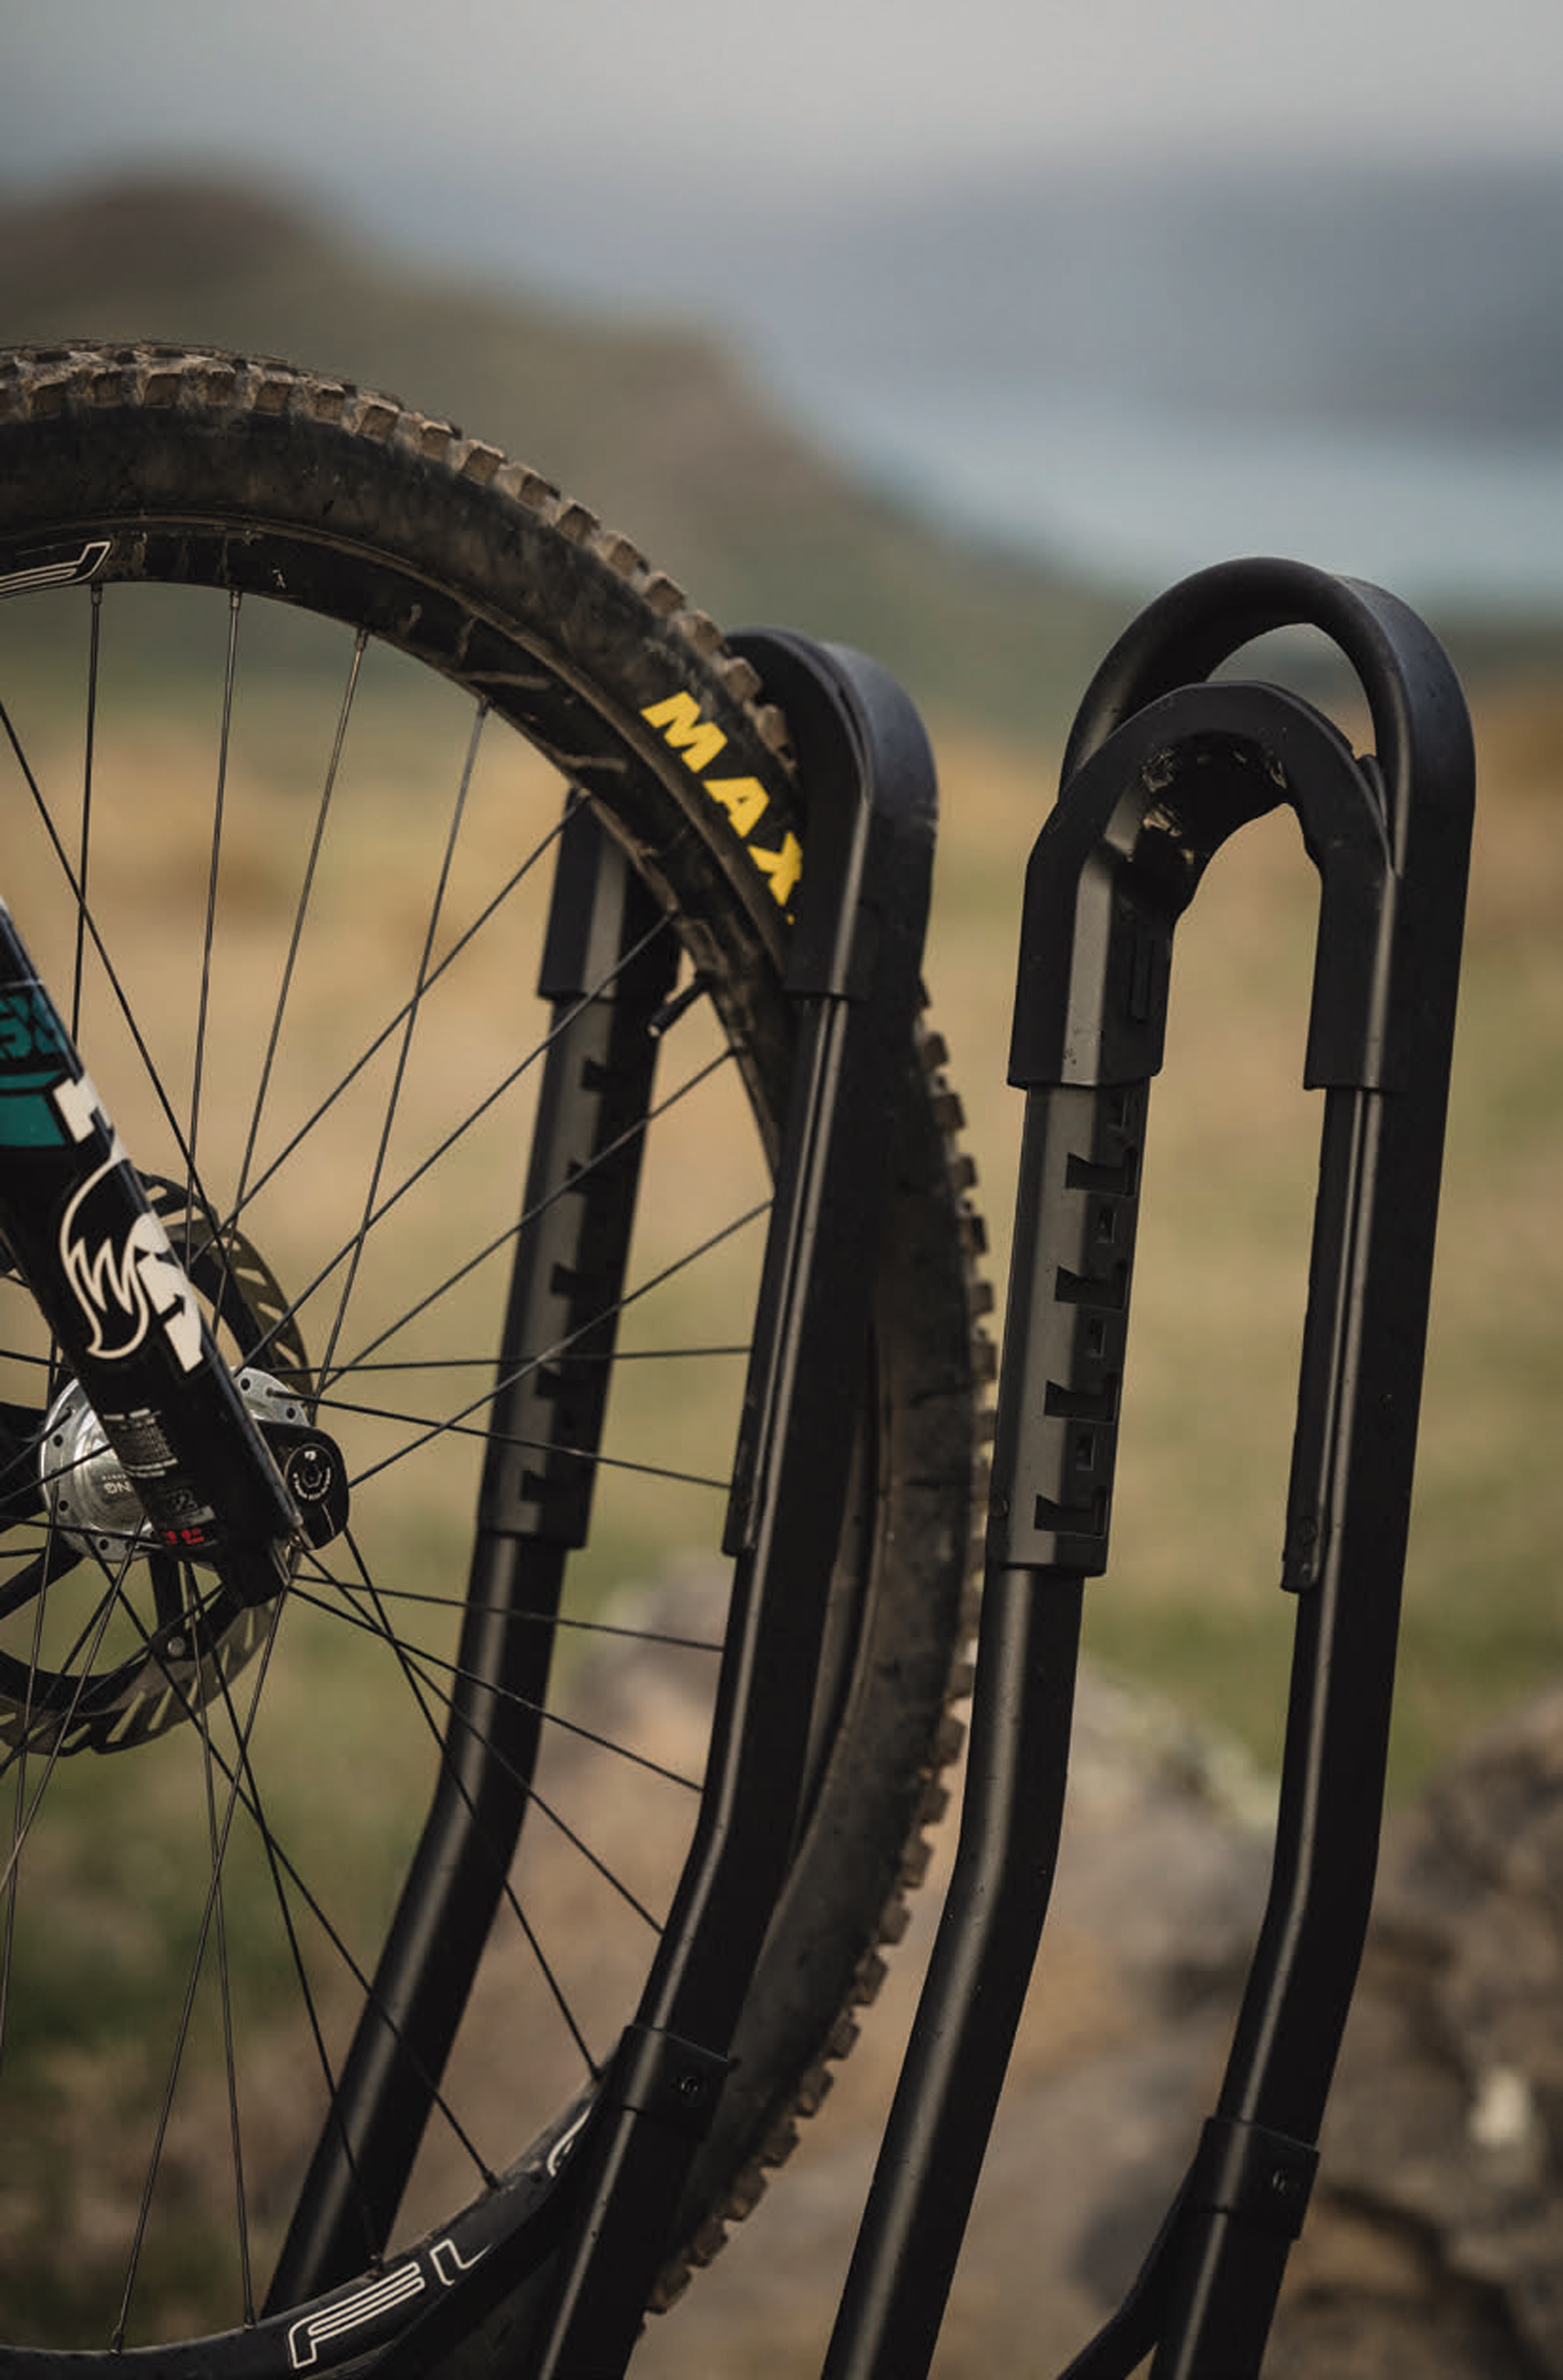
The tyre holders/arms feature a hard-plastic cup which acts as the key point of contact against the tyres and needs to be adjusted depending on the size of your wheels. Doing so is straightforward, but isn’t something you’d want to be doing each time you load your bike. As in our case, if you have a mullet-wheeled bike, or ‘his and hers’ with varying wheel sizes, you find yourself placing the bikes on the rack in the same order and orientation each time to avoid any hassle.
Each carrier bolts onto the main arm of the rack using a t-track style system (similar to what you’d find on roof rack type bike carriers), which allows for close to 30cm of fore-aft adjustment. This range of movement in pairing with the ability to place your bike anywhere on the carrier and adjust the balance of the arms to affect its position means the days of bikes mating is all but over.
Where other racks would creak and rattle, Inno’s HD rack hasn’t made a peep. Even with 45kgs of carbon and lithium swinging off the back down rough, corrugated gravel roads and mild 4×4 tracks, the bikes held rock solid and would barely wobble even, as the truck bounced around. Long journeys are much the same – hassle free and without movement.
The Tire Hold HD is designed exclusively around a 2-Inch hitch, so for those using a smaller hitch receiver or a tow ball, you’re out of luck when it comes to running this heavy-duty bit of kit. Inno offer similar models using a lot of the same materials and construction, but only for those whose vehicles don either a 1-1/4” or 2” hitch. For the towballer’s, sadly you’ll be needing to look elsewhere for the time being.
The ability to lock your bikes onto your rack is a feature you tend not to utilise all that often, but is one which you want to be well thought out and reliable when you need it. Unfortunately for the Tire Hold HD rack, the locking solution is the one feature which really lets it down. Their solution to security is a basic double-loop cable which requires being fed through itself on one end, and the other being clamped down by the hitch’s expanding wedge handle. The cable itself is something out of a primary school bike rack and wouldn’t take much to cut through or pull out of the locked handle. With the bike rack loaded, locking the cable in place would require you reach underneath the rack and fiddle around with a small key, realigning the handle on a small spline, and clamping said cable loop in place.
An easy solution would be to buy an aftermarket bike-lock and chain the bikes together, but for $1249, you’d hope they could come up with a better solution – perhaps wheels locks like the ones found on the Rocky Mounts or 1Up models.
My only other peeve of Inno’s rack is the inability to expand the carrying capacity after the fact. The Tire Hold HD is available in a two or four bike model, but neither option can be changed with the purchase or removal of an extension. Having that ability is helpful both ways – being able to shorten it for around town when it’s just you, or being able to take a car full of friends on riding trips, without the need to have two racks sitting in the garage.
Time will tell how well the Inno rack lasts but, for now, I’ll be keeping this one fitted, at least until I need to carry more than two bikes – and will be carrying my own lock.
CamelBak M.U.L.E Pro 14
Words Liam Friary
Images Henry Jaine
RRP $279
Distributor Southern Approach
I’m always scheming or planning an overnight trip, particularly during that time between the clocks springing forward and winding back again (boooo!). How much gear we actually need on a trip, and what we are going to use to carry it, is always a big consideration.
I don’t mind having some weight on my bike, but I always like to try and keep it free to move, so having a decent backpack with enough storage is an absolute must. Extra hydration is also key when pedaling off into the backcountry for hours and days at a time, making a reservoir a must have. For these trips you need to pack ya meals, snacks, layers, jackets, power bank and locator beacon at the very least, along with other essentials.
The M.U.L.E Pro 14 is aimed at big days out and comes with loads of genuinely useful storage arrays. The back panel is most excellently called ‘Air Support’ and really does help reduce sweaty back syndrome. It also features the brilliant Crux Reservoir which holds three litres of water. As well as a compartmentalised main storage chamber, the M.U.L.E. Pro 14 has a hip belt with cargo carrying capability (another must) and a removable bike tool organiser wrap thingy. You can also insert optional ‘Impact Protector’ spine protection armour into the pack.
When loaded up and out on the trail, the CamelBak M.U.L.E. Pro 14 isn’t that noticeable — and that’s a good thing! For a very spacious pack, it’s just so damn comfy – no pesky annoyances. The combo of stability and security is adequate without having to wrench the bag around my torso. My overnighter stuff was all packed into the CamelBak M.U.L.E Pro without hassle and if you need to pack a sleeping bag you can do that, thanks to two straps that have little hooks on them; I used these to secure my sleeping bag to the bottom of it. Again, when riding, the bag felt snug and secure — I could feel its weight, but it was well distributed. All contact points for the bag have been carefully considered, with each strap being made up of a cross-hatched mesh, along with a sponge centre for maximum ventilation. The traditional shoulder straps have a runner system for easy adjustment of the chest strap too, which reduces that cutting sensation on the armpits which can be a bloody nuisance with an ill-fitting and heavy backpack.
The M.U.L.E Pro 14 hosts a very spacious 3L bladder suitable for whatever your trail adventure. The reservoir is easily accessible via a full-length zip down one side of the bag — the bladder can be removed and refilled with ease, thanks to its helpful handle design and large opening towards the top. The quick release hose connection reduces faff in feeding it in and is great for cleaning as well. The drinking tube has a magnet on it, so it stays secure while you ride. I think the magnet is great for making a solid connection but, when riding and moving, you need to twist it – which can be a touch difficult.
Overall, the light open mesh absolutely lets the back breath whilst remaining secure. The hip straps and lumbar pad really help distribute the weight nicely. A handy addition is the mesh pocket on either side – big enough for a multi tool or snacks for quick and easy access. The best pocket, though, is the sneaky one on the left-hand side of the pack where the waist strap meets the bag. This little pocket is well protected and will fit your cell phone for snapping memorable moments. It meets all my requirements for storage space and stows enough water. The comfort reigns supreme and it does its job very well. Now, I just have to find some more time for backcountry missions?!
Abus Airdrop MIPS Helmet
Words Lester Perry
Image Cameron Mackenzie
RRP $579
Distributor Southern Approach
Full-face helmets underwent a revolution a few years ago, splitting camp. One took the full-gas, maximum protection, downhill helmet route, and the other headed down a more Enduro-focused, breezier, lighter-weight but marginally less protective road.
Although still popular with the Enduro crowd, lightweight full-face helmets are being snapped up by eMTBers all over the globe; the extra protection offering more peace of mind should a 20+kg bike smack you on the head during an accident.
The ABUS Airdrop MIPS hits my test scales at 804g, putting it towards the heavier end of the lightweight full-face category; however, as with most things, the scale alone doesn’t tell the entire story.
Internally, we find a traditional MIPs liner; it’s well-fitted to the shell and under regular use there is no noticeable movement between the EPS shell and MIPs liner. On the rear, we find a familiar dial adjust for a customised fit, although there’s no vertical adjustment to the harness, so it may not suit all head shapes perfectly. The internal padding is soft on the skin, and cheek pads snap into place simply and are easy to remove should you want to during a long, hot liaison – or for cleaning. The inside of the chin bar is lined with closed cell foam to help soften the blow should you take a big front on impact. This padding wraps up the shell slightly in a section in line with the wearer’s collarbones; the theory is to blunt the helmet’s impact on your collarbone should they make contact during a big crash. I haven’t put this feature to the test, but it does seem like it would work. The closure is a secure, tried and true, classic double-d-ring style; a somewhat fiddly but proven system.
A fashionably large and adequately adjustable visor is bolted in place but designed to “break away” in the event of a crash, drastically reducing its leverage on a wearer’s neck. The visor itself seems sturdy and has stood up to a bit of abuse; less could be said about many, more brittle visors out there.
Having reviewed other ABUS helmets previously, I went for the same S/M size, with a 52-58cm size range. The Airdrop is certainly a snugger fit, though, and I had the adjuster wound the entire way out. Even then, I found the shell was only just large enough for my head. Without trying it, the larger L/XL size shell would have been quite a step up, and I like the comparatively slim silhouette of the S/M size. Provided my head doesn’t grow then this size is comfy enough.
I was surprised by how much airflow the helmet offered, particularly considering the traditional MIPS liner usually disrupts airflow. The combination of large frontal air intakes, the strategically placed internal channelling, and the large rear exhaust ports worked exceptionally well.
I was surprised by how much airflow the helmet offered, particularly considering the traditional MIPS liner usually disrupts airflow. The combination of large frontal air intakes, the strategically placed internal channelling, and the large rear exhaust ports worked exceptionally well. I could feel the air passing over my head, even on muggy late spring days; I found it more breathable than some helmets I’ve worn with more vents. Vents just above the ears are a nice touch, offering virtually uninterrupted sound, so you can easily hear your mates yelling at you to “get off the brakes!” Or maybe that’s just me?
I’ve yet to come across a full-face that doesn’t work well with goggles, and the Airdrop is no different. However, depending on how large your goggle frame is, there may be limited space from the top of the frame to the forehead of the helmet, so it’s worth checking whether your specific setup would work. Not all full-faces play nicely with glasses; however, should you want to go down that route, the two work just fine together on the Airdrop.
The Airdrop meets all the necessary safety standards here in NZ, but I wonder how much it exceeds them by? It’s something we’ll never know. Still, with fewer vents than some popular models and more ‘meat’ (and consequently weight) across key areas, my bro-science would tell me that this helmet may lean further toward a downhill helmet than some brethren. I won’t delve too deep into the subject, but there is a sticker inside the lid touting that ‘the chin bar meets ASTM F1952 Standard Certification’; essentially a certification for downhill helmets that are tested to a higher level than the usual standards we see.
The fact ABUS claims the chin bar passes this certification leaves some grey area as to whether or not the entire helmet meets the standard. This standard is tested across an entire helmet, not just a single area, like the chin bar. The bottom line is, the helmet is more than sufficient for its use case, and there’s some added comfort in the fact it also meets at least some of the ASTM F1952 standard.
I’ve been impressed with the ABUS Airdrop. It’s light enough, plenty breezy, has some nice features, and looks unique amongst all the popular models seen out on the trails. I’ve even had several questions and comments about how good it looks!
The fit won’t suit everyone, so if you think you’d be on the crossover between sizes, be sure to try both to ensure the best fit.
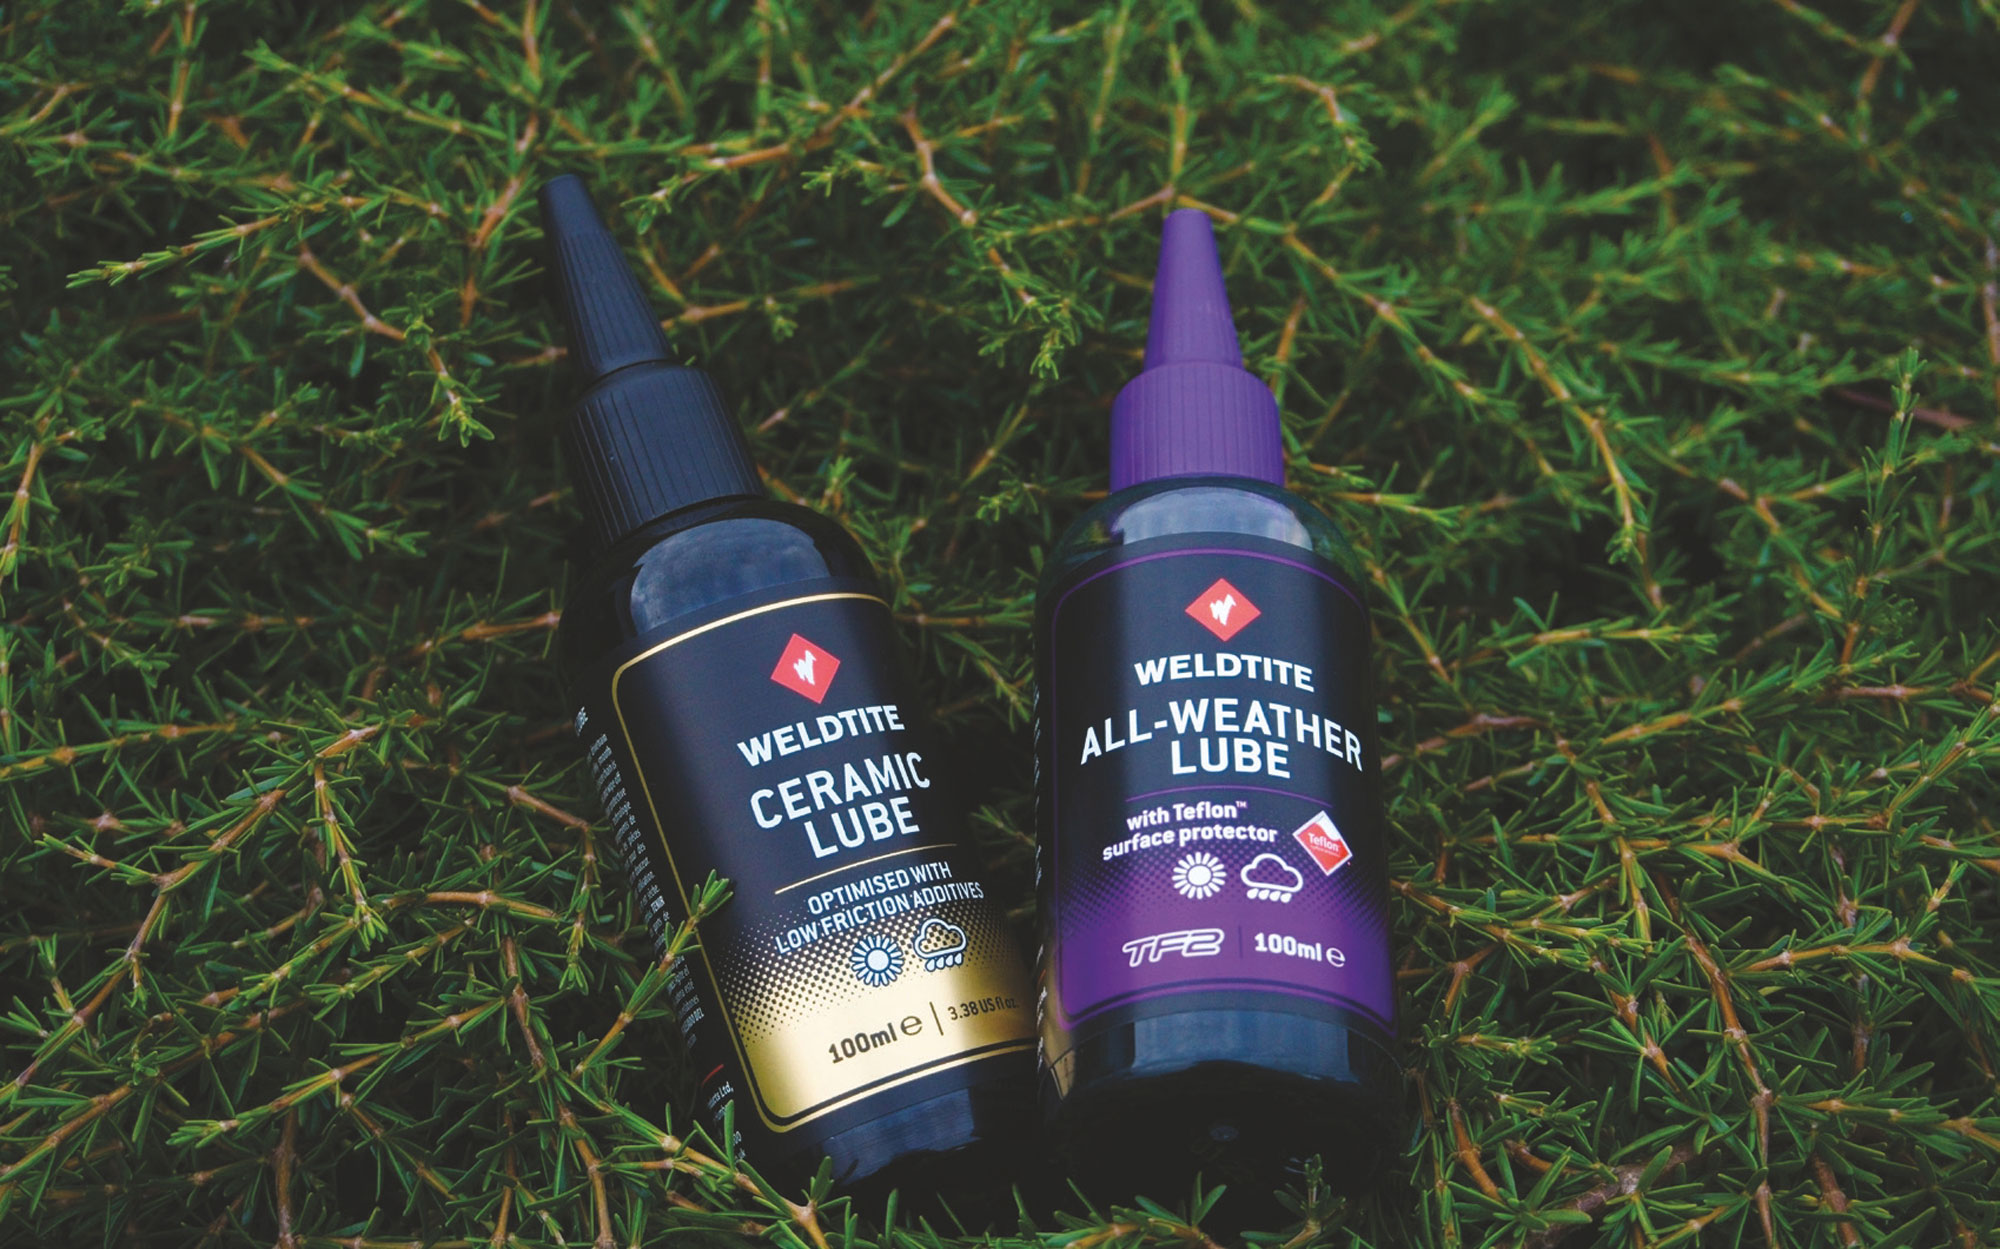
Weldtite Chain Lubes
Words & Image Lester Perry
RRP $19
Distributor Southern Approach
Weldtite has a storied history. Starting out in London in the early 1940s, it initially manufactured and supplied puncture repair kits to British and Canadian paratroopers who, once on the ground, were getting about on folding bikes.
Eventually outgrowing its facility, Weldtite shifted to Barton, by the River Humber in North Lincolnshire, where it continues to develop and manufacture a wide range of bike maintenance products, to this day.
A lot has changed in the world of chain lubricants over recent years. New formulations, wet, dry, light, drip or melt; there’s now a lube for whatever style of bike you ride and whatever conditions you ride it in, not to mention options for both human and electric assist bikes as well. Whatever the style of lube or the name on the label, they’re all attempting to achieve the same goals: quieten the drive train, increase its efficiency, maximise its lifespan, and not attract contaminants.
I’ve spent a few months comparing the merits of two similar – but distinctly different – Weldtite chain lubes. Using multiple bikes and varied trail conditions, I’ve garnered a good understanding of each lube’s drawbacks and benefits.
Weldtite Ceramic Lube
This is an all-weather lube with ceramic additives for optimal efficiency, helping to conserve precious watts and decrease drivetrain wear. Its low viscosity allows it to penetrate right into the links of the chain, and its various additives bond to the chain’s surfaces, creating a hydrophobic barrier to resist water and contamination.
It’s reasonably light and has a runny consistency, so care was needed while applying it. I found it easy to overdo it, leaving the entire drive train susceptible to build-up of dirt and other contaminants. It literally only takes a small drop on each chain link to do its job. Once I figured the sweet spot between ‘too much’ and ‘not enough’, this lube was great. As with other lubes, one key to gunk-free riding is to begin with a completely clean system (chainrings, chain, jockey wheels), then apply the lube, leave it to sit a few hours, and finish by giving the chain a thorough wipe to remove any excess sitting on the outer surfaces.
In dry conditions, the drivetrain stayed clean, smooth, and quiet for many rides, with minimal gunk on the chainring or jockey wheels. I’ve been surprised at how well the lube has lasted; it could go multiple rides before needing to reapply. In wetter conditions, I found it didn’t last quite as long, although the bonus in the damp was how little grime the drivetrain collected, certainly less than many lubes I’ve used.
On a mountain bike, I’d reach for this lube over the summer, in dry to variable conditions. I’d run this lube year-round on a road or gravel bike.
I’d say it’s a jack of all trades, master of none.
Weldtite All-weather Lube with Teflon™
This lube is designed to excel when the trails or roads are wet, or rain is falling. It has a marginally thicker consistency than the Ceramic lube but is still quite runny. The All-weather is a bit stickier than the Ceramic Lube, closer to a more traditional ‘wet’ style lube. Weldtite tells us the lube is enhanced with a ‘Teflon Surface Protector’ to assist in repelling water and contaminants.
A light application is vital – it’s not as sticky as some all-weather lubes, but if there’s much on the outer surfaces of the chain (or overspill on chainring or jockey wheels), these areas attract contaminants. As with the ceramic lube, I began with a clean chain and applied a thin layer across the chin, leaving a few hours to wipe off any excess before riding. With such a small amount needed per use, the 100ml bottle should last even the most frequent of riders for a long time.
Amongst my normal cruising around, I rode this lube on one big (by my standards) overnight mission – some 19 hours of riding split in two by a particularly broken sleep in a roadside shelter…. but that’s a story for another time. Across multiple surfaces and trail types, from groomed gravel to stodgy mud, my drivetrain got a good workout and offered a real-world glimpse of what this lube is all about. There was no sign of the chain drying out, and at no point did the drivetrain seem like it needed more lube, staying quiet for the entire ride. By the time I rolled back into my garage at home, there was some buildup of contamination on the chainring and jockey wheels, although it was not a concern given the conditions and hours ridden. Had I taken the time to give the chain and jockey wheels a quick once over after my first day of riding, I could have saved some precious watts being absorbed by some of that buildup.
Given its chequered reputation, it would be remiss of me not to mention the use of Teflon (PTFE) in chain lube. A portion of the bike industry is removing PTFE and related compounds from their products, claiming no justifiable case exists for their continued use. A solid body of evidence shows that the PFAS used in the manufacture of PTFE, and the PTFE itself, are growing global health concerns. Both compounds are termed ‘forever chemicals’ and cannot completely break down in the environment. There’s a host of studies and evidence online if you’d like to know more about why this is a concern.
So, where does that leave me with the Weldtite All-weather chain lube? I’d say it’s a jack of all trades, master of none. This lube quiets the drivetrain, withstands terrible weather, and lasts well, but the drawback is that it picks up a bit more muck while doing its slippery job than some lubes targeted toward more specific conditions. This could be right up your alley if you’re keen on one lube to use across multiple bikes without matching lube type to conditions.
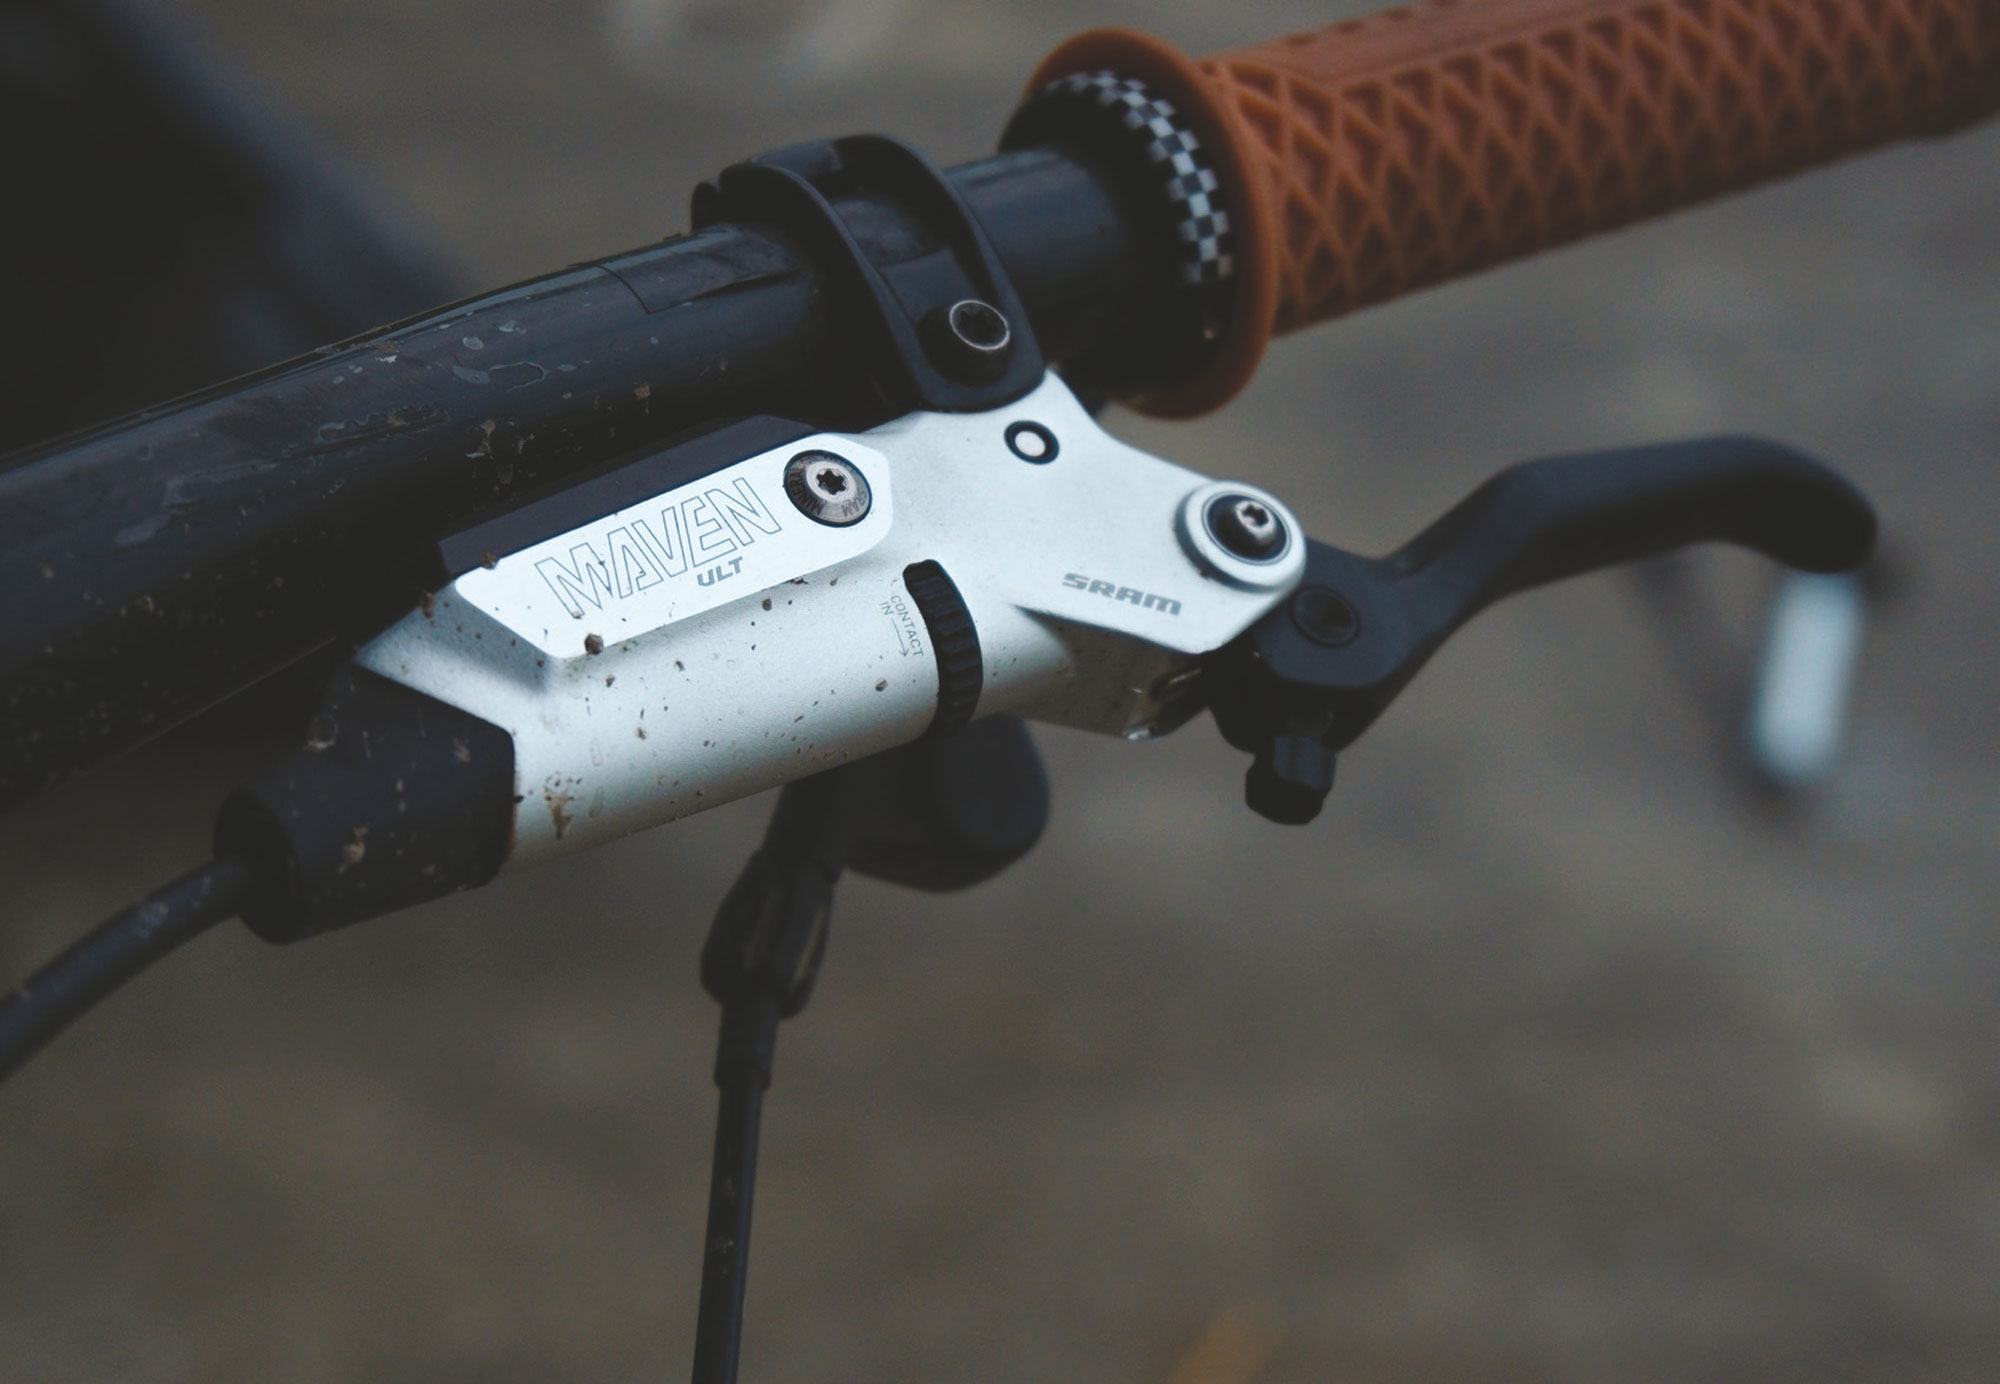
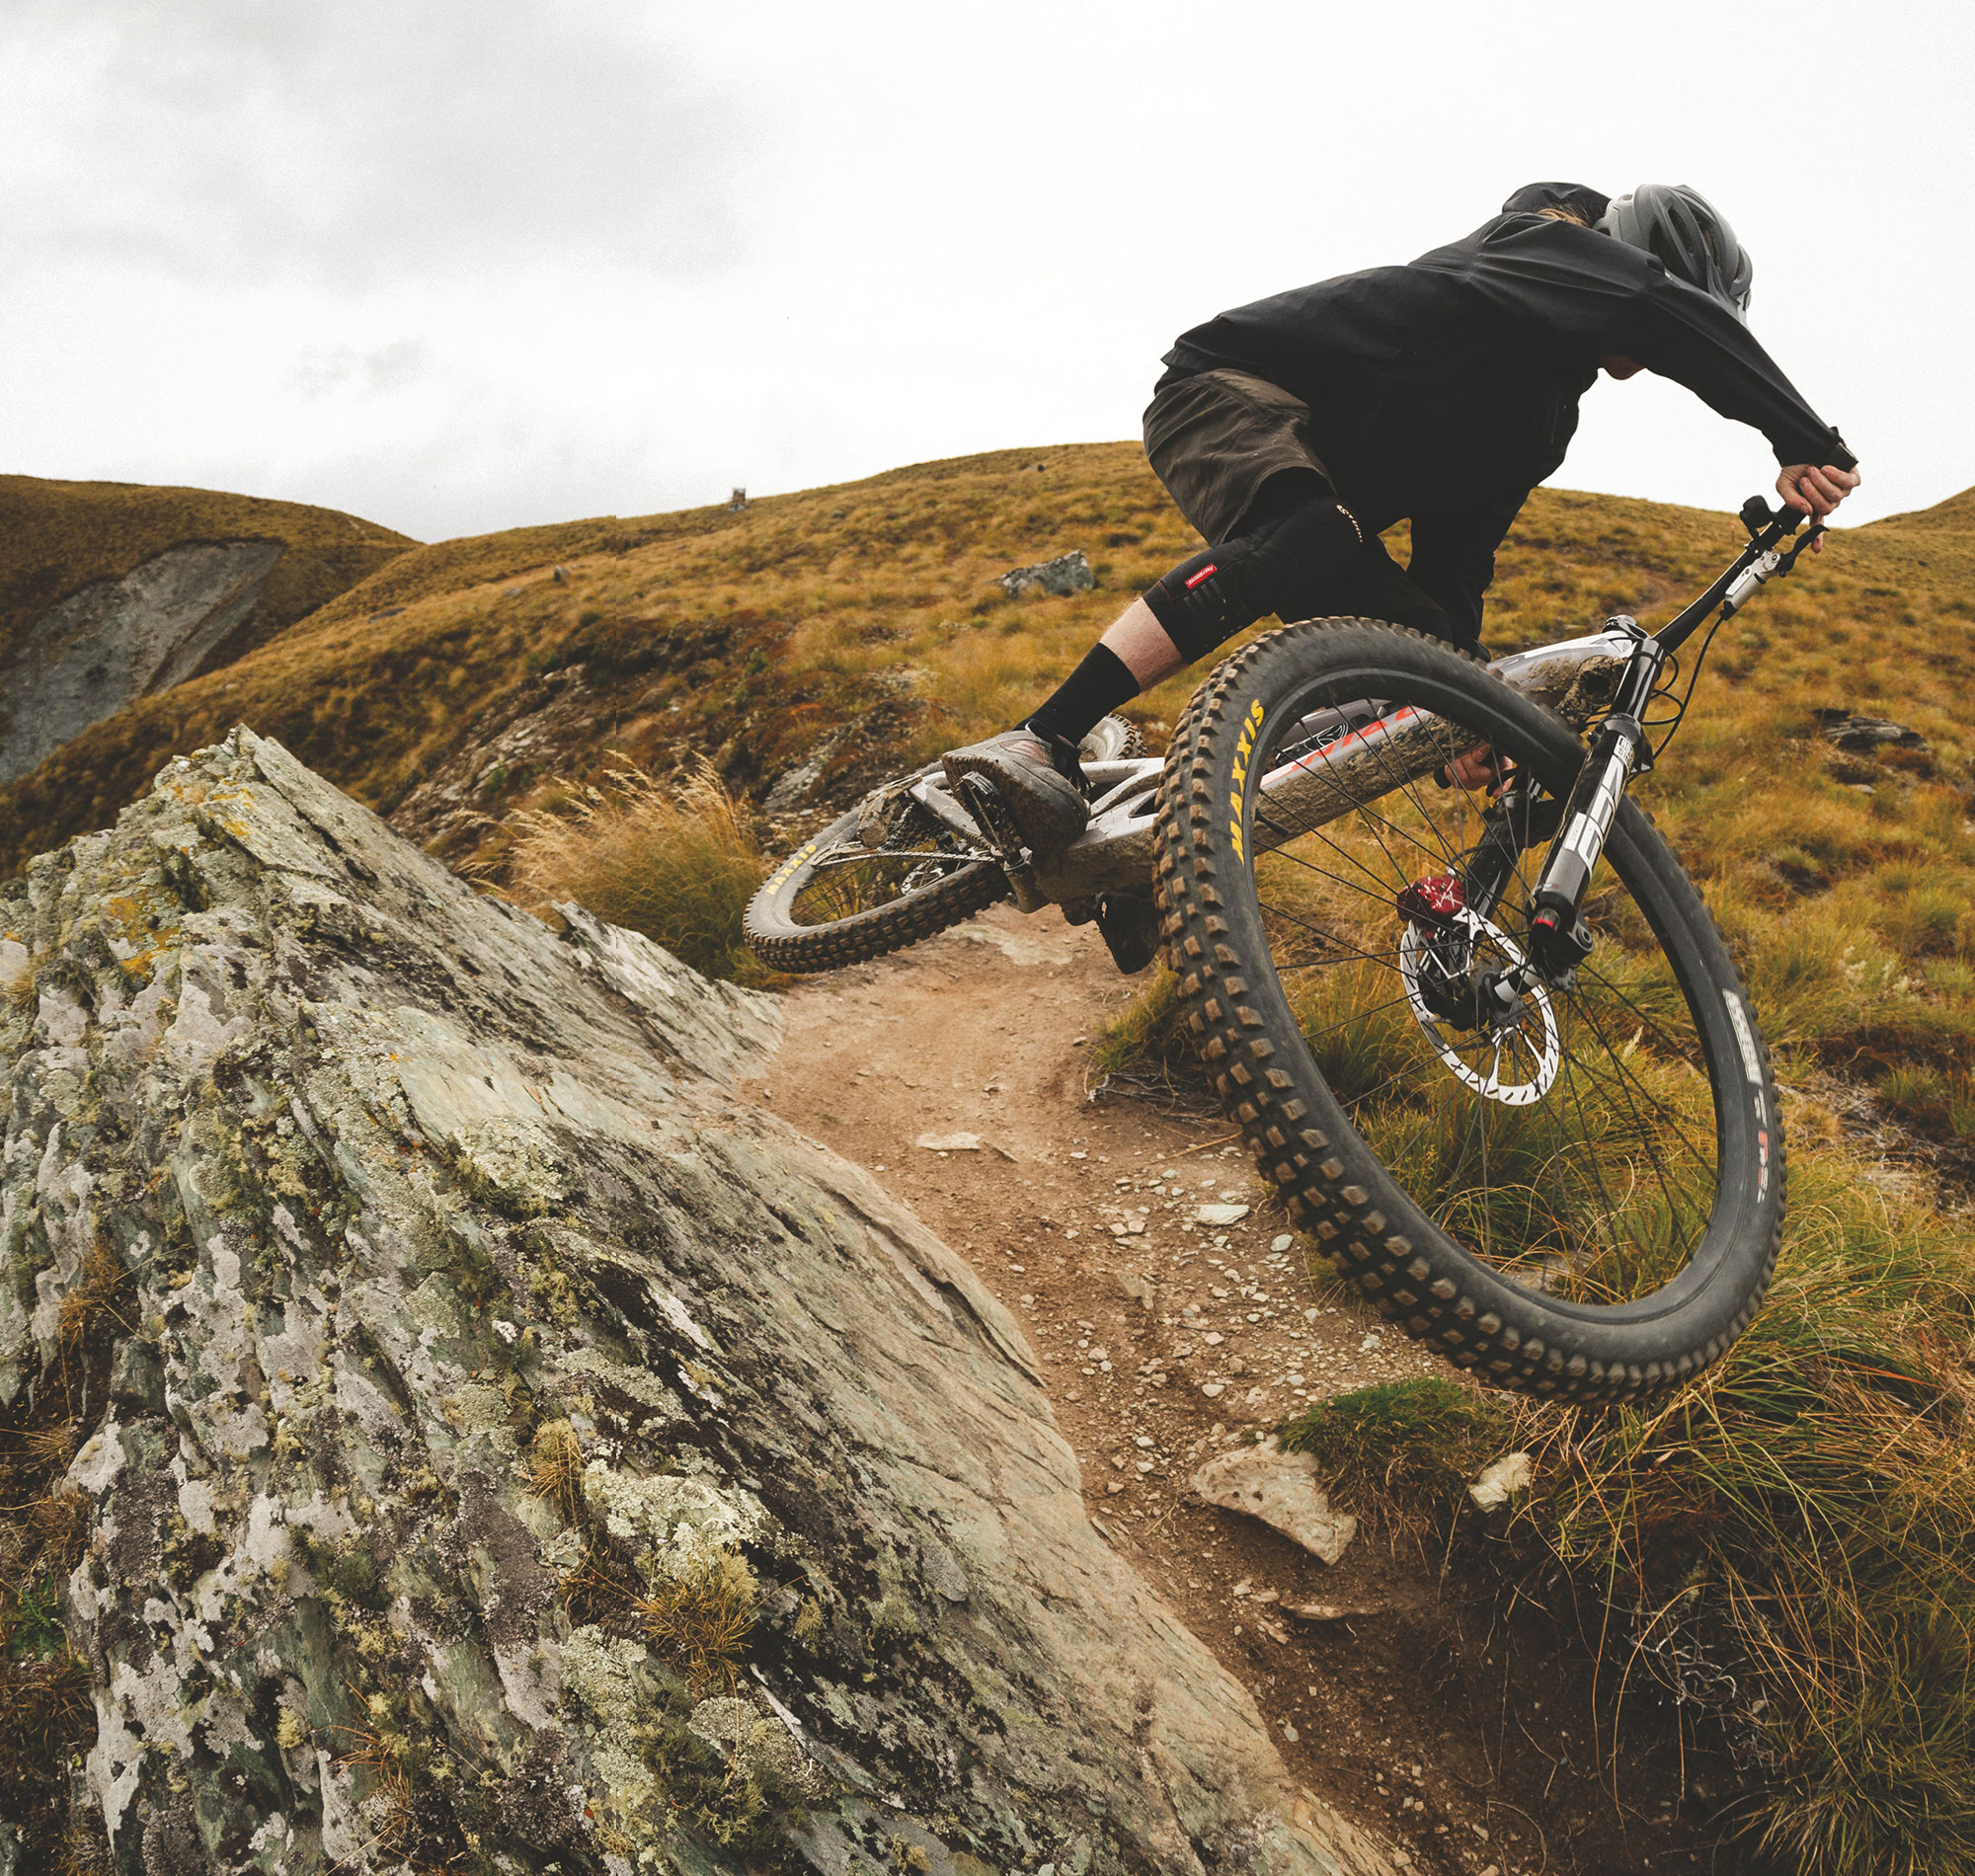
SRAM Maven ULT Brakes
Words Lester Perry
Images Lester Perry & Callum Wood
RRP $622 per end
Distributor Worralls
It’s been a while since I came across a new bike component that, once bolted on, offered a noticeable performance improvement from its predecessor. Often new releases are more of “a tweak here, a tweak there, and a splash of paint” rather than a complete redo, ending up with something vastly better than what was offered before.
In the space of just 12 months, SRAM has done just that – offering two groundbreaking new ranges, first with the launch of the Transmission ecosystem in March 2023, and now with the recent release of the Maven series of brakes.
The first and fundamental change that SRAM made at the outset of its quest for top performance was to design the system using mineral oil rather than its traditional DOT fluid. DOT fluid absorbs moisture over time, and its use means more regular brake bleeds as the oil’s properties eventually change as moisture is taken on. After a couple of years, the seals, particularly in the lever, needed replacement as they are ultimately eroded or swollen by the DOT fluid, rendering the brakes useless. Unfortunately, the cost to replace the seals is about equal to just replacing the entire lever (unless you do the job yourself), so guess where all these old brakes end up? Mineral fluid isn’t corrosive and doesn’t absorb moisture like the DOT so, theoretically, less maintenance is required, and the brakes will last a lot longer.
The combination of the new seal material and the mineral oil offers better performance across the heat spectrum in which the brakes operate. From the depths of a Queenstown autumnal inversion layer – where brakes may never heat up a lot – to lengthy laps on Whistler steeps, the idea is to offer a brake that performs more consistently across a wider variety of running temperatures and with less maintenance. The new seals and use of mineral fluid, combined with larger pistons and a new, gargantuan calliper, seem to have achieved this – from my experience so far.
For a brake to be powerful and consistent, it needs to keep enough heat in the system without overheating or excess cooling; not be too hot, not too cold, just right – like a good bowl of porridge. The greater thermal mass in the Maven calliper takes longer to heat up but, by design, balances the peaks and troughs of temperature, maintaining a more consistent and optimal temperature, ultimately providing a more consistent braking performance regardless of how hard you are on the brakes.

There’s a nice, solid, woody feel, and you can tell when the pads contact the rotor. There’s a familiar feeling of modulation, just like other high-end SRAM offerings.
We installed a set of Maven ULT on my daily driver, a Trek Slash, and over the past few months I’ve been figuring out what they’re all about. I’ve been running the stock organic pads and 200mm HT2 rotors. In the past, with SRAM brakes, the stock organic pads would be first to go, instantly upgrading to a sintered option. In this case, I’ve had no complaints with the Maven’s stock organic pad compound. Apparently, like previous SRAM offerings, the sintered pads come into their own in wet conditions, but so far I haven’t seen the need to put the sintered pads to the test on these brakes.
There’s a limited edition Maven Expert ‘red splash anodised’ colourway that Liam (editor) has been running but, honestly, that red would have clashed brutally with my orange bike, so the polished silver and black version ULT suits my setup perfectly – and we all know looks are part of the performance package, right?
The lever feel is not too dissimilar to the latest SRAM Codes. There’s a nice, solid, woody feel, and you can tell when the pads contact the rotor. There’s a familiar feeling of modulation, just like other high-end SRAM offerings. With some heat in the system at speed, the lever remains comfortably consistent and doesn’t wander or pump up. Wet weather is no bother either. The combo of the 200mm rotor and the huge pad contact area provides awesome wet-weather power.
It’s nice to see a slight tweak in how the brake hose exits the lever body; compared to the Code’s ‘Stealth’ levers, the hose comes out of the lever and angles away from the handlebar rather than towards it like other Stealth style brakes. Having ridden bikes with the standard, angled ‘Stealth’ levers and their regular ‘slap’ noise as the brake hose smacked on the bars, I was glad to see this minor tweak. I’ll be interested to see if this change rolls into the rest of the ‘Stealth’ levers over time.
The Maven ULT edition features lever reach and pad contact adjustment. Although the lever looks quite similar to the Code Stealth lever, inside the lever body we find the necessary differences, including piston size, to optimise for the Maven calliper’s oversized pistons.
My favoured setup is to have the pad contact wound completely in (so the pads contact quickly) and the lever wound far enough in that it ends up near parallel to the handlebar, allowing for minimal reach and only a small lever throw before pads engage. The lever pull feels slightly firmer than a SRAM Code and considerably firmer than a Shimano brake. It’s a matter of getting used to it rather than better or worse in my book, and I’ve been running Shimano 4-pot brakes up until this set arrived.
The Maven is touted as providing almost 50% more stopping power and requiring about 30% less force on the lever to deliver the same power as the Code Ultimate brakes – some heady stats that, before riding them, I found a bit hard to swallow. After a couple of months aboard the brakes, however, I can’t argue with these numbers; there is a serious amount of stopping power on tap and my forearms aren’t complaining.
In seasons gone by, it’s been common to see downhill and enduro racers’ bikes fitted with the largest rotor size they could squeeze into their frames. Part of the impetus behind making the Maven’s so powerful was the aim to be able to scale down the power by running smaller rotors. Smaller rotors are less susceptible to rock or debris strikes, so staying straighter and having so much power on offer gives a rider the ability to tune their power to their needs depending where or how they’re riding.
With no worry of underpowered or overcooked brakes, there’s no reason not to brake later towards turns or go deeper into a chute before braking.
Weight-wise, there’s an additional 60 grams per end on the ULT above a comparable level Code brake (calliper, hose, lever); my trusty calculator tells me that’s a 20% increase. It is considerable, especially when most of the extra weight is in the calliper. In fairness, depending on what size rotors are fitted, and whether or not they require adaptors, you could end up with a similar (or even lighter) total system weight compared to a Code with larger rotors. But, with more power and more consistent performance.
As you see, there’s a load of tech to unpack with an entirely new offering like the Mavens, but if what you really care about is how these units work in the real world, then read on.
There’s no doubt these brakes are the gruntiest I’ve used. I’ve ridden several powerful gravity- oriented brakes, but by no means a majority of what is available. The Mavens have surprised me, not just with their raw power but with how consistent the feel is; every time I’ve pulled the lever, the feel is the same and, even on longer runs where other brakes have suffered with heat issues or cooked rotors, I’ve learned to rely on the consistency of the Maven.
With immense power comes immense responsibility. Traction is more critical during heavy braking, and part of this is maintaining body position – something that takes some adjustment. With no worry of underpowered or overcooked brakes, there’s no reason not to brake later towards turns or go deeper into a chute before braking. Braking in a shorter distance means higher forces on the body and tyres over a shorter time span than lesser brakes – think a Stab rather than a Slice – and certainly something that takes some time to become familiar with.
Anchors on = slow down. Full stop. No story, straight to bed.
It’s taken some time to adapt my riding and change my ingrained habits to make the most of the Mavens, but it does feel like if I were against the clock, I’d see some time savings, particularly on high-speed and steep tracks.
With some heat in the system at speed, the lever remains comfortably consistent and doesn’t wander or pump up. Wet weather is no bother either.
On most eBikes I’ve ridden recently, the brakes have underwhelmed me. An adequate brake has often been let down by an inadequate rotor, and it’s been quickly cooked, rendering it nearly useless. Generally the brakes just aren’t consistently grunty enough for the weight they need to slow down. A note to product managers: a 180mm rotor doesn’t belong on an eBike! The additional heft of a complete eBike system (rider, gear, bike) makes a set of Mavens for eBike use a total no-brainer and a worthy upgrade.
As good as the Mavens are, they’re not for every bike, and for sure, they’re too powerful for some scenarios. In slick conditions, I think I’d like to try smaller rotors to detune their bite somewhat. Such powerful brakes make it a bit harder to keep the wheels rotating under braking when trails are super wet, and lockups come easy when there’s this much power at such little effort. Likewise, unless the brakes are fitted to a downhill bike, or you’re riding long, steep trails on an Enduro bike, then you’ll likely want to de-tune them to the point where their performance (outside of the mineral oil and heat advantages) would put them in line with a Code or similar brake. On anything less than a balls-to-the-wall Enduro or Downhill bike, where maximum power isn’t essential, I’d be reaching for a Code or something similar.
Spending time on these brakes has got me thinking; SRAM now offers eBike tuned suspension (under the Rock Shox brand), transmission drivetrain, Maven brakes, and even a collaboratively developed eMTB motor. Combine these bits with other brands in the SRAM family: such as ZIPP wheels, Truvativ cockpit, Time pedals, and a Hammerhead bike computer. These are all arguably top-shelf and market-leading (or close to it) items that all suit the eMTB market to a tee. There are only two pieces to the puzzle missing: a good set of tyres and a frame…. Hmmm what will the future hold?
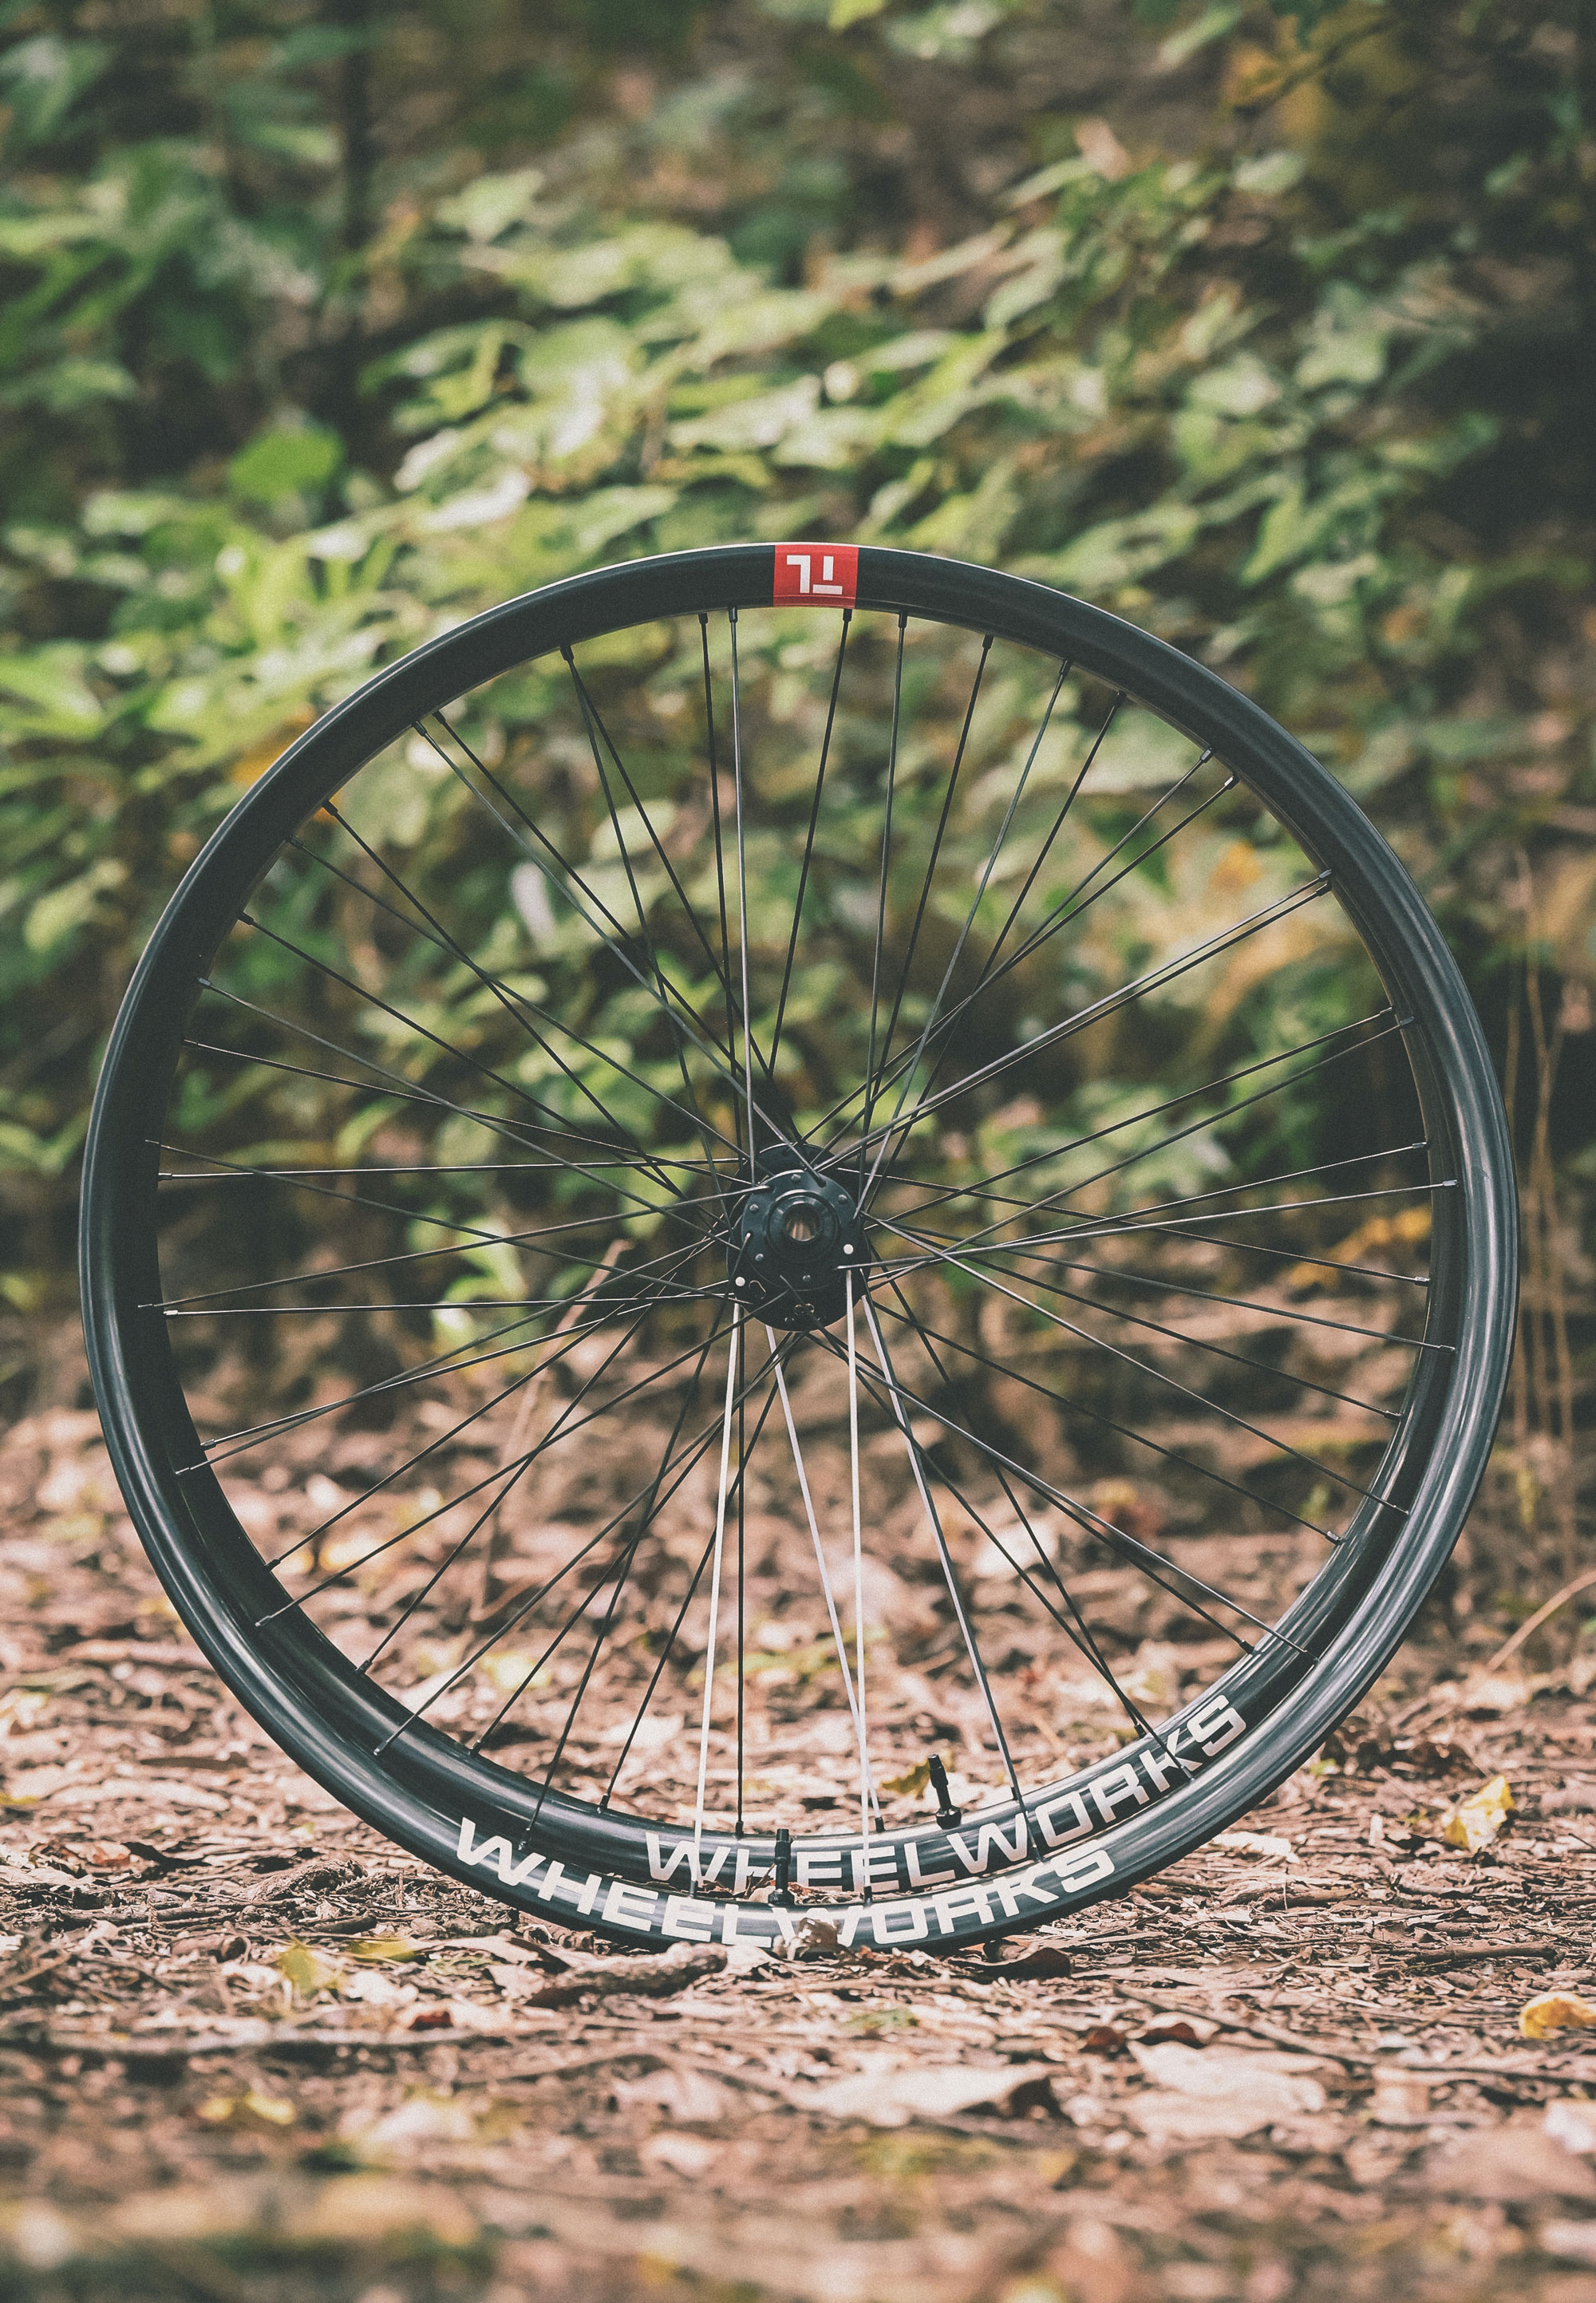
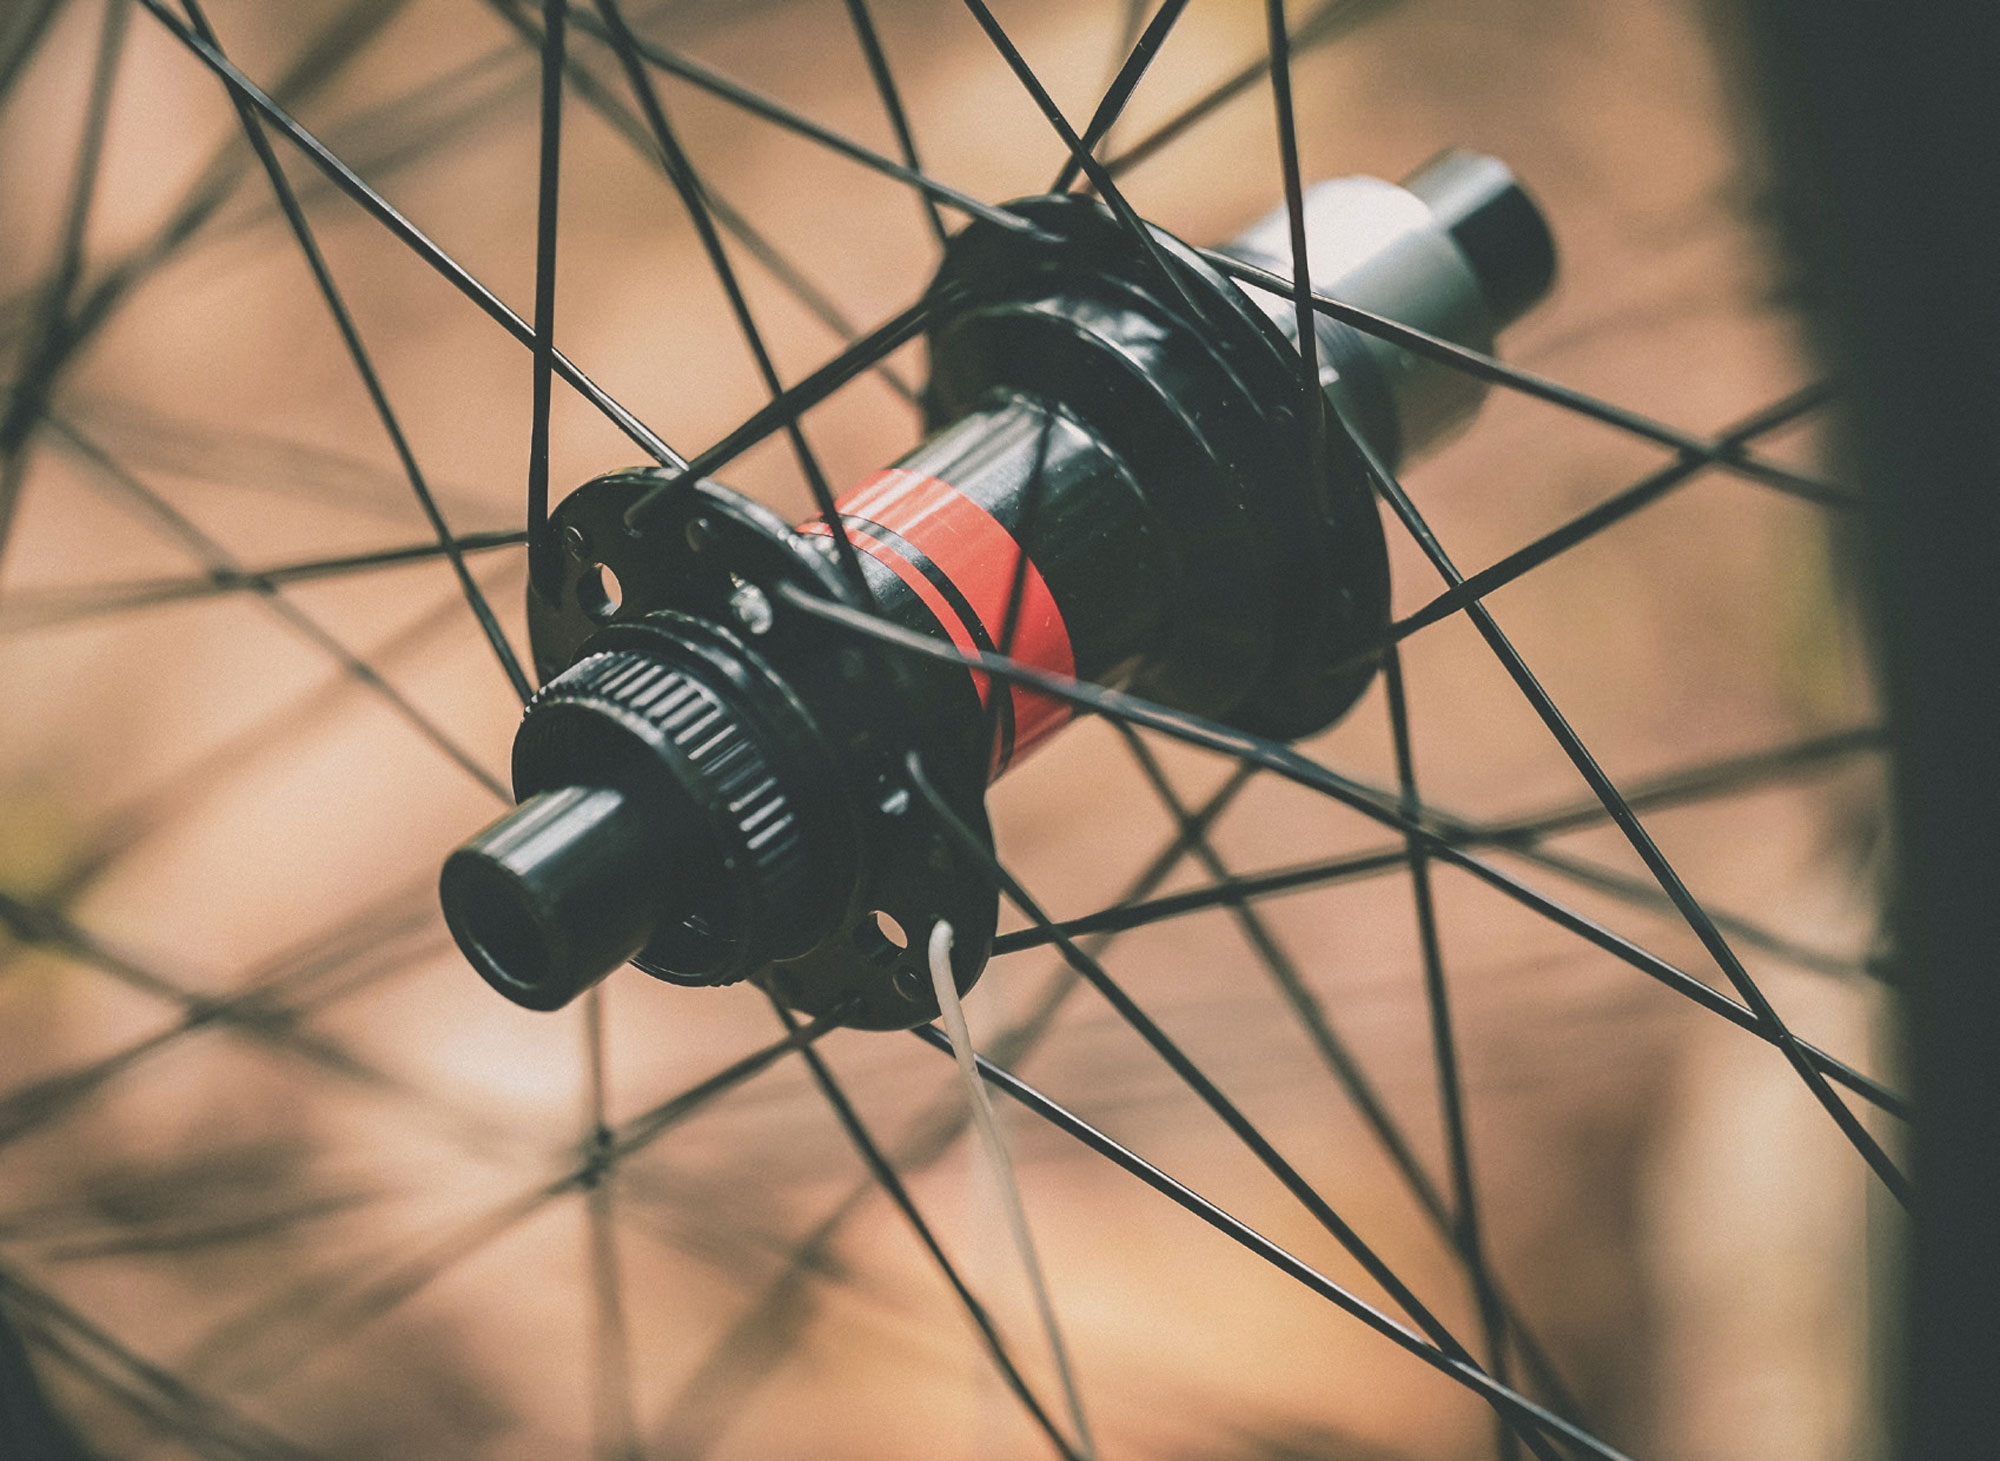
Wheelworks TrailLite Carbon
Words & Image Lance Pilbrow
RRP $3600
Distributor Wheelworks
Way back in November 2022, I was lucky enough to get my hands on not one, but two sets of Wheelworks’ new wheels to review. These were the Flite Trail model; one set in carbon and another in alloy. The idea was to do something of a side-by-side test on each pair over the summer and write something up for print after giving them each a good thrashing.
Needless to say, they both flew through the tests (and I did an unusual amount of wheel and tyre swapping that summer). At the end of that I was a little torn; the carbons were lighter, stiffer and no doubt, won on bling, but the alloys provided serious value for money, and Wheelwork’s after (and before) sales support meant that either way, you would no doubt be a satisfied customer.
Even better, though, was the opportunity to hold on to one of the sets for a long-term review. “Are you interested in holding onto these $3000 wheels for a bit longer?” they asked. “Ah… Um, yeah!” (What kind of question is that?) By now I had grown quite attached to the carbon Flite Trail wheels, and though I knew one day I would inevitably have to give them back, I was going to do everything I could to put that day off for as long as possible.
Many readers might be unaware that long-term reviews of high-end products are not all that common in this industry. Often, something arrives, you have it for a month and then it’s back on the courier again to the distributor to be used in a demo fleet, or to be sent to another media organisation for them to do their own review. It’s just the way the industry works. However, these long-term reviews are the sort of reviews I think most people would like to see more of.
We all know most products will work just fine for a month, but a year or 18 months down the track? That’s when the cracks begin to show, and that’s the kind of information you really want to know when you open a magazine for advice.
So, enough background, but suffice to say, props to Wheelworks for believing in their product enough to trust it to be reviewed over almost 18 months.
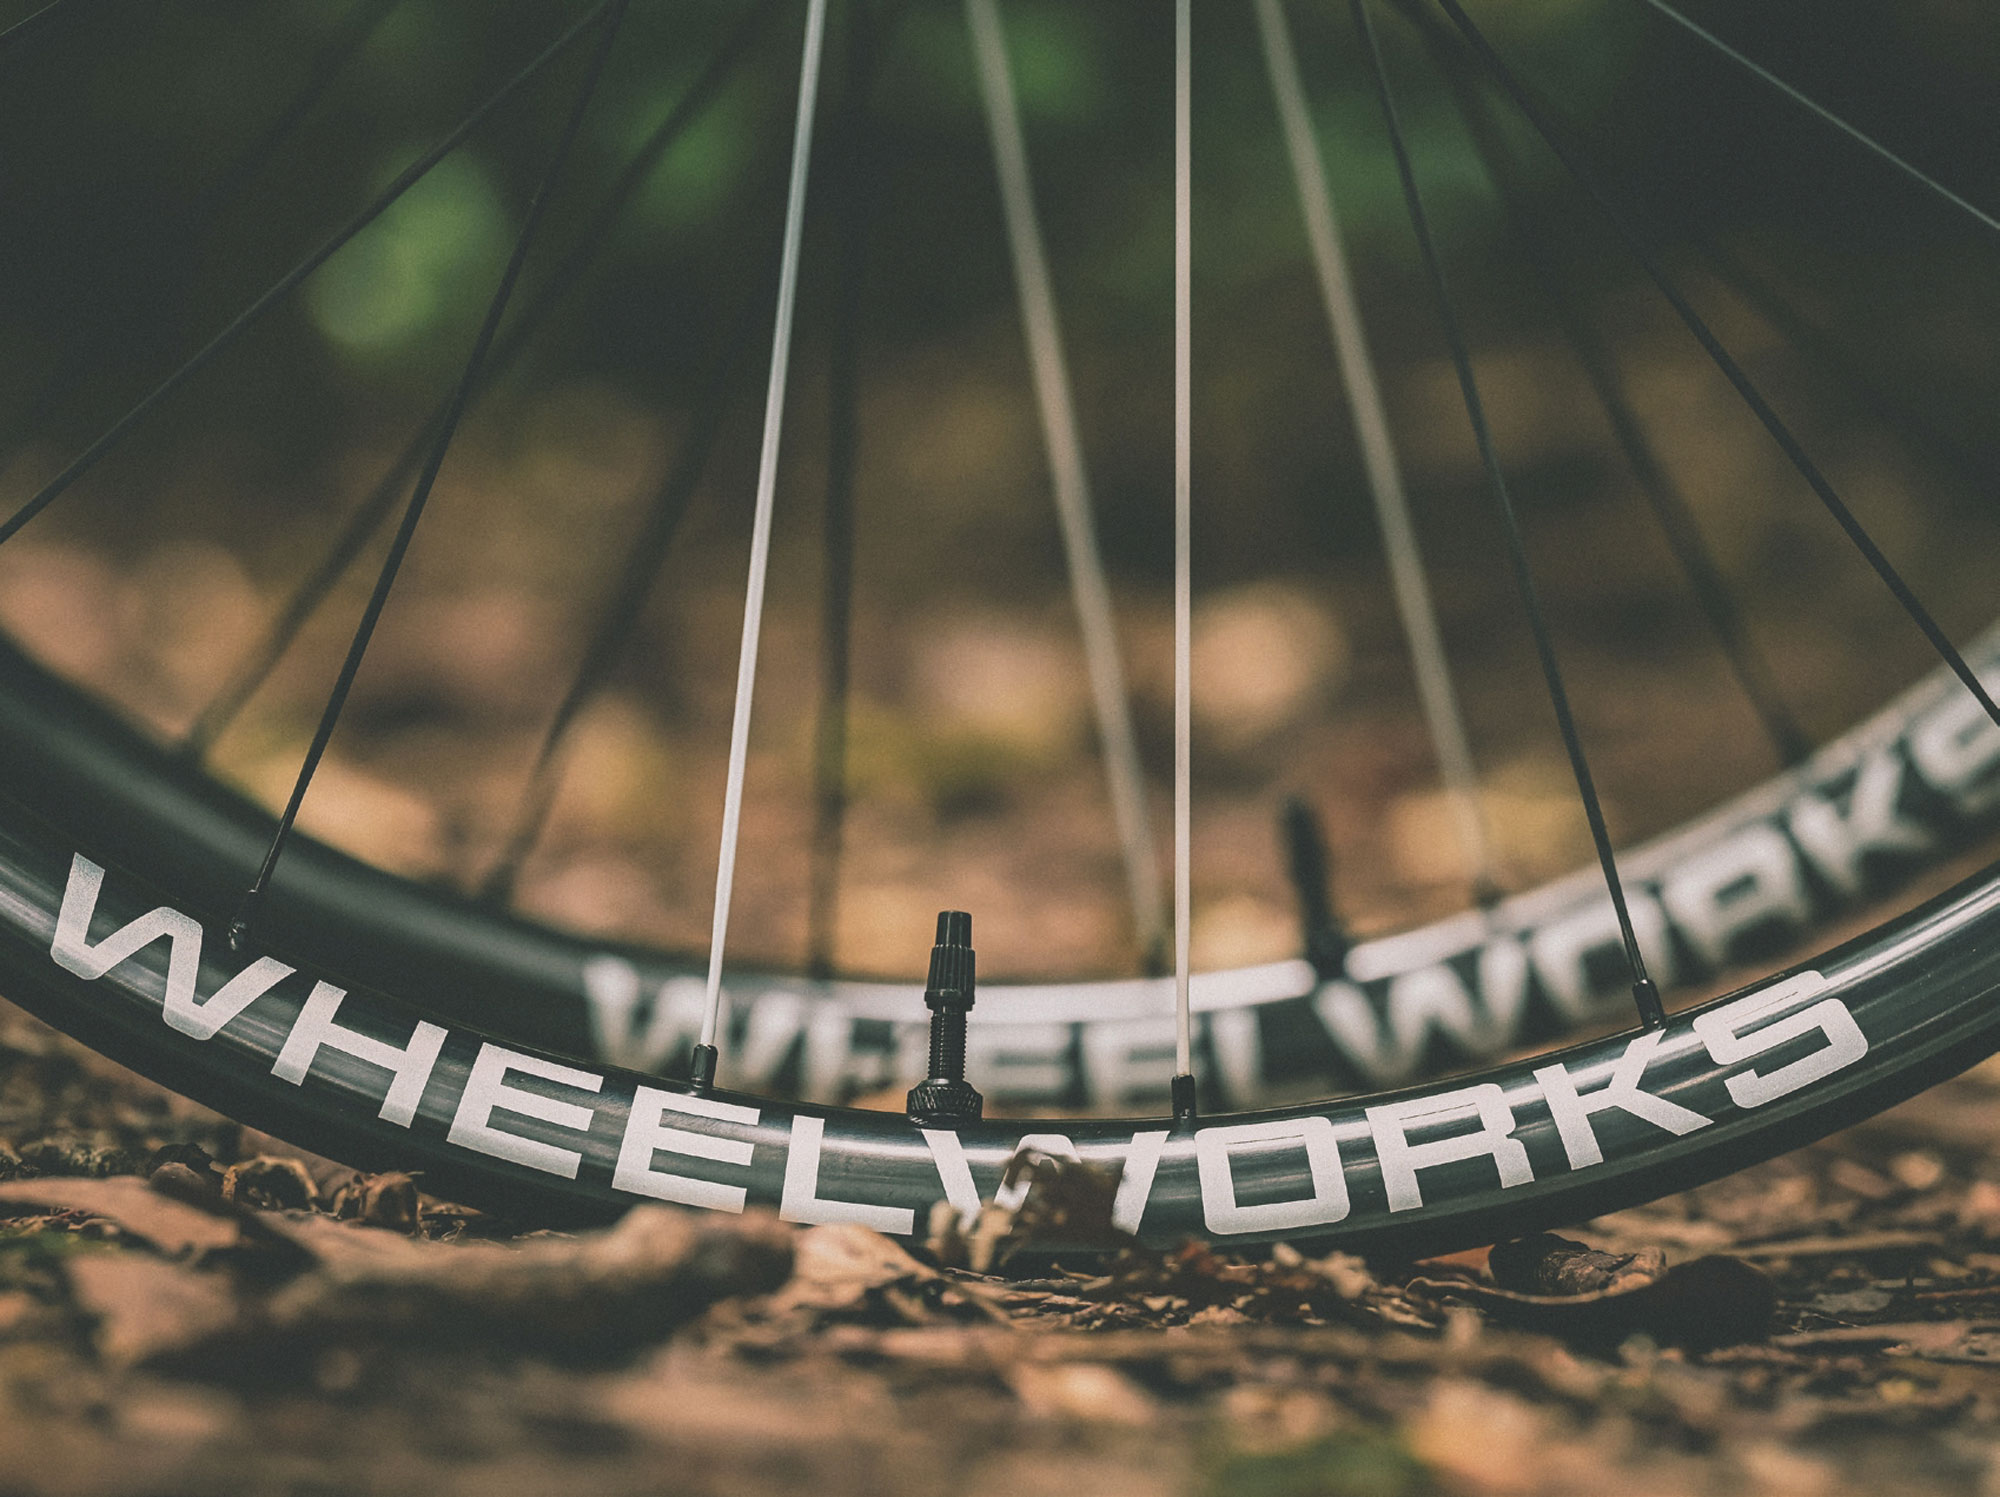
A quick recap: the TrailLite Carbon wheelset comes in at 30mm internal / 36mm external width and it runs 28mm high. The wheelset I rode weighed in at 1650g grams including rim tape and valves installed. The carbon rims were matched to Wheelwork’s own Dial hubs and laced with DT Swiss Aerolite spokes. Mine came with red decals on the hubs, a small red ‘TL’ (TrailLite) icon, and a larger, silver Wheelworks logo that follows the arc of the rim. These are all customisable to match whatever colourway your bike is, because we all like to be matchy-matchy. They came pre-taped and with valves installed.
As I mentioned in the earlier review, Wheelworks really are all about wheels. That’s their sole focus, and that focus is part of what makes purchasing a set of wheels more engaging than just scrolling through an endless list of options on the internet. It’s personal. Prior to getting the wheels, I spoke with their team about my riding style, bike, weight, and what I was hoping to achieve or improve over my current set up. This conversation dictated the build, and having their expertise guide the process means that, as a buyer, you are going to be massively confident in what is a significant purchase.
after 18 months of testing they really are still running as good as new; a real testament to the strength and layup of the carbon, and the craftsmanship involved in the build.
So, 18 months in, how did they fair? Well, I’ve got to be honest… the Wheelworks decals have started to show some signs of wear. A travesty! Jokes aside, that is quite literally the only thing I can fault them on. Over the review period, I rode a Whaka 50, a Whaka100, some Enduro, as well as 18 months of just everyday regular riding. In that time I cased more jumps than I would like to admit and did zero maintenance on them. I had no reason to. In terms of ride quality, what I was most taken aback by was the impressive lateral stiffness and how that enabled me to track a line through uneven terrain; and the awesome acceleration they enabled.
When the day finally came to send them back, I thought I should see just what state they were in, just in case I needed to send an apologetic email to the Wheelworks team before they unboxed them at their end. Grabbing a few zip ties to make an impromptu wheel alignment jig, I realised that, yep, they’re still dead straight. I ran my fingers over the Dial hub bearings and, yep, still silky smooth – smoother in fact than when they even arrived. I am honestly really impressed. To be fair, these are a $3600 product so, yeah, I would expect them to be faultless, for a good long time. But mountain biking is a sport that is tough on gear. We seem to keep on asking our gear to be lighter, whilst also being stronger – and wheels are a perfect example of this. At some point, something has to give…. Unless there is a real commitment to maintaining quality and not cutting corners. I think the Wheelworks wheels hit the sweet spot with this. As I said, they weigh in around 1650gm. I think this is bang on for most trail riders. They feel light enough to have that ‘zip’ about them (and to also feel like you have a slightly unfair advantage over your mates in the Whaka100), but clearly still enough strength to go the distance. I wouldn’t say I ‘abused’ these wheels (especially not on record as I would quite like them to send me other wheels to review… ahem… Berd’s?) as, to be honest, I’m just not that sort of rider, but I like to think I ride pretty hard when I’m in the zone and often kid myself into believing I’m a better rider than I actually am…. That combo means that at least once, on most rides, I have that moment of wincing as I slam into a root or rock and think “doh! that is going to be a cracked rim.” But, after 18 months of testing, they really are still running as good as new; a real testament to the strength and layup of the carbon, and the craftsmanship involved in the build.
All in all, this is probably one of the least surprising reviews most of our readers will read. My final thoughts after 18 months of solid testing; Wheelworks wheels are great. About as surprising as saying water is wet. Wheelworks have built a business based around their reputation; a reputation for building consistently solid wheelsets, for backing them up with an outstanding warranty and after sale support and, ultimately, for creating a culture of really valuing their customers. When you do that wheelset after wheelset, it’s no wonder they are so consistently recommended.