


Review: 100% Tarka Body Armour
You don’t have to be in this sport long to know that there is some real potential to hurt yourself. In fact, if I’m away on a group ride for a weekend I almost always assume someone will be going home with a body part in plaster, a sling, on crutches, or all three. My own X-ray file is proof of all of this, so I’m a big fan of riding within my limits these days and, if I want to push them, I will only do so when I’ve armoured up.
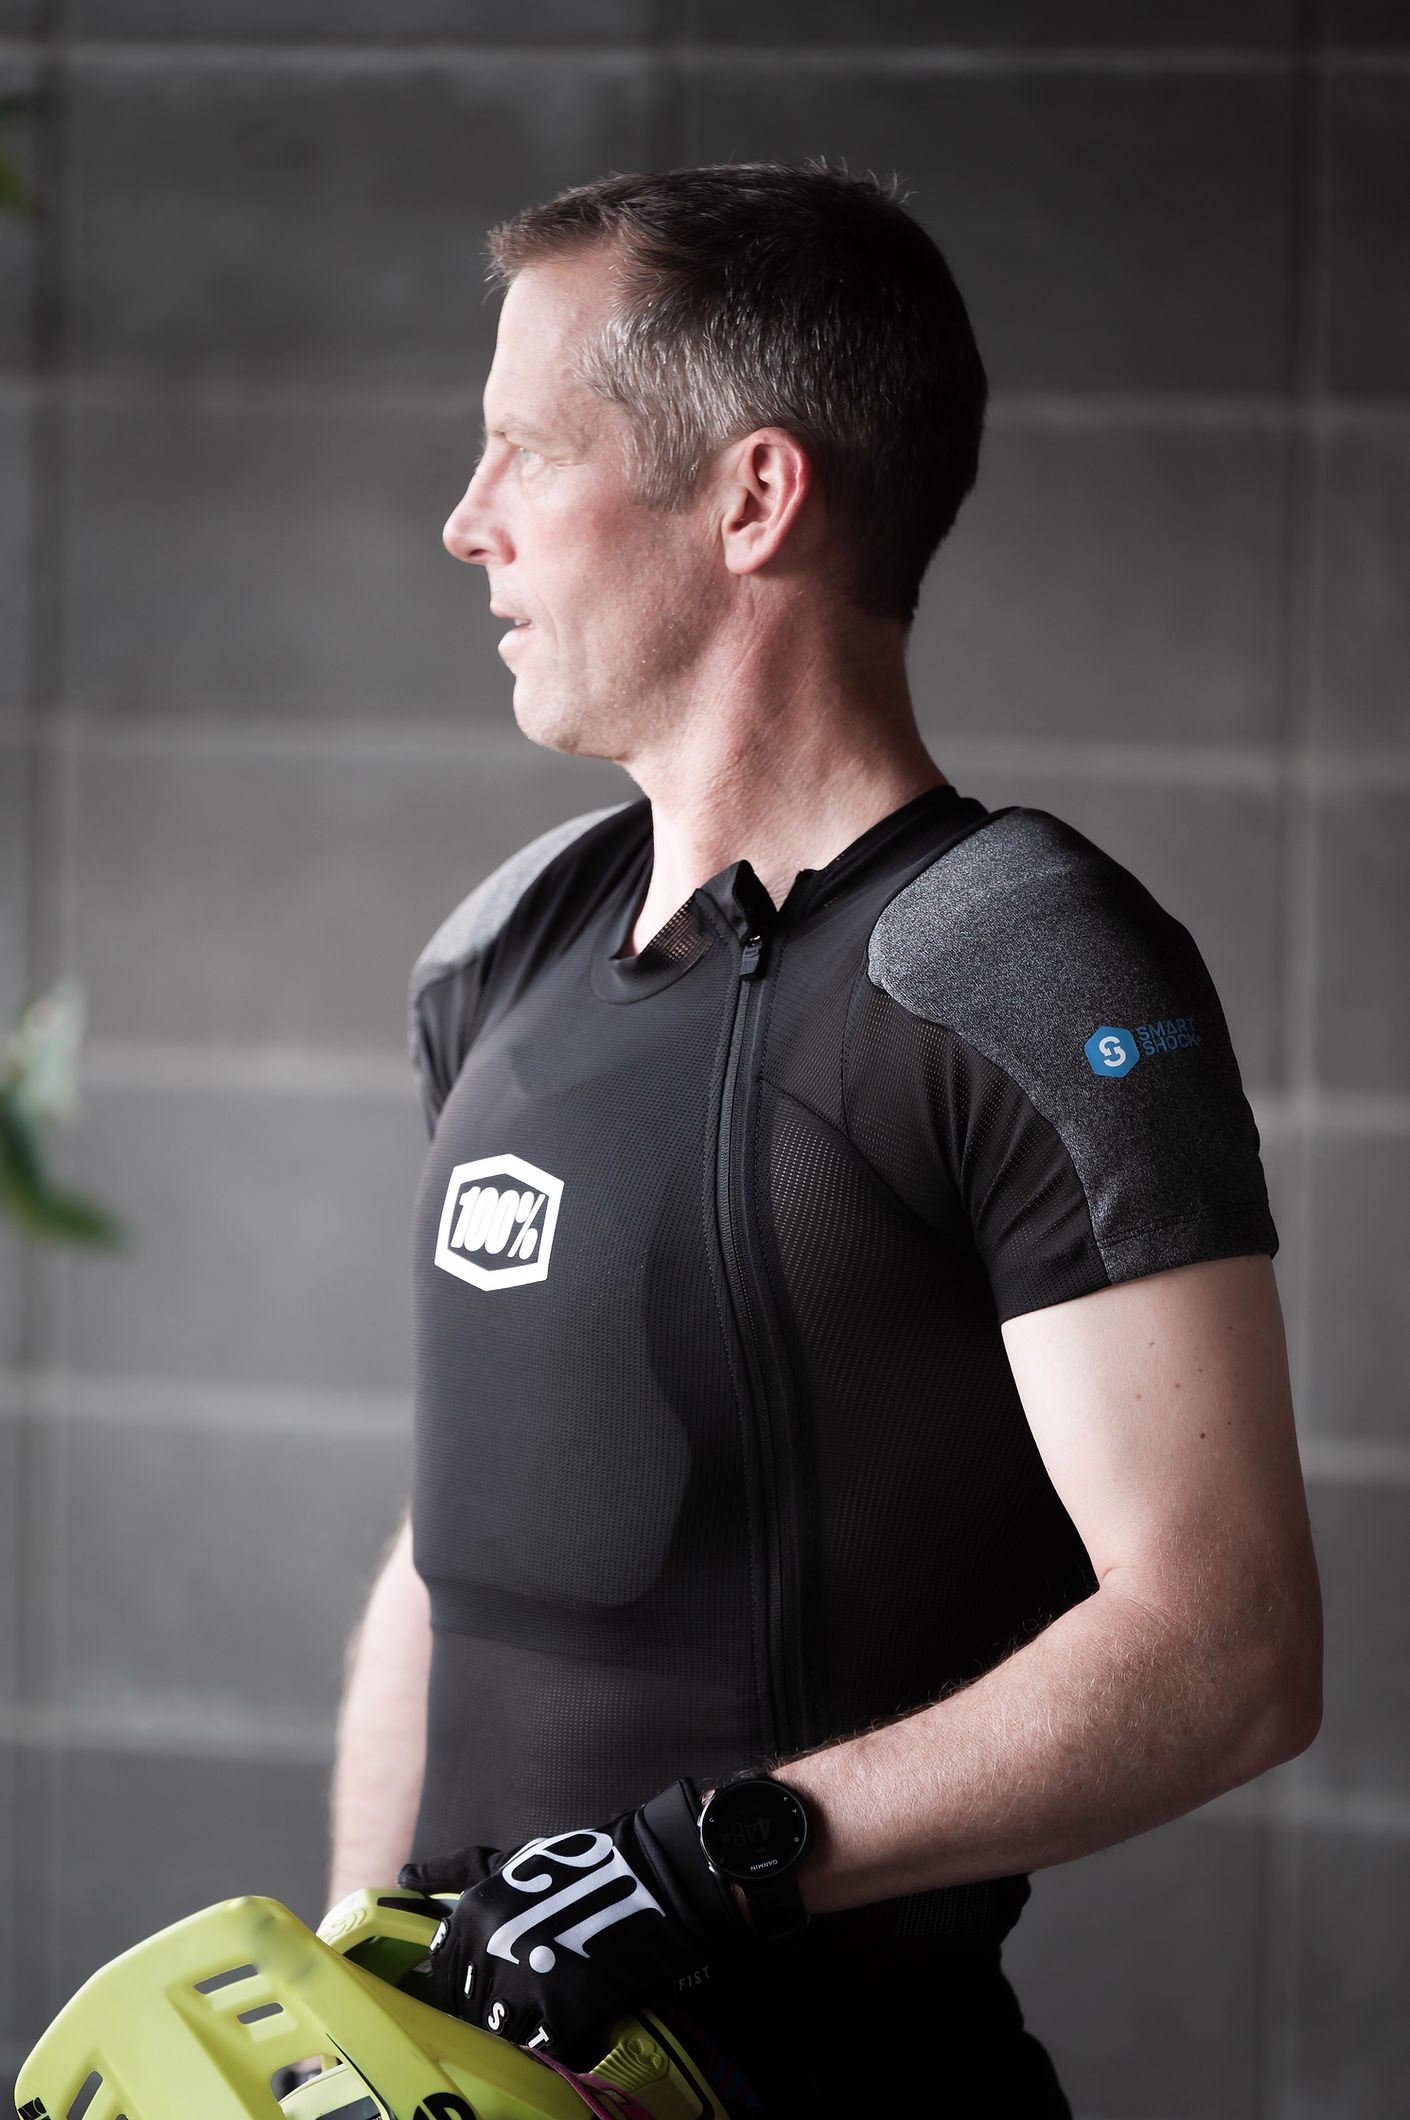
Lots of people own the requisite full-face helmet, elbow pads and knee pads, but fewer people opt to go for a chest and shoulder protection system like the 100% Tarka. And that’s understandable. Chest protection is kind of another level of hassle and has tended to be uncomfortable to wear, bulky and awkward fitting. The Tarka seeks to address some of these issues.
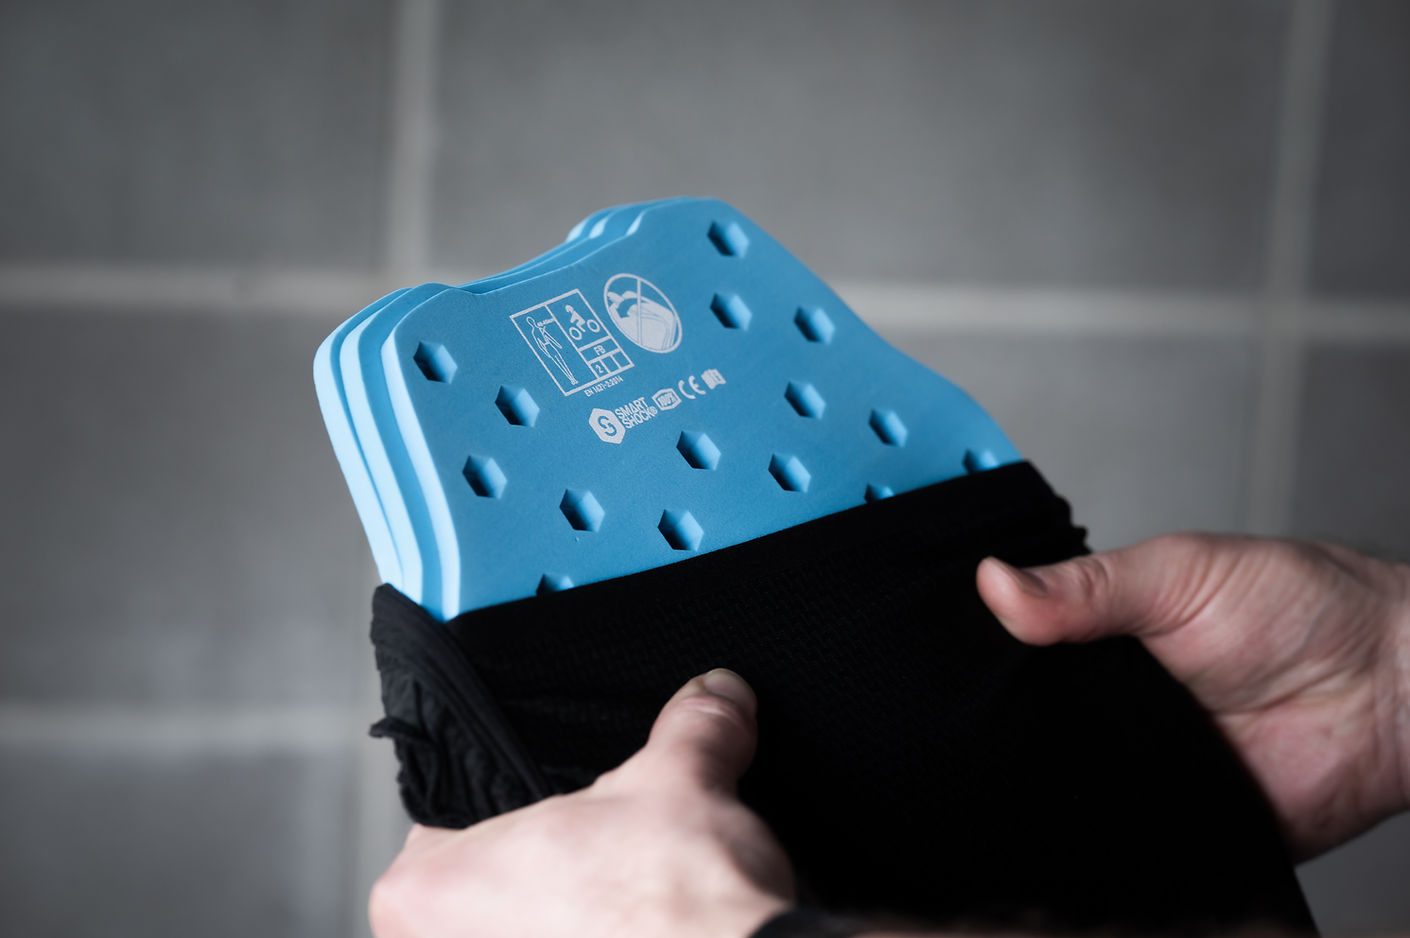
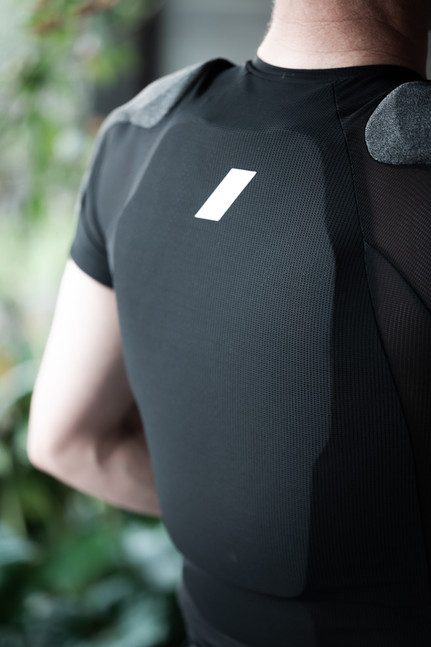
The Tarka is available in three versions: a vest (chest and back only); a short sleeve (chest, back and shoulders); and a long sleeve (chest, back, shoulders and forearms). We tested the short sleeve option. The Tarka features unique ‘Smartshock’ material in all three impact zones, and is impact tested and certified to the highest level of CE impact protection. The Smartshock panels are a blue, impact resistant material that look a little like they are made from camping pad foam, albeit a fair bit firmer and, on the front and back, there are three of them stacked on top of each other. They are malleable yet firm. How firm? Well, I think you could hit a rock at any speed and if it hits you in the blue zone - that zone will be the least of your worries. All Smartshock plates are removable, so if you just want the back protection, you can remove the chest protector for example, which also means you can easily wash the vest to keep it fresh.
Fit wise, it is slim. I would err on fitting up a full size from normal, but once it’s on it's comfortable enough. Some other body protection I have worn seemed to itch from the get-go, but this felt fine. I didn’t need to wear a liner shirt underneath generally, but some people might. Silicone logo grippers on the lower hem also keep it from riding up your back too. All the blue panels are ventilated, and the material of the body is a breathable mesh. Don’t get me wrong, wearing body armour is still warm, but this breathes about as well as you can expect from this kind of product. On the trail, I was impressed with the free range of motion, it never really felt ‘in the way’ like some armour can. It’s definitely a solid piece of kit, so much so that I’m not going to put it on for a regular trail ride but, if I was spending a day on the shuttles or a gondola, it’s something I would definitely take. It’s got enough heft to it that I think the target market is much more the gravity/DH crowd, rather than trying to add a little bit of protection to your everyday trail riding. Basically, I think if I was doing something where I was planning to wear a full-face helmet, I would take this too.
At $399 it’s a wee bit of an investment, but it’s cheaper than time off work when you injure yourself or when you have to take care of your young grom who’s smashing out laps on the bike park, trying to be the next Blenki or Bulldog, but ends up smashing themselves. I also think that wearing appropriate protection for the risks that are taken in our sport is not only common sense but, really, it’s about being a good citizen too. So, if you’re taking risks, suit up, your future self will thank you for it.
Available through FE Sports.
REVIEW: LANCE PILBROW
DISTRIBUTOR: FE SPORTS
RRP: $339
Review: 100% Corridor Stretch Wind Jacket
“I’ve tested this jacket in all possible riding conditions...”
The 100% Corridor Stretch Wind Jacket is currently my go-to for riding. It’s the one thing I’ll carry with me no matter the conditions. Made from mechanical stretch woven fabric, with a water resistant coating, this jacket protects against the harsh weather conditions Wellington is so well known for. Thanks to it being super lightweight, it’s easy to stash away in a small pocket without being a hassle whilst riding when ‘Welly on a good day’ makes an appearance.
I’ve tested this jacket in all possible riding conditions. It’s been great riding through light winter snow on back country trails down south, keeping me warm and protected in harsh and exposed conditions. Being lightweight and protective, I reckon it’s a go-to jacket when riding under the trees. It’s proven to be great on the trail in light showers and snow, though not extremely waterproof when riding through heavy rain in less sheltered and more exposed environments.
With zippered pockets on each side, I’ve found that I can keep my essentials – phone, sunglasses and keys – with me, securely, when going out for a ride. 100% has also paid attention to the finer details on this jacket. With one pocket equipped with a microfiber lens-cloth, it’s easy to stop and wipe dirt and sweat off the phone. This jacket is slim fitting and flattering, designed with back-venting making it not only warm, but breathable too. With reflective taping and logos on the front and back for visibility, the jacket stands out from your regular bitch ass riding coat.
Overall, the 100% Corridor Stretch Wind Jacket helps in battling the elements, is lightweight and compact, and has proven to be highly effective for blocking wind and light rain on the road or trails. The 100% Corridor Stretch Wind Jacket is made of robust material and has, so far, been exceptionally crash proof. The perfect cool-season accoutrement.
REVIEW: KHULAN TUMEN
DISTRIBUTOR: FE SPORTS
RRP:$183
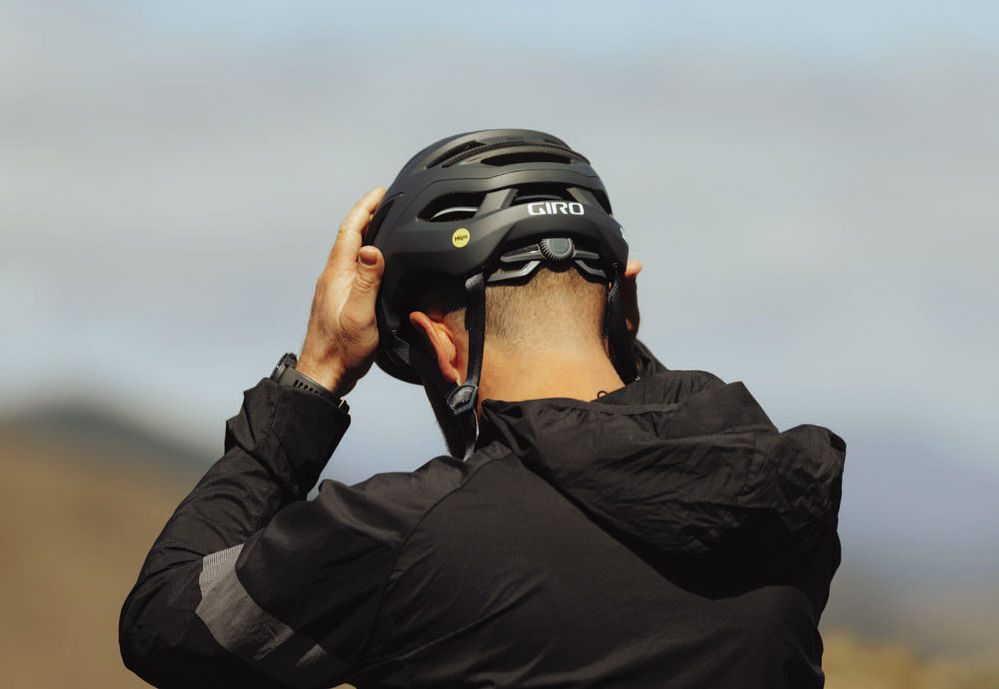
Review: Giro Merit Spherical Helmet
“I haven’t tested the impact protection (for obvious reasons!) but would never under invest in protecting my noggin. The Merit offers a ton of protection to a very high standard.”
Put simply: lids protect your noggin. But it’s not just protection we want from a helmet, it’s also comfort, airflow, lightweight, style, a fair price... and the list goes on. Thankfully nowadays, the cycle industry does a pretty good job at delivering on most of the above, and Giro is at that forefront of innovative design and sturdy protection. Their top-tier Manifest helmet, which dropped a few years back, uses Spherical Technology powered by MIPS. It’s also heavily ventilated, supremely comfortable but a little pricey. Learnings taken from this top-tier helmet design have been put to use in the new Merit – but for a fraction of the cost.
The Merit box arrived, and with it came a cover letter from the brand manager. I opened the letter and the first thing that caught my attention was: ‘enjoy this new helmet and the ride snacks – and sorry we couldn’t host you at our HQ in Santa Cruz for a media junket’. My immediate thoughts were: ‘nice lid – bloody pandemic’!
The Merit is light and littered with vents. Let’s go over the Spherical Technology: the two halves of the helmet rotate independently, which create the slip plane that is said to reduce trauma to your brain in rotational impacts. The Spherical Technology also uses what Giro call ‘progressive layering technology’. This basically means the two halves of the helmet use different density foam layers. One layer works best with high-speed crashes and the other works best at low-speed crashes. That’s clever aye?! It also means that the layers work together for a safer helmet, for all impacts at any speed.
Just after I received the helmet, I headed to Nelson. The trails there provided the perfect testing ground for the Merit. Firstly, the comfort is great. After multiple long days wearing the lid, it never annoyed me – this has continued with the rides I’ve done back home. The fit employs a RocLoc Trail Air cradle which is height adjustable, with a sliding central ladder rather than press studs, which makes the tuning pitch a lot easier. Not to mention, the security and comfort are excellent. The design uses a thin Ionic+ padding which grips around your head.
The coverage and depth of the Merit run close to the Manifest, dropping slightly down at the temples, with the occipital lobes at the rear giving the lid a down-country/trail/enduro feel and style.
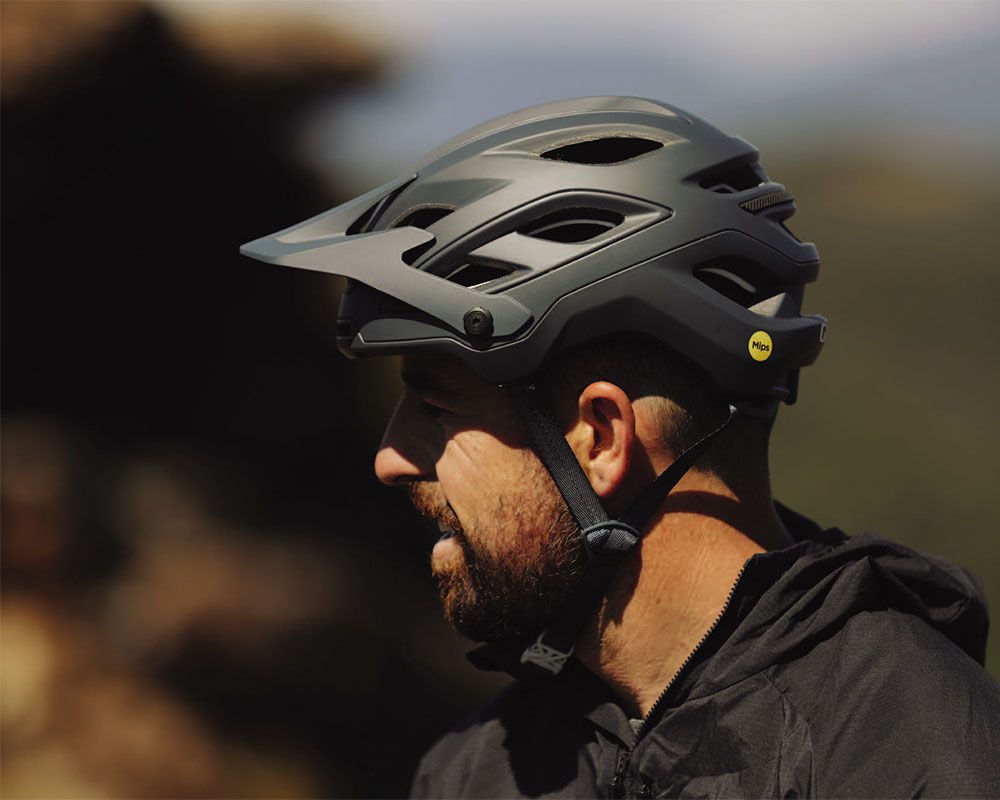
The ventilation delivers too, and it does a good job at cooling. Ok, so perhaps it’s not been used in the hottest of weather, but it wasn’t cold by a long shot. There is ample ventilation – fifteen vents, in fact. These are backed up with internal channeling to suck air over your noggin and out of the exhaust ports at the rear. The air flow does a fine job on long climbs and swift descents. The Merit kept my noggin cool and stopped the sweat from dripping down my face and fogging up my sunnies. This is thanks to small brow vents in both inner and outer shells. And if you want to stow your sunglasses, the arms will slide securely into the vents. For goggle users, there’s a rubber goggle strap retainer strip on the back of the Merit, too.
I haven’t tested the impact protection (for obvious reasons!) but would never under invest in protecting my noggin. The Merit offers a ton of protection to a very high standard. And, whilst I didn’t visit Santa Cruz on this occasion, I have visited Giro’s HQ and can tell you these helmets are put through the toughest tests with their crash test protocols. Giro have been at the forefront of MTB tech for the last thirty years and the Merit continues in that vein.
REVIEW: LIAM FRIARY
DISTRIBUTOR: WORRALLS
RRP: $369
Review: CamelBak M.U.L.E 12L 100oz Hydration Pack
“The icing on the cake is the twist-lock chest strap, which has a magnet on the bladder tube so that it stays in place when you’re descending...”
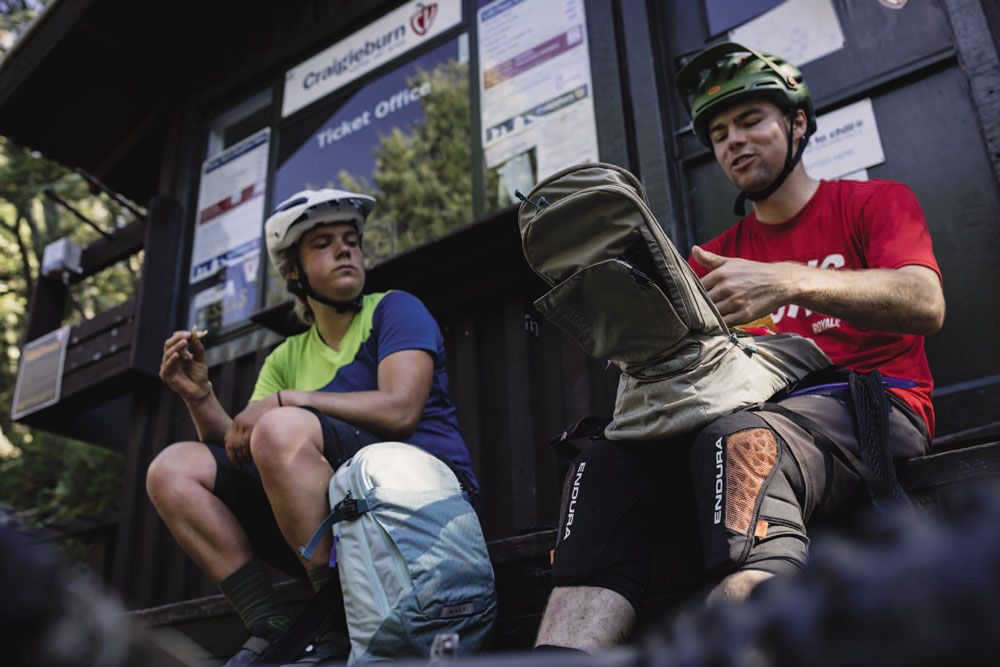
A last-minute invite to a backcountry mission in the Craigieburn Forest is something you should always say yes to. The Broken River and Cheeseman ski area offer world-class trails only an hour and a half from Christchurch.
Long alpine descents amongst the beech trees, whilst riding over cornflakes, are what a mountain biker’s dreams are made of. In fact, throughout the day when the wind picked up, it was literally raining cornflakes from the trees. Big mountains mean lots of water, snacks and tools need to be carried, to keep me fuelled for the whole day, since we would be out for over eight hours. Thankfully, the CamelBak M.U.L.E 12L 100oz Hydration Pack was the right tool for the job.
Now, for someone like myself who had shoulder surgery nine months ago – which has left me with a massive scar running across my collarbone – I was wondering how a Backpack would go, as this was my first time riding with one since the injury. The M.U.L.E pack has so much adjustability to ensure the best comfort for every rider. The 3D Vent Mesh Harness is super lightweight, breathable and has extra storage for those quick-access gels when you’re needing a boost of energy. The bag has lots of ventilation on all the main contact points on your back, with its AirSupport Back Panel, and it’s designed with Body Mapping Technology which allows for maximum ventilation on the hottest areas of your back. Considering it was 25-degrees and not a cloud in the sky, for my day in the mountains, the Air-Support kept my back cool and my shoulder comfy all day.
12L of total storage, with a 3L bladder to ensure you stay hydrated, is the setup. There’s a total 9L of storage for everything else you could need for a big day out. The icing on the cake is the twist-lock chest strap, which has a magnet on the bladder tube so that it stays in place when you’re descending – a perfect addition o the bag. Carrying a jacket in a bag is often a pain, but with the M.U.L.E’s Stretch Overflow pocket it was tucked away nicely at the bottom of the bag, but still easily accessible if the weather took a turn for the worse. Tool storage for all your necessary spares is super well organised as there are plenty of pockets to keep everything in its place nicely. You’re able to fit literally anything you could need to get yourself out of a trailside mechanical. My favourite part: the slot for storing your pump. It doesn’t get caught at all on the zips, nor does it take up any unnecessary space, a big win.
The Helmet Carry is a handy aspect of the bag as well. Not only is it perfect for carrying your helmet on ‘hike-a-bike’ sections, but it also doubles as a good spot to store your rubbish. Now, carrying tuna and rice on a ride might seem strange, but the most important thing is that it doesn’t leak in your bag – the outside pocket is the perfect way to avoid this.
Stats of the day: 40km; 1900 vertical metres gained; 5L of water; 2 bags of Haribo lollies and 1 tuna and rice.
Safe to say the M.U.L.E carried me through the day in the mountains. I don’t usually wear a bag riding, as I’ve always had comfort issues, but after eight hours of wearing the M.U.L.E, its comfort, useability, and storage systems are just too good to pass up. It is now my go-to bag for epic backcountry riding or long days in the saddle.
REVIEW: MAX HIDES
DISTRIBUTOR: SOUTHERN APPROACH
RRP: $199
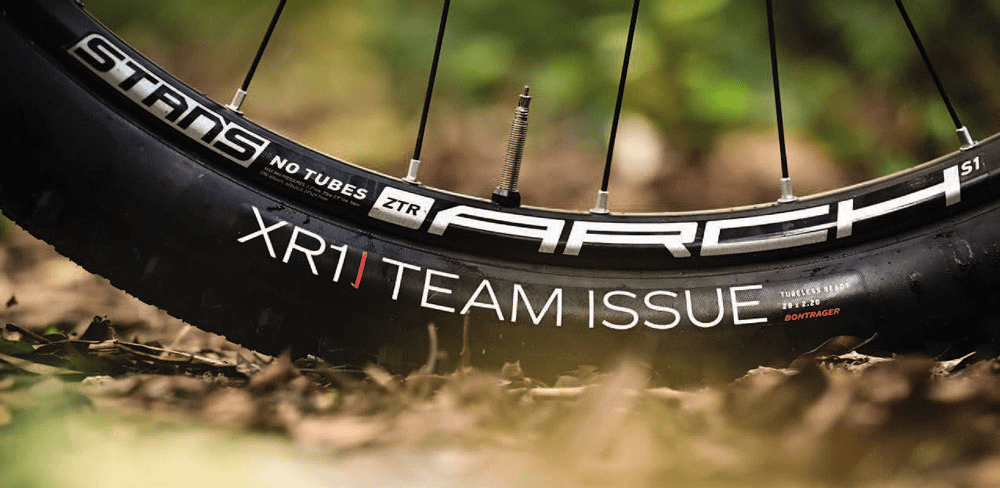
Review: Bontrager XR1 Tyres
“There is something really, really appealing about the instant speed you have on offer from a lighter tyre…”
If there is ever one change I make to my bike, to make it go faster, it’s always my tyres. Whatever discipline you are trying to excel at, tyres are a critical part of making that possible. Tyres are also the one area where you can gain or lose weight dramatically, and the increased impact this has, via the inertia factor, means that if you haven’t thought about changing your tyres to better suit your riding style – you should! Fortunately, they are one of the easiest things to change, which makes experimenting a breeze.
A lot of today’s trail bikes come with pretty chunky tyres, which look great – and give great confidence rolling down the hill – but if you haven’t at least tried a set of lightweight XC tires, you might just not be aware of how much rubbery lard you are dragging around with you. If you predominantly keep the wheels on the ground, and tend to ride in drier conditions, you might be able to try a lighter tyre.
Bontrager’s XR1 are their new, lightest of the light, fastest of the fast race tyres. I’ve been riding the 2.2 TLR (tubeless-ready). The XR1’s weigh in at just 630g, which guarantees speed off the line. The tread is extremely low profile across, with slightly raised outer knobs. It also features the Bontrager ‘TM-Speed’ compound that rolls faster, making it the go-to race tyre for Trek Factory racers. Under the skin, the XR1’s feature a 120tpi construction giving them a nice supple feel and ‘Inner Strength Casing’ which is made of a lightweight nylon insert that provides strong, supple sidewall protection for added tire durability, with minimal weight penalty.
Setting them up on the bike was a breeze. They mounted straight up with minimal fuss and were seated easily with my Blackburn Chamber Tubeless floor pump. Out on the trails, I was again reminded that everything is a trade-off and, as much as I do like riding with larger tyres generally, there is something really, really appealing about the instant speed you have on offer from a lighter tyre – they transform your bike into feeling quite different. The XR1’s really motor along, and the combination of low rolling resistance and low weight means you just seem to be able to ascend in one or two higher gears than you usually would.
The XR1’s are naturally most at home in dry conditions – did I mention those centre knobs are small? They are probably only 2mm tall but, in the dry, they are still surprisingly effective at generating traction. Heavy braking, however, needs to be executed with awareness as it’s not hard to move from slowing down to front wheel drifting – brake on the straight before it’s too late! The TM Speed compound was also impressively grippy over tree roots. In the wet, they have their limitations, and if I knew I was racing in the wet I’d opt for something like the XC2 or XC3. The close knobs don’t shed mud as easily as some others – but, on the plus side, the low knobs don’t hold as much mud either. The side knobs provide surprisingly effective cornering support considering the overall size of their bite. In the dry, I found myself impressed with just how far I could push them. The Inner Strength Casing, so far, has kept the puncture tally at zero – which is great.
Experimenting on tyres isn’t something most of us can afford to do too often but, at an RRP of just $79, the XR1’s fall a decent amount under the cost of some other name brand tyres. So, if you’re looking for a lighter tyre for some summer racing, bikepacking, or even just to make it easier to keep up with your fitter friends, the XR1’s are definitely worth a look.
Review: Lance Pilbrow
Distributor: Trek NZ
RRP: $79

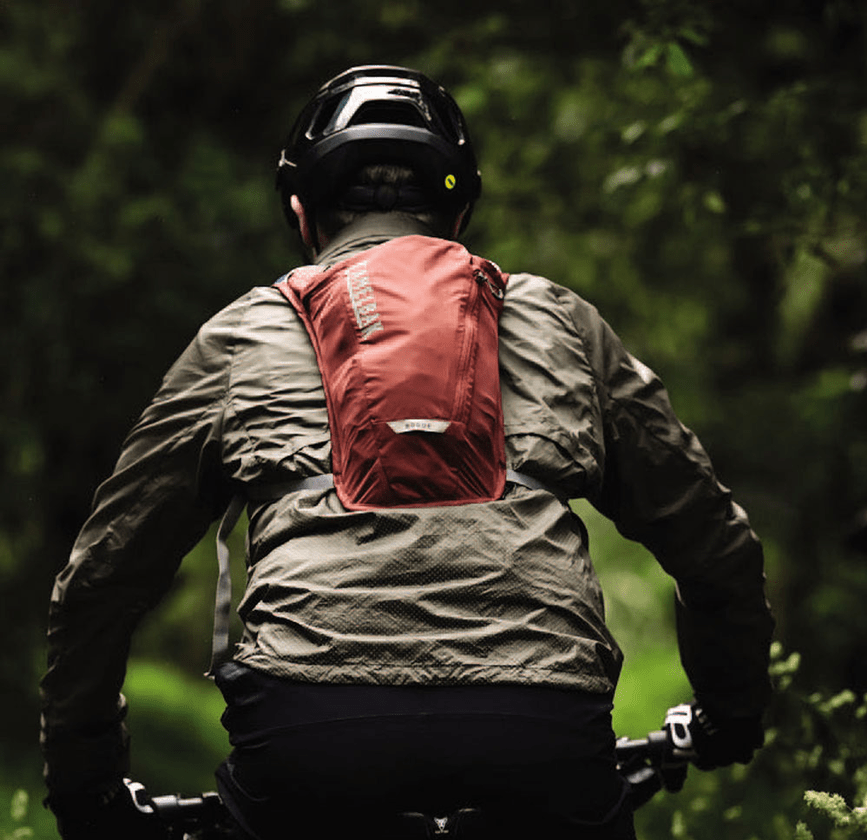
Review: Camelbak Rogue Light
“The Rogue feels like it’s barely there.”
The Rogue Light is Camelbak’s latest lightweight hydration system. With its minimalist setup, the Rogue is ideal for when you need to take a bit more than a bottle, but still want to take as little as you can get away with.
The Rogue comes supplied with a two litre bladder, which is just right for a decent ride. For storage, there is the main compartment that the bladder sits in – this has a small internal zippered pocket, great for glasses or wallets – then there is another zippered pocket on the side, which is ideal for keys, muesli bars and multitools. Lastly, there is an open pocket which is ideal for storing a raincoat, and having it open means you can whip it out quickly when a shower comes through. It’s available in no less than five colours; on test is the Fired Brick / Koi version.
The fabric of the Rogue is noticeably thinner than previous Camelbak’s I have owned, and this obviously helps keep the weight down; being lightweight and breathable is clearly the defining goal. The shoulder straps are a mesh material, as are the side panels of the pocket, while the back panel is Camelbak’s Air Support system which, again, creates a sort of lightweight, padded mesh panel on either side of your spine, creating a groove for your spine to comfortably sit in. On the front, there is only a single strap across your sternum. I thought I might miss having a hip strap, but on a lighter bag like this I didn’t notice its absence one bit. The Rogue stayed in place just fine and I never noticed it rocking around, side to side. Internally, the bladder sits neatly in its pocket and is held in place vertically by a hook and loop system, with the plastic loop of the bladder hooking into the sewn loop of the bag.
Camelbak’s Bite Valve system is tried and true, I find the flow just right and really like having the shut-off valve that prevents anything leaking out when something is sitting on it in the boot of the car.
I’ve had a number of Camelbaks over the years, and they’ve always been larger versions, such as the M.U.L.E. However, I can see real appeal in these lighter versions.
Often, a larger bag on your back feels heavy and sweaty on hot days – comparatively, the Rogue feels like it’s barely there. Because of that, there are a number of people that the Rogue might really appeal to – for starters, younger riders. The Rogue is fundamentally just a small, light hydration pack. With a lot of smaller kid’s bikes not having room for a water bottle in the front triangle, having a backpack is ideal – but most packs are adult sized.
The Rogue is small enough that it actually looks just right on kids. Our kids (aged eight and ten) can attest that the Rogue is a winner for them. (There is a heap of adjustability in the shoulder straps so don’t think that it’s not a good fit adult’s too!)
The second unique group that might be really interested in the Rogue, are the bikepackers – or ultra-distance riders – who, again, want minimal equipment but often need to carry extra water through a section, or the ability to stow more food than their bags can easily hold.
The Rogue fits the bill nicely for them too and, as a bikepacker myself, I think I will be taking this on my next mission for this very reason.
I really liked the Rogue Light. It’s minimal, durable, cool, and comfortable.
At first, I thought this probably wasn’t a product I would have bought for myself, but after having a chance to test it, it’s actually got a lot of use – I probably grab it more often than I do my M.U.L.E now, and the fact that it makes a great fit for the kids as well means that it’s getting used by someone on just about every ride. •
Review: Lance Pilbrow
Distributor: Southern Approach
RRP: $139
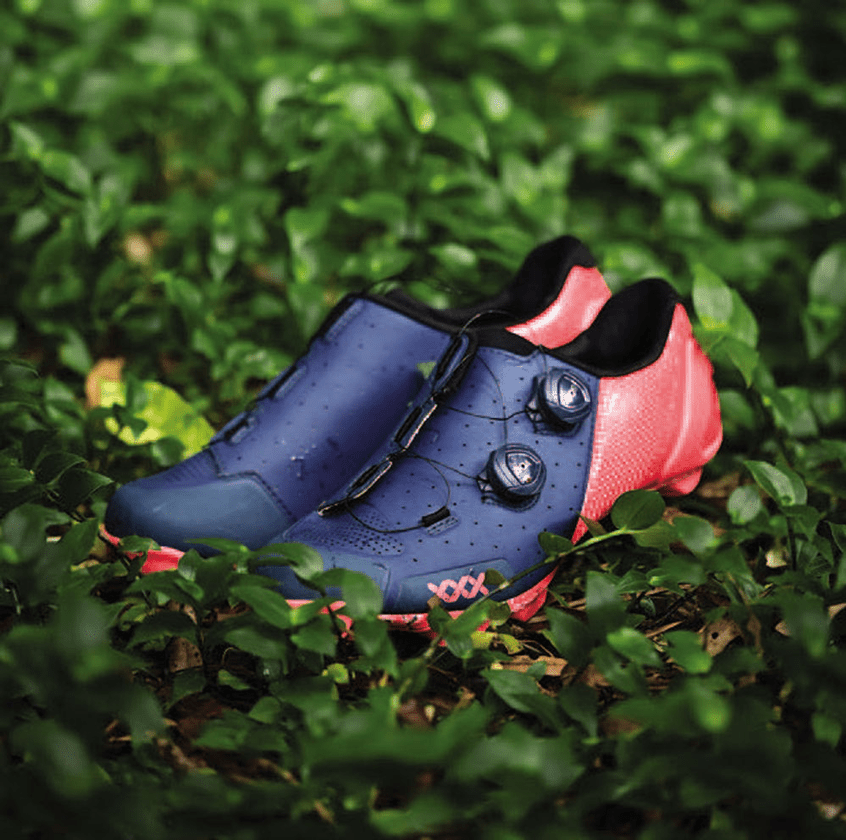
Review: Bontrager XXX Shoes
“Not only do these shoes ‘feel’ fast – in the sense that you can indeed feel them not flexing – they also give you a very secure and connected feel on your pedals.”
When it comes to XC riding and racing, it’s all about getting the power transferred from your legs, through your feet, and into the pedals. But – there’s a critical link in that chain that can make a massive difference: shoes.
Having a stiff shoe that won’t flex under the massive power that you’ll be generating as you sprint off the line, is vital to achieving good results. But there’s more to it than just a stiff platform – the whole shoe needs to be comfortable too, so getting the form and shape of the shoe ‘last’ is essential when creating footwear around the additional goals of being both lightweight and flex-free.
The XXX shoes are Bontrager’s top-of-the-line XC race shoes. And kind of like their name suggests, they are a bit racey. The XXX’s key features include a 100% OCLV carbon sole – that is extremely lightweight and stiff for efficient power transfer; dual independent BOA dials for precise, zone- specific fit adjustments; and their ‘inForm Pro’ last that delivers an ergonomically optimized and high-performance fit.
Out of the box, the Nautical Navy/ Radioactive Pink version that we tested was, well, eye-catching, to say the least – perhaps a little too much so for some, but they are also available in a plain black on black. Slipping them on and dialing up the Boa retention system, they felt just right in terms of sizing, and the Boa system gave a nice even tension across the top of my foot. I run a size 44 shoe normally, and these felt true to that. I would say I have a wider than normal foot and, somewhat surprisingly, these still felt spot on.
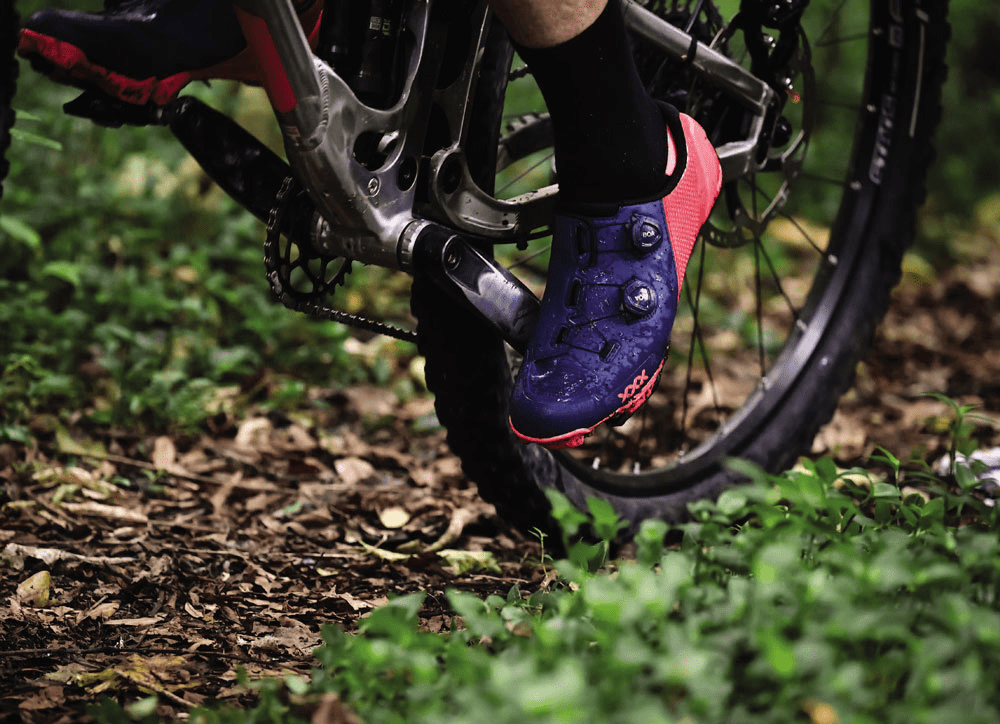
Walking around, it was clear that these shoes are meant to do business; they are extremely stiff. Bontrager rate their shoe’s stiffness on a scale of 1 to 14 and, as you might have guessed, these are a 14. Having never owned or tested an XC race shoe of this calibre, I was really impressed with how they felt to ride. Not only do they ‘feel’ fast – in the sense that you can indeed feel them not flexing – they also give you a very secure and connected feel on your pedals. On the bike, I was really impressed by just how comfortable they were.
My expectation of a shoe like this was that they would be light and stiff at all costs – maybe even at the expense of some comfort – but that wasn’t the case at all. They have ample padding in all the right places.
At the same time, there isn’t padding where you don’t need it and the shoe uppers themselves feel thinner than other more casually oriented shoes; I found this makes them breathe well, as well as dry out rapidly.
After a few rides, I had an opportunity to really put them through their paces on the Old Ghost Road. Surely 86km would be a real test for these! By the end of the day, I truly had put them through their paces, and did find just one or two areas worth noting. The underside of the shoe has a very thin layer of what I assume to be paint, on the carbon sole. After the numerous times we had to get off and walk on the OGR, as well as descending the significant rock staircase of the Skyline Steps, the paint on the sole was fairly trashed. Not only that, walking down the rock stairs I became aware that these really are indeed not walking shoes. The centre area under your arch, on the outer sole, is the aforementioned painted carbon and this offers very little grip. There is a little patch of rubber in this area, but walking down the rock staircase with my bike on my shoulders, over uneven ground – often standing on this carbon patch – the underneath of my arch felt fairly treacherous. Also, the rubber Tachyon tread on the front half of the sole is OK but, if I could have my way, it would be a softer, grippier compound to give you some more confidence in these situations. Obviously, these shoes are meant for XC racing which, generally, doesn’t involve a lot of hike-a-bike, so to be fair I was probably using them outside their intended use. But the reality is, a lot of consumers will use these for much more than just racing. Speaking of rocks, what I was happy about was the GnarGuard coating that surrounds the toe box, after the OGR and a number of other rocky rides, the toe box still looks in great nick – so, even though the soles are well scratched, for the most part you don’t see that and the uppers look great. Our ride was 10+ hours and at about the nine hour point I started to get some pain in the centre of my foot but, again, that was probably due to using these beyond their intended use. The inner soles are quite thin, so better insoles with a little more support is something I would look into for the longer term. On the whole, I was really impressed with their comfort over the whole day.
At $599 the XXX’s are a premium price, but they are also – undoubtedly – a premium shoe that will be appealing to a lot of riders looking for a stiff, light, fast shoe to tear up the race track this summer. •
Review: Lance Pilbrow
Distributor: Trek NZ
RRP:$599
Reviews: Ilabb Clothing
“Founded by two Motocross racers in 2007, ilabb soon found their clothing in demand.”
ilabb have been a player in New Zealand clothing since 2007. Recently, they’ve made a push into the mountain bike scene. Founded by two Motocross racers, Seadon Baker and Matt Saunders, ilabb started out making decals for motocross, however, they soon found their clothing in demand. The brand continued to evolve from there, tapping into unique subcultures such as drift, moto and now mountain biking. As such, I’ve had a selection of ilabb gear on test over the past season.
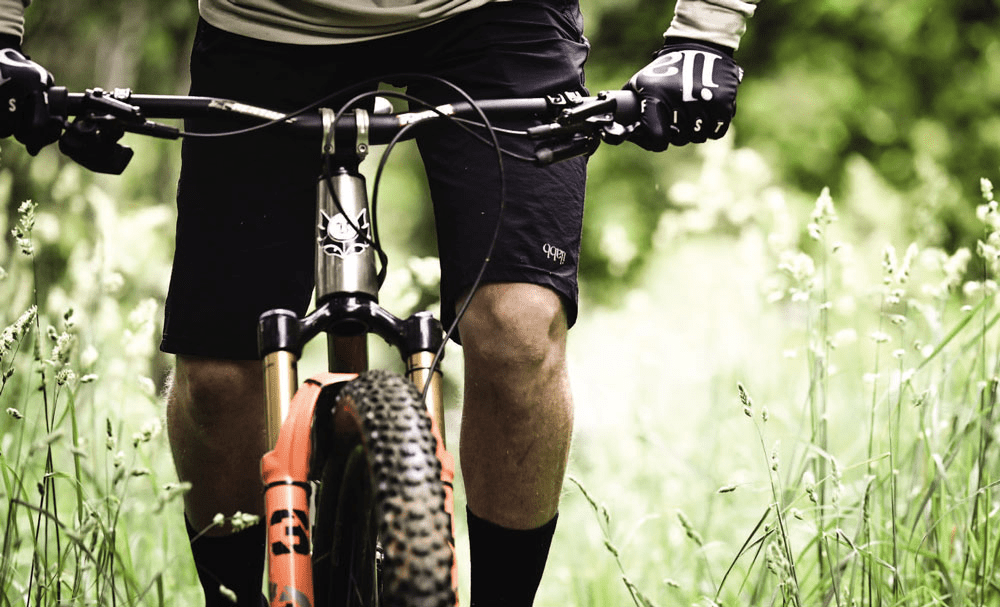
Terrain Shorts $139.99
ilabb’s Terrain shorts were the standout item for me. I really loved the fit and finish of these shorts – they’re made from ilabb’s conveniently named NYLABB material. This is a premium hard-wearing textile, made from high grade nylon with a high abrasion threshold; it’s got quite a unique tough-yet-soft feel about it. The Terrain shorts just nail the details. They feel supremely comfortable, thanks to the ample stretch around the hips, and the dome closure is securely held in place by the addition of a wide patch of Velcro up the fly. Internally, the inside of the hip panel features ilabb’s motto, ‘LIVE WITHOUT BARRIERS’, in highlighter pink; the lettering is made using a tacky, silicone, non-slip material – again, great for keeping them in place, especially if you’re wearing them over a Lycra chamois. Both main front pockets are zippered and there is a third smaller zippered pocket that’s great for a small multi-tool or car key fob. There are no pockets on the back because, well, who wants to sit on stuff while you’re riding?! I really liked that they are a plain black and don’t have massive logos everywhere - in fact, the only logo is the tiny reflective ‘ilabb’ on the front left leg. After plenty of muddy rides, washes and spins through the dryer (even though that’s not recommended on the care instructions!) they are still looking great and are my go-to short now.

 The front of the Lomond is a different weave and thickness to the back, being a lot warmer on the front, meaning you can cool down through the back.
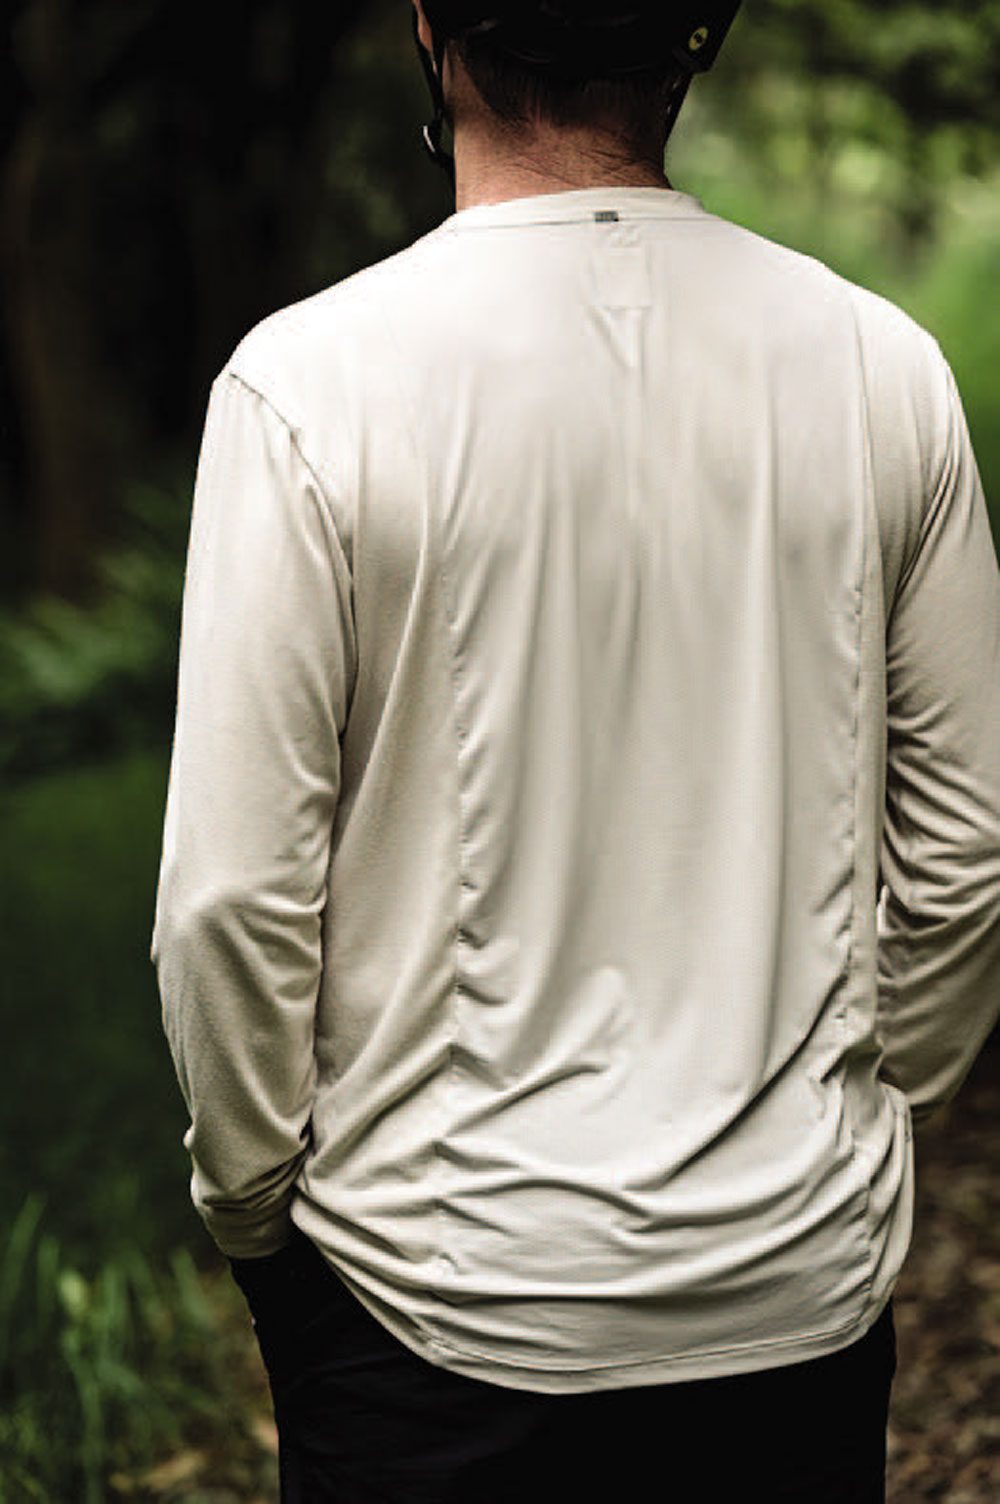
Lomond LS tee $89.99
When it comes to anything other than hot summer riding, most riding tops can be a bit hit and miss. Too hot, too cold – almost never just right. Enter the Lomond top. It’s like a long sleeve technical pyjama top, and it’s awesome. The Lomond is made from 79% Polyester, 14% Tencel, 7% Spandex - and is 100% snuggly.... like you wouldn’t believe (and yes, I have slept in it a number of times). In other words, it’s just right on those colder spring days. The Lomond is made using ilabb’s Dri-Ryde material and is lightweight, breathable and moisture-wicking. The front of the Lomond is a different weave and thickness to the back, being a lot warmer on the front, meaning you can cool down through the back. Despite not generally wearing long sleeve tops, due to overheating, the Lomond is really useful and versatile – and a great pick for cooler days on the bike. There is a short sleeve version available too, which would be great for summer. Again, I like the minimalist logo. The Lomond is available in black, or the dreamily named, ‘Moonbeam’.
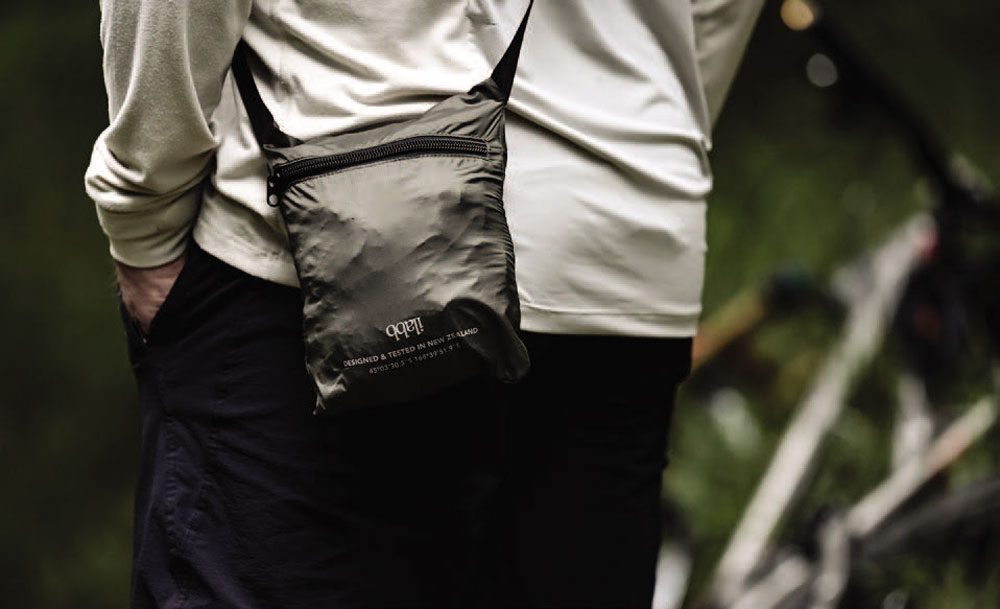
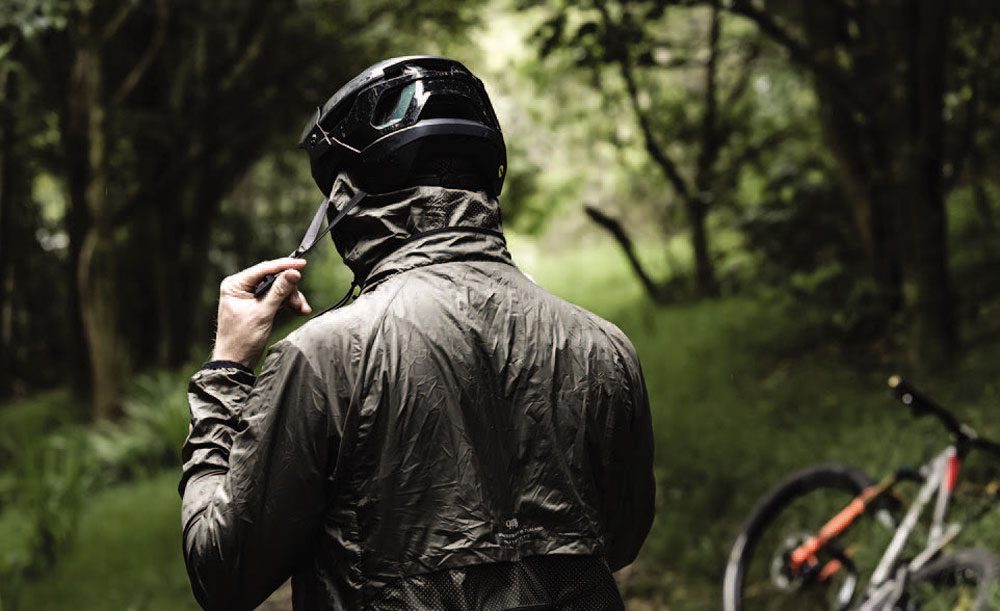
Marlborough Jacket $139.99
The surprise of the collection for me was the Marlborough Jacket. The Marlborough is a very lightweight nylon shell that has a few handy features for cyclists – the first of which is that it has a hood, but the material is so thin that it can actually sit comfortably under a helmet. Handy drawstrings pull the hood nicely around your face, and once it’s in place you can comfortably ride in the rain without water running down your neck. It’s enough to make you almost look forward to rainy days. I’ve had other jackets with hoods, but this is by far the most comfortable to wear underneath a helmet. Secondly, this aforementioned lightweight material means that it crushes down to about the size of a healthy filled roll – and into its own bag, that is sewn into it, nonetheless! The lightweight fabric means that this really is just for showers, more than Everest expeditions but, being so small, you can leave it in the bottom of your bag permanently and it will be there when you need it. It even has a handy shoulder strap if you just want to take it out for a stroll. Sadly, my wife keeps stealing it and putting it in her bag for when she is out. On the bike, it’s cut to sit well in the riding position; there are two zippered front pockets, a draw string around the waist, vents under the arms and on the back, and a subtle polka dot pattern on the front and back which is also reflective. It’s available in hot pink and black as well as the army green colour I’ve got. The truth is that, despite its minimal protection, it’s getting worn a lot more than all our other jackets combined.
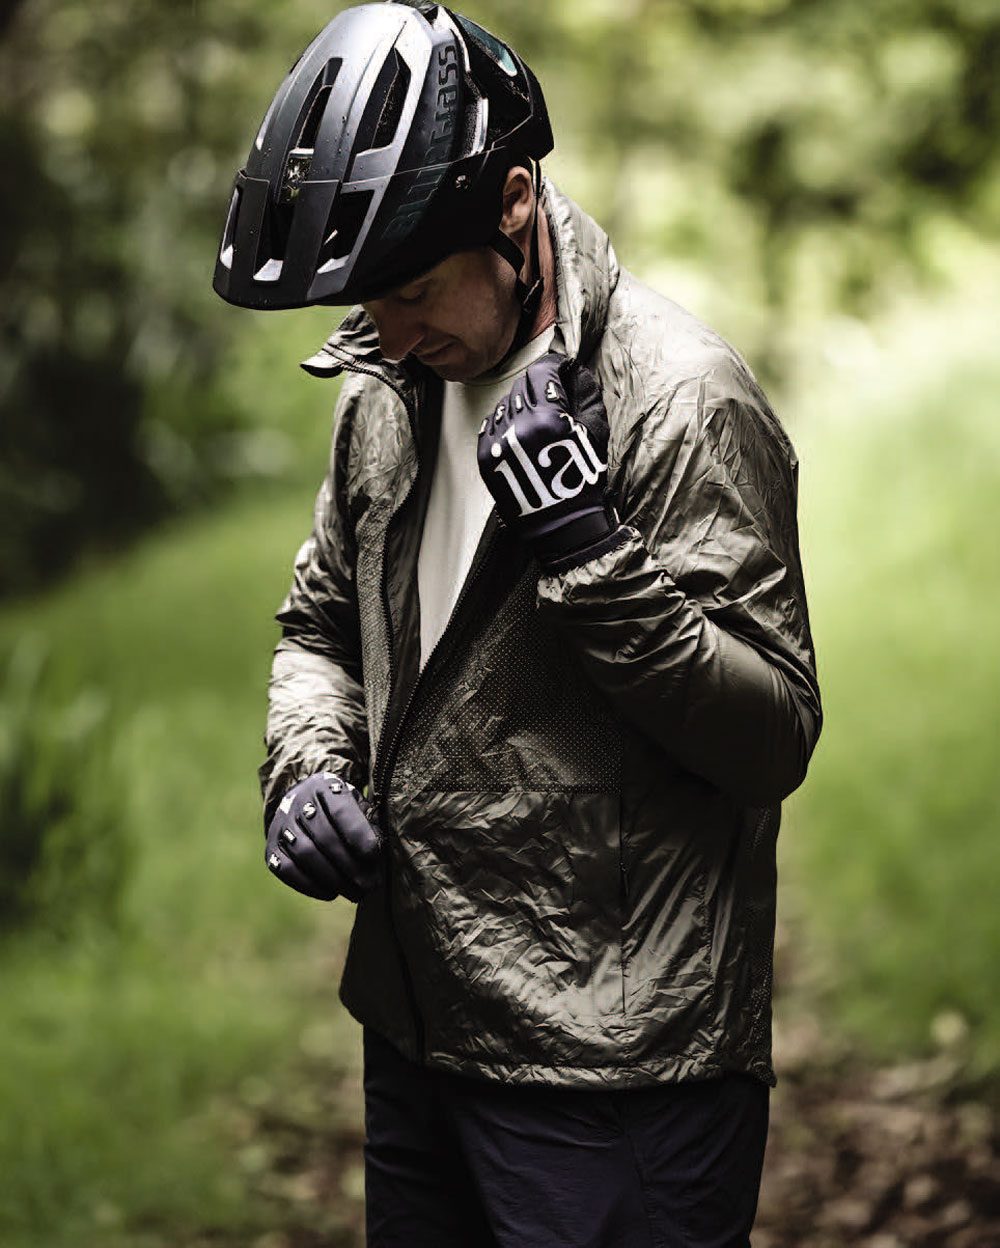
Fist Gloves $59.99
It takes all of about two seconds to know whether a set of gloves work for you. ilabb’s Fist gloves work for me. Not too thick, not too thin, just right (again!). Personally, I don’t need massive amounts of protection, I just want to be able to hold onto the handlebars and not have my sweaty hands slide off the ends. The ilabb’s fit my hands just right, they don’t rub anywhere, they’ve got all the right stretch in all the right places, and they haven’t got holes in them after the first handful of rides (unlike some other gloves that shall remain nameless). I also liked the slightly thicker neoprene cuff. After a decent amount of riding with them, they still look great and aren’t showing any significant visible signs of wear. The full logo across the whole back of the hand probably isn’t my personal flavour, but it doesn’t really bother me because they fit so damn good!
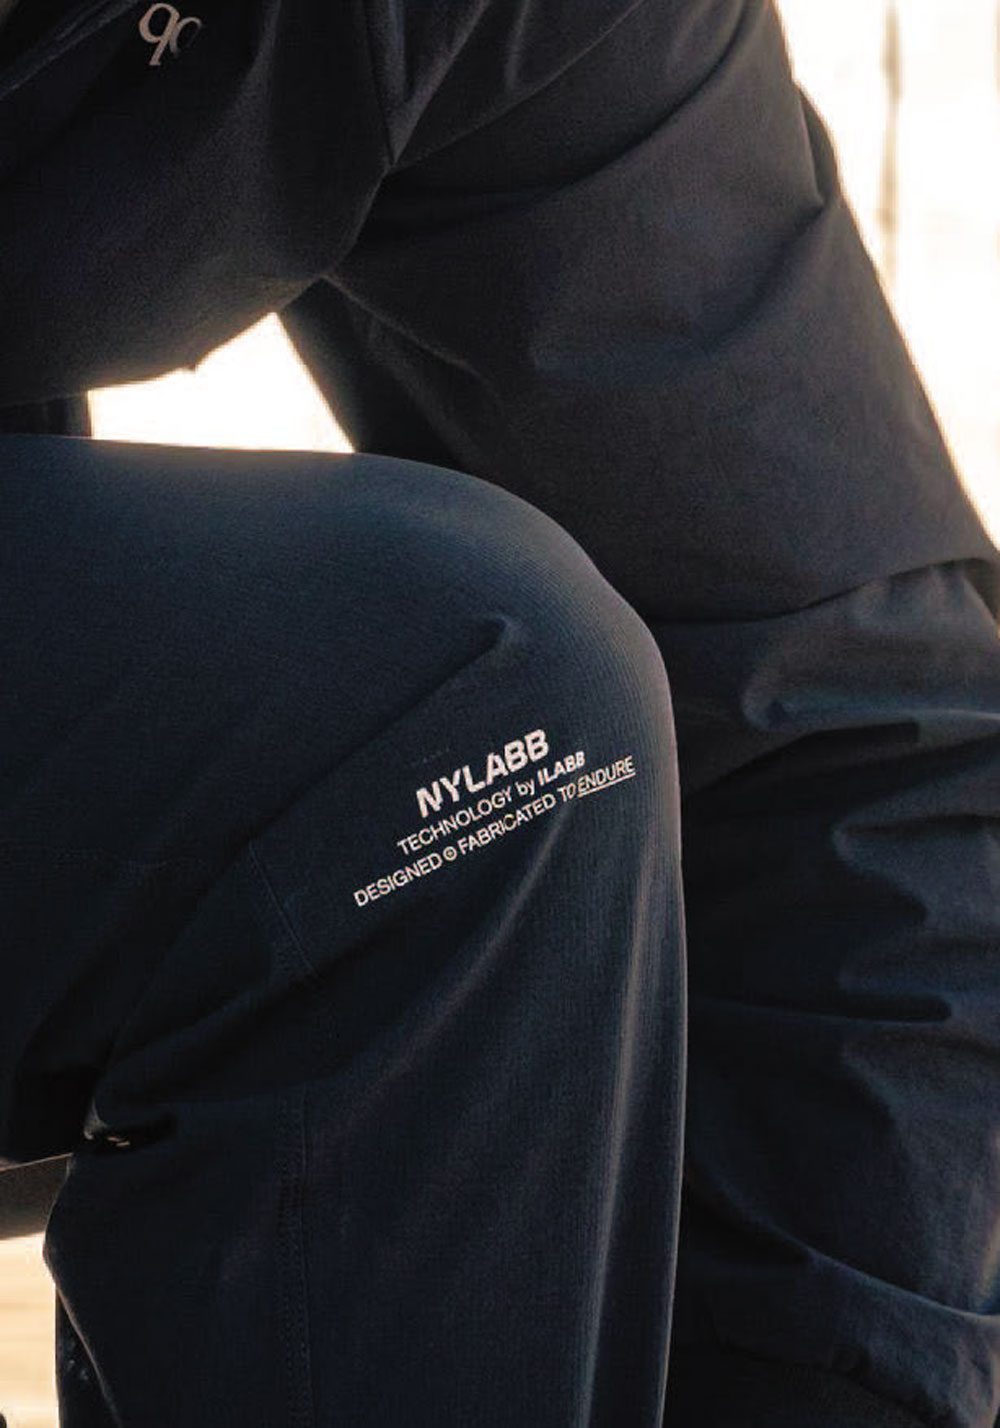
Commuter Pant $159.99
Lots of us use our bikes for getting to and from work, and ilabb’s range extends well into catering for this as well. The Commuter Pant is made of the same NYLABB material as the Terrain shorts, and has a healthy ability to repel water, even though it’s not designed to be a waterproof pant. It’s got a great cut and subtle finish, meaning you could definitely wander into your local brew pub on the way home and not look out of place. In fact, depending on your dress code at work, you could just about get away with wearing them in the office, too. A subtle reflective logo on the knee might help cars see you if you forgot to charge your lights. These pants are lightweight, breathe well and feel great on. Two zippered pockets on the front, and two on the back, mean there are plenty of options to stow stuff.
Commuter Bomber Jacket $199.99
What is it about Bomber jackets? You just feel cool wearing them, right? ilabb’s bomber jacket is no different. An ideal piece of kit, it crosses seamlessly from bike to pub to local MTB club committee meeting - and any other social environment where casual bike wear is not only accepted, but endorsed. A traditional Bomber collar, domes down the front, and wide cuffs complete the look, while the NYLABB material has a stealthy matte finish that also repels water. The Commuter Bomber Jacket is lined, to provide additional comfort and warmth. Done up, it doesn’t flap around, is cut to fit the riding position, and has a good amount of stretch, so it feels great. There are vents under the arms to keep you as cool as you look.
Nevis Vest $179.99
Vests are underrated. Why don’t we wear more vests? They are great for keeping your core warm, they let the heat out when you get hot, and allow your arms to work freely. Vests are great, and the Nevis vest is a near-perfect example of this. The Nevis is made of a softshell material (ilabb’s TEAMTECH, a softshell outer fabric with a bonded fleece inner and water-resistant coating) that keeps the wind from ripping through you on colder days. I’ve found myself wearing this a lot, as our Taranaki weather typically has four seasons in one day; early morning rides, dropping the kids to school, nipping down to the shops - the Nevis vest seems to fit just about every occasion. Two zippered front pockets and a waterproof chest pocket means you’ve got places to put your stuff - and the full length and decent sturdy front zip means you can unzip it all the way down and let it flap in the breeze if that’s your jam. Silicone strips round the bottom mean it won’t ride up while you’re riding home.
Review: Lance Pilbrow
Distributor: ilabb
Review: Smith Wildcat Review
“The clarity from these is top-notch and I found it great for use in areas of medium to bright exposure.”
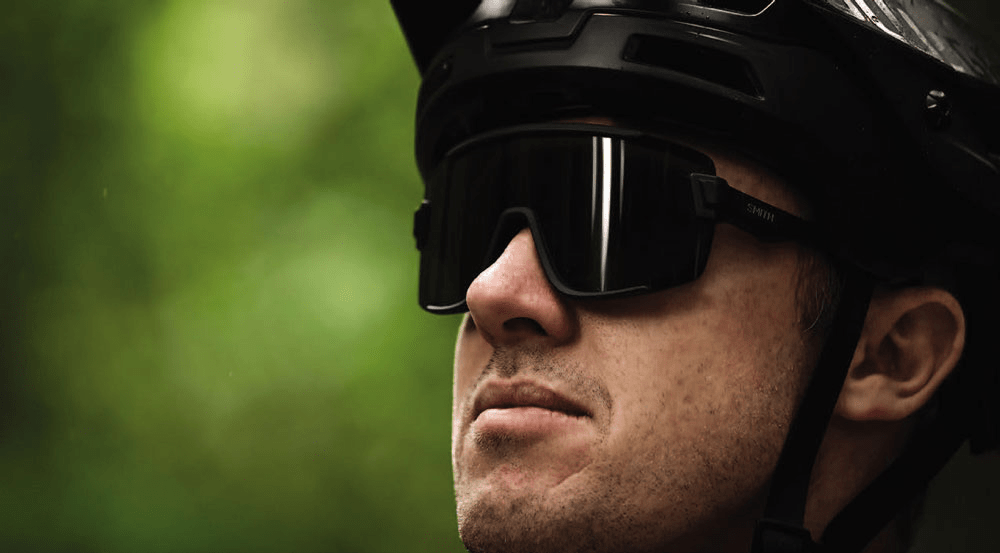
Glasses are a critical piece of cycling kit for me. Am I the only one whose eyes water as soon as I’m rolling faster than about 5km/hour? Because of that, I basically never ride without glasses – which suits me fine as, on the odd occasion I don’t have them, I seem to get something flicked into my eyes anyway. So yeah, glasses are my friend. As a result, I was stoked to be able to try out a set of new Smith Wildcats.
The Wildcats are one of Smith’s latest offerings and feature a massive wrap-around lens. Smith has a reputation for high-quality eyewear and lots of experience making goggles, and the Wildcats almost come across as a strapless, frameless (almost) pair of goggles. The pair I tested were the matte black frame with the ChromaPop black lens. There is a clear lens in the box, as well. The black lens features Smith’s ChromaPop color enhancement technology and is finished with a light black mirror. The clarity from these is top-notch and I found it great for use in areas of medium to bright exposure. They’re probably a bit dark for a dense forest on an overcast day but, generally, I found them just right for daytime riding. I even took them skiing for a day and they did the job just fine there too. The frame is a hybrid TR90 and TPU frame, it’s got a lightweight feel but still feels solid. The hinges have a satisfying notch as they lock into place. Changing the lens is dead easy – just flex the upper frame up and the lens easily flexes open and wiggles past the side mounts. It’s worth noting, a red mirror lens is also available.
Fit wise, I find the Wildcats to be supremely comfortable. The nose piece has two positions – narrow- wide adjustment – as well as the ability to slide vertically a fraction as well. Both narrow-wide positions fit me fine; the tighter position just sits the glasses out a little further, and with the wider position, they sit a little closer to my face. I’m actually still not sure which one I prefer. Both the nose piece and the arms feature Smith’s hydrophilic megol rubber, which is grippy and comfortable. I found they stayed in place on-trail perfectly. I loaned them to a friend who found them to slip a bit, but I may have stretched the frame out a little by that point. Whether he’s small headed, or I’m big headed, I’m not sure – I didn’t ask my friend for his opinion. I happen to ride a Smith Forefront helmet and, no surprise, the glasses integrate really well with that helmet. I also tried them with a Bluegrass Rogue, and they fit fine too. The arms are quite long but they don’t seem to get in the way of my helmet, which is great.
At 135mm wide and 62mm tall, these are some of the biggest glasses out there. I’d say I have a normal sized head and don’t generally wear massive glasses, but I liked the fit and look of these. This larger size meant, for me, they offered great protection from debris and also kept the wind flow (that makes my eyes water) well out of the way. Despite being so big, they only weigh 32grams – so don’t let the big size put you off. Glasses this large tend to have a bit of a ‘look at me!’ vibe about them, but I found that the matte black kept them a bit more understated, which I personally prefer. You can always add the fire-red lens if you want to stand out in the crowd. The Wildcat’s come supplied with a sturdy, hard case so they are well protected when you’re not wearing them as well. All in all, a great set of glasses that ticks all the boxes – recommended!
Review: Lance Pilbrow
Distributor: FE Sports
RRP: $315
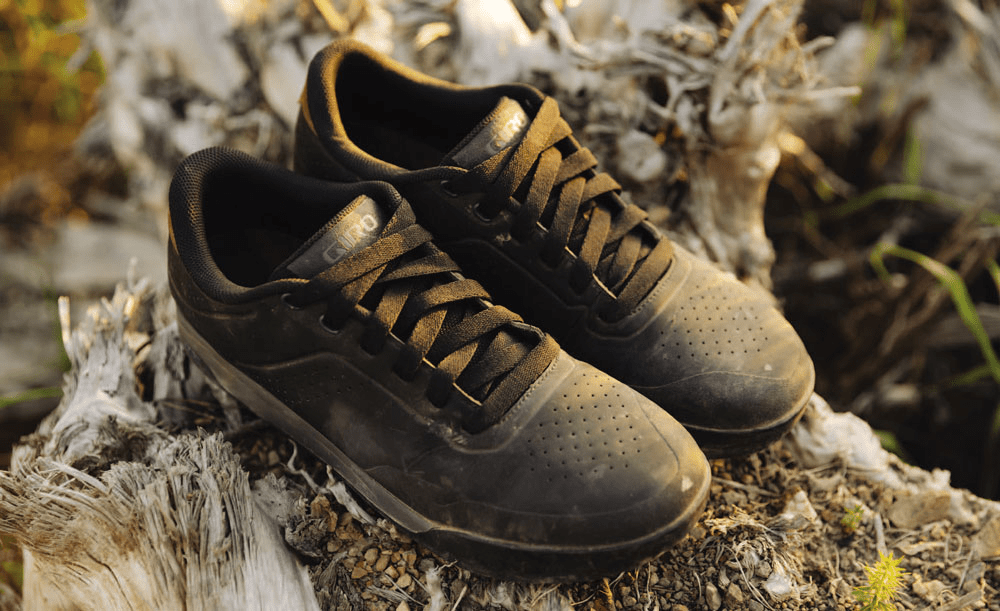
Review: Giro The Latch shoe
“The ‘fast-drying Microfiber upper’ really does what it says on the box...”
Contact points: where you connect with your bike, and your bike with the trail. Contact points really are the most important points to consider when you’re looking at making improvements to your riding and set up. Well, they are the most important to me, anyway.
Giro has released their new flat pedal mountain biking shoe, The Latch, with a casual yet stylish look, in a range of low-key, subtle colors. And these shoes are surely going to be a hit, based on looks alone.
The build of The Latch is sleek and tidy, and you get the feeling it has been constructed to withstand the beating of back-to-back laps and day-long missions in the mountains. With an easy-to-clean exterior, there are no awkward creases or joins to try and dig dirt out of; all that is needed is a quick wipe down, post-ride. I rode these shoes in all conditions to try and give the best review I could, and one thing that did really impress me, was just how fast they dry out after being completely soaked. I am really not a fan of putting my dry feet and socks into wet shoes in the morning. When I checked on these shoes the next day, after a soaking wet ride, they were just about dry and all I did was kick them off into the laundry room! The ‘fast-drying Microfiber upper’ really does what it says on the box....
Alrighty, moving onto the fit: I have pretty wide feet, and have always struggled with finding shoes that accommodate these flippers of mine. When I first slipped these bad boys on, I was pleased as they were very comfortable and cushioning. Unfortunately for me, after about half an hour, my feet felt hot and uncomfortable from being ‘ever-so- slightly’ squeezed. To remedy this, I loosened the shoes right off, which did help, but I was still experiencing that feeling of tightness. Like I said, I do have quite a wide foot (at the widest point it’s 11cm). So, if your feet are similar to mine, you may experience this same feeling.
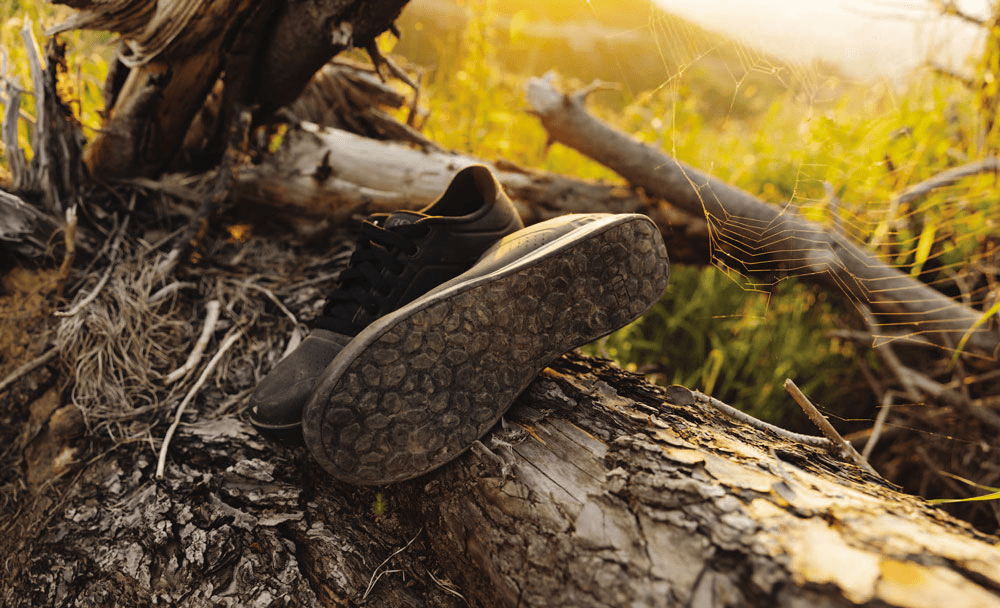
Now for the ride feel: ‘Tack’ is such an appropriate name for the new rubber sole from Giro, as it gives a great connection between you and the bike.
I first rode the Giro Latch with a pedal I usually run, but its pins are not quite as sharp as those on my other set. My experience with this set up was frustrating at first, as I felt that the new Gamma tread pattern was not quite deep enough. An example from one of my test runs, was when I was pushing it through rooty sections of trail and – even with the Mute foam mid sole – I was finding I had to adjust the centre of my weight forward to feel more secure on the pedal, which was then changing the way I rode my bike. It didn’t feel bad, however, it was just different.
Giro mentions on their website that The Latch have a ‘new fit that brings the foot closer to the pedal and flattens the sole profile’. Perhaps what I had experienced was a result of this.
But what if you don’t want your foot ‘closer to the pedal’? Enter pedal number two.
With the pairing of sharper pins and the Tack rubber sole, I found I was able to maintain the position I am most comfortable in – and with full confidence too! The pins were all I needed to really get a good feel of The Latch. I could push in, turn and pop out without feeling like I had to scoop with my feet to bring the bike with me. The connection between the shoe and the bike is super confidence inspiring; I felt I could really put the bike wherever I wanted and it wasn’t going to disappear from underneath me.
The comforting, quick-drying upper of the shoe paired with the cushioning mid-sole and the tacky rubber sole, is all wrapped up in a tidy and subtle aesthetic. The new Giro Latch flat MTB shoe is definitely worth considering if you need to replace your worn-out riding shoes, or if you are looking to make an improvement in your riding. Consider you connection; are you ‘Latched’ on?
REVIEW: SAM TODD
DIST RIBUTOR: WORRALLS
RRP: $269