

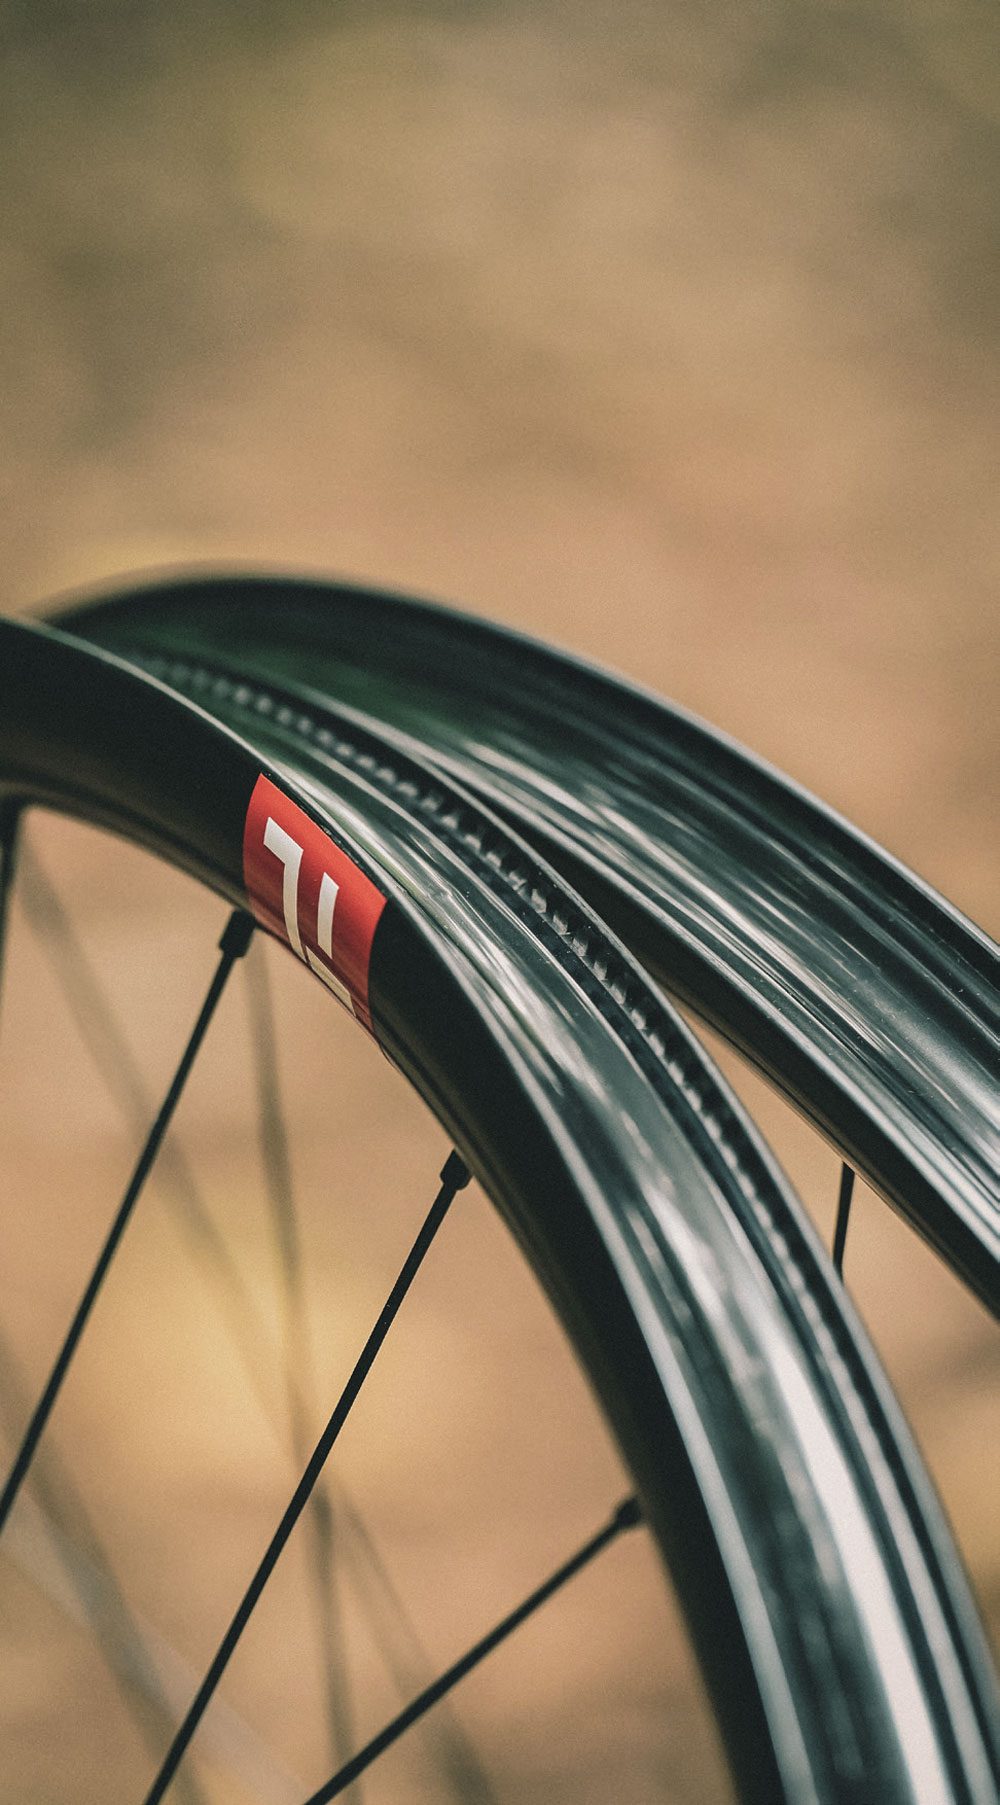
Yamaha YDX Moro 07
Words Lester Perry
Images Darren Stanley
RRP $8999
Distributor Yamaha NZ

I’m always intrigued when a large company enters the Electric Mountain Bike market and tries to take on the ‘Big Three’ (Giant, Trek, Specialized). They come in with a hiss and a roar, take a small share of the market, fight for scraps for a few years, then finally the accountant strikes a big red cross through the eMTB line on their spreadsheet, parking the project and returning them to their core business.
Yamaha has gone about things differently. They developed the world’s first production eBike 30 years ago, and have been building eBikes for the Japanese market for the last three decades. More recently, they’ve supplied motor units to many of Europe’s most popular eBike brands, including international juggernaut, Giant. The YDX Moro 07 is just one piece of their global ‘Switch ON’ strategy which spearheads their move into the world of electric personal mobility and away from fossil fuels. Perusing their international website, you get a taste for Yamaha’s plans: they offer options in almost every category of ‘Power Assist Electric Bicycle’, including models targeting road and gravel (but why?).
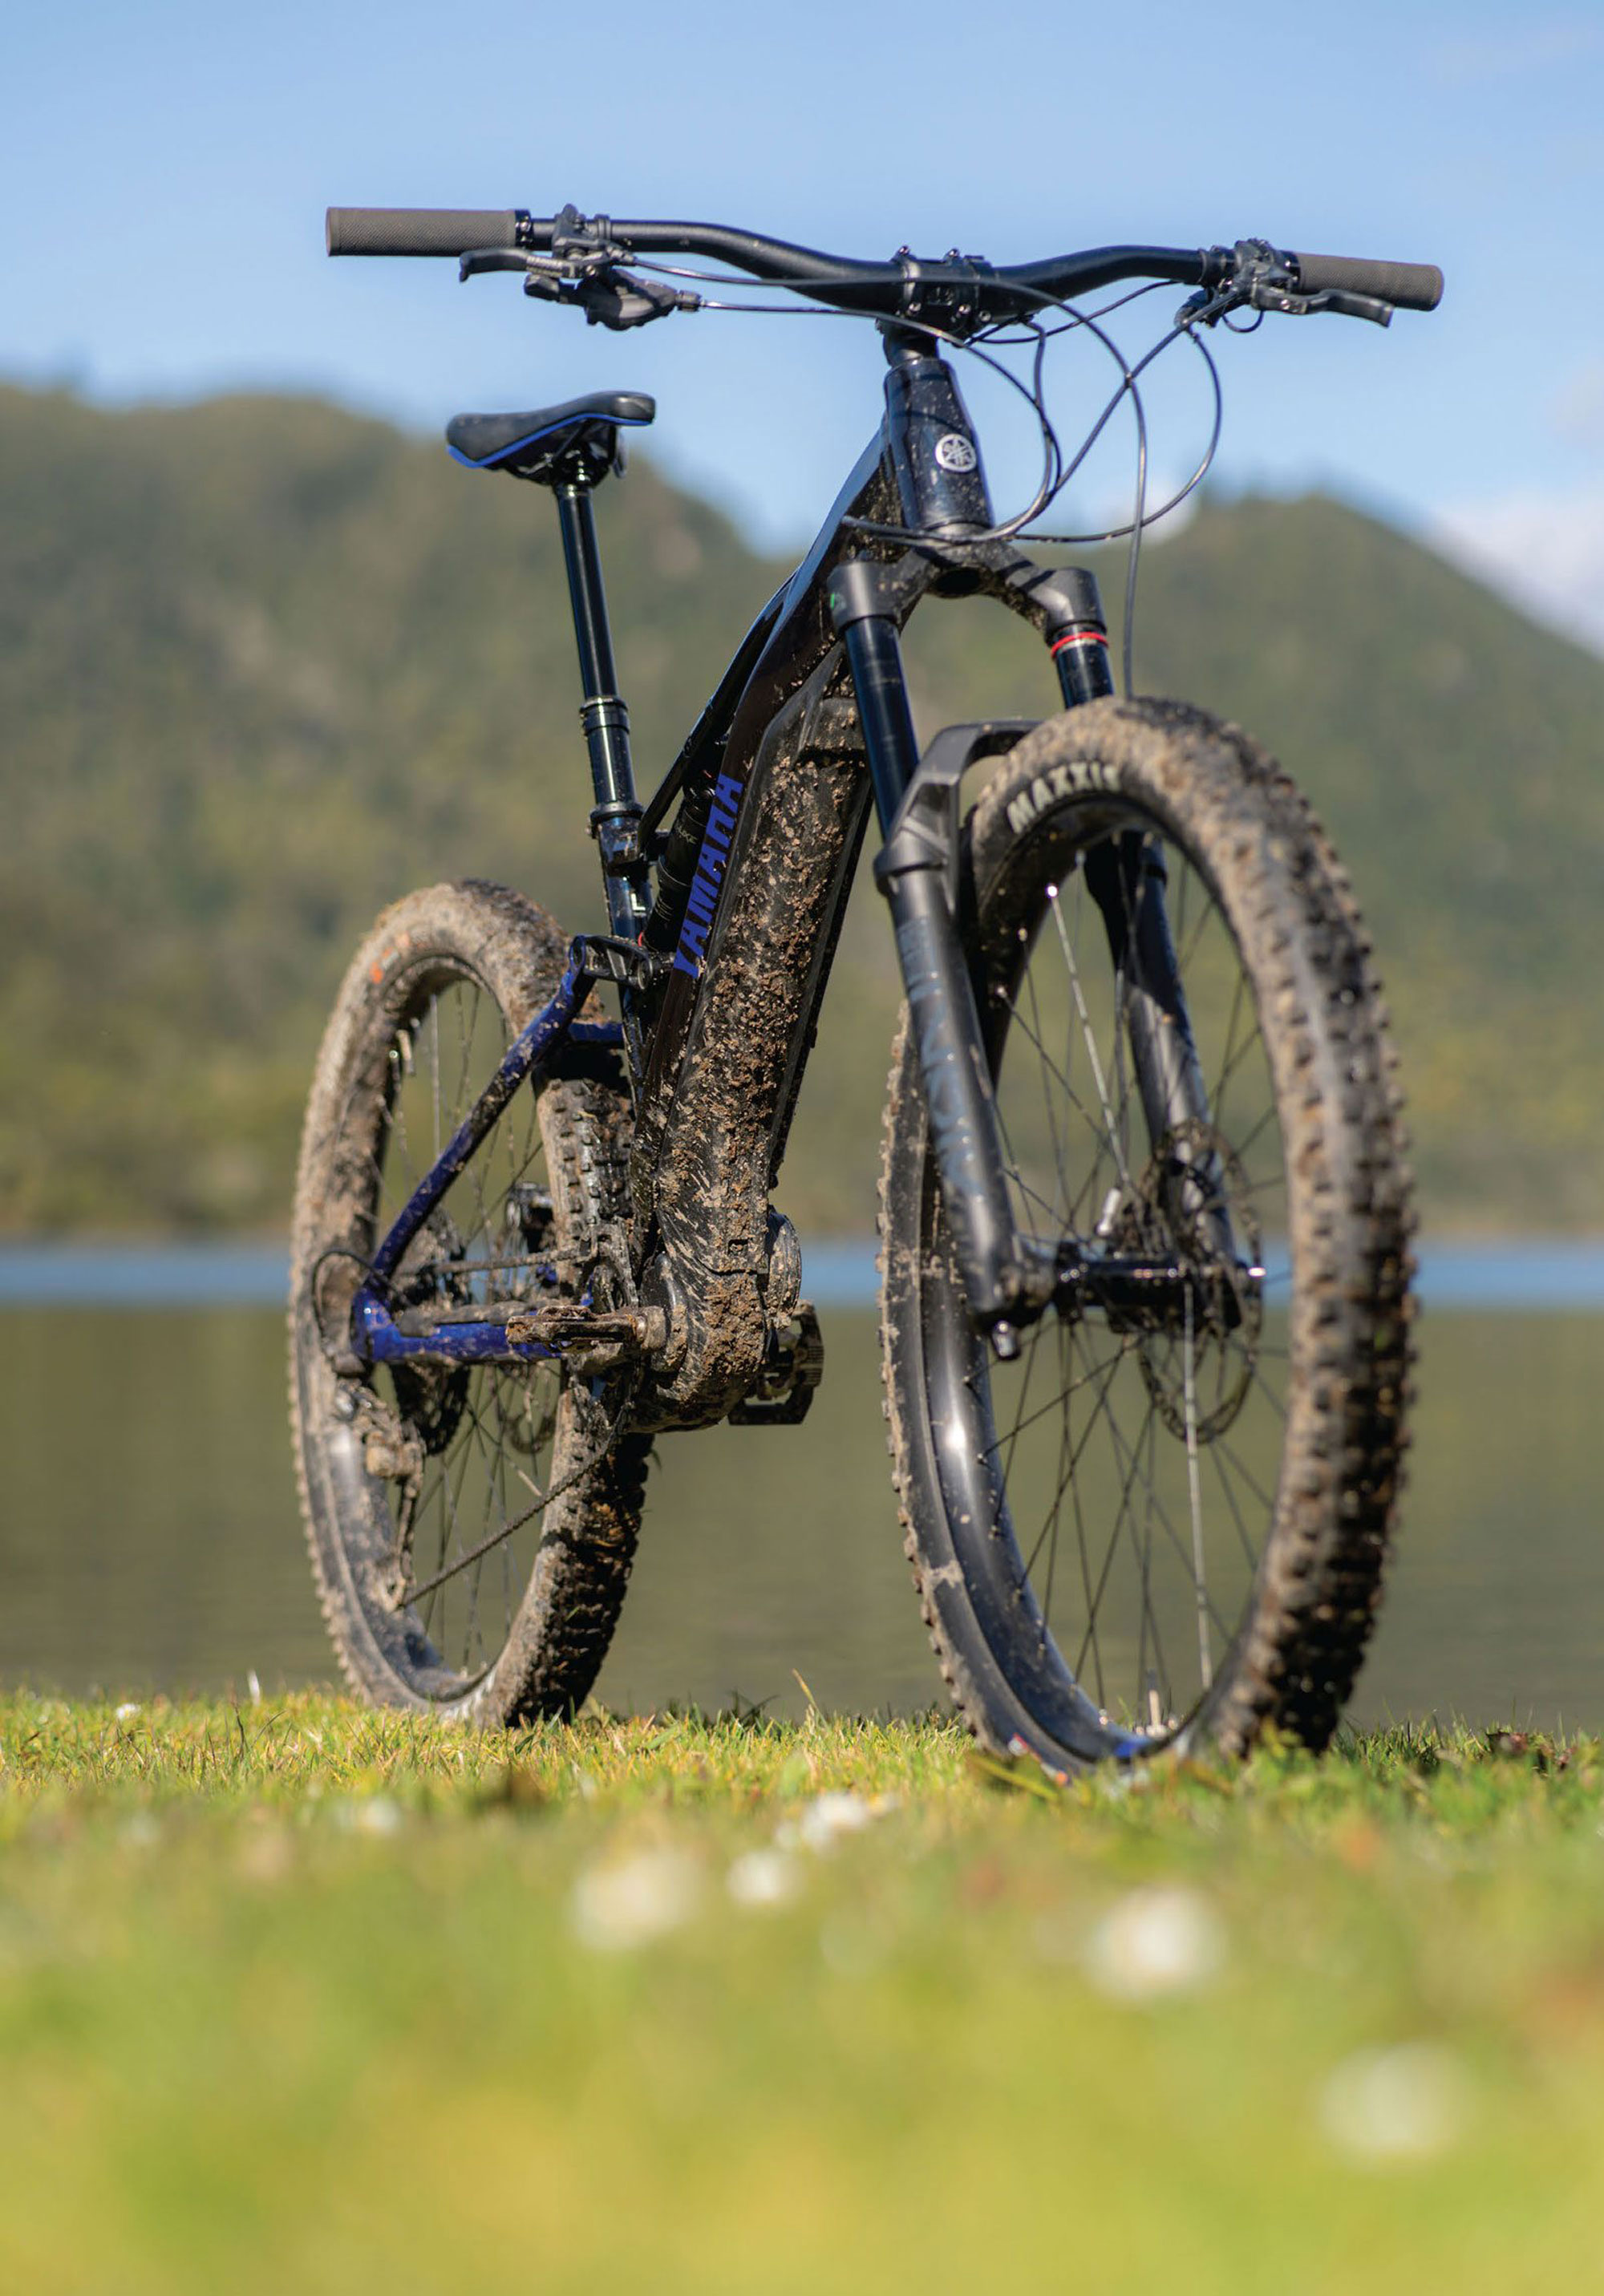
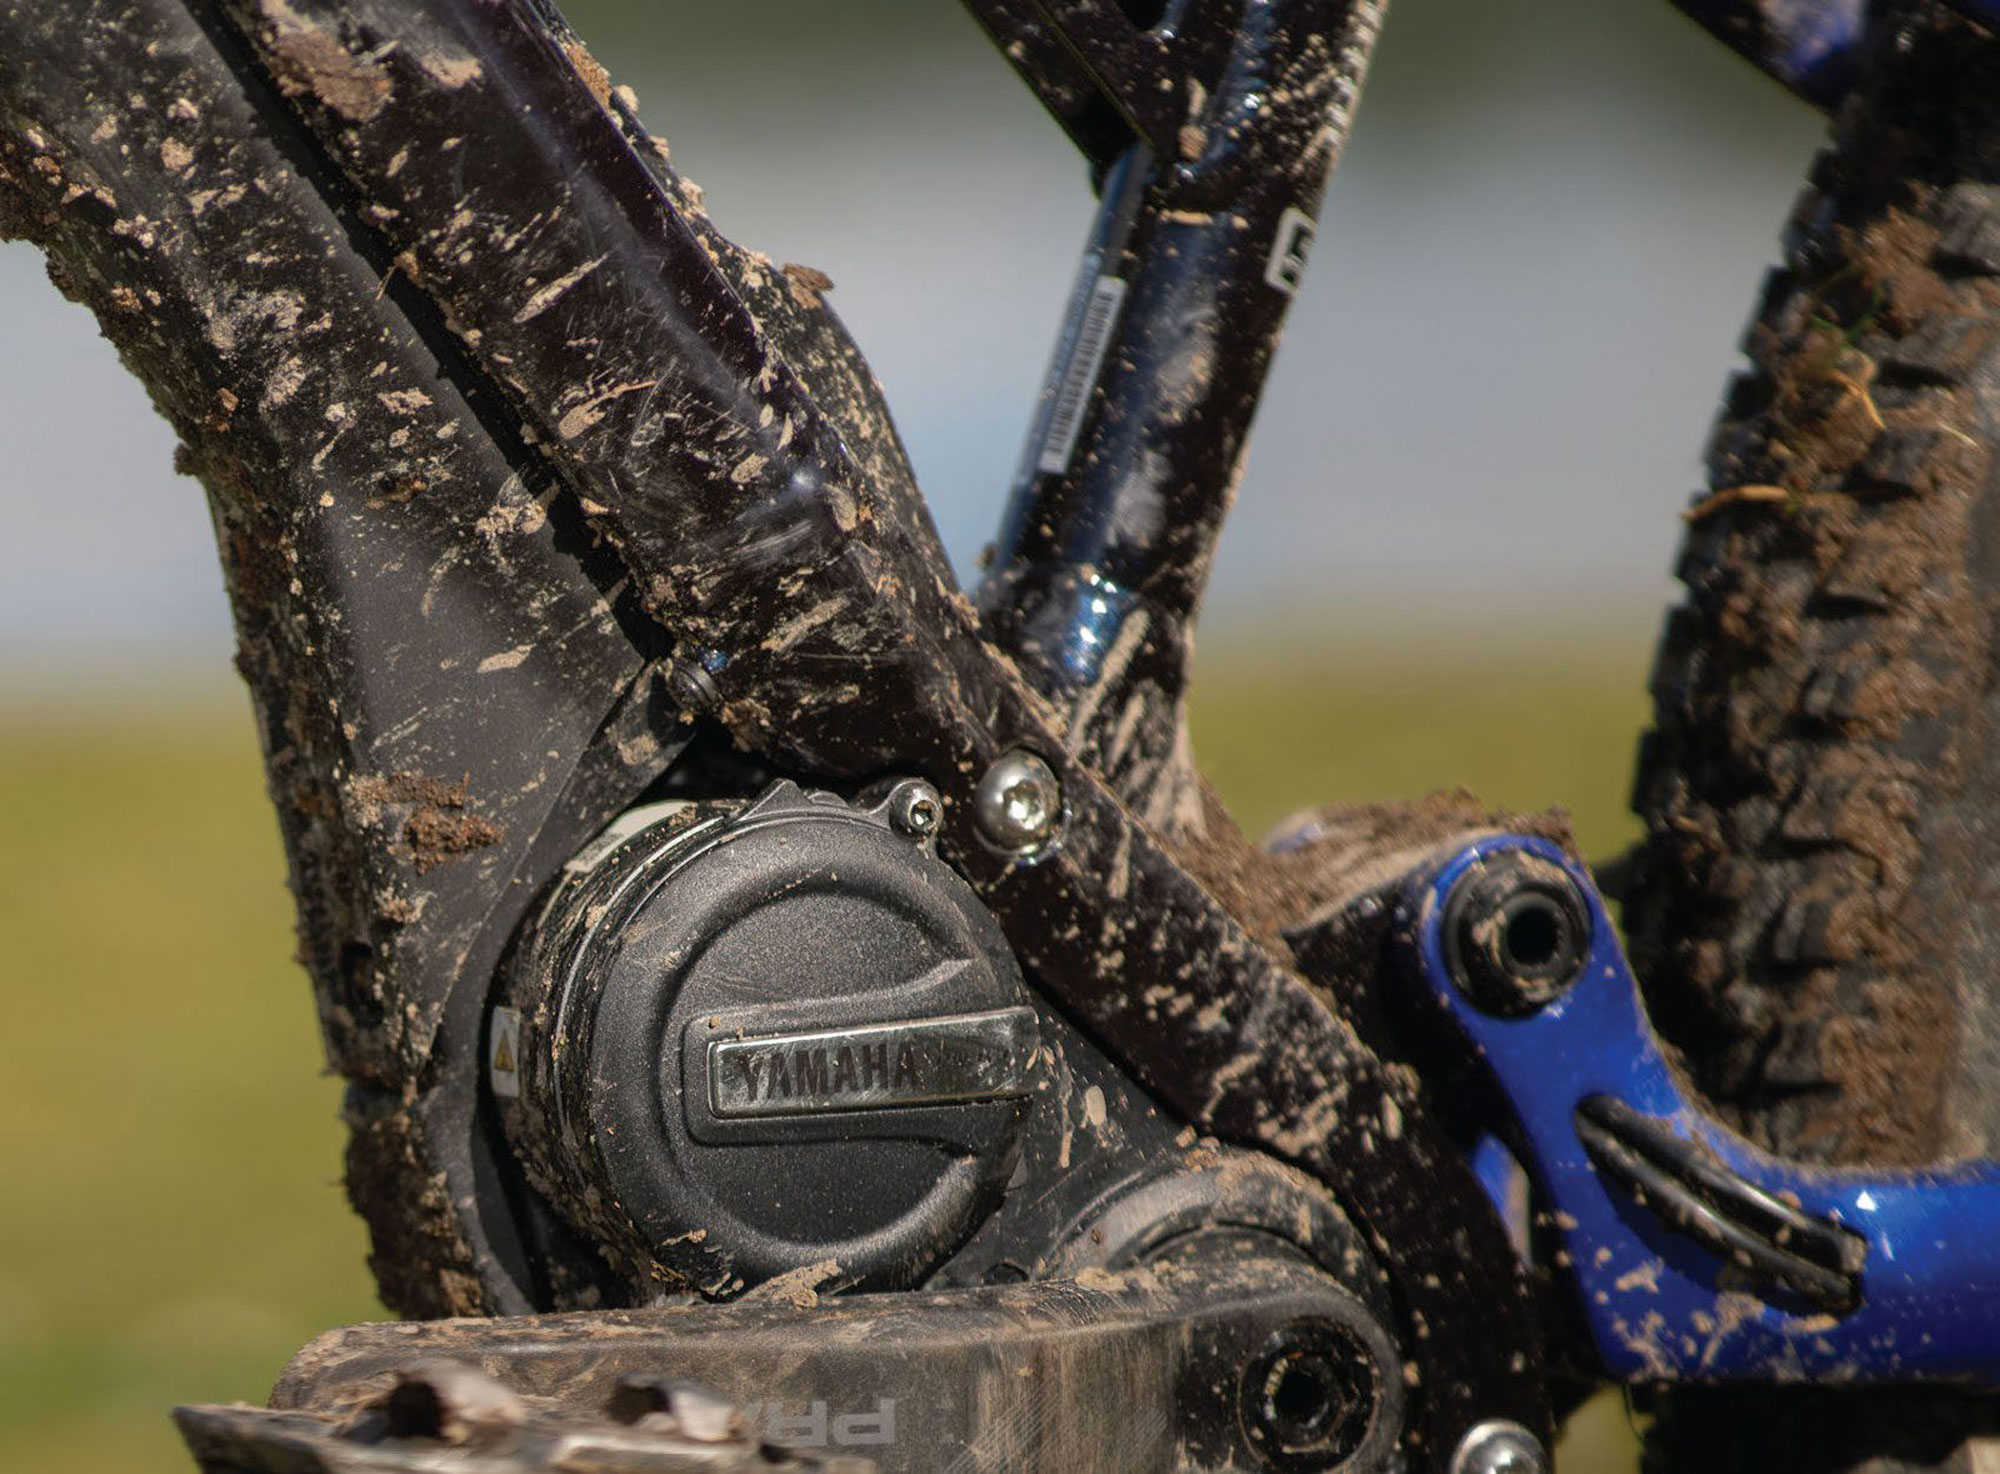
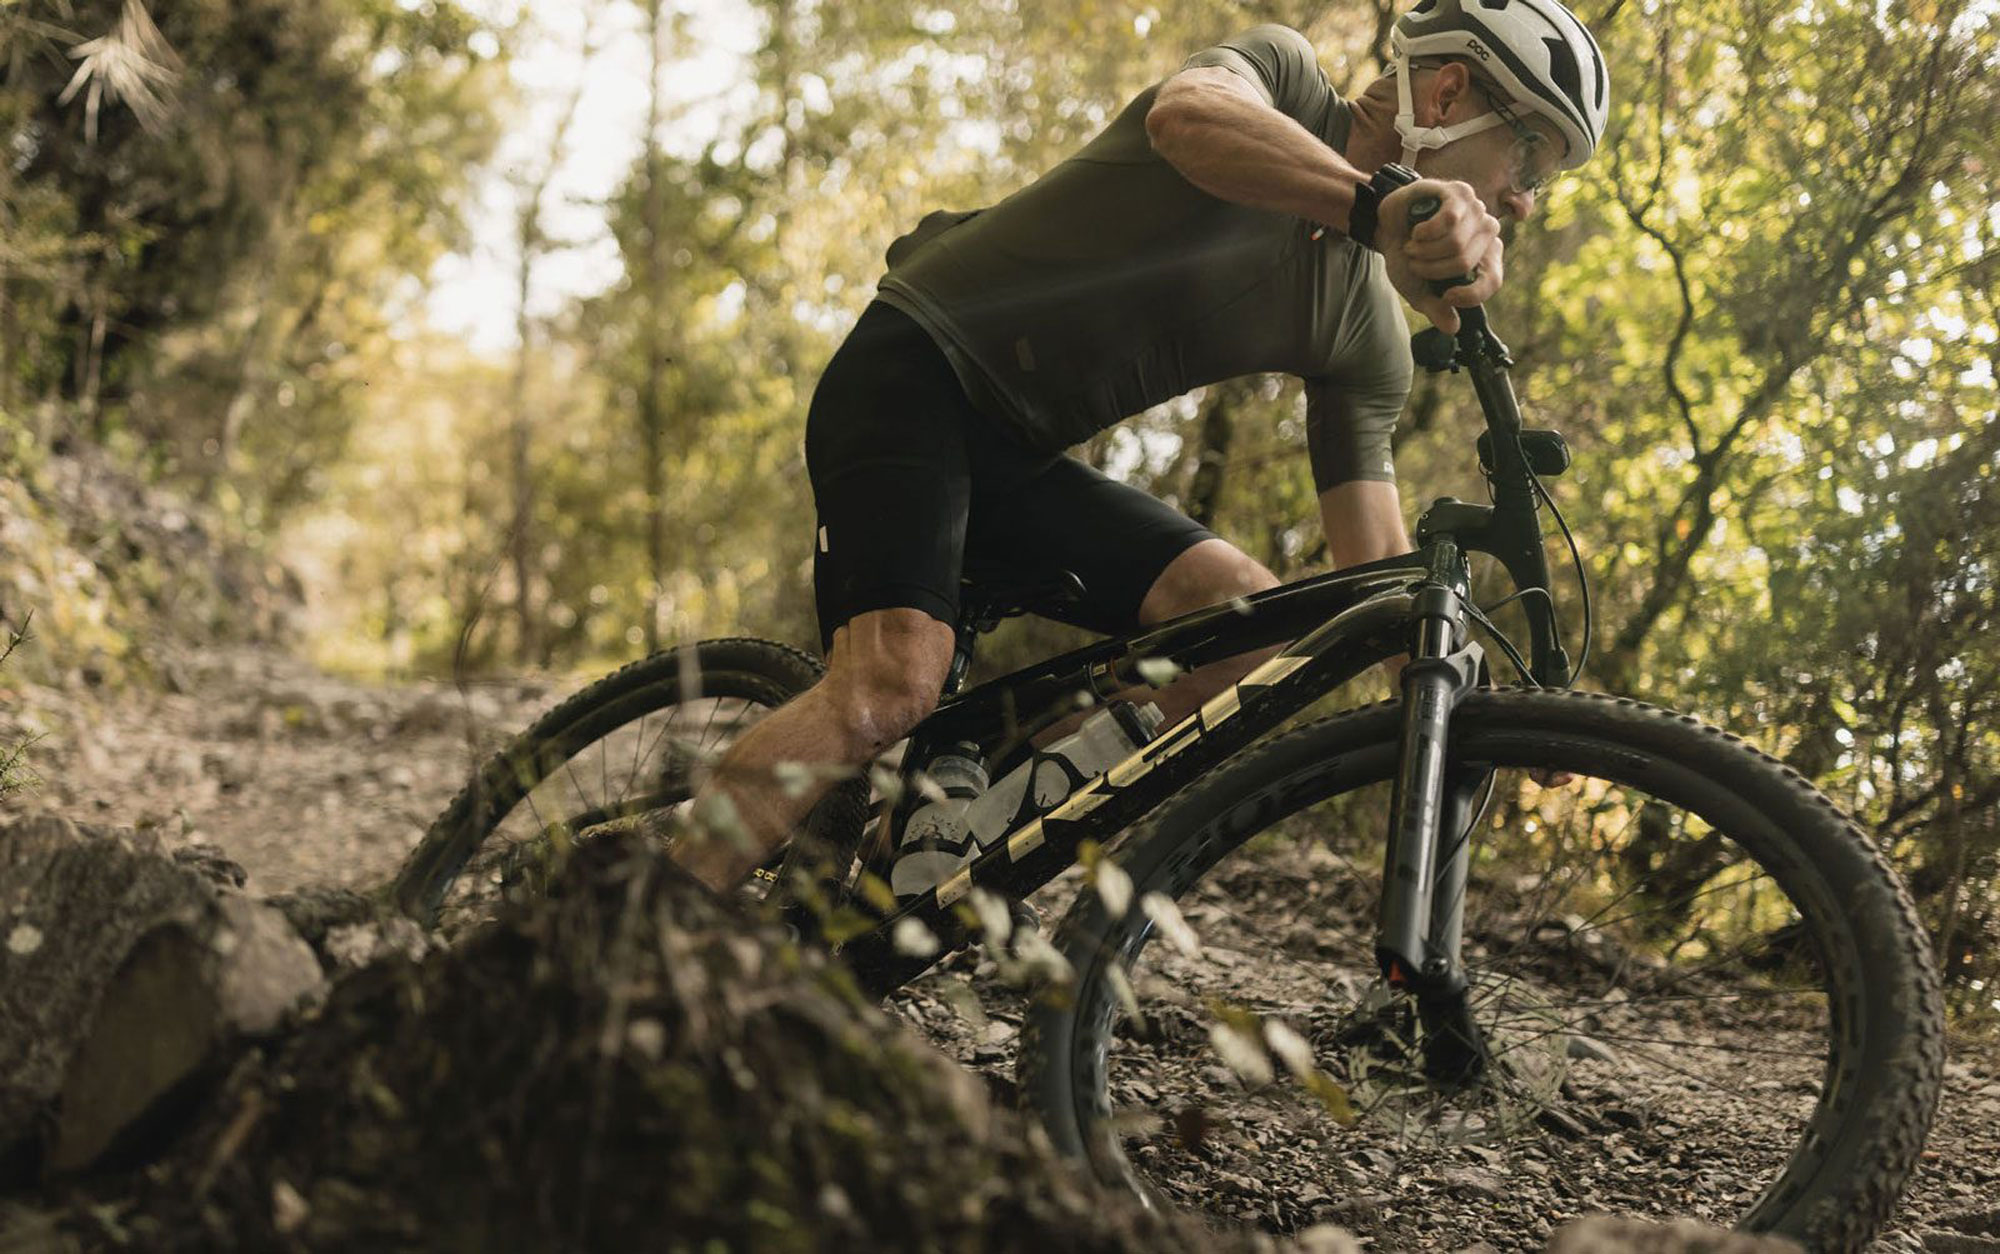
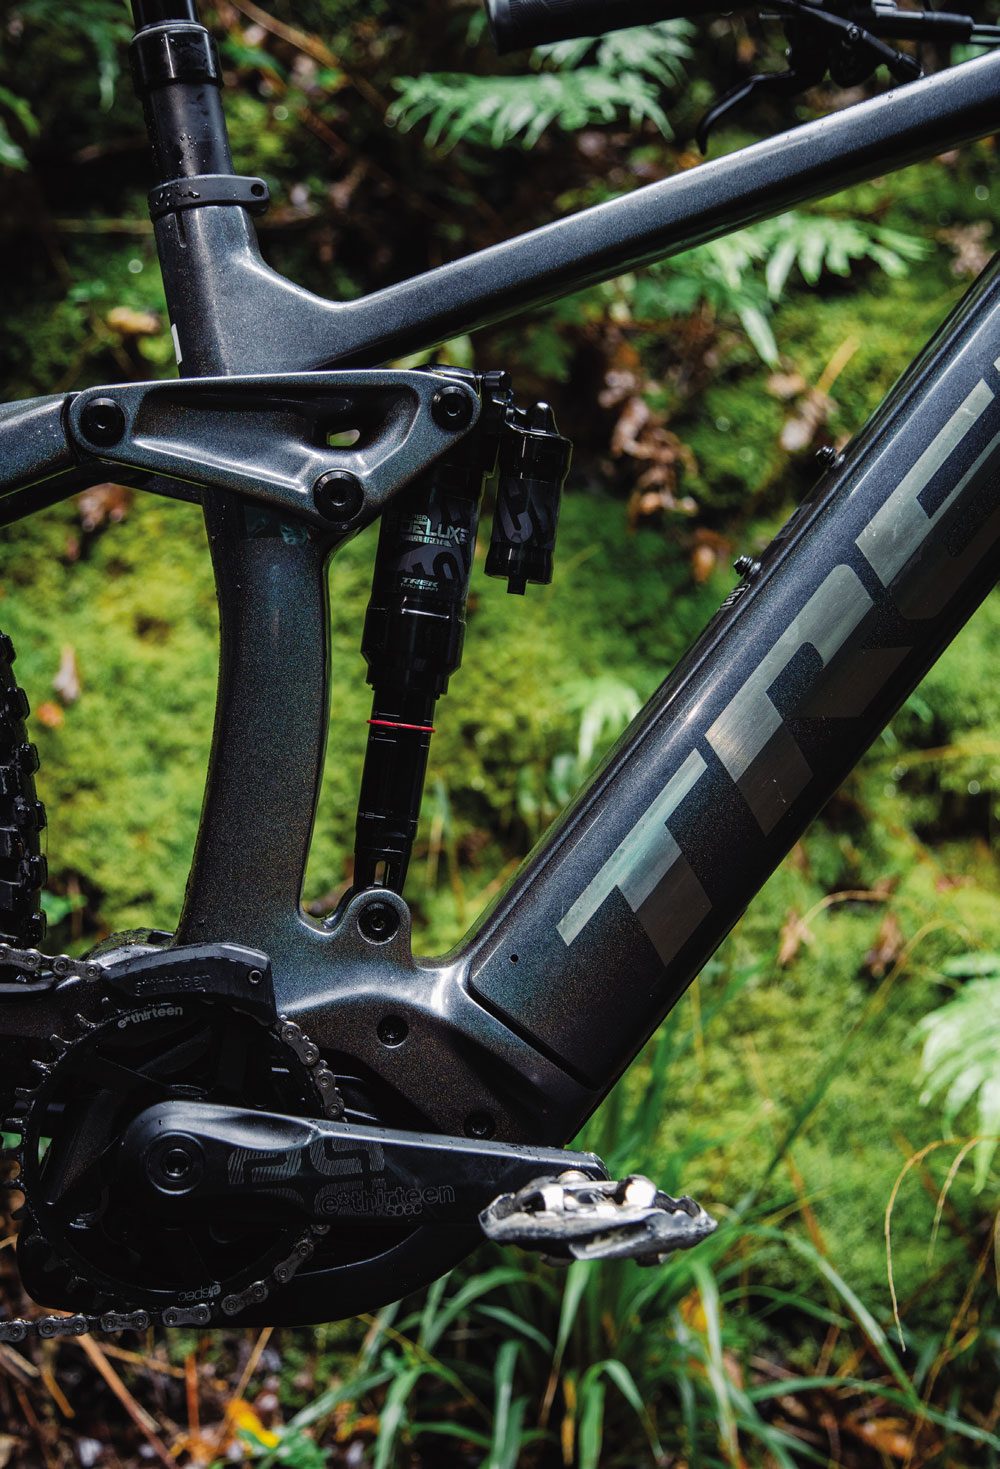
The YDX Moro 07’s frame has been around for a few years now and has some unique and eye-catching hallmarks. The ‘Dual Twin Frame’ splits the top and down tubes into two, sharing some visual cues with their motocross bikes. The rear shock tucks comfortably into the split top tube and the battery fits neatly into the split downtube. The key upgrade to this most recent model is the inclusion of Yamaha’s latest eMTB motor, the PW-X3 -their lightest, smallest, and most powerful drive unit. Boasting 85nM of torque, it’s on the money versus the competition and is powered by a 500w/hr battery.
The frame is set up specifically for 27.5” wheels and features 150mm of rear travel, made possible by a custom-tuned Rockshox Super Deluxe Select+ shock. Up front, the bumps are tackled by a 160mm Rockshox Lyrik Select tuned for eMTB use. Nowadays, we’re seeing most bikes in this travel segment with either dual 29” wheels or mullet style, 27.5” rear and 29” front wheels, so this bike is unique in its full 27.5” setup. Fitted with a Shimano XT drivetrain, gear shifts were precise, rapid, and remarkably trouble-free -even under power.
Geometry is what I’d term conservative for a 150mm/160mm travel bike. The head angle sits at 66.3 and the seat tube angle is a vanilla 70.2 degrees. After perusing the Yamaha website and crunching the numbers on the three available sizes – small, medium and large – I determined I’d be best suited to a large frame. The ‘reach’ numbers were somewhat puzzling; a medium at 437mm and large at 482mm – that’s a major step up between sizes and at 482mm I thought the large may feel a bit long, and the medium very short. Yamaha’s sizing chart had me firmly on the medium size but after comparing reach to my personal bikes I settled on the large. At 176cm tall, I was comfortable with the large size but I’d say if you were over 185cm in height you might be too tall for even the large to be comfortable, regardless of Yamaha’s sizing recommendations. Some of these geo figures are quite a departure from modern bikes of this ilk and prove how geometries have evolved in the last few years. With all this said, we all know how a bike rides is more than just specs and numbers.
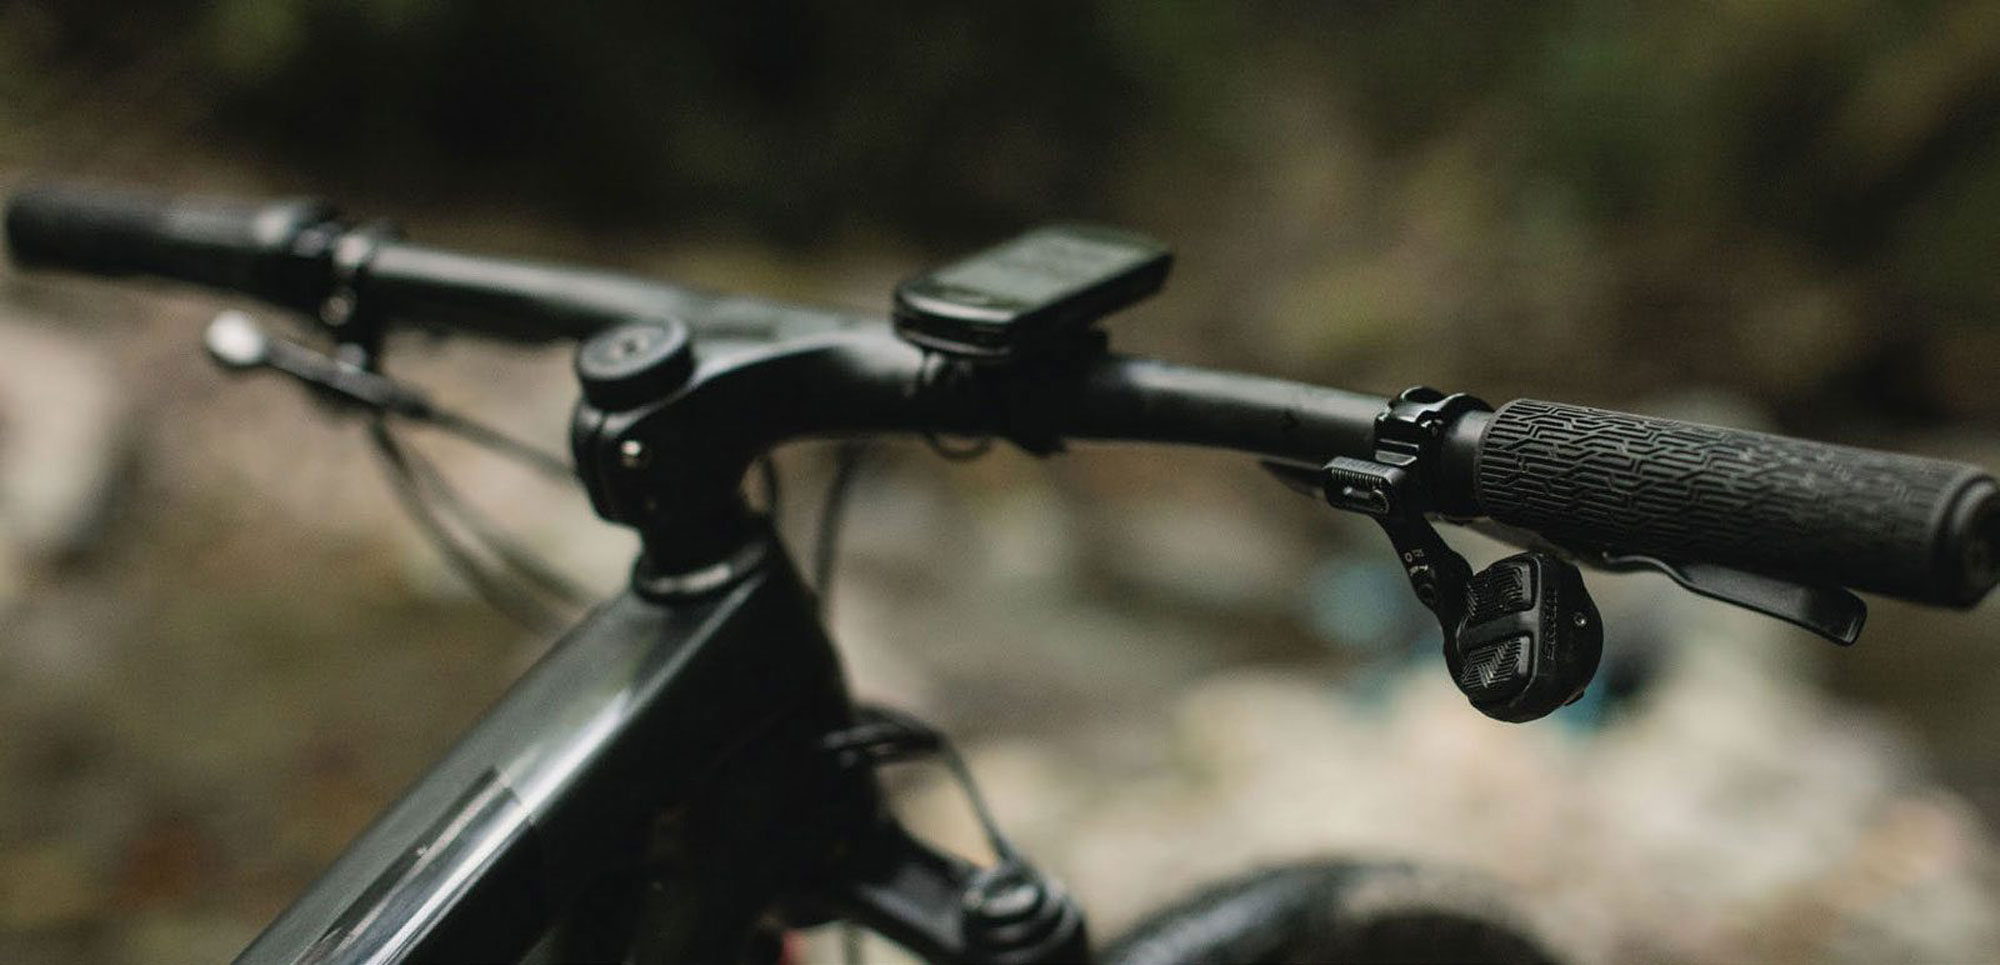
Assistance modes on offer are ECO, Standard, High, Extra-Power and Automatic, as well as a handy Walk Assist that gently drives the rear wheel when needing to push the bike somewhere. Assistance levels are clearly visible while riding, on the brand’s ‘Interface X’ LED display, and easily adjusted on the fly via the ergonomic remote switch just beside the dropper post lever on the righthand side.
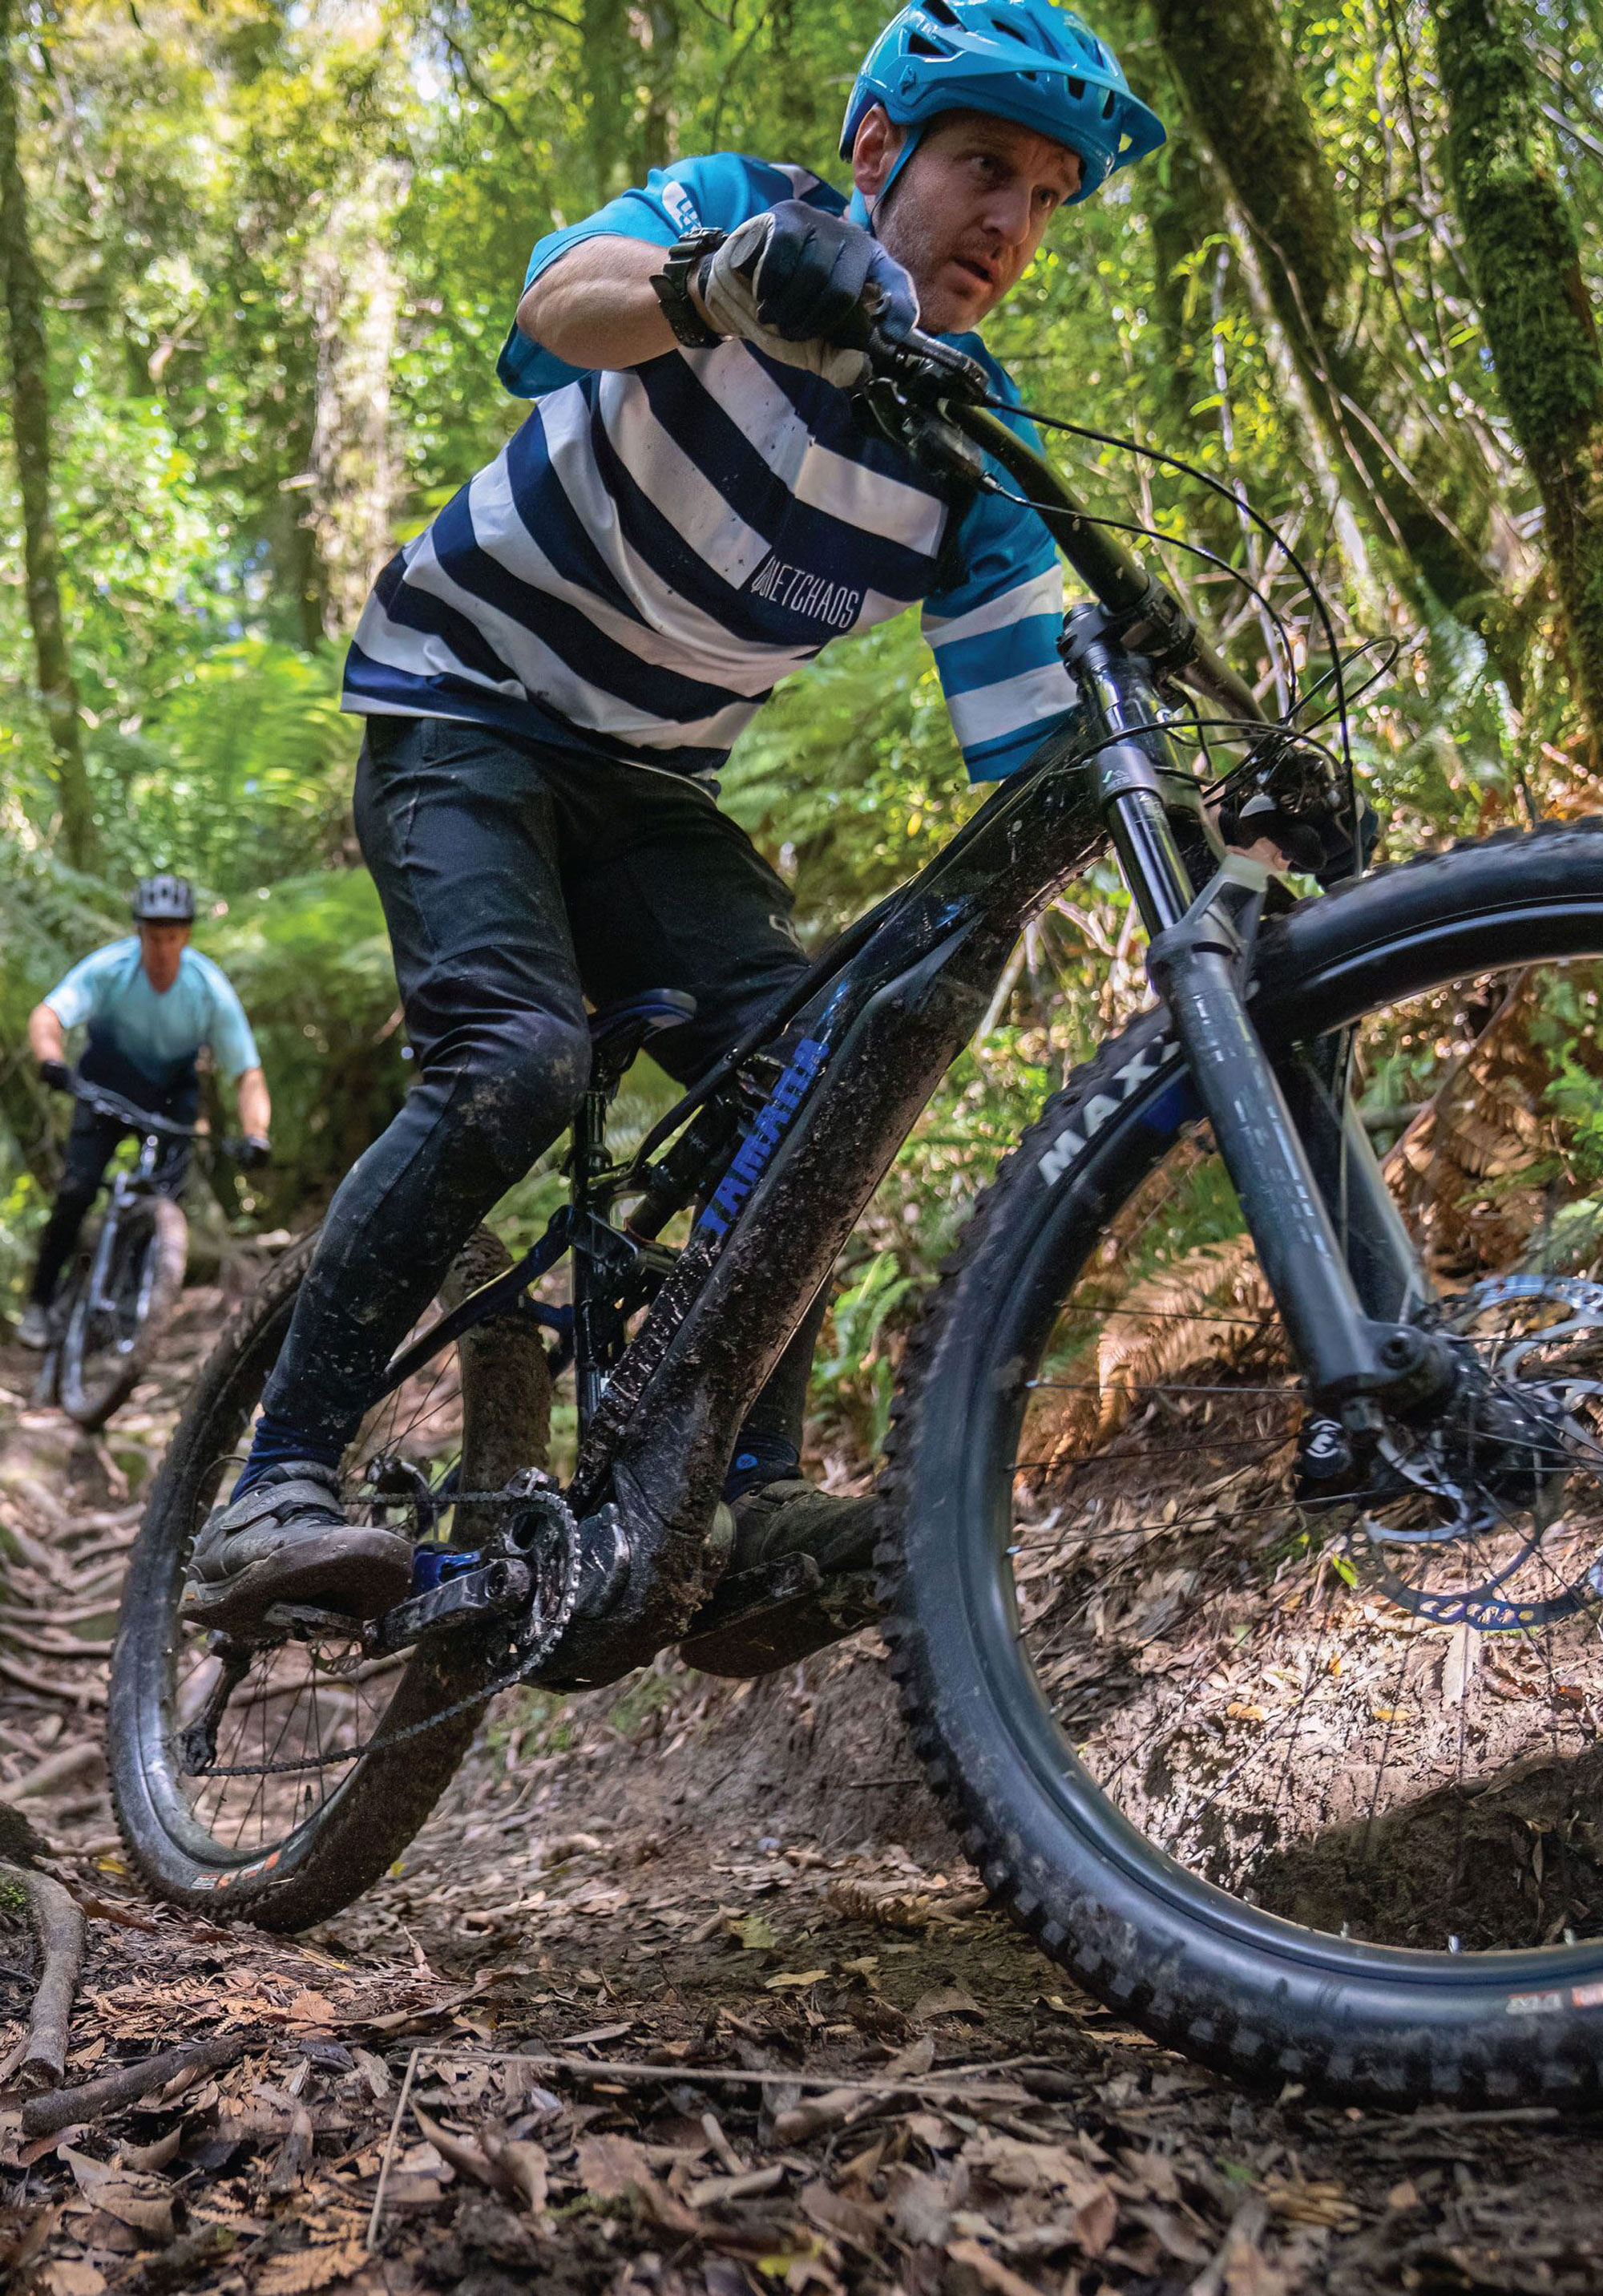
After some initial tweaking of the suspension pressures to suit my weight and riding style, getting used to the bike was a cinch. Some bikes take a good amount of time to feel familiar, but this bike didn’t have that issue and I was quickly tackling trail sections with the same gusto as I would on my regular bike. The comparatively small wheels made initiating turns and adjusting lines quick and easy, and the bike cornered well, even with at times bad technique.
Climbing is where eMTB’s shine; getting up technical and steep climbs that you couldn’t physically manage on a regular bike. The MORO 07 climbs really well most of the time; I found the ‘Automatic’ power mode and its ability to automatically adjust the output depending on the rider’s pedalling input, offered the optimal amount of power for most situations and gave a very natural feel while pedalling. Only when blasting along gravel roads or pedalling up to max speed into a trail feature did I select the Extra-Power mode; in most scenarios it was simply too much and was overly aggressive with the supply of power, causing unwanted accelerations or wheelspin while climbing techy or slippery trails.
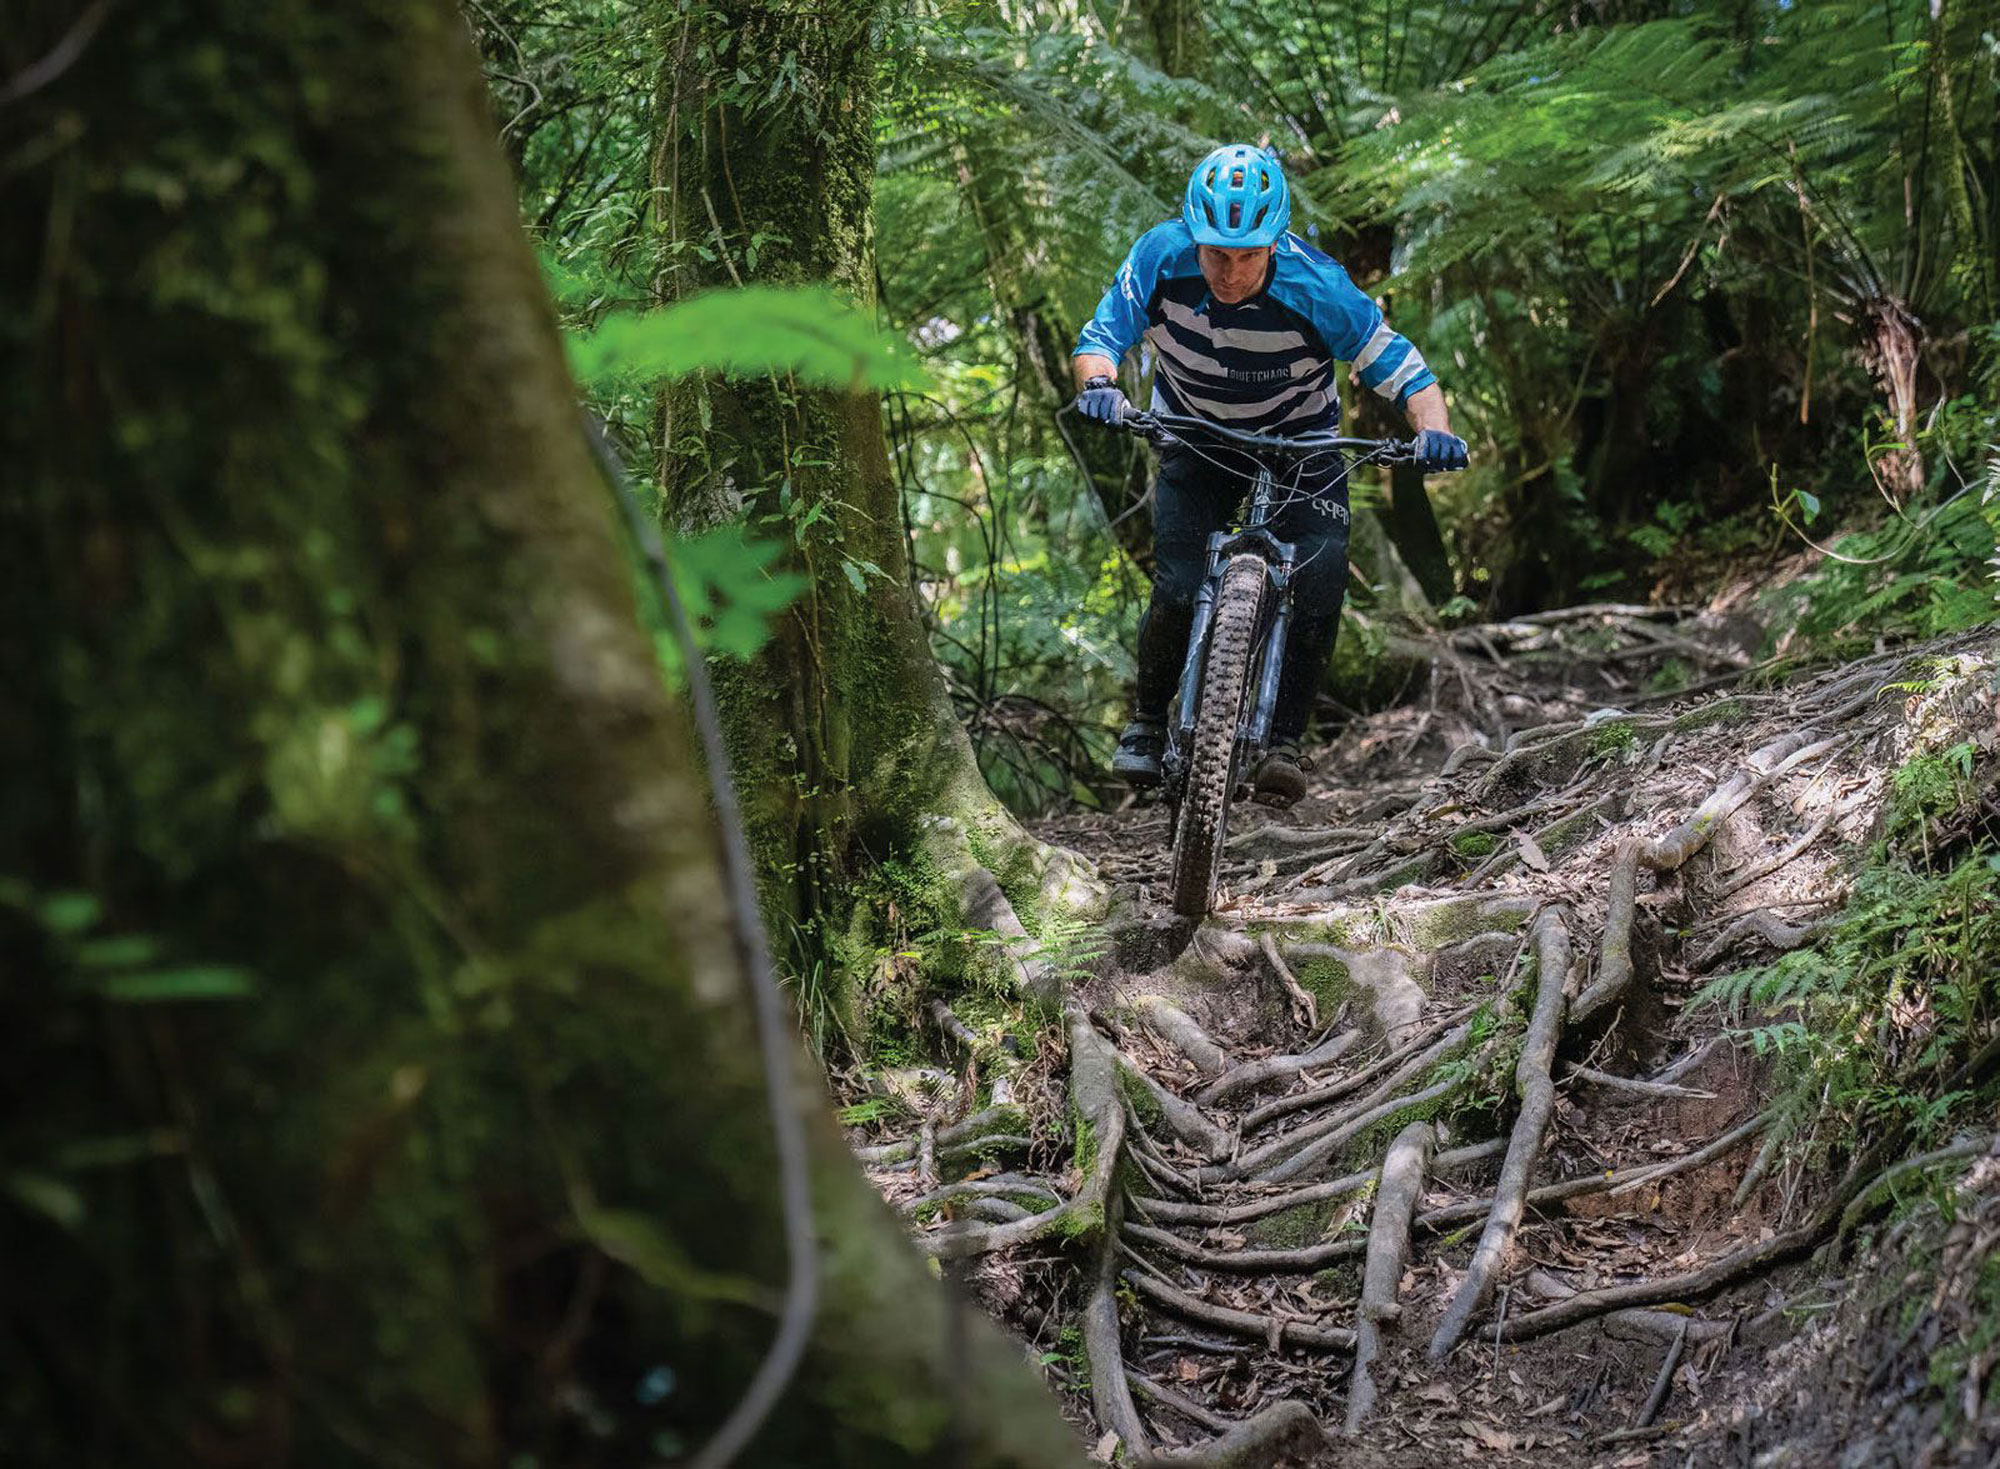
Heading downhill brings a huge grin to the face: it’s flat-out, simple and fun aboard the MORO 07. The bike feels well-balanced, and even playful, for a 23.7kg eMTB. It’s composed and stable in most scenarios and, even when compared to its 29” wheeled brethren, the bike has long chainstays which aid stability when descending at high speed and help limit sketchiness through chunky terrain. The downside is that, when combined with the long reach on the large size, it isn’t simple to pull the front end up to manual through deep dips in the trail. Sure, it’s doable, but shorter chainstays would make it easier.
Descending, confidence is boosted by the Magura MT5 4-piston brakes; I’m pretty finicky when it comes to brakes but the solid, woody feel suited me and when coupled with 203mm rotors front and rear there is plenty of stopping power on tap, something that is lacking on many eMTBs, and surely necessary with the extra weight of an eBike, to stay in control while descending.
The large volume 2.8” wide tyres damp trail chatter, inspire confidence, and enable you to hold a good line… to a point. I did find that under big compressions or very hard hits, particularly on steep descents, the tyres could be unpredictable as they warp under the strain. This was a bit unnerving at times but is something I’ve experienced riding 27.5”+ sized tyres previously. This could be helped by running a stiffer casing tyre, or tyre liner like a Cush Core or similar. The pairing of the Maxxis Minion EXO+ DHF 2.8” up front with the Maxxis EXO+ Rekon 2.8” on the rear was good for general use and in dry, hardpacked conditions they hooked up well, but the Rekon on the rear fell short while climbing steep, loose or wet pitches; the knobs simply aren’t up to the task as it’s a small knobbed tyre designed for pedalling speed rather than high torque traction. I would have liked to see a tyre with a stiffer casing and larger knobs specced on the rear, either a Maxxis Minion DHR2 or similar would be perfect with larger, paddle-style central knobs for traction, and stiffer casings for increased stability. Let’s talk about the elephant in the room: the 500Wh battery. Three years ago, a 500Wh battery was considered pretty standard, however nowadays, even at the price level of the MORO 07 full power, eMTBs are generally specced with batteries of 600Wh or higher. The larger batteries usually come with a slight weight penalty at this level, but a couple of hundred grams for another 100Wh at least is probably worth it. With this all said, I’ve been surprised how much more efficient this motor is with its power than some other brands, and the range is reasonable -it’s impossible to put numbers to this but if you don’t go heavy with the max assist you’ll get a good couple of hours riding in before the battery life is an issue.

I’ll be honest, I was pretty sceptical when Yamaha offered up this bike for review, but outside of a few things I’d change, it really surprised me by how fun it is. After spending some good hours on it across multiple rides and trail styles, I find it hard to pin point any deal breakers and it really goes to show that how a bike rides is the sum of all its parts, frame included, not just the geometry numbers and any preconceptions these may bring about. I’d be interested to know how the bike would improve with a 29” wheel up front, some shorter cranks and more aggressive tyres –all of which could be experimented with by a buyer.
Riding bikes is all about having fun and the MORO 07 delivers this in spades. Although $8999 isn’t small change, it’s comparable to the competition and if you’re looking for a quality bike without blowing the budget, this rig packs a good bang for buck and will stand out on the trail amongst the hordes of bikes by the “big three” brands that now flood the trails.
Burgtec Cockpit
Words Liam Friary
Image Cameron Mackenzie
RRP $315 – Bars | $199 – Stem | $54 – Grips
Distributor Everoutdoor
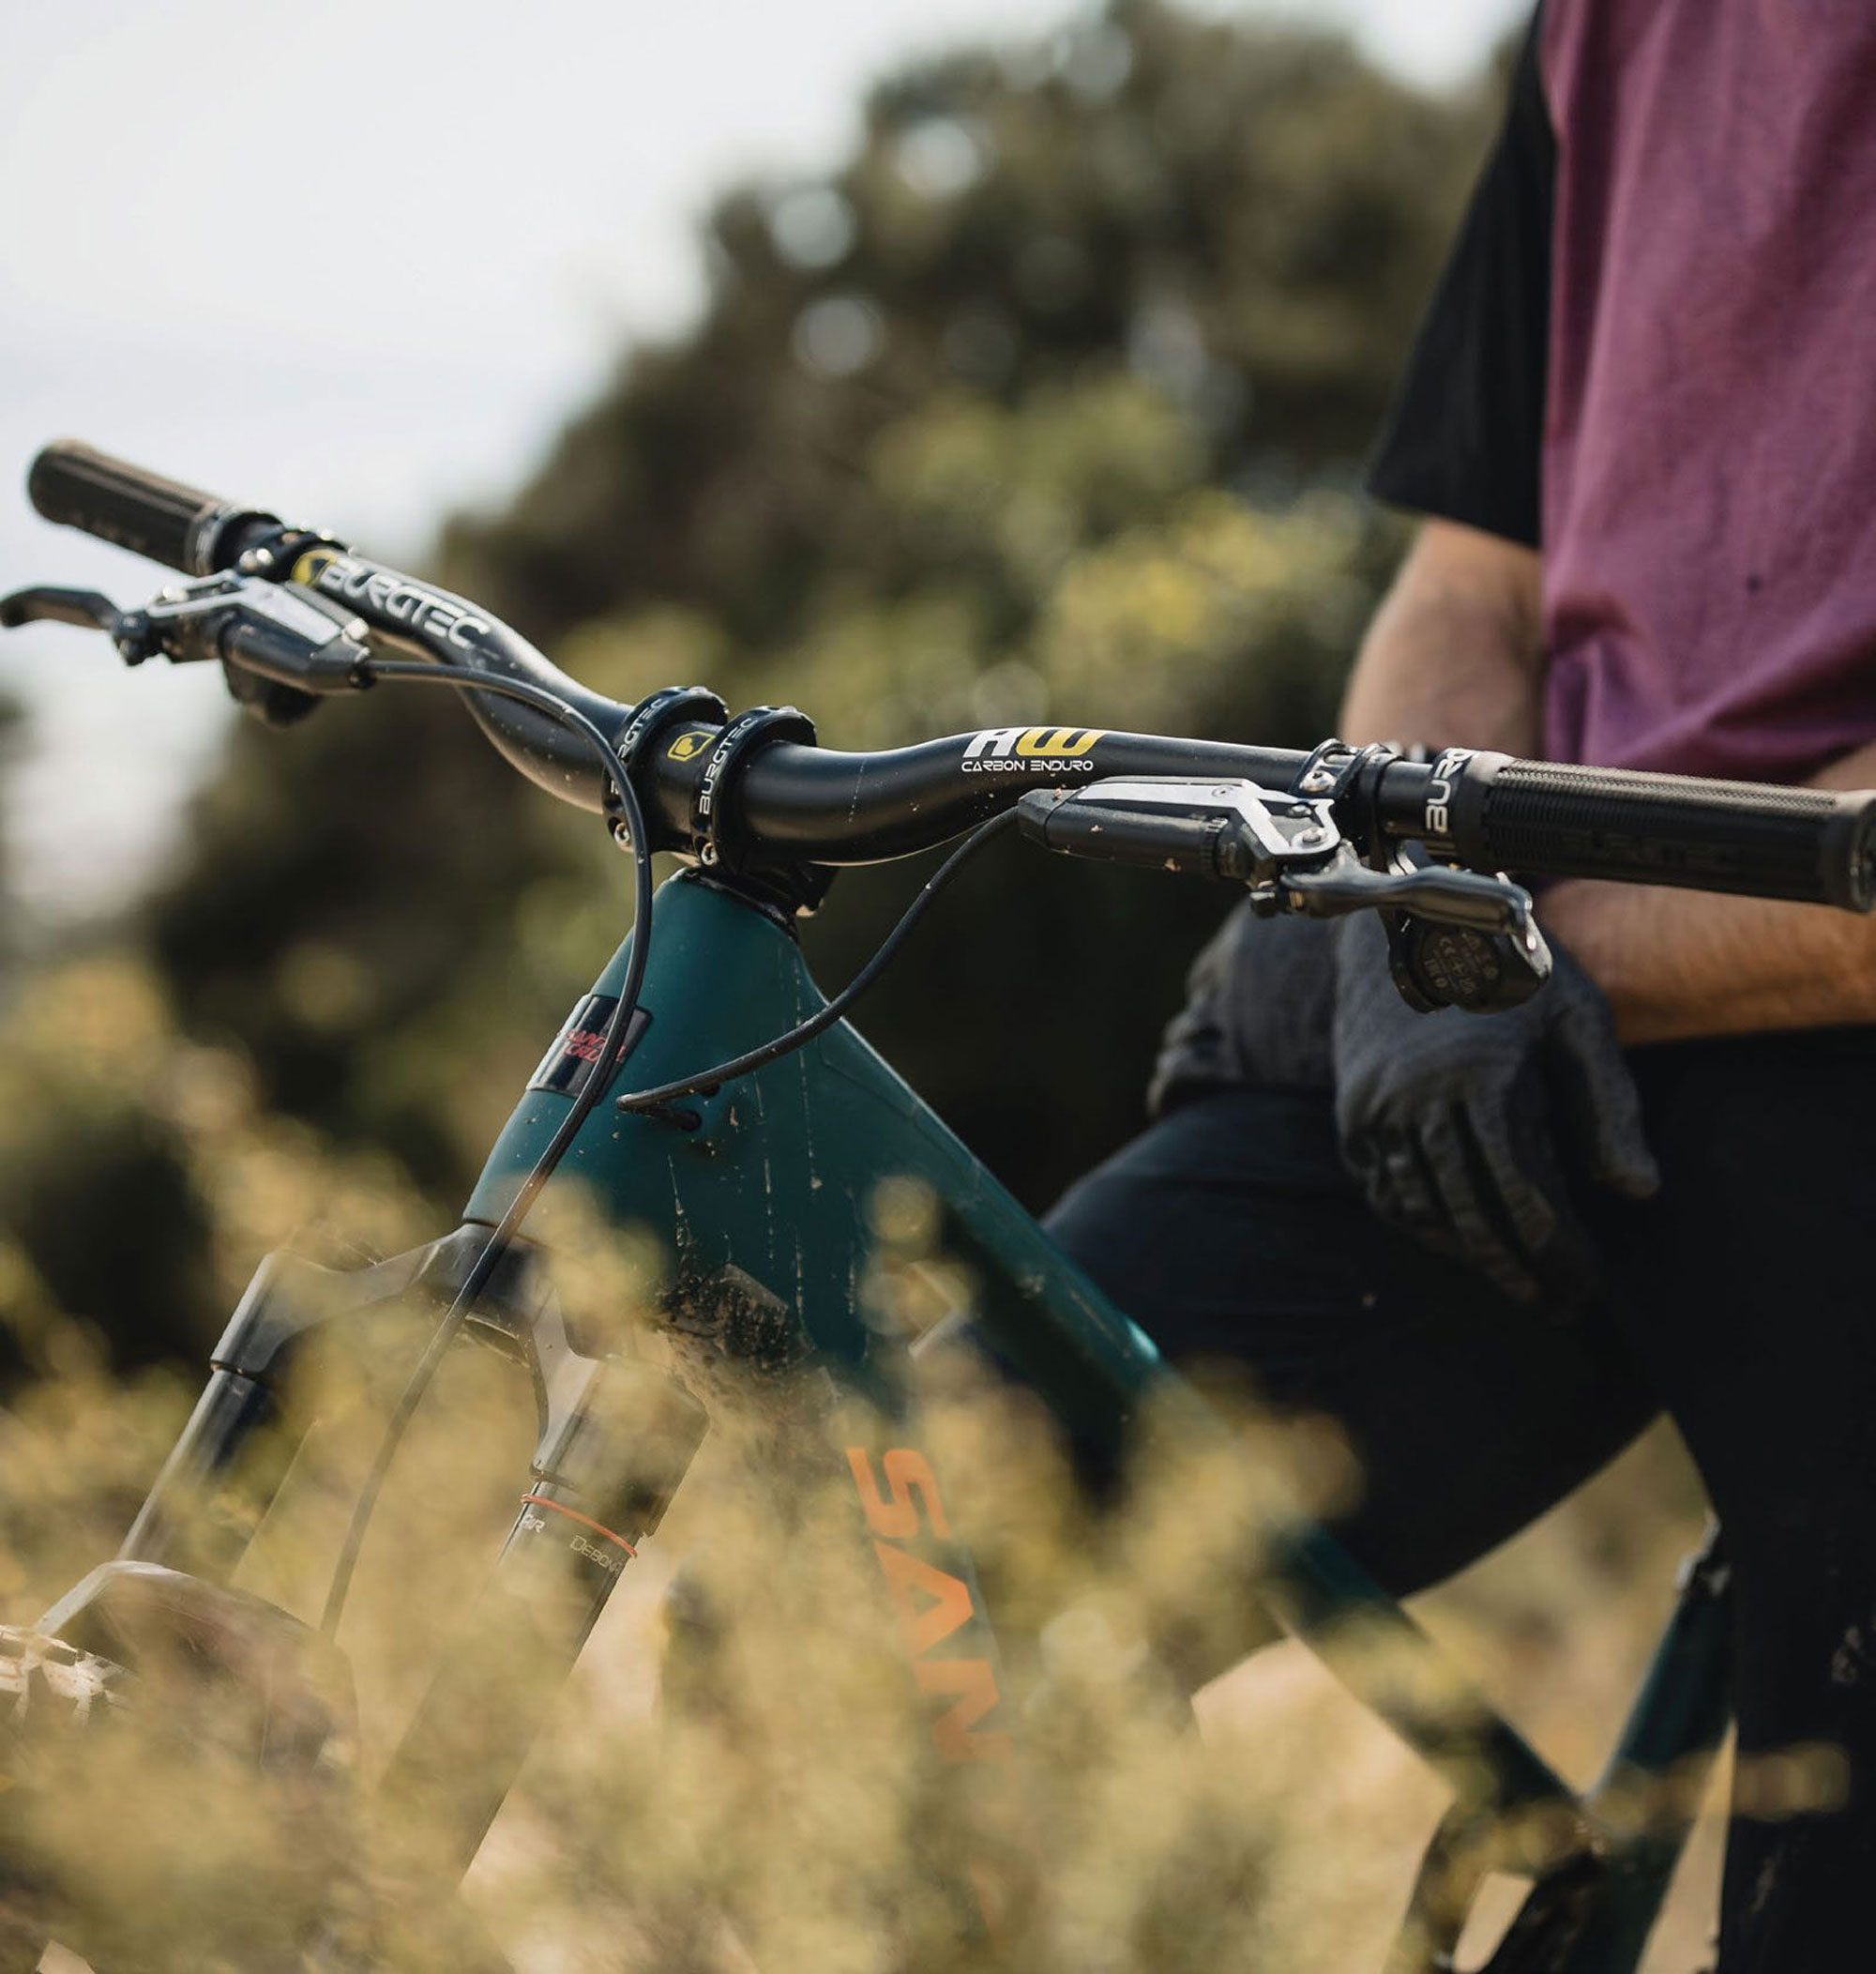
Burgtec Components are well known for their race pedigree. The UK based brand has been synonymous with downhill racing since ‘04. The Santa Cruz Syndicate, 50:01 crew and a large roster of riders have helped push the development of Burgtec’s sturdy component range that can stand high-level racing demands.
I have been riding Burgtec’s cockpit for the last few months. For a new Santa Cruz Hightower build, I went with a Burgtec Ride Wide Carbon Enduro Handlebar, Enduro MK3 Stem and Super Soft Greg Minnaar Signature Grips. Seeing that harsh UK trails helped to develop these products, I thought it would suit our harsh environment back home as well.
The Burgtec Ride Wide Carbon Enduro Handlebar is a full 800mm width bar made from Uni-directional carbon fibre, coming in at a respectable 258 grams. A 9-degree backsweep paired with 5-degree upsweep are familiar numbers to most, with a 30mm rise and 35mm clamp being the only offerings for this model. There are handy cut marks to help you trim ‘em down to whatever width you’d fancy, and some handy torque recommendations are in place to ensure you do not damage them.
The Burgtec Enduro MK3 stem is well suited for the current crop of enduro bikes and riders. Burgtec wanted a stem that offers the best amount of bar-to-steerer precision they could.
So, to stack up to these demands, without adding a heap of weight, Burgtec had to modify their manufacturing to include an initial forging stage, aligning the grain of the 6061-T6 aluminium and improving the strength and fatigue life in the process. Along with that, they added some bulk and length to the steerer interface -the bigger overlap helps with the stiffness.
To finish off the cockpit, I opted for Burgtec Super Soft Greg Minnaar Signature Grip. They enlisted the help of the GOAT who needs no intro. These grips were prototyped through the 2020 season and based on the World Cup winning pattern of the Bartender Pro, as used by Greg along with Nina Hoffman, Danny Hart, and Angel Suarez. The Super Soft is made up of a unique blend which fuses together additional suppleness with an extra tacky compound. It’s all in the aid of avoiding hand pain, even at the bottom of the rowdiest track.
Let’s turn the attention to how the cockpit felt on the trails. I’ve had this bike built for a few months now and every time I finish a ride, I want to get out for another one. Perhaps that’s just my current mood but, when you have good bikes and reliable components, it does bring more joy to your riding. The understated-with-just-enough-graphic- aesthetics of the cockpit is absolutely dialled in my opinion. But the looks do stack up. I found that there’s a nice neutral/natural feeling sweep, to the bars. They also felt nice and compliant – no harsh feel like other similar bars at 35mm clamp, which have felt overly stiff. The grips were damn soft and had a great overall feel with or without gloves.
The combination of the Ride Wide Carbon Enduro Handlebar and Enduro MK3 stem combination provides a noticeably direct connection between the hands and the front end, without a single hint of undesirable twist. As I indicated earlier, there wasn’t a harsh feel – even when venturing down some chunky, rocky terrain in the South Island. When the bike has been boxed up on the back of the rig, and thrown under other riders, the high-quality hardware with good tolerance shines.
The word ‘solid’ comes to mind for the Burgtec Ride Wide Enduro Carbon Handlebar and Enduro MK3 Stem. These are at the higher end of the price spectrum but will stack up to the demands of hard chargers without blowing your wrists apart. Of course, grips are quite personal but, for me, the Burgtec Super Soft Greg Minnaar Signature Grip feel superb and finish off the cockpit nicely. I only hope these don’t have to be returned.
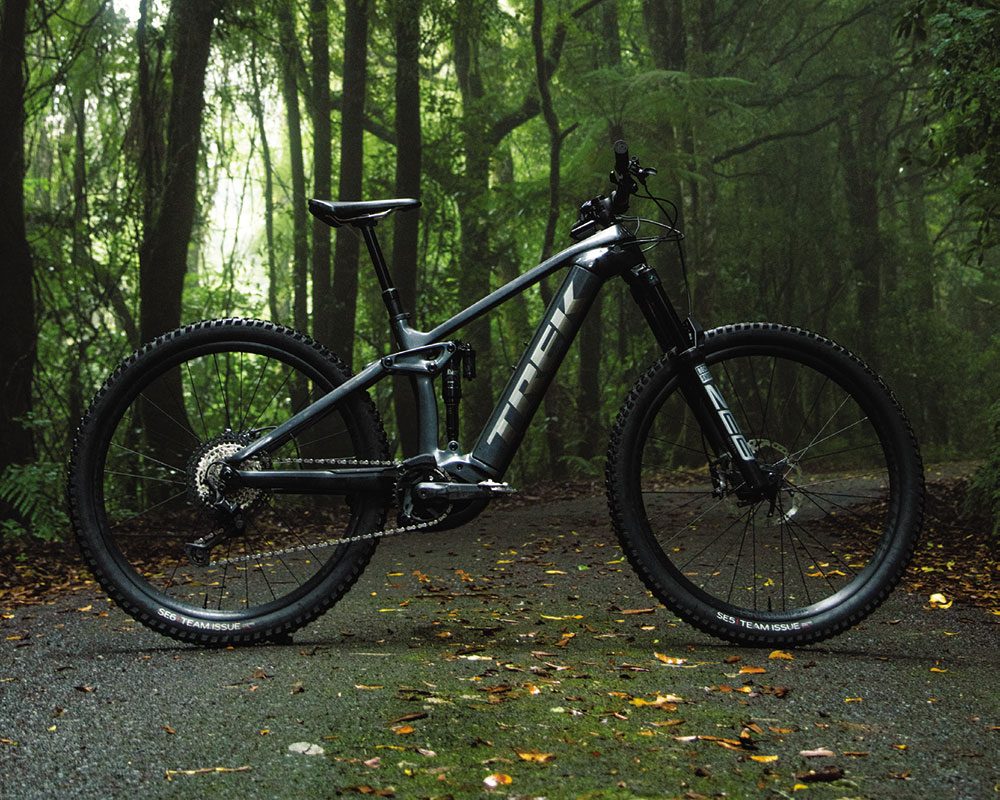
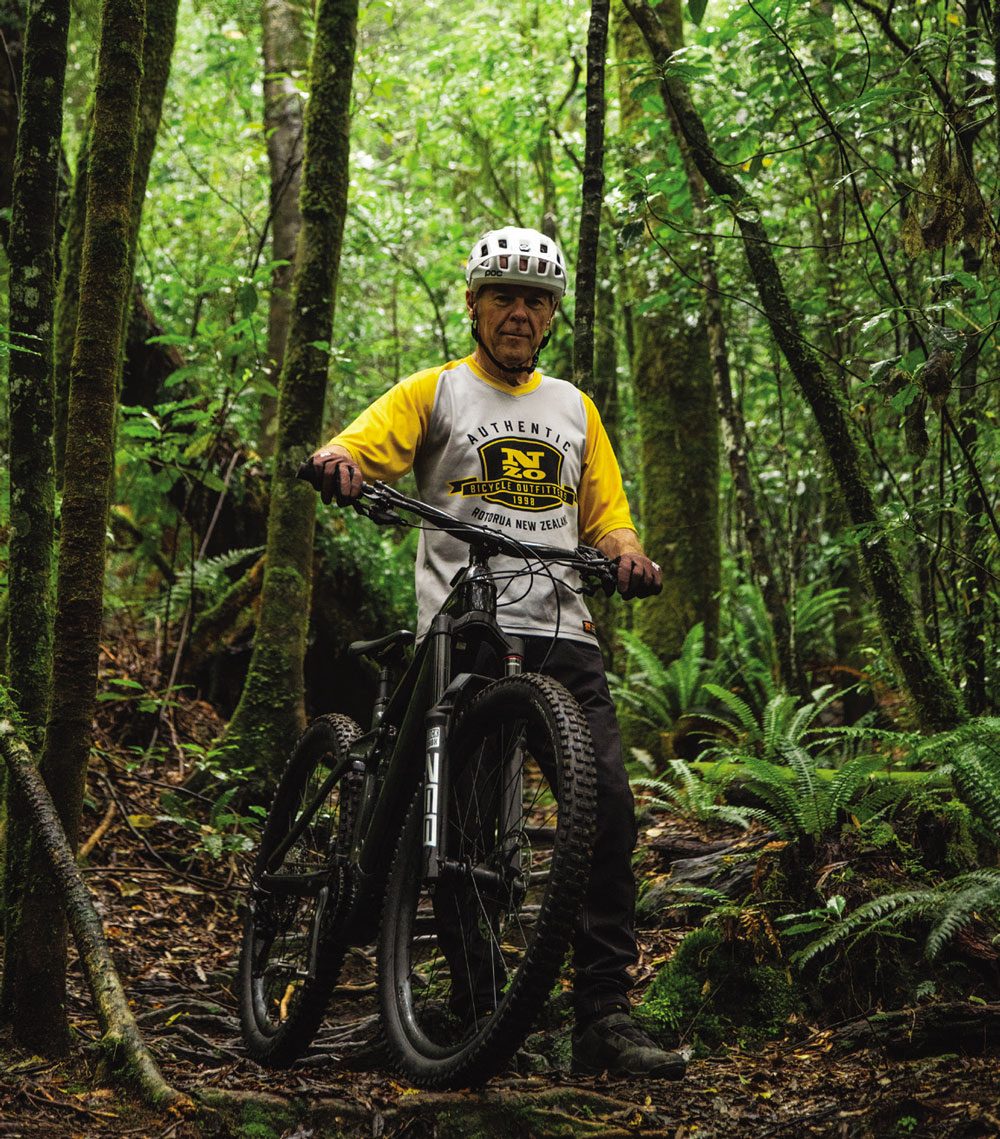
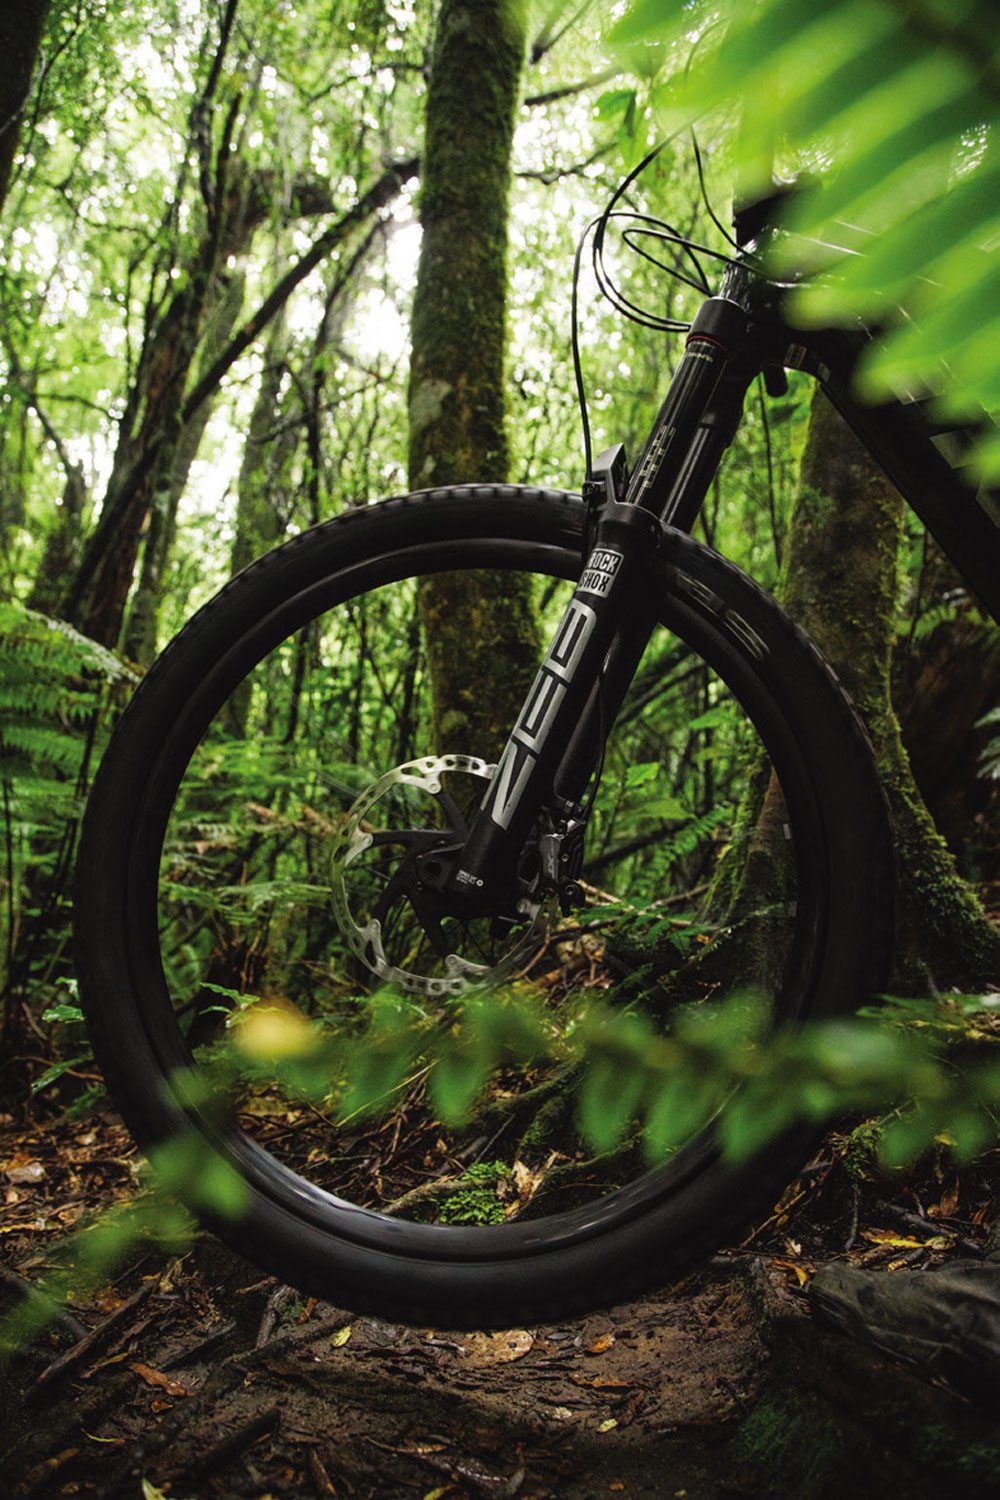
Trek Supercaliber SLR 9.8
Words Liam Friary
Images Cameron Mackenzie
RRP $12,999
Distributor Trek New Zealand
Flick back through your iCal to mid-2019, and the cheese-curd lovers from Trek bicycles in Madison, Wisconsin, would have just launched a category-defying, new cross-country race bike: the Supercaliber. A short-travel, full suspension bike that rivalled the efficiency of a hardtail, but with just enough travel to ease the blow when trails got spicy.
The bike carries the moniker from Gary Fisher’s OG Supercaliber, released for model in the year 1990. The Fisher brand, and Supercaliber name, were eventually acquired by Trek, after which it was filed away for several years, only to resurface on the first generation Trek Supercaliber in 2019.
To the uninitiated, the fresh Gen 2 Supercaliber looks almost identical to the first. The top tube is slightly straighter (rather than noticeably curved on the Gen 1) but the clean, racy lines remain – as does the heart of the bike: the IsoStrut suspension, this time bumped up by 20mm to 80mm travel. Gen 2 has some incremental changes across the frame material used, geometry, and specs. None of these things alone are groundbreaking but, combined, they’ve enabled a leap forward to modern times for the Supercaliber.
As World Cup level XCO courses have become more technical, the equipment used to compete has evolved. Where the previous generation’s 60mm of rear travel and subdued geometry was suitable back in 2019, it’s long been surpassed. Although Gen 1 is still a favourite for racers – and even some bikepackers – here in NZ, a few brands now have similar offerings and the Supercaliber has been left behind. Until now. This redesign brings the bike up to meet the needs of a modern racer while retaining the comparatively short travel and snappy handling of its predecessor.
The Supercaliber frame is now available internationally in two tiers. The premium SLR version features a low Fibre Areal Weight (FAW) achieved by using a higher-modulus carbon lay-up and less overall material. Intended for wireless gearing, the SLR sheds further weight by not incorporating internal cable guide tubes. All Supercaliber models feature the same IsoStrut swingarm and shock.
While visually the lines remain almost unchanged, the geometry has stepped forward into the modern age with the bike getting the now common longer and slacker treatment. Not one to push the boat out too far, Trek have slackened the head tube angle to 67.5 degrees from 69 on the Gen 1, and stretched the reach from 450mm to 465mm on a large size, with scaled increases across the size range. The seat tube angle gets bumped a minor half-a-degree steeper to further centre the rider’s weight, for climbing prowess.
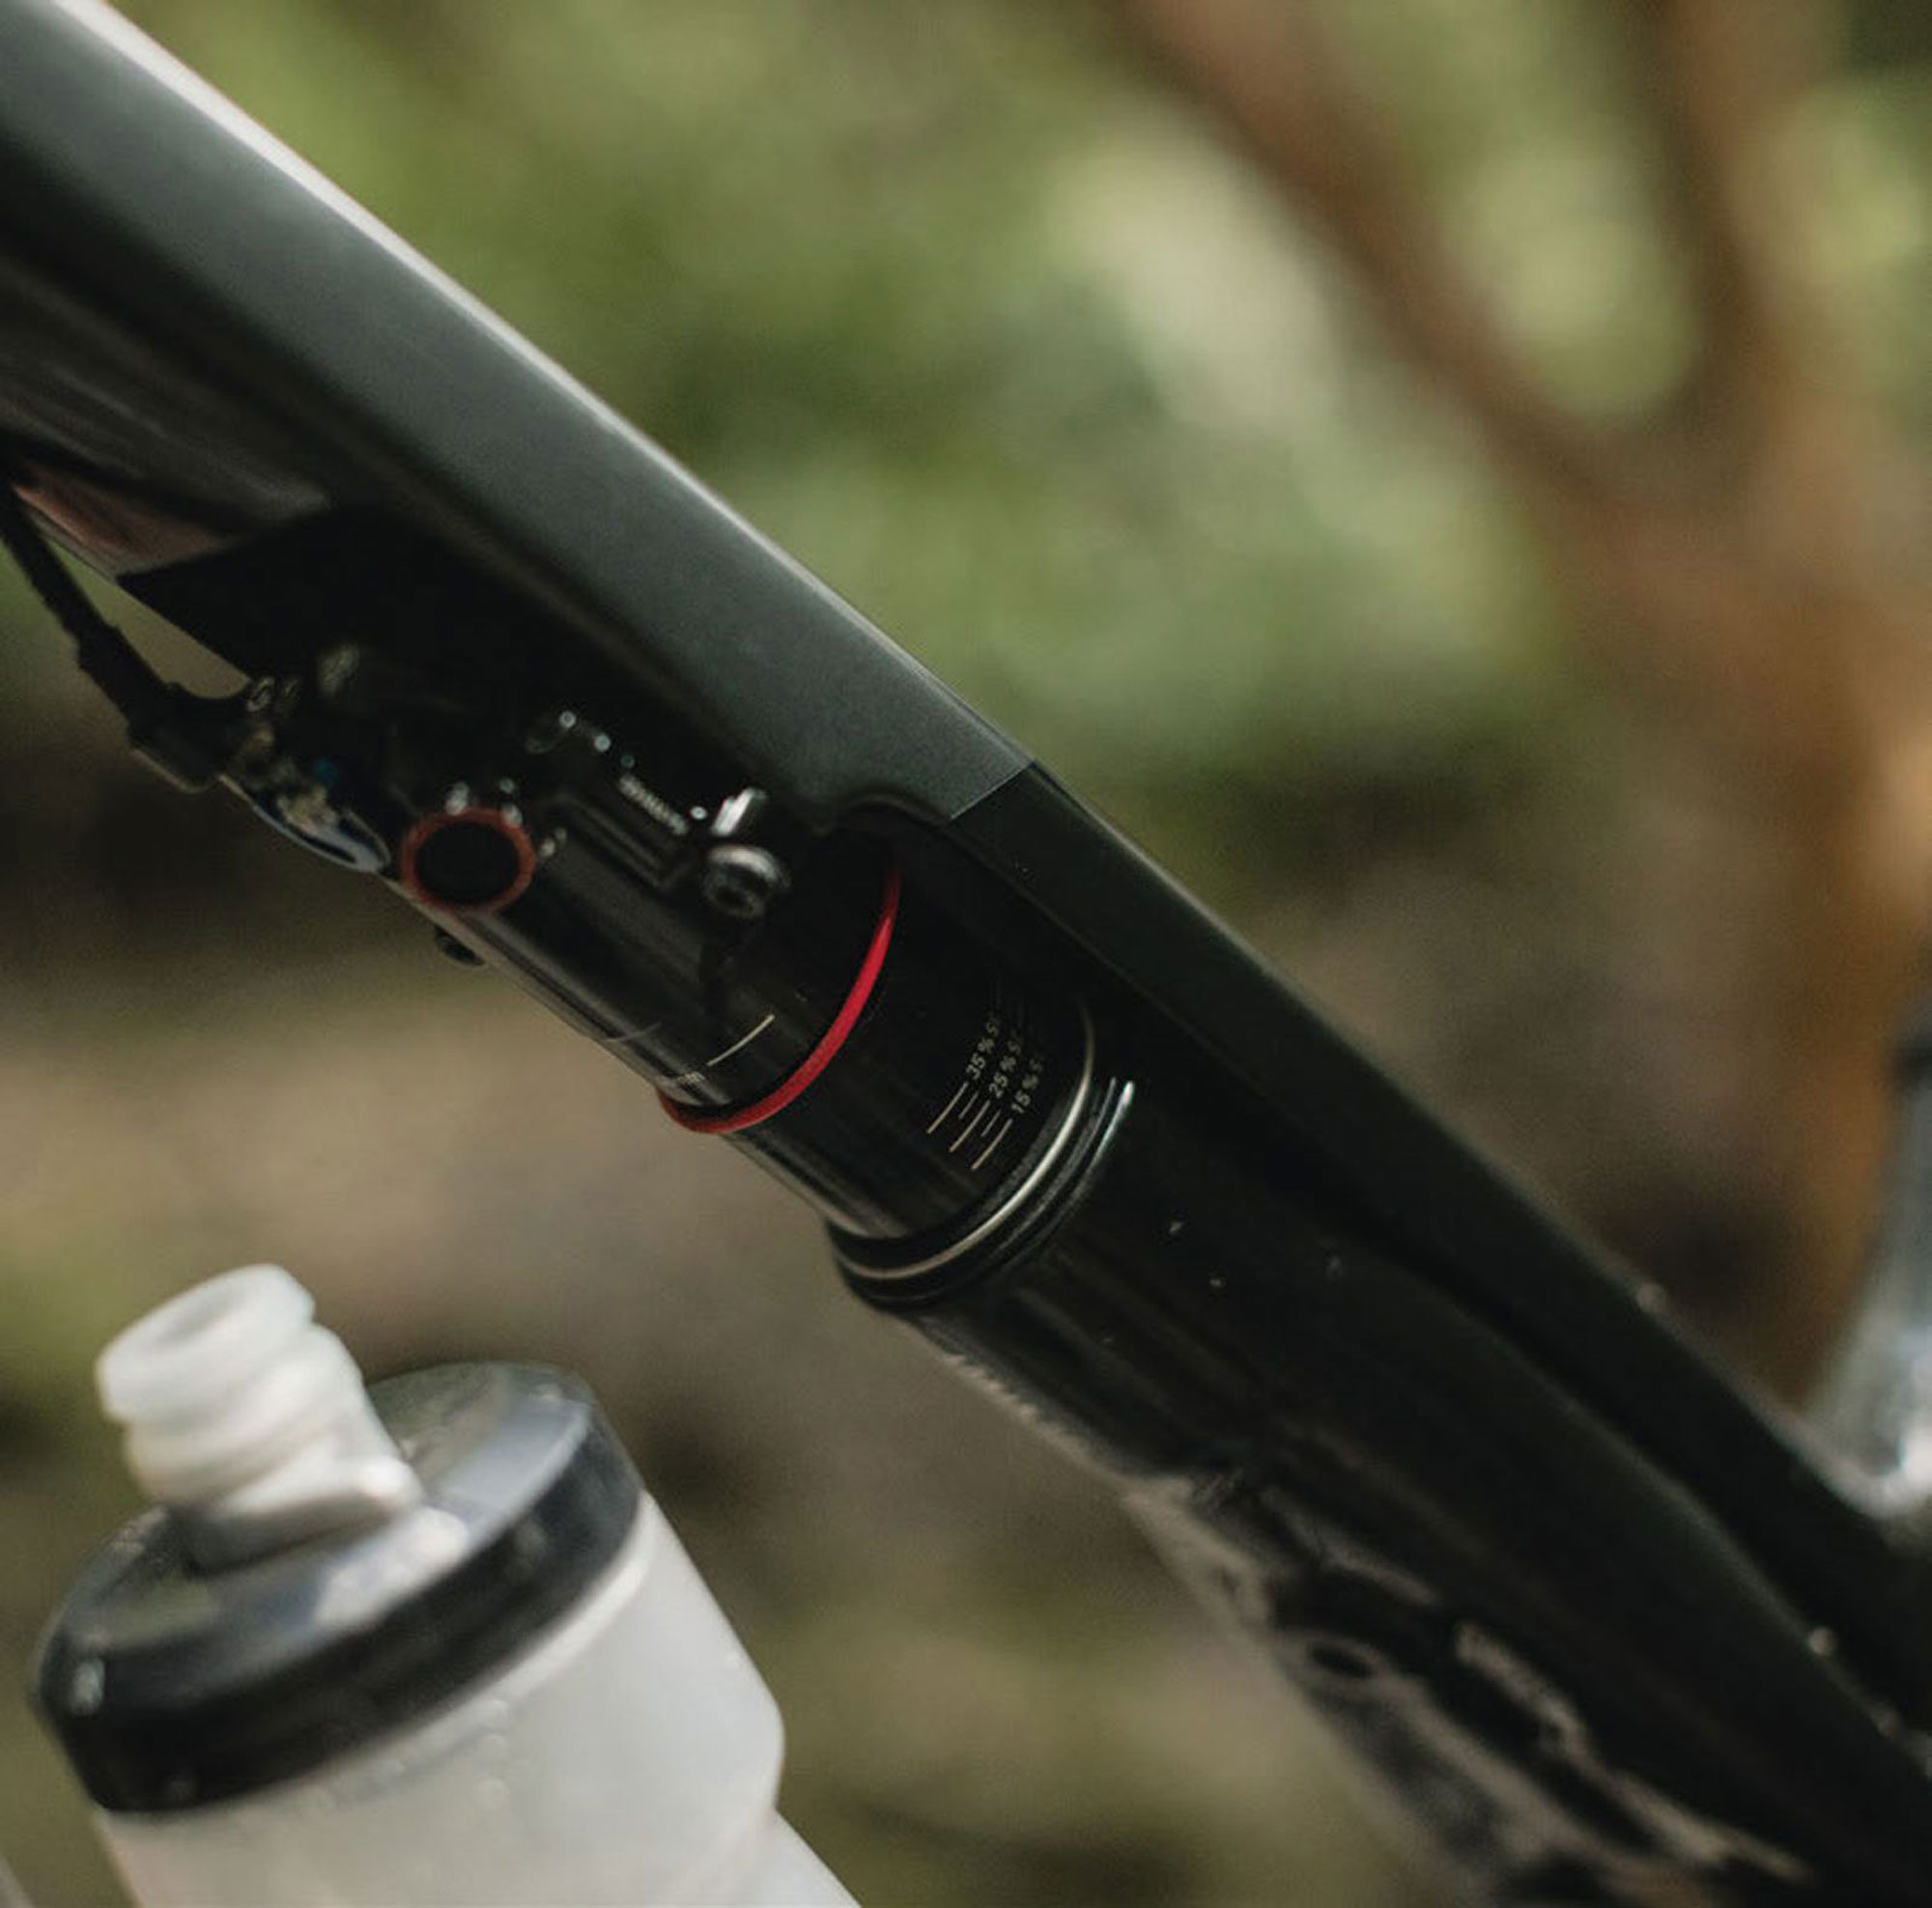
The swingarm is suspended by a frame-integrated RockShox SIDLuxe shock. New to the bike this year, it’s a bit simpler than the previous Fox edition and is now more easily tuneable. The shock is designed specifically for the Supercaliber but shares the same traits – even some hardware – as other Rockshox suspension products. The swingarm itself has no pivot at the rear axle, relying on the tuned flex of the seat and chain stays for its vertical compliance. The shock has 15-35% sag markers anodised on its stanchion, making fine-tuning for specific courses or conditions a simple, one-person affair. That lack of pivots on the rear triangle helps to bolster lateral stiffness and ensures every watt makes it to the wheel.
The back end of a bike is only ever as good as the front; the rear wheel follows the front after all. Up front, we find the new Rockshox SID fork with 110mm of travel – 10mm more than the previous – although the bike is designed to take up to 120mm. With a DebonAir spring and new Rush RL damper, I’ve found this fork more supple and active than my own bike’s previous edition SID Ultimate. I’ve got no qualms saying the new SID is as good as it gets for an XC fork. Stiff enough in all scenarios thanks to its 35mm stanchions, it tracks the ground exceptionally, helping the front wheel track and maintain traction, as well as easing the pain on the hands and arms of the rider.

Both the SIDluxe shock and the SID fork have lockout cables running back to the new TwistLoc Ultimate remote lockout. This new TwistLoc blows the doors off the vulnerable, previous editions. A twist towards the rider to lock, and away from the rider to unlock with a positive click, audible and tactile -perfect. My only comment on this new remote is that the cables exit at 90 degrees from the unit, upsetting the clean lines of the Stealth brakes and cableless AXS shifter – somewhat unsightly compared to the clean brakes, but at least it works well and is trouble-free, so far.
A trait of the IsoStrut suspension layout – and hiding the shock away inside the frame – is that there’s plenty of room in the front triangle for water bottles. I was stoked to see a 900ml bottle fit comfortably on the downtube of the large-size bike, even with a regular cage. A 600ml fits comfortably on the seat tube, although I did need a side loading cage to make it work smoothly. Sure, it would be good to fit a 750ml bottle on the seat tube but at least you’re better off than many bikes with only a single bottle.
Our test bike was a size Large. At 176cm tall, Trek’s size chart would suggest I’m in the middle of the bell curve for their M/L size, at the top end of M and right at the bottom of the recommended height for a Large, so there is some cross-over available depending on a rider’s particular attributes; i.e. leg, arm, and torso proportions.
Surprisingly, the Large size didn’t feel too big and unwieldy for me, although I imagine the M/L’s 15mm shorter reach and consequently shorter wheelbase might have increased how nimble the already snappy bike felt. A minor tweak I made was to swap out the supplied 175mm crank for a 170mm length. This is a somewhat personal preference, but it does seem a lot of top-end riders are going for a shorter crank these days too. It’s great to see Trek speccing a 170mm crank on the Small and Medium sizes, although I do wonder if the M/L should also be fitted with these. It’s nice to see a 34-tooth chainring specced, and there’s room to fit an Anton Cooper-esque 38-tooth if your legs are up to the task!
With the sizing out of the way, it was time to get set up and ride! Consulting the Trek website, their Suspension Calculator gave me some baseline suspension pressures to tune from. The bike was pretty spot on with the suggested settings, but I preferred a couple of clicks slower on the fork rebound, and a click slower on the rear. At the suggested pressure, the IsoStrut-supported rear end sat precisely at 25% sag.
During its maiden voyage, I found the back end a bit harsh over successive hits compared to my regular, more down-country style bike with 120mm rear travel. This was no surprise as it’s a completely different style of bike, so I upped the sag to 30% for my next rides and found this to be nicer for descending but not quite as efficient while climbing, although the lockout did the trick here. My thinking is that around 30% sag is ideal for a long day on demanding, rugged trails, a ride where optimal climbing isn’t the goal, or a shorter XCO track with substantial rough technical downhill sections. For a smoother course, or a marathon-type effort with limited rugged sections, 25% or firmer would keep things efficient and lively, offering enough kush to keep things controlled on the descents, but lightning quick on the pedally bits.
Pedalling efficiency is upped on the Gen 2, by a tweak in the main pivot position, moving it upward a touch and forward slightly. This seemingly small change has raised the anti-squat number considerably, meaning the suspension is less active while pedalling, absorbing fewer of your precious watts. The bike does really get up and go when you lay the power on!
The RSL one-piece cockpit is as polarising as a tyre choice. I’ve had people come up to me and slate the Bontrager one-piece bar/stem setup, and others approach me to tell me how much they like it. As far as the shape goes, I’ve found it fine and although different to what I’m used to, I adapted quickly. The Large bike gets a 750mm width bar moulded to a -13 degree 80mm long stem. The set-up is stiff, that’s no secret, but my gut feeling is bringing a more compliant bar to this cockpit party might change the bike’s handling a bit. The stiffness of the bars is in keeping with the overall stiffness of the frame and wheels, etc. So, while they might not be for everyone, I think given a few rides, correct suspension and tyre pressures, this cockpit helps bring the best out in the bike. I do wonder if the fact you can’t adjust the sweep of the bar by rolling it forward or back, relative to the angle of your arms, may mean that your arms sit at a different angle to the bars than optimal (due to overall setup). If you want to try a different length stem then you’re in for a new stem and handlebar too, but at least they’re simple to change with no crazy stem or headset cable routing here.
Trek’s mountain bikes are renowned for having short head tubes, and the Supercaliber is no different; 10cm on this Large, while XL gets a 12.5cm, and all other sizes a 9cm head tube. This allows riders to fine-tune their stem and handlebar height across a wide range. Go from pro-level slammed, to bike-packer high-rise handlebars with a simple swap of spacers. After my shakedown ride, I switched a spacer and dropped the stem 10mm from stock, putting a little more weight over the front end and seating me in a more comfortable pedalling position, without being too aggressive. I’ll likely drop another 10mm spacer out and lower the front end further as there’s plenty of room for adjustment and experimentation.
Being an out-and-out race bike it would be a waste to just take it out for some rides on familiar trails in an attempt to get an accurate gauge of how it rides. A rig designed to win World Cups is best tested in the exact scenarios where it’s designed to excel and be pushed towards its limits, something that’s not easily replicated outside of an actual race. With this in mind, I entered the inaugural Whangamatā Black Rock XC race. With 60km and 1800m of climbing, the 3-lap course was no joke. Granted, the bike is designed for shorter, punchier XCO-style races, but the reality is that, here in NZ, longer marathon-style events will likely make up a large portion of the race action a bike like this will see. It’s also likely to be popular with the bikepacking crowd, just as the Gen 1 was.
I had a good number of hours aboard the bike before the event, and was feeling pretty comfortable aboard this rocket ship, but actually putting it right in its element really gave me a true appreciation for just how good a bike of this level really is. Out of the start, we were tussling for the first single track, in and out of the saddle, avoiding a near pile up on the first corner. We were strung out entering the first single track climb. The SRAM GX Transmission is ideal in situations like this; whatever unfolds in front of you, you can rest assured that if a gear shift needs to happen, it will. I had no qualms firing through gears under full power, seated or standing.
Most of the trails in Whangamata are clay-based and certainly pretty spicy in the wet! After some rain the day before, I was stoked to see blue skies for race day and, although the majority of the trails were either dry or close to it, enough moisture remained in the dirt, in sections, to make things unpredictable at times. At first glance, I wasn’t sold on Bontrager’s new Sainte-Anne RSL XR tyres. The central knobs are very closely spaced for rolling speed, but the shoulder and side knobs are widely spaced and low profile. I wasn’t expecting much from them, particularly in the damp. Surprisingly, though, they hooked up adequately thanks to the combination of said tread pattern, a 220 tpi casing, dual rubber compounds, and the ability to run low pressures thanks to their large 2.4” volume. Traction was surprisingly good and, even in the few truly slippery sections, the grip was predictable. There wasn’t really any section of trail I felt the tyres were majorly lacking, but they certainly excelled on dry hardpack and gravelled sections, maintaining speed really well. For a properly wet race, I’d be opting for something with deeper tread for sure. The tyre volume, coupled with the Kovee Elite wheels’ 29mm internal width, offered sure footing even under the heavy G-forces when railing some of Whangamata’s seriously good berms at full pelt -no tyre roll or sketchy moments.
There’s certainly something special about the feeling you get from racing a bike like this. When you really put the boot in and power up a short, sharp, technical climb, it just feels like every watt you’re putting into the pedals is propelling the bike forward; no flex, no suspension bob, just pure unadulterated forward momentum. One particular section at the Black Rock was a prime example of this; a climb through a section of forestry slash and up a sharp pinch back into the pines. Turning right into the slash, a majority of your speed was scrubbed off and you were presented with 100m or so of partially covered logs and scrap, creating steps and obstacles to navigate your way across, up and over. Rapidly laying down the power, the bike shoots forward, the transition hopping up a step to full-gas pedalling nearly instantly thanks to the Freehub’s 108 points of engagement. I’m a huge fan of the Bontrager hubs; simple and effective. The overall light weight helped me hop over obstacles and up over the final pinch – again, out of the saddle, under full power and on a loose clay surface. The bike was well and truly designed to dominate techy sections like this, and the momentum I could carry quickly extended the gap to the riders behind.
Climbing gravel roads, or smoother consistent- grade trails, is undoubtedly a strength of the Supercaliber. Its low weight, suspension kinematic and prime seating position combine to create deadly efficiency that helps you stay on top of your gear for longer. Coming off my longer-legged, heavier bike the difference was considerable and over the length of the Black Rock XC, climbing was where I made most of my gains in the field – most unlike me. With that said, it never gets easier… you just go faster! As efficient as this bike pedals, I found locking the suspension out on smooth sections helped get the most out of every pedal stroke, particularly when running the 30% sag, and there’s enough give whilst locked out to not beat you up too much.
Descending from the top of the main climb, we had the choice of two lines: to the left the A-line, a fall-line style section with no clear main line and a snake pit of roots crisscrossing the entire descent – and it was plenty steep. To the right side of the A-line is the B-line – a clean, digger-built, flow-style trail; it’s longer but faster and, overall, the time difference between the two lines is negligible. On the first lap, I took the left line. Having not pre-ridden any of the course, I wasn’t sure what to expect. This A-line was where I started to figure out what this bike is about on the downhills, and it highlighted that descending isn’t just about suspension travel. When it’s pushed, its minimal-yet-effective 80mm of travel has enough forgiveness to confidently hold a line. Aided by how stout the entire package is, and its modern geometry, the bike holds a line well and is balanced and stable while descending. No wet-noodle, flexy XC frame here. In these exact scenarios, I’ve ridden longer-travel bikes which handle much worse and suck your confidence by flexing and twisting under the heavy braking and the hits they’re taking. Situations like this are where the stiffness of the one-piece cockpit shines; a distinct lack of flex helps you keep things pinpoint and accurate. On this descent, I was thankful for the dropper post. It’s 150mm travel allowed me to get the saddle right out of the way on the steeps – props to those pro guys who still run fixed posts on gnarly trails! My only gripe on the Bontrager dropper post, is that the remote doesn’t integrate well at all with the SRAM brakes. It functions fine, but the clamp does interfere with the Stealth Brakes master cylinder, limiting how much adjustment you have with the remote. I couldn’t quite get it where I wanted it, but made it work.
For the laps following the first one, I opted for the B-line: a smoother, safer option while fatigued. This line was the highest speed section of single track in the race and gave a great indication of how the bike was at speed. The entire package felt solid through the upper highspeed berms and predictable off the jumps that followed. Further down the descent, however, some choppy gave a real-world example of the shortcomings of short travel. Under heavy braking, and through a section of braking bumps, the rear suspension felt somewhat harsh, causing the tyres to break traction and skip across the tops of the bumps. It wasn’t a big issue as this was basically a straight section of trail but, if it was much wetter, the lack of traction could have been a real issue coming towards the corner at the bottom of the section! This situation does highlight how the bike is bred more to take the place of a hardtail than be a supple descending machine – the suspension travel certainly has a damped feeling, as it needs to be with only 80 millimetres of it.
On the subject of braking; I was glad to have some time aboard SRAM’s new Level Bronze brakes, particularly their new Stealth levers. I’ve never been a huge fan of SRAM’s XC-oriented brakes, the lever feel was hard to get right and once you finally achieved a good, powerful feel, it only lasted a few rides then you needed to tune them again. Touch wood, but so far I’m impressed with these new units. The lever shape is familiar, but the feel when braking is more positive than previous and overall there’s plenty of power on offer when needed, if they’ve sorted the longevity issues these are a winner.
A small, partial floating brake mount is used on the rear, feeding the braking force to the chainstay and rear axle, keeping the braking forces from interfering with the flex in the swingarm. This brake mount seems to work effectively, but there is more torsional flex under braking than there would be from a traditionally mounted calliper. This doesn’t appear to affect the braking power, although at times it does affect how the brake feels. The front brake has a 180mm rotor stock, which is welcome, as many XC bikes are fitted with 160mm rotor up front. The rear rotor is 155mm stock, the max size allowable being 160mm. I’d personally like the ability to upsize rotors on the rear; giving heavier, real-world riders more stopping power, and helping slow down fully laden bikes when loaded for bike-packing, although it looks like there’s simply no clearance to do so.
The Supercaliber gave me an appreciation for how good bikes are getting these days and highlighted how it’s no one thing that makes a bike like this excel, but the sum of everything; frame, components, and geometry. The engineering team at Trek appear to have designed the bike as a whole system, with all parts complementing each other rather than designing a frame and haphazardly speccing it out. Had any of the elements been lacking I think the experience could be different.
The Whangamata Black Rock race was an awesome experience and, with its varied terrain, was a great way to put the Supercaliber under real-world review alongside training on it in the buildup. Although the Supercaliber has been designed more for the punchier 1.5 hour efforts of World Cup competition, it was well suited to the endurance-type effort of the Black Rock. If you’re looking for a race bike for any breed of XC race here in NZ, the Supercaliber would sure do the trick – don’t be put off by the small travel number as the geometry and handling well exceed bikes of longer travel.
If it were mine: I’d ride the M/L size, throw a set of 170mm cranks on there, have a set of gruntier tyres for wet racing, and try a standard stem and handlebar to see what difference there is. I’d fit a dropper remote compatible with SRAM’s brake lever clamp and a handlebar-mounted rear vision mirror so I could watch my competition as they disappear behind me!
Unfortunately, this bike removes any excuse for poor performance but, at least nothing is holding you back from that podium… aside from your own fitness and skill.
That’s a big tick from me on the Supercaliber. It’s not perfect – but it’s pretty damn close. The team at Trek might have a hard time prying it from my greasy mitts!
Bike Review: Trek Rail 9.8
WORDS: GAZ SULLIVAN
DISTRIBUTOR: TREK NZ
RRP: $12,999
I am not privy to the think tank at the centre of Trek Bikes, so what follows is pure guesswork, but here goes: Nearly two decades ago, Trek broke ranks and named their flagship trail bike after the top category of that very American petrol-head sport of drag racing. From its very beginnings, in the 1940s, the simple competition between two vehicles over a standing start quarter mile has been a technical arms race. And, the first thing those early hot rodders did to get an advantage over the guy in the other lane, was to figure out how to use something more volatile than pump petrol into the engine.
The stuff they focused on is nitromethane. Various amounts of it definitely makes more horsepower. Mixed with a number of other ingredients to make engines start reliably and not tear themselves apart immediately, nitro was called ‘the poor man’s supercharger’. Then they added superchargers, and squeezed phenomenal power out of a V8 motor.
To differentiate the entrants running on regular petrol from the engines running on anything else, a category was added to racing classes called ‘Fuel’.
If there was any doubt that Trek was referring to nitro when they named the Fuel line, they dispelled that by adding a model called Top Fuel a few years later: that is the name of the blue ribbon event of drag racing, the fastest, most explosive, and most specialised class of the sport.
The first dragsters were simple contraptions, usually a 1930s Ford with the body removed and the engine set back toward the rear of the vehicle, and some sort of crude accommodation for the driver, aft of the engine. Because the main members of the chassis were frame rails, the cars become known as ‘rails’. As things got more sophisticated, and custom-made machines were fabricated from lightweight tubing, the name stuck. The fastest things on a drag strip were rails.
When Trek launched its flagship eBike, they slapped the name ‘Rail’ on the top tube, further cementing my belief that any other possible meaning associated with the name could be ignored: it was another tip of the hat to the dragsters.
The latest incarnation of the Trek Rail is the third iteration of a simple design, based on the time-proven system shared by the Fuel and the Slash. Like its four-wheeled namesake, the design is fairly brutal and unapologetic. No attempt is made to hide the Bosch power plant, and the Rail 9.8’s massive 750 watt battery is an obvious part of the bike’s architecture, not really hidden in the gargantuan down tube. It’s an obvious eBike, and wears its heart on its sleeve.
To further connect the bike to its hot rod DNA, is a sparkly metallic ‘prismatic’ paint job and big decals that look like chrome.
Out of the box, the 9.8 has an epic set-up. A full carbon frame offers 150mm travel and is teamed up with a RockShox Zeb fork, providing 160mm travel up front. It comes with a tough Bontrager 29 inch wheelset that stayed true and gave no trouble over a three month review period where I clocked up over 1100kms on the bike. It is possible to mulletise the bike with the assistance of a Trek dealer to make the necessary adjustments to the Bosch system for correct speed readings and power output. Mostly Bontrager components wear a full set of Shimano XT shifters, drivetrain and brakes.
Geometry is aimed at going fast on trails: a head angle of 64.2 degrees in the low setting of the adjustable rear suspension flip chip Trek calls a ‘Mino-Link’, and a longish frame reach of 45.2 cm.
The Bosch Performance CX Line motor has a reputation for reliability and, on the trail, it was surprisingly quiet compared to other eBikes I have shared rides with. The Bosch motor does emit a fair amount of clatter on downhills, however.
The details are nicely handled, a removable battery has a pop-out handle for carrying it indoors for charging, or to keep it safe while your sled is hanging on the back of the truck. You can access the internal cable routing while the battery is out. The bike has a neat little flap over a charging port on the seat tube, so you can charge it while the battery is installed.
Charging takes quite a few hours from low to full charge, but is worth the wait once you get on the trail. The battery is a seriously well-endowed source of grunt.
Last year, I was lucky enough to write up a NZ Mountain Biker review of the Trek Fuel EX e, and I was amazed by how much I liked the e-assist. I reckoned the Fuel EX e was the ideal bike for a mountain biker, with a bit of fitness and experience, looking to go a bit further or squeeze more trail out of a busy schedule. Now I can directly compare the EX e to the Rail, and I think that still holds true.
The Rail can take anybody to the top of just about any climb with comparative ease. But, put it in the hands of a rider with a bit of fitness and experience, and riding it becomes a different sport.
The brute power of the bike is amazing. I found myself looking for very steep things to ride up. At 85nm of torque it isn’t the most powerful bike available, but I am not sure more power would be much use – it’s fun figuring out how to dole out the horses without overcooking the available traction.
The range of the bike is equally impressive. My last outing before the sad day I had to hand it back was a case in point.
I rode 62.6kms, climbed almost 2000m, and averaged over 20km/hr. Most of that was on-trail. There is no way I would have chosen the route I took on my pedal bike, and if I did I would have been out for a very long time.
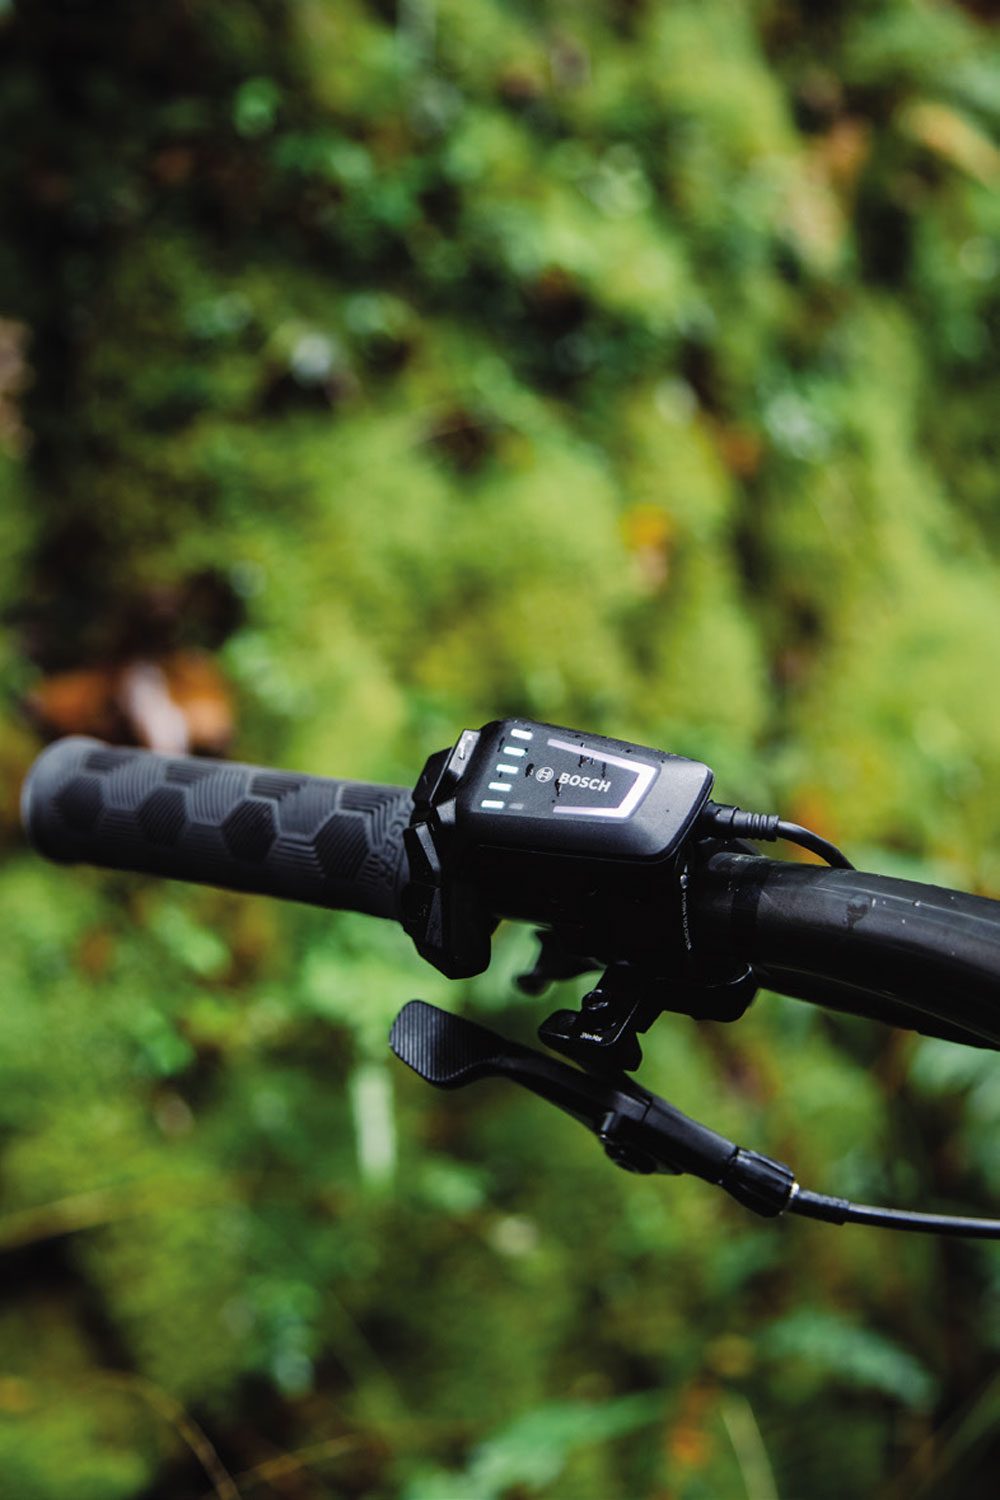
The Bosch Smart System – which the 9.8 shares with the XTR 9.9 Model – is a slick and feature-packed interface with the bike’s power system. A clear readout panel sits on the top tube. A neat little cluster of buttons sits out by the left grip, with on/off on top of the cluster, two buttons for moving through the display options, an ‘ok’ button – which also acts as a scrolling button for the display screen – and two buttons for choosing the power mode. In addition, the control cluster has a colour-coded LED graphic that lets you know what power mode you are in. More on that later!
There is a lot of information available via the display. The first screen shows battery percentage, power mode and current speed. Toggle the selector through the screens and you get similar info in more detail: larger readouts of battery level, distance covered this ride, distance remaining at current power mode, current and average speed, current and average cadence, and much more.

The system integrates with an app available for a more modern phone than the vintage iPhone I was using at the time of the review, so I can’t say how that works. Based on how slick the system is in use, I expect it is good.
The modes of power available on the 9.8 are the same as the rest of the Trek Rail line. You have Eco, Tour, Emtb, and Turbo. In my dozens of rides aboard the Rail, I can’t say I ever used Eco. I am sure it would be useful for something, when that mode is selected the range claim is over 100 kilometres. But, seriously folks, this thing is an eBike, so why not E the snot out of it?
The ride I mentioned earlier, that covered a good chunk of my local patch and included some very hard climbing, was completed in Emtb all the way.
Emtb is the sweet spot. It is intuitive, an attempt by Bosch to determine what the rider is trying to do, dishing out power as optimally as the onboard computing can deliver. Like the other modes, it measures the watts the rider is putting in and multiples them, but it also responds to short and extreme bursts by continuing to supply power if the rider backs off briefly, making short work of tricky root sections on steep climbs. Once a rider becomes accustomed to this delivery of extra power it is really useful for conquering technical climbs.
I tried Tour mode from time to time on rides, and noted that the assist is similar to Emtb but gentler, and the range is increased. Turbo is full power, but Emtb has the same power when you need it and just feels better and more natural.
The extra weight of the bike is only really apparent when lifting it into the van, or if it ends up on top of you – which, I confess, happened to us a few times. On the trail, the e-assist easily overcomes the 23.4kilograms of heft, and I think the extra weight down low makes going downhill on the bike a lot of fun.
The suspension design of the bike teams up with the RockShox dampers to deliver a well-balanced ride. The Zeb fork is a good partner for a big bike like the Rail, with stiff 38mm legs keeping the front wheel going where you point it. The custom-tuned Super Deluxe shock out back has a thrust-shaft design that provides a very supple feel.
The generally-downhill-oriented geometry of the bike makes hauling ass a lot of fun on any trail, and I was surprised how often I came up against the only minor riding niggle I experienced with the Rail. It is speed-limited at 32kph for the New Zealand market. At that speed, the power simply stops being delivered. On the EX e that speed-limiting factor was easy to ignore because the power system is disengaged from the pedal power of the bike. The Rail has a different approach, so when the motor stops assisting, you are driving the motor with the pedals. It goes from punching you forward to feeling like a real drag on the pedals, instantly.
The Rail is a bike that I liked immediately, and grew to like even more as the test period extended. Because the bike was in the shed, and I knew at some point it wouldn’t be, I rode it almost exclusively. Switching back to the pedal bike was tough, because the power of the Rail is so front-and-centre of the ride experience. Getting used to the speed of the bike on all sorts of terrain made getting aboard a plain old mountain bike feel very slow and drab.
A couple of rides on the regular bike removed that feeling, and all was well with the world – but the rides that are on tap with the Rail make a strong case for having one in the rack.
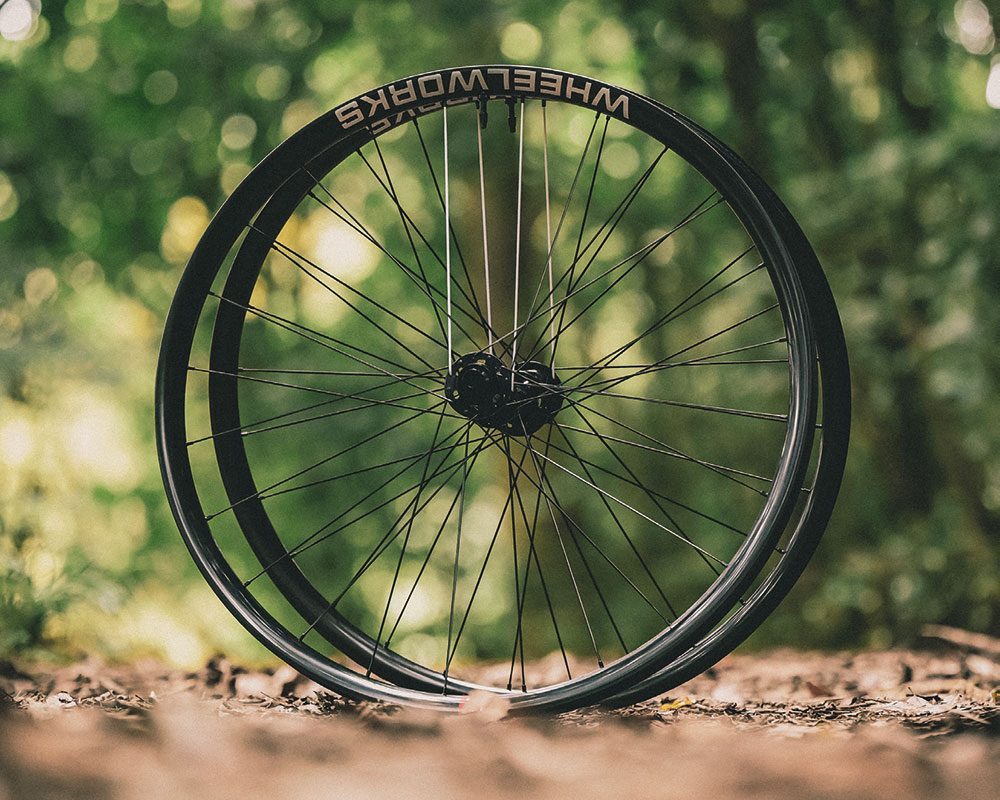
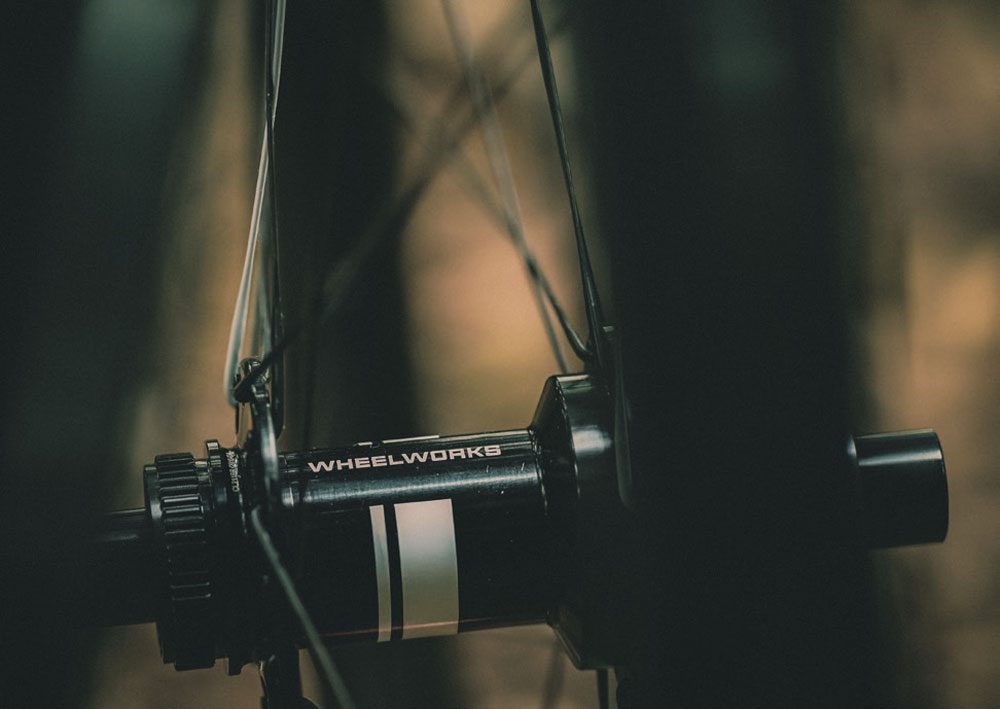
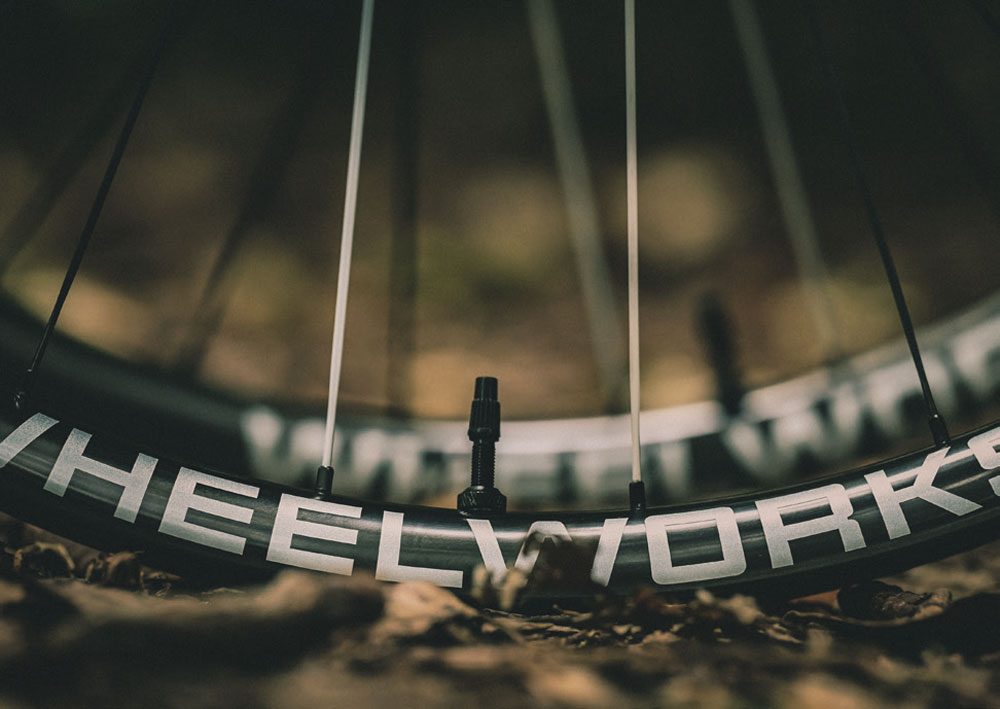
Product Review: Wheelworks TrailLite Carbon & TrailLite Alloy
WORDS: LANCE PILBROW
DISTRIBUTOR: WHEELWORKS
RRP: $3350 WHEELSET
Wheelworks has been at their game for 20 years, and their trademark ‘Wheelworks’ rim decals have become something of an icon in the New Zealand cycling scene.
“They cost how much?!” My mother-in-law gasped as I revealed the price of the latest Wheelworks carbon wheels I had hanging from the wall in my garage workshop. My mother-in-law is a casual cyclist, eBikes opening said door, but the idea of anyone spending $3350 on a pair of wheels seemed, at the very least, bizarre in her mind.
“What exactly do they do?” she asked.
“Well, I guess they roll like any wheel”, I replied. “But they’re also very light; they’re made of carbon fibre, and they’re built right here in New Zealand. They’ve got an amazing warranty, unlike anything else really,” I replied.
Yes, these were probably the most expensive hula hoops either of us had laid eyes on, let alone touched. “And people buy these?” she asked again. “Yes,” I said, enthusiastically. I felt like arguing the merits and value of these shiny new wheels – that I had been drooling over ever since they arrived –was not something even my persuasive self could achieve, so I quickly steered the conversation back towards the firm favourites of most parents-in-law: politics, Jacinda, COVID, the usual.
What is value in our sport? It is something I have been mulling over, particularly as I’ve had these Wheelworks wheels on review for the past few months; undoubtedly the most expensive single ‘component’ I’ve reviewed in my fifteen or so years working as a writer in the mountain bike industry. Pulling up at the trailhead, I felt a little like how the owner of a Ferrari or a Lamborghini might feel as they pull up in the parking lot, with people actually saying out loud to me, “nice wheels!” Yes, yes they are very, very nice wheels.
Before we get too deep into philosophical discussions about value, let’s talk a little about wheels and why Wheelworks, a small New Zealand company based out of Willis St, Wellington, sent me their latest creations. Wheelworks has been at their game for 20 years, and their trademark ‘Wheelworks’ rim decals have become something of an icon in the New Zealand cycling scene. With a small team, they have been able to focus on doing what they do – building the best quality wheels they can, slowly iterating and improving their products – to carve out a niche in the marketplace. Over the years, their own in-house products have been designed with the typical Wheelworks attention to detail, and they’ve become renowned for their exceptional quality and strength. They’re the kind of company that, when you ask around about them, you don’t hear anything but good reviews.
A recent overhaul of their products led to something of a streamlining of options, and I was lucky enough to be asked to review and compare their new TrailLite Carbon and TrailLite Alloy wheels.
So, a quick overview. The TrailLite Carbon wheelset comes in at 30mm internal / 36mm external width and it runs 28mm high. The carbon rims were matched to Wheelwork’s own Dial hubs and laced with DT Swiss Aerolite spokes. For comparisons sake, I was also sent a set of new TrailLite Alloy wheels as well, the same build but with an alloy rim instead of carbon.
Both sets came with red decals on the hubs, a small red ‘TL’ (TrailLite) icon, and a larger silver Wheelworks logo that follows the arc of the rim. These are all customisable to match whatever colourway your bike is – because you know we like to be all matchy matchy. They came pre-taped and with valves installed.
Before they’d even arrived I was able to experience first-hand the way Wheelworks operate. A phone call with Wheelworks ensured I was able to discuss all aspects of my riding to make sure they had as much information as possible to get me on the right set of wheels: my riding style (do I take the ‘b’ lines or absolutely huck everything in sight?); my bike and travel (is this going on an XC racing whip or an enduro sled?); riding intentions (do I want these to survive multiple seasons of enduros, or am I prepping for the Whaka 100?); oh, and without getting too personal… how much do I weigh? All this information helps Wheelworks get their customers on the right wheel, with the right build, at the right price. But the question still has to be asked – these are a $3350 wheelset, so why do people buy Wheelworks wheels over any of the other boutique brands that are available? I was able to put these questions to Andrew Ivory, one of the Wheelworks team, over a Zoom, and it really helped me understand the unique space that Wheelworks occupy in an increasingly crowded market.
First of all, it’s always going to be positive that they’re local. Most of us would prefer to buy New Zealand made products (their rim manufacturing, like most carbon products, is done in China it should be pointed out) if we can find items of similar quality at a comparable price. Supporting New Zealand companies always feels good. But it’s more than just ‘feeling good’, for Wheelworks this means that they can offer after sales services that are in a league of their own. Yes, they offer a lifetime guarantee on their carbon wheels. That’s great, but a few other companies do that too. A Wheelworks warranty, it should be pointed out, isn’t just for a manufacturing fault, it’s for any impact damage. If you ‘case’ a jump and destroy your wheel; if you break the carbon rim of your Wheelworks wheel while riding it; they’ll replace the rim and rebuild the wheel at no charge. That’s saying something. So often companies try to find a way of passing on costs back to the consumer; “yes we’ll replace the rim, but you have to pay to get it built up” for example. This real commitment to stand by their products is something they can offer without fear, because with 20 years’ experience in the business they know, they just see so few wheels they have built ever come back.
But, it goes on; if your wheel ever simply goes out of true – they’ll true it up for you at no charge. If a nipple breaks, if a spoke breaks – they’ll replace them at no charge. So yes, it’s a lot of money for a wheelset but, in a way, it’s the last wheelset you might ever need to buy and you’ve got a lifetime of free servicing to go with it. Oh, and as they obviously carry plenty of stock of all their products, they can usually offer same day repairs, or get it back out on a courier to you in 24 hours. With the current wait times you experience at most bike shop service departments, this is really impressive.
Wheelworks have tried to create something special with these wheels. Not all carbon rims are created equal, Andrew informed me. Over the years, dealing with all the different brands and intrepidly exploring, getting their own carbon rims manufactured to their specifications, they have seen it all. And it isn’t all rosy. At one point in the company’s past, they were returning up to a third of the rims they received back to the manufacturer as they didn’t pass their own quality control standards. That led them to move to other manufacturers and, Andrew told me, now they have a great manufacturer whose quality is outstanding. But what makes their rims unique? Isn’t it just a fancy hoop with a bunch of holes in it? No, not really. For the TrailLite rim it’s the specific way in which the carbon and resin is laid up, and then the precision with which the spoke holes are also drilled that sets Wheelworks apart. The spoke holes are all drilled, if you can imagine, with their final spoke path in mind. Once Andrew explained it to me, it started to make sense; spokes don’t run from the rim perpendicularly to the centre of a circle, they run at a slight angle to where they lace to the hub, which isn’t quite the centre due to the way wheels are laced with a cross-over pattern. What’s more, putting the wheel on its other axis, the spokes run ever so slightly to the left and the right to allow for the width of the hub. Wheelworks carbon rims are drilled taking all of this into account so that the nipples sit neatly against the rim and don’t rub or pull with uneven tension. Also, rims are designed specifically for front or rear use, with the rear rims being designed with more strength and impact resistance in mind. The attention to detail is true of their Dial hubs, with flanges angled to help the spokes align directly to the rim, and perfectly chamfered edges to hold it securely. They are also designed with ease of serviceability in mind.
It’s hard to talk about anything in the bike industry without referencing what it weighs. The Wheelworks Carbon TrailLite wheelset I rode weighs in at 1650g grams, and the alloy set at 1830 grams. The carbon front rim weight is 405 grams and the rear, 490. Dial front hubs are 135 grams, and the rear, 290. If you’ve had any interest in a new set of wheels it’s likely you’ve started to read up on the various options out there and maybe even started a little spreadsheet tabulating the weight of the myriad of options out there. (To compare it with something at a similar price point, a Reserve 30SL wheelset has a claimed weight of 1723 grams, built with i9 Hydra hubs.) 1650 grams for a trail bike wheelset is certainly light, but it’s not veering into the category of ultra-light, which is maybe around the 1300 – 1400 gram mark. This really reflects a big part of Wheelworks’ market, and where the TrailLite product is targeted; riders who tend to be people who do all manner of things – the odd XC race, a bit of bikepacking – and just generally orient their life around getting out on the bike as much as possible. The type of people who want a wheelset that is reliable enough to be used in any and every situation but is still light enough to make a bike feel like it’s come to life.
This was pretty much my experience with the TrailLites. I first put them on my bike a few days before an impromptu entry into the Whaka50 and couldn’t help but appreciate what they did to my ‘down country’ bike. The acceleration that a lighter wheelset offers became noticeably apparent when using them over a longer course like the Whaka, with lots of climbing. It was especially noticeable in sections where the terrain took me through short and sharp ups and downs; I felt like I was much more able to keep a good speed up pinchy little climbs at the end of the race where I was used to slowing down to more of a ‘just survive’ grind through the final climbs. After this, they endured a summer of riding, with plenty of opportunities to enjoy the way a lighter weight wheelset makes a bike accelerate out of corners, carry a little extra speed into corners and pop a bit further off of anything that looks like a jump. I couldn’t help but think that the carbon TrailLites also seemed to hold their line through off-camber terrain with a greater ability than the wheelset they had replaced on my bike.
The alloy TrailLites were interchanged with the carbon wheelset with the intention that I would be able to review these in something of a side-by-side way. This was always going to be a difficult task, as it sounds like some sort of science experiment that is being done in a controlled environment. The reality is it’s anything but controlled and there’s no way of keeping tyre pressure, suspension pressure and trail conditions the same, let alone the way any particular ride unfolds. All this is to say that real world side-by-side testing that claims to provide anything scientific is maybe more aspirational than data driven. In terms of on-trail performance, the best I can offer in terms of a comparative statement is that the lower weight of the carbon wheels did indeed seem to translate into on-trail ‘liveliness’, and I appreciate that’s a suitably vague statement! Perhaps what this also reflects, is how impressed I was with the alloy TrailLites too. At around $1850 – depending on your build – the TrailLite alloy version gets a lot of the Wheelworks benefits: working with a great company and getting custom wheels expertly built; an amazing after sales service and warranty. Putting them on my drop-bar bikepacking MTB, I felt like the weight savings were less apparent in terms of acceleration, as my bikepacking bike tends to be ridden on gravel roads with more consistent speeds; there is simply less braking and accelerating compared with typical mountain bike terrain, so you simply aren’t trying to bring the bike up to speed so often. This made the lower priced alloy TrailLites seem more appealing for that application, and the carbons more appealing for pure mountain biking, if your budget allows. The Dial hubs have run flawlessly through the test, and I personally liked the ‘precise’ sound to the freehub. It’s moderately noisy in a good way, with a satisfying zing about it, but it doesn’t make a big deal of its presence either.
It’s worth mentioning that chasing weight savings really can be chasing your tail in mountain biking. In one sense, we’re seeing lighter and lighter wheels, and on the other we’re putting wider and heavier tyres on our bikes. You could argue that keeping wheels light means that even with heavier tyres, wheels aren’t getting heavier and heavier. What’s maybe more interesting, is the way that eMTBs might play a role in how we think about wheels. With the average eMTB carrying 20kgs or more of weight, and typically smashing into things with more momentum, having correctly built and tensioned wheels is going to be essential.
Speaking of smashing things, I did in fact accidentally do my best to take Wheelworks up on their warranty. Mucking around on dirt jumps with my kids one day, pretending I was 16, it all went wrong. I came up horrendously short, one wheel either side of the dirt jump landing. Mid-air I knew that what was to come was not going to be pretty. The impact was severe, and I was reasonably sure I would be couriering the wheels back in pieces. But once I dusted myself off and hobbled over to my bike, I was amazed (and relieved) to see the wheels still running true – which is a real testament to their build quality.
Buying a set of wheels isn’t something you do as just a casual upgrade, like getting a new derailleur. It’s a serious investment and one that you do only when you really need to. The TrailLite wheels are going to appeal to a lot of riders who are comparing their options, especially those who are building a bike up item by item. I’m thinking these will be particularly appealing for people who are looking to invest some of their budget where it’s going to make a noticeable difference, and especially so if they dabble in things like bikepacking – where gear failure can leave you stranded in the middle of nowhere. (Having replaced multiple spokes on a friend’s bike in the middle of the Timber Trail, midway through the Kopiko, I can attest first-hand how serious this can be). It will mean different things to each of us, but to be able to speak to people like Andrew and their team on the phone, talk through all your interests and intentions, and for them to bring their wealth of knowledge to help you explore your options, is fantastic. I genuinely got the impression they weren’t simply about selling expensive wheels, but were trying to find solutions that worked for individual riders, whatever their budget was. The option to be able to demo wheels before buying them is something else that is really unique too, and reflects their commitment to outstanding service.
Six months is actually a pretty decent amount of time to be given to review a product in the typically fast turnaround deadlines of mountain bike media, but it’s still short enough that it’s hard to give anything particularly useful in regard to assessing claims about long-term reliability. I’m really encouraged that Wheelworks are going to leave the carbon wheels with me to do an even longer term assessment of their reliability, but if understanding Wheelworks ethos and my initial testing is anything to go by, there are going to be many happy miles of rolling to come.
Bike Review: SRAM Eagle Transmission XO Groupset
WORDS: LIAM FRIARY
PHOTOGRAPHY: JAKE HOOD
DISTRIBUTOR: WORRALLS
RRP: $3,315
The mountain bike world is constantly moving forward. The sport is – and has been – defined by progression. I mean, without it, we wouldn’t be riding the bikes nor the trails we are today. SRAM’s Eagle Transmission takes the term ‘progression’ to a whole new level. I think the real standout thing about this product is a statement from SRAM’s PR homie, Chris Mandell, who said, “we (SRAM) didn’t have to change the hanger, but we wanted to have better, more precise, accurate and robust shifting”. And so, several years back, the development started.
Sometimes progression is misguided and, as we know, there’s a heap of new products with a ton of claims that don’t really seem to add any value. However, getting rid of the derailleur hanger with the new Eagle Transmission groupset, and solving adjustment issues, has value. The evolution hasn’t relented in the past two decades and, it’s fair to say, most parts and components have been overhauled, making them lighter, efficient and more robust. The drivetrain and, especially, the rear derailleurs and corresponding cassettes have undergone significant improvements, offering huge gear ranges and fast, reliable shifting. So, as the key player between the derailleur and frame it’s fair to say the derailleur hanger has seen some development – but it’s been lagging. Especially when you consider the wide range gears of modern derailleurs. Also, nearly every bike brand uses their own hanger design, which sometimes requires adjustment of the rear derailleur. This can often mean messing around with the upper and lower stops, or the B screw, because if the rear derailleur isn’t shifting like it should, you need to set the distance between the upper pully and the cassette. And we haven’t even delved into the realm of dropping or knocking your derailleur hanger, which can make it bend and render it bloody hopeless.
SRAM’s Eagle Transmission aims to solve all these issues by removing the hanger altogether, thanks to its hangerless interface. The Eagle Transmission derailleur mounts directly to the thru-axle, however, it’s not all that simple to get this transmission on your bike. You will need to have a UDH derailleur hanger. Now, I’m not here to write an essay about it, but more to give you my first impressions of riding the new groupset over the past four months. For more, check out the feature (page 40) about the SRAM ride camp, and we will aim to bring you more ongoing tests of the groupset throughout the year. In the next issue, I will go more in-depth about the new cranks, chainrings, chain, and the longevity – I will also add my take on the new SRAM Code Ultimate Stealth brakes.
Late last year, I was contacted by Chris Mandell (SRAM PR) to get a UDH bike ready for his upcoming visit to Aotearoa. I scrambled around and managed to wrangle a media Trek Fuel EX bike, which we fitted out with SRAM Eagle Transmission XO groupset.
My initial riding impressions of the Eagle Transmission, was that it shifts more efficiently and has a mechanical shift feel. Let me elaborate on those points in a reverse order.
The Eagle Transmission groupsets have new controllers, now called ‘Pods’. There are two models – Standard Pod and Ultimate Pod. They both look similar, but you can change the rubberised button caps on the Ultimate Pods and adjust the ergonomics of the buttons. Also, there are two clamps for mounting the Pod. The standard clamp connects the Pod to the brake. You can move the Pod in and out to a certain extent, moving it towards or away from your hand, as well as rotating the horizontal axis. Alternatively, you can make use of the so-called Infinity Clamp, which is a separate handlebar clamp. You can rotate this in almost any position and attach it in every conceivable way. Here too, the Pod can be rotated infinitely around its own horizontal axis. The whole thing tightens up with a single Torx T25 bolt. Additionally, on the inside of the Pod, you’ll find a button for the MicroAdjust function, which allows you to fine-tune the derailleur, shifting it inwards or outwards in 14 increments. You can still adjust the assignment of the buttons using the SRAM AXS app, or use the traditional AXS controllers if you don’t get along with the new Pods.
The shifting on the new AXS Pods is different when compared to the previous generation of AXS controllers – its more defined, and firmer. They give better feedback and have a definite click. This is thanks to rubberised caps and the different ergonomics options – it’s much clearer about which button you’re pressing. This became evident when getting rowdy through a tough technical rock section. The more I have used these Pods, the more I like them – and this became more noticeable when switching back to the previous generation of AXS controllers. They just make more sense in terms of the ergonomic perspective.
Let’s move onto the shifting. Out the gate, the functionality of the Eagle Transmission groupset is a very clean shifting process, however, there’s a slight lag when compared to conventional shifting. There’s a reason behind this: the chain of the new transmission will only shift once it has reached the perfect point on the cassette. So, when you press the button on the Pod, it doesn’t necessarily make the rear derailleur move immediately. This does depend on your gear choice and your cadence when shifting. But we’re talking fractions of a second and it’s barely noticeable after you’ve ridden it for half an hour – now I don’t even notice it. The flip side to this, is that it allows you to shift unhindered, and keep pedaling at full throttle.
Out with the old ways and in with the new era – you no longer need to back off the pedals every time you’re shifting. This is quite a big change and it’s supreme in practice. Also, this is super- convenient and promises to massively increase the longevity of your drivetrain – especially on an XC bike or eMTB. Sometimes, when shifting more than one gear, it feels like the derailleur delays the process ever so slightly – so you think you’re done and then it shifts into another gear. The reason behind this, is to maintain its precision and keep the chain engaged with a maximum of two cogs at once. You can delete that knocking noise and associated vibrations you get from conventional derailleurs when shifting under load.
The groupset has been flawless. During the four months I’ve tested it for, it’s been smooth and quiet all that time. That’s no joke – I’ve travelled with the bike up and down the country in cardboard boxes and it’s been on and off my rig a ton, and that’s before I even mention the relentless riding. I think I noticed the biggest change when I went back to continental shifting – it becomes apparent that you need to back off the pedals to shift. For me, the shifting under load is massive gamechanger. After a while you unlearn the old ways of shifting, and this shifting becomes intuitive.
I was clearly lying earlier, as this is now becoming an essay – so let me bring it to a close with some final words about robustness. During the test period I didn’t manage to rip off any of the rear derailleur, and would bet it’s near impossible to do so. I bashed the derailleur around and it has come away unscathed, apart from a few cosmetic scratches. It rides unfazed about any disturbance, even when directly stood on – Chris did this during one of the ride camp days and showed us that even when it’s stood on you can pick it up and ride off without any drama whatsoever. I have shown a few friends this trick over the test period and it impressed them, but what was more impressive was that I could get back aboard my bike and change gears. This derailleur is bloody tough and performs incredibly well.
SRAM have done well at removing the parts off the trail that are annoying – like adjustment requirements – and delivered on impeccable, reliable and robust shifting. Yes, the price is damn high, but given the innovation, quality and precision, you’re not going to be disappointed.
Trek Evoke Clothing
WORDS: LESTER PERRY
DISTRIBUTOR: TREK NZ
RRP: $239 (SHORTS), $79 (TECH TEE)
“I reach for the same few pieces of kit each time I’m headed out to the trails; the cream rises to the top…”
Even though I have a fair mountain of riding kit in my cupboard, I’m beginning to realise how little of it I actually regularly use. I reach for the same few pieces each time I’m headed out to the trails. The cream rises to the top and, provided I’ve done my laundry, then it’s unlikely I’ll delve too deep into the pile to use anything other than my unintended favourites. Recently, a new set of kit has made its way into my rotation, though: the Trek Evoke tech tee and the Trek Evoke shorts have become some of my regulars for trail riding.
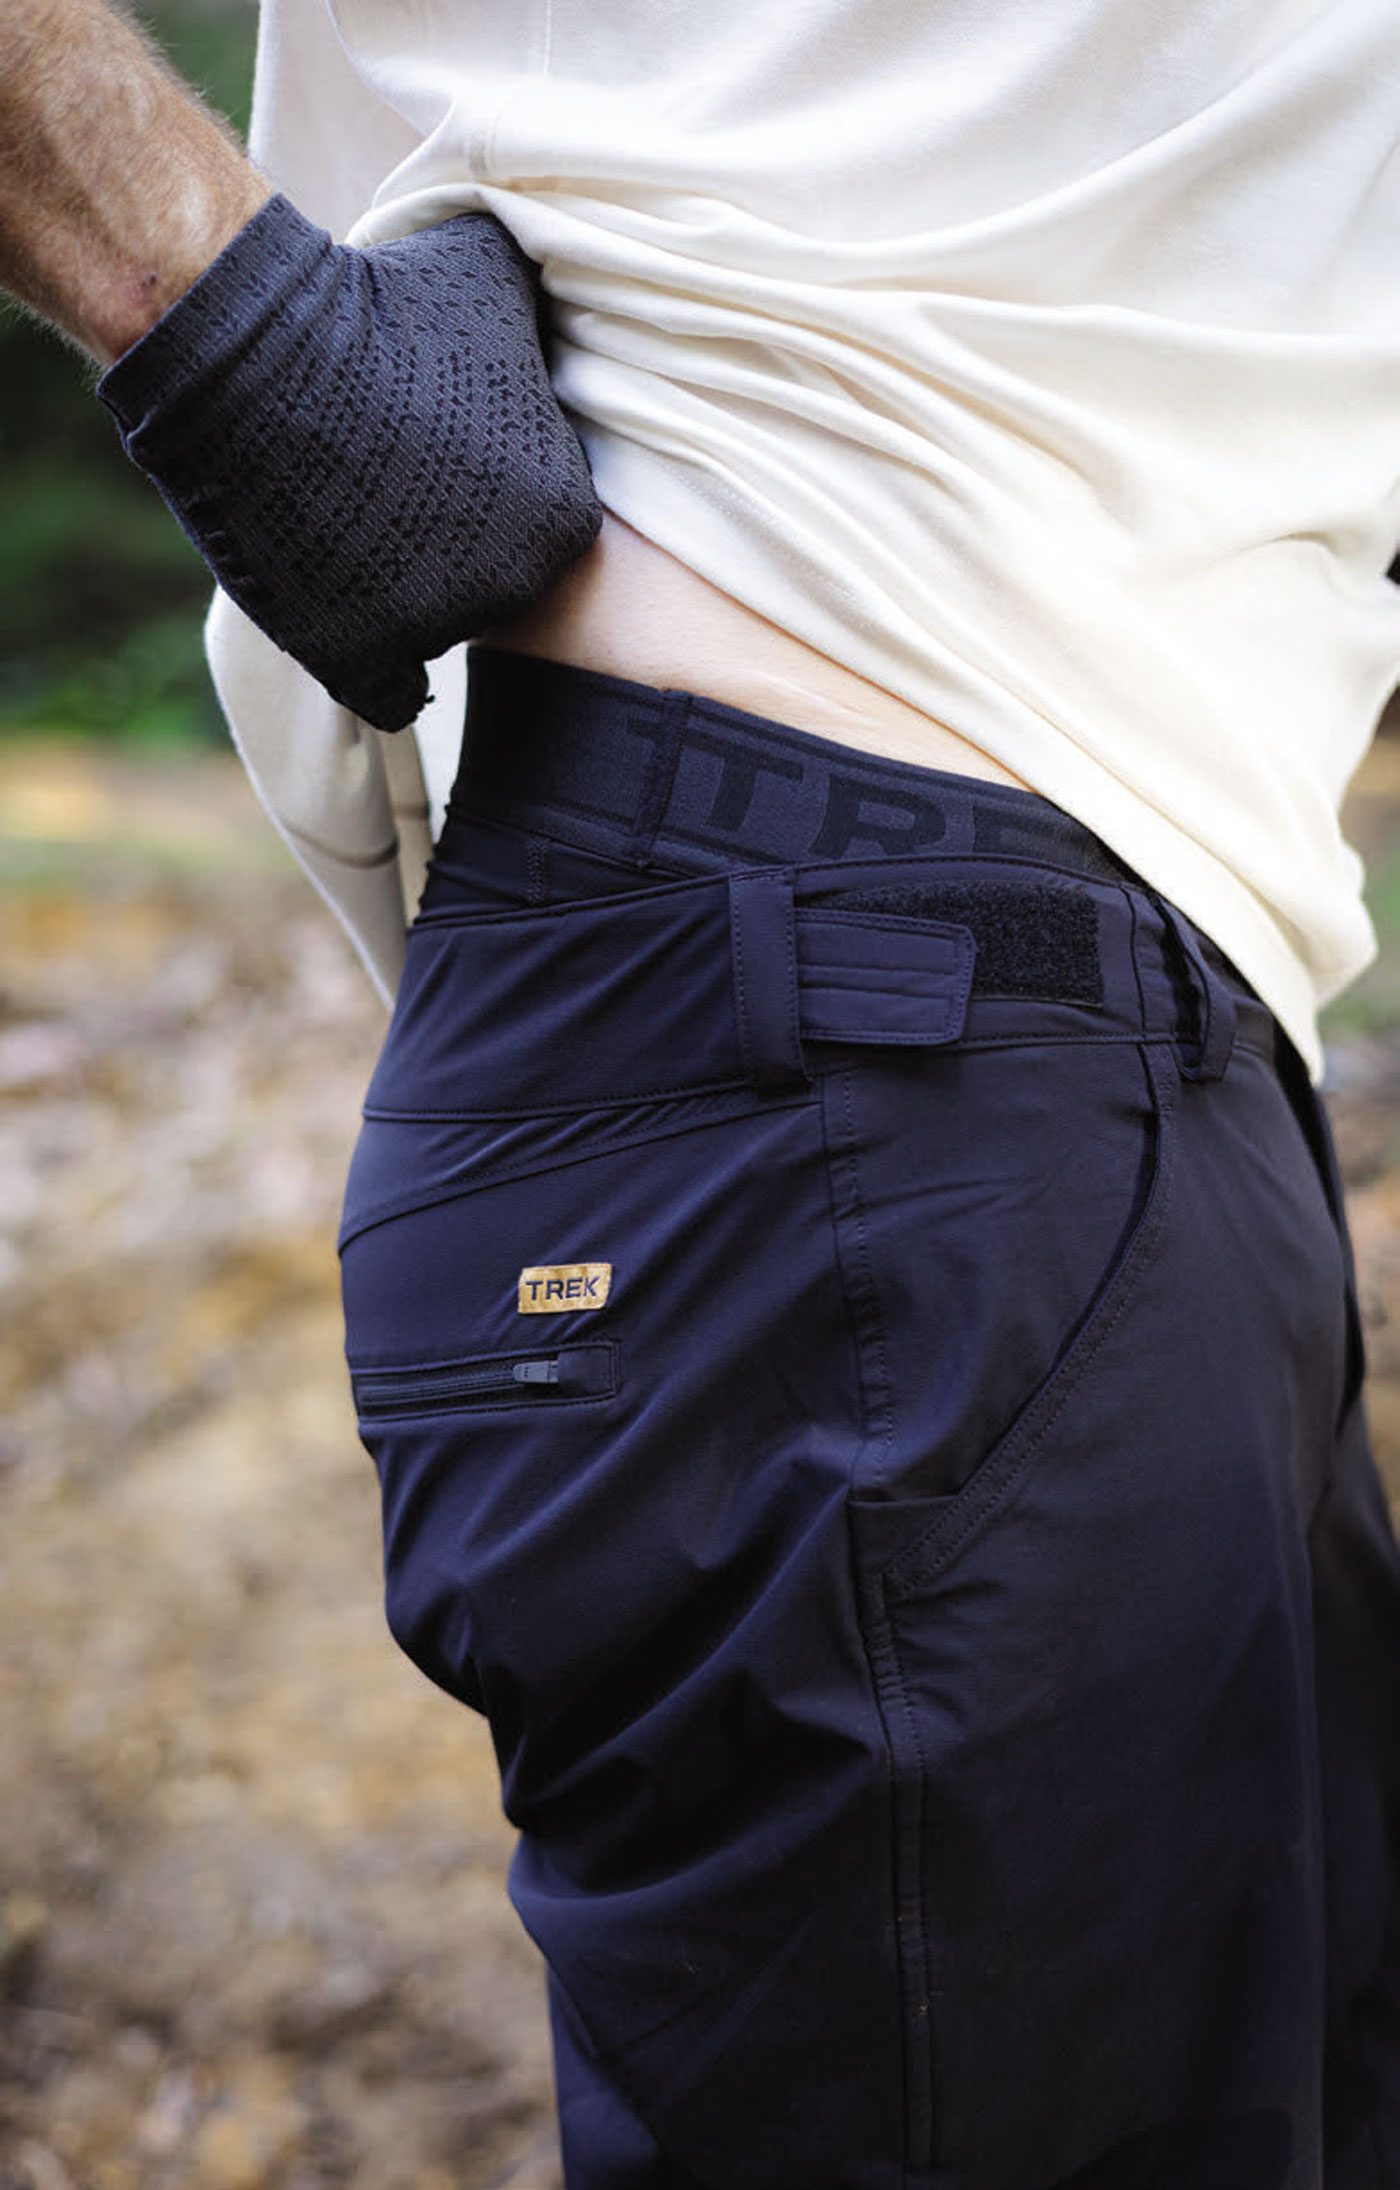
TREK EVOKE SHORTS
Trek has stepped up its game and featured a lightweight two-way stretch material on the outer short, that’s not only made up of 65% recycled materials but tested for harmful substances through the STANDARD 100 by OEKO-TEX® test as well. It’s soft to handle and plush against the skin.
There are two main hip pockets up front and a zippered one on the back – ideal for car keys or small Allen keys, but nothing much more considerable. Up front, a domed closure is paired with a zipper to keep things tidy. I’m a pretty strict 32” waist so went for a Medium. I reckon they’re slightly on the larger side but, with a small adjustment of the Velcro adjusters on each side of the waist, they’re spot on. The fit is listed as ‘semi-fitted’, which seems pretty accurate as they’re reasonably roomy through the leg without being baggy.
The leg length is what will probably be the kicker as to whether you like these shorts or not. I’m slightly below average when it comes to leg length for my 176cm height, and the Evoke’s sit a little above my knees with their 11-inch inseam. In the grand scheme of MTB shorts, this is on the shorter side of things; most shorts sitting in excess of 12 inches. I reckon this length hits the nail on the head for their intended use as a trail short though, ideally sans-knee pads. The overall silhouette is equally at home on a trail ride as at the gym or local swimming spot – they’d even be sweet for a drop-bar gravel ride. With subtle branding – just a small woven label above the rear pocket – they don’t scream “I’m a mountain biker!” at all… which makes a nice change.
Wearing liner undershorts has become normal for many riders these days, and we’re seeing fewer and fewer people hiding bib shorts beneath their baggies. There are a heap of liners on the market these days but, from what I’ve experienced, most fall short and are merely ticking a box rather than offering the ideal solution. The fits are off, chamois are bad and the overall experience leaves me wishing I’d just purchased a good pair of bibs instead – then hidden them under baggies, of course!
Trek has knocked it out of the park with this pair of liners though – I’m impressed. Let’s start at the top and work our way down: the waistband is a wide, soft number – think, a comfy boxer-short style – and there’s no narrow elastic cutting into your stomach as you’re doubled over, chewing your stem whilst grunting up a steep climb. A couple of different recycled nylon and spandex blends on the main panels help the shorts form nicely to your body, with no discernible bunching or rubbing. The legs feature a similar band to the waist, but with rubber grippers on the rear – finally, a liner the legs won’t creep up on – and they’re awesome for holding up knee pads too. The liner can be used snapped into place, attached to the shorts, or worn completely independently – i.e. under another pair of shorts. Not by themselves… although we’re not ones to judge.
All the good features of a liner are easily let down by an inferior chamois but, after lots of saddle time, my undercarriage is happy to report that the chamois lives up to the rest of the short. No dramas here.
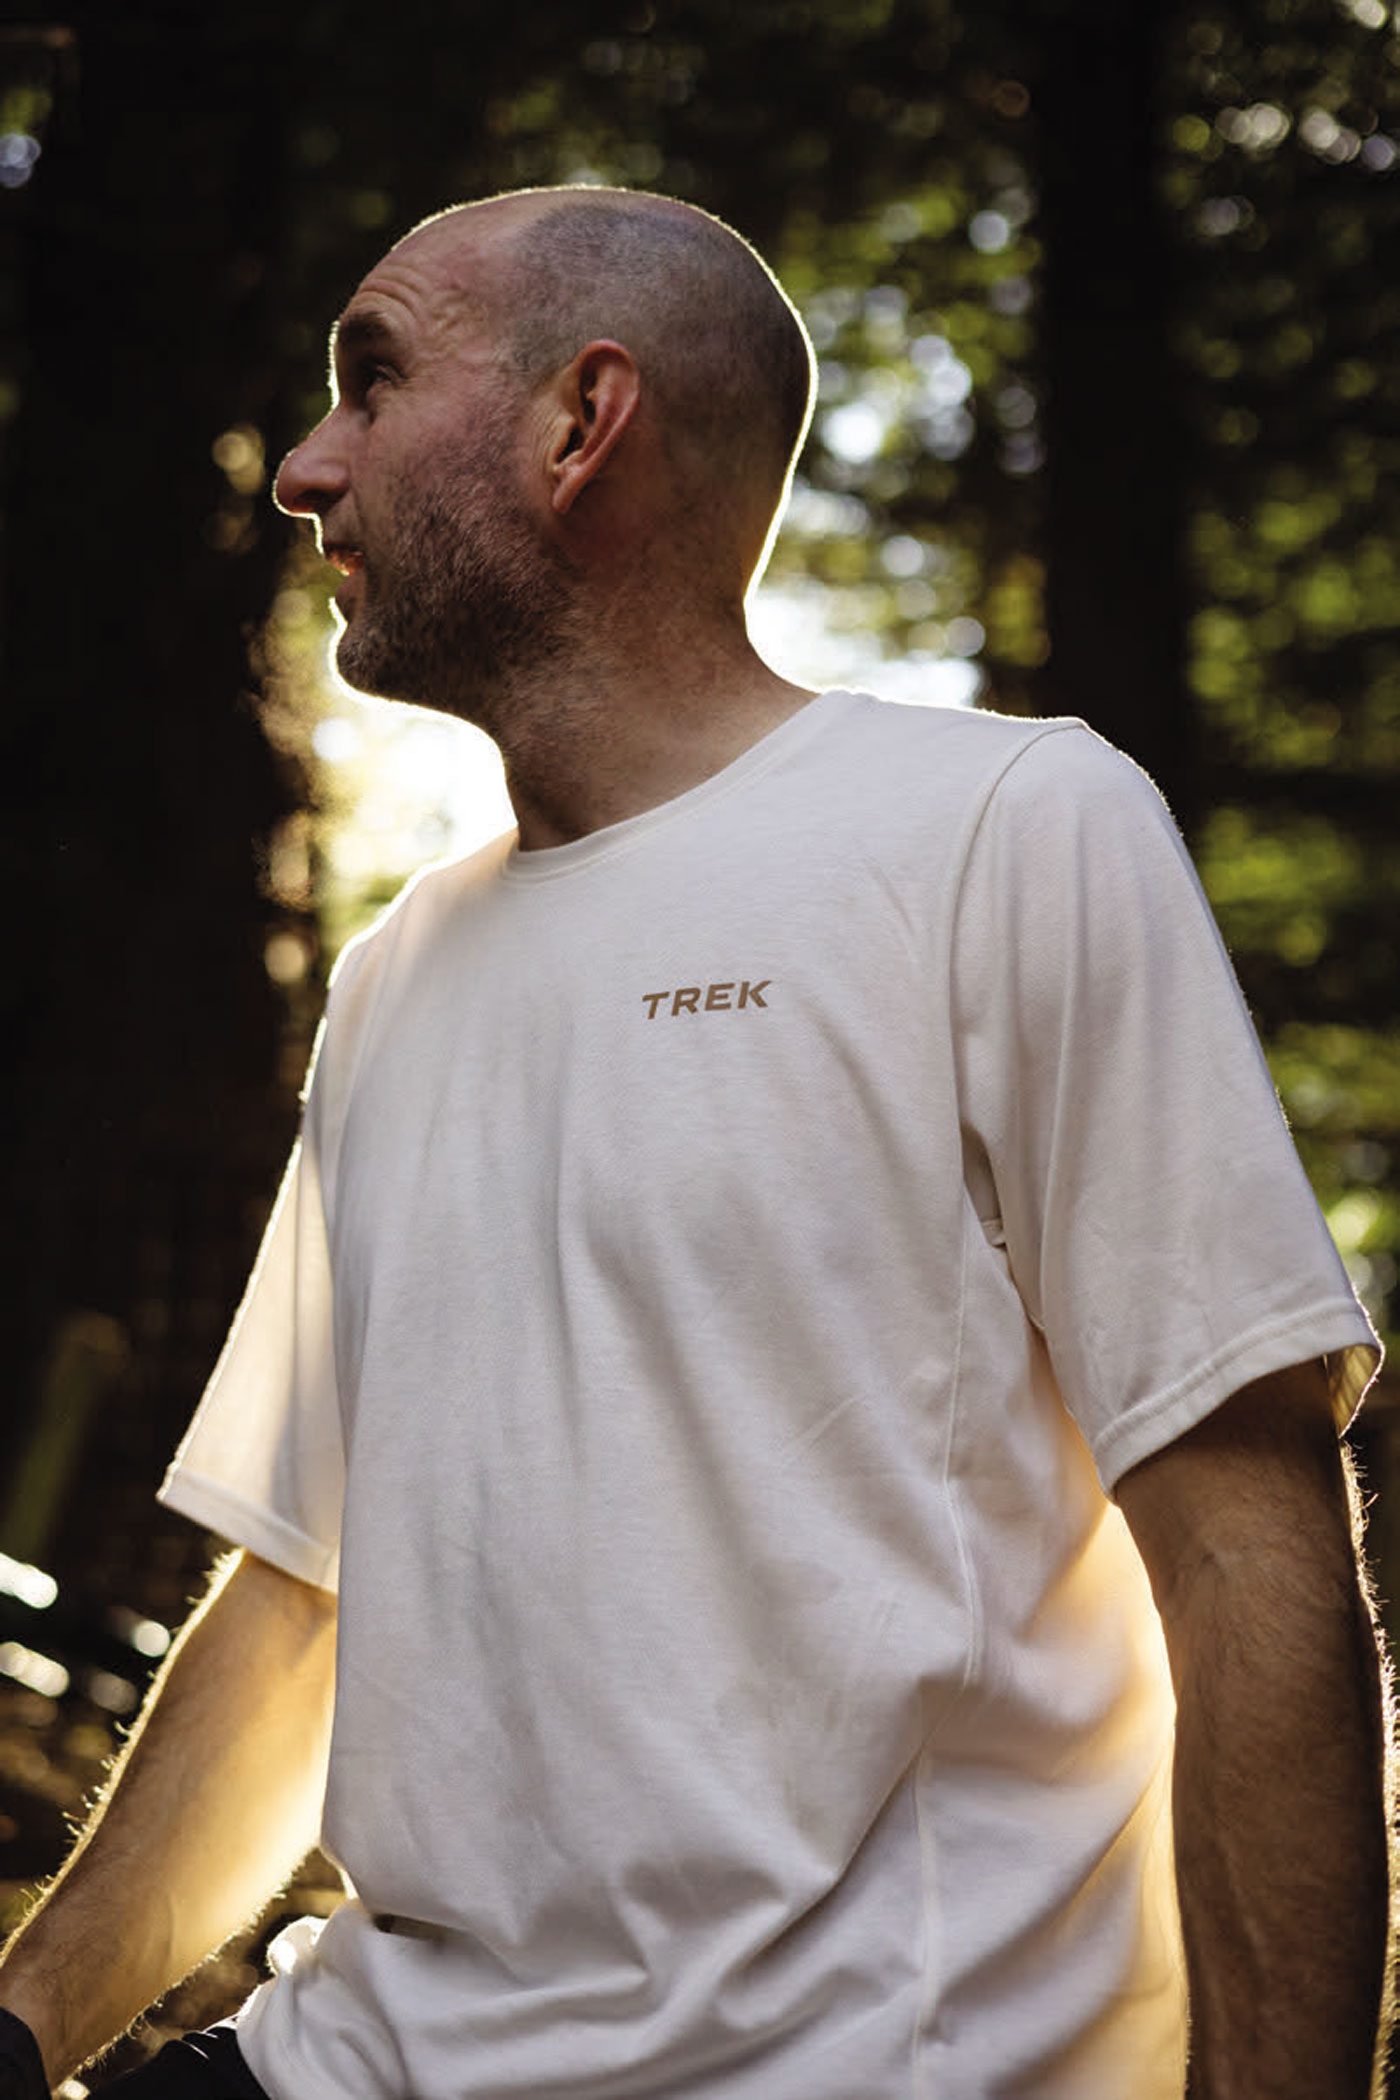
TREK EVOKE TECH TEE:
The Evoke Tech Tee’s main body fabric contains 85% recycled polyester blended with cotton, and passes the same OEKO-TEX® tests the shorts do, so no nasties are hiding in the fabrics.
Wearing a size large (normal for me) the semi-fitted cut is plenty comfy and leaves room for movement. I’m impressed that Trek used some panelling down the sides to help shape the form, not just a standard tee-styled cut. The rear has a slightly dropped tail to help avoid a public builders crack.
The fabric feels reasonably lightweight but not to the point I’d be concerned about tearing it any more than other riding shirts. It breathes well and doesn’t hold on to sweat but helps it evaporate off. Although I’ve been riding this off-white colour over the early winter, the mud seems to clean out of it much easier than some shirts I’ve used.
As with the shorts, this top doesn’t stand out from a casually-dressed crowd and, again, subtle branding helps you stay low-key; just a small chest logo hit proves that you are in fact a cyclist.
WRAP-UP
Like most of the Trek kit (or, previously, Bontrager) I’ve used over the years, the quality of both the shorts and the shirt appears to be top-notch. So far, it seems these garments will stand the test of both time and trails. If you’re searching for some versatile trail-riding garb with subtle style, and don’t want a baggier style ‘all-mountain’ look then the Evoke shorts and tech tee will likely be right up your alley.
First Impressions: SRAM GX Transmission
WORDS: LESTER PERRY
DISTRIBUTOR: WORRALLS
RRP: $2,170
“I was eager to pull out the UDH hanger from my battle-scarred frame and slide on a new Transmission…”
After hearing whispers that a more affordable GX groupset may be in the pipeline, I was eager to pull out the UDH hanger from my battle-scarred frame and slide on a new Transmission.
SRAM has launched the GX series – continuing their ‘All Day’ theme with a groupset designed for all-mountain, all-day missions, at a far more affordable price.
What you find on the GX system is largely the same as the higher-end Transmissions released earlier this year. There are some subtle differences which are visually noticeable from those higher-end units. In particular, the battery is hidden away in what I’ll refer to as the “Derailleur Garage” – keeping it out of harm’s way – essentially inside the derailleur. Replaceable, protective skid plates have been added, and a two-piece outer link. It also features a tool-free cage assembly – so it’s both removable and upgradeable, should you want to do so. A steel inner cage replaces the carbon of its higher-end brethren. Like the GX AXS of old, it’s been built for riders of the real world.
A couple of weeks before the launch date, a nice cardboard cube arrived on the courier. I quickly watched an install video, and it was game on. It’s been a long time since I’ve installed anything on my bike that required a proper read of the instructions or, in this case, a video. SRAM does a killer job of stepping through the installation process: whoa-to-go in around 30 minutes. I’d imagine after another couple of goes, a whole Transmission could be installed in about 15 – 20 minutes, maybe even quicker. It really is pretty simple provided you’ve watched the video. My only install hiccup was my inability to pair the system to my phone (no doubt user error, but I’ll figure that out soon) as well as the compatibility of the shifter clamp with my brakes, which aren’t SRAM. It took a bit of jimmying, but I managed to get the two to work together – it did mean that I couldn’t take full advantage of the adjustment that should have been available. Fortunately, the one spot I could get the shifter to sit was just right for me. I see in their documentation a different shifter pod mount is available and this would have completely solved my issue.
Te Miro MTB Park, just out the back of Cambridge, was my first testing ground. For the uninitiated, the trails are reasonably varied but the general theme is clay and native roots, dispersed amongst meandering climbs with the odd pinch or crux move requiring low cadence torque and fast, precise shifting to get the most out of your bike if speed is your aim. Coming off the back of a few days of intermittent rain, I wasn’t expecting much aside from mud and muck – perfect for bedding in a fresh groupset.
Leaving the car park, I snapped through the gears and made sure everything was still as it should be. I shifted through the cassette and took a couple of looks back just to be sure it had shifted, as it was so smooth and quiet, just a small ‘zit’ noise and a rolling increase of resistance at the pedals. I spun my way up the Easy As climb, taking the harder, steeper lines where possible, purposely shifting at the wrong time and under full power. Thoroughly impressed at how positive the shifting feel and accuracy was I pressed on, thinking to myself, ‘sure, it’s good now, but I bet once there’s some mud in the system it will be just like everything else’.
‘Easy As’ caps out and links into the Miro climb; its mellow gradients are broken up with some proper NZ native roots. Regular traffic polishes off the bark and pulls slimy dirt up onto them. You have to have your wits about you to keep the power down and maintain forward momentum, a situation where a mis-shift or slipped gear will likely see you stalled out or on the floor. Again, I was impressed by how accurate the shift was, with no slipping or mis-shifts, regardless of how many shifts under full power, and regardless of cadence.
Climbing to the top of the native bush, Miro finished, and I dropped into ‘Phil’s Gold’ – a test of a rider’s fitness, line choice and cornering ability; no steeps, but lots of corners, and a fair smattering of slimy roots. Eager to make this thing mis-shift, I again banged through gears, up and down the cassette, forcing shifts out of near-dead-stop corners. Nought. Nothing. Nada. I couldn’t get it to fault. I wondered whether I’d be so positive after a few months aboard the groupset – would the crispness remain after riding the second half of winter on it?
Another climb up Miro and a lap down ‘Native DH’ and my time was up for the day. I was only one proper ride in but so far, so good. I found myself shifting way more than I would aboard my previous group, and shifting from dead stops, under full power, and over chunky surfaces. I’d be concerned about heading over the bars and losing teeth on any of my other setups with that sort of carry-on.
SRAM made some pretty bold claims about their remapped Cassette, new X-sync technology (i.e. redesigned shifting ramps) and use of their flat-top chain to make it all work: ‘Creating seamless shifts even during your hardest power output.’ I’ve gotta say, there’s something in this combination of marketing speak and fancy nomenclature that really makes this thing shift impressively under power – something other brands claimed they’d done years ago – but SRAM has taken it up a level. I’ll be very interested if it continues to perform to this level, even after many km’s and battery charges.
So far, I have three main concerns. One, will the shifting with buttons mean I lose my right thumb muscle tone, rendering it useless when I go back to a cable system? Two, will I smash off the low-hanging shifter Pod? And three, will I want to give this groupset back after the next few months of testing is over?
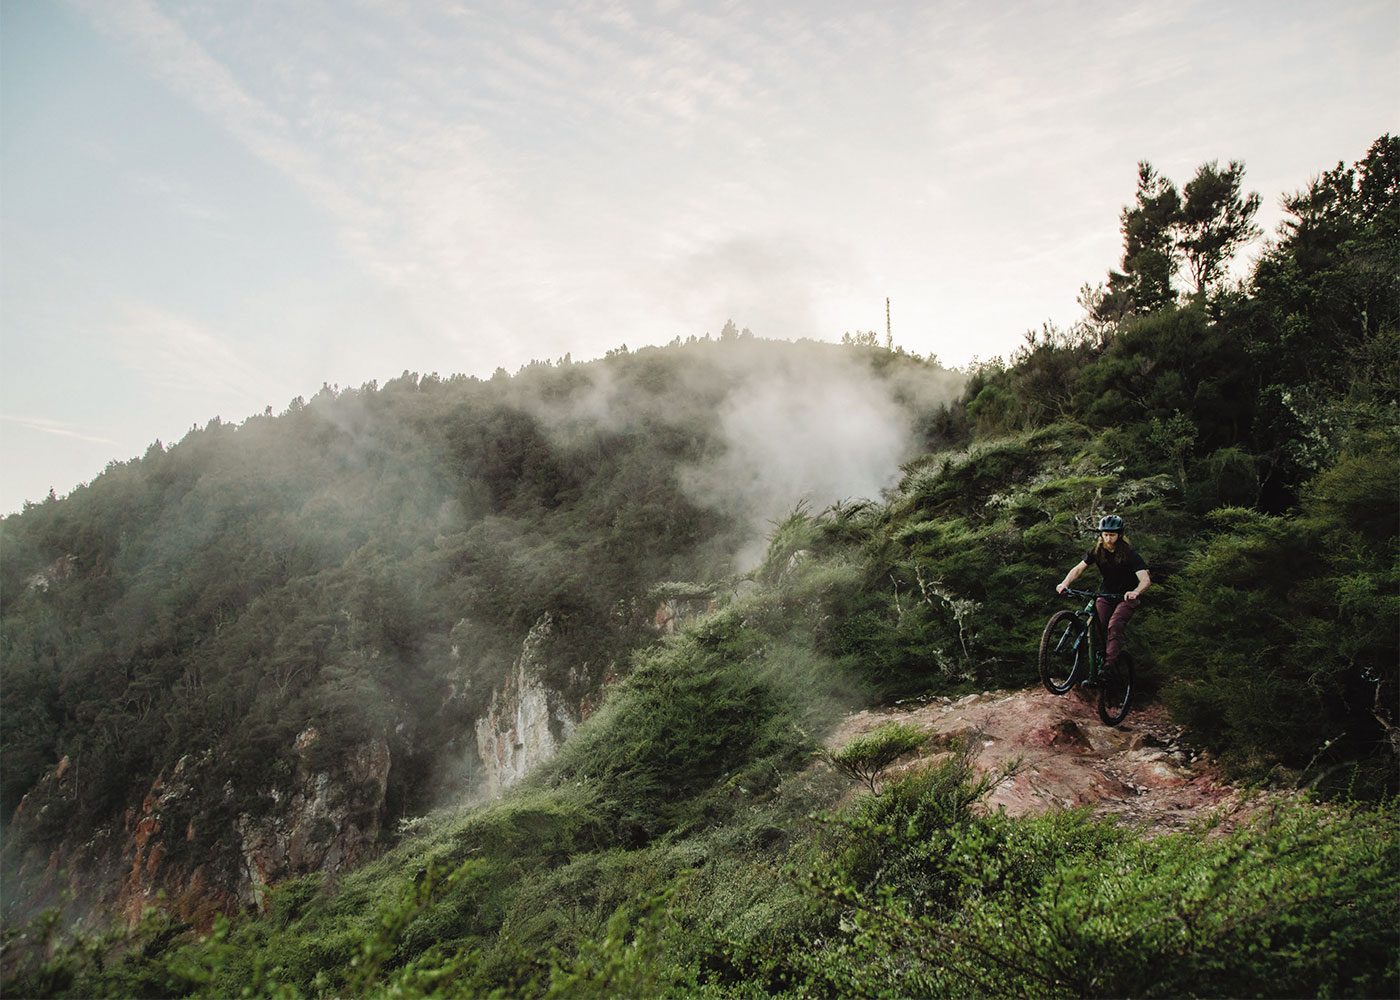
Bike Review: Norco Fluid FS A1
WORDS: GAZ SULLIVAN
PHOTOGRAPHY: SAVANNA GUET
DISTRIBUTOR: ADVANCE TRADERS
RRP: $5,599
“The Norco Fluid FS A1 was something of a revelation.”
I was looking forward to getting on the bike. Some mates in Australia had almost convinced me to get a Norco a few years back and, while I didn’t follow their advice, I was curious to find out what they were on about – and what I was missing out on.
I spent a month and a half on it – riding every other day, trying to figure out what made it feel so good.
As a representative of today’s mid-price mountain bike, it is a great example. Whether you think a hair over five and a half grand is mid-priced depends on a lot of things, but in a world of five figure builds, some of which start with a two, it seems pretty economical.
The first thing that needs saying is how good the bike looks. Obviously subjective, but a sparkly green paint job with chrome stickers does it for me.
It’s a very nice piece of design and execution. Subtly formed tubes, seamless junctions, and that lustrous paint job look really great.
The rear end finish is industrial by contrast – no effort has been made to smooth out the welds. Again, personal opinion, but I like that.
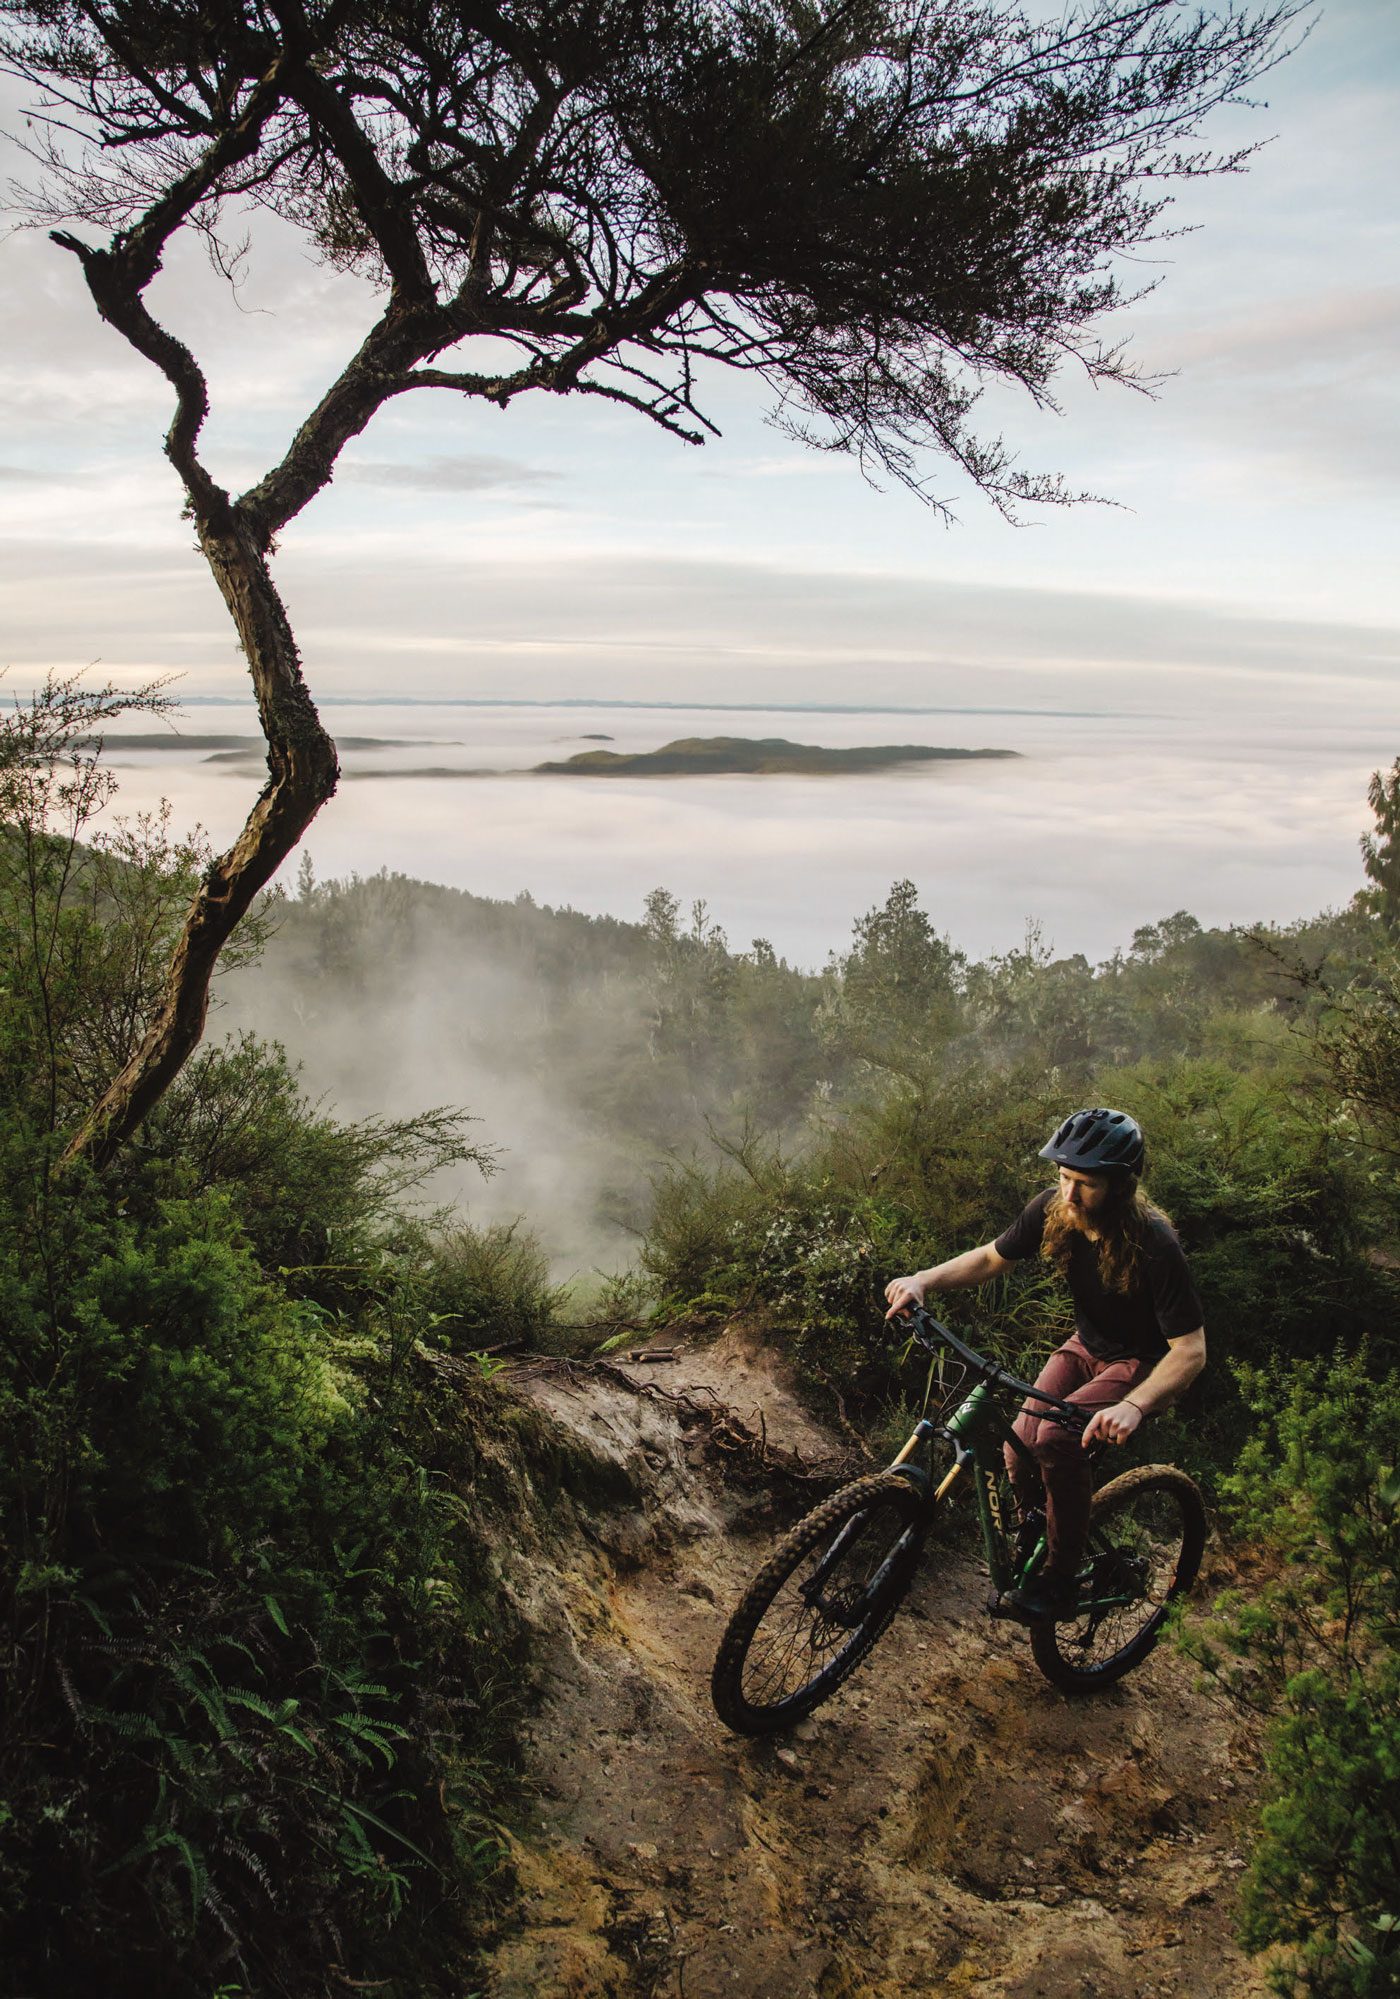
The Norco fitout has quality where it counts. Suspension is handled by Fox FLOAT components at both ends. The Factory 34 GRIP2 fork gives 140mm travel up front, and the X Performance Elite shock provides 130mm at the back end – pretty much the perfect setup for most trail riding.
The ultra-reliable Shimano XT drivetrain pairs up with a Praxis G2 crankset, with a 30 tooth chainring driving a 10-51 XT cassette. They even spec’d an XT chain.
The less critical parts are not from the big guys, or flashy boutique brands. As you might expect, they are from the more budget oriented end of things.
But that doesn’t mean they are not up to the job.
TRP supplied the brakes and the seat dropper. The brakes are Trail EVO, a four piston design hauling on a 203mm rotor up front and a 180 at the back. They worked really well while I was on the bike. The seat dropper was also well-behaved, and generous in both width at 34.9mm and travel, a handy 170mm on the Medium and Large size bikes.
While we are on that subject, the bike comes in five sizes, S to XXL, with a few tweaks along the size range. The S comes with 170mm cranks, the rest of the line-up have 175s. The seat dropper moves 150mm on the S, and 200mm on the XL and XXL.
The wheel set has Stan’s Flow S1 rims on boost hubs, and come fitted with Vittoria tyres.
So, that is the basic stuff you could find online out of the way. A bit more of a web- crawl would reveal some very positive information from the bike media – the machine is Pinkbike’s Value Bike of the Year, Vital MTB’s Bike of the Year, and Bicycling Magazine’s Best Value Trail Bike.
All good.
The stuff you can’t find online is what I thought of it.

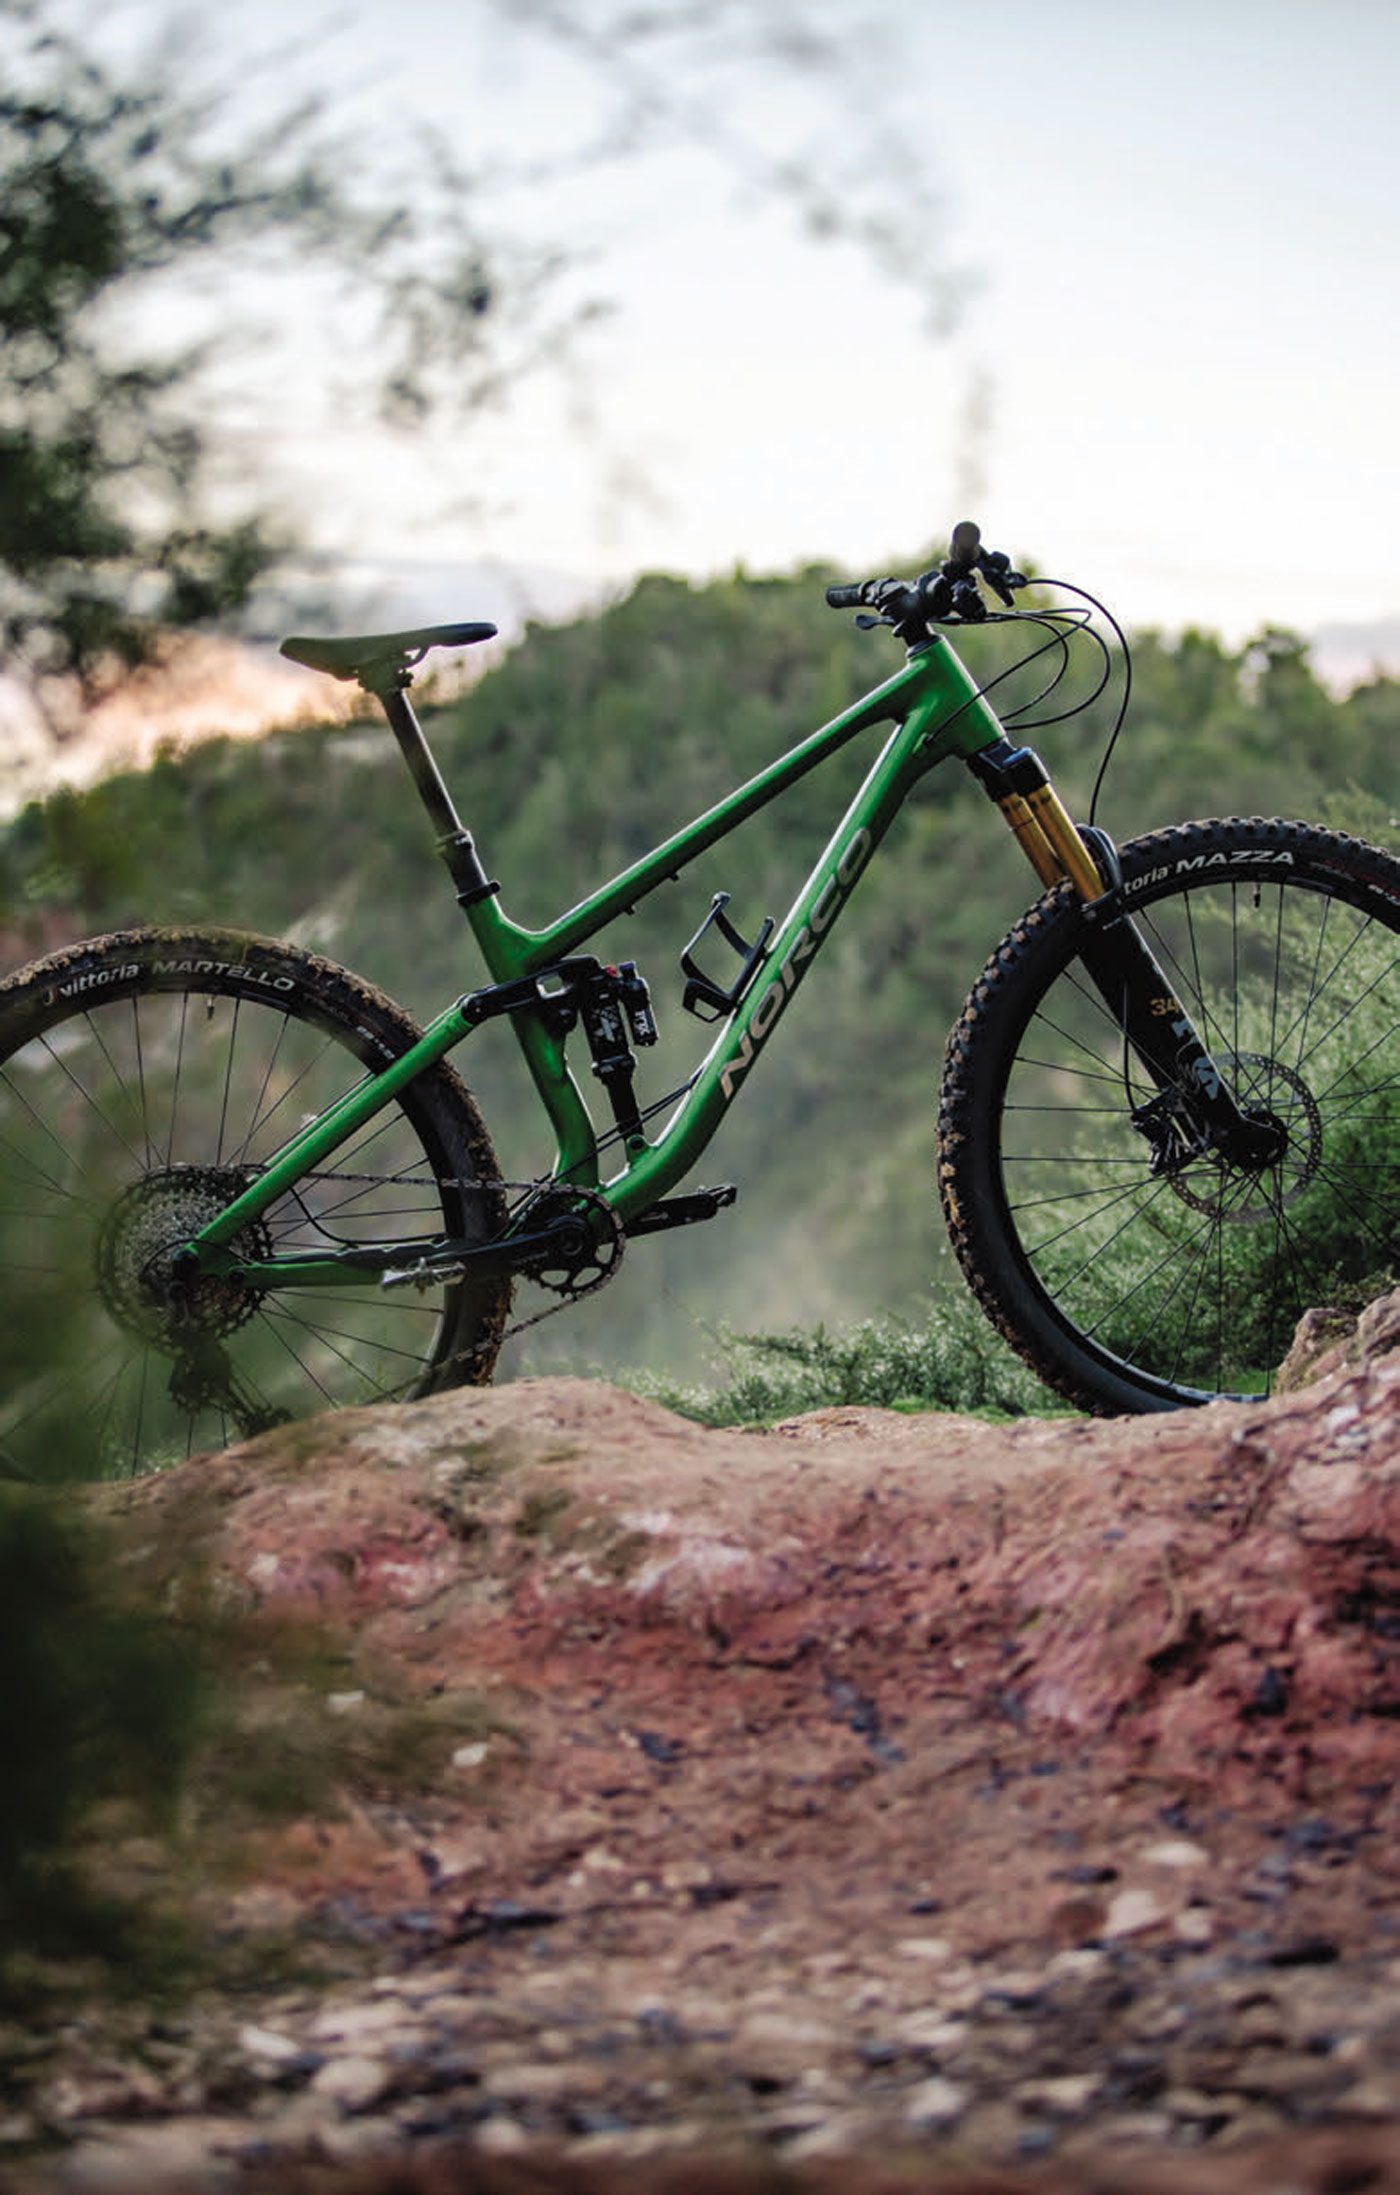
My first ride was out the door and onto a fairly long singletrack climb. The bike is not particularly light, mid 15s in kilograms. It feels light, though. The suspension design and shock combine to make a solid pedalling platform, and the bike goes uphill as well as any bike with the handicap of having me on top of it.
A steep 76.6 degree seat tube put me in the ideal position for climbing a trail that has a lot of little obstacles and tight turns.
Turning directly into a downhill trail at the top of the first climb was a snap decision – this particular trail is a favourite, because it is at the top end of what I consider to be within my comfort zone. Normally I would go somewhere else until I felt at home on a strange new bike, but the Norco felt very familiar from the first few pedal strokes.
As much as climbing on the bike felt better than the weight would have you expect, going downhill was better than the mid-travel suspension promised.
Going down the trail, the bike was surefooted, relaxed, and felt quietly capable. The rear suspension is a very solid feeling platform and the long 480mm reach, (in size large), combined with a fairly slack 65 degree head tube, made everything I came across on the trails I like easy to ride with confidence.
The tyres were new to me, although Vittoria and I go way back – like, almost fifty years – to a couple of pairs of track tubulars I liked in a previous life. I have been very happy with a couple of sets of road tyres from the bicycle-only tyre company, but I had never tried their mountain bike rubber before.
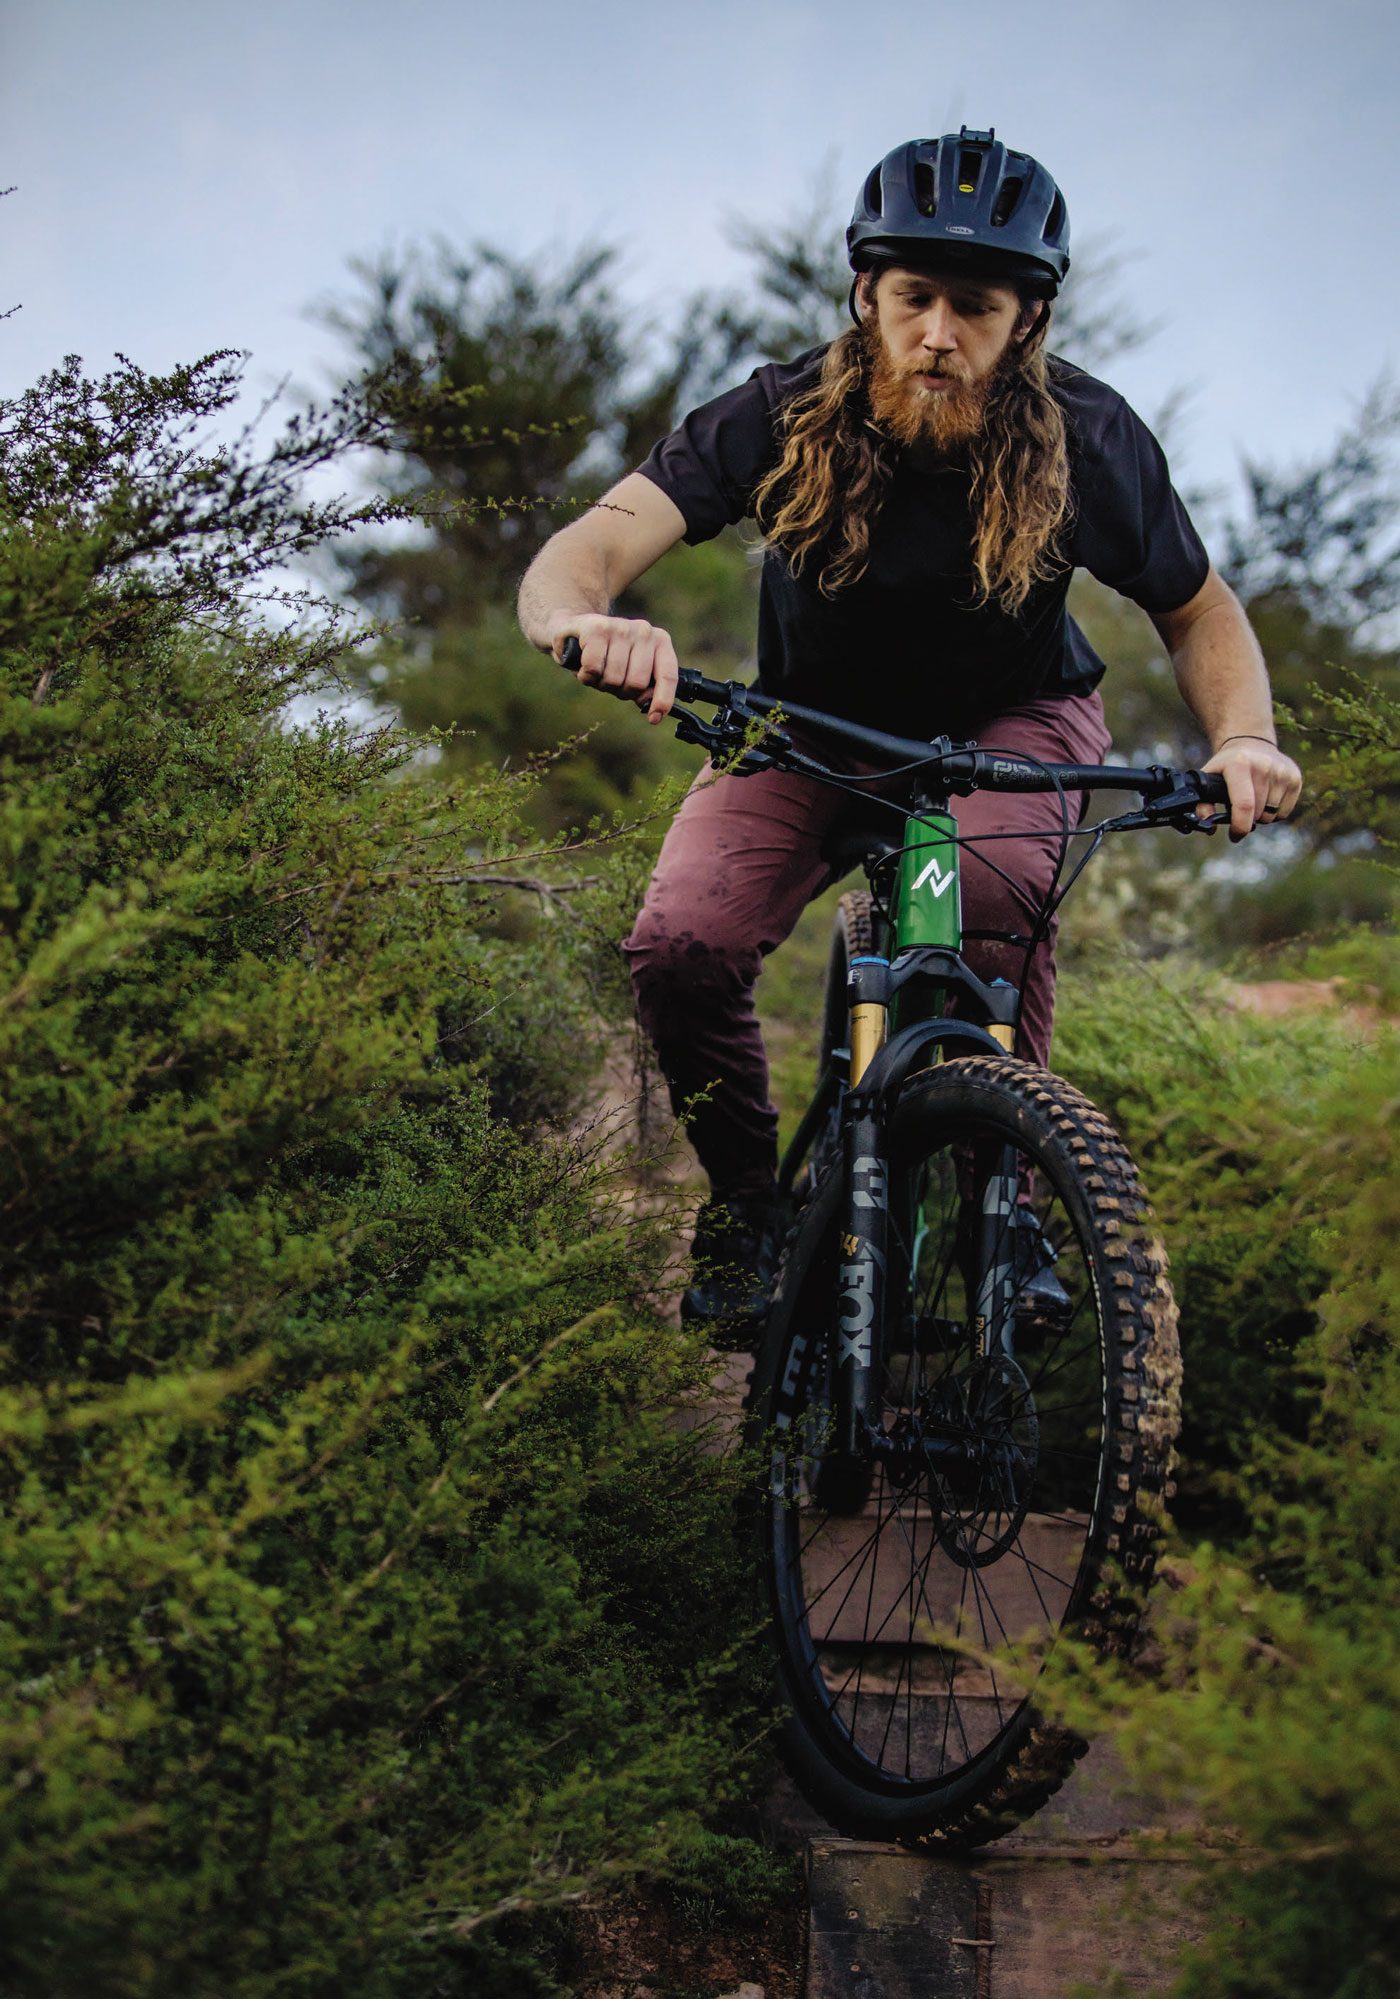
The bike came with a 2.4 Mazza on the front and a 2.35 Martello on the rear. I think part of the sprightly feeling the bike had on the climbs and rolling along cross country trails may be down to them. Like the bike, they are not particularly light, and they are not the fastest rolling tyres around, but they were reliable on the fairly wet trails we encountered during my time aboard the Fluid.
I found the more I rode it, the more I liked it.
The Fluid is a bike that straddles the divide between a cross-country style bike and a more enduro oriented rig. For an all-day ride with a bit of everything, it’s hard to imagine what it could do better.
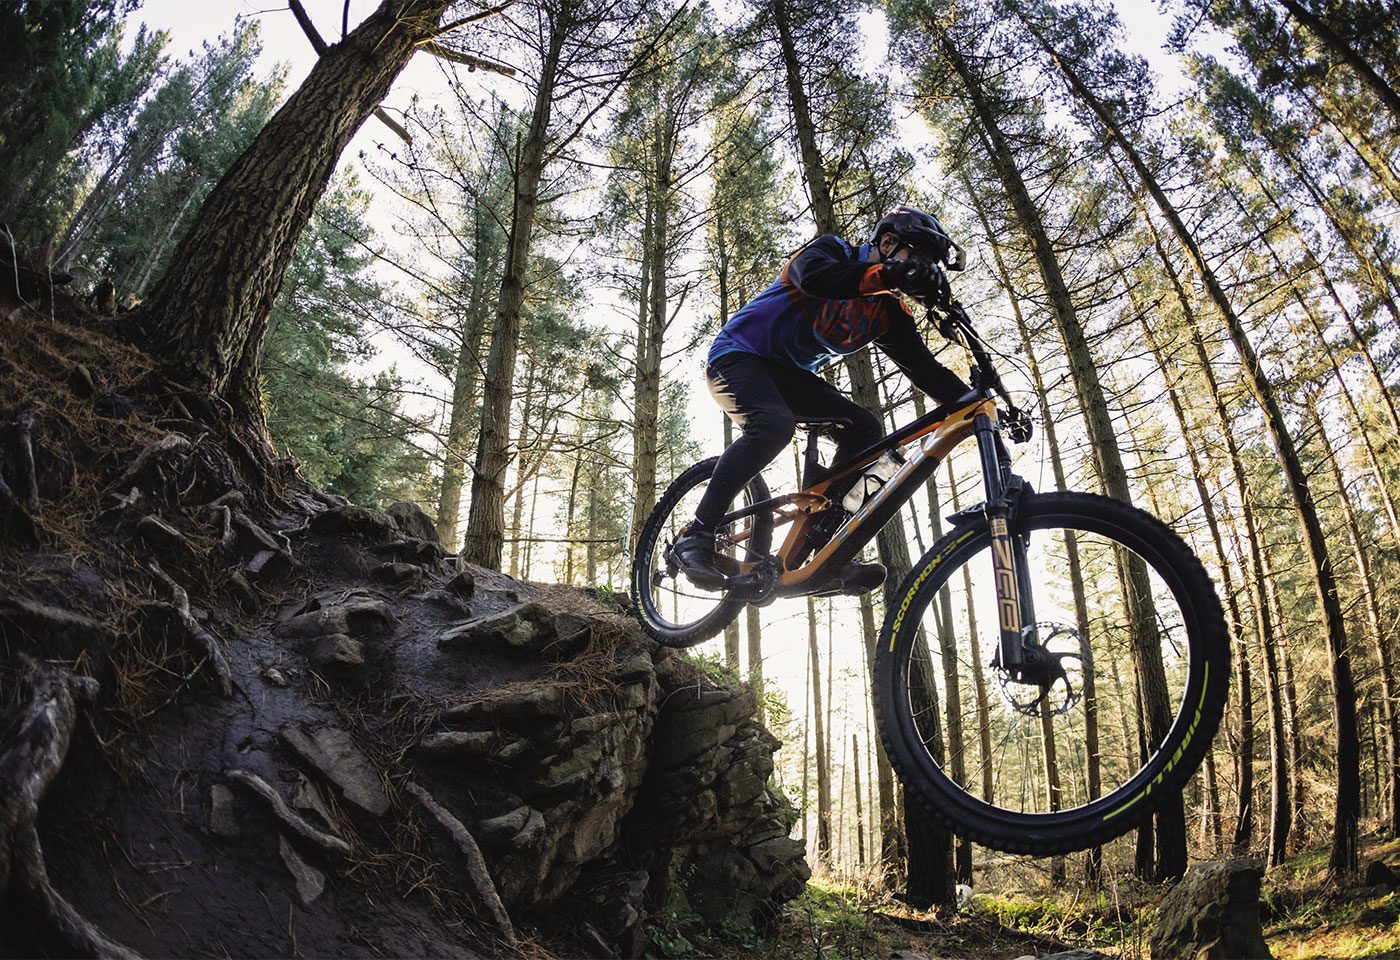
Pirelli Scorpion Race DH & Enduro Tyres
WORDS: LESTER PERRY
DISTRIBUTOR: FE SPORTS
RRP: $149 (RACE DH), $159 (ENDURO)
“The first day of testing was about as testing for a rider as a tyre…”
‘Pick a tyre brand and be a dick about it.’ This phrase rings true in the MTB world – getting riders to try a new tyre brand is a tough ask. If what you’ve got works, why should you change it?
It’s fair to say the tried and true tyre brands have rested on their rubbery laurels over recent years, with no groundbreaking leaps forward in technology. Recently though, newer brands have entered the fray, and existing brands are innovating hard – in Pirelli’s case, they’re drawing on years of motorsport experience to shortcut the development process and take on the major players.
Pirelli has quietly toiled away for the last couple of years, developing their line of gravity focussed tyres, bringing over 150 years of motorsport prowess and synergising with MTB legend and development specialist – not to mention ex-World DH Champ – Fabian Barel alongside numerous test riders worldwide.
The perfect rubber compound is similar to Goldilocks’s porridge: when it’s not quite right, it’s not right at all. When conditions are prime, traction comes easy; it could roll well but then come unstuck on roots, rock or hardpack, feeling like you’re being “pinged” offline. Too soft and it will sap your speed and likely wear excessively quickly. What we’re after is the best of both worlds. When it comes to tyre carcass, we all want the lightest but most puncture-proof casing possible – again, the best of everything and an impossible task!
Once the Italians at Pirelli’s HQ in Milan finally woke from their afternoon ‘riposo’ (rest) we were shipped out two sets of their newly released ‘Scorpion’ gravity treads; a pair each of the new Enduro M in 29”, DH in 27.5”, and 29” to set up mullet.
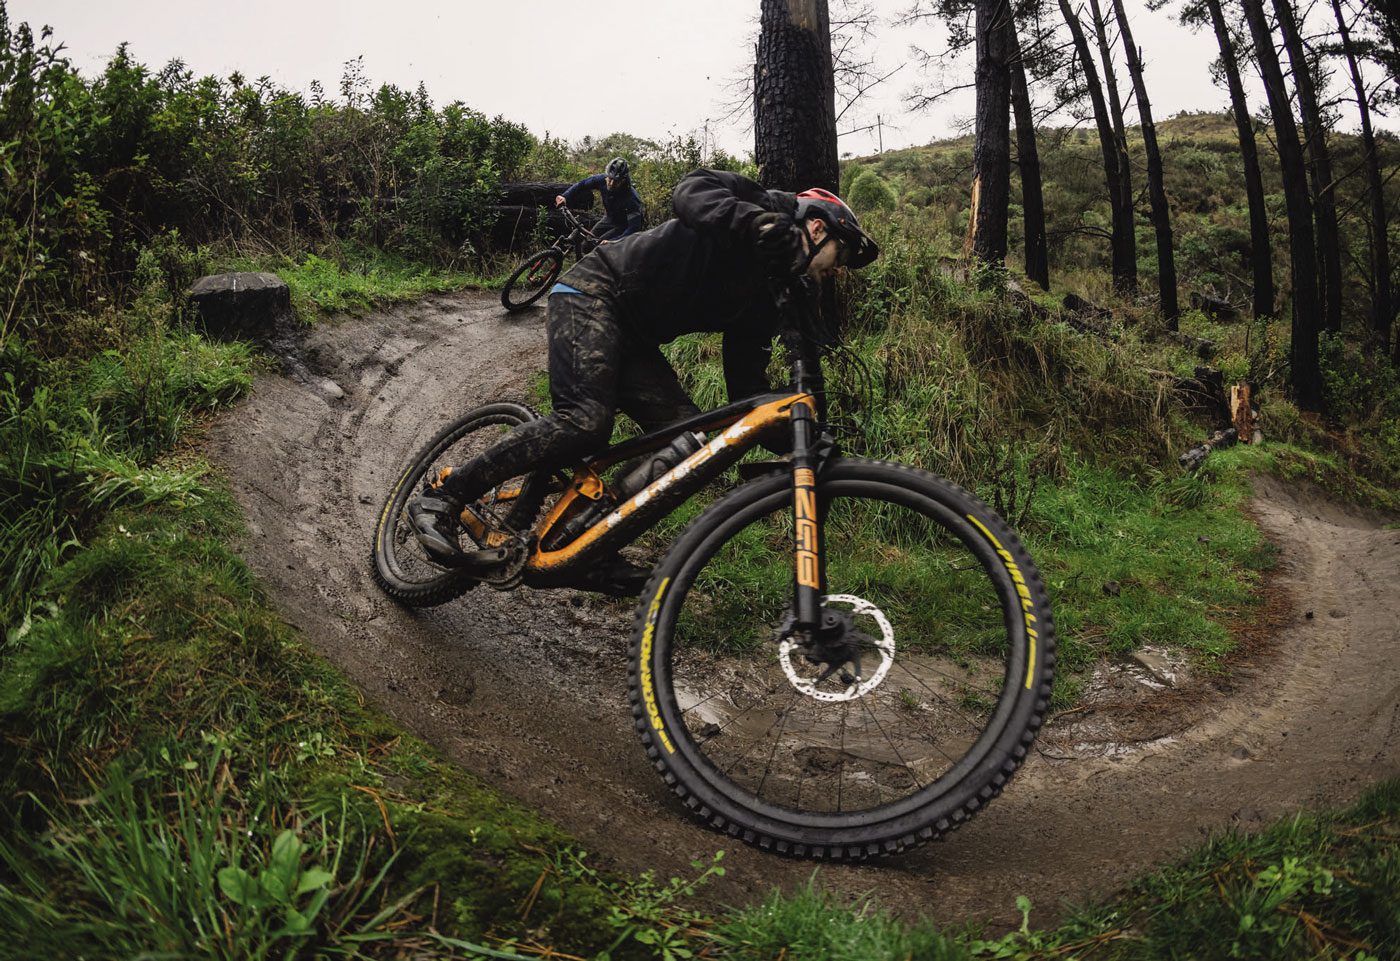
Scorpion Race DH
Front: M (Mixed) Dual Wall+, Evo 42a dual compound, 29×2.5”
Rear: T (Traction) Dual Wall+, Evo 42a dual compound 27.5×2.5”
The Scorpion Race DH tyres feature a full 62tpi DualWall+ casing and a rubber insert at the bead to help prevent pinch flats. Designed with a heavy-hitting, all-out gravity focus, these tyres leave no question as to their intended use, with large knobs and huge, loud logos screaming, “Go fast and hit stuff”!
The best constructed tyre can be let down by the rubber attached to it, and it’s no secret most tyre brands fail at this when they enter the gravity market. Fortunately, it’s not Pirelli’s first rubber rodeo and they’ve nailed their compound. The Evo Dual Compound is soft and sticky, with a slow – but not sluggish – rebound characteristic. That sounds very subjective but it’s abundantly obvious when a brand gets the compound just right, and plenty have got it wrong.
Mounting these up on my enduro bike was a pleasant surprise. Comfortably edging them onto the rims by hand, then snapping them into place with a regular track pump – no tyre levers, sweaty brow or sprained thumbs required.
Rolling down the driveway, a few hops up and down the curb then some aggressive turns on the grassy verge gave a few instant impressions. They roll well for an out-and-out downhill race tyre, with no feeling like they’re sapping rolling speed and, while they’re noticeably heavier than the trail tyres I had been running, the weight is in line with their intended use and their competition. The first day of testing was about as testing for a rider as a tyre – a wet, but fortunately not too cold, day in Christchurch’s Port Hills. With slippery chutes and wet rocks aplenty, this was the perfect zone to get a feel for the treads in some challenging conditions. After all, what good is a tyre reviewed in prime conditions?
The first stop was the Christchurch Adventure Park and some sections of ‘The GC’ DH track. A few turns in the trail hooked right and straight across a slick off- camber; as I glided across the face I thought, “OK, these hook up well”. In control and comfortably upright, not something I’d expect to come so easily in these conditions.
You can’t tell a great deal how a tyre will perform by simply looking at the tread pattern, but you can make some assumptions about it will likely ride. The Scorpion ‘M’ tread has aggressive ramping on the lead edge of the centre knobs, helping it roll well and maintain speed. There’s a line of transition knobs to fill the void when tipping over to the side knobs from the centre, helping keep the feel consistent. Siping (small cuts in the knobs) are added to help the knobs conform to firm surfaces, adding extra edges for just that little more grip, as well as helping the designers somewhat tune the feel of a tyre. The M tread is reasonably open and clears mud well even at pretty low speeds, and the side knobs offer plenty of support and a consistent drift once they do break loose.
On the rear, the ‘T’ tread speaks of its motocross heritage. The main feature of the tread is a wide central knob – it’s super effective under brakes, and without the ramps of the ‘M’ tread it offers exceptional power transfer but higher rolling resistance – it’s a downhill focussed tyre after all, so not really a big deal. The central knob is designed to have the centre portion cut out of it to optimise for softer conditions or use as a front tyre. For the uninitiated, tread cutting is a common sight on the World Cup Downhill circuit. The side knobs are nearly identical to those on the ‘M’ series and have a similar consistent feel.
After a couple of days aboard the Scorpion DH tyres, sampling Christchurch’s Port Hills in winter conditions, I’d happily recommend them to those seeking a full-blown DH race or park option, those looking for a heavy-duty Enduro setup riding rocky courses, or aggressive ‘Clydesdales’ aboard e-bikes looking for extra grip and puncture protection.
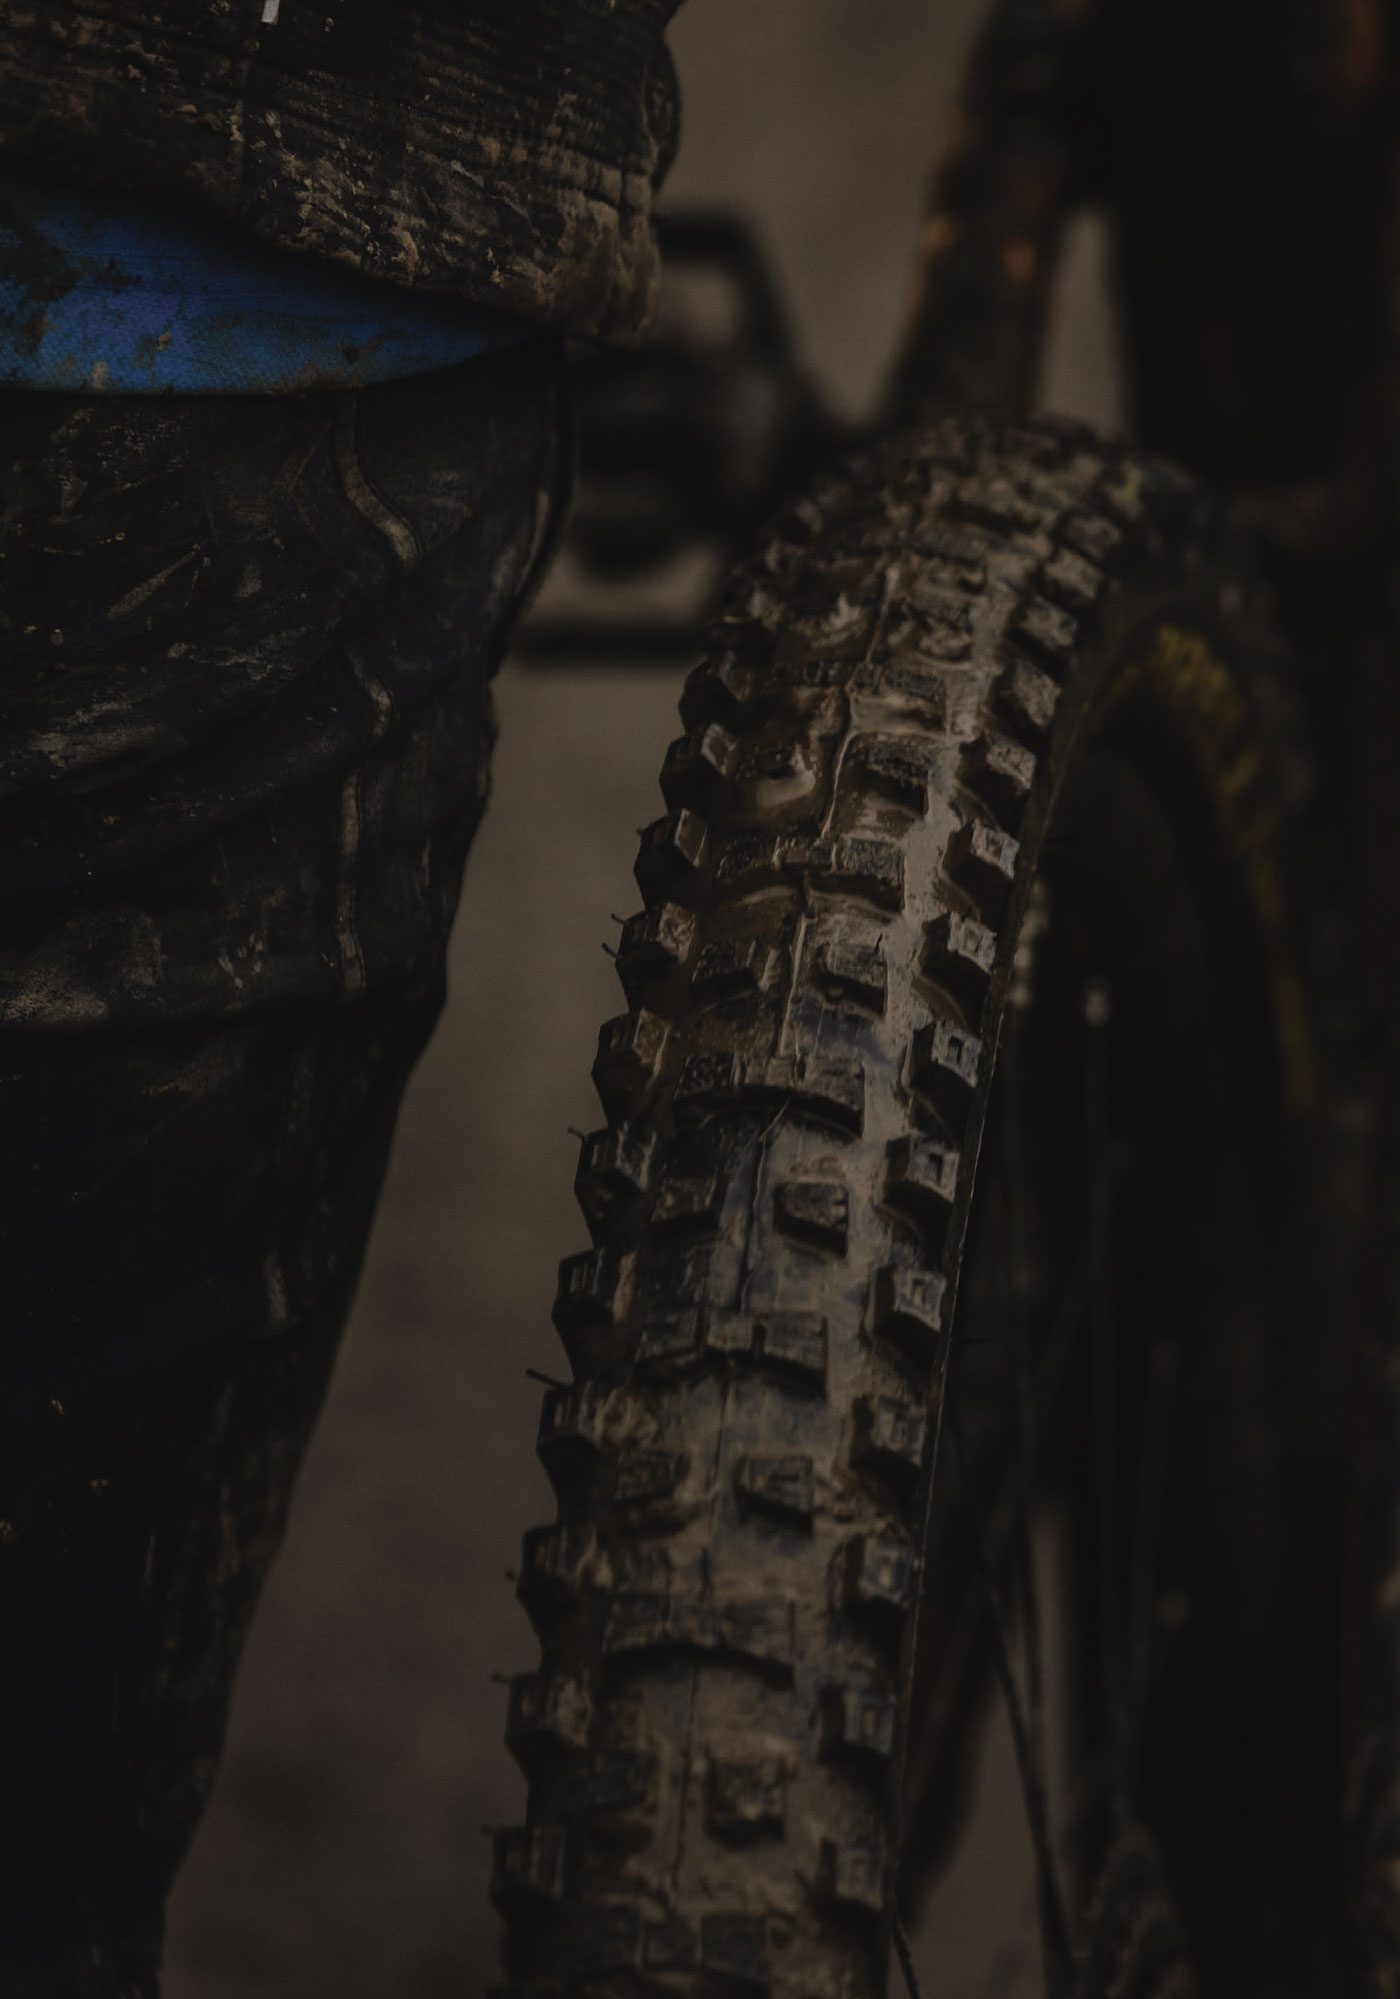
Scorpion Race Enduro
Front: M (Mixed) Dual Wall, Evo 42a dual compound, 29×2.5”
Rear: M (Mixed) Dual Wall+, Evo 42a dual compound, 29×2.5”
Back on home turf in the Waikato, I unpacked my bike after the Christchurch stint and mounted up the Enduro cased tyres. Just like the DH tyres, these were a cinch to mount up.
Front and rear I had the ‘M’ tread. The same tread and compound as the DH front tyre I’d ridden the week prior, but a more supple ‘Dual Wall’ 120tpi casing and rubber insert like the DH tyres. According to Pirelli’s documentation, these tyres knock around 190g off the DH versions in 29”, so certainly a big difference in weight.
Testing these in the middle of a Waikato winter it’s a sure thing there will be lots of moisture around and with our local trails a mix of hardpack clay, slippery roots and moist leaf rot, there’s plenty of variety to make an assessment – we’re just missing sections of chunky rock. Riding around this area can be sketchy at best of times, in the winter, so any shortcomings in either bike setup or skills will quickly be highlighted.
The lighter weight of the Enduro tyres was welcomed after running the heavier DH versions. The Enduro ‘DualWall’ casing gives more trail feel, and the lighter weight was certainly noticeable when hopping over trail features or accelerating out of slow corners. These things offer confidence in spades, particularly when the going gets fast and rough – after all, that’s precisely what they’re designed for. They allow you to more confidently head for the ideal line, not just the one dictated to you by the conditions or your tyres.
Descending on these is a blast. Charging on familiar trails and headlong into some sketchy root sections, I was thankful for how well the tyres held their line; the soft compound offering confidence on the roots where my normal tyres would let go. Cornering feels very natural, with no discernible gap from being ‘upright’ to leaning in, something I’ve struck on tyres in the past. There’s a positive, almost locked-in feel about them, thanks to the strategically placed, large sticky knobs.
All traction comes to an end at some point, and the Scorpions give a consistent drift rather than a “you’ve just hit ice” sort of surprise once they do let go. I noticed this several times when the tread would let go in a controlled manner and then hook up again, no big sketchy surprises here.
Braking was awesome, largely down to the large knobs, but equally down to the rubber compound and carcass, all damping trail chatter and allowing the tyre to bite and conform without breaking traction.
Climbing was where I found the only chink in the Scorpion ‘M’ armour. With the central knobs so heavily ramped on the leading edge, there’s no square sharp edge to bite in when climbing. ‘Slippery when wet’ surfaces require being conscious of where and when you’re putting the power down to prevent wheel spin. It’s not a big deal on a tyre of this genre, as they’re designed for all-out enduro speed, not taking uphill KOM’s. This trait may be more noticeable on an eBike so opting for the ‘T’ tread could be ideal.
All the acronyms and hyperbole mean nothing if you’re bouncing off roots and can’t hold a line confidently. The combination of tread pattern, rubber compound and casing on these inspire speed and confidence. If you’re an enduro racer or eMTB rider looking for a hard-hitting, but not overly heavy or sluggish set of tyres to use all year round, these should be on your ‘must-buy’ list.
Are the Pirelli Scorpion gravity series a game-changer? It’s hard to say they’re head and shoulders above the established competition, but they’re easily on par or fractionally better and certainly a very worthy opponent. If you’re looking to change things up and try something fresh, these tyres would be a great place to start. You might well find an advantage over what you’ve been used to – I certainly have.