First Impressions: Specialized Turbo Levo
Words: Nathan Petrie
Images: Cameron Mackenzie
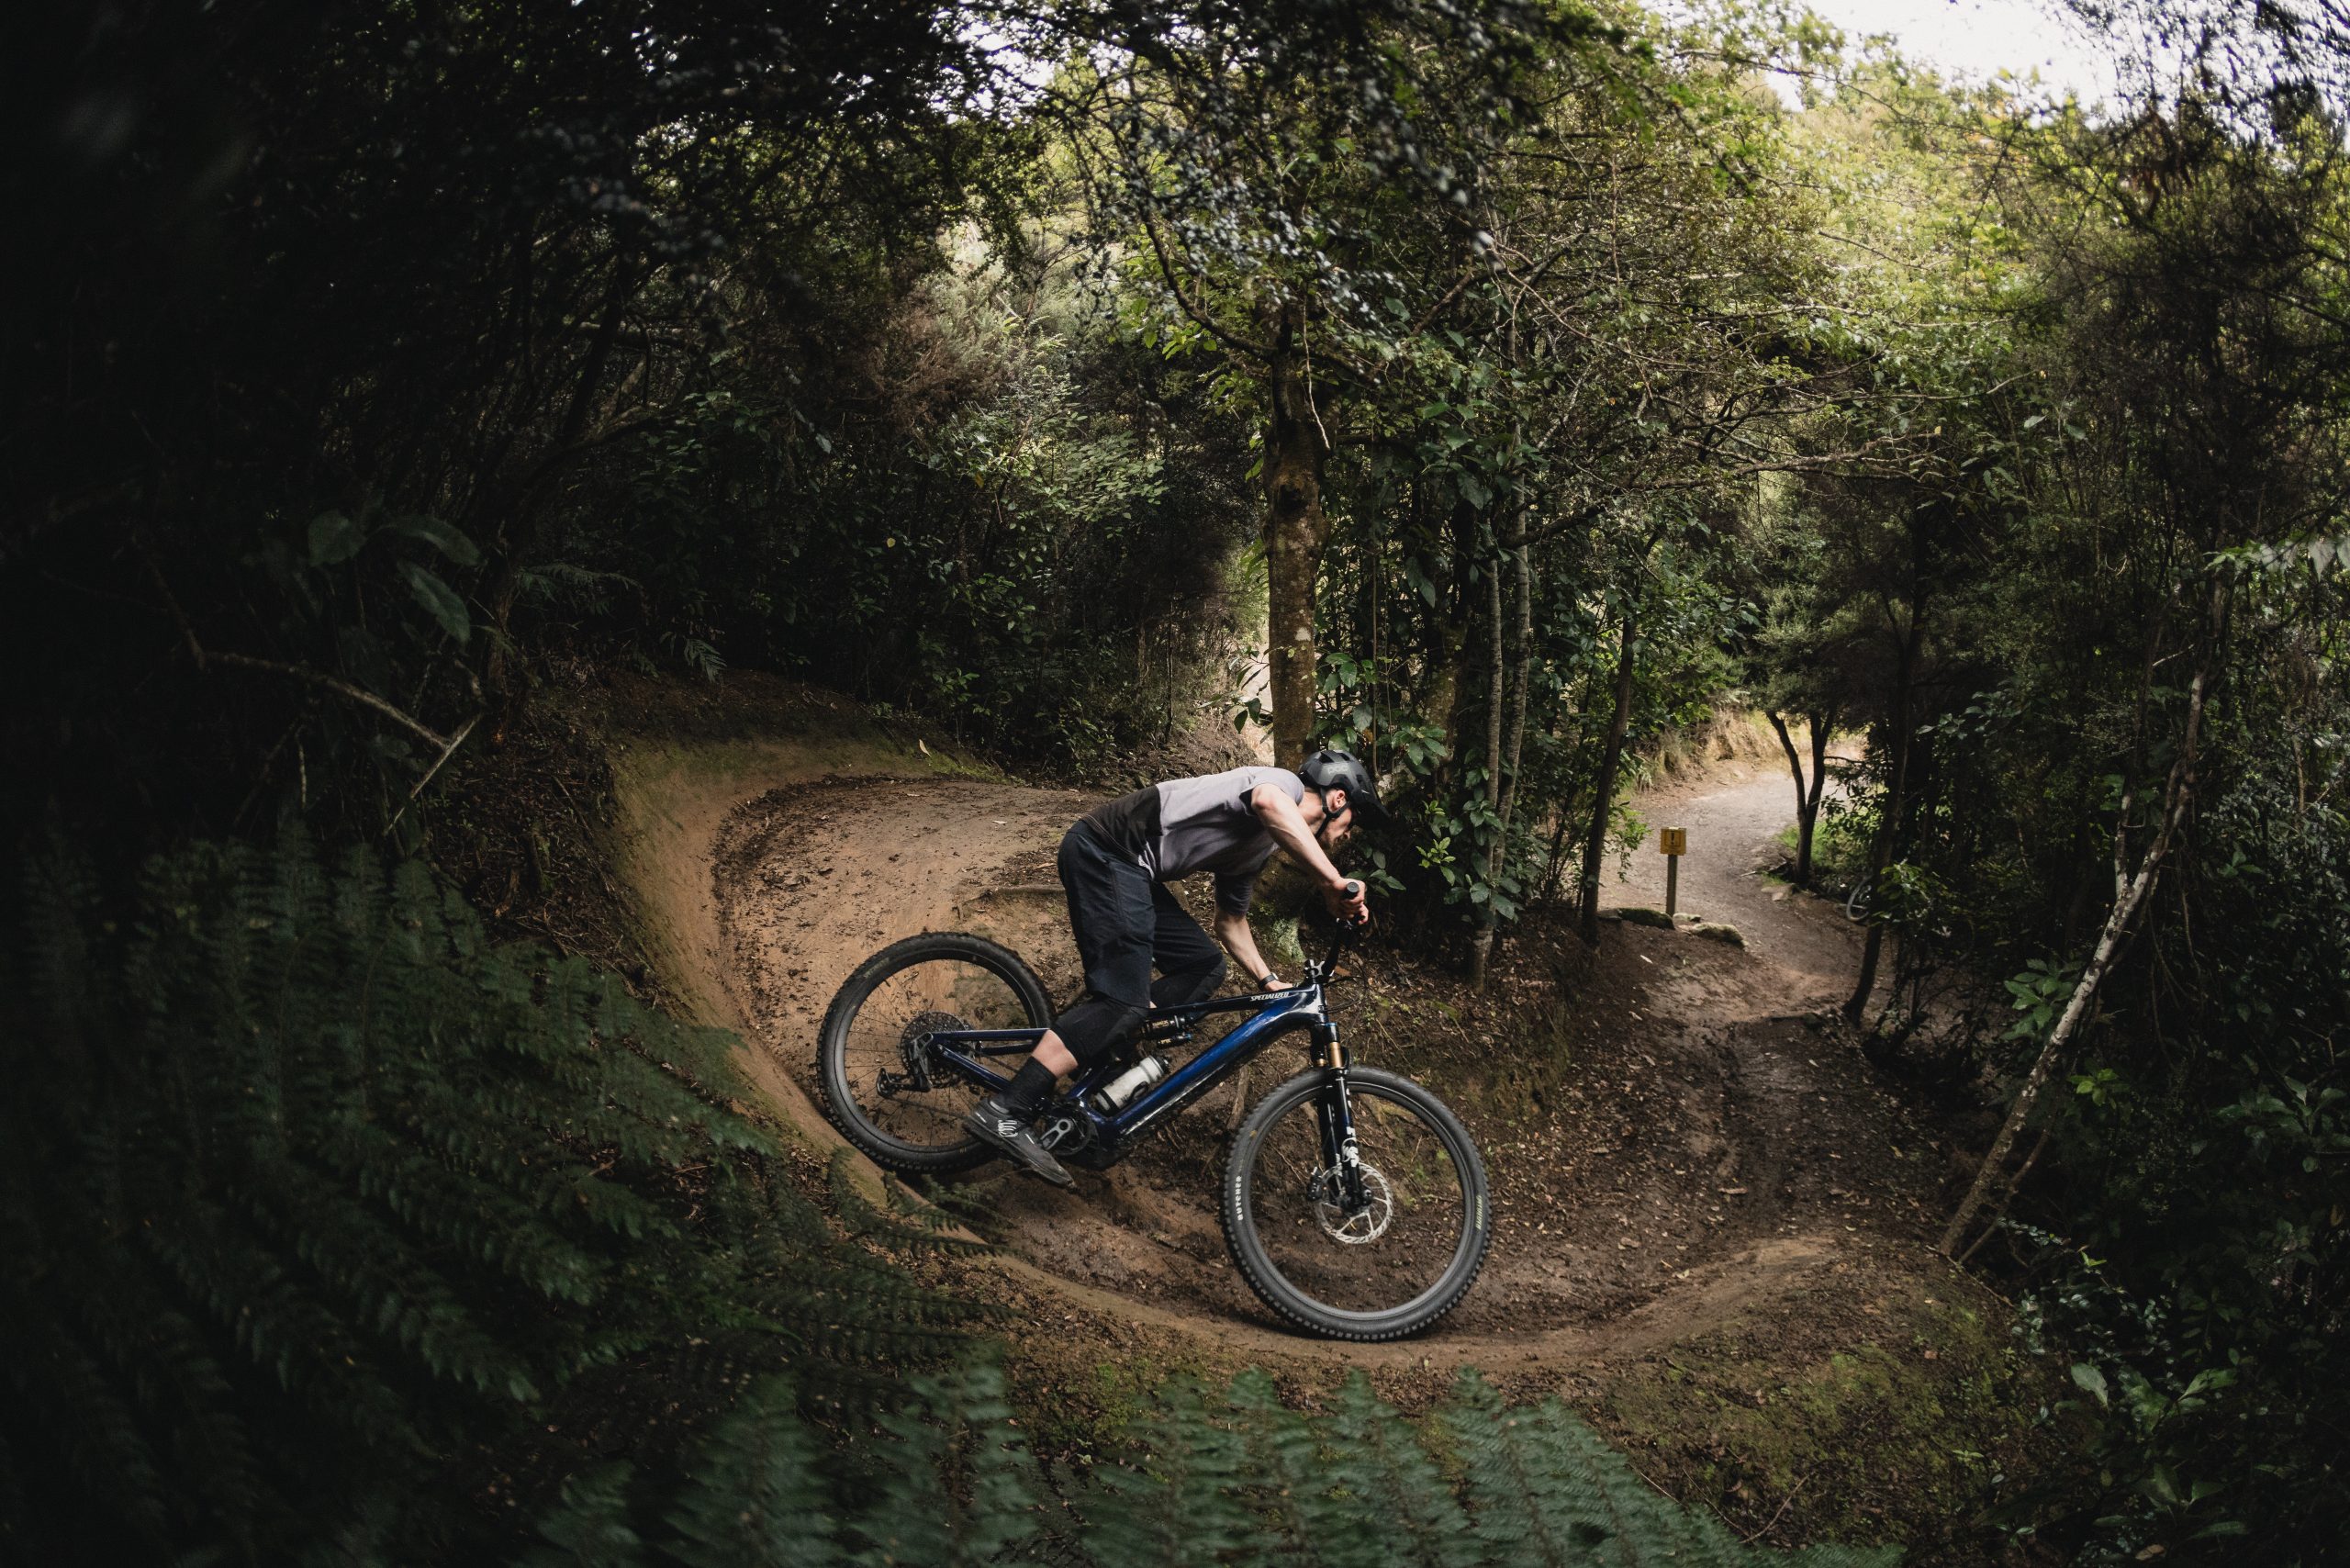
As an unashamed fan of eBikes, I’m always pumped when I get the chance to throw my leg over a new offering from a brand in the space. So, when the opportunity presented itself to try out the highly anticipated new Specialized Levo, I knew it was something I couldn’t turn down. The Levo’s a bike that holds a bit of a special place in my heart, seeing as the first generation one was the first eBike I had the chance to ride. Times have changed a lot since then though, and in the rapidly evolving world of e-bikes I was interested to see how this redesigned Levo stacked up! Pulling the bike off the rack, the first things that are noticeable about the new Levo – aside from its Stumpjumper-inspired styling – are the large Geni shock and the stout downtube. But don’t let either of these things fool you into thinking that the new Levo’s just a two wheeled couch like some full-power eBikes can be. A quick bit of carpark tuning later and it was apparent that the Levo had a lively and responsive feel. At a time where riders are facing the choice between a full-power or lightweight eBike, this kind of responsiveness with the power and range the Levo offers may provide some riders with a bit of food for thought.
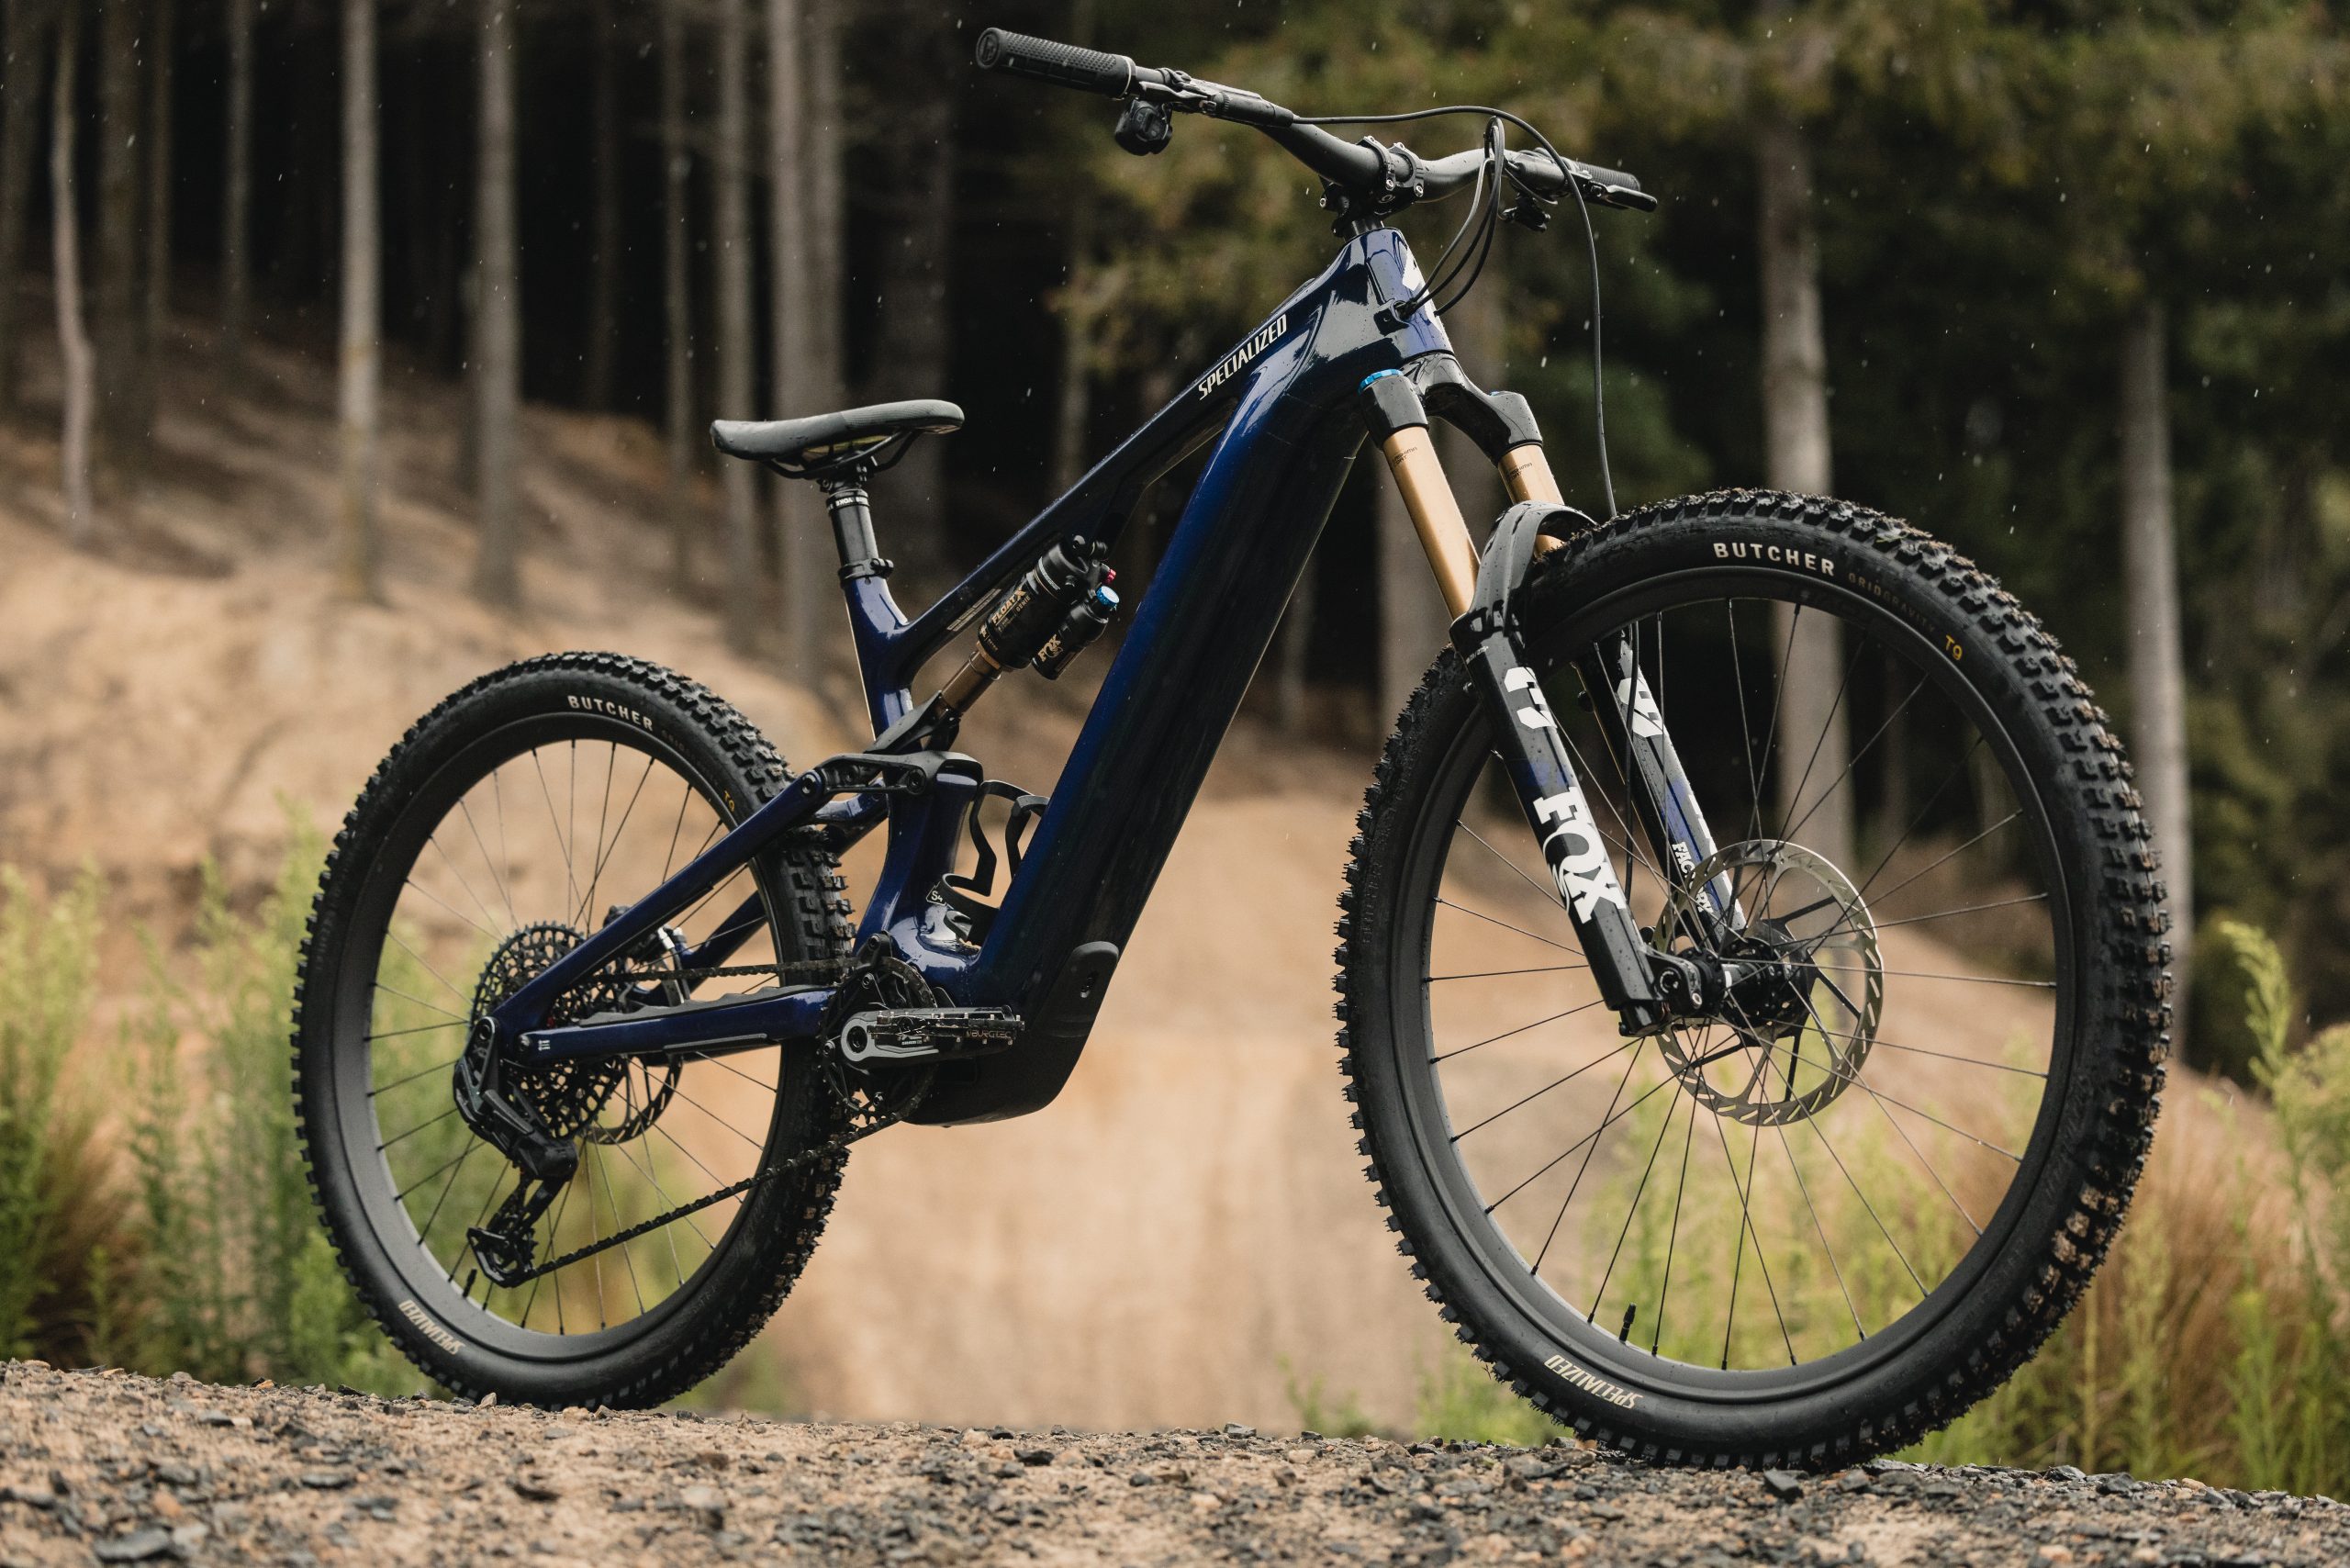
A glance over the Levo’s geometry chart and travel numbers reveals where this responsive demeanour might come from. The key figures like head-tube and seat-tube angle, chain-stay length, reach and wheelbase were all pretty standard across the board for our S4/Large size test bike. As with many of Specialized’s gravity-oriented bikes, the head angle, chain-stay length and bottom bracket height can also be adjusted to offer a more customised riding experience. On top of this, the travel – at 160mm front and 150mm rear – is a pretty ideal amount for all-round riding. The weight also feels fairly respectable too; impressive given the large 840Wh battery spec’d on our Pro level build. As has been the case for a while with Specialized eBikes, the overall package is fairly well thought out. The remote – while still wired – is fairly slim and very responsive, and the enlarged touch screen is well integrated into the top tube so you can easily keep tabs on your battery level and power setting. Specialized have added to the versatility of the system by giving riders the choice between either the 840Wh battery we had, or a smaller 600Wh aftermarket option.
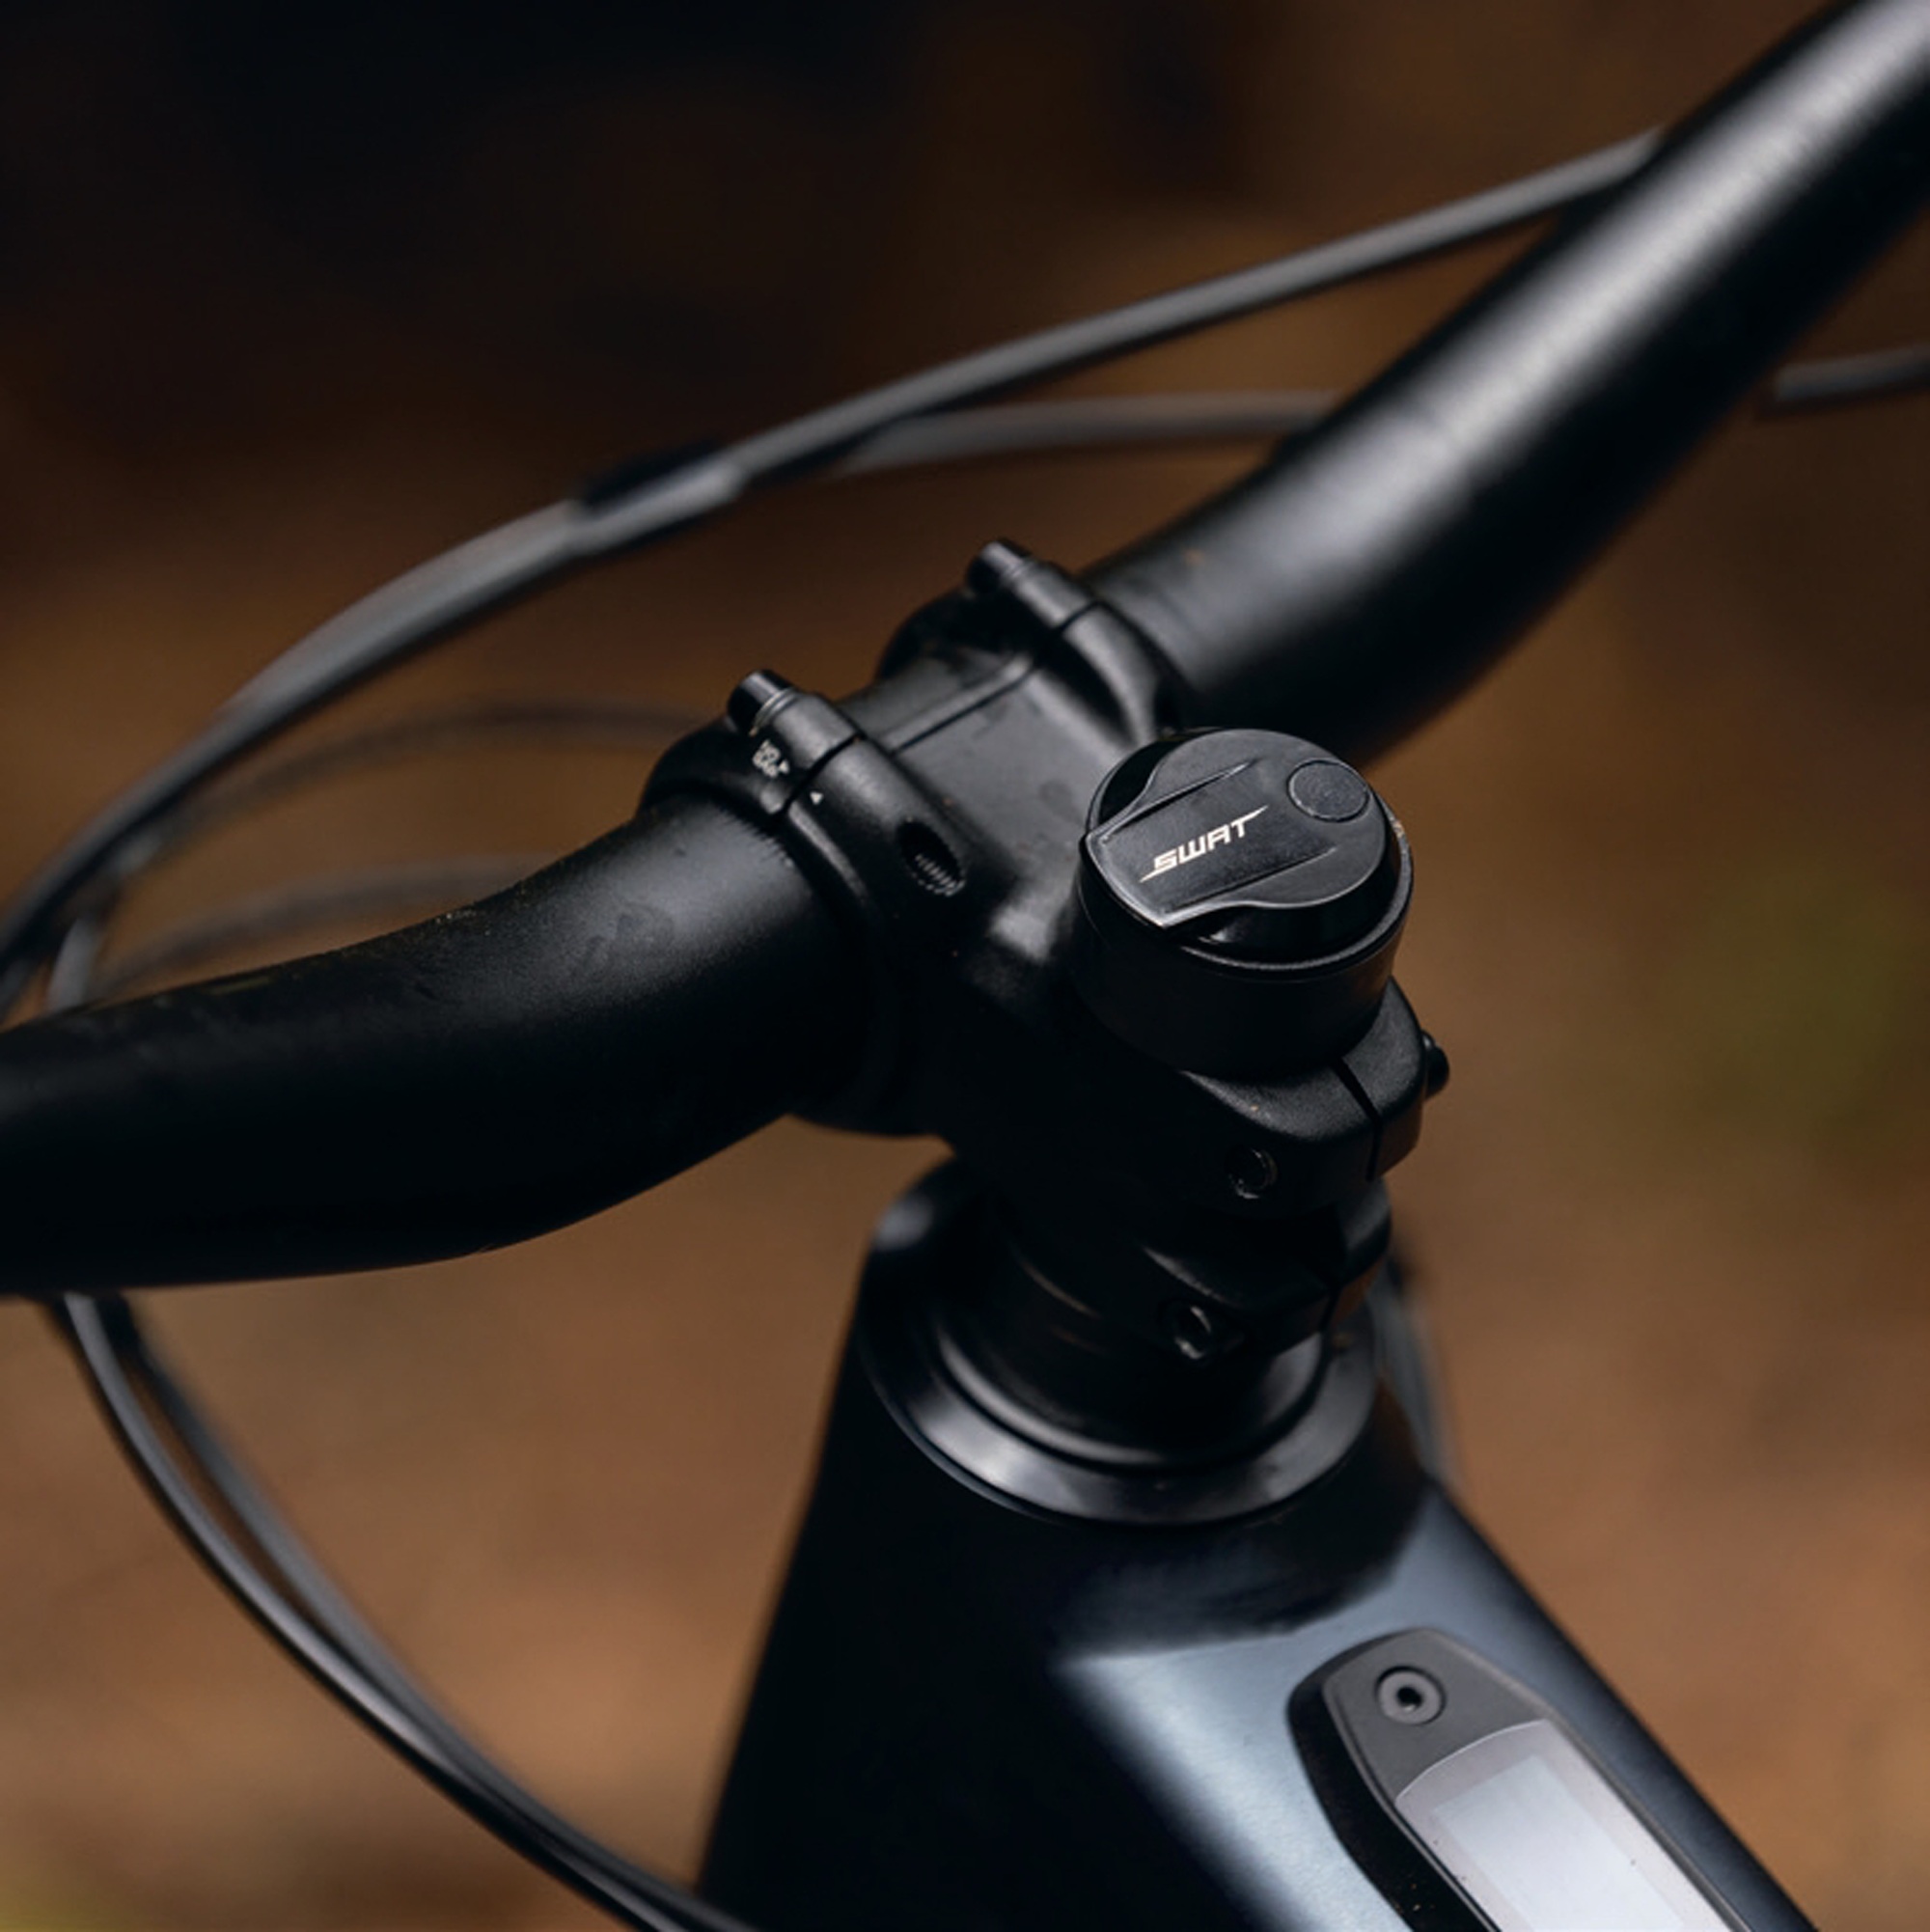
On top of this, riders can use the 280Wh aftermarket extender for even more range with either battery. This gives a fairly impressive 1120Wh of capacity at its maximum which should offer plenty of scope for the kind of back country exploring eBikes are good for. The Levo also features an eBike-first in-frame storage option, with a SWAT bag that fits neatly above the battery in the head tube area. The build kit on our Pro level model was also largely what you’d expect from a bike at this price point. From the nicely finished carbon frame to the Factory Fox 38 fork, SRAM XO transmission drivetrain and carbon Roval wheels, the build kit didn’t leave you feeling short changed. The frame and motor were nice and quiet on the descents as well, with no annoying motor or cable rattle to speak of. The only possible area for improvement would be consistently speccing a 200mm dropper post as standard on S4 bikes. While many companies seem to be keen on allowing riders to size up, anything less than 200mm on what would be a large bike is just too short for the average buyer of that size.
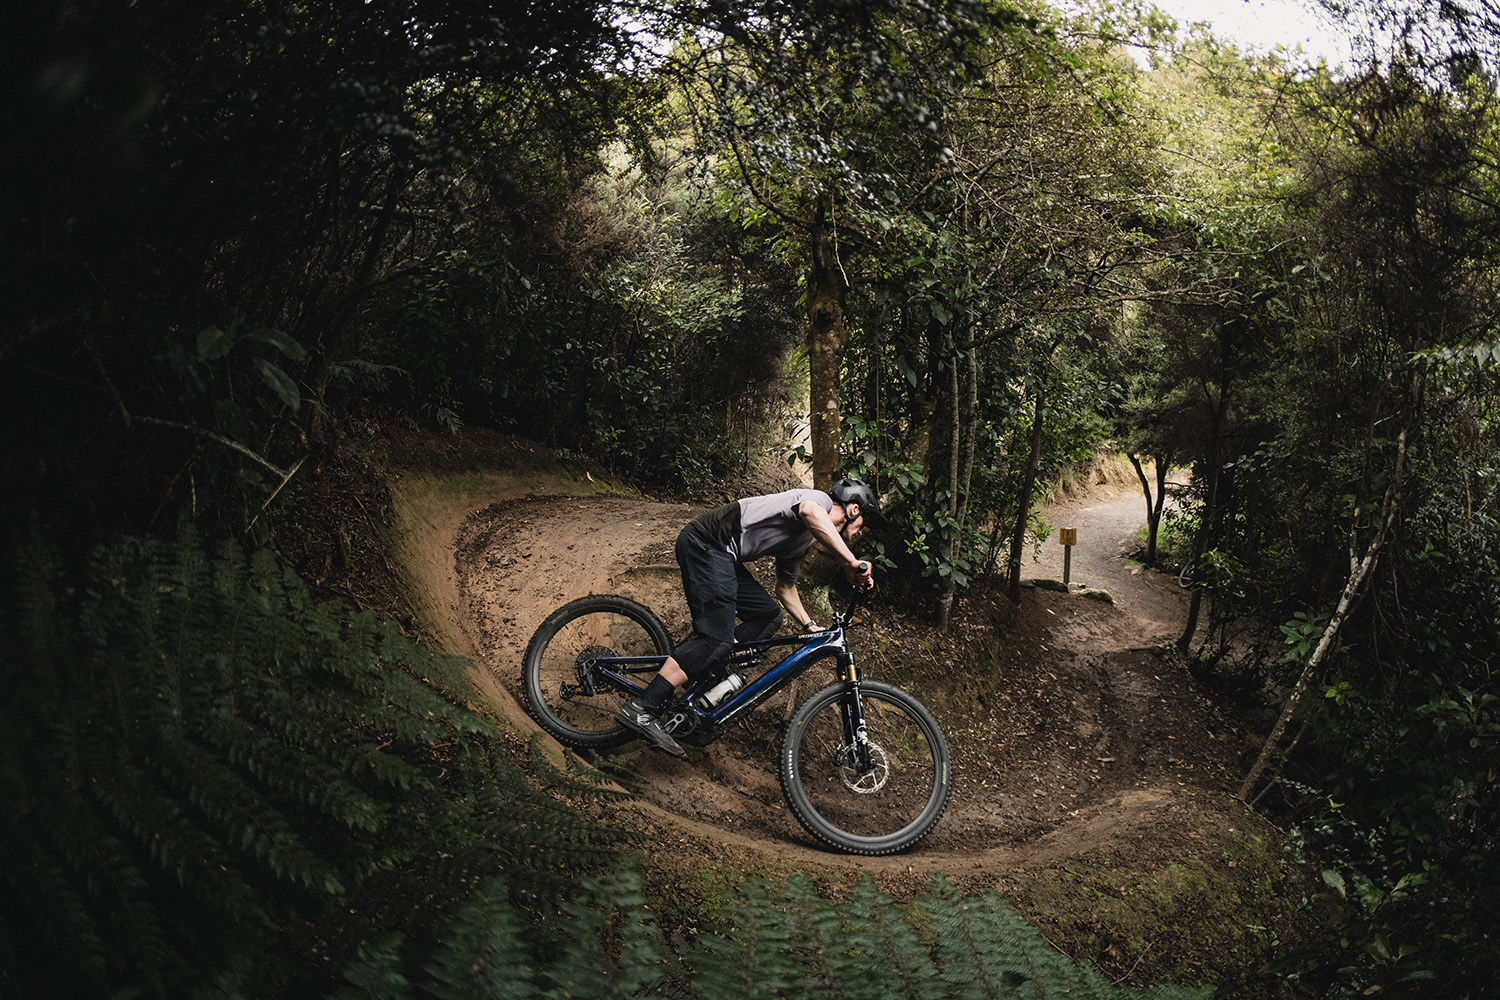
While the first ride on a new bike will always be a bit of an unfamiliar experience, having that first ride in an unfamiliar location can really highlight how easy it is to get on with a new bike. For me the first lot of riding on the Levo came in the form of a trip to Dunedin to highlight what the city had to offer as a riding destination. The first outing on the bike at Signal Hill confirmed that the bike is pretty easy to just get on and ride. The predictable handling and suspension performance means that, aside from the usual cockpit adjustments, there’s not much of a bedding in period – or any quirks to get used to. The first thing that strikes you on the climbs, is how smoothly and quietly the bike delivers its ample power and torque. Some eBike motors aren’t exactly stealthy when it comes to putting the power down with a noticeable whine from the motor. This was something Specialized put a lot of effort into when developing the new 3.1 motor. The new Levo also has a decent bump in power and torque over the outgoing model, with that power being maintained over a much wider cadence range. While my first ride didn’t feature much in the way of technical climbs, we did head up a couple of fairly steep sections of single (and double) track. Aside from some unrideable clay patches, these climbs didn’t seem to faze the Levo, even in Trail mode.
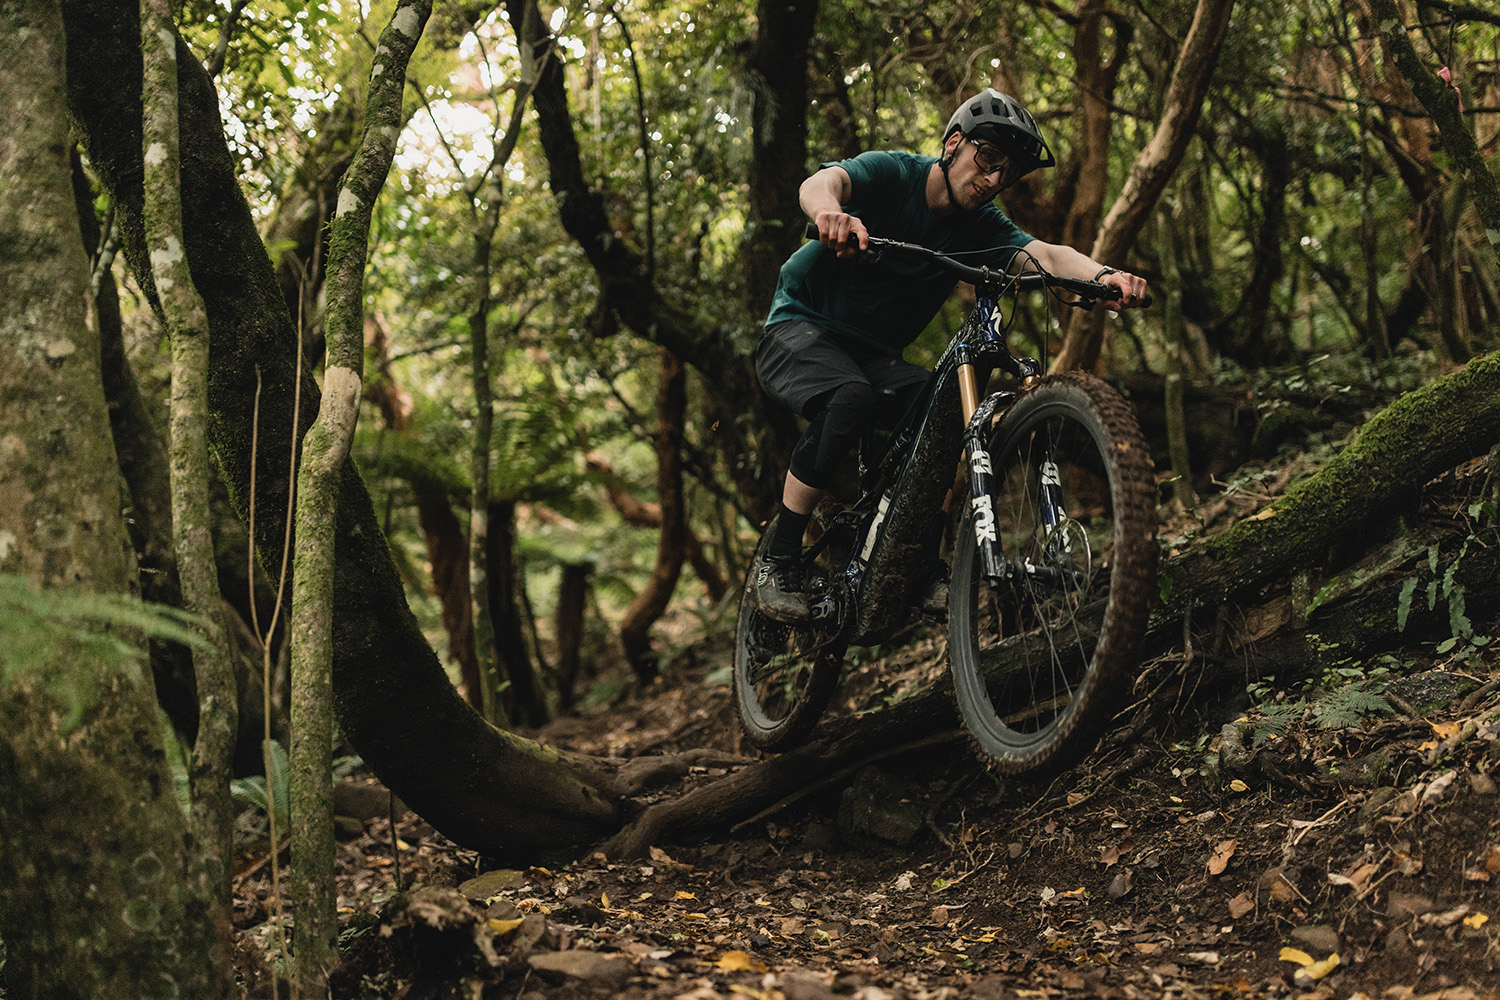
The responsiveness that was noticeable in the car park was also put to the test early on at Signal Hill, by rolling through a few sets of jumps. Some full power eBikes can be a bit of a chore to get off the ground, especially with flatter take-offs, and can still feel slightly weighty in the air. Not so with the new Levo. On both the high-speed DH style jumps on the Nationals track, and the more sculpted lips on the Jumps track, the bike was more than willing to get airborne. When in the air it was also easy to move the bike around and get some decent shape – once again, not something that is readily done with all full power eBikes. The bike also performed well on the slippery rocks and roots that we were treated to throughout our time in Dunedin. The bike struck a nice balance when it came to frame stiffness, holding its line well in rough sections but not causing the bike to feel harsh or deflect off a wet root or rock. This stiffness, coupled with the suspension and wheels, made for a comfortable and compliant ride in rough and unfamiliar terrain where you’re not always on the ideal ride line. The revamped Specialized tyres also offered plenty of traction in most places and, when combined with the SRAM Mavens, provided a nice sense of control over the slick terrain.
The outing in Dunedin also provided a good opportunity to put the range of the new Levo to the test, with two decent length rides in one day. While these rides didn’t cover a huge number of kilometres, we did get in near on 1200m of climbing across two locations. This left us with around 27 percent of the battery remaining by the end of the day. I also had the opportunity to try the Levo a bit closer to home, in two different situations that eBikes are good for. The first was more of a power hour-and-a-half on the trails of the Christchurch Adventure Park and Victoria Park. The adventure park in particular can be very harsh on bikes, between the stretches of exposed volcanic rock and the hard pack singletrack littered with roots and rocks. Once again, the Levo provided a smooth and controlled ride on a lot of the rough sections and handled the steeps in both locations without any issue. Another run through some jumps on the adventure park’s O-Zone trail confirmed that feeling of predictability and liveliness that came through in Dunedin.
The second outing was more about tapping into the spirit of exploration eBikes in general are great for. This outing in the Canterbury high country largely featured some lower grade grassland, riverbed traversing and hiking trail. While none of this really challenged the Levo from a motor, battery or suspension travel perspective, it highlighted the general-purpose nature of the bike. Even on less demanding terrain at a more leisurely pace, the Levo never felt like too much bike. The same responsiveness was still there, and the motor still offered decent assistance when cruising along in Eco mode. So, after a bit of time in a good range of settings, I think it’s fair to say that the Levo carries on the lineage pretty well. It’s still that same great all-rounder bike that it’s always been, but with some useful improvements to the power, range, frame and suspension performance. It’s a bike that’s easy to just get on and ride in a wide range of terrain and for a variety of ability levels. Like its lower-powered (Levo SL) and unpowered (Stumpjumper) stablemates, it gives riders user friendly geometry, travel numbers and ride feel that makes it an easy bike to feel comfortable on right away. The combination of reasonable weight, good integration, generous range and quiet, responsive motor certainly maintain its place in the top tier of full-power eBikes.
Specialized Levo SL Comp Alloy
Words Lester Perry
Images Jamie Fox
RRP $11,500
Distributor Specialized NZ
The Specialized Turbo Levo SL debuted in 2020. With its discreetly integrated battery and motor system, it looked more “normal” than the competition’s eBikes at the time. The Levo SL set the standard for eMTB aesthetics and was a lighter, more agile alternative to the standard Turbo Levo, Specialized’s full-powered bike that launched five years earlier.
Now in its second generation, we’ve seen an evolution in suspension, updated geometry and improved motor efficiency. I’ve spent roughly two months with this bike, changing its many adjustments and razzing it around my local—and some not-so-local—trails.

Chassis
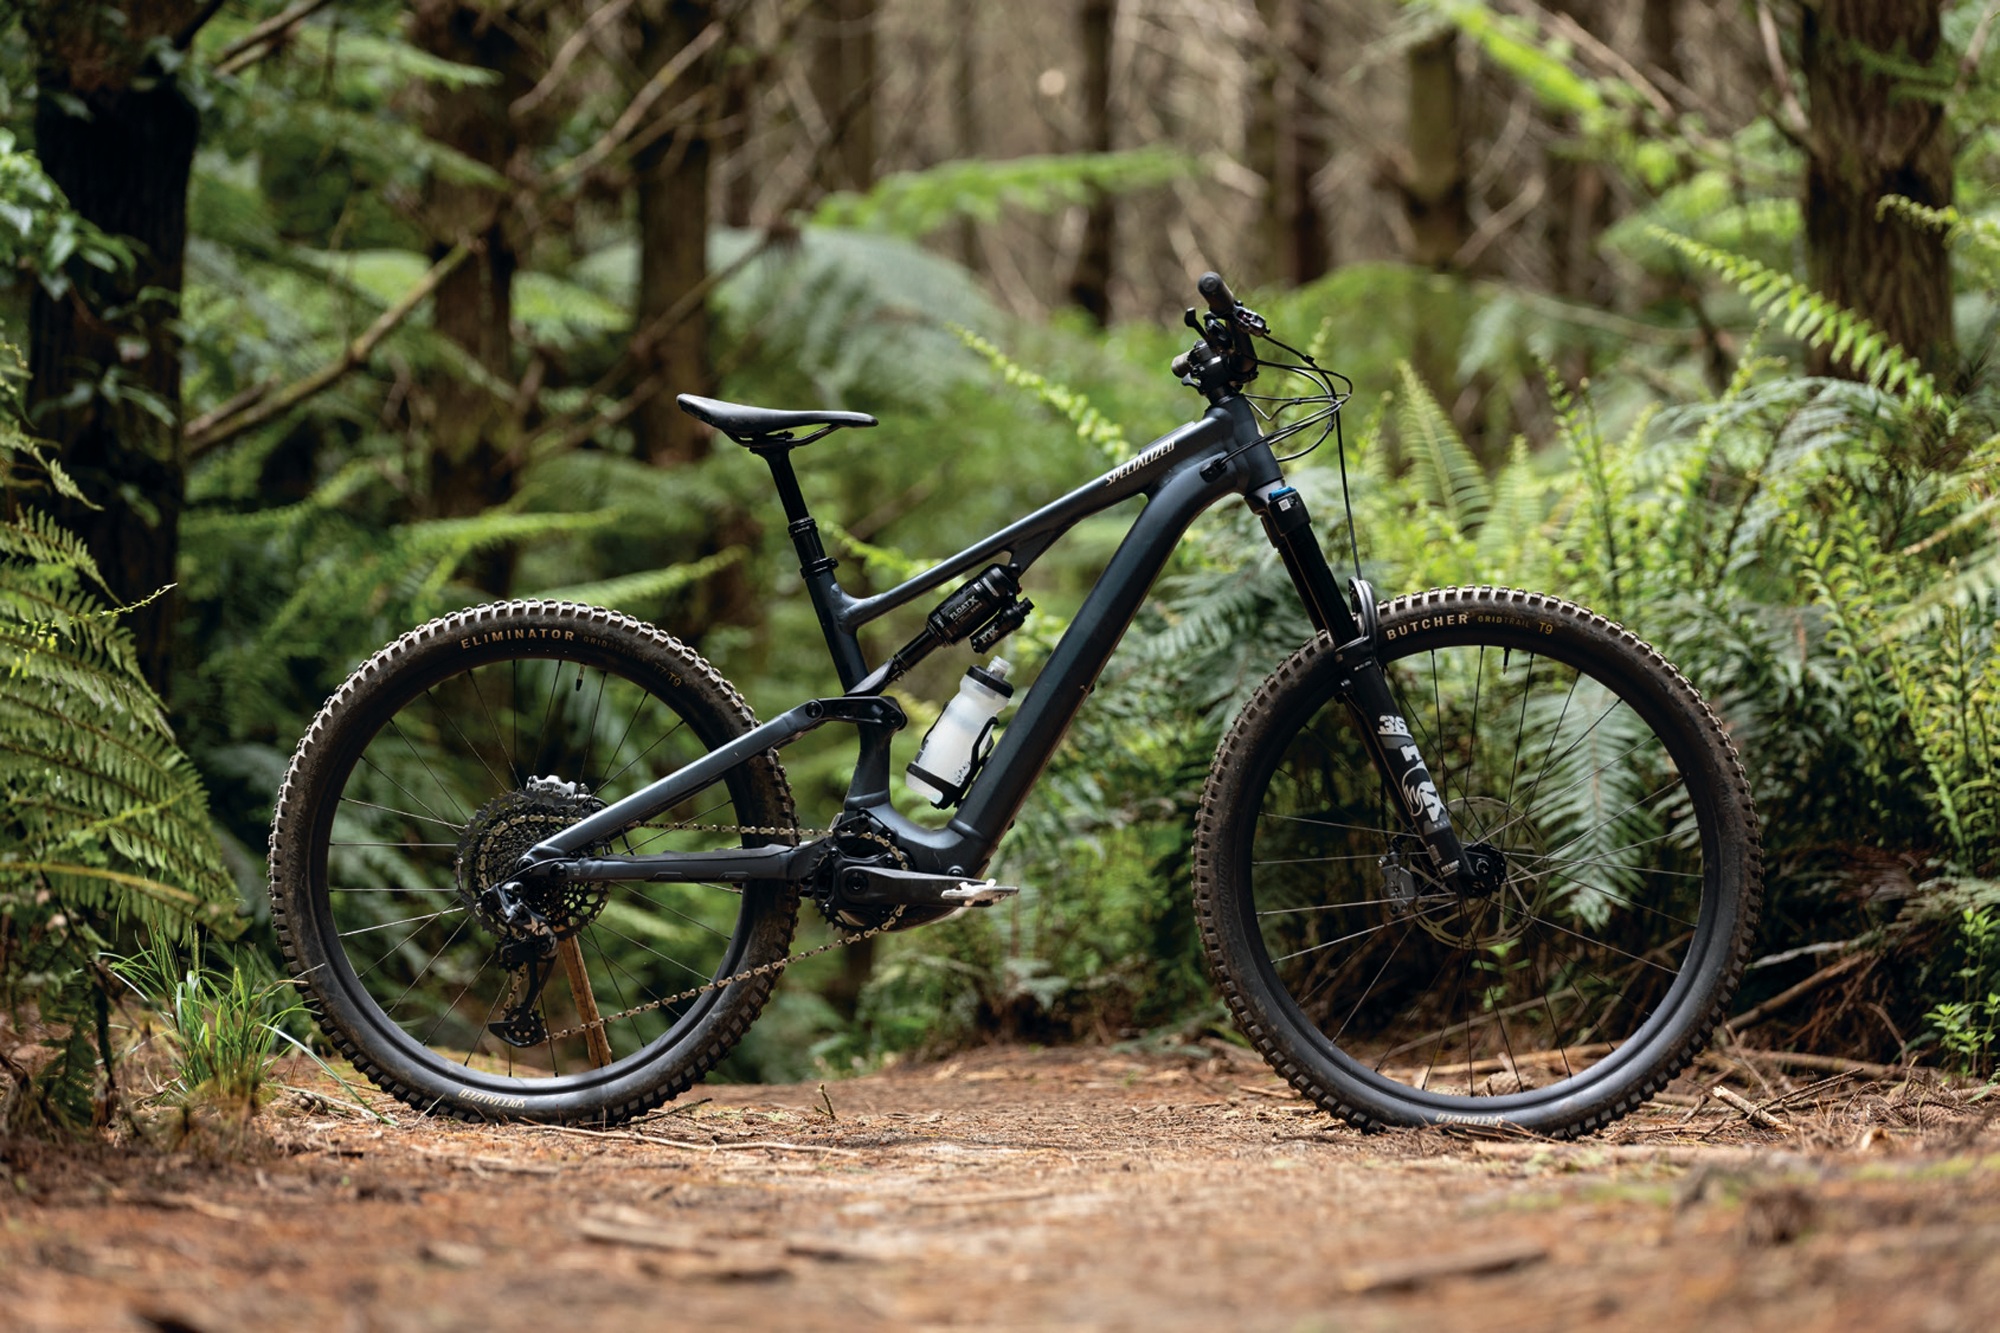
The SL2 Comp Alloy is the gateway into the SL lineup. With its alloy frame, it’s what I’d call the heavyweight of the SL range; the frame comes in at a kilo heavier than the carbon equivalent, so although there’s not a vast difference between the two, a kilo is a kilo. Considering the motor and battery are identical to those of its higher-end carbon brothers, the Comp Alloy would be an excellent platform for future upgrades; decreasing its weight (although not by a drastic amount) and adding to the overall ride experience with better components.
With a 160mm front suspension fork and 150mm travel in the rear, the Levo SL2 strikes a healthy balance of brawn and butterfly. There’s enough travel and the geometry is designed to not hold you back on the nastiest of descents, yet the bike is light and nimble enough to pick your way through tech, rapidly change direction, and even bunny hop or manual through sections with surprising ease.
This bike could be viewed as a couple of different bikes, able to be configured in a number of ways thanks to the breadth of adjustment available: the head angle is adjustable between 63 degrees (slack), 64 (stock), and 65 (steep). Adjusting this is almost as easy as replacing a headset bearing; remove the stem, headset top cap, compression ring and bearing, and lift out the upper headset cup. No tools are required. Drop in the supplied ‘adjustment’ headset cup; depending on its orientation, you’ll either get down to 63 degrees or up to 65.5 degrees. Refit the headset components—and job done. There’s no need to touch the lower headset cup at all.
The bike has a mullet wheel configuration, a 29-inch wheel up front, and a 25.7-inch out the back. Thanks to a flip chip on the Horst pivot (near the dropouts) that lengthens the chainstays by 10mm, the rear wheel can be swapped out for a 29-inch if you want more roll-over capability without nuking the machine’s handling. The bottom bracket is adjustable to a minor degree by flipping its off-centre lower shock mounting hardware and raising the bottom bracket by 5mm from stock. It’s a scant amount but will offer a smidge more clearance for the pedals and motor housing over technical terrain, although I haven’t found this to be needed in the stock ‘low’ setting. It’s worth noting that each adjustment made will affect all geometry numbers. Specialized have a chart in the manual explaining what the numbers look like with different adjustment configurations.
I toyed with the head angle a little, riding with it in the stock 64 degrees to begin with, then in the steeper 65 degree setting. The stock 64 degree setting was a good middle ground for most trails, although it felt a fraction slacker than ideal on flat or mellow trails. So, I fitted the adjuster cup, setting it to 65 degrees. The one-degree steeper head angle increased the manoeuvrability on anything mellow and tight, but it wasn’t as stable on choppy descents. I never felt the need to slacken the bike to 63 degrees, but if I were headed somewhere to ride steeper, faster trails, say Queenstown or Nelson, the slacker setting would be ideal. The stock 64 degrees seems to be the perfect middle ground for general riding.
Given all the adjustment options, this bike can adapt to optimally align with your riding style and the trails you ride.


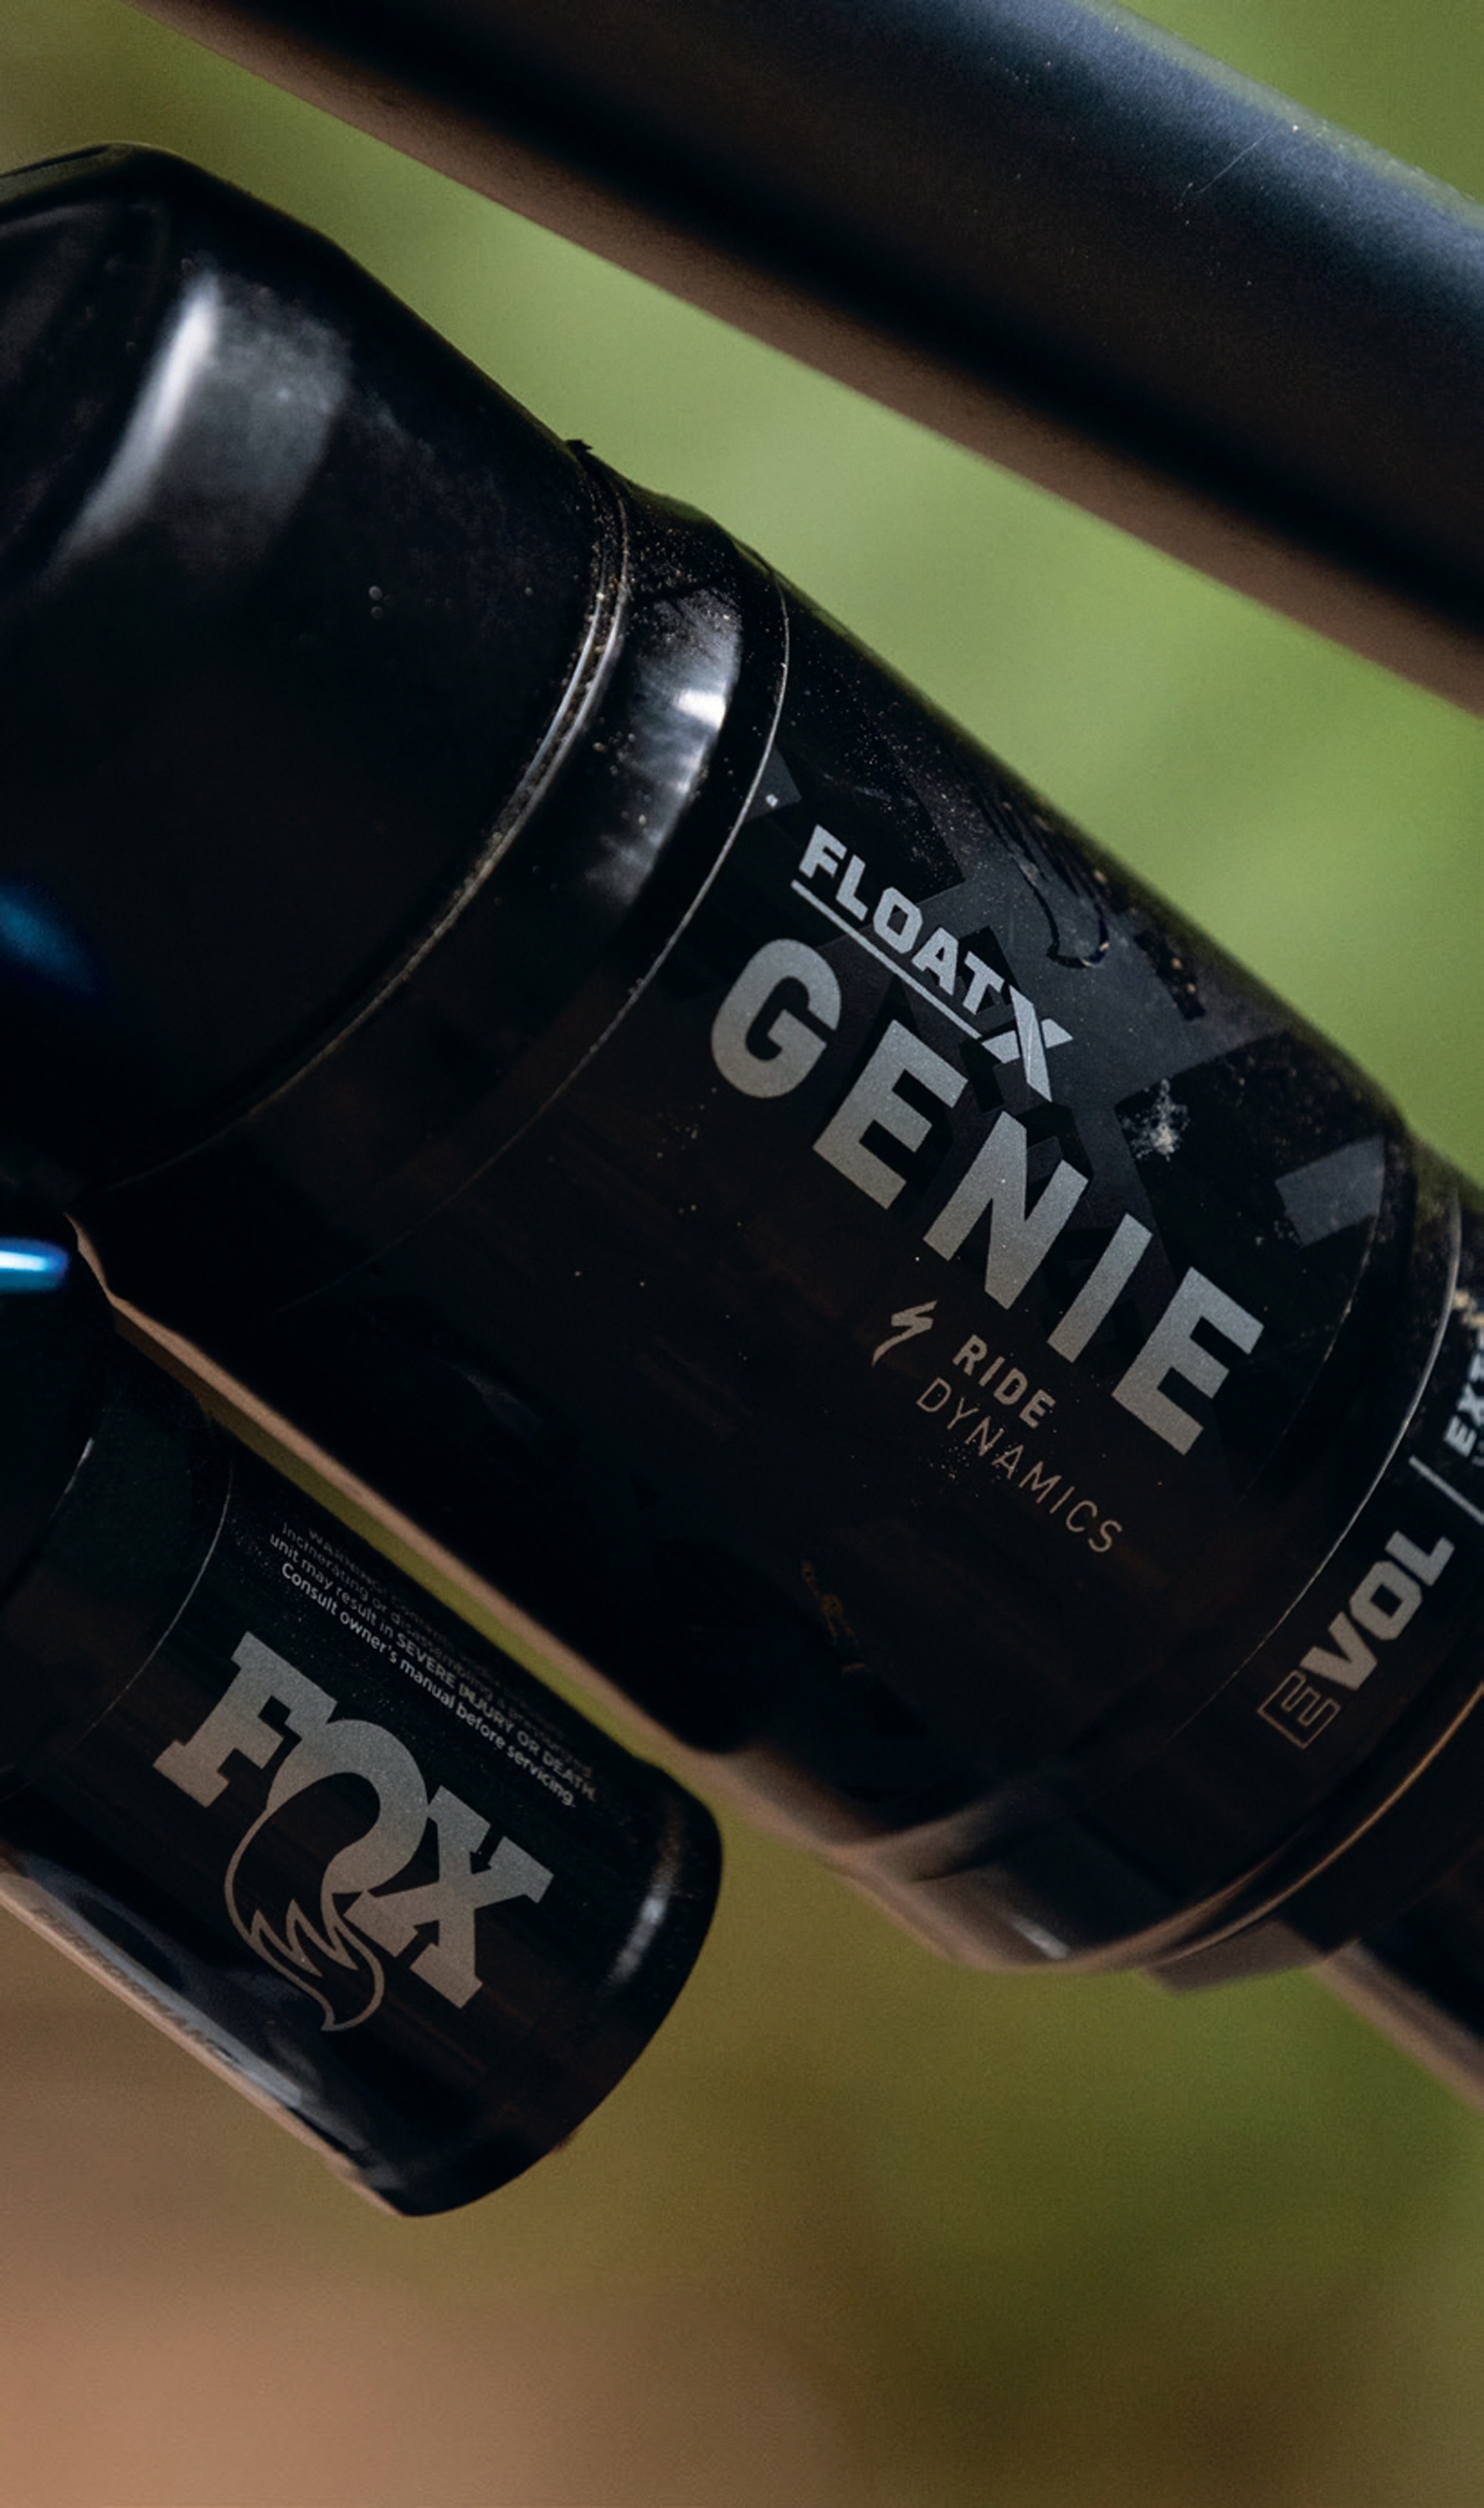
Genie Shock
This latest iteration of the Levo SL features the Specialized developed, Fox-manufactured, Genie shock. This unit launched to fame on the latest Specialized Stumpjumper, claiming a coil-like feel and a tuneable mid- and end-stroke.
By making the main air spring larger, they’ve enabled the shock to maintain small bump sensitivity and relatively linear progressivity through the first 70% of its stroke. With 30% of the stroke remaining, the shock closes off most of the total air volume, essentially creating a smaller volume air spring active for the end of the stroke, causing a much steeper ramp-up and drastically increasing bottom-out resistance. On a bog standard air shock, in most cases (depending on the bike design), you sacrifice small to medium bump compliance and sensitivity to achieve decent bottom-out resistance, and vice versa. Bottom-outs increase once you soften the shock in a quest for buttery small bump and mid-stroke sensitivity. The Genie manages to deliver small bump sensitivity while maintaining super end- stroke ramp-up, and bottom-out resistance.
After my first ride on the Genie, I was amazed at how linear the shock felt, and it certainly delivered on the coil-like claims with a buttery smoothness. Although it performed well, I wanted a bit more support to push against while pumping and jumping, and felt it was moving through more travel than was necessary, causing it to wallow at times. Mid-stroke tuneability is in the shape of plastic volume bands fitted in the air can, much like many other shocks. They’re simple to fit and equally easy to remove. Let all the air out of the shock, pick off the snap ring that holds the air can on, slide it back, snap the two halves of a volume spacer together over the shock body, slide the air can back into place, refit the snap ring, air it up and hit the trails—all you need is a small pick—or in my case, a tiny screwdriver from my son’s tool kit that worked as one—a shock pump and five minutes.
Once I slid the air can off, there were no bands to be found, which explained the overly linear feel. I fitted three bands of a possible four, aired back up to 33% sag, and confirmed my choice with some front-yard testing. It wasn’t until I hit the trail that the extra support really brought the bike to life, increasing how playful and lively the bike was on the track.
The end-stroke is also tuneable by adding circular chips to the shock’s interior air chamber. It’s a slightly more involved procedure, but it can still be done without removing the shock from the bike. The end-stroke ramp up and bottom-out resistance was fine for me in its stock setup, so I didn’t change anything here.
Once dialled in, the shock performed like the literal magic carpet Specialized intended. Thanks to the Genie’s effectively softer-than- normal spring rate early in the stroke, the small bump sensitivity was impressive, and there’s an amazing amount of traction on offer, it’s really noticeable how well the rear wheel tracks across bumps while pushing through a rough section or corner, compared to many other bikes.
Spec highlights
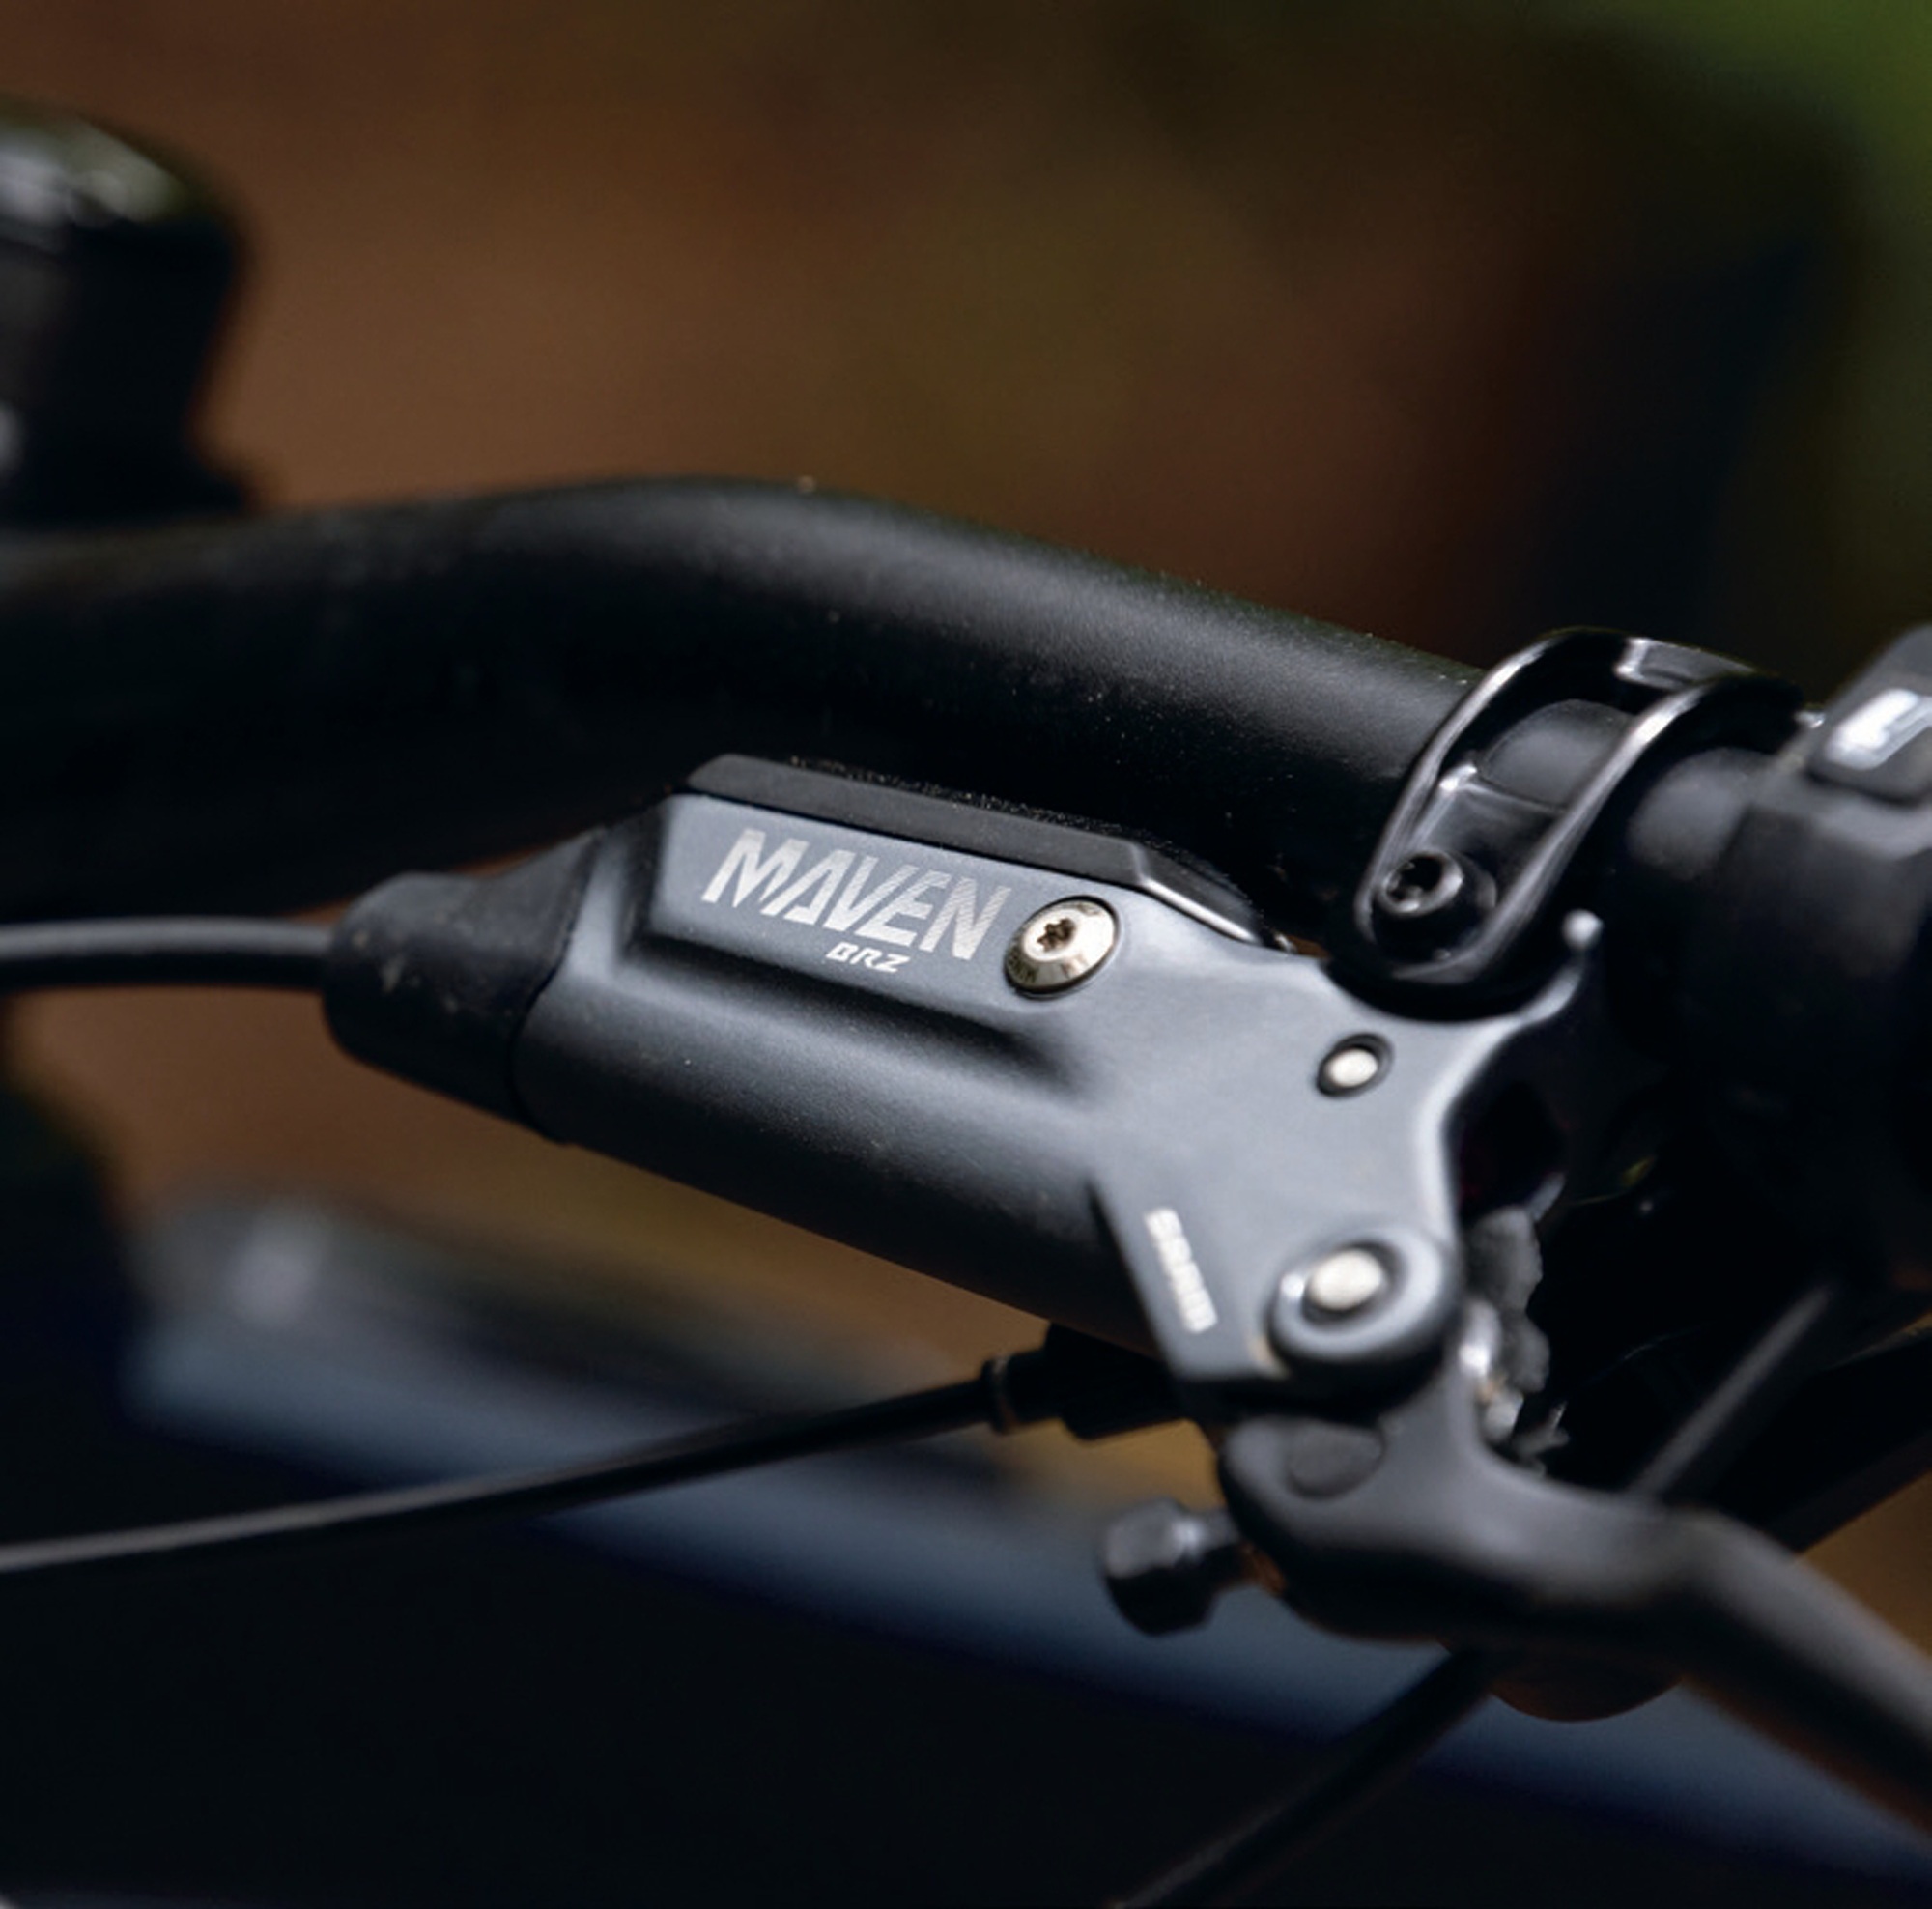
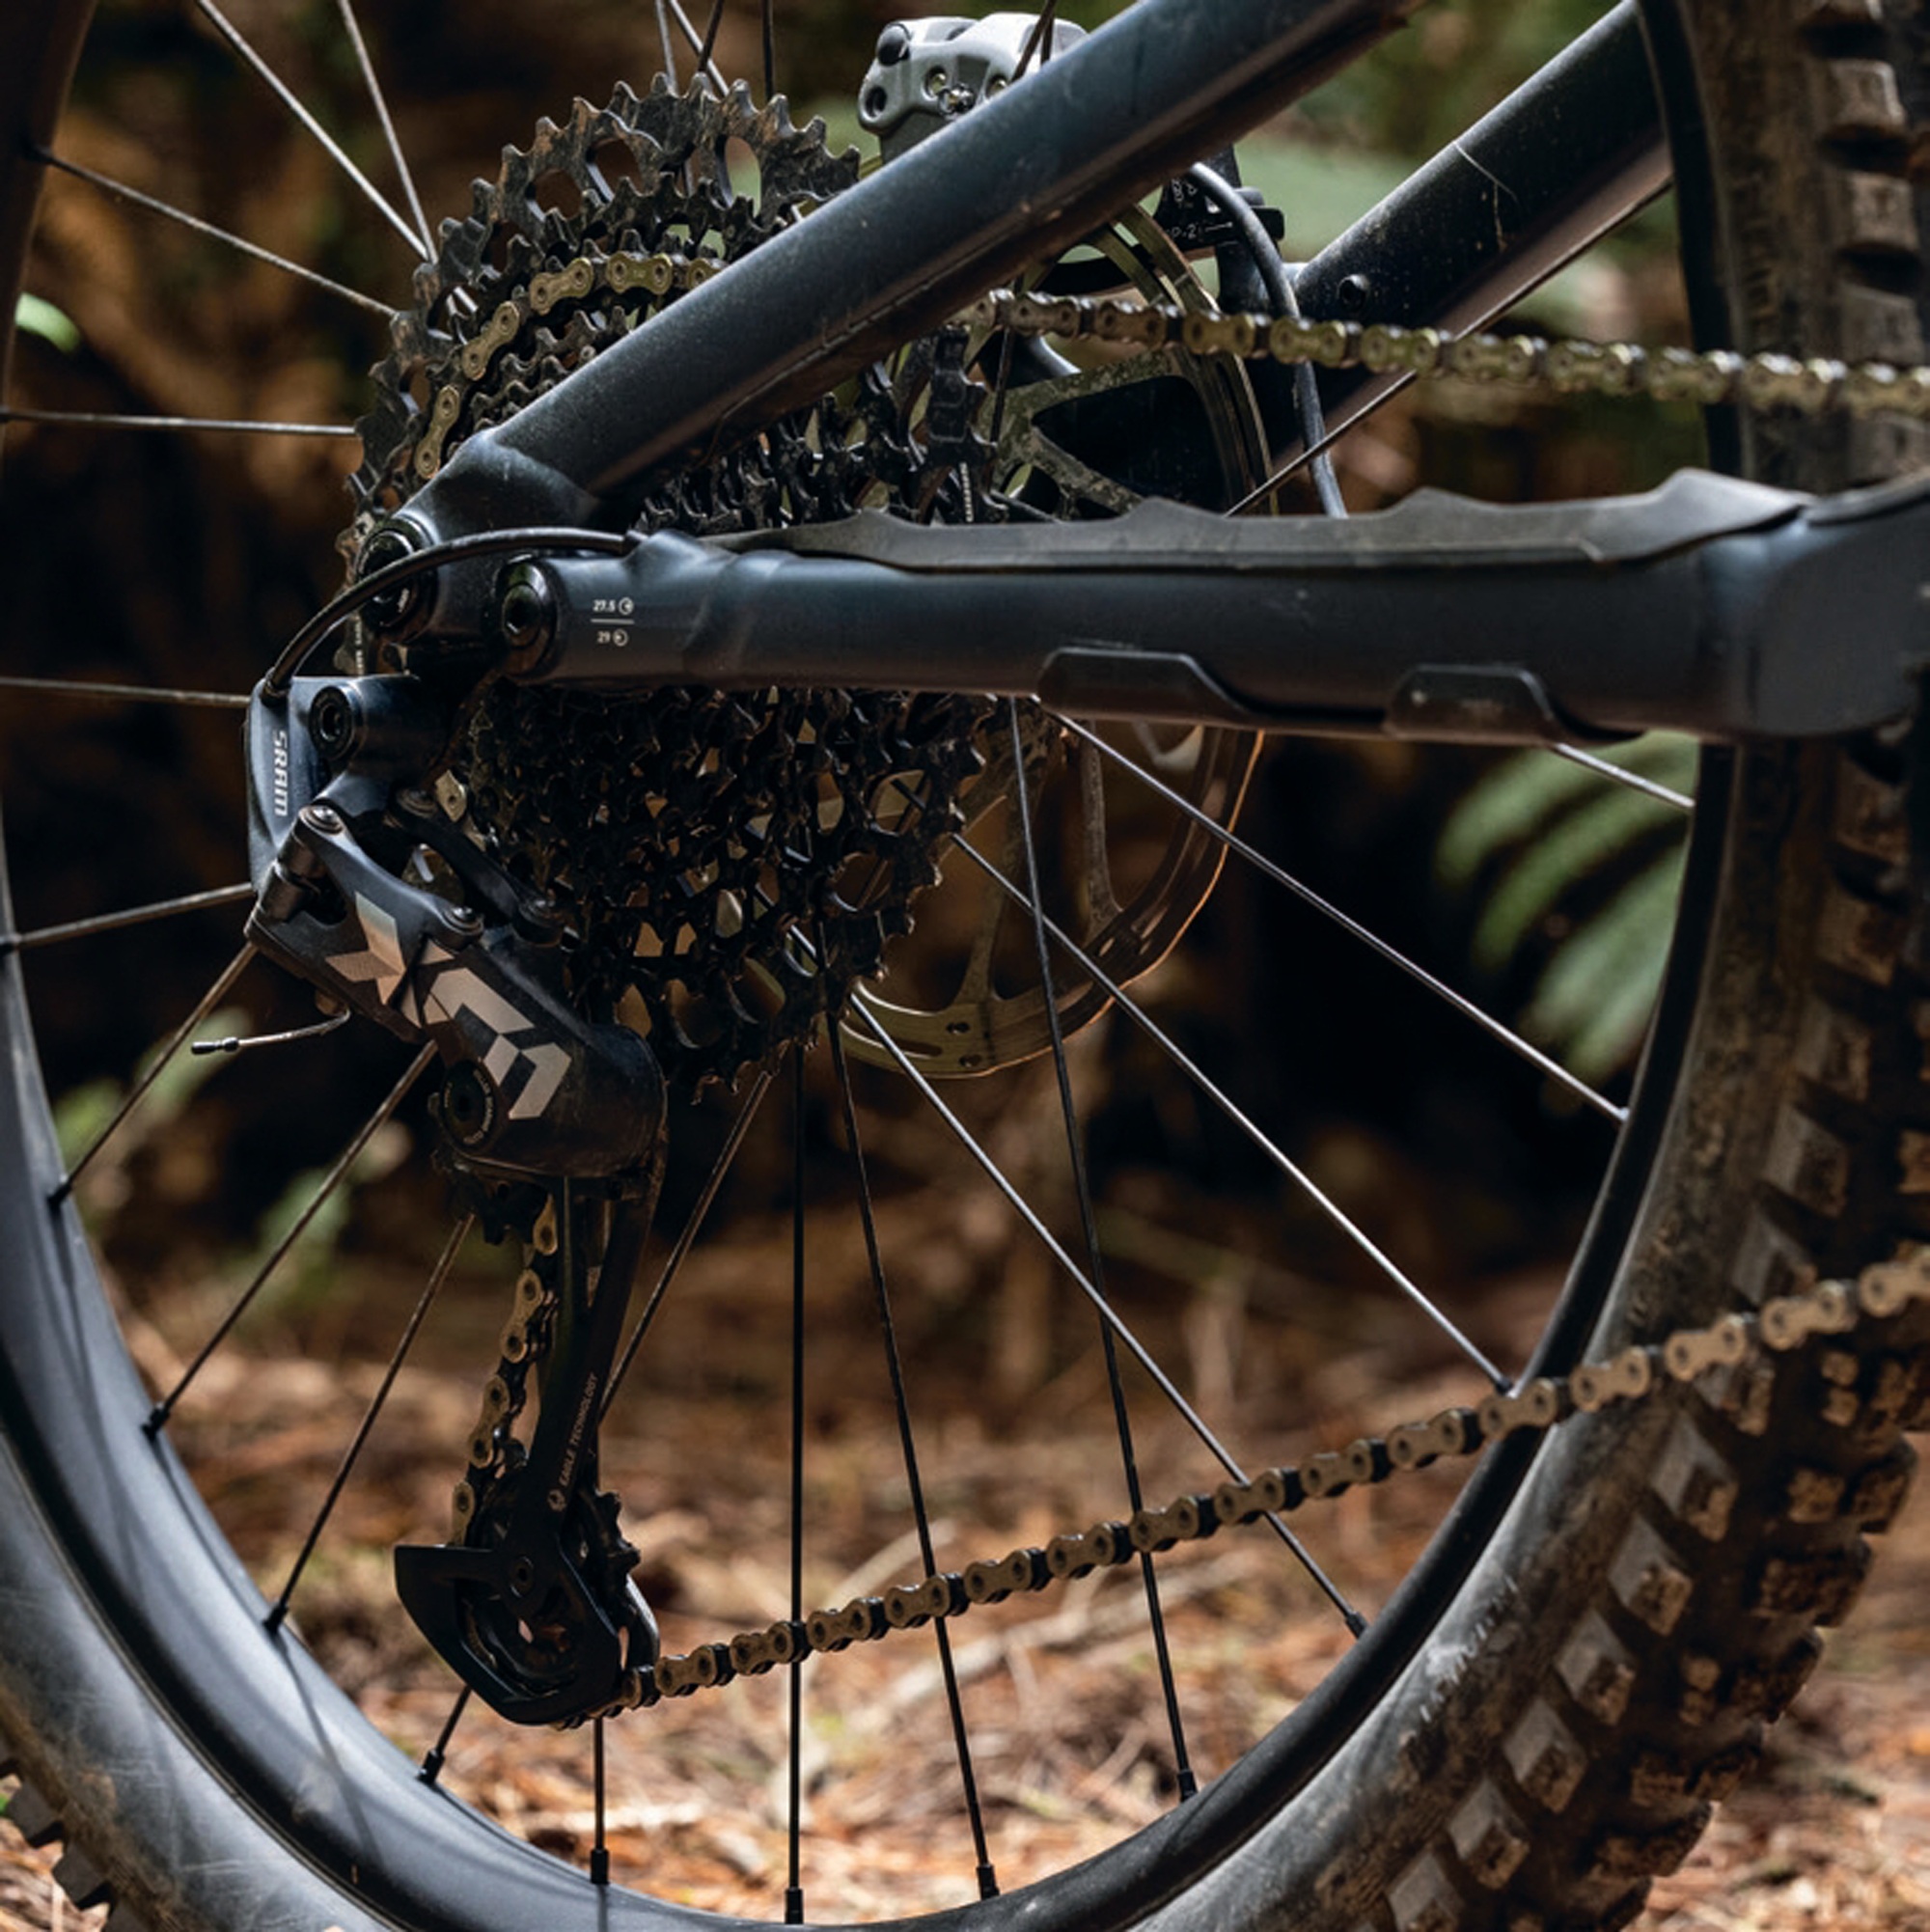
Fork: Fox Float 36 Rhythm | grip damper 160mm travel. The fork is stout enough to handle the heft of the bike, and did an adequate job, but could benefit from better damping and adjustment. A worthy upgrade, or step up through the SL range to get these benefits. Brakes: SRAM Maven bronze | 200/200mm rotors. Mavens get the big tick from me, the power and consistency are amazing and they add a level of confidence to an eBike that I don’t think can be gained by any other single component. Drivetrain: SRAM GX eagle shifter, chain and cassette, coupled with a SRAM X01 derailleur. Does the job admirably. Once it eventually wears out, I’d replace this with a SRAM T-type system as it’s far superior on an eBike.
Crankset: SRAM S1000, 165mm length. Short cranks are the best on eBikes, and 165mm is a great choice.
Wheels: In-house Specialized alloy rimmed set. They do the trick but, considering that the bike had hardly any use when it turned up but the rear wheel already had a small flat spot in it, I’d say that much like many OEM specced alloy wheels, these rims are on the softer side.
Tyres: Front—Specialized Butcher | grid trail casing | gripton t9. Rear—Specialized eliminator | grid gravity casing | gripton t9/t7. No complaints here. Reality is that, with the extra weight of an eBike, most tyres perform pretty well. Good to see a heavier Gravity casing specced on the rear, although with their softer compounds, the square edges are worn from the knobs quite quickly.
Cockpit: We get some plain Jane—but effective—alloy parts here. The handlebar has 20mm rise and a comfortable shape—no real complaints, but an easy place to upgrade.
Seatpost: X-fusion manic 170mm. This post fits the price point well, there’s no noticeable play in the post and it’s nice and smooth, but the return is a bit slower than ideal.

Motor unit
At the heart of the Levo SL2 is the new SL 1.2 motor, Specialized’s latest—and a noticeable improvement on the previous SL 1.1 generation. It offers a quieter, more natural-feeling ride, delivering 50Nm of torque, up from 35Nm previously, with 320 watts of power. Although there’s enough power and torque to get you through most scenarios, the light weight comes with the feeling that the motor is not doing all the work, you’ve got to play your part too.
The SL2 has a 320Wh battery, and a 160Wh extender is available. The SL series bikes are lightweight in all aspects of the driveline, compared to the standard non-SL Turbo Levo models, which are powered by the Specialized 2.2 motor pushing 90Nm, with a 700Wh battery. The range extender can also be used on the full-powered bikes.
The burning question everyone has regarding eMTBs is; “how long does the battery last?” The answer inevitably is always; “it depends”. There are so many variables at play that it’s hard to compare even the same bike between riders, let alone different riders on different bikes. I’ll put a stake in the ground, though, and you can make some assumptions from there. Fully kitted, I’m pretty well bang on 80kgs, and my local trails are either up or down; there’s a minimal amount of flat ground, so I’m either climbing or descending.
The climbs are pretty steep, and there’s sporadic pedalling down most of the descents. On a ride where I used Turbo most of the time while climbing the gravel road climbs (some very steep) and Trail mode everywhere else, I can get 1:45 to two hours out of the battery. The variance in time is solely down to how hard I’m riding; a solid, fast pace, and I’m looking in the vicinity of 1:45, but a little less effort on the climbs and I can get to two hours. On the same ride, if I backed the assistance down and asked a bit more of my legs, 2.5 hours or three at a stretch, may be attainable. For rides made up predominantly of flat sections, if I stuck to Eco mode, I think I could hit the 3.5 hours Specialized claim is achievable. The truth is, though, I don’t want to ride like that, so I budget my rides at 1:45 hours ride time and go from there. Once the battery is down to 10% charge, the bike will slide into Eco mode to help you limp home.
The power delivery is very natural; there are no surprises or sudden accelerations, and the motor simply does what it should and multiplies your power with a smooth ‘acoustic bike’ feel. There is a slight lag when initially putting effort into it, and this took a little time to adjust to, but I soon adapted to it. The SL1.2 motor rewards a cadence of around 75-90rpm for those looking to get the most out of each pedal stroke, so if you’re one to rely on the torque of a motor to get up a pinch, rather than shifting to a lower gear—this bike’s not for you.
Mission Control App
I didn’t faff with the app too much; I just synced up my phone with the bike, pushed some assistance settings to ‘max’ and got stuck in. I wanted to ride this like a standard bike and not get bogged down with tweaking, tuning and apps. It’s nice to have the ability to fine-tune assistance levels simply, and if a user wanted to maximise battery efficiency, one could nerd out with the settings. Software updates for the bike are done via a connected app, no need for cables.
MasterMind TCU
An upgrade over the SL gen 1 is the use of the MasterMind TCU (Turbo Control Unit). The screen is seamlessly integrated into the top tube and comfortably readable at a glance. Modes and screens on the TCU are controlled via the simple-to-use handlebar remote. It’s a nice touch to be able to micro-adjust through assistance levels in 10% increments if you want to get specific assistance while out on the trail, rather than relying on the pre-programmed three settings.
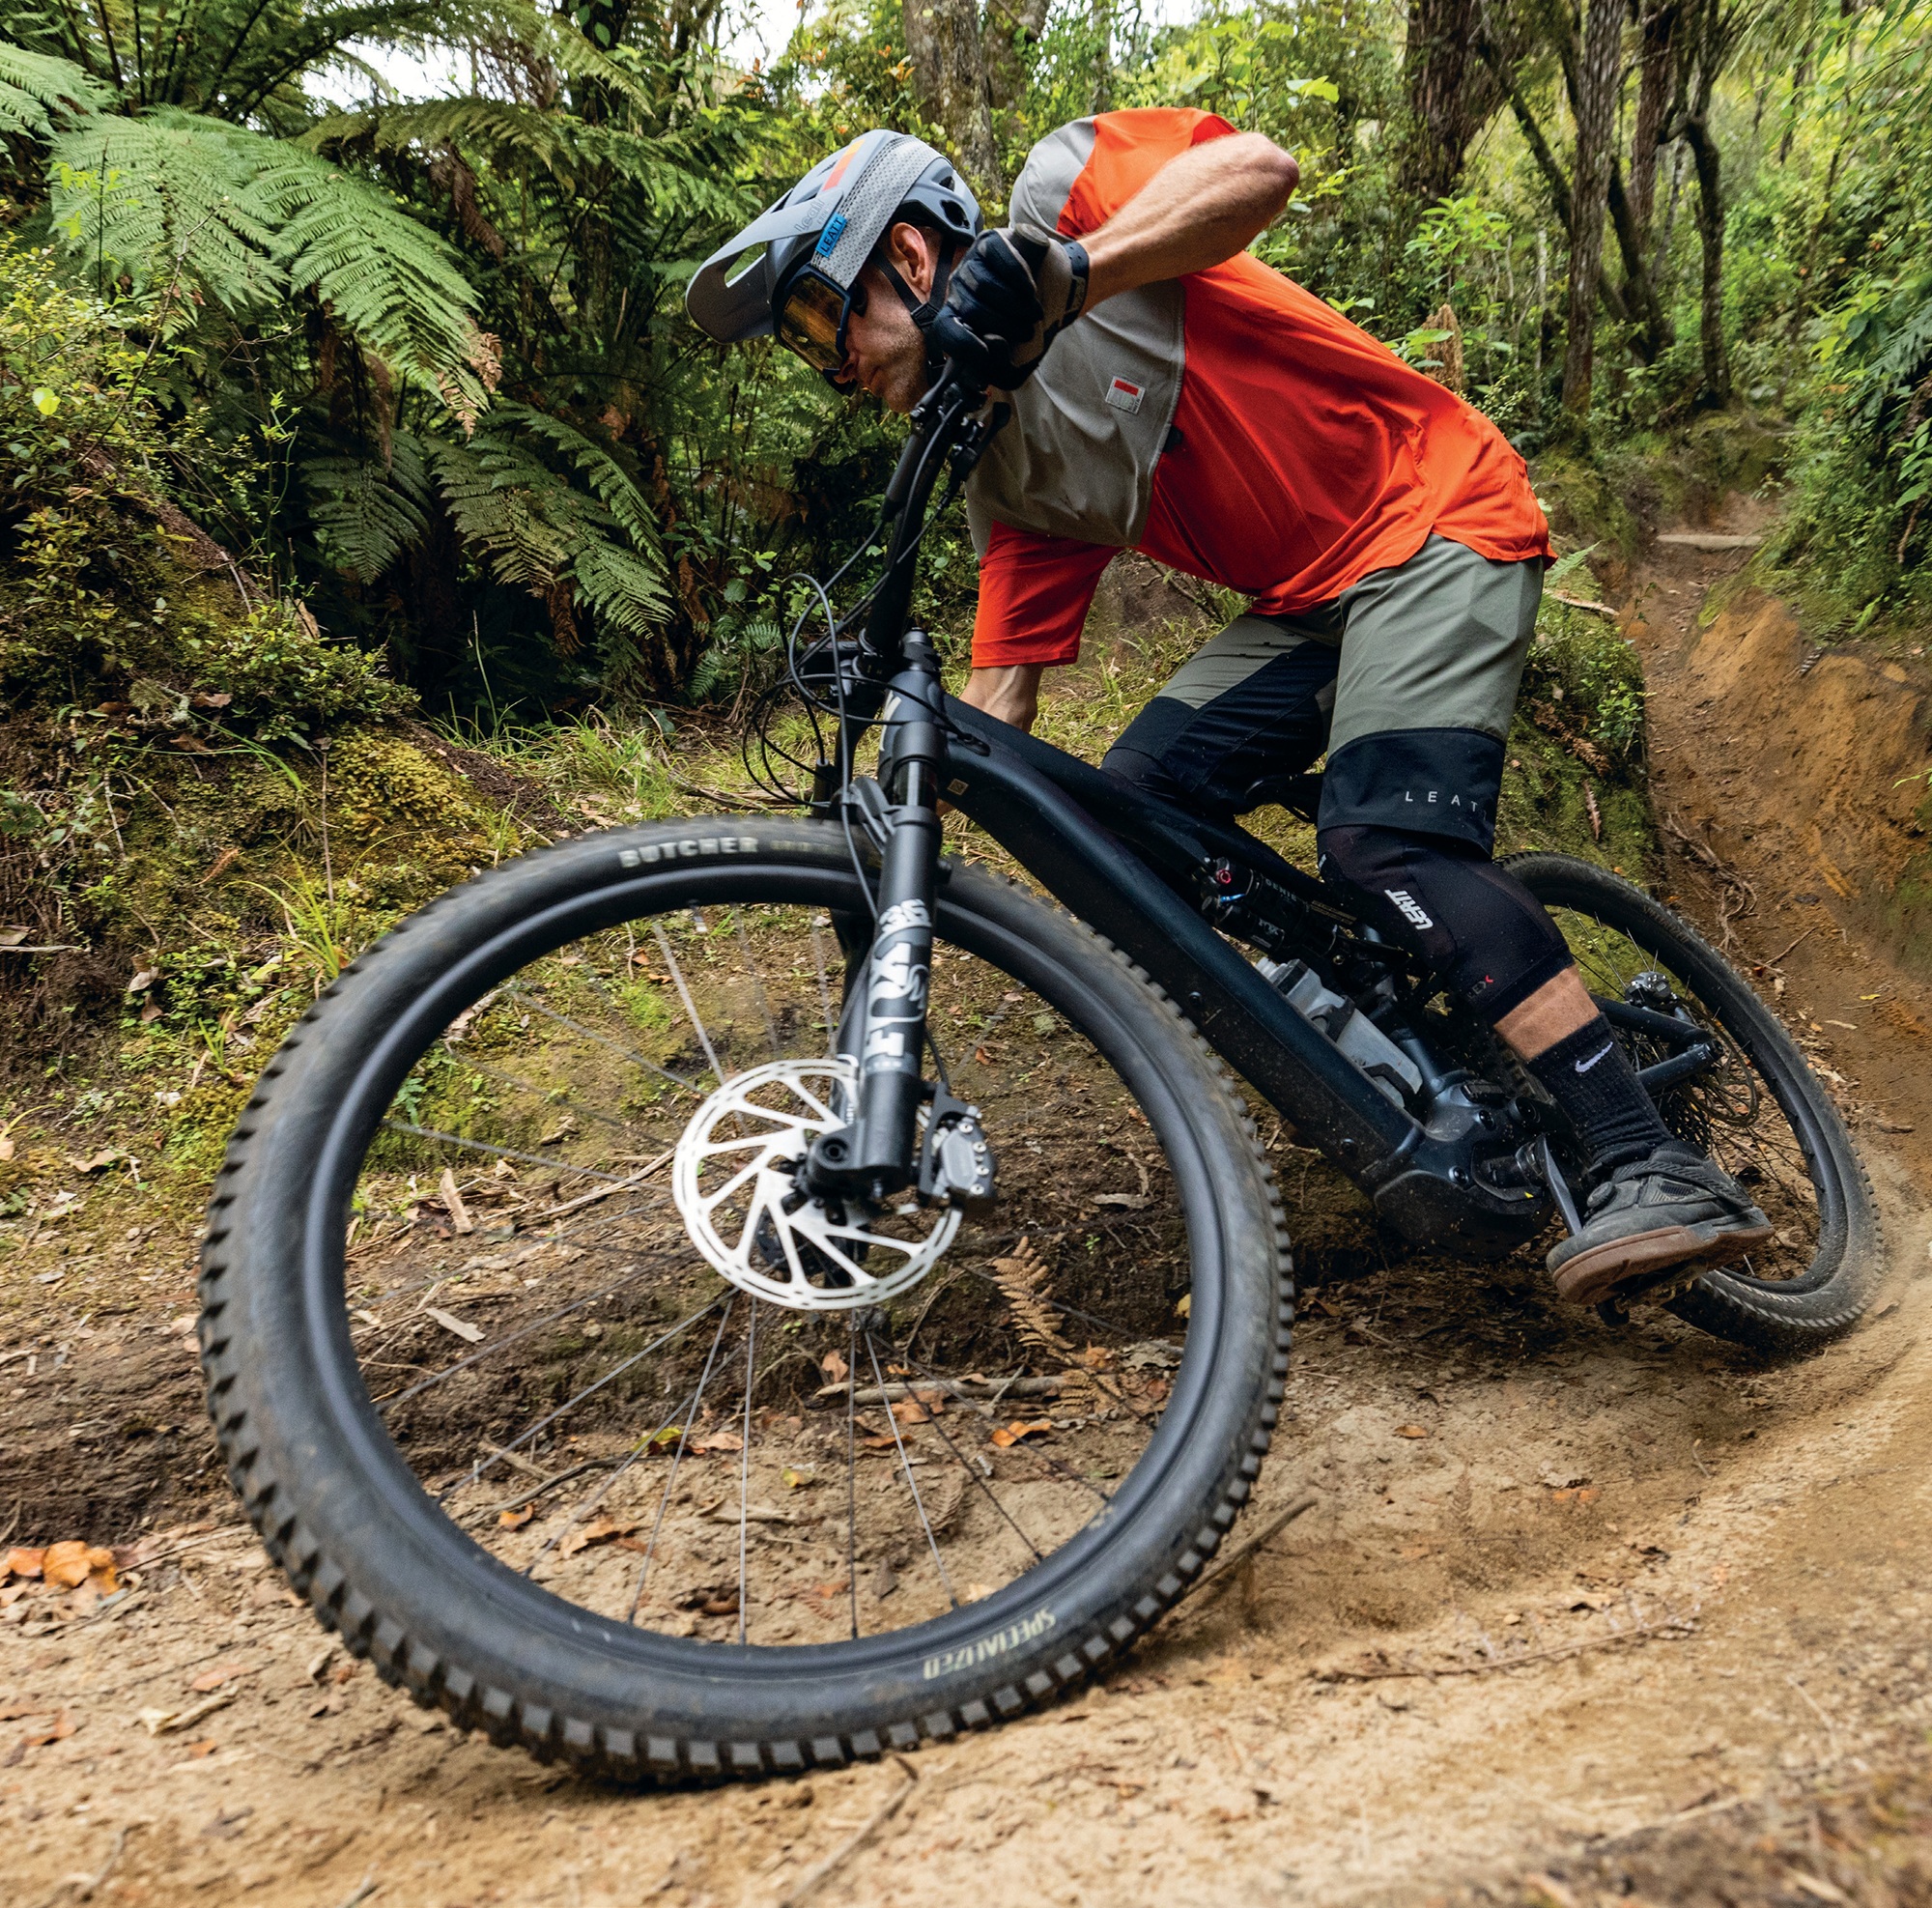
The ride
The Levo SL2 is the first lightweight, low-powered eBike I’ve ridden. So, my observations are compared to full-powered eMTBs and regular old pedal bikes.
Taking the SL2 for its first ride, my immediate thought was; ‘damn, this actually handles like a normal bike!’ My main gripe with full power bikes in the past has been that they don’t suit my riding style, they’re fun in their own way, but their weight means they’re more like a cruise liner than a jet boat… and it’s a jet boat I want! Precise, nimble, manoeuvrable, responsive, confident and playful are the current acoustic bike marketing buzzwords, I guess. Unfortunately, most of these boxes can’t be ticked on a full- power, full-weight eBike – as mentioned, their characteristics align closer with the cruise liner.
Descending on the SL2 takes the best from an acoustic experience and couples it with the best from an eMTB. The SL2’s higher weight than a normal bike combined with its capable suspension gives insane stability and predictability while descending but, being lighter than a full-powered eBike, combined with its balanced geometry, means it’s drastically nimbler and more precise down a hill than its overweight brethren. The ability to change lines and unweight through sections really sets this lightweight bike apart.
The more I rode the SL2, the more I was amazed at how well it corners. I didn’t need to change any components or make any adjustments at all to make it perform; I just got on and rode. Even in its stock setup, it handles turns exceptionally. Balanced geometry is a piece of the turn- shredding puzzle, and so too is the lower centre of gravity of an eMTB, but the traction on offer sure makes a difference, too; part of this will be thanks to the weight of the bike (over an acoustic one), but the suspension is up to the task. The SL2 is a leap above any other eBike I’ve thrown a leg over in the cornering department, and it is better than some trail bikes I’ve reviewed.
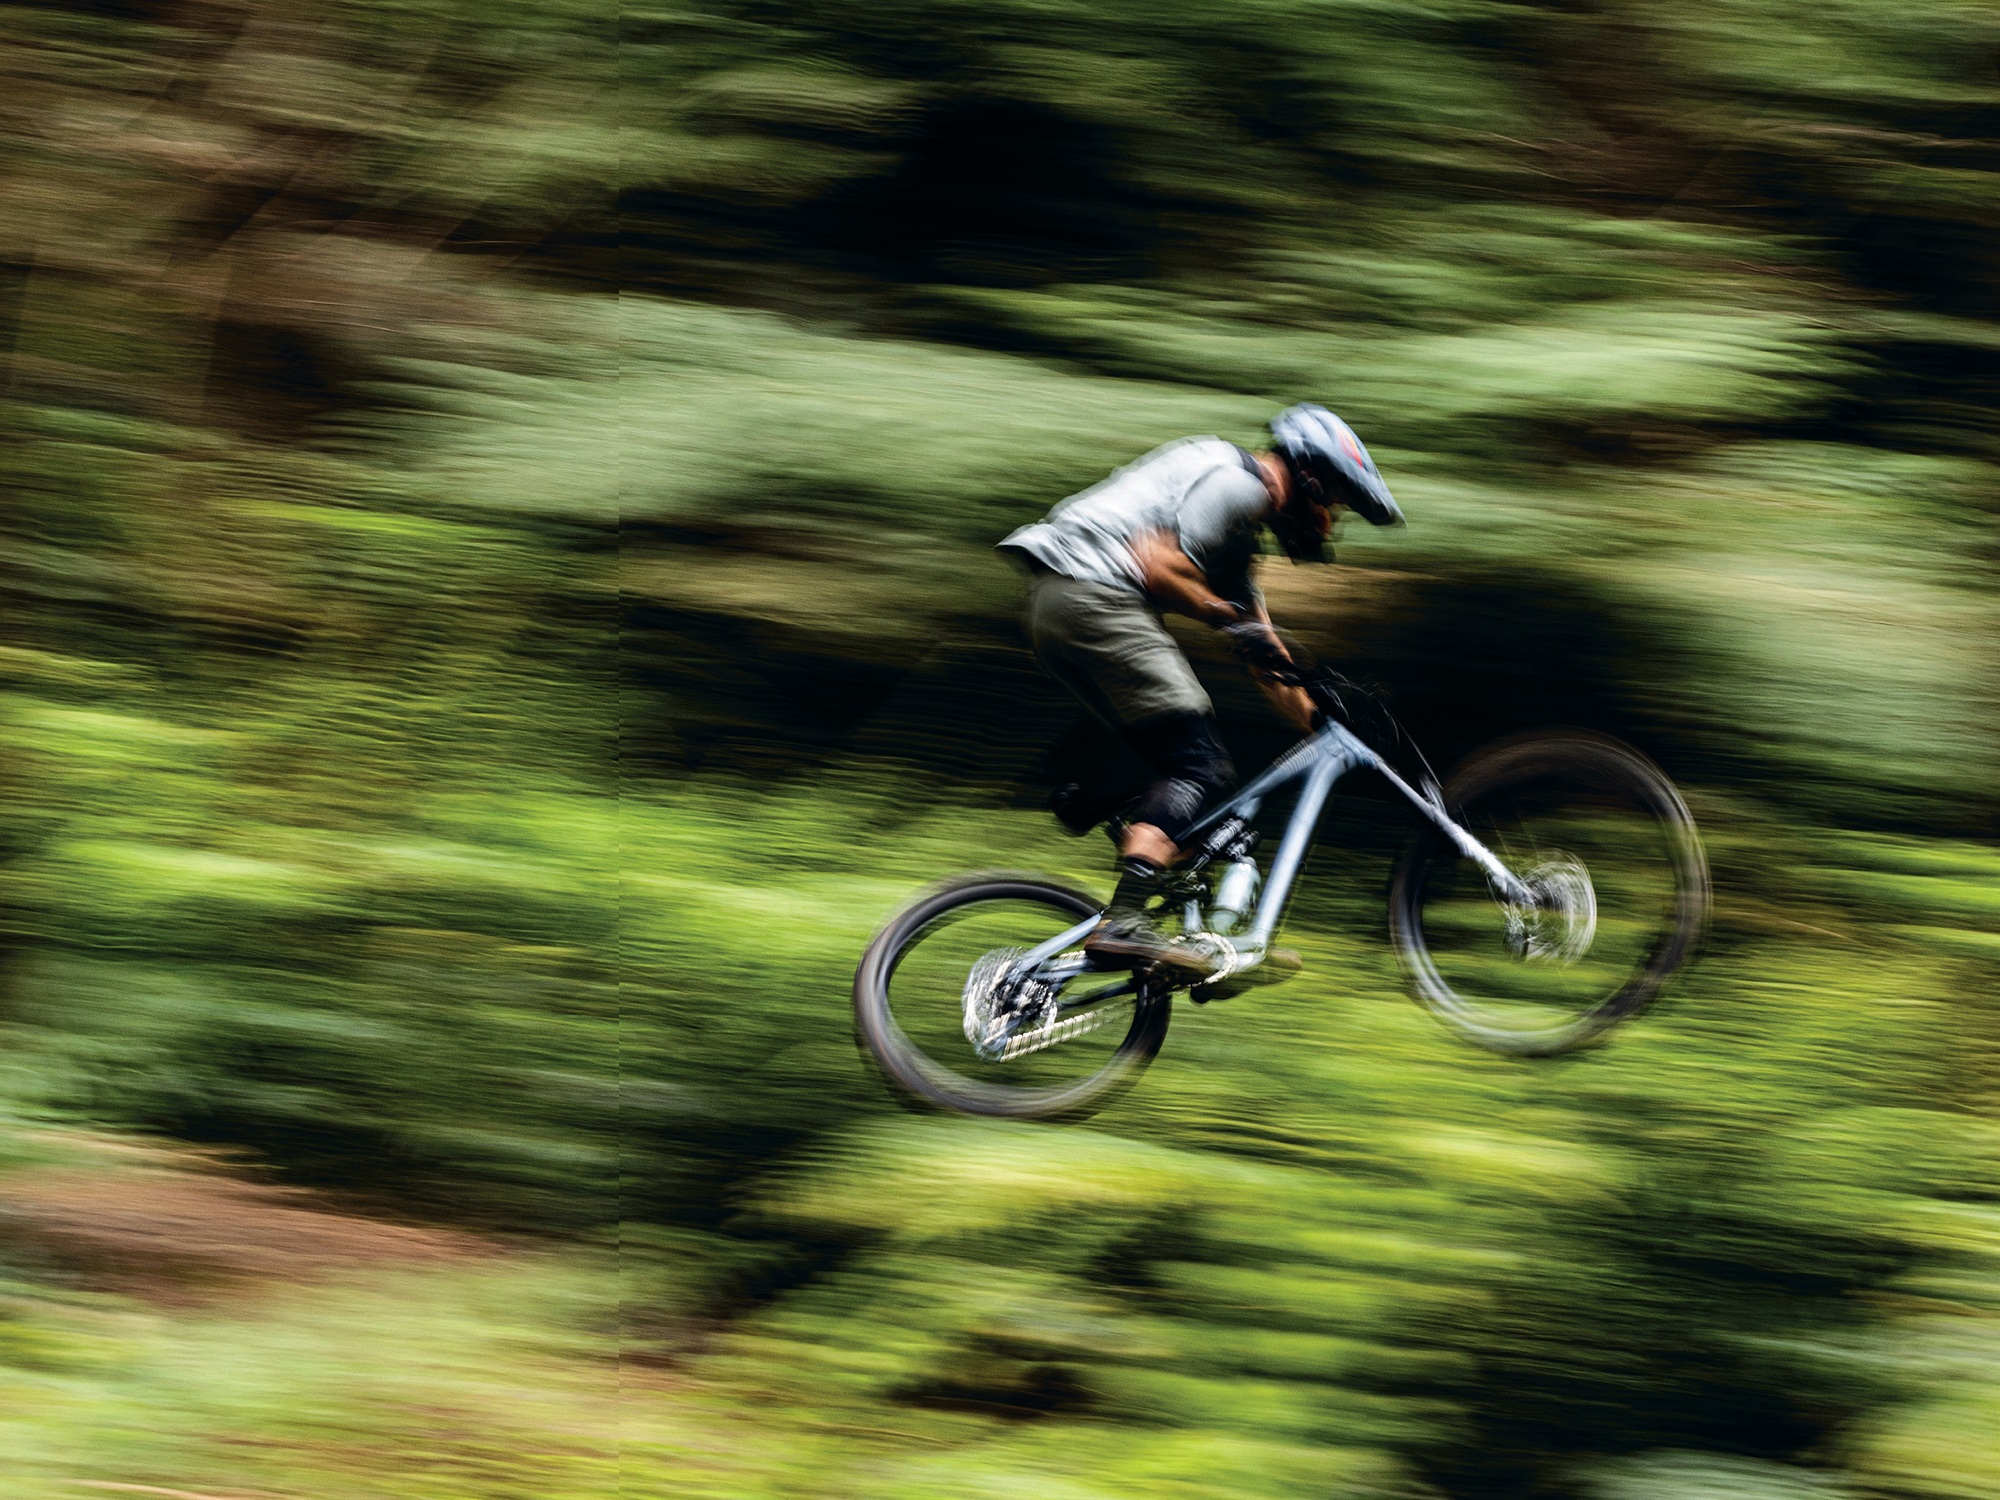
Jumping on the SL2 is great, and surprisingly so. The weight is nice and balanced, and it is predictable taking off everything from lumps and bumps to larger, steeper lips.
The bike cruises along flat trails where there’s no need for high power similar to a full-fat one, just more nimbly and playfully, not weighed down by additional motor or battery heft.
Compared to high-powered eMTBs, the SL2 didn’t give me superpowers to tackle super steep climbs—you know, the ones where you can barely keep the front wheel on the ground, even with your weight right over the front. Instead, the SL2 meant I could make it further up super steep pitches than I would on a trail bike, before I ran out of steam but, unlike a full-powered bike, I definitely felt like I needed to use my own strength, rather than just chopping into Boost mode and have the bike ‘pull’ me up the hill.
Without the power, torque or battery capacity of a full-fat eMTB, the SL2 still takes some effort to ride, and I found I can still get a similar workout to a regular bike while riding it, just covering more ground and not blowing myself up to maintain higher speeds. Riding a full-powered eBike I find I’m still getting a decent cardio workout, and it’s quite normal to be sitting up at high heart rates for long periods, but most of the time (unless I’m sitting in Eco mode), it feels like there’s not much leg strength necessary. The SL2 hits a sweet spot and, thanks to coupling it to my Garmin, I could see my own power input and proof that I was pushing similar watts to a normal bike, just going faster for them.
The SL2 let me ride how I like to ride. It’s light enough to be playful, but hefty enough to offer the composure and stability only extra weight can give while descending. Until this bike, I wouldn’t have considered owning an eBike as my only mountain bike but, after a couple of months aboard the Levo SL2, I may have found the bike that would make me switch sides.

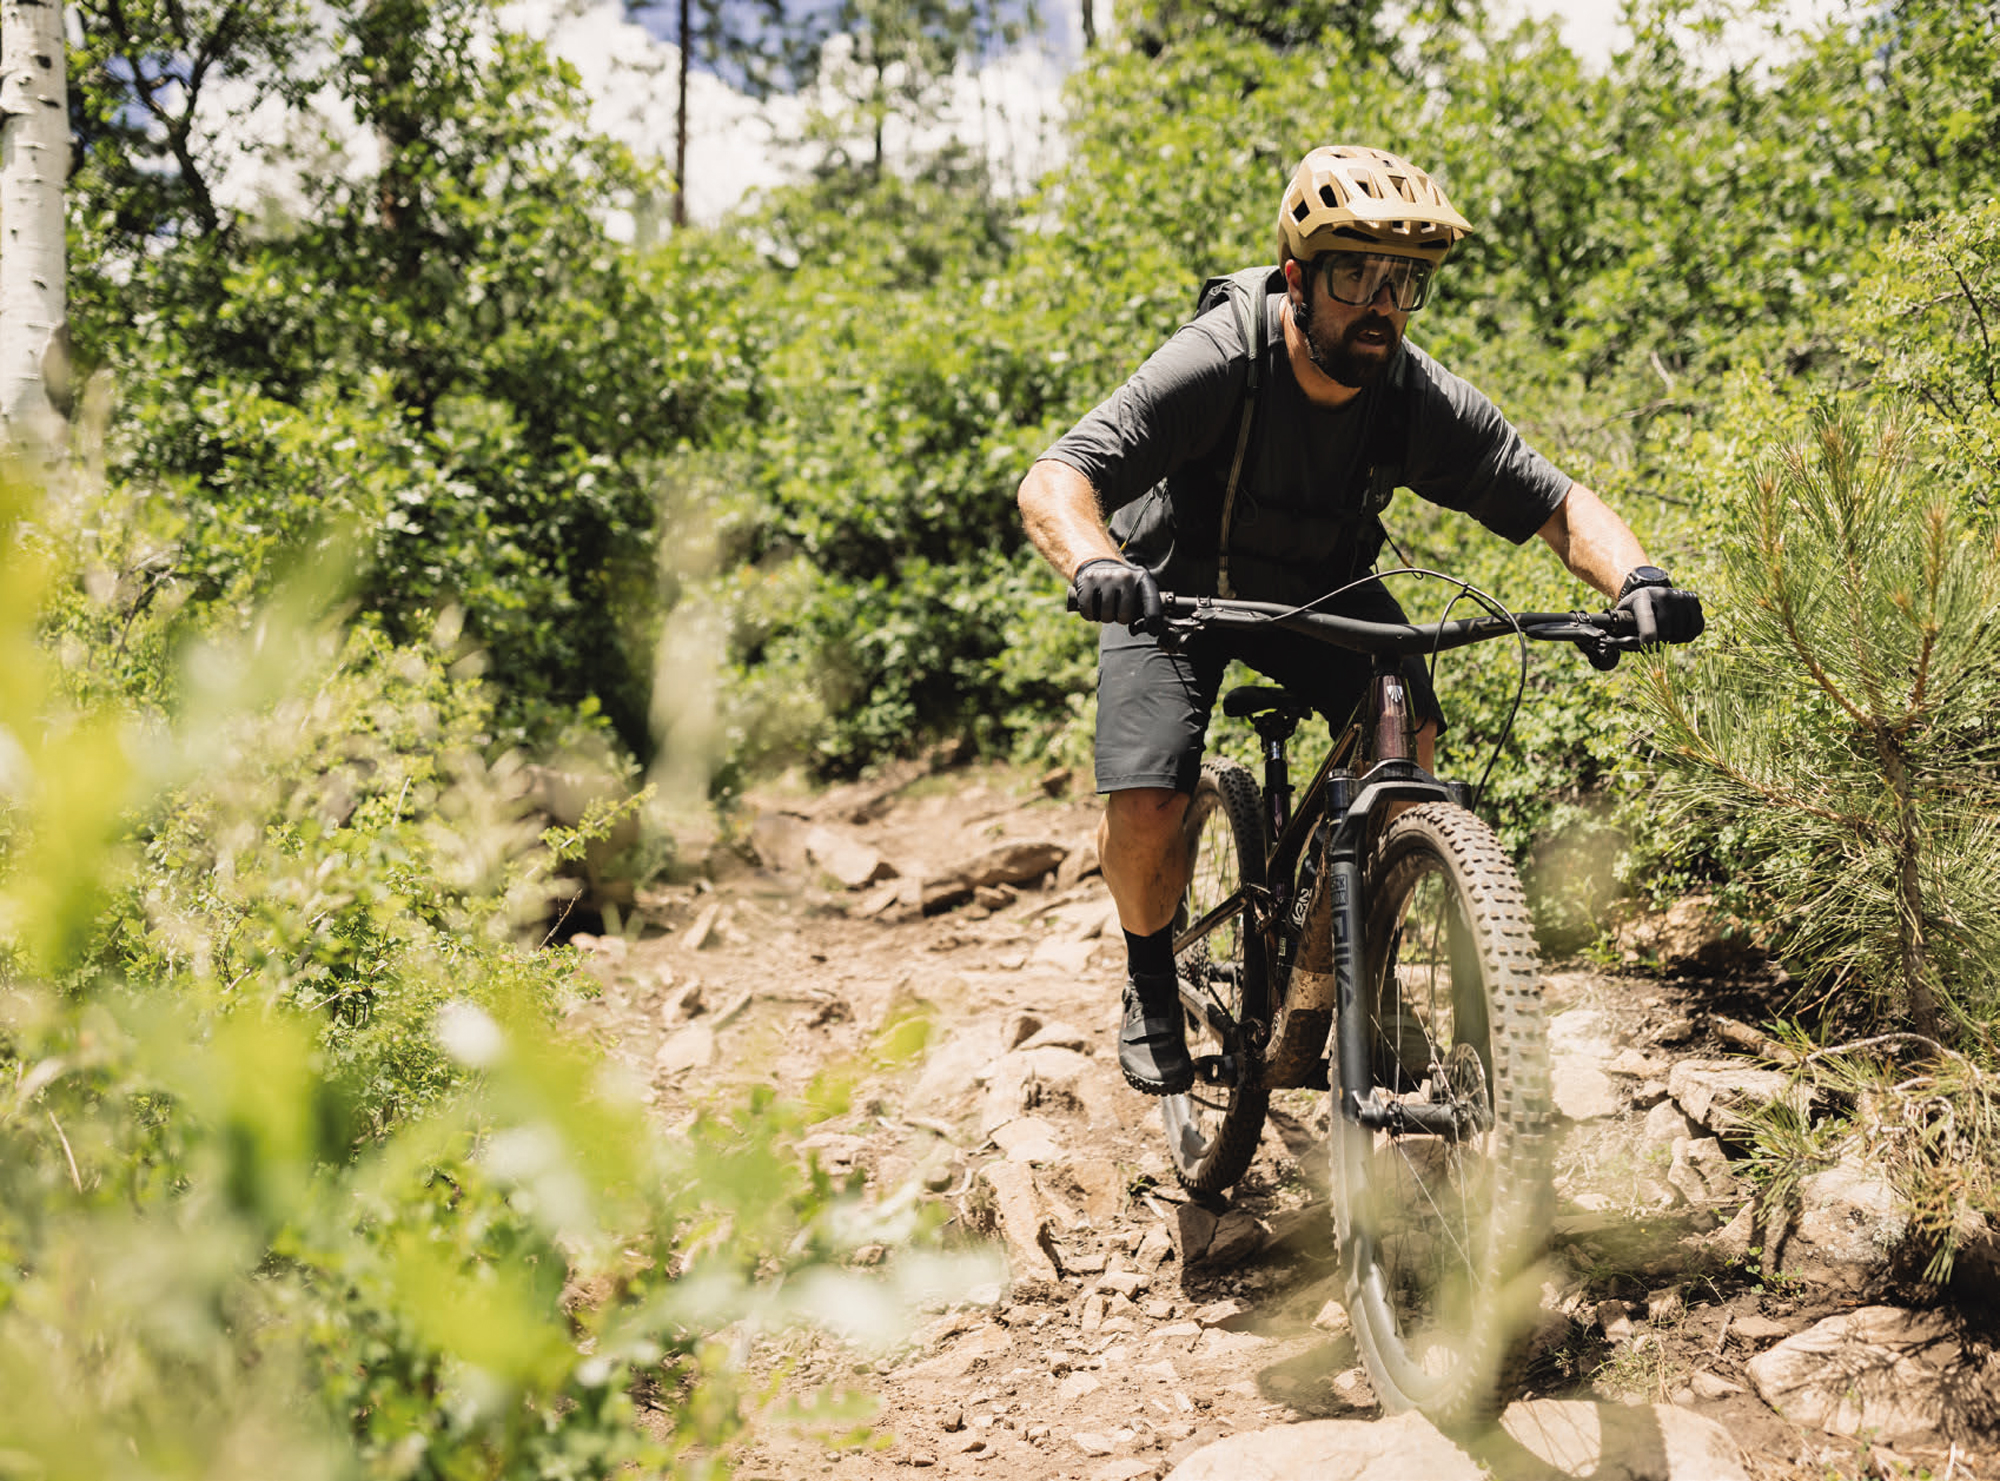
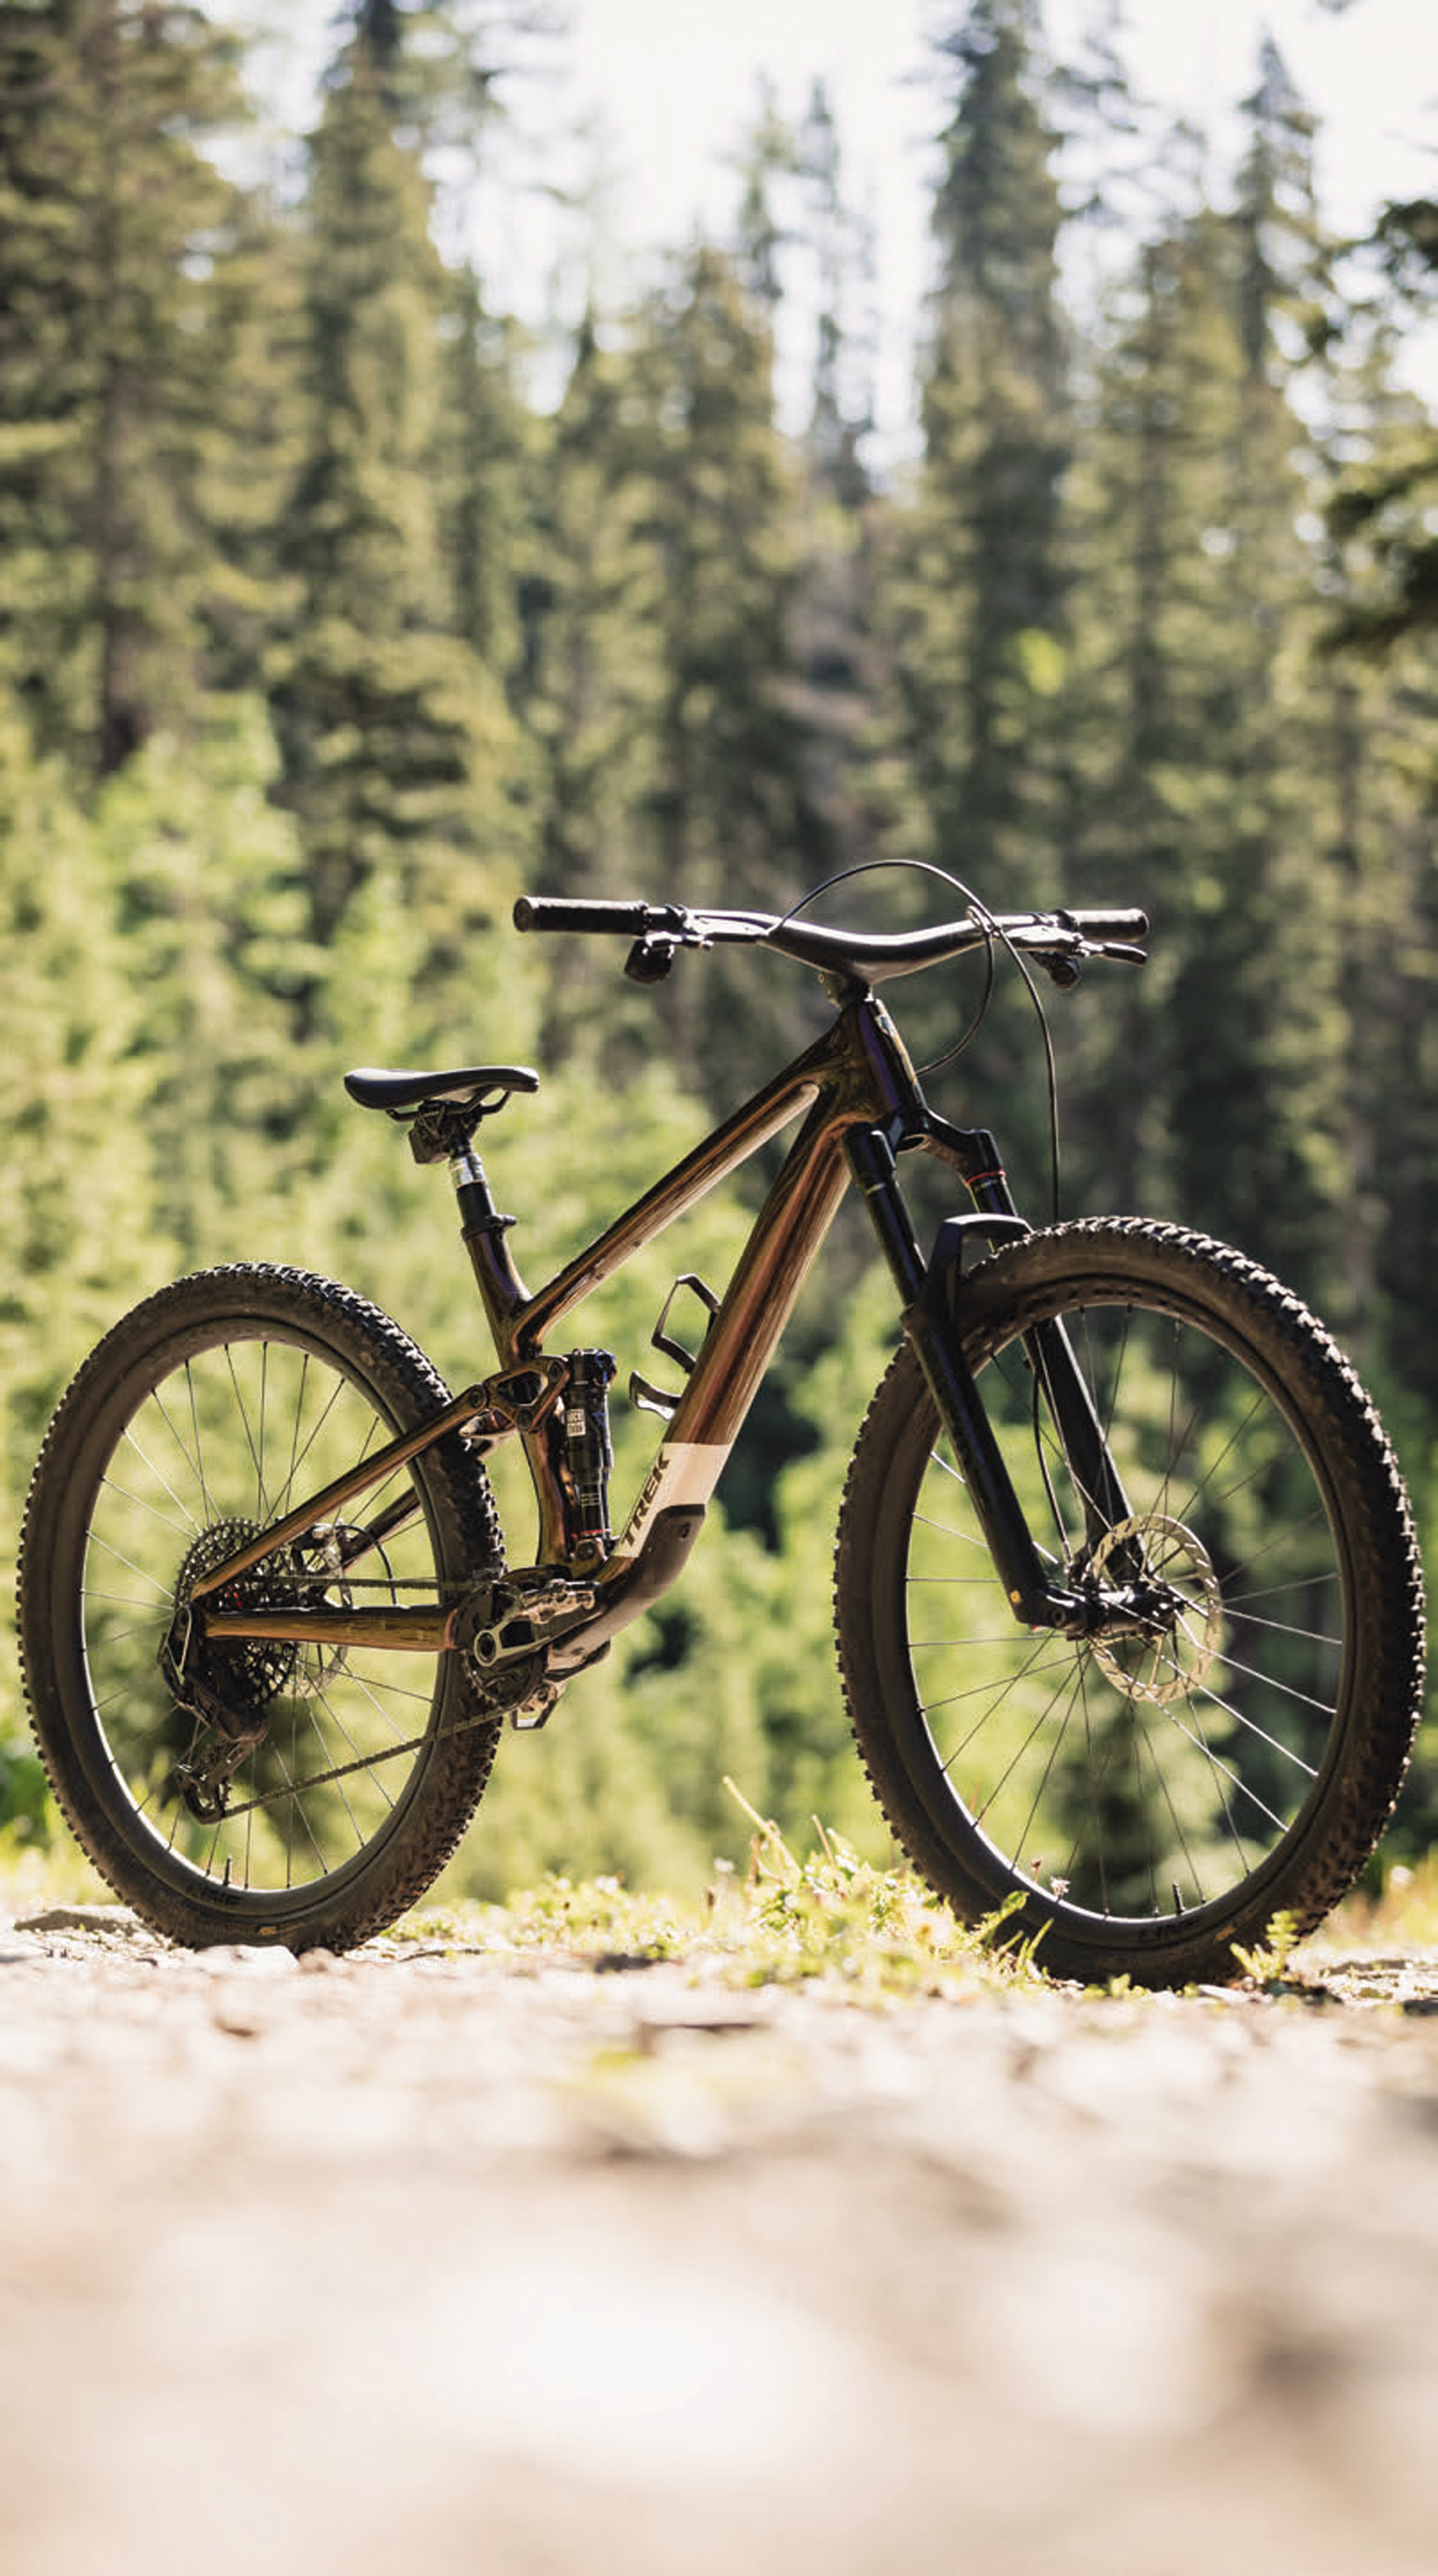
Trek Top Fuel
Words Liam Friary
Images Cameron Mackenzie
RRP$15,499
Distributor Trek New Zealand
The lines are somewhat blurred between an XC long-travel bike and a lightweight trail bike but, regardless of categorisation, the bike is designed to be super-adjustable with a redesigned frame and a 4-position Mino Link. There’s also a ton more you can customise, like wheel size, geometry, and suspension travel, making it super appealing for everyday trail riding, or even XC racing duties.
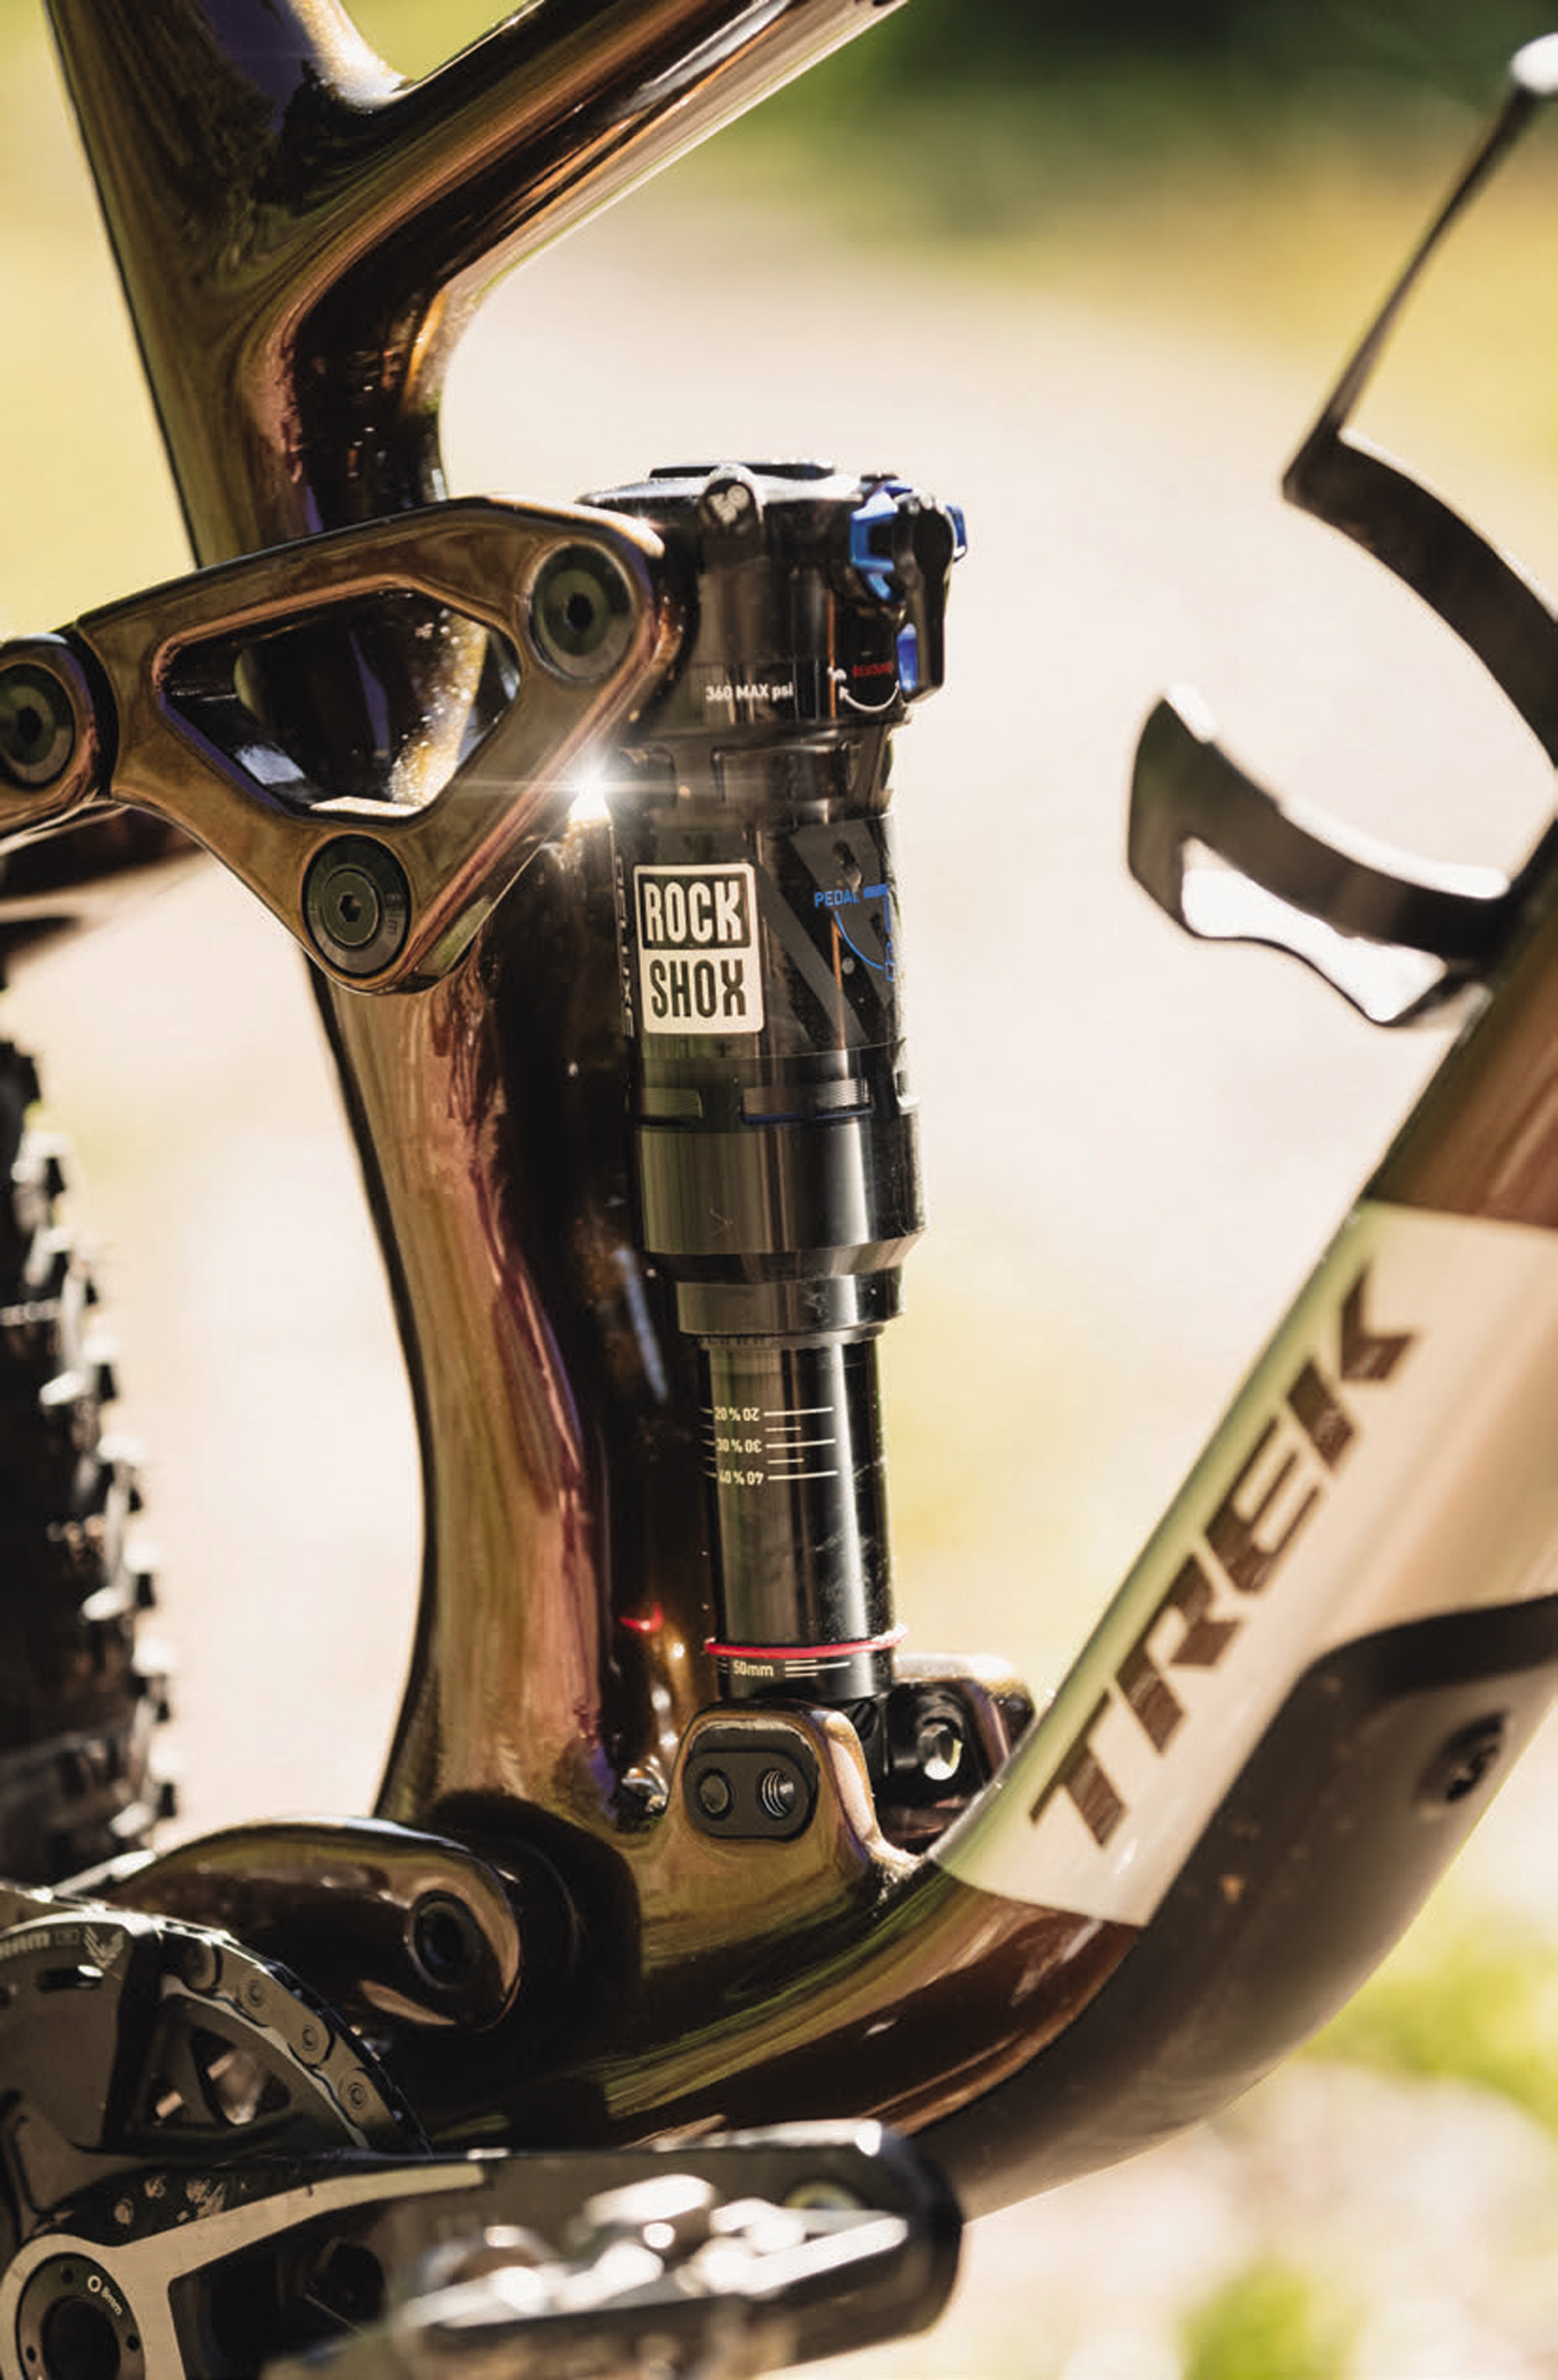
Trek has opted for refinement rather than revision – a trend the industry is increasingly embracing. Generally, bikes are in a good place regarding geometry numbers, so there’s no need to reinvent the wheel – at least for now. While the new Top Fuel looks similar to the previous generation, it has gone on a slight diet with about a 100g savings in the carbon frame, and employing slimmed-down tubes across the entire frame. The new 4-position flip chip, used for adjusting the bike’s geometry or the amount of shock progression, is located at the lower shock mount. This flip chip offers High/Low geometry settings that modify the angles by 0.5° and change the BB height by 6mm. Additionally, you can move the suspension leverage rate forward and backward with the flip chip. The forward position offers 14% progression, while the rear position offers 19%, providing more ramp-up at the end of stroke. I rode mainly with the rear, more progressive position and found it better suited to my riding style and the terrain where testing was done.
I appreciate the ability to change out the rear and front travel if desired. The rear shock is built around a 185x50mm shock, but you can increase the stroke to 55mm and boost travel to 130mm. The frame is rated for a 120-140mm travel fork, which allows for different setup options, such as an XC whippet with 120/120mm travel or a rowdier trail bike with 140/130mm travel. I’m inclined to build the latter so, hopefully, I’ll have more on that sometime soon. If you wanted to have a mullet setup with a 27.5” rear wheel, that’s also possible with this new platform.
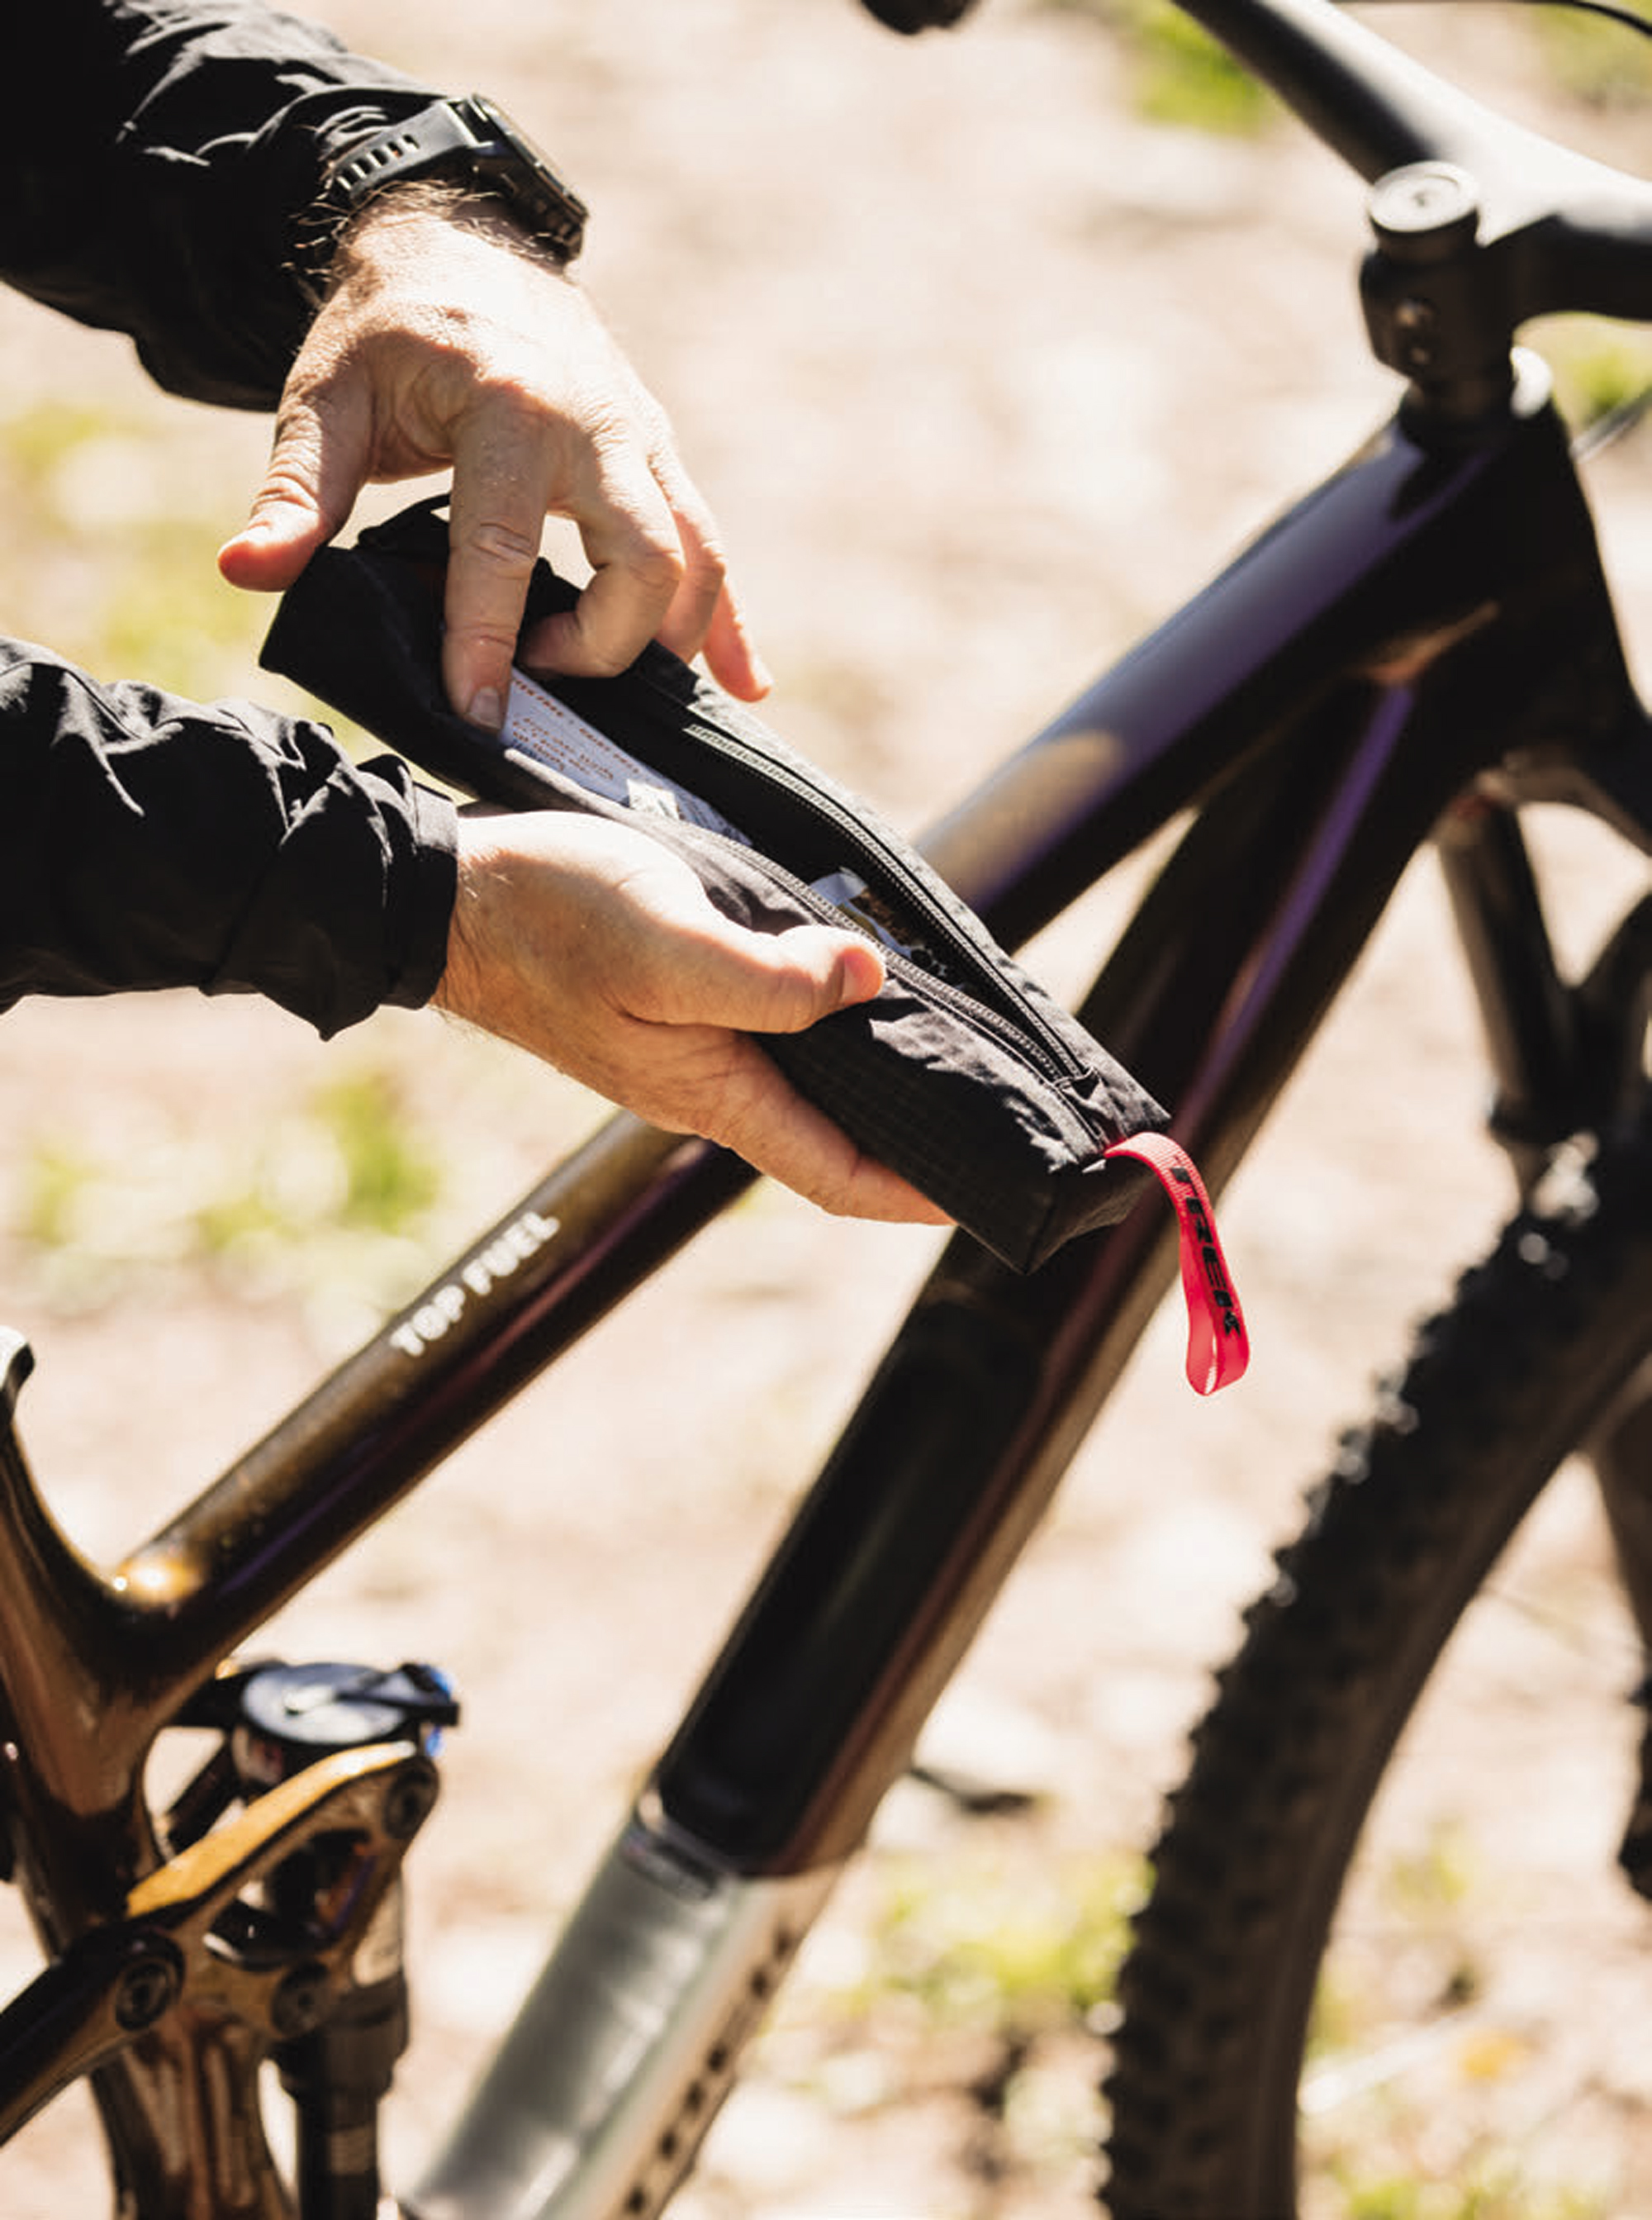
Returning to small refinements, the new Top Fuel is slightly more progressive than the previous generation and has a tad more anti-squat. Rear travel is kept at 120mm and comes with a 130mm travel fork up front. 29” wheels are standard on all frames except the small, which is built around 27.5” wheels. The internal storage has also been updated with larger openings and better weatherproof sealing, and cables have been kept out of the way to minimise snagging. Trek has won the applause of shop mechanics by keeping cables out of the headset and eliminating the Knock Block headset. A tried-and-true threaded BB is used, as well as bolt-on downtube armour and a rubber chainstay protector.

While there are slight changes to geometry, the 65.5° head angle remains consistent across all sizes. The effective seat tube angle ranges from 75.2-76.9°; Trek lists this angle based on a specific saddle height for each size. Another update is the size-specific rear centre lengths, which vary from 435mm (smaller frames) to 445mm (X-Large frames).
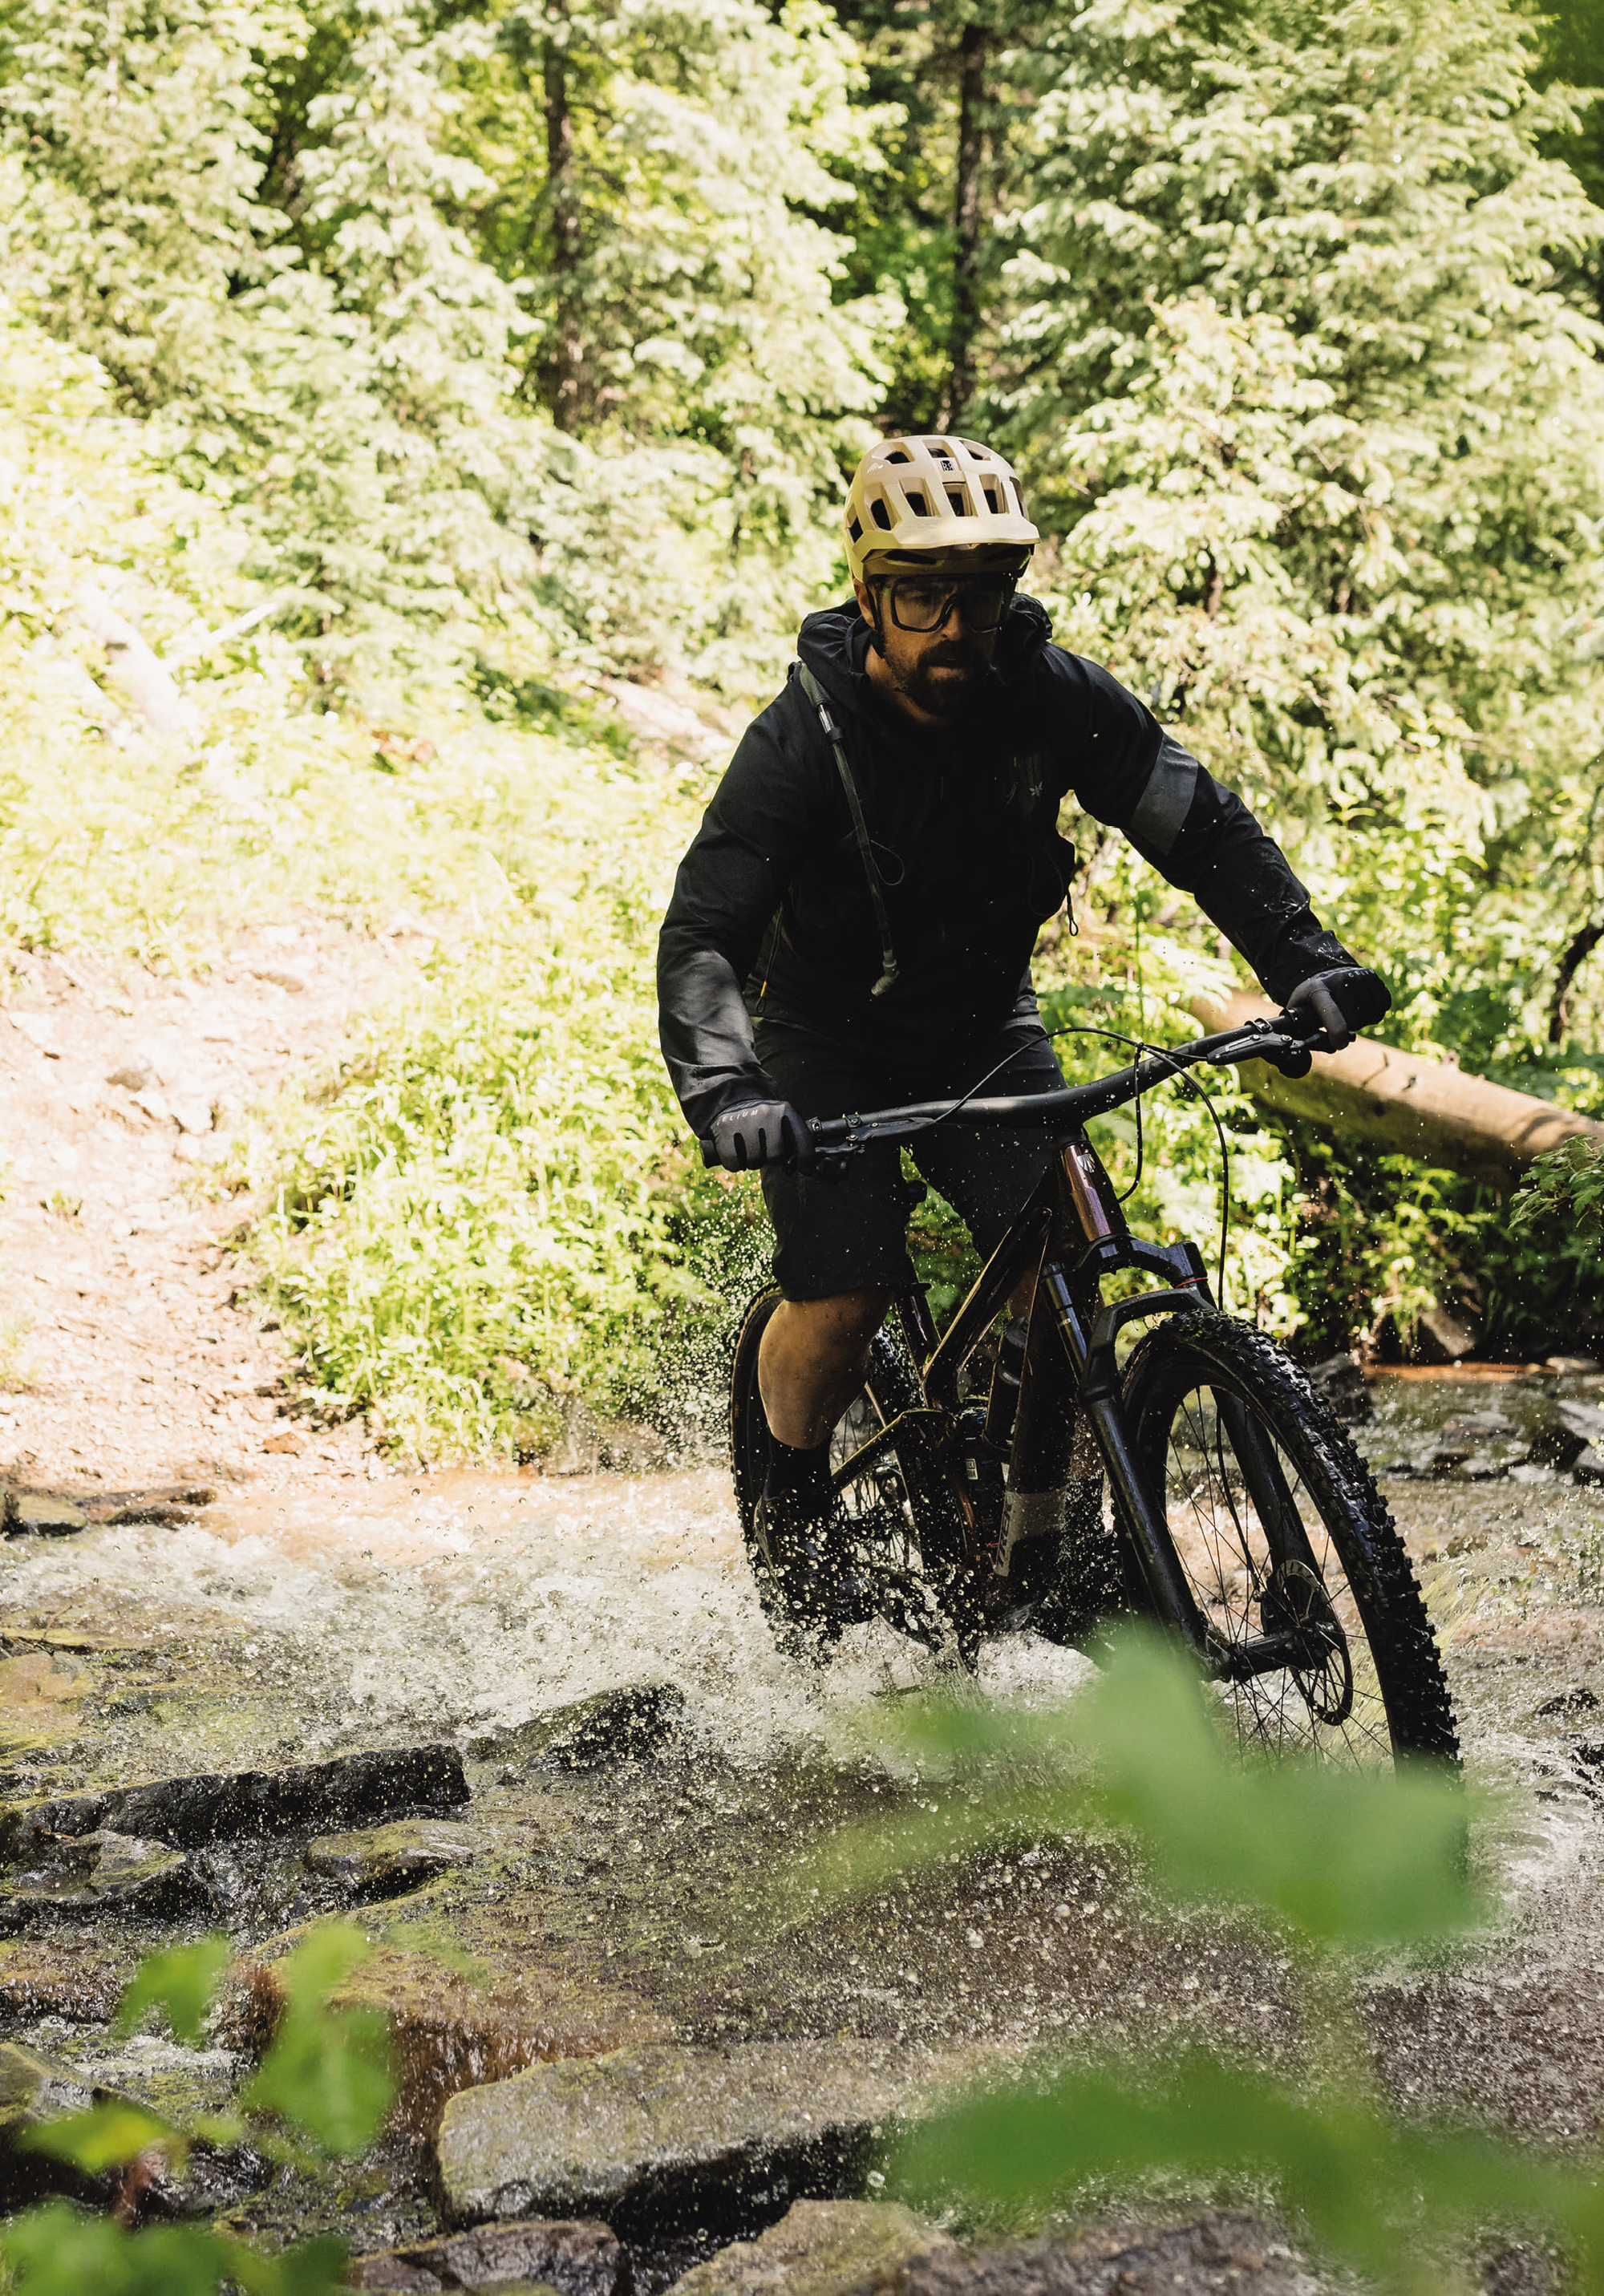
I had the pleasure of riding the new Top Fuel in Durango, Colorado, USA. Having more than a week based in Durango meant I could get very familiar with the bike, logging over fifteen hours of ride time. There’s plenty of pedalling needed in Durango, and often you’re either riding long climbs, flats and descents that have pedal sections. I thought this bike was well suited to the terrain. The first thing that struck me was the pedalling efficiency and overall zippiness of the bike. I rode twice a day locally and had two high-country long ride missions as well. On all occasions, from road to gravel to trail, I didn’t feel the need to hit the lockout lever, as it pedalled great with it wide open. The bike feels swift and light and climbs exceptionally well.
The Top Fuel’s adaptability is the new four- position Mino Link at the lower shock mount. Effectively, this set of flip chips allows riders to choose between permutations of high and low geometry, and more linear or more progressive suspension curves. Initially, for the first few days of riding around the mountain bike parks of Durango, I had the Top Fuel’s flip chip in its default ‘low, less progressive’ setting. As we headed for longer high-country rides, a simple flip of the chip meant I could steepen the head tube angle by .4° and raise the BB by 6mm. I found this setting was ideal for ramping-up. It offered adequate dampening and felt comfortable even after several hours in the saddle. The more progressive setting reigned supreme across rowdier terrain on the longer descents in Colorado’s high- country. The bike moves very swiftly, especially over long rides. I’m a big fan of the flip chip!
While the RockShox Pike fork nods to more trail-oriented riding, there’s something about the overall frame that makes it more compliant than the white paper stats indicate. This compliance was evident when we ventured into the backcountry, which made for lengthy and rowdy descents. These rides were often long – around three hours or more – so having a compliant frame was welcomed. These rowdy sections are when the bike feels burlier than presumed. Again, on descents, the Top Fuel chassis is bloody solid; with the bike’s light weight, this is a little surprising. But, when you throw that together with the progressive rear kinematics, it’s confidence inspiring. Bear in mind, when things get really real – rough and steep and you need to pick your line – apply a bit more effort to stay cantered and weight both axles. That said, the newly designed compliance of the frame and separate linkages means smoother, grippy moments when it matters most.
On the shorter, punchier rides in and around Durango’s extensive trail network, the bike was super smooth and sprightly. Heck, simply making your way to the trailhead, the Top Fuel is just as sharp – sprinting forward eagerly as soon as you put the slightest pressure on the pedals. Uphill, it’s just as powerful and lively. From more XC-oriented loops to bike park-style jumps and berms to rock slabs, with sketchy rocky descents, the rear end stays active, even under brake load. I think the key component is the four-bar suspension platform over a single- pivot flex-stay, which offers superior grip both uphill and downhill. There’s suitable snappiness, and the bike generates speed very well.
Standing is fine but, for seated climbing, the Top Fuel is a beast. It soaks up big roots and rocks without losing traction or bouncing you offline. On rockier technical climbs I would normally not make it, but it would clear them. Although it’s not technically an XC race focussed rig, the Top Fuel is a super capable climber. And, with it being so well balanced, you can pick your way through more technical sections without having to carry a lot of momentum in. Cornering aboard this rig is bloody fun too. Leaning into flatter corners and railing berms is awesome. The balanced ride pays off here – keeping an ideal amount of weight on both wheels which keeps it easy to judge traction.
The Bontrager Line Pro 30 OCLV Mountain Carbon wheels do a great job. They’re sprightly and engage swiftly. These wheels are laced with Bontrager Gunnison up front and Bontrager Montrose out back – these tyres keep in fitting with the bike’s lightweight theme. I found them super supple and quite zippy but, on gnarlier rockier sections, I had to choose my line. Whilst they didn’t give me any grief on rockier descents, choosing the best line was imperative, as I was a tad worried about snagging them. I can understand the thinking behind choosing to spec these tyres, but if the bike remained with me, I’d prefer something a little beefier – even with the weight penalty. In saying that, they did hook up well – and impressed me on faster rolling sections. I suppose it really depends on your application for this trail bike, as it’s up for wide interpretation.
Keeping with the parts and component’s theme – the RSL MTB Handlebar and Stem comes equipped on the Top Fuel. On trail, I found the RSL handlebar/stem combo to be quite comfortable. It wasn’t overly stiff nor super compliant; it sat in the middle somewhere, which was kind of great as meant I could focus on the ride. I quite liked the RSL bar’s good feel, with enough damping to keep your hands from taking too much abuse. It provided reasonable comfort and was plenty stiff when accelerating out-of-the-saddle. The sweep and rise were dialled for me, as I usually run a slightly forward roll on my bar, but it won’t suit everyone. Although I do love the super tidy aesthetics and feel of the Bontrager RSL integrated bar and stem, I do think perhaps a more traditional bar/stem combo would possibly suit more riders. As the rest of the bike has quite a lot of adjustability, it would be good to have the same within the cockpit. Such as swap a shorter stem for gravity focused days and a longer one for long ride days or racing.

SRAM’s XO Transmission does a flawless job of shifting. I did break the chain, however, and luckily we had another chain-link with us in the backcountry. But that can happen at any time, to any groupset. I have XO Transmission on my personal bike and it’s super robust, shifts flawlessly and you never have to faff with it! I think if you’re spending your hard-earned cash on a new bike, then having Transmission is definitely worth your consideration. SRAM Level Silver four- piston brakes, with 180mm HS2 rotors front and rear are on stopping duties. I did find these brakes fairly good for some of the riding, mainly around the mountain bike parks of Durango with shorter descents. However, on longer descents in the backcountry they weren’t powerful enough. Keep in mind, that was mainly on super long runs with chunder sections throughout. I have been riding SRAM Maven’s on my personal bike, so am a bit partial to a heavy hitting brake. Again, if the bike was mine, I would upgrade to a bigger front rotor and possibly swap these brakes to SRAM Codes.
This bike is bloody fun! Hands down one of the best bikes I’ve ridden this year. It’s sprightly but super capable. The balanced ride inspires a ton of confidence. It pedals everywhere super efficiently – dances uphill, generates speed across flats and shreds going down. Its more bike than you think and makes a strong case for having a shorter travel bike! Of course, there’s a few nit bits that could be addressed as I’ve mentioned but, overall, the new Top Fuel is all class. I’m very keen to build this bike as a burlier 140/130mm trail bike, so hopefully we can make that happen soon.
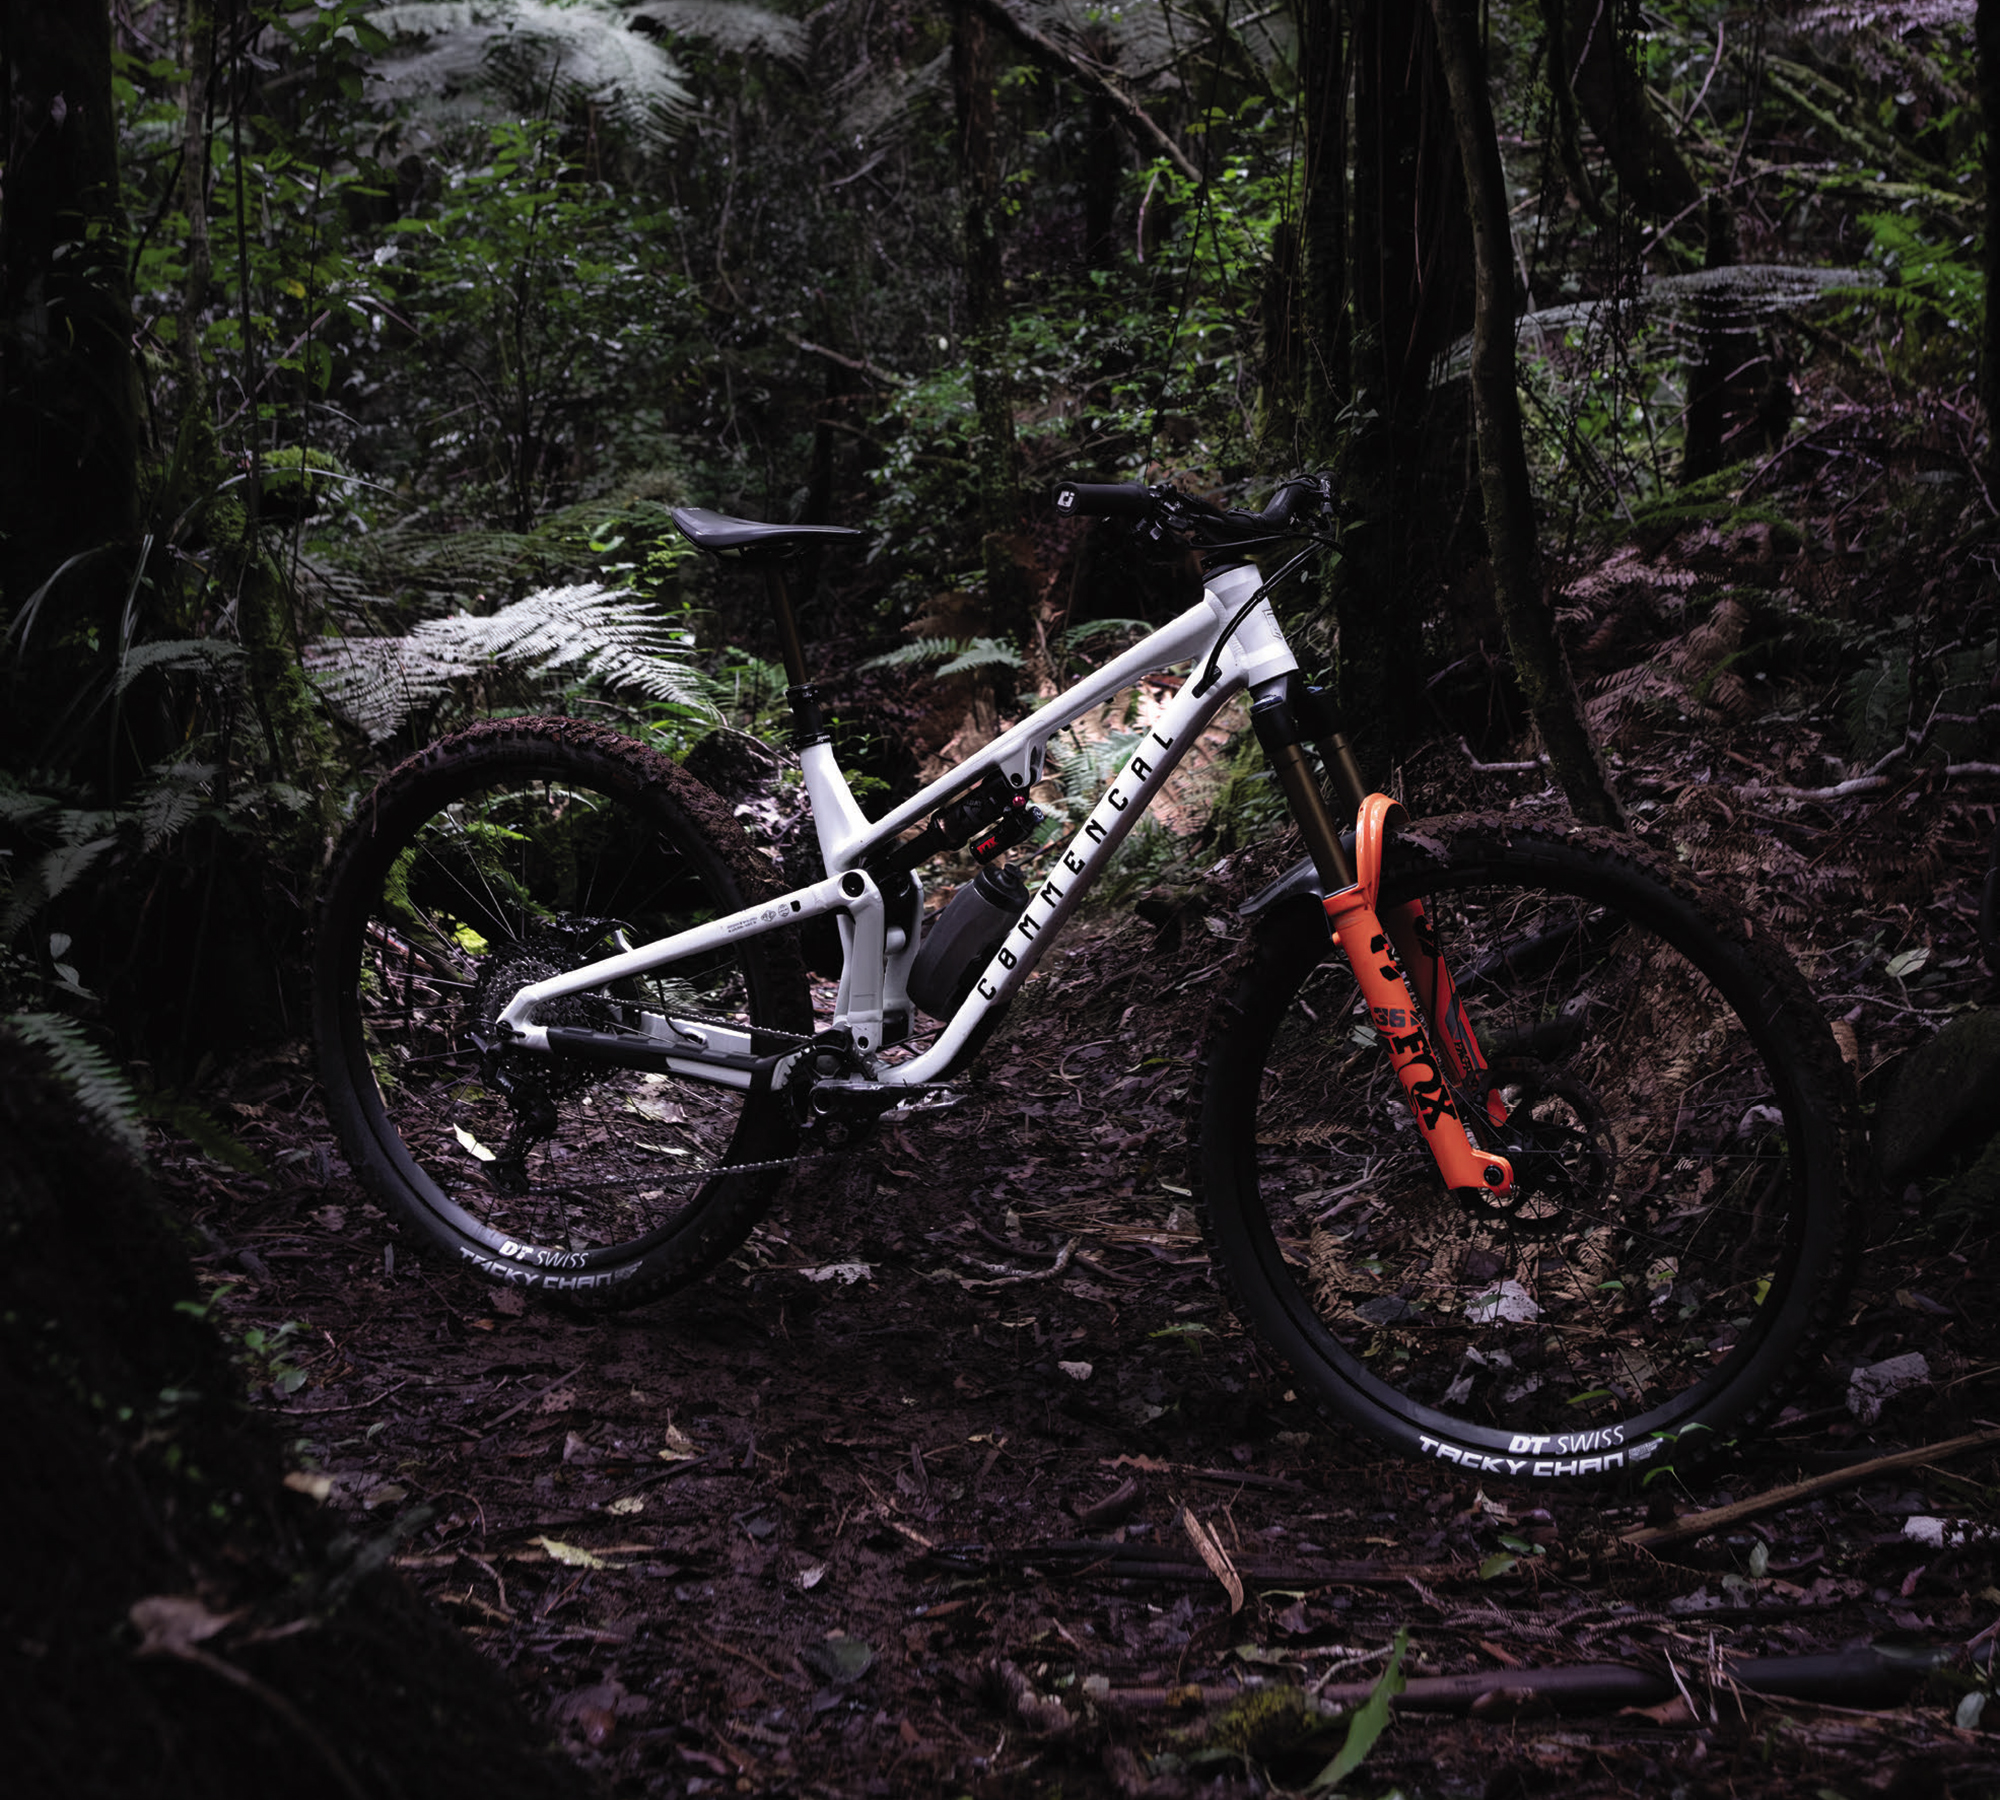
Commencal Meta V5
Words Lester Perry
Images Bevan Cowan
RRP $10,000
Distributor Commencal New Zealand
Since its creation in the year 2000, Commencal has been a mainstay in the downhill racing scene. Max Commencal, the BMIC (Big Man In Charge), enjoyed earlier success with SUNN Bicycles, a BMX company he formed in 1984. By the early 90’s, SUNN shifted its focus to Downhill MTB racing.
Beneath names like Nicolas Vouilloz, Anne- Caroline Chausson, Cedric Gracia, and other greats, the SUNN Downhill team amassed multiple world titles aboard their innovative downhill bikes.
Under the Commencal brand, their riders remain some of the sport’s winningest to this day; at any World Cup Downhill, across all categories, you’ll likely see a Commencal rider on the podium. This hunger for competition drives the development and direction of the now global, direct-to-consumer brand. The Meta V5 is a product of their Commencal Enduro Project and the four years of development under team riders that preceded its launch.
Development
Applying the same development theory and methods that brought downhill success, the Meta V5 was created to be Commencal’s comprehensive Enduro Race bike. Commencal aimed to provide their racers with one platform that would excel across all scenarios they’re presented with over an Enduro World Cup season. Alex Rudeau proved their development process was on point, securing himself five podium finishes and third overall in the 2023 Enduro World Series. The proof is in the pudding.
Frameset
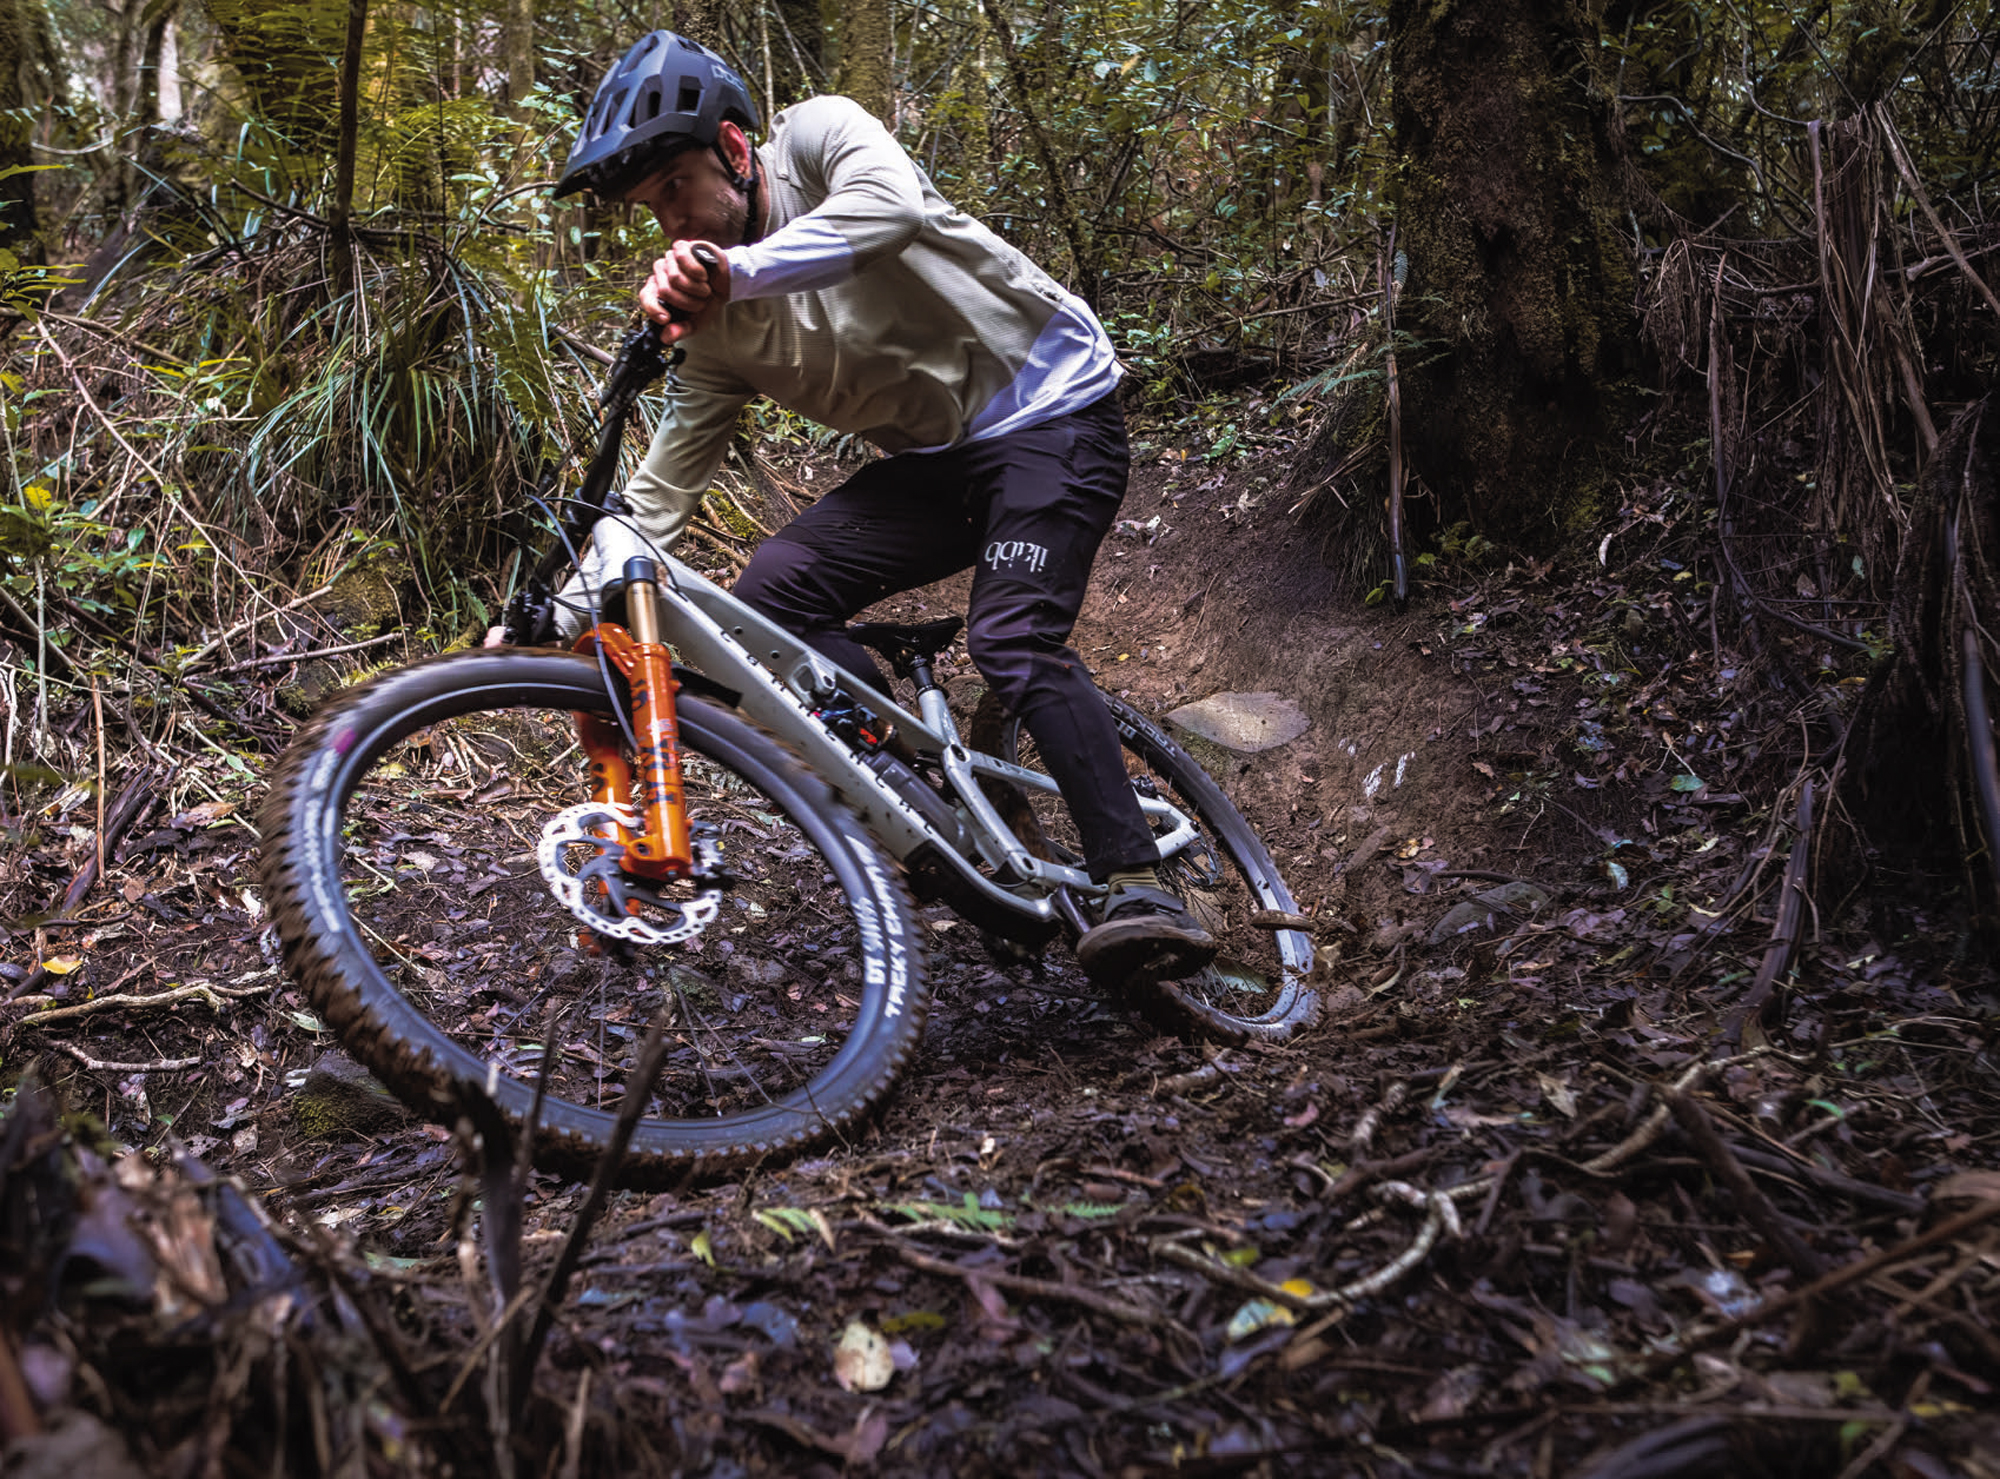
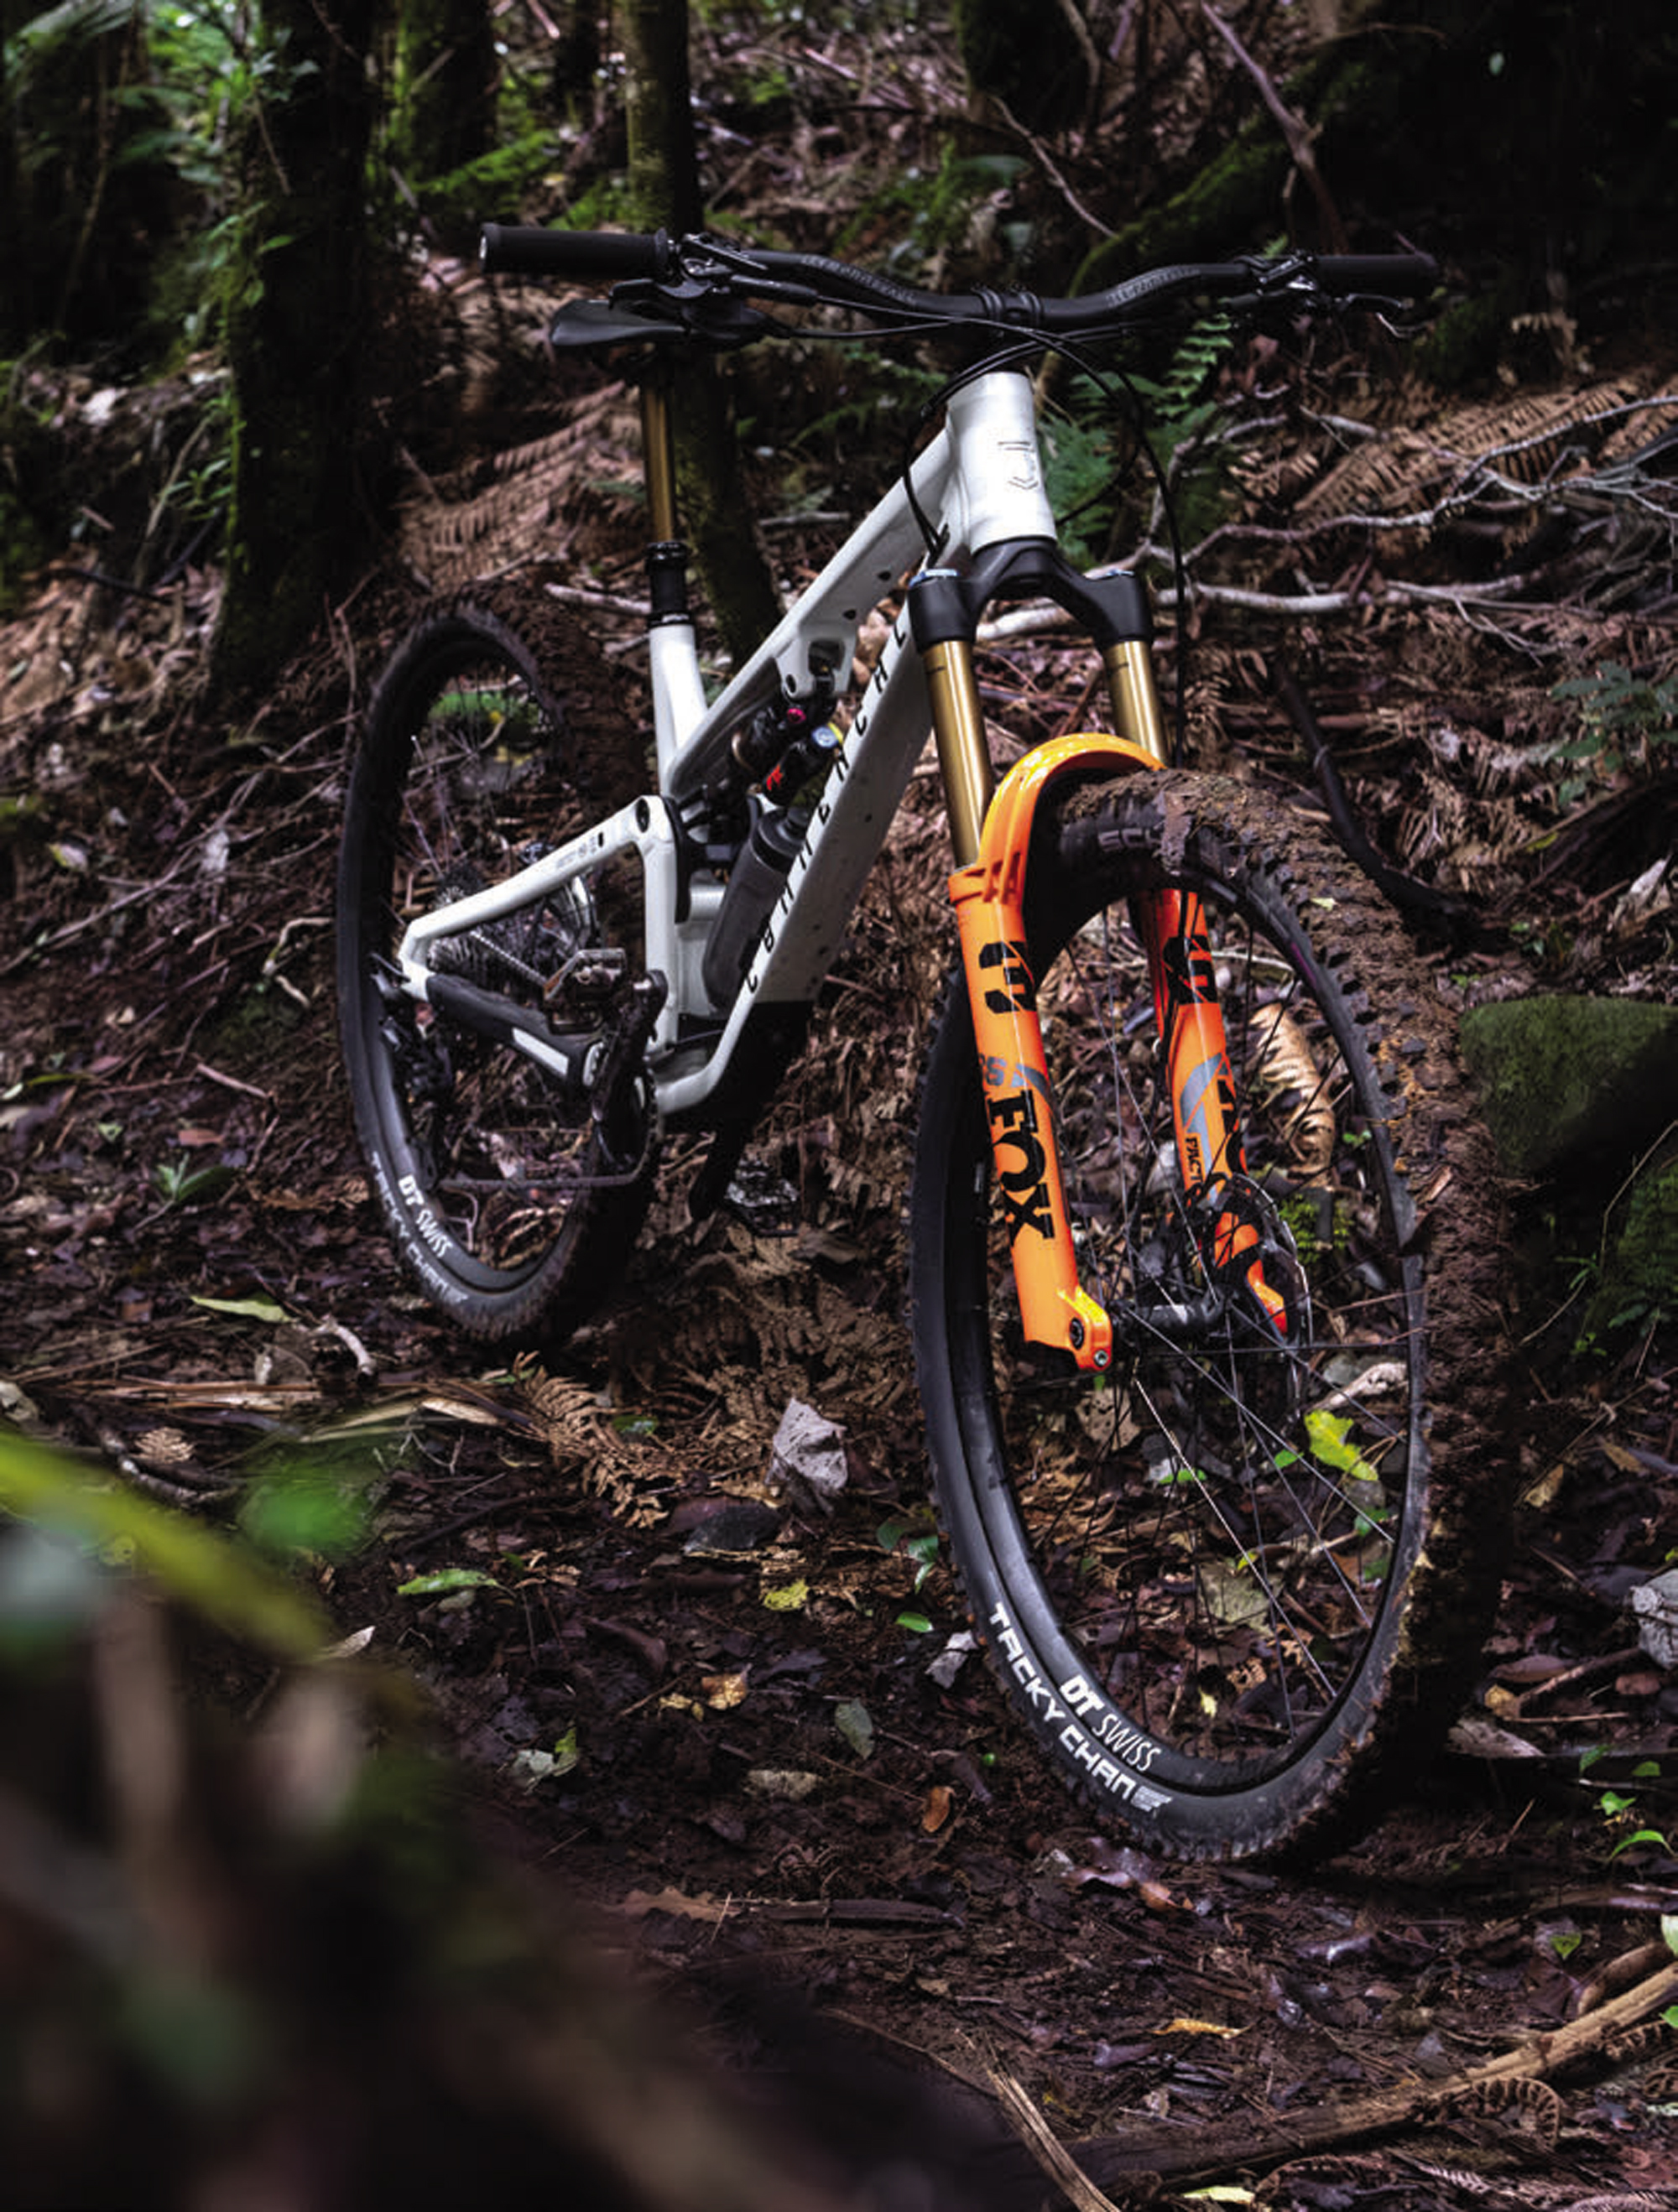
Keeping with Commencal tradition, the frame is 100% alloy like the rest of their range—not a carbon fibre in sight. Rolling on 29er wheels, with 150mm rear travel and 160mm up front, this bike strikes the sweet spot of travel vs. pedalling ability and agility. Carrying speed is key to Enduro and the V5 delivers.
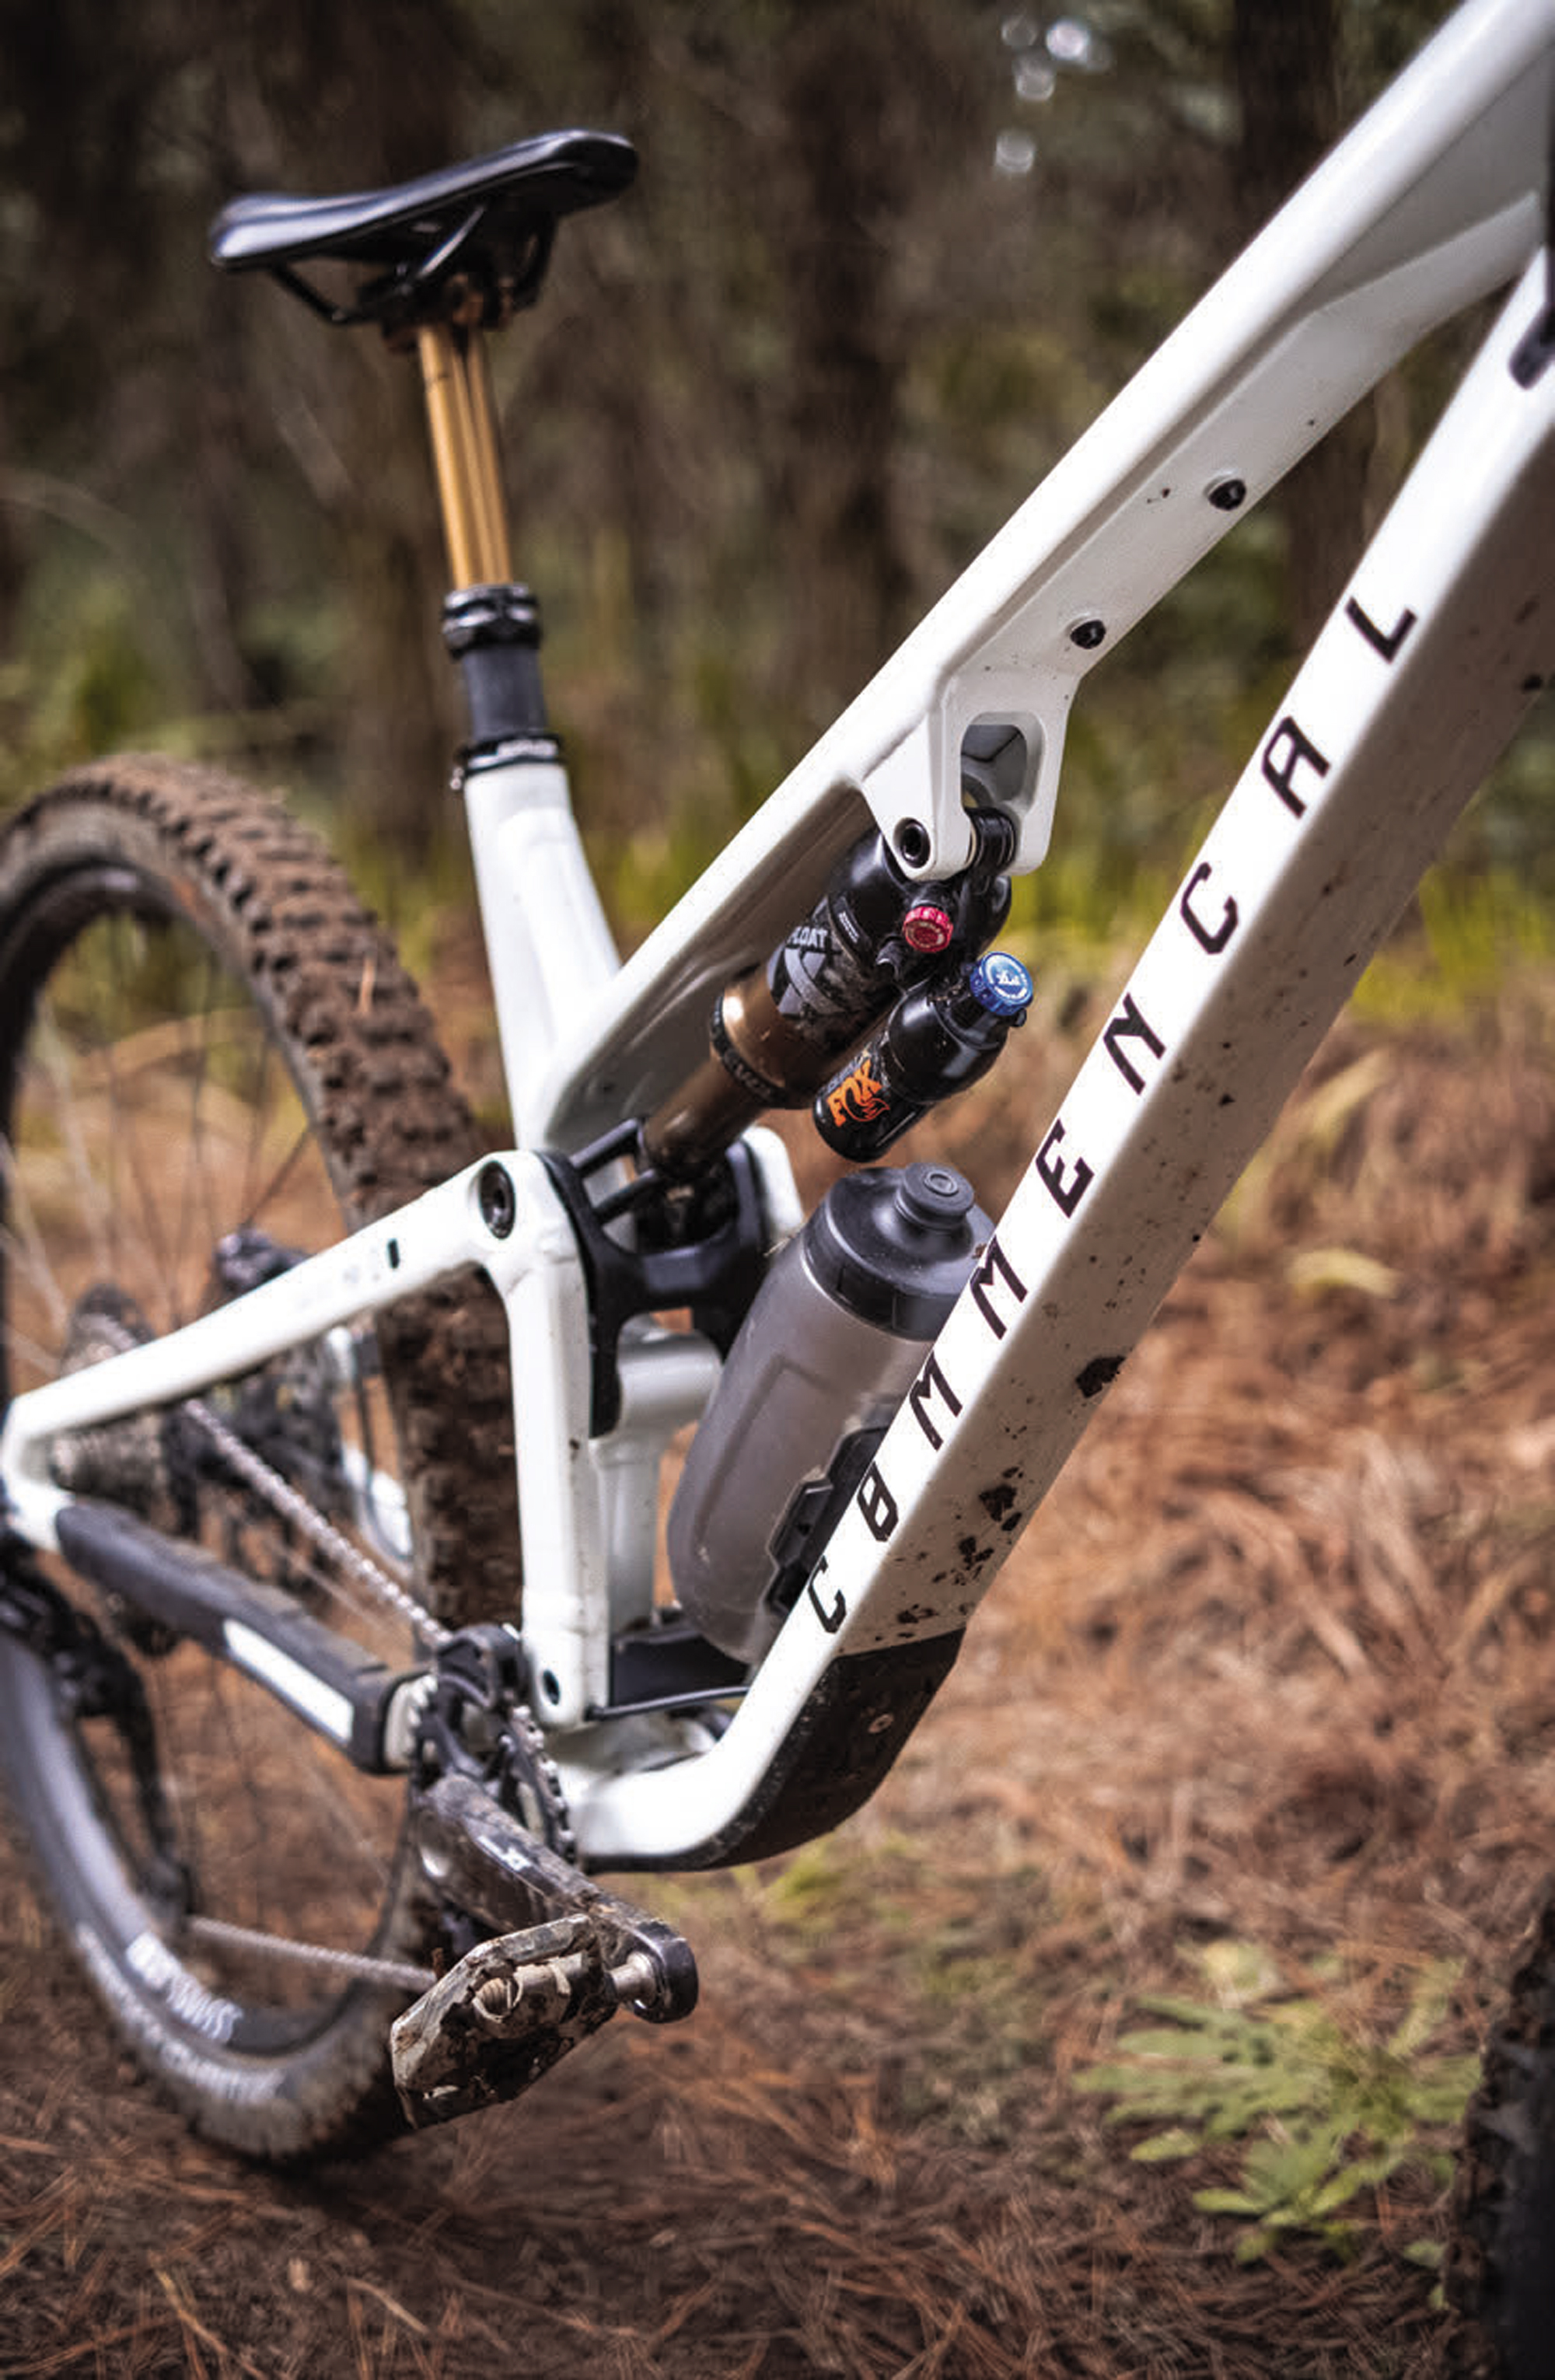
An alloy frame would be a prime candidate for a threaded bottom bracket but, for whatever reason, Commencal has stuck with a bb92 press- fit style. In fairness, I’d rather have a press-fit in an alloy frame than a carbon one, so I guess they’ve landed in a bit of a middle ground on the V5.
The frame features a plethora of tubing profiles; there is not a single ‘regular’ round tube anywhere. Depending on location, each tube is shaped to achieve specific strength, weight and compliance. Under the top tube is an accessory mount, and there’s a bottle cage mount situated in a small channel indented in the downtube tube. As is customary on most bikes today, a UDH hanger graces the dropouts.
The front and rear triangles connect with a series of bolts, bearings, and pivots that make up the VCS (Virtual Contact System) linkage. Ten bearings are spread through the swingarm’s five pivot points. The swingarm has some smart subtleties: bearing caps help keep grime out and expander plugs in the pivot axles help keep them tight. The lower end of the shock features a flip chip, allowing for a small amount of geometry customisation.
Let’s get through the details before looking at my thoughts after a couple of months aboard the V5:
Geometry
Although nothing jumps out as too progressive or outside the realms of sensibility when looking over the geometry chart for the Meta V5, there’s a lot to like. There’s a flip chip on the lower end of the rear shock, and other than a cursory couple of rides in ‘High’ to confirm there’s no massive difference between the two settings. I’ve stuck with the bike in ‘Low’, as I’d imagine most riders would do.
There’s nothing crazy here; I’d point out a middle-ground head angle and reasonably steep seat tube angle. As is becoming customary with Commencal’s bikes, the stack height is above average and pretty big for a medium-sized frame, a trend that seems to be taking hold with some brands.
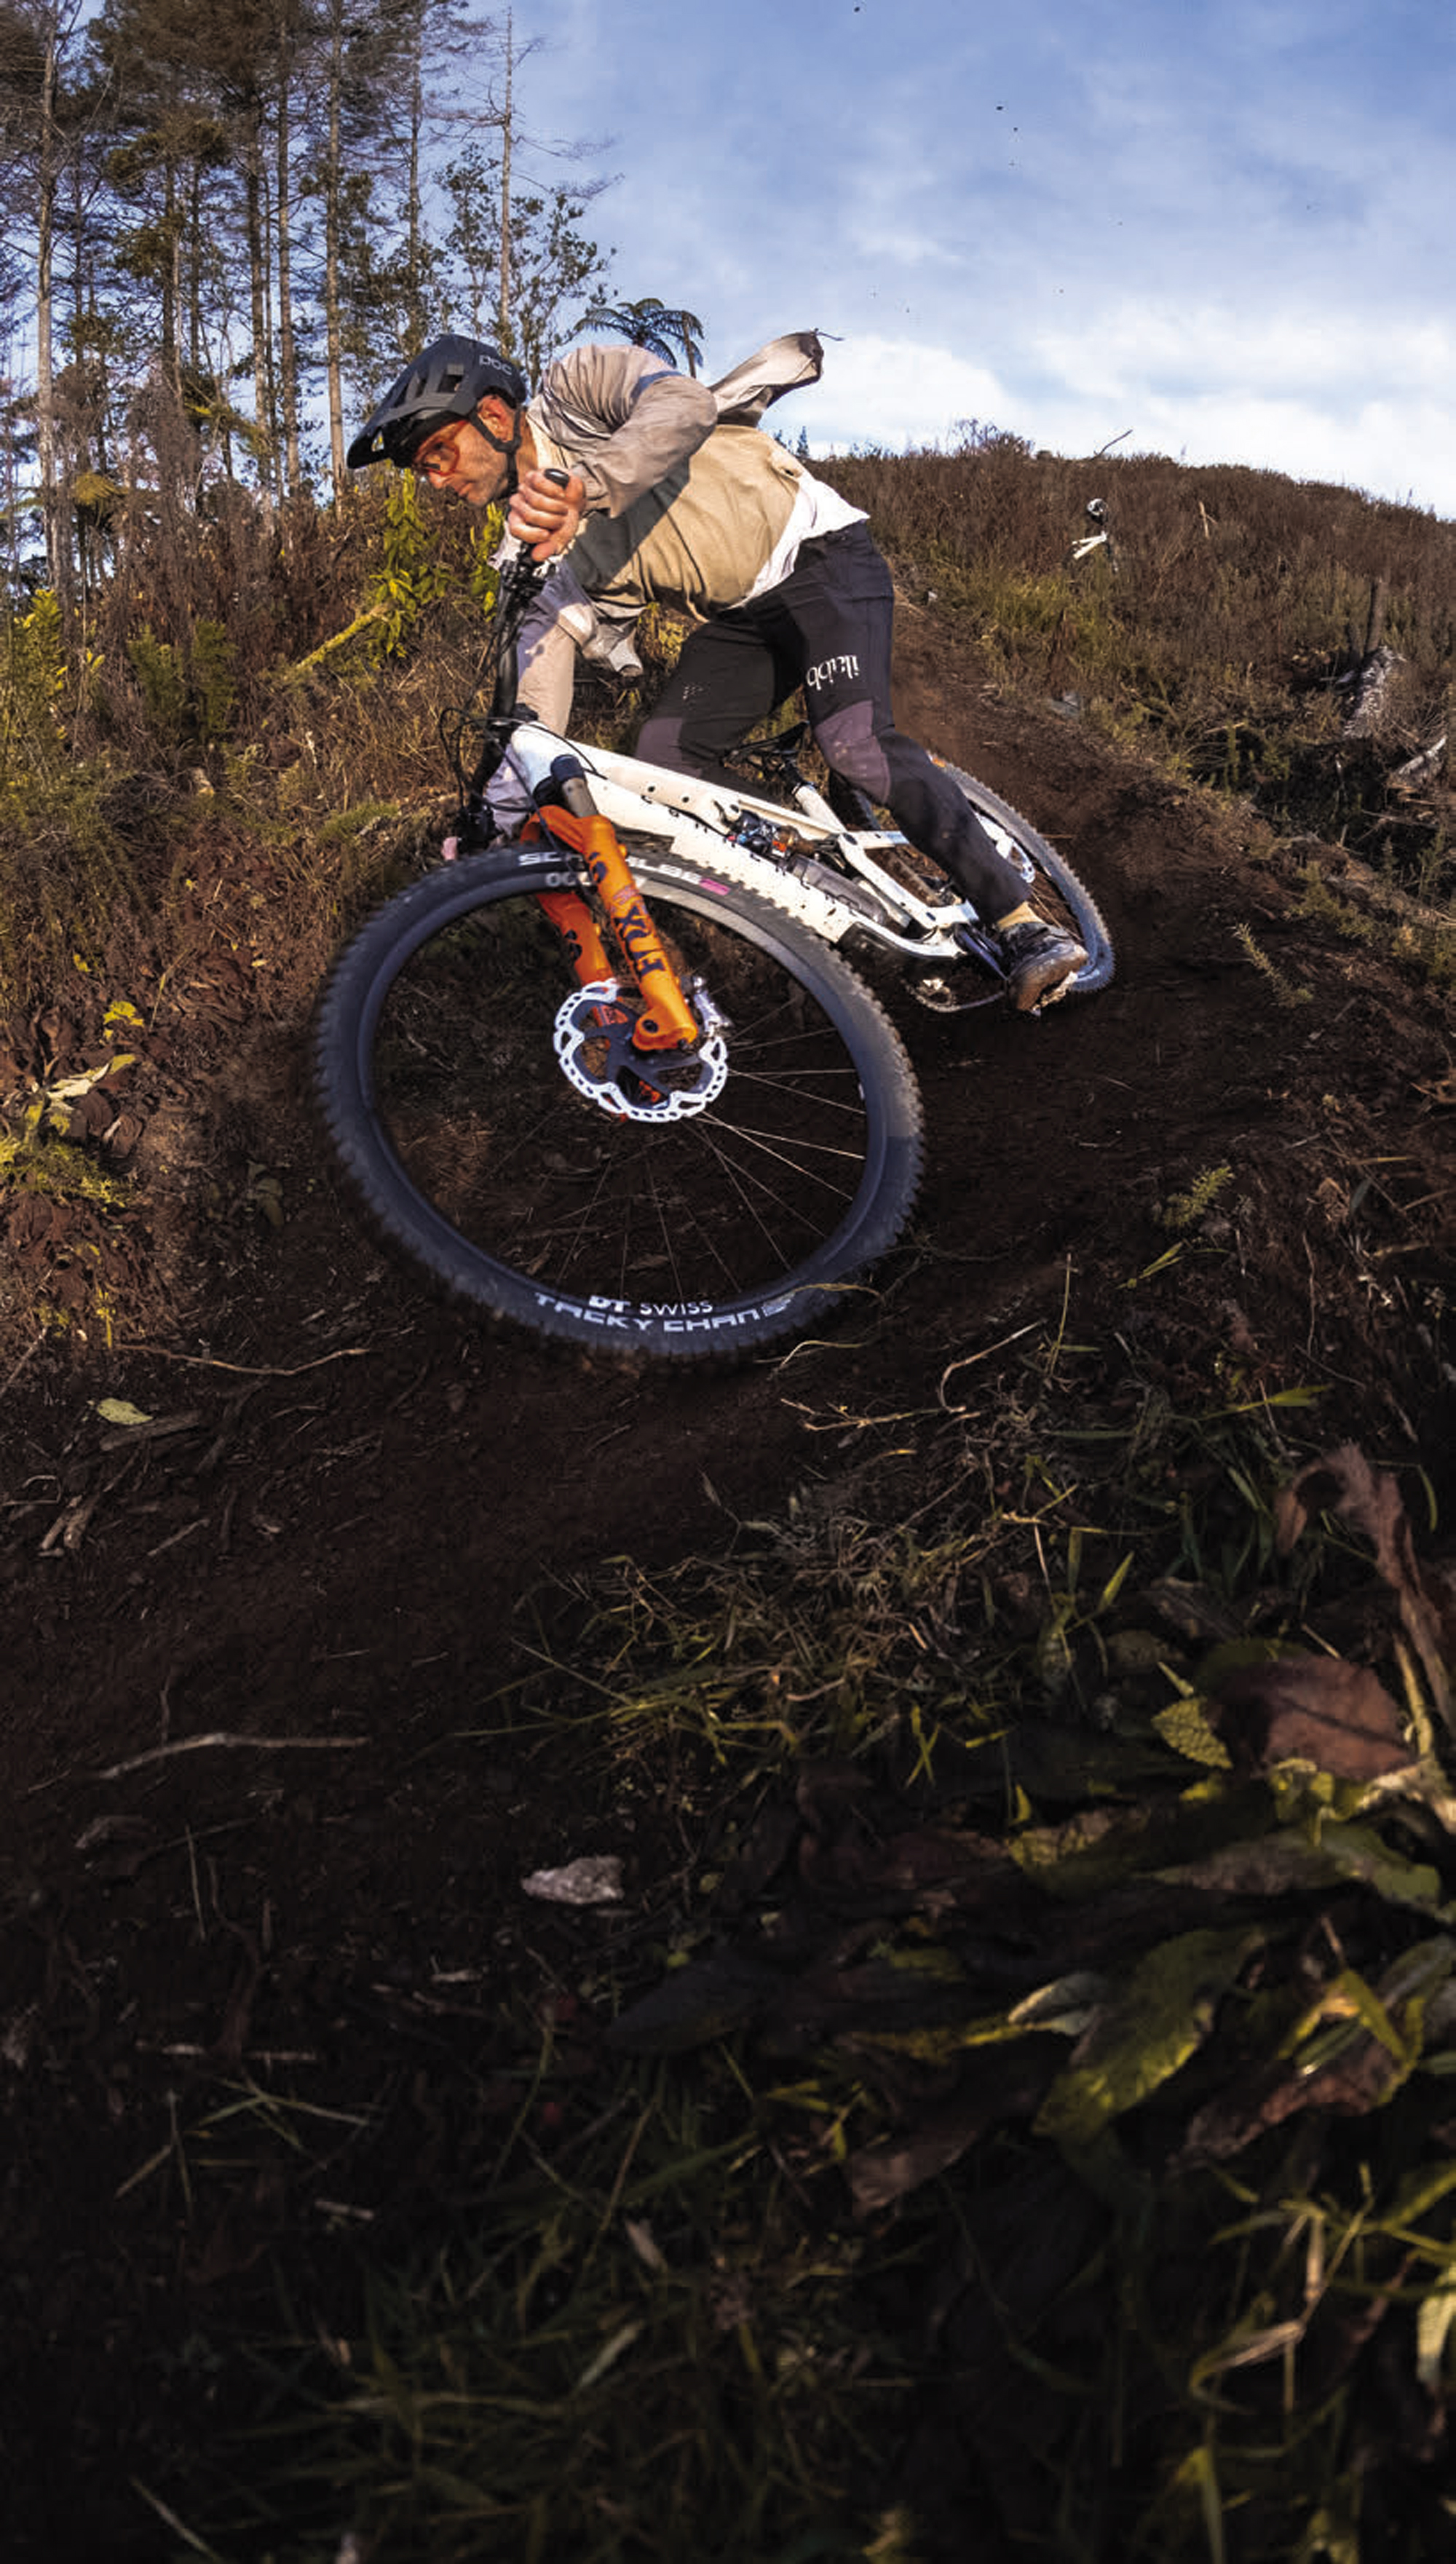
The Ride:
According to the Commencal size chart, at 176cm tall, I sit right at the top of the Medium recommendation and at the bottom of the Large. With a bike of this ilk and travel category, I chose to go smaller rather than larger, and settled on the Medium size.
A couple of weeks after exchanging a emails with Commencal about how and where I ride, how long I’ve been riding, and what sort of rider I consider myself to be, a pre-tuned Meta V5 arrived on my doorstep. Frothing to get out, I quickly mounted the handlebars in the stem, attached the front wheel, and was good to go; the assembly only took about five minutes, including removing the bike from the box. A quick driveway test confirmed the supplied setup felt like it was in the ballpark of where I’d like it to be; they’d even trimmed the bars to my preferred 760mm width — bonus.
To give my thoughts some context, compared to my usual ride, this bike comes in at 10mm less travel on either end, a 14mm shorter reach, a 10mm higher stack, a 2-degree steeper seat tube, and almost equal chainstay length and head angles. Considering the 30mm riser bar, my hands end up roughly 30mm higher than my bike – quite a lot. Weight-wise, the Commencal comes in a little heavier, but not by an amount that makes a difference to anything; it adds to the feeling of stability. Considering how similar the geometry is between my bike and the Meta V5, they’re poles apart in how they ride.
I get on some bikes, and everything clicks immediately; this was one of them. Although I initially felt the shorter reach and higher front end compared to my bike, I quickly forgot these differences and was comfy on the bike after just a couple of runs down a trail. Not once have I felt like I wasn’t in the correct position on the bike or had to shift to a particular body position to get the bike to do what I wanted; everything just seems to click nicely, and now has me questioning my usual setup.
The suspension settings, as supplied, 71 psi in the fork and 177 in the shock, were ideal for getting to grips with the bike; nice and balanced, with no surprises. A couple of rides in, as I got used to the bike and speeds increased, I added a little air pressure front and rear and, taking this into account, slowed the rebound and added a click of compression damping to both front and rear. The Meta V5 is a full-gas Enduro bike and, although optimised for descending, you still have to make it to the top of a hill before heading back down. The Meta V5 is not a spritely climber, but it gets there. Out of the saddle, while under power, the suspension firms up substantially and gives an excellent platform to push against, i.e. when tackling steep technical climbs or sprinting over a punchy climb, it does both well. When I’m ticking my way up a gravel road or a long, smooth single-track climb, I’m immediately reaching for the lockout on the shock; the firm pedalling platform and steep seat tube make the climbing position comfortable and efficient.
Descending is a dream, highlighting some savvy design and an equally impressive suspension package. The VCS linkage is a virtual pivot linkage offering super plush suspension that’s supple off the top, offering wicked levels of grip; through the mid-stroke, it feels pretty linear but still has a good level of support. Even though it has 150mm of rear travel, it feels more over big hits or flat drops as it firms right up at the end of the stroke, preventing any harsh bottom outs, and I can’t think of a time when I’ve actually felt an abrupt end of the travel.
With all the links and pivots involved in the VCS, the rear end of the bike is quite wide to accommodate it all. It’s so wide, in fact, that it’s quite normal to drag my legs on it while riding. Not to the point of being annoying, but it’s noticeable and will inevitably rub and mark the frame over time. Fortunately, the bike I received has a tidy ride-wrap installed, so the paint isn’t affected.
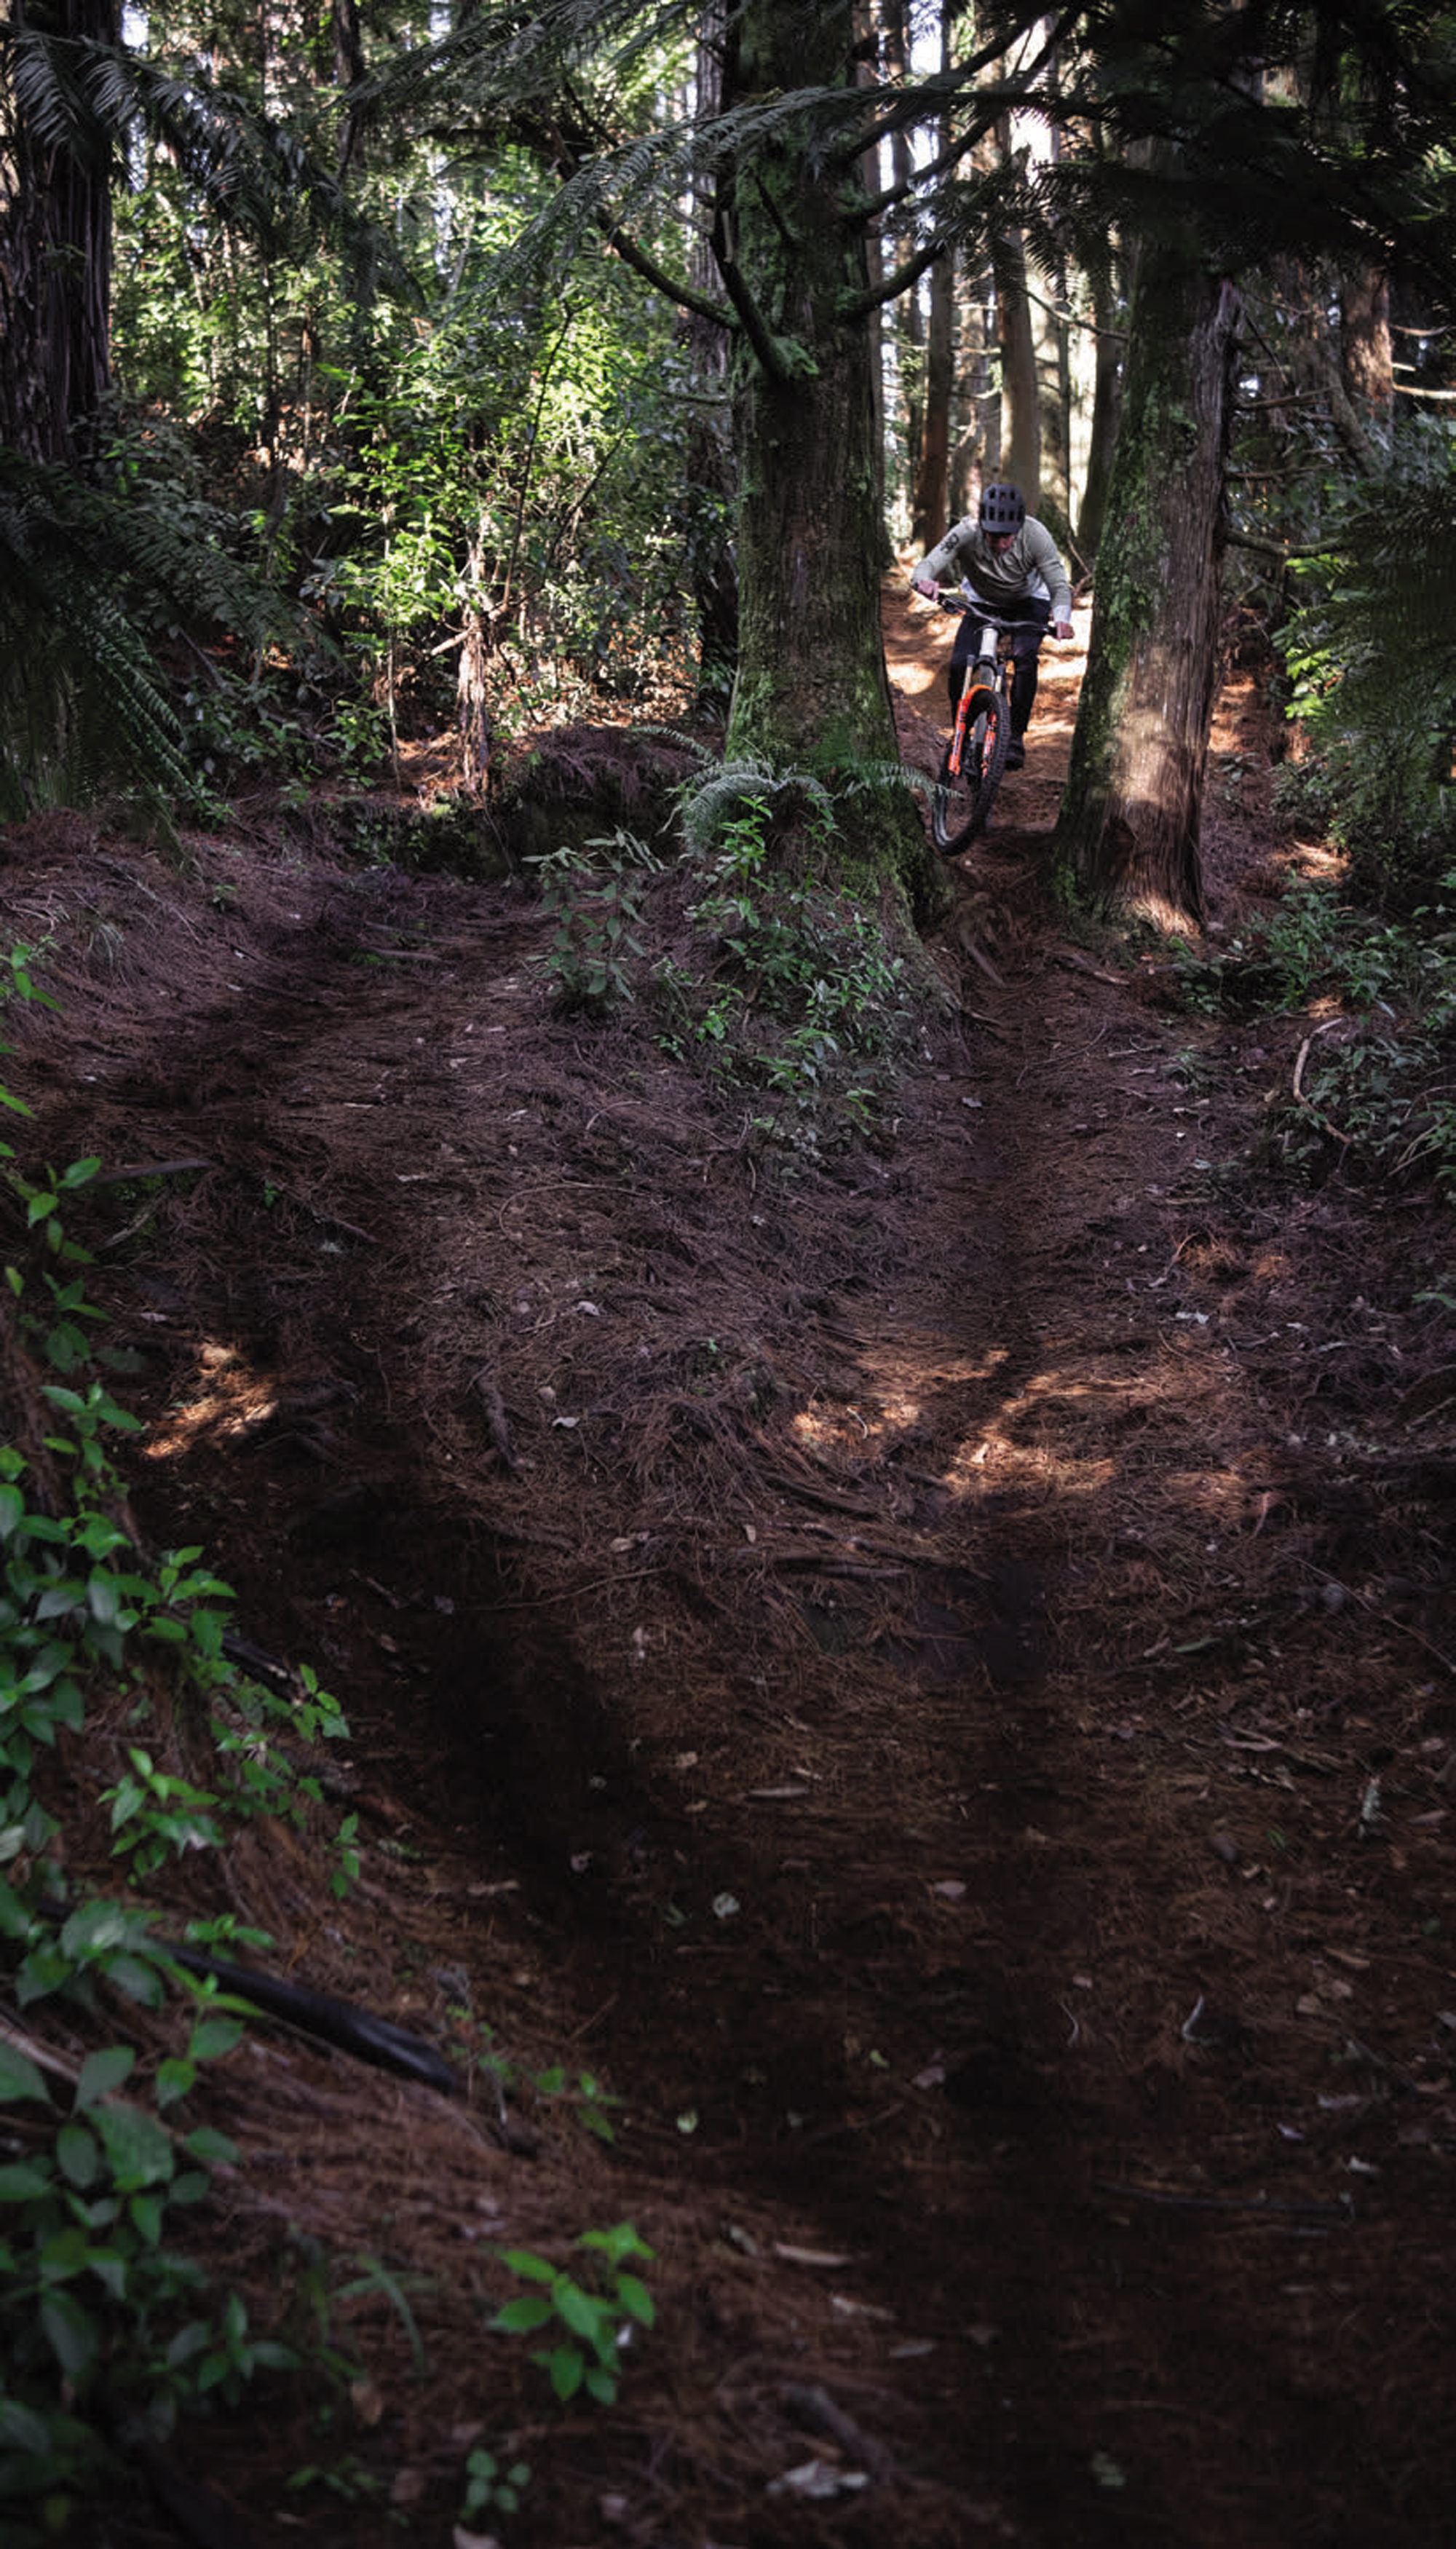
I find the front end stiffer than many bikes, and the suspension works in combination with this front-end rigidity and the flex of the back end to provide a ride that’s quite unique, but only in good ways. While charging through rough sections, the bike remains composed with amazing stability and with no harshness or the feeling of being deflected off obstacles or ‘pinged’ off square edges. The chassis floats across the chunder, reacting more to rider input than the trail feedback. Thanks to this, I felt less fatigue on long descents, feeling there was no need to wrestle the bike to stay on line or keep it where I wanted, I could just stand centred on the bike and let it do the work.
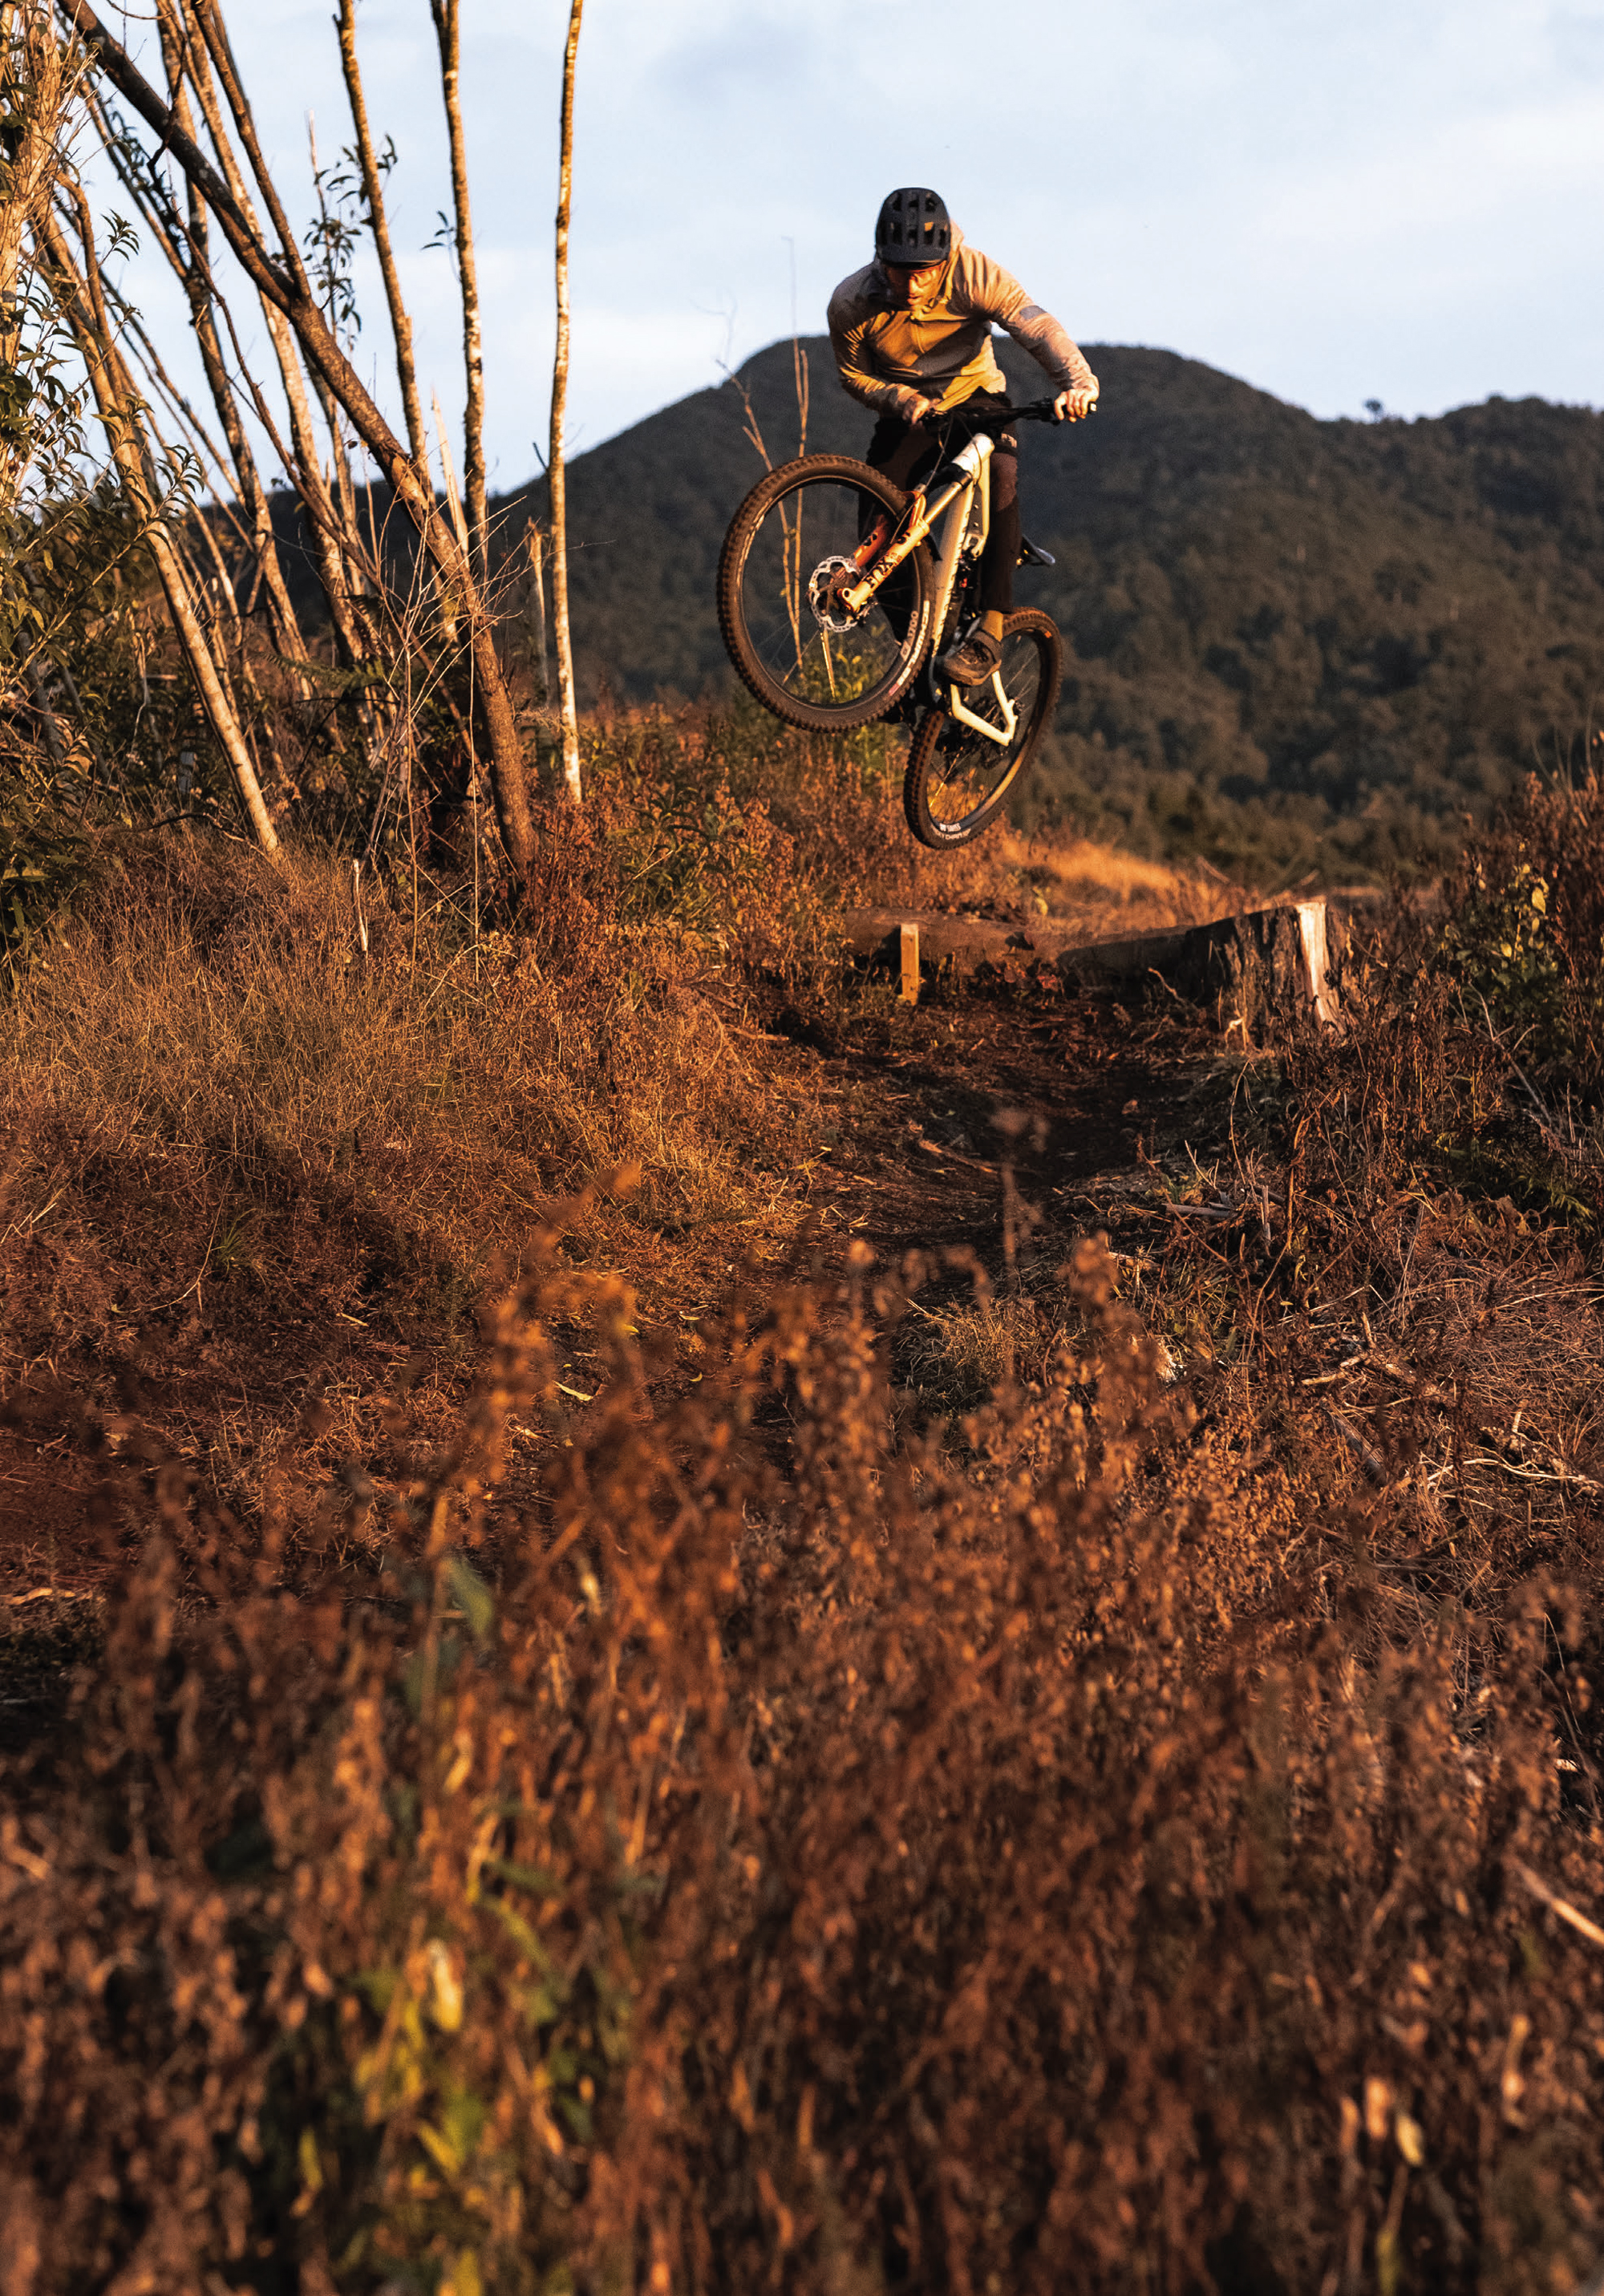
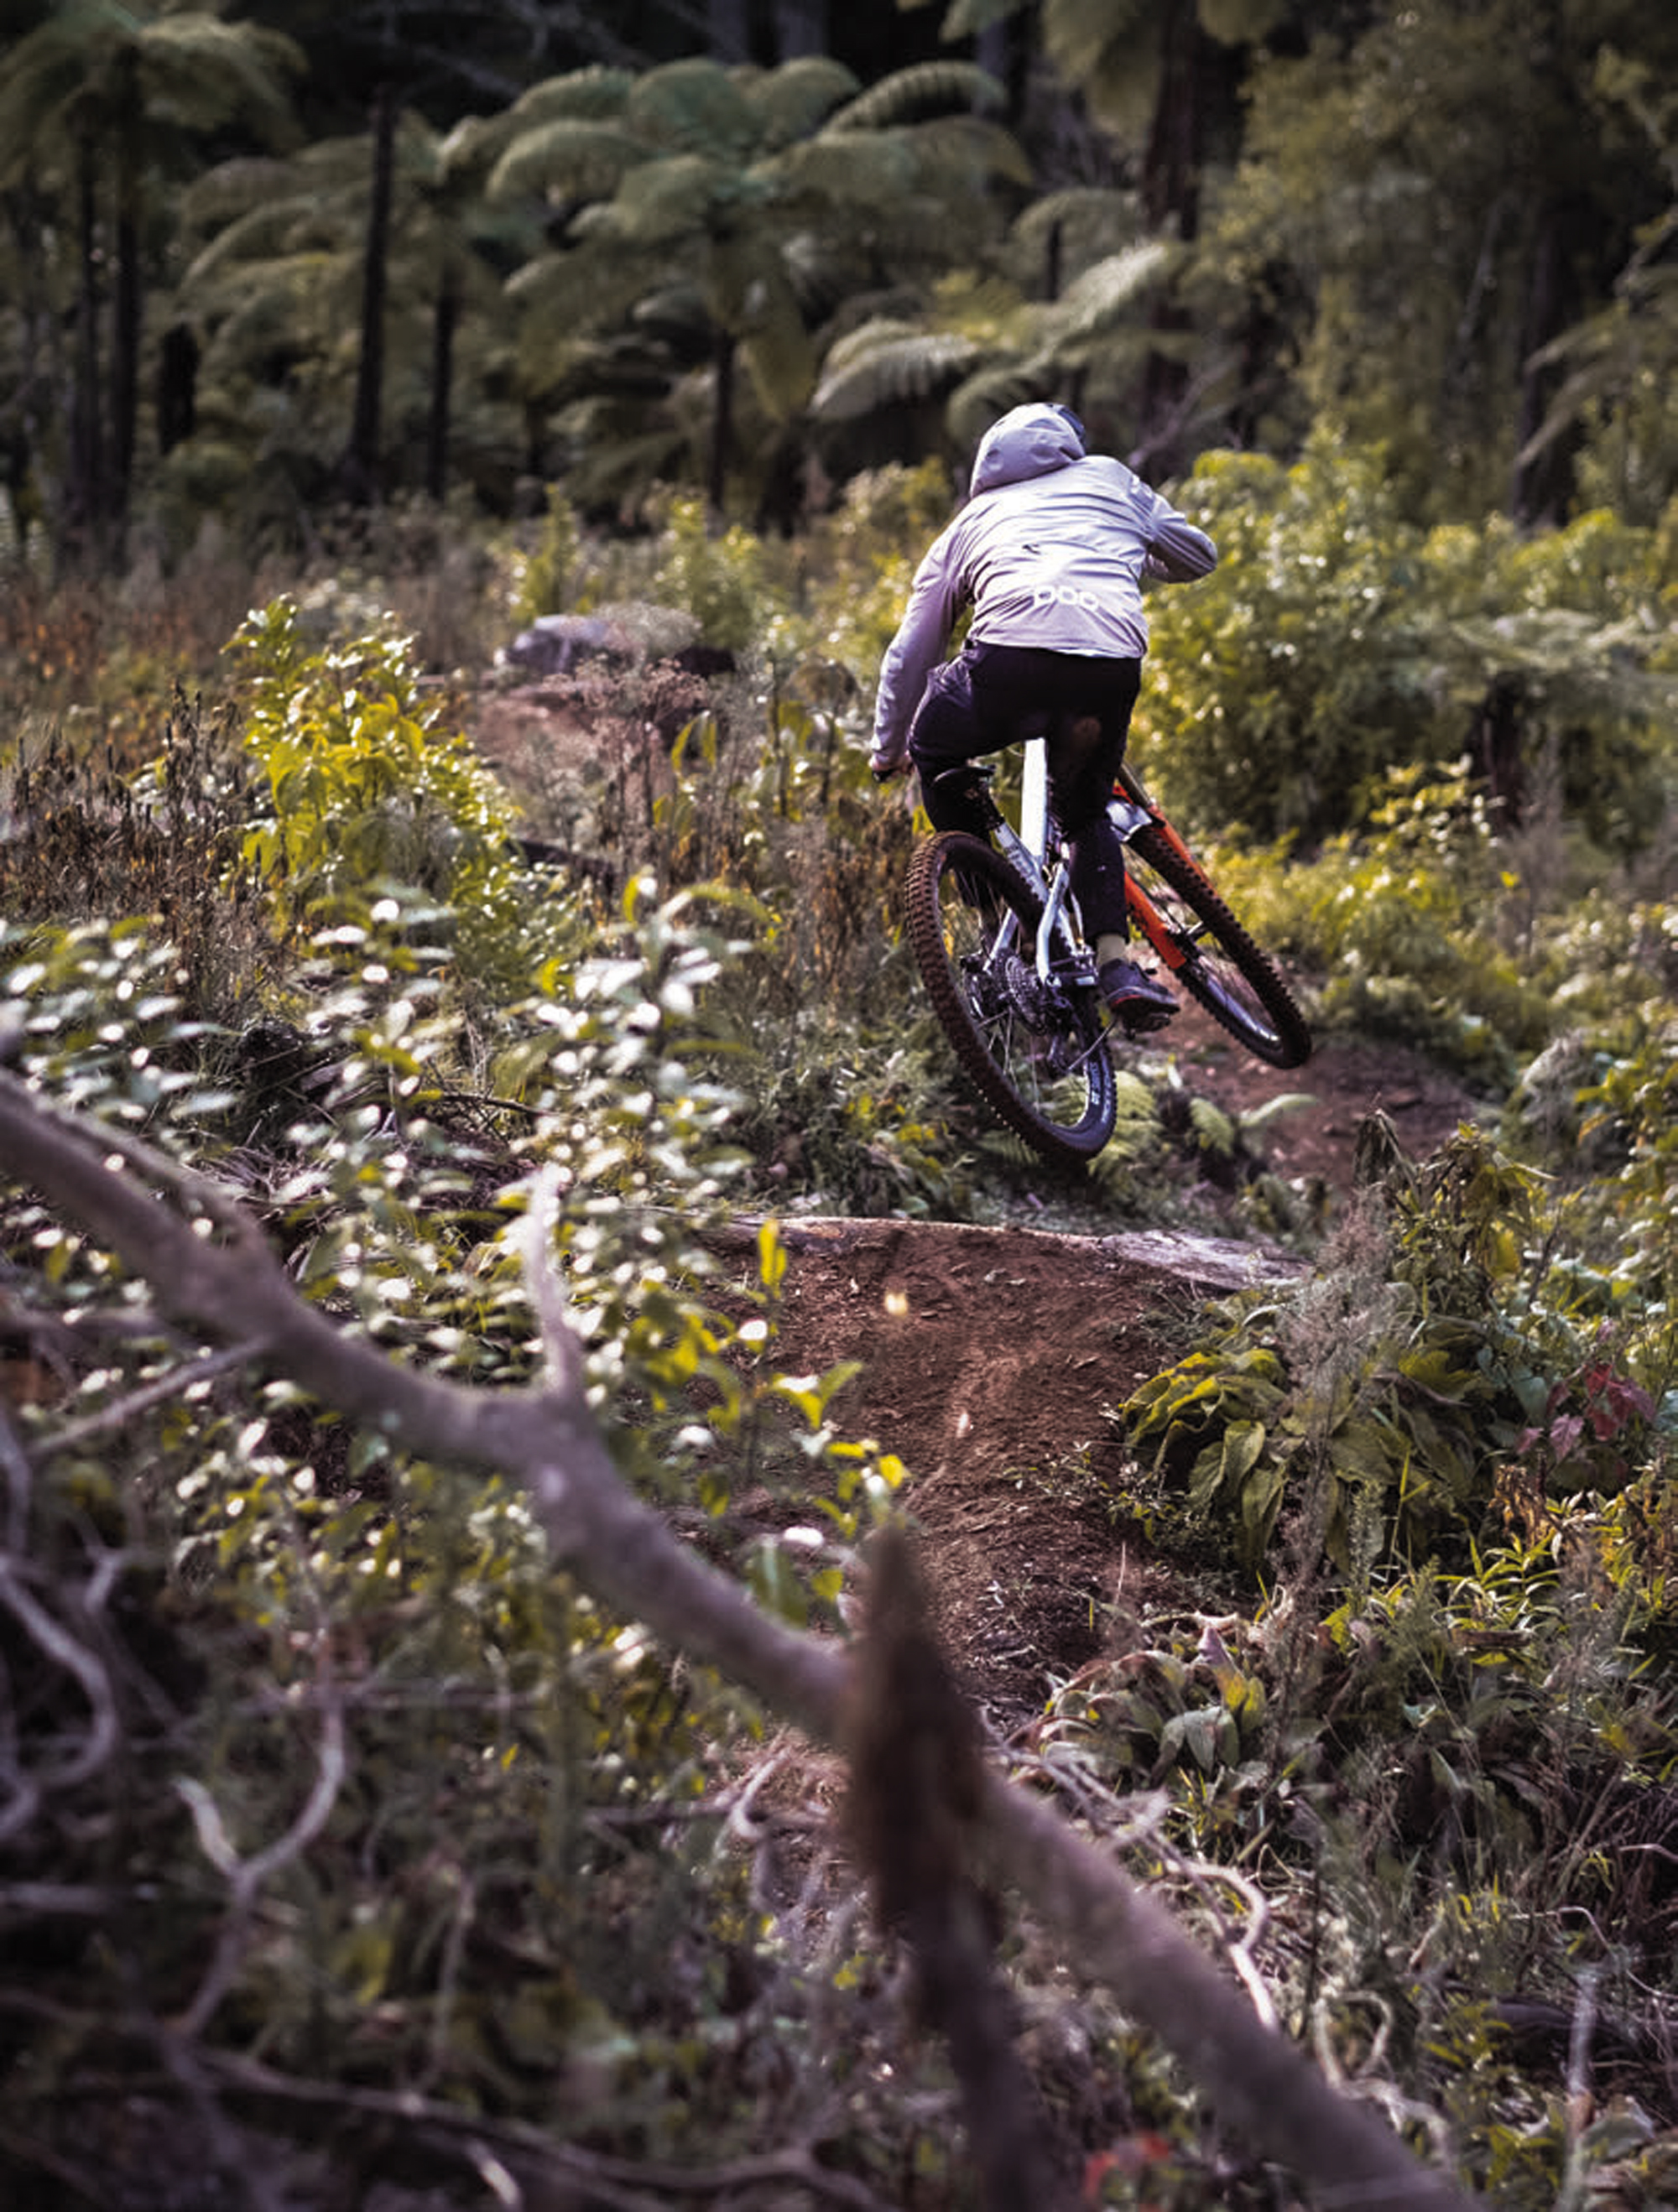
Considering the weight, travel and reasonably linear mid-stroke suspension kinematics, the Meta is surprisingly lively and is fun to pop off trail features and manual through sections; even though it’s such a sled, it strikes a surprising balance of high-speed downhill capability and mellow trail cornering agility and playfulness.
The overall balanced feel lends itself to aggressive and controlled cornering. Initiating turns or quickly changing direction is simple, not requiring any dramatic weight shifts to maintain traction.
Adding to the predictability and stability is some well-engineered flex in the back end, that works in harmony with the suspension. Much like the Cannondale Habit LT I reviewed a few months back, there’s an amount of lateral flex in the swingarm. Still, tuned compliance has significant advantages, particularly at this mid-travel level. It helps keep the bike composed in the rough and gets across off-camber more smoothly by assisting the wheel to stay on the ground rather than being deflected off bumps (where stiffer bikes would rely more heavily on just the suspension to move the wheel). I’m not sure this trait is necessarily faster in itself, but the resulting reduction in fatigue over the long run is certainly noticeable.
One thing that struck me early on was how quiet the bike is. Thanks to substantial chainstay and seat stay bumpers and tidy cable routing, the bike maintains a nice, dull sound when on the trails. By the look of those bumpers, the chain is still hitting them while slapping around, but they’re doing their job well and keeping sounds muted.
On my second ride, the frame developed the dreaded and much-publicised creaking in one of the pivots. Considering the bike had a pre- review strip down and grease, this was quite a surprise. Thankfully, after going through the involved process of getting to each pivot bolt and re-tightening them (it’s a total faff to do), the creak faded out. It seems the pivots will need some attention every 4-6 weeks, depending on the conditions they’re ridden in. I’ve had similar experiences on other alloy bikes in the past, and it seems to be part and parcel of alloy frames; when compared to a carbon frame, a bit more care and attention are necessary to keep pivots clean, tight, and creak-free, this Commencal is no different.
I’m not a fan of the Fidlock drink bottle that was supplied. Unfortunately, without customising a bottle cage, there’s no way to carry another bottle style in the front triangle. It’s much fiddlier than a standard bottle to put back in its holster after a sip. The saddle isn’t terrible, but it’s on the firmer end of the scale and, after a couple of hours pedalling up hills, it doesn’t agree with my backside; it may be my preference, but I’d like something a bit softer.
Like many others, the Commencal product managers missed a beat when it comes to the dropper post. At 175mm, it’s not the shortest drop around but, even with my 720mm seat height, a 200mm post would fit. Adjustable dropper posts are available, and I’d love to see one on this bike to maximise the drop and allow riders to fine-tune it to their needs.
The DT Swiss EX1700 wheelset hasn’t skipped a beat, and I continue to be impressed by DT’s pre-built wheelsets. The Schwalbe Tacky Chan tyres have been great for conditions at my local riding spots recently. The Ultra Soft (front) and Soft (rear) are a perfect combination, providing excellent traction in all scenarios and trails I’ve had them on. All things considered, they roll surprisingly well, although they’re showing signs of wear pretty quickly. I’ll be interested to see how they go in proper mud rather than the hero dirt of late, particularly as they’ve already lost their square edges.
Final thoughts
Riding the Meta confirmed that the old adage “fast is fun, fun is fast” couldn’t be truer for this bike. It’s easy to get it to go fast downhill, and I’ve found myself off the brakes through sections I’m usually slightly more apprehensive about. Combine this increased confidence with the agility and playfulness of the bike, and it ticks a lot of boxes for me. If you’re considering a new ride, the Meta V5 would be worth considering and, provided you’re happy to keep the rear end serviced, I’d confidently say that — much like me — you’d be stoked on this bike!
Bosch SX: Is this the new natural?
Words Nathan Petrie
Images Cameron Mackenzie
Looks can be deceiving. Something may appear small or neat, but take a peak under the hood
and you’ll find something much greater
In the bike world, we lust after the lightest (and latest) technology but, at the same time, we never want to give up that purity of the ‘natural’ ride feel. At the forefront of our communal infatuation with ‘bike porn’ is the eBike. Is it possible to embrace the technology without giving up on the simple joy we get from pedalling a bike?
Since Covid, eBikes have become commonplace on our trails and the daily ride for many of us. The maturing market now provides a wide range of eBike products for every style of rider. From full-power to lightweight motor options, a variety of battery sizes, and matched with different bike brand geometry. Bosch has led this charge and the arrival of their Performance Line SX system in New Zealand is the next phase of this evolution.
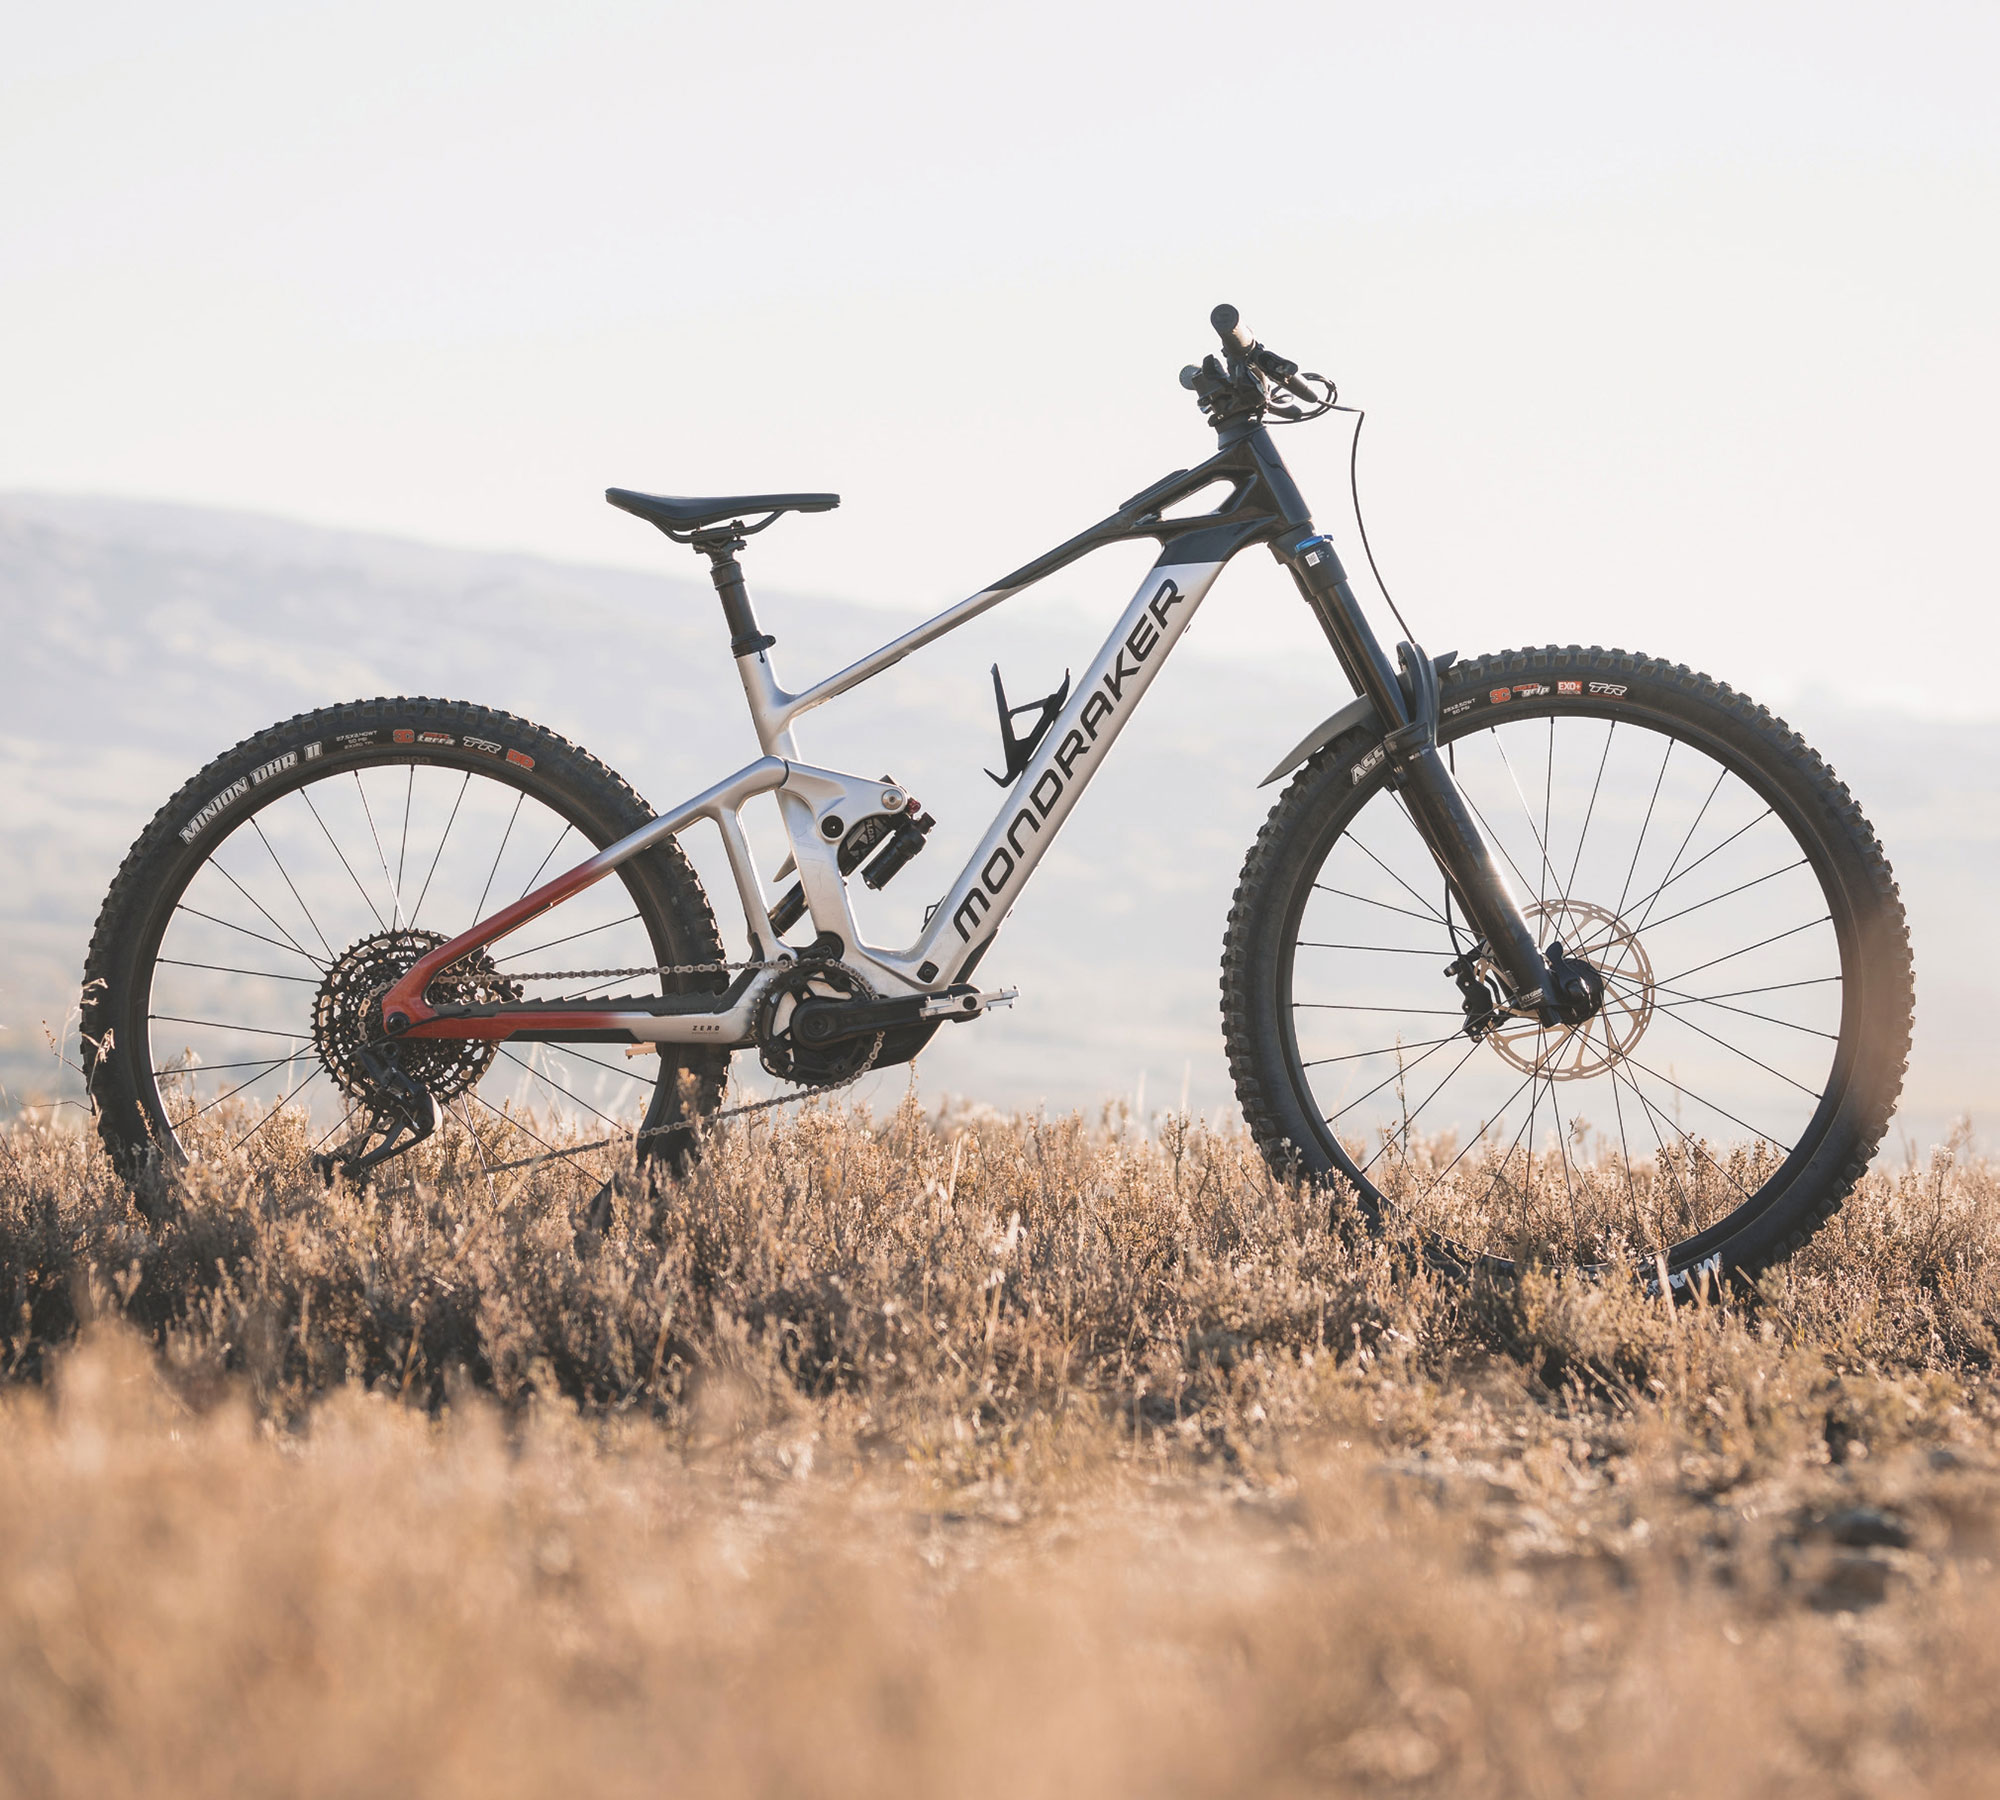
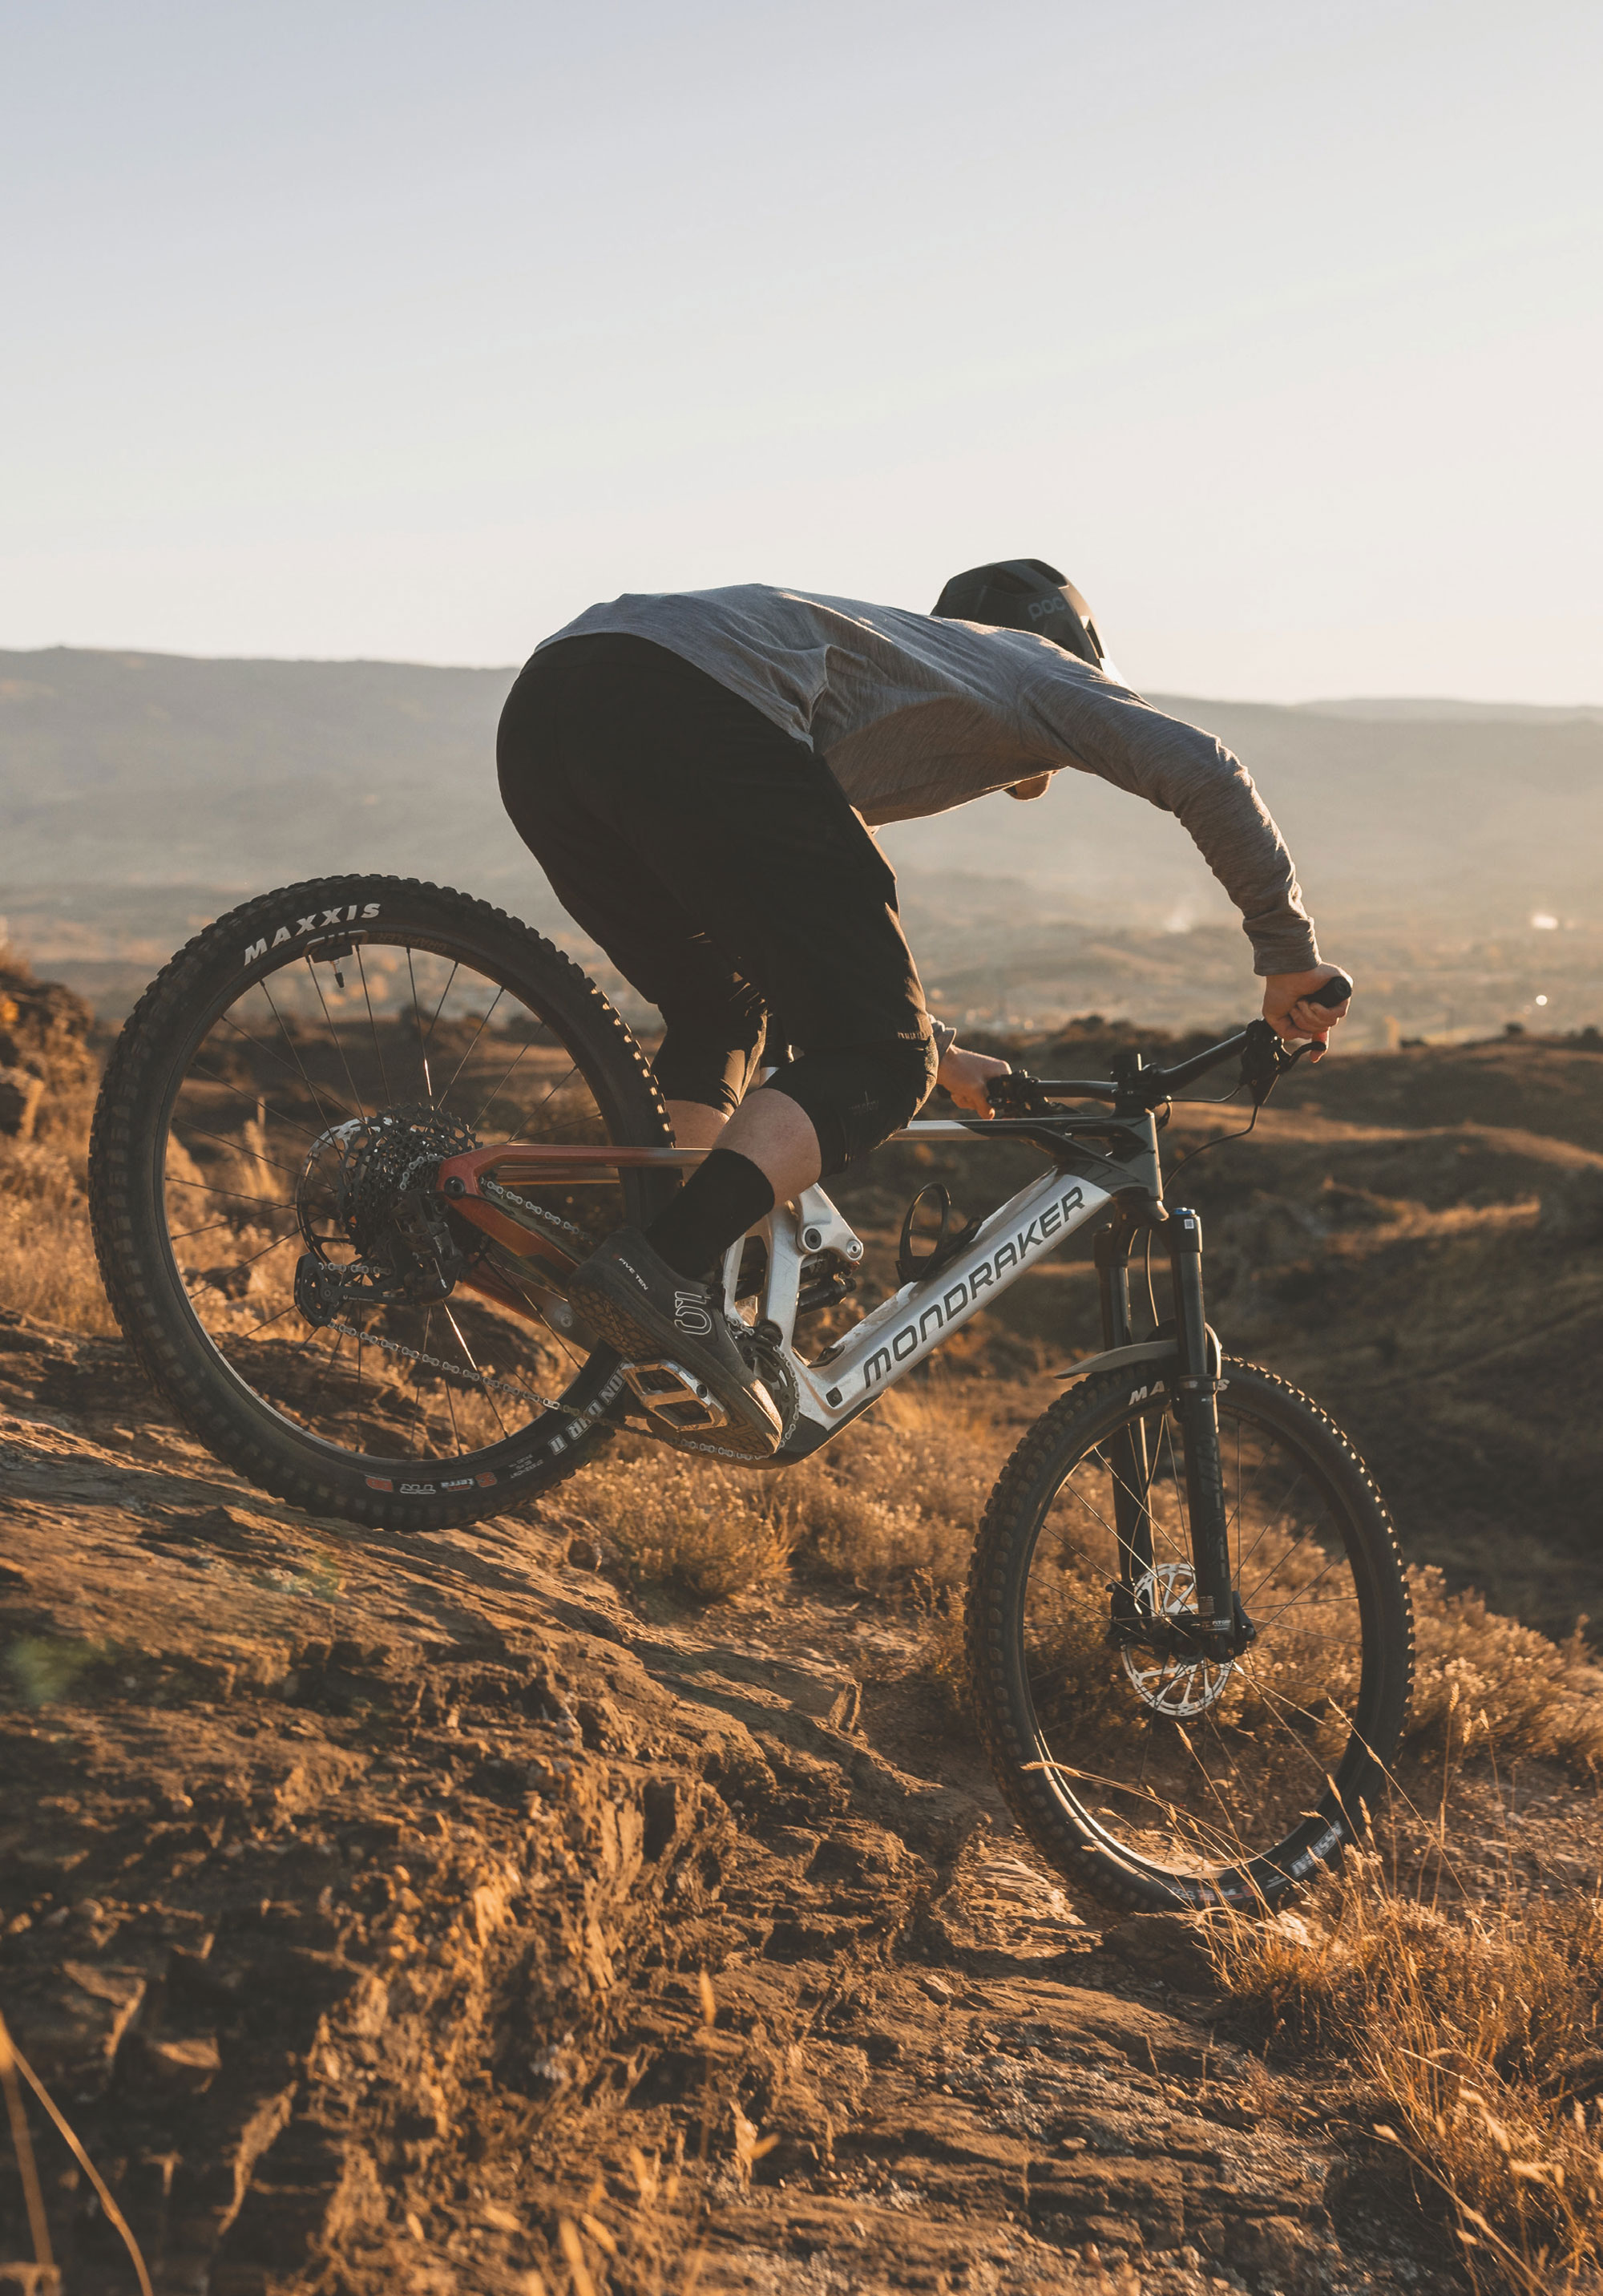
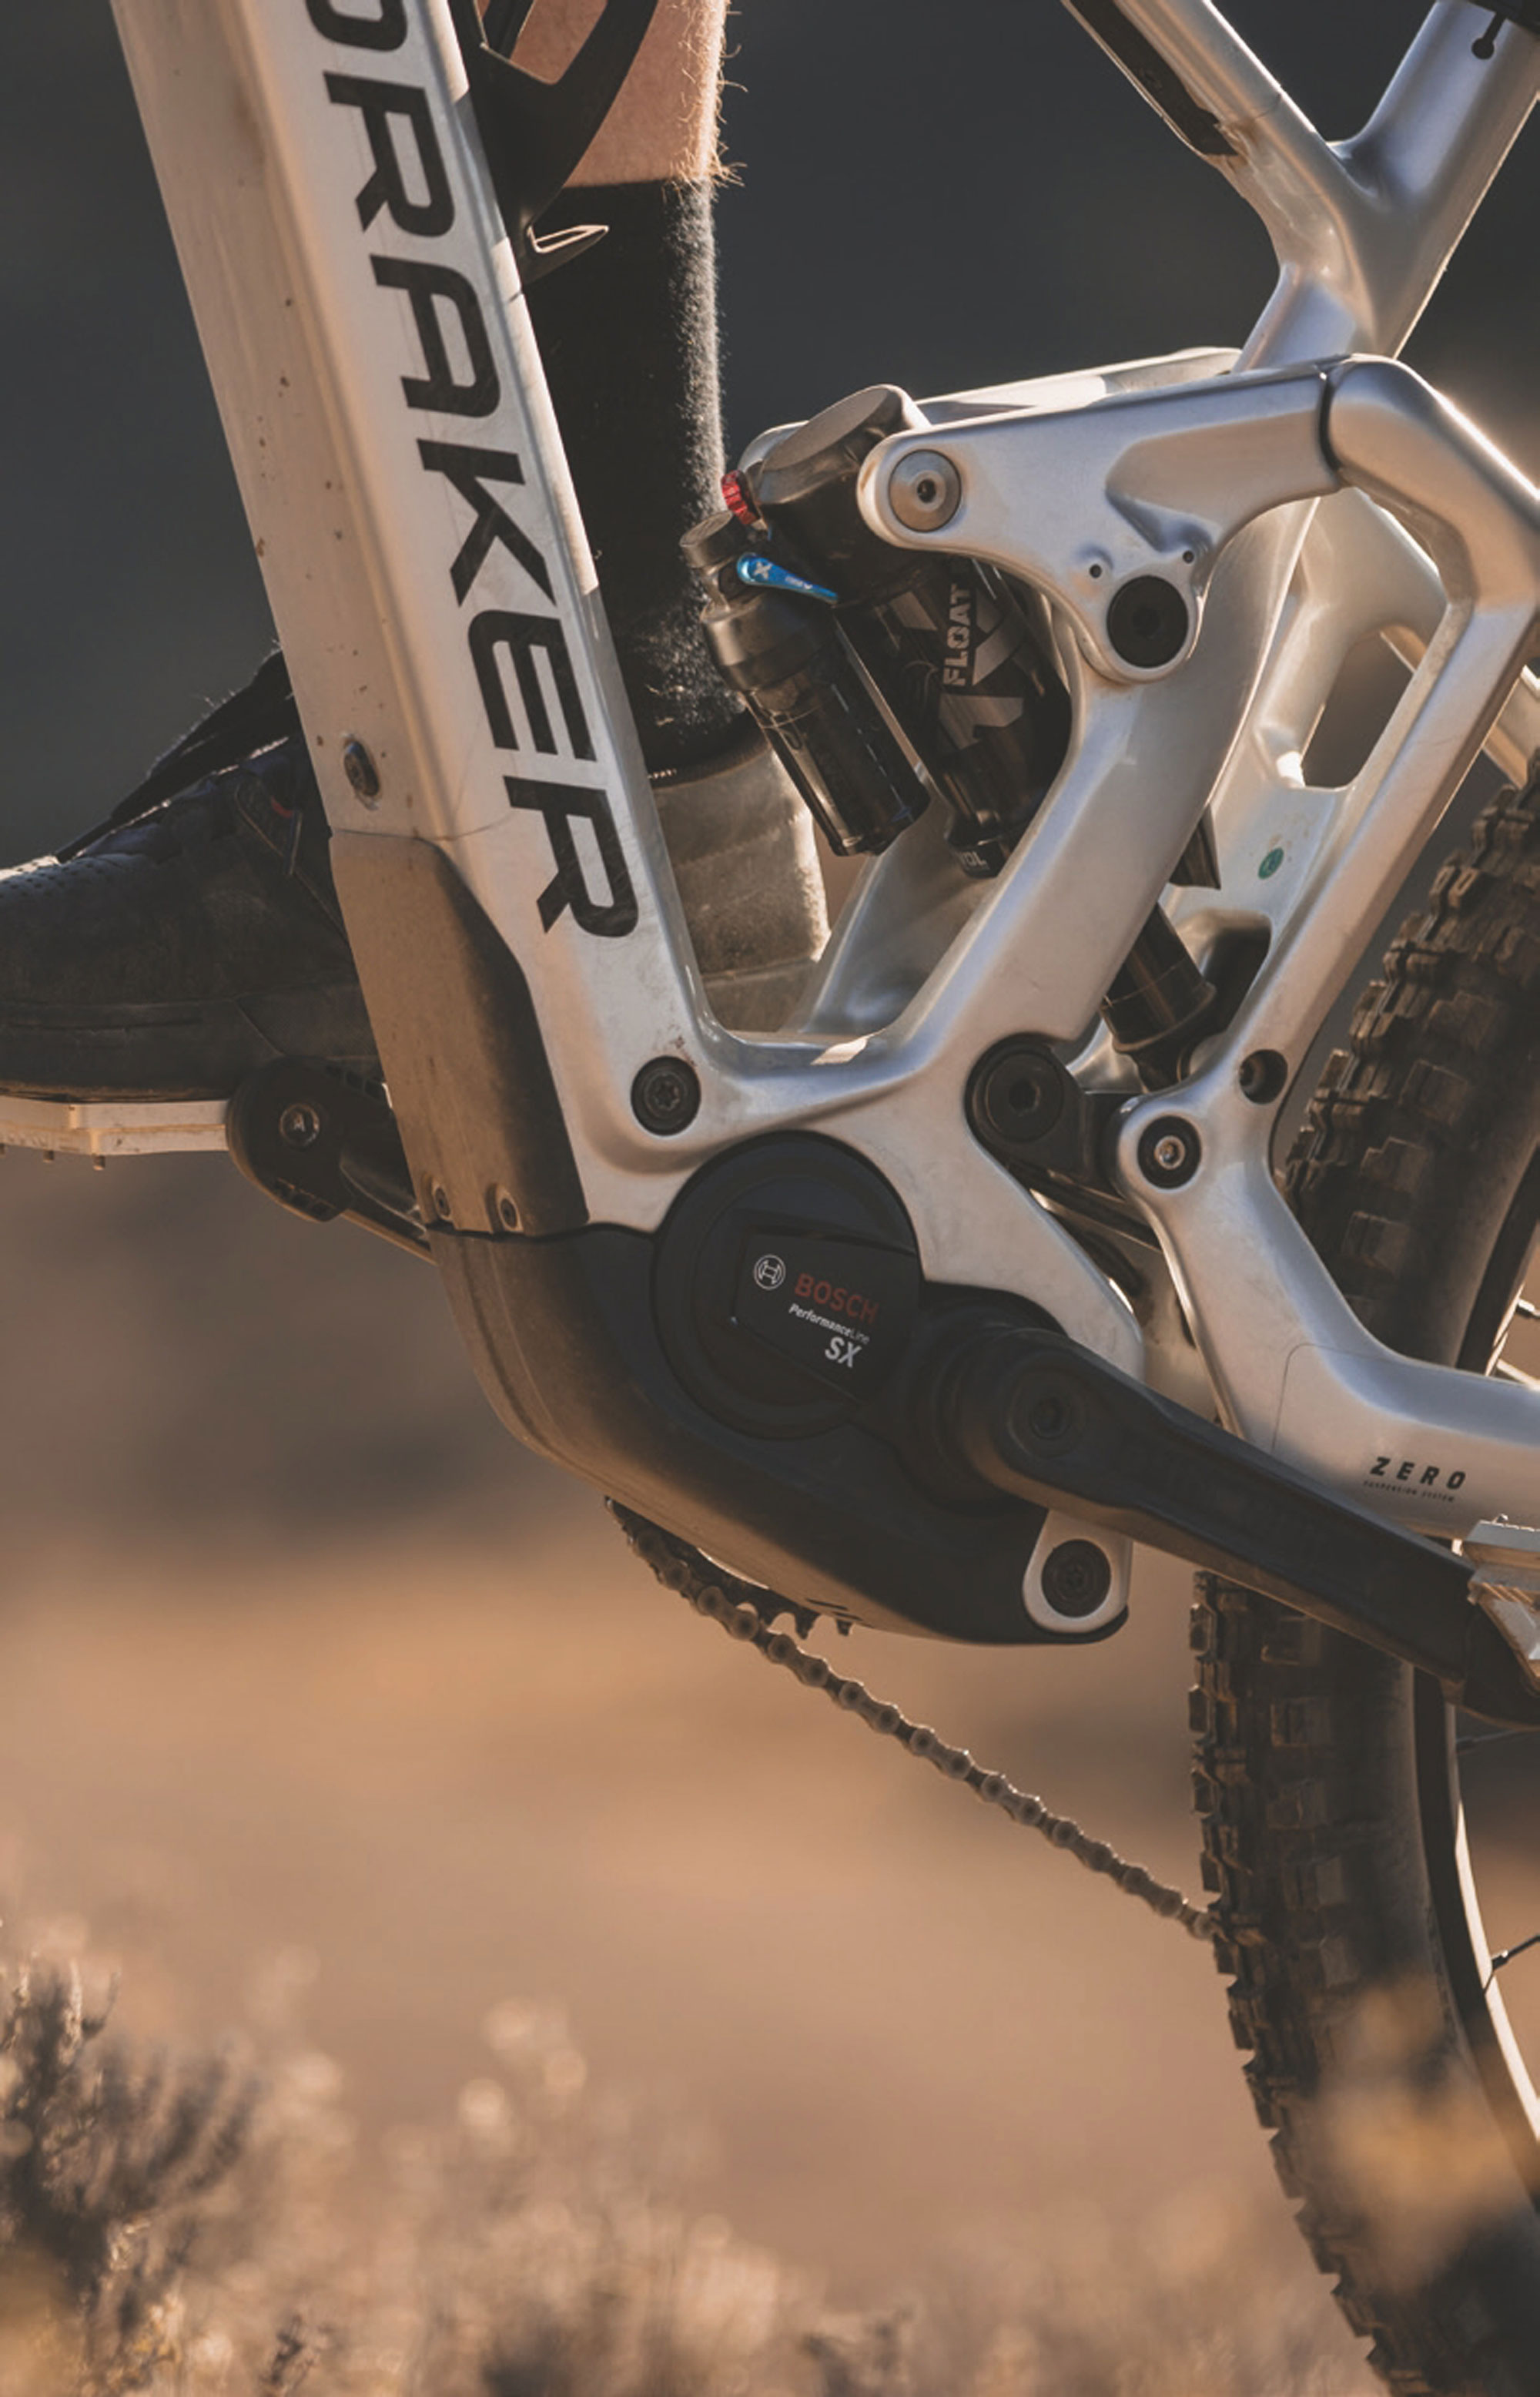
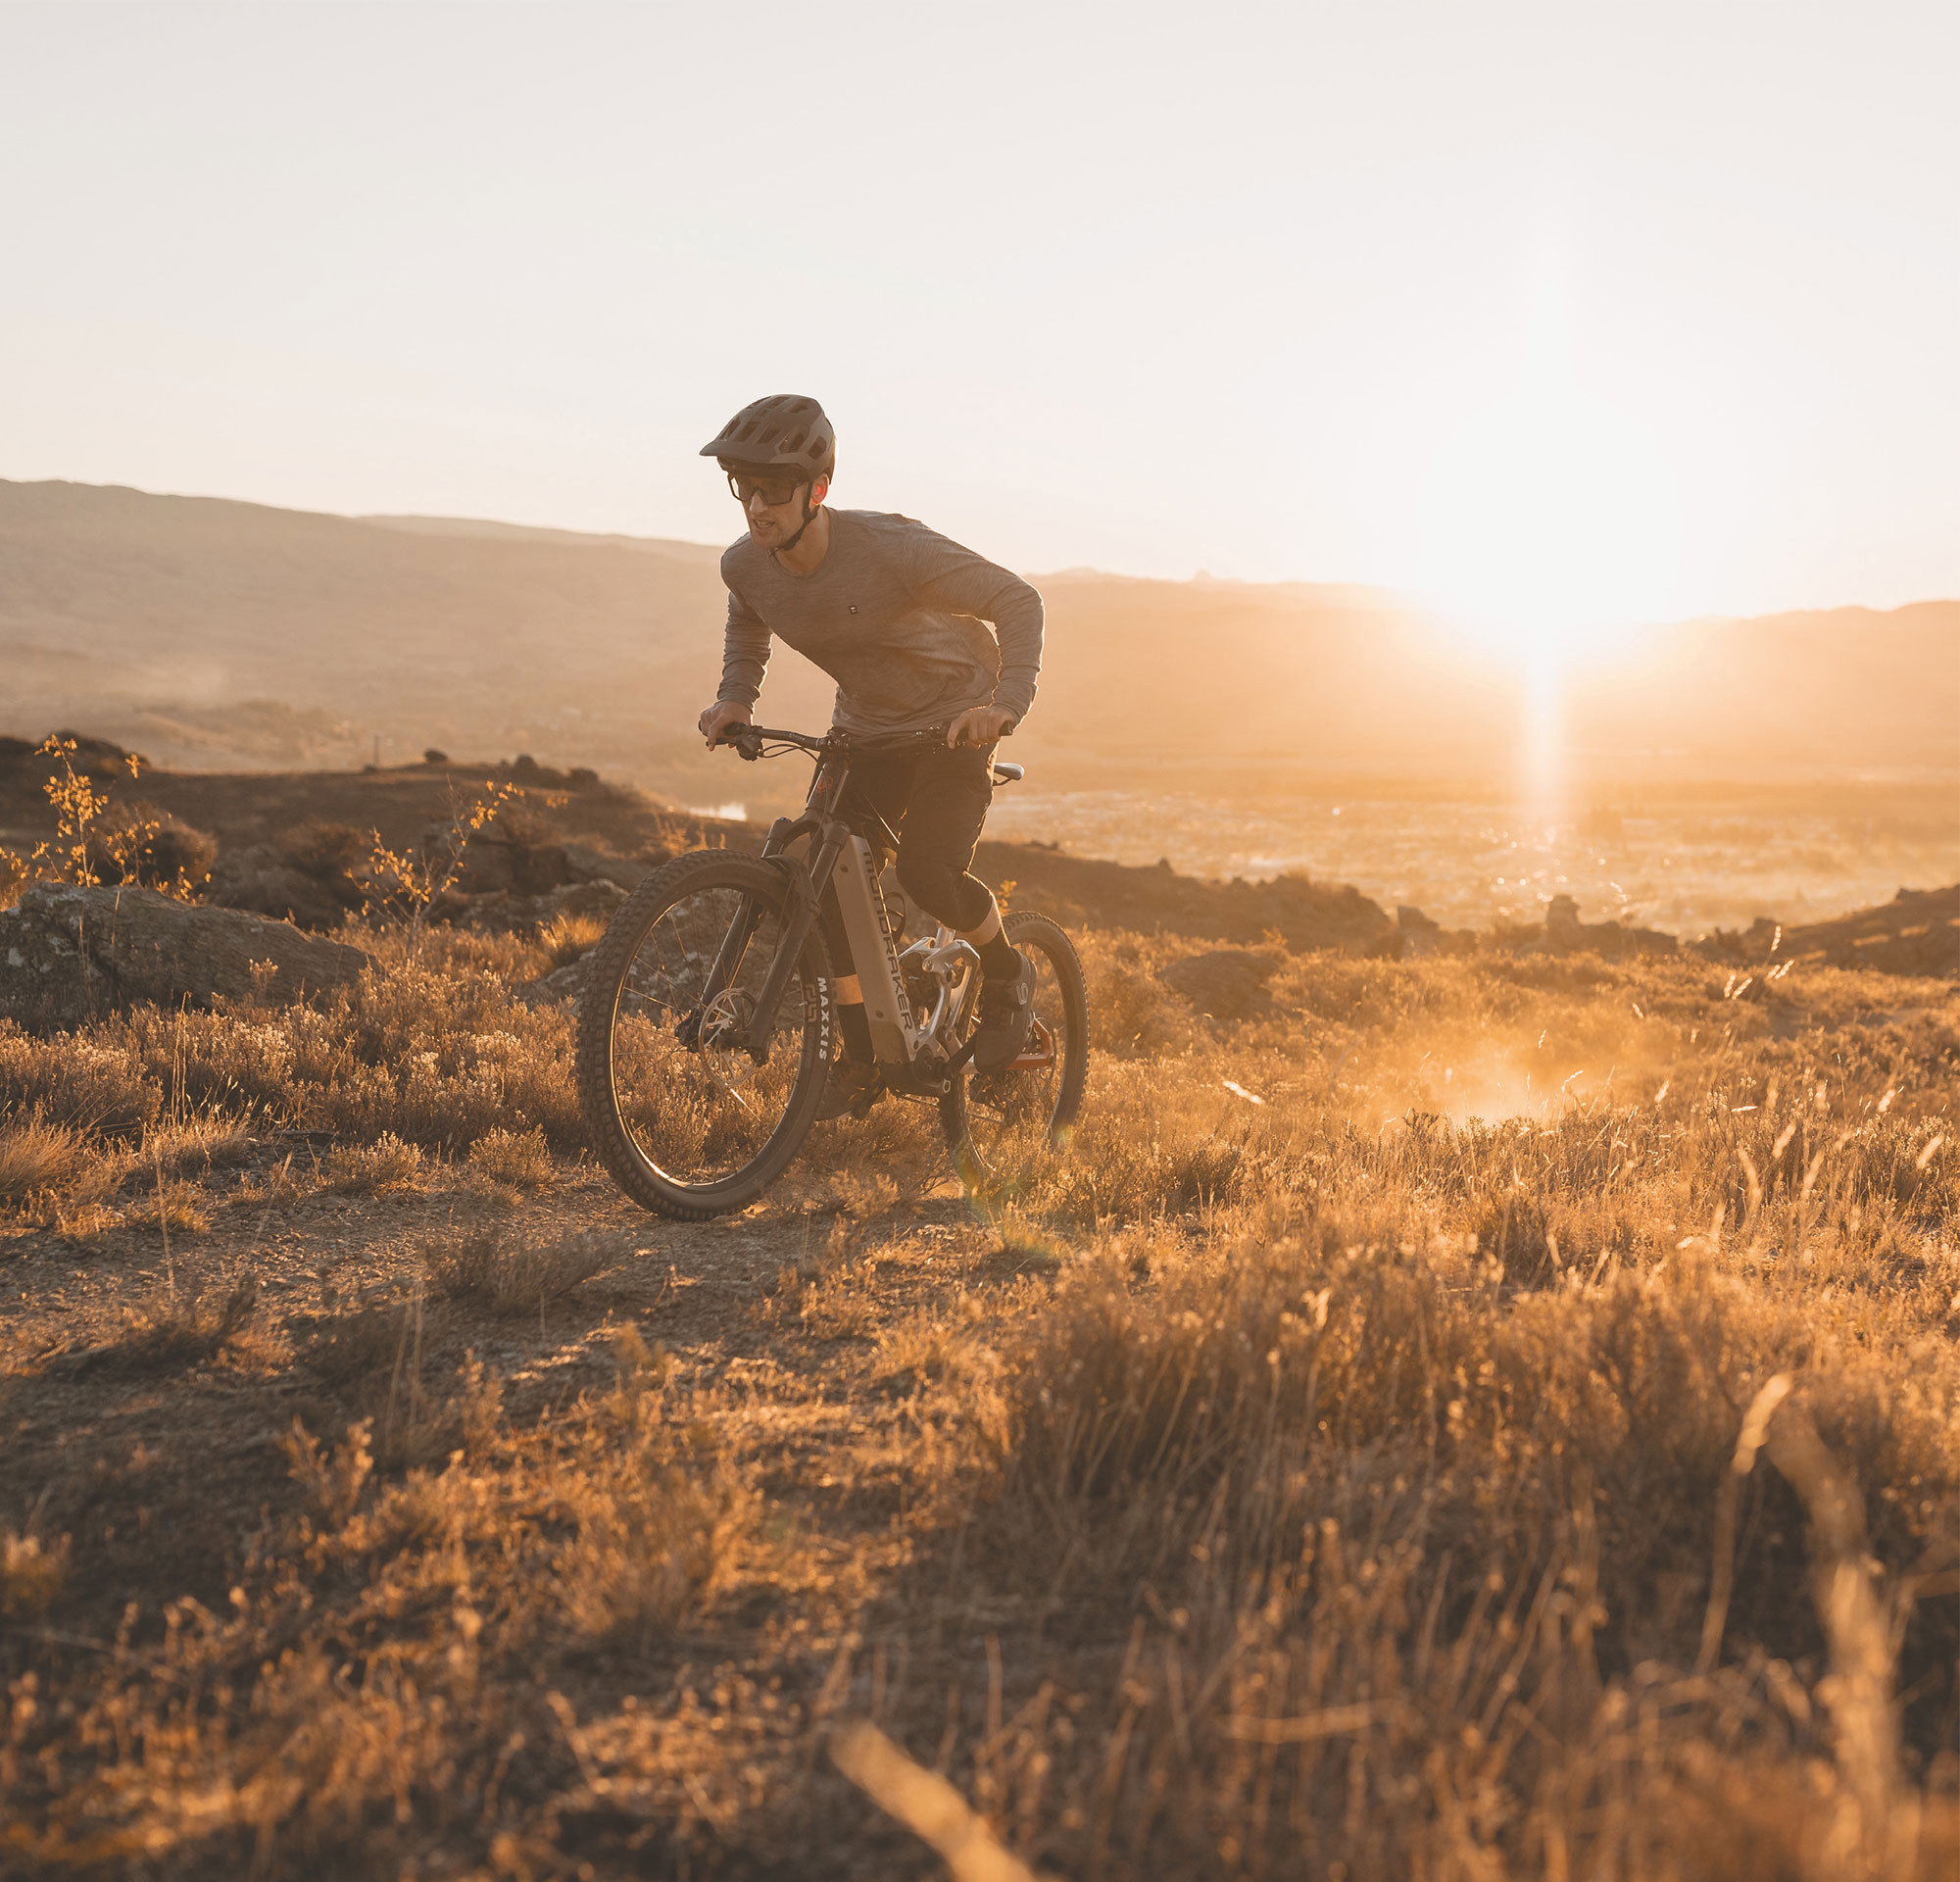
When the opportunity came through to test ride the new Mondraker Dune R, equipped with Bosch’s Performance Line SX, my interest was well and truly piqued. My current bike is fitted with the Performance Line CX, and I knew the SX was a light-weight system, so was keen to see how it would compare. We headed for the rugged terrain of Matangi Station in Alexandra, to put it through its paces; the perfect proving ground for both the system and bike with steep climbs, tight pinches and rocky single track.
My most obvious question was how the SX motor would feel in terms of assistance compared to my experience on the Performance Line CX. Would it feel underpowered or too much of a jump down? How natural would it feel to ride? I was also interested to see how you use the modes. For the type of riding I do, I usually ride my CX bike in the two lowest modes, Eco and Tour, but I wondered if I’d need to use eMTB or Turbo? Or, if I stuck to my usual modes, how fast would I be able to climb up stuff? Would I feel like I was going a whole lot slower? Would the SX system experience be up to Bosch’s usual high standards?
I put the motor to the test straight out of the car park, climbing up a steep four-wheel drive track to access the trails. I didn’t expect the SX to be as strong as a full-power motor like the CX but it was easily powerful enough going up. I didn’t need to switch to eMTB or Turbo mode. Even on the loose gravel surface, where you can easily lose traction on the steep sections, the bike performed well and I could push through without having to get out of the saddle.
I think a lot of experienced riders still yearn for that analogue bike feel and the lower-powered modes deliver that nice balance of assistance.
On an eBike, you can sometimes feel like the front wheel is going to lift off on steep sections, especially in high power modes, but I didn’t experience any of that pull-up at the front. I felt like you could manage the torque and it was well delivered. It was smooth and consistent and didn’t come on in a big burst.
I had heard that the SX is more cadence- sensitive but even so I didn’t have to spin it up as quickly as I thought I might have to and was getting good assistance low down. It wasn’t hard to get used to it either. I just had to drop down one gear and I was set. I was still covering the ground fast and it felt really natural.
My personal preference when it comes to modes on my CX powered bike is to be in Tour mode 80% of the time, maybe eMTB mode if I’m going up a more sustained technical climb. I never really feel like I need Turbo and I hardly ever use it. I love to pedal but still want that assistance when I need it. I think a lot of experienced riders still yearn for that analogue bike feel and the lower-powered modes deliver that nice balance of assistance. Eco and Tour don’t feel super strong on a heavier bike so I thought I’d see how they felt on the SX. I switched to Tour on the steep sections and it was ideal, giving me the assistance I needed.
I had a try with eMTB and Turbo and found they were good for starting on a steep technical climb, getting you into it without feeling too strong. This is where these modes come into their own. In the spots where you’re at a low cadence and can run out of traction pretty easily, those high- power modes can help you get moving without having to worry about spinning the wheel and losing grip straight away. You get the torque that you need, where you need it. With eMTB mode you can get up and over most things and it’s the most intuitive mode for most types of riding.
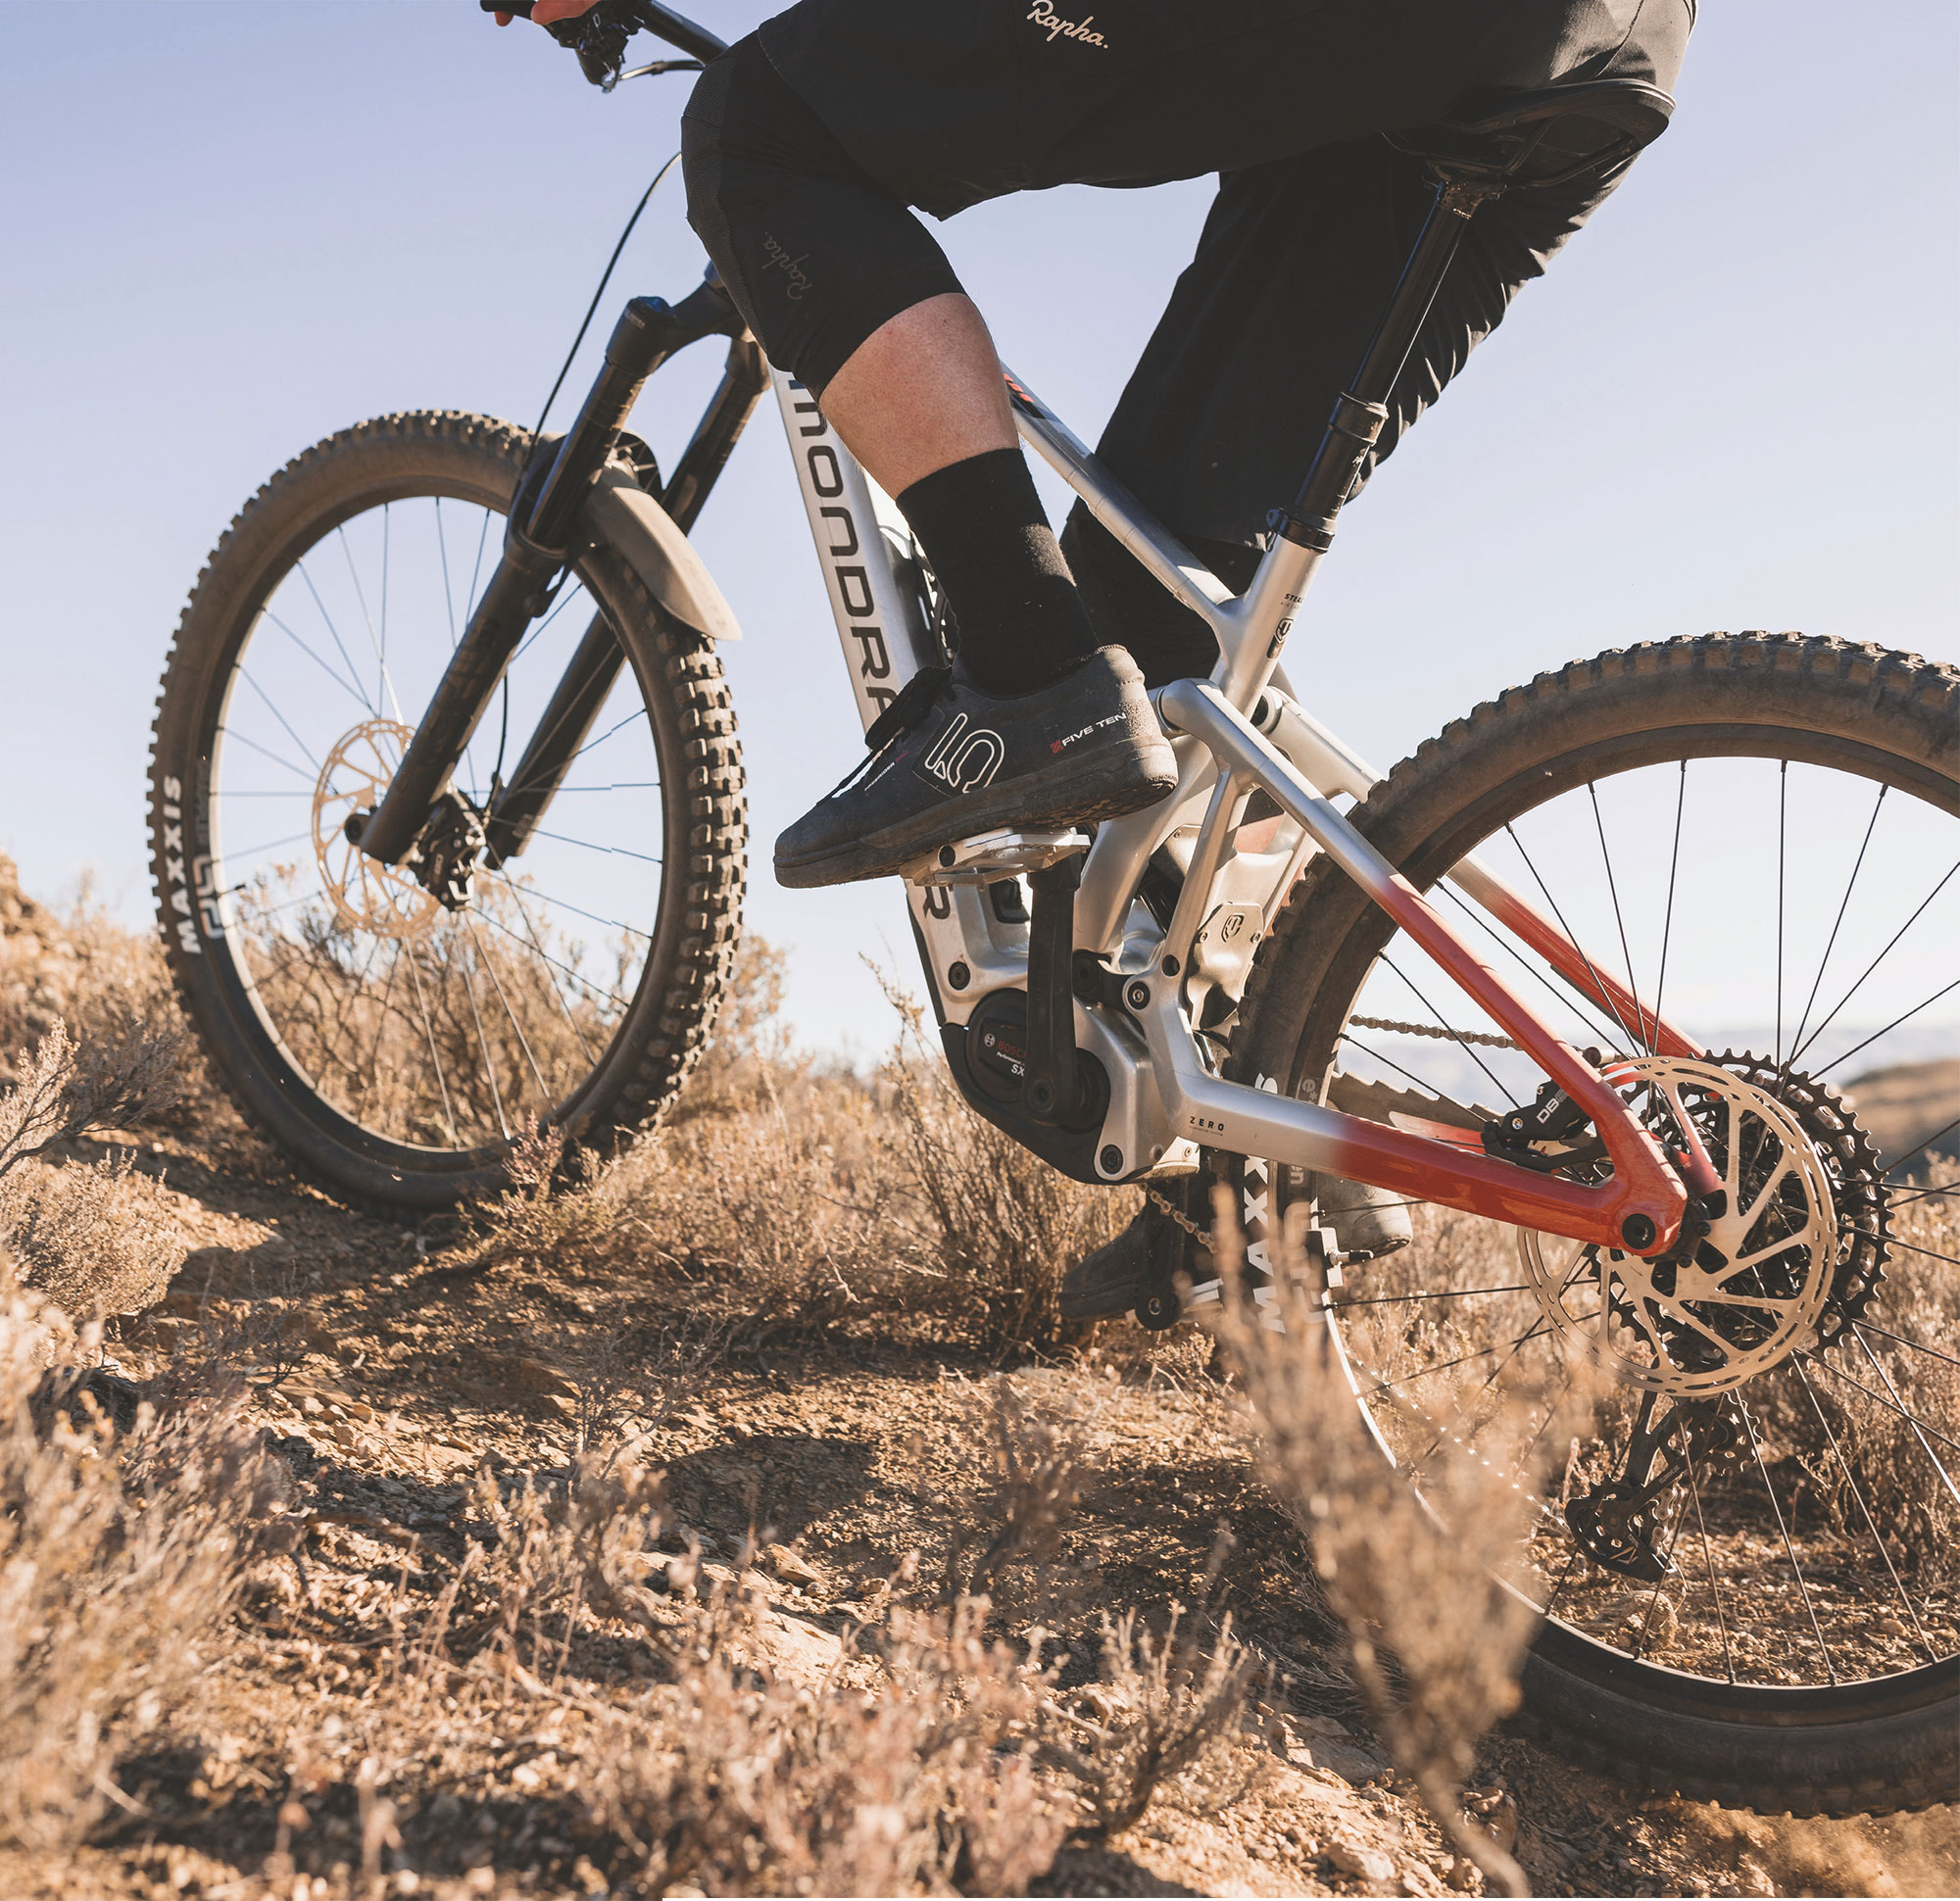
The PowerMore 250 range extender is a good size, weighing in at just 1.5kg and sits on the bottle cage mount. Even though you’re carrying the minimal extra weight, you’re not going to be suffering anymore because you’ve still got the assistance from the motor and the bike is already lighter.
In the morning, we used about 40% of the battery, then rode three hours in the afternoon on some pretty steep, techy terrain, all on one battery charge and I never felt any range anxiety. We didn’t have the Bosch PowerMore range extender with us, but it would be ideal on big days like this. Having the option of an extra 250Wh on top of the 400Wh from the Bosch CompactTube 400 that comes on the Mondraker Dune R is a huge bonus.
The PowerMore 250 range extender is a good size, weighing in at just 1.5kg and sits on the bottle cage mount. Even though you’re carrying the minimal extra weight, you’re not going to be suffering anymore because you’ve still got the assistance from the motor and the bike is already lighter. It’s much easier to add 1.5kg to your backpack than a full-size second battery and it widens the scope for more ambitious backcountry missions.
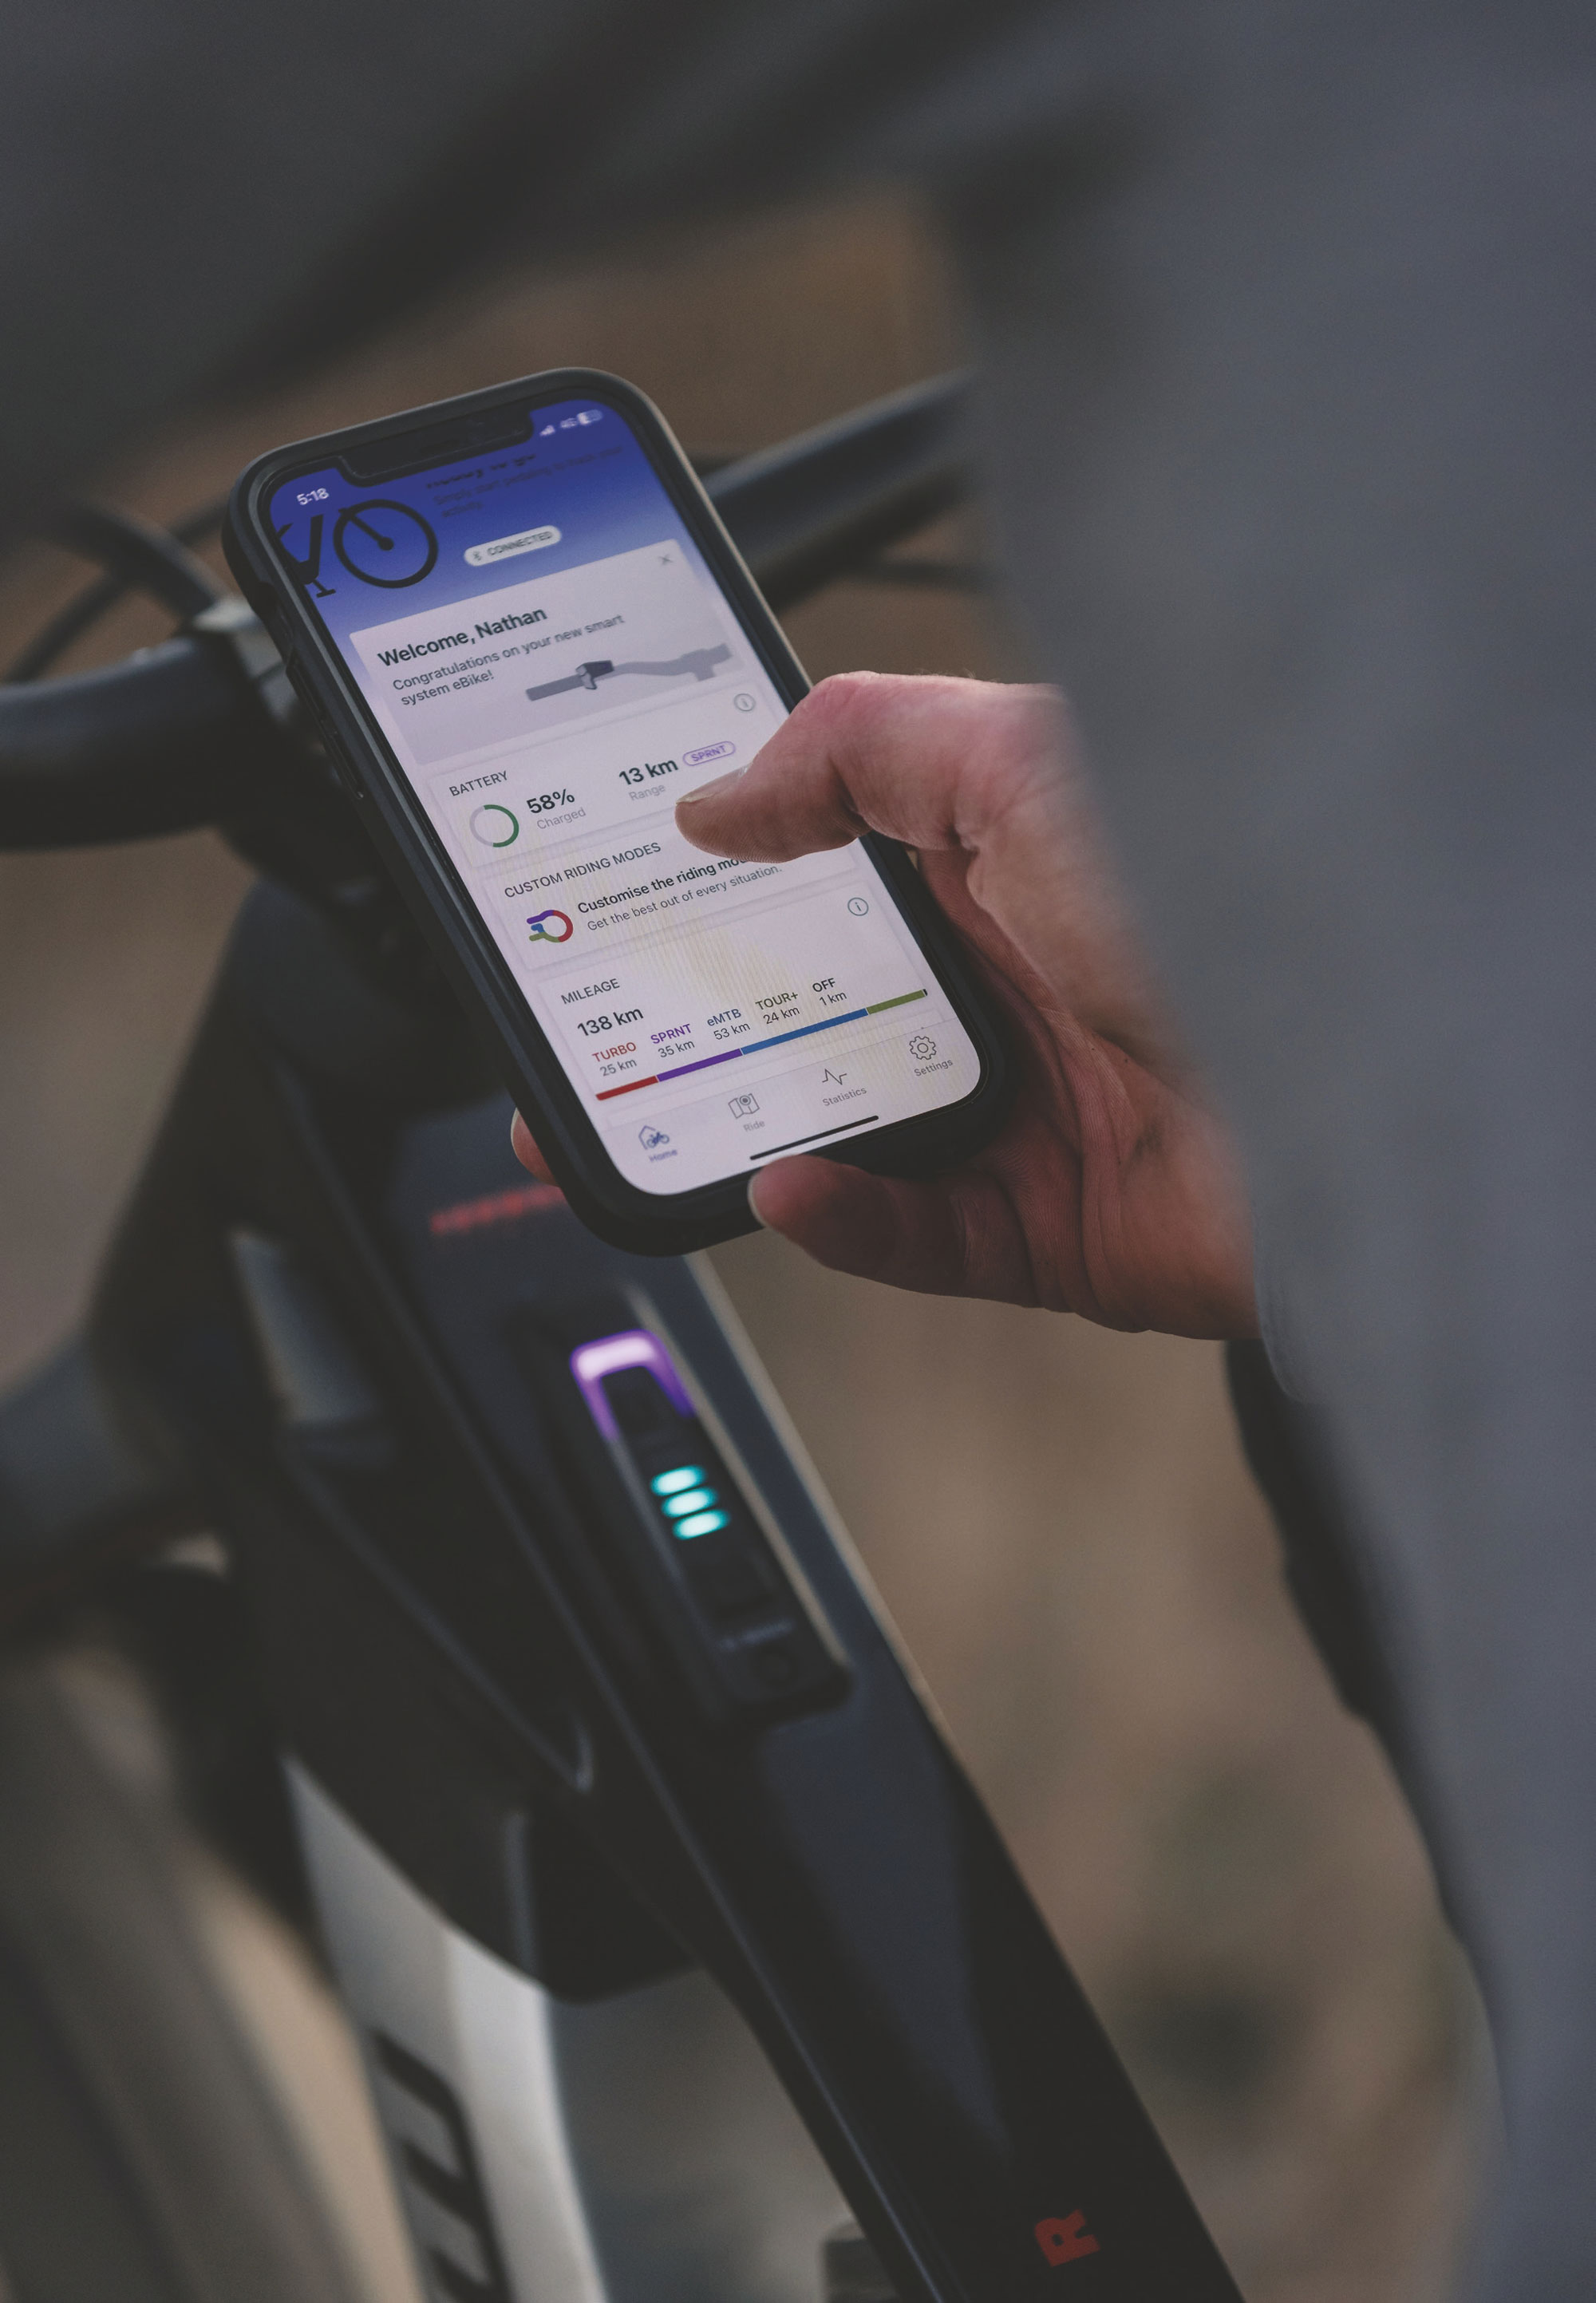
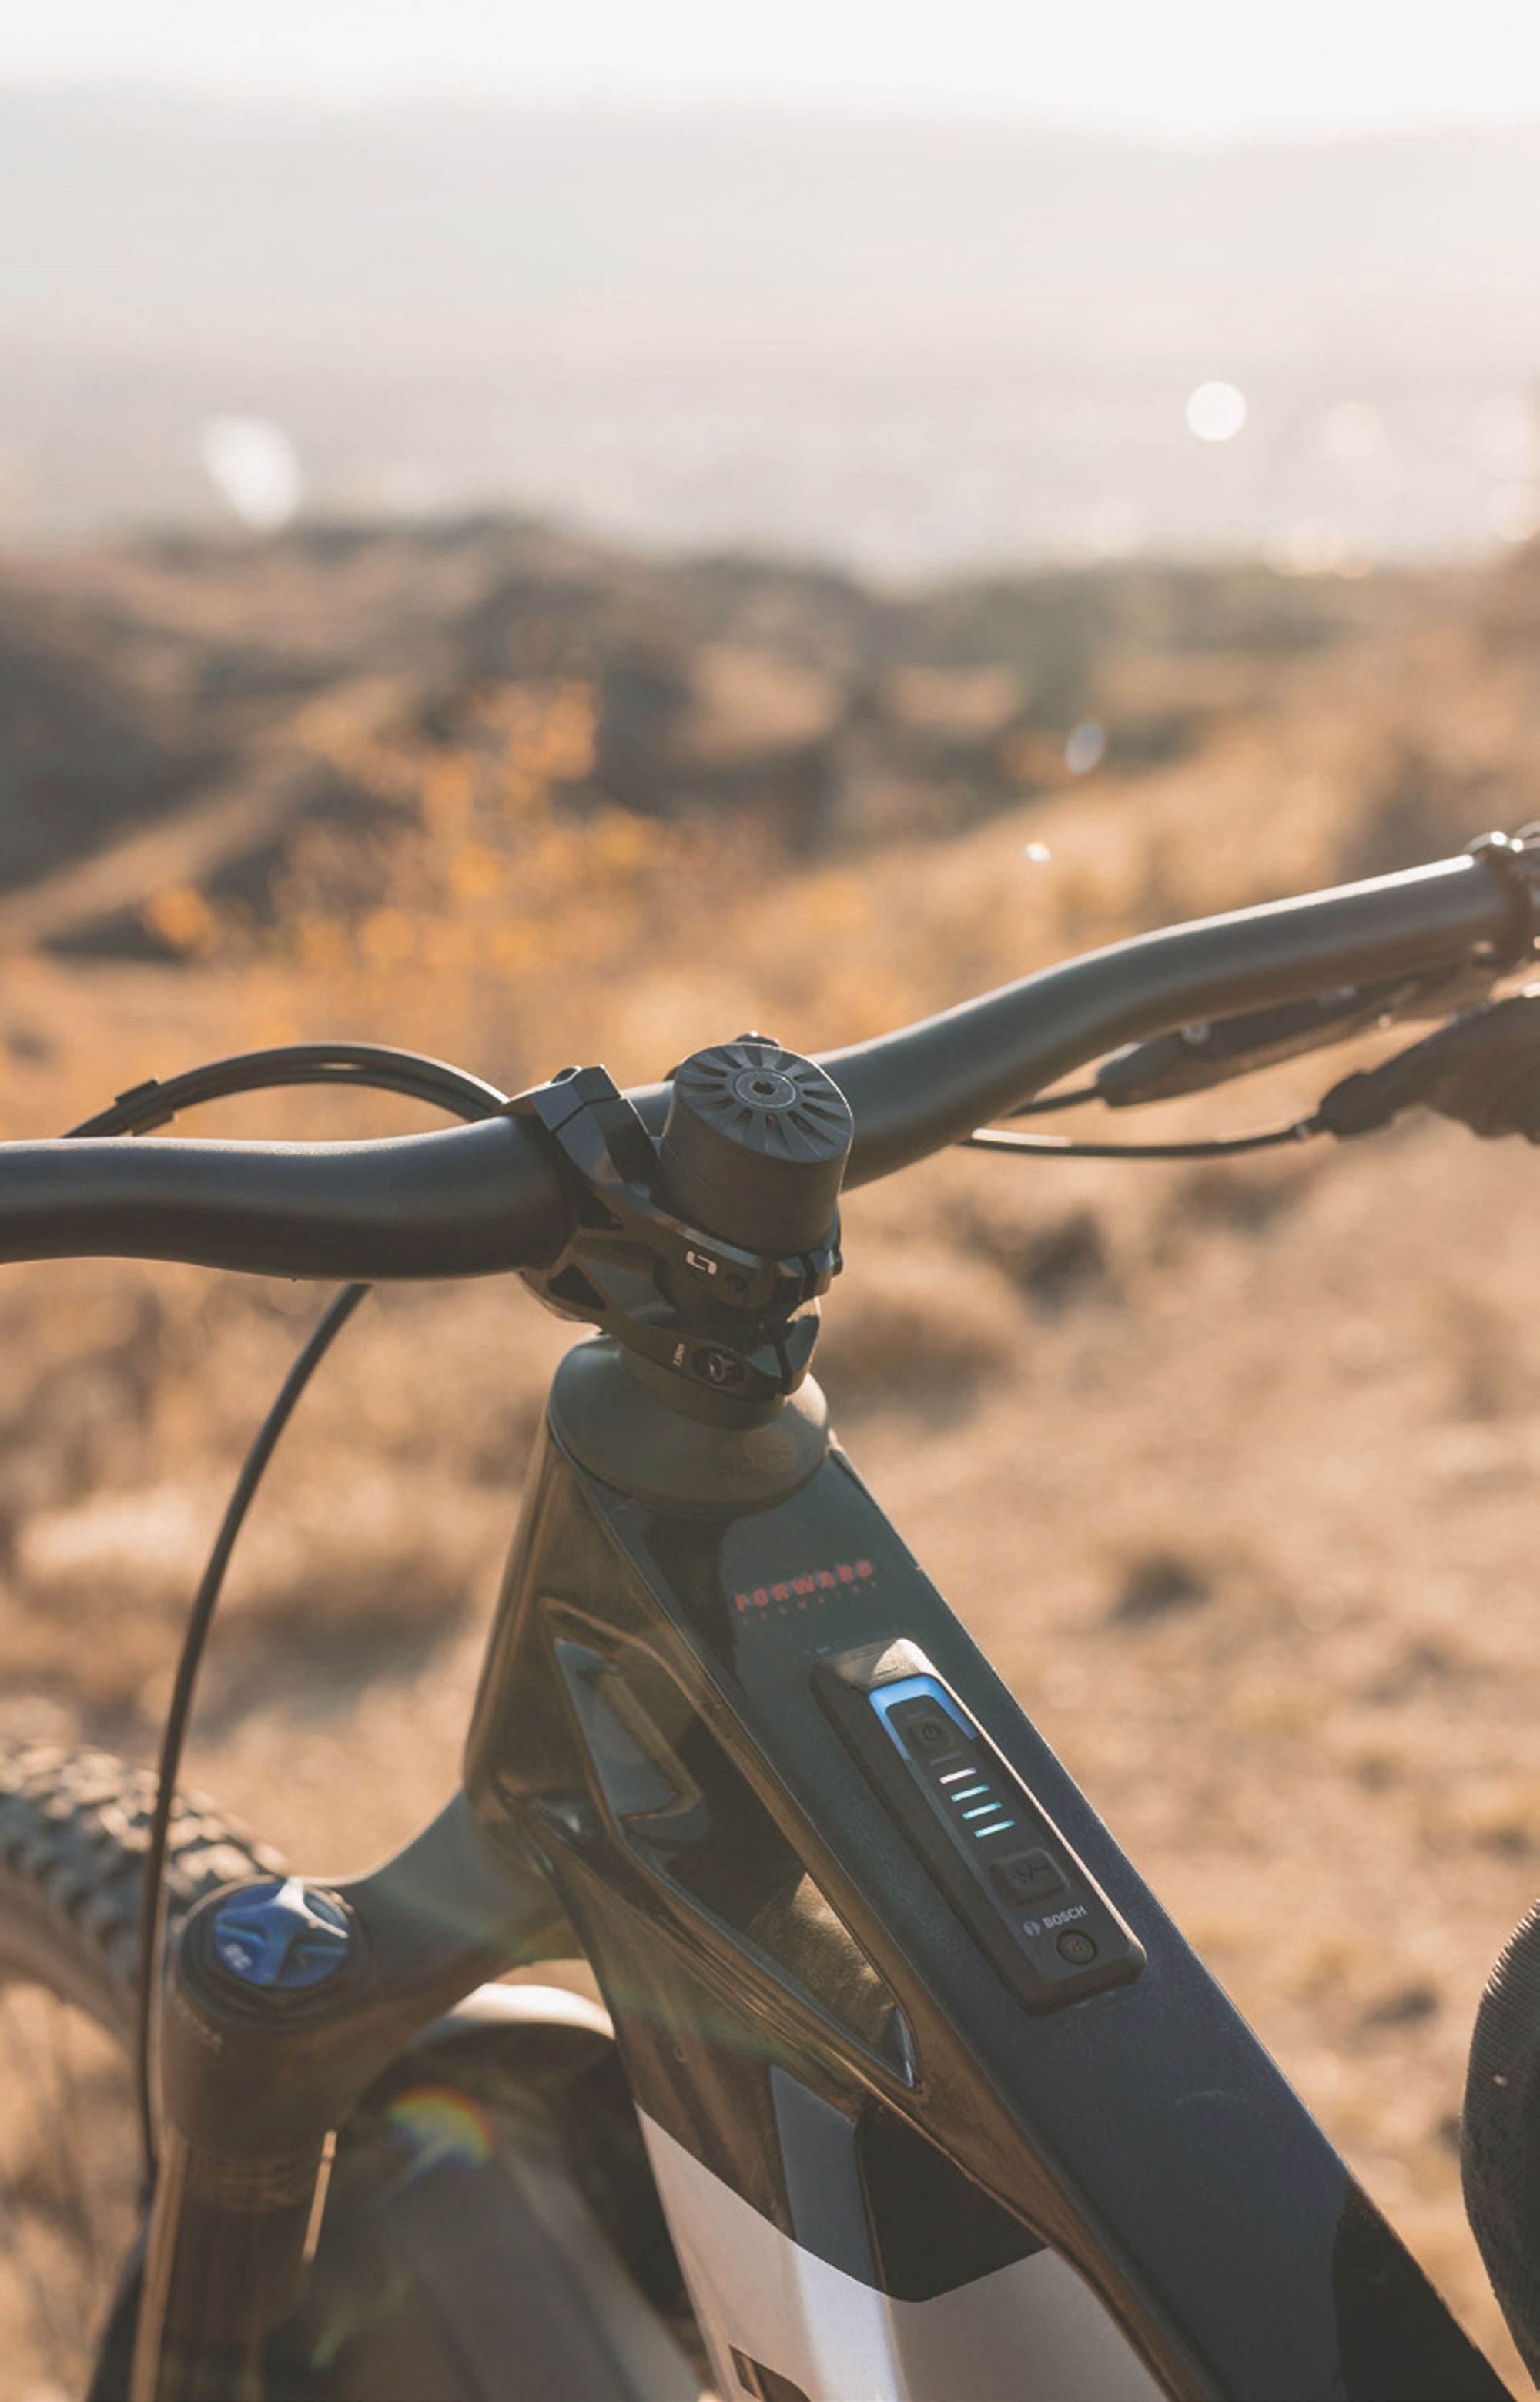
The Mondraker Dune R has a system controller installed in the top tube, so you can do a quick glance down to check how much battery you’ve got left and what mode you’re in. I liked not having a display unit to clutter the cockpit. But if you prefer having a display unit you can have this added on. Having a minimalist eBike setup with only the system controller and mini remote, but the Flow App in your pocket, means you’re getting the best of both worlds: a pure riding experience with the reassurance of powerful data in your pocket so you can quickly crunch big numbers if you need to. The Mini Remote next to the grip is great. If you’re in a tough spot where you need to change the mode easily and quickly, it behaves responsively.
Going on a deep dive on the bike itself, The Dune R is a solid package. Mondraker has three tiers of the Dune R and this is the most affordable. Build-wise, this is in line with what you would expect at this price point. The headset was super clean with the internal cable routing; that was a nice touch and didn’t impact the steering range. Having the 180mm fork on the front means it’s quite a burly bike. I had thought it would be a bit of a handful but was pleasantly surprised on some of the tighter spots we rode; it still felt light and manoeuvrable and handling was really good. Mondraker uses their own patented dual link suspension design where the shock is compressed at both ends. This gives the bike amazing pedalling efficiency, a very progressive nature. It felt lively and responsive, firm but still plush. It was also very quiet and the build quality was immaculate. The geometry was that classic Mondraker style from their race pedigree – an aggressive approach for descents where you’re tucked in but, if you’re sitting down climbing, it puts you in a good spot. Mondraker also has a unique approach to its high-end carbon bikes. They use pure Toray Carbon with a unique layup to achieve low weight, high strength and stiffness. Most carbon frames are composites where carbon is mixed with fibreglass, so this is very solid. The bike itself really is an amazing first pairing with the Bosch SX system. I think the overall aggressive approach of the Dune makes this a compelling option.
After riding this bike, I asked myself who the bike and – specifically – the Bosch SX system could be suited to?
For advanced riders, the eBike choices are really interesting now, especially if you’re someone who’s come from an acoustic bike. This bike and system is not such a drastic jump as it would be to a full-powered eBike. It has a super-natural feel; you’re taking an analogue experience and you’re just giving it enough assistance but not in a heavy- handed way. Likewise for existing eBike riders, this presents a really different ride experience.
This system will suit someone who loves technical climbing and still wants the capability to manoeuvre, but understands that it is going to ride like a trail bike on the descents as well. It has got the right amount of torque, you can spend most of your time using the low assist modes but with the reassurance that you can bump up to eMTB when you need it and dial it back down when you don’t. Even if you’re riding with people on non-eBikes you can still chuck it in the lowest mode and ride quite naturally in a mixed group, which is sometimes difficult to do with a full-powered eBike.
This system will suit someone who loves technical climbing and still wants the capability to manoeuvre, but understands that it is going to ride like a trail bike on the descents as well.
I think this could be the ultimate system for backcountry and hike-a-bike missions. The SX has plenty of torque and power, so you can climb the more unusual trails you come across on backcountry outings – and having the option of the range extender gives you that certainty of range. An eBike assists you in exploring places you otherwise wouldn’t reach, but there are always sections where you’re going to have to carry your bike over deep river crossings, where trees are down or you’re navigating a washout. Hauling a bike over that unexpected stuff can be taxing and this is where the weight is really important. Walk mode with the lighter weight system is also a breeze.
To sum up, it was an amazingly fun experience to ride this eBike and I was well and truly surprised at its capability. I was already familiar with the Bosch system so the SX felt comfortable while also bringing in some new experiences. Everything was developed to the expected high standard, from the overall system to the Flow App. I think the SX system fills a really broad part of the market and it actually strengthens where its full-powered CX offering fits. Once people ride it, it will change a lot of mindsets. The system that bridges both the eBike and the analogue worlds – you can have your cake and eat it too. This is the new natural.
Special thanks to Outside Sports, Matangi Station and Mondraker NZ (Allsports Distribution).
The Mondraker Dune R is available for purchase at outsidesports.co.nz and nationwide. For a full list of Mondraker NZ retailers visit mondraker.co.nz