

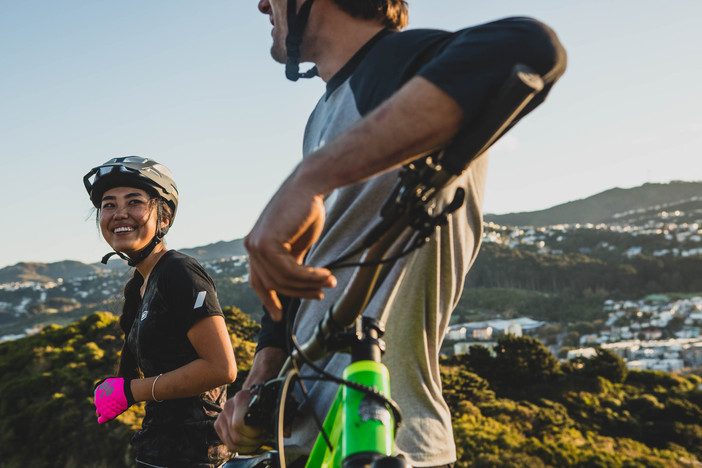
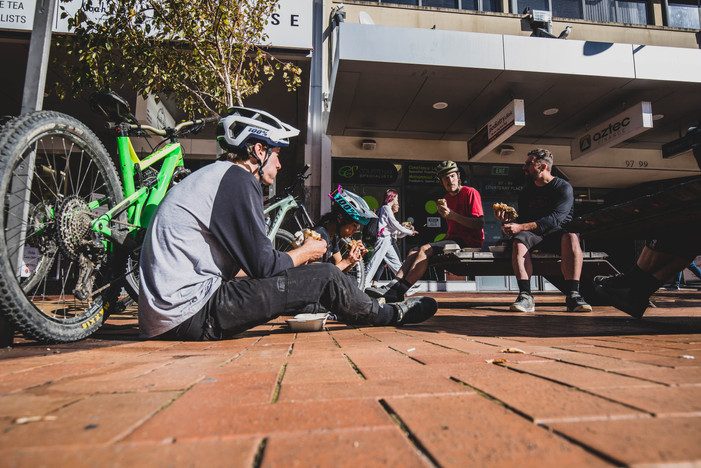
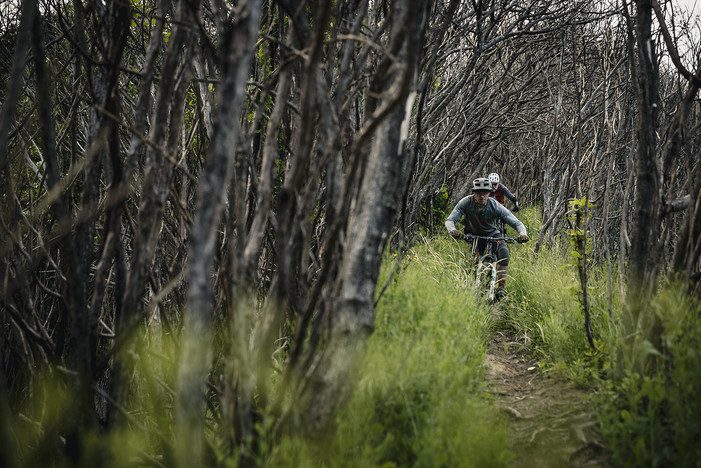
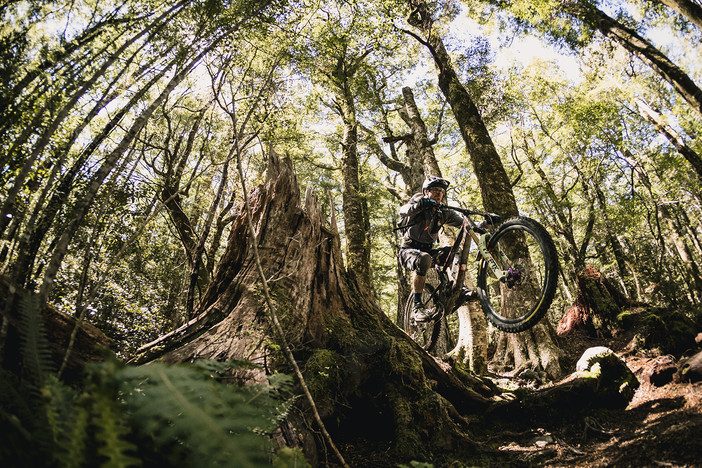
Story: E-Zing Back Into it Pt. 2
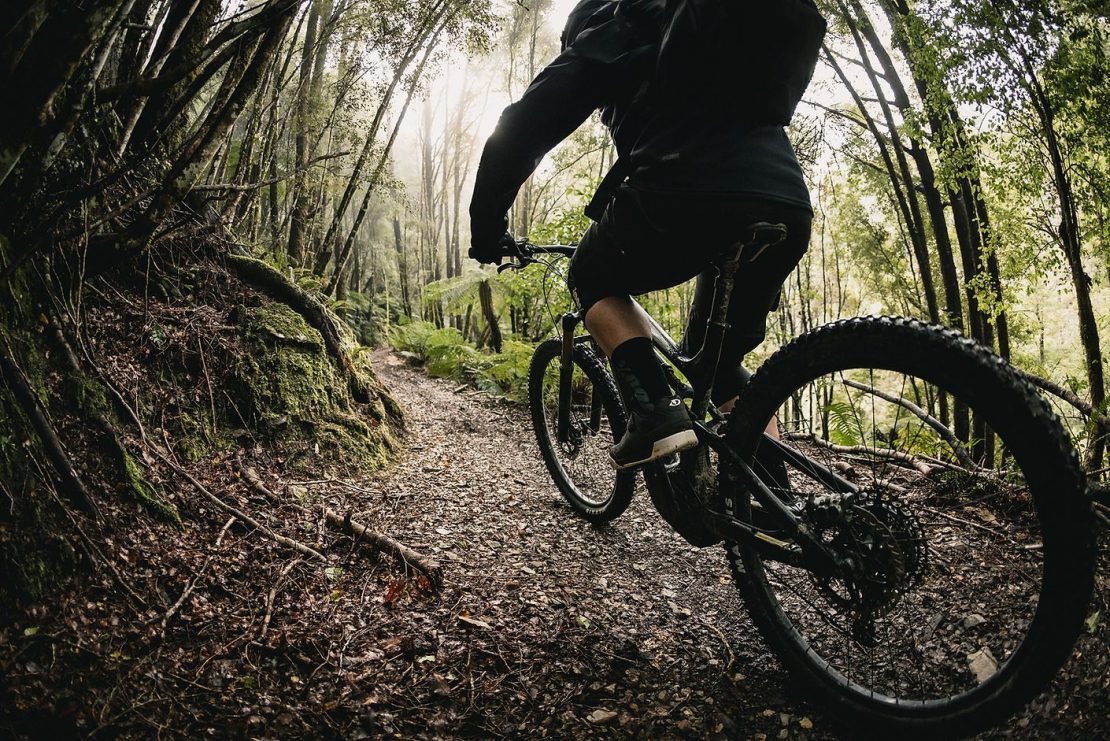
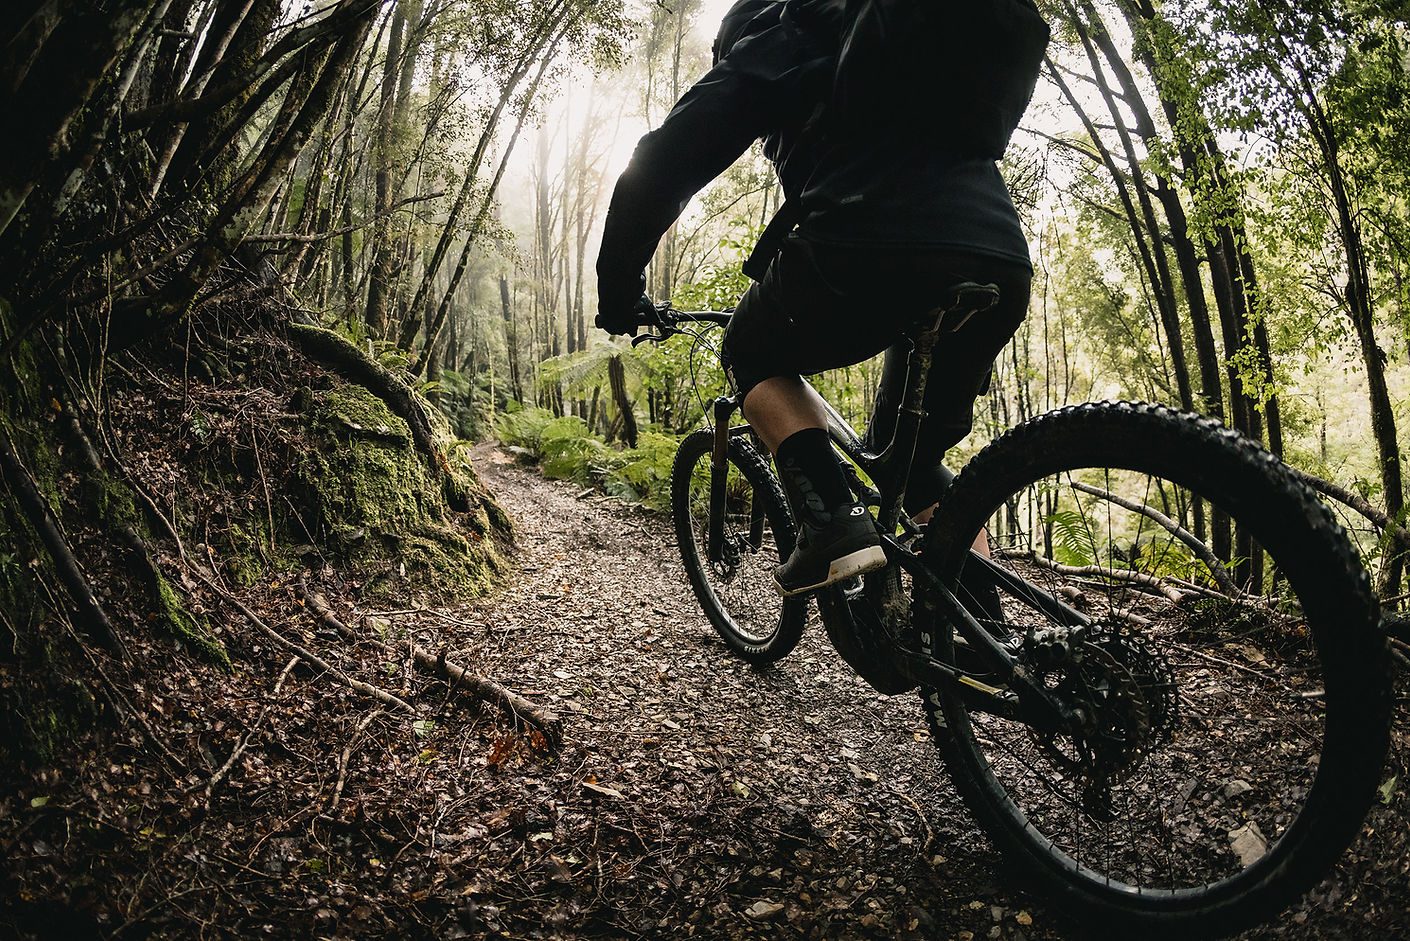
Yeah, yeah - I've been going on about how bloody brilliant e-mtbs are for a few issues now. I even evangelized before actually buying one; extolling their virtues as the saviour––or perhaps even death––of mountain biking as we've come to know it. In the ensuing months, riding almost exclusively off-road with added electric assistance, I can now tell you I was wrong. So wrong. You definitely shouldn't buy an e-mtb.
For a start, good luck even finding one to purchase. The worldwide shortage of eMTBs (due to the death of Sean Connery - which we covered in the last issue) is the result of every person over 60, on the planet, recklessly flaunting their Boomer wealth and privilege to shut out anyone else who might not be old and rich. I know this to be true, because I'm constantly told that eMTBs are only to be ridden when one becomes that magical age called “old”, which is approximately 10 to 20 years older than the vintage of the complainant. Even guys who are further advanced in years than my already post-middle-age tell me they're too young, which leads me to believe the optimal time to buy an eMTB is somewhere north of 80. I'm much too young, in that case, and obviously too stupid to realise the error of my ways.
eMTBs are cheating. Not like jamming a vial of EPO into your arm or shuttling, no, these are much worse. You don't get any form of physical workout - in fact you don't have to do anything at all, just sit there and let the bike do the rest! I know this to be true because I'm constantly told by these gurus of fitness that they want a physical challenge, and that can only be attained by pedalling squares at walking pace up a 2km climb for half an hour or more. If, after a climb, your lungs aren't about to jump out of your ribcage and you're not in peril of a stroke, then you're obviously a “pussy” and have no right to call yourself a mountain biker. No, I don't care if the eMTB gets you three ascents to one and adds speed and handling challenges to the climb, if you're not starting the descent with shot legs and barely enough strength to keep the bike upright and at speed, you're basically Lance Armstrong with knee pads.
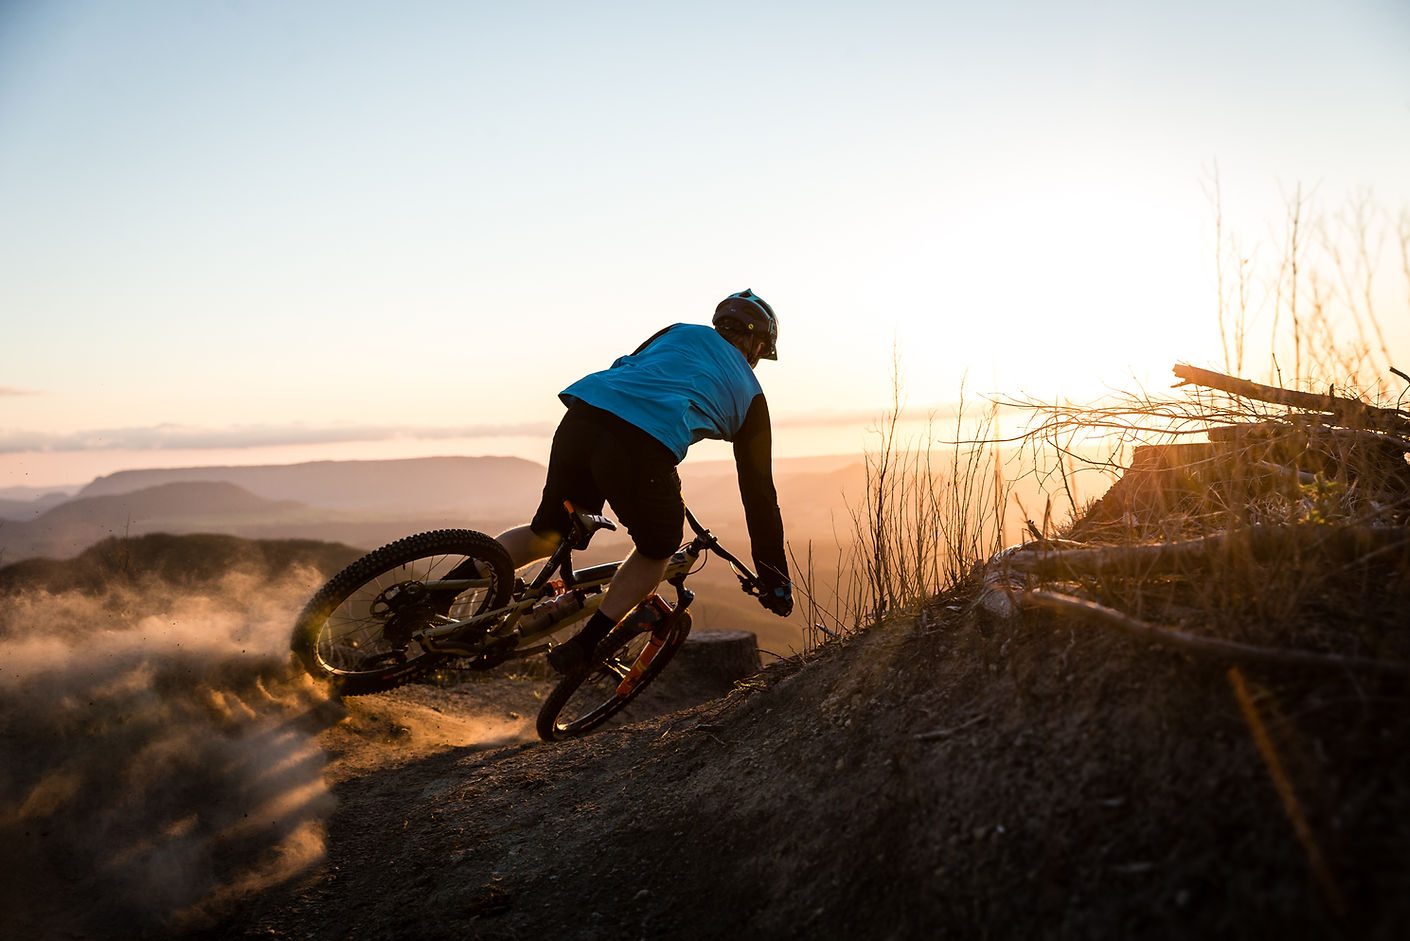
OK, so perhaps you've cheated your way up the climb with no effort at all, passing real riders and rightly earning their contempt, and now you're at the start of what can only be defined as the real reason to ride mountain bikes: the descent. There's no way you're going to enjoy this on an eMTB. I know this to be true because I'm constantly told that real bikes are lighter and also something called 'flickable', therefore they are much faster when pointed downhill. If there are real riders waiting to descend the same trail, let them go ahead, because there's no chance you will catch them with all that extra weight, low centre of gravity and bursts of power out of corners and over rises holding you back. I'm sure the electrics interfere with GPS signals too, as my Strava consistently and falsely claims that I'm faster on every descent on the eMTB, which I know to be a falsehood because real riders who only ride 'flickables' tell me so. And I'd trust them over digital data tracking any day.
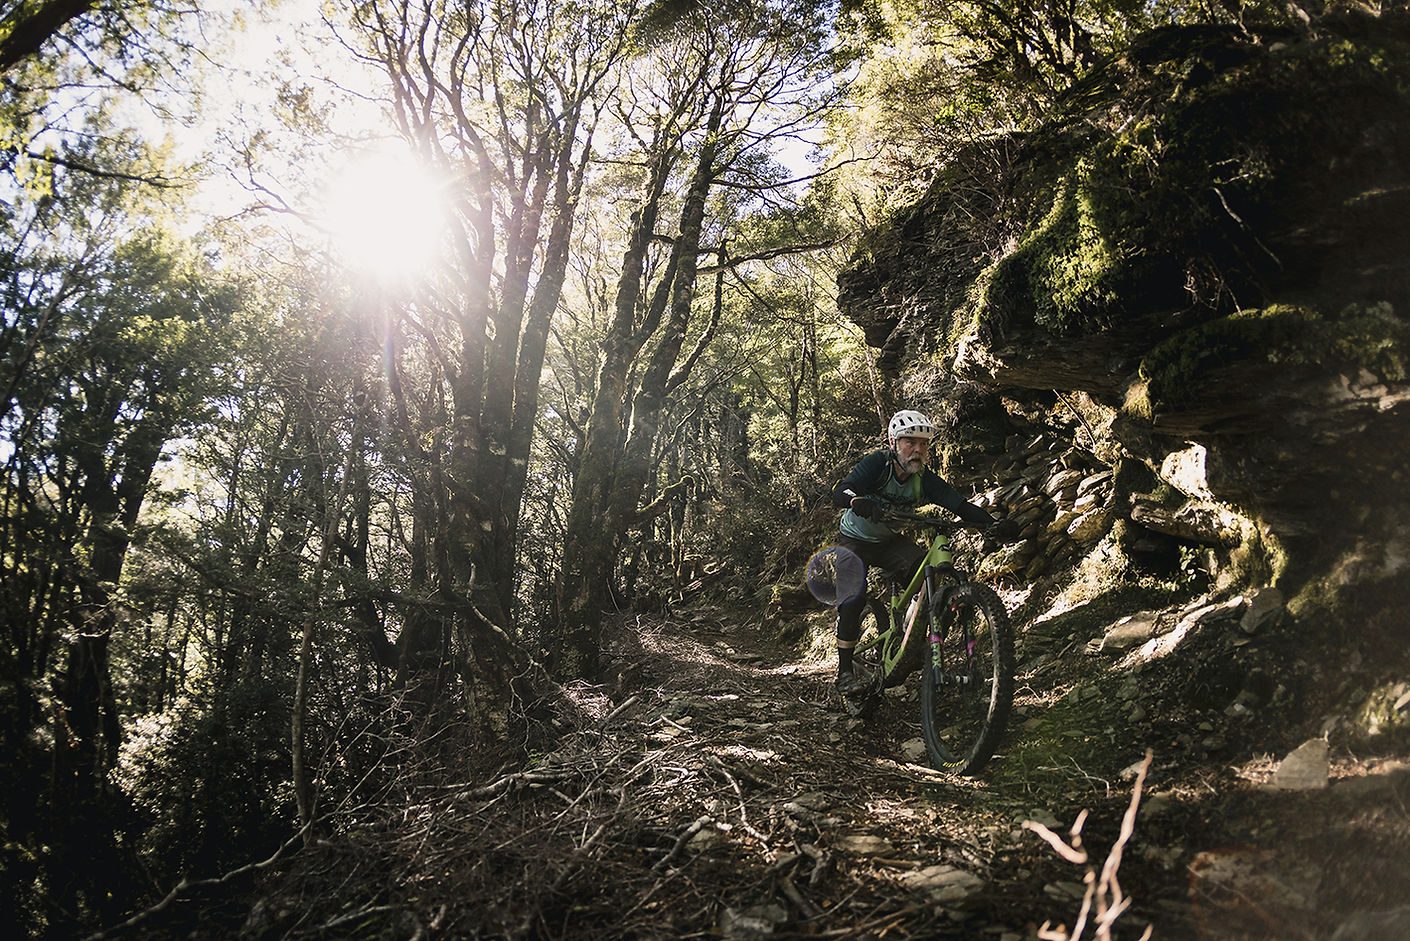
I guess one of the most important and sobering things riding an eMTB has taught me, is that I don't actually like mountain biking. I know this to be true because if I did, I wouldn't be riding off-road most days of the week; I wouldn't be doing more distance per hour of riding; and I certainly wouldn't be climbing more metres per ride. And, some of the trails I ride now (which I haven't for years) well, no real rider would go near them either…. Because, there's no shuttles to get them back to the top, so obviously that track sucks. Scrambling up goat tracks, riding over rocky outcrops, picking a point on a steep hill where there is no hand-built trail and seeing if you can even get halfway up it – this isn’t real mountain biking because there's no way you can do this on a *real* mountain bike. Sheesh, when will you get it?
Maybe, just maybe, there will be a real eMTB for real riders one day because, right now, the technology is prehistoric and used by Neanderthals. I know this to be true because I'm constantly told by real riders that they are waiting for the tech to advance and bikes to become the size of an iPhone64 before they make any decision that could hinder their real rider status. Bosch and Shimano, etc have no clue and aren't making any advances in motor or battery tech at all, and the bikes don't ride - or even look! - like mountain bikes (despite looking exactly like mountain bikes). Yes, they do ride differently to real bikes - if you call faster, more stable and more fun different rather than better.
If you're still confused about whether to get an eMTB or not, I suggest talking to those who know best on the subject: someone who's never ridden one. They know what's up, and should be listened to. Personally, I wouldn’t do it. I don't want to see packs of fit, happy riders getting in multiple runs of their favourite trails, or heading into hills they've never been into before - and I certainly don't want to see newcomers being drawn into the sport we love and guard so rabidly from outsiders (like roadies). In fact, I'm calling for a stop to all eMTB access on anything other than fire-roads; a minimum purchasing age of 70 for new bike sales; and no new bikes to be released until technology comes up with a way for the bikes to be activated by pedalling, as I'm told that currently it's not actually required on these abominations. And, won't someone think of the shuttle companies?! I never thought I'd see the day when mountain bikers would get to the top of the hill with motorised assistance, or indeed pedalling - and you should not contribute to the inevitable rapid downfall of the sport! I'll be getting rid of mine pronto, buying a diesel Hilux and a 20kg DH bike and saying “e-bikes suck” at every opportunity. That's real.
Words: Brett Kennedy
Images: Cameron Mackenzie
Story: E-Zing Back Into it Pt. 1
You don't need me to tell you that 2020 has been a shit year. Most say it's “strange” - but that's an understatement, and a deflection of the way the world has changed. Few realise the true impact that this significant event will have on all our lives in the future, and that they too will be directly affected by this sudden, unexpected development.
Yes, E-bikes have gone mainstream.

If you'd told me at midnight on December 31st 2019 that I'd be evangelising pedal-assistance for mountain biking, I'd have rightly claimed you were drunk and somehow dizzied by the euphoria and expectations of a bright new year. Well, that all got turned on its head around the middle of the year, when everyone cottoned on that riding bikes was a good way to pass the time. Suddenly, we had a lot more of it on our hands due to the other big event of the year: the death of Sean Connery. The weeks of stay-at-home mourning for the great actor and inspiration to bald men worldwide, opened up a chance to look deeper into our souls and ask: “do I want to ride more?” The collective answer was a resounding ‘yes’.
Apart from Bond dying and electrification of the world in full swing, ‘20 was shit because I spent most of the early part of the year with only nine functioning fingers - one too few for any kind of off-road bicycle action, which had caused the injury in the first place. Forbidden under the Connery lockdown anyway, it wasn't too much of a problem and the now-compulsory, solitary confinement Zwift seminars became a tolerated form of simulated exercise - without all the distractions of 'fun' and 'fresh air' and unneeded peripherals like 'dirt', 'rocks' and 'trees'.
Eventually, we were released back into the wild, Bond was burnt to a crisp and we all got on with our lives, albeit now always carrying that dreaded number with us everywhere: 007. Everyone was thinking the same thing; “gotta get an e-bike”. But, as with all great crises, supply was outstripped by demand and the masses started to gather in larger groups at the local dispensaries, fighting over any remaining stock and trying to get as high up on the lists for the new drug as soon as it was released. The people needed E and, like street junkies, they were prepared to do anything for a fix. I had to use my insider trading knowledge to get ahead of the pack and secure my own hit first, even if there was unsurety as to whether I actually needed it or how it would be of any benefit to my life. Fuck it - what harm can throwing oneself into the deep end of a black, deep, murky pool while hooked up to mains power actually do? The results would be shocking, but not totally unexpected.
“E-bikes are for the lazy!” … “They'll make you fat and unfit!” … “It's cheating!” … These were all warnings that were heeded then dismissed like a true junkie. “This smack has battery acid in it? Meh, can only give it more kick, right?” These doomsayers were no doubt uninformed, biased and had no actual experience in the real world. I'd dabbled in small doses, and have never been afraid to get in at the pointy end when others would take a wait and see approach, looking for safety in numbers and a degree of 'everyone else is doing it now, so I will too' safety-net thinking. I was ready for the backlash and public shaming, but it never really amounted to any level that would cause banishment from society. Maybe I was onto something?
When a commodity is in high demand and short supply, the truly addicted will do whatever it takes to acquire it at any cost. I was prepared to pay more than I ever had for my addiction, and even look beyond my regular dealers. After a lean year when other substances from the same cycling family took over, I wondered if this was really still a habit I wanted to feed. I'd grown tired and bored of the slog uphill for a run back down, and even that aspect didn't deliver the same euphoria as it once did. I was fat, lazy and drunk - the perfect criteria for buying an e-bike, surely. It was time to reopen the gateway that mountain biking offered so long ago, and let in a new beast altogether.
For a so-called drug of choice, the options were more than a little limited with the uptake of new users. My research led me to a list of requirements that were met by the Scott Genius E-Ride. I'd ridden a mate's bike and wanted the Bosch motor and bigger 625wh battery. I couldn't get the first hit quick enough but, like an overeager kid in a candy store, I managed to put myself out of action for another week while heaving the beast into a work stand. Remember kids, some drugs are heavier than others so proceed with caution. Finally, garnished to my liking, we hit the trails.
Spoiler alert: I enjoyed it. I really liked it. I fucking loved it. Being fat, lazy and drunk doesn’t help - but it also wasn't a hindrance either. I finished that ride spent, if not more than I would've been on an old-fashioned bike. I'd ridden further, faster, and had a hell of a good time. Sorry. Sure, I couldn't walk comfortably the next day, but I couldn't wait to do it again. As with any drug, the long-term effects are the most important, but for now the short-term ones are hitting the spot. Whether the good times endure, or there's a massive comedown, will surely be determined in the honeymoon period between now and the next issue.
Words: Brett Kennedy
Images: Fin Lloyd

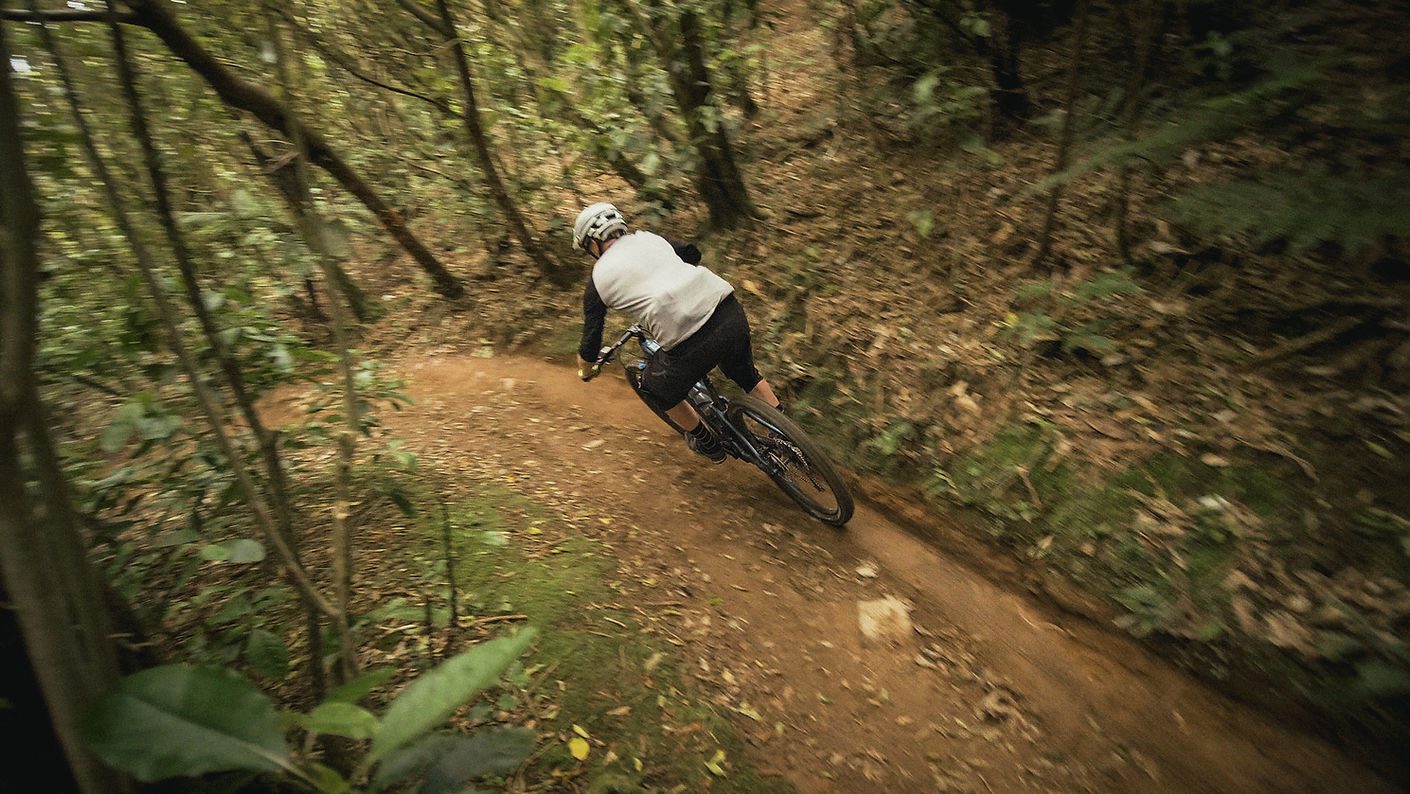
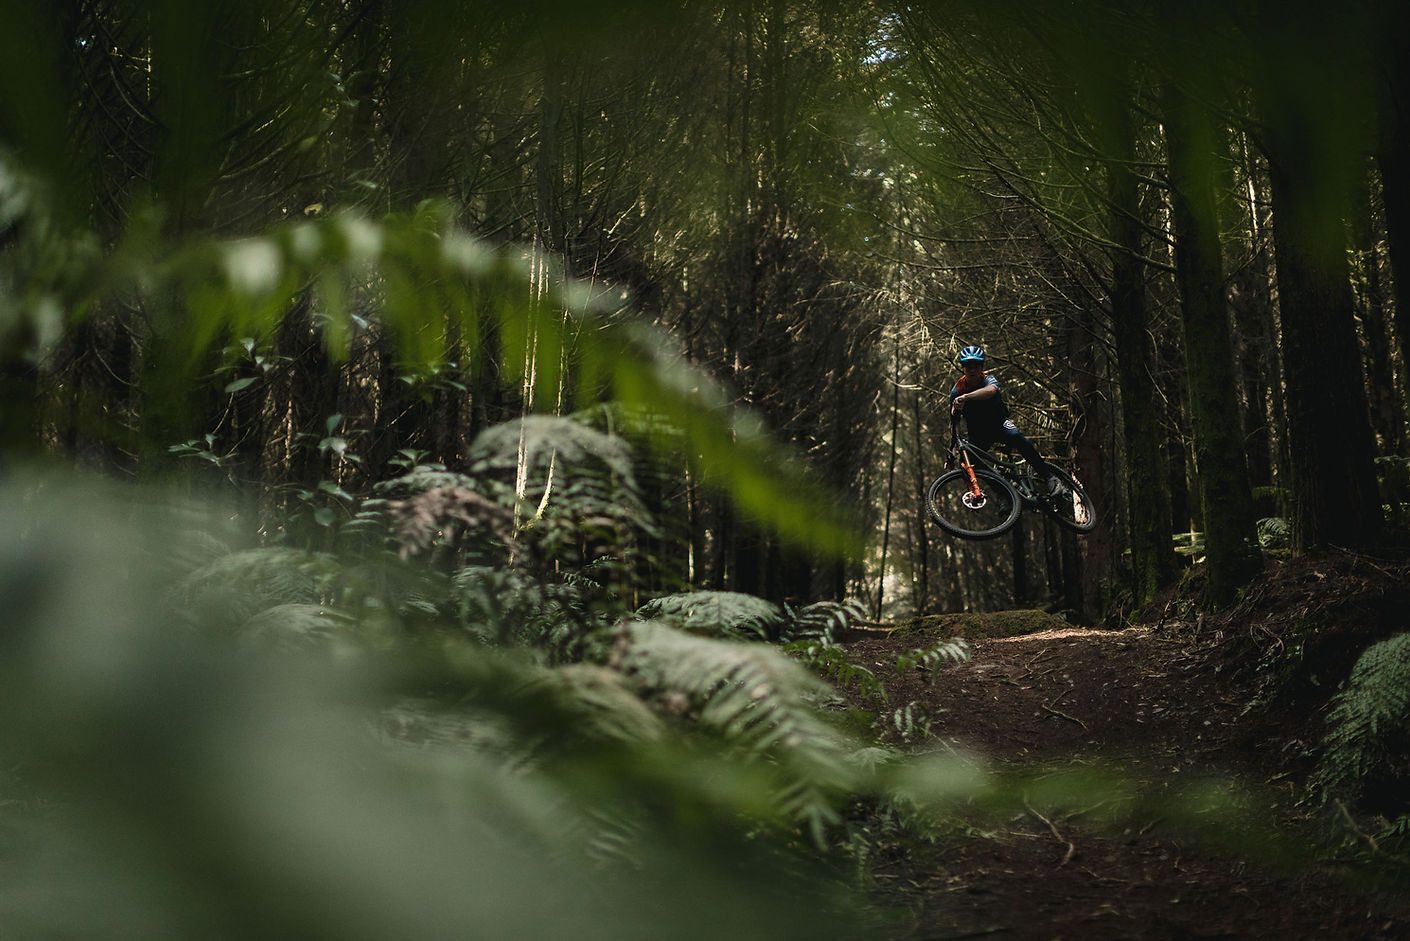
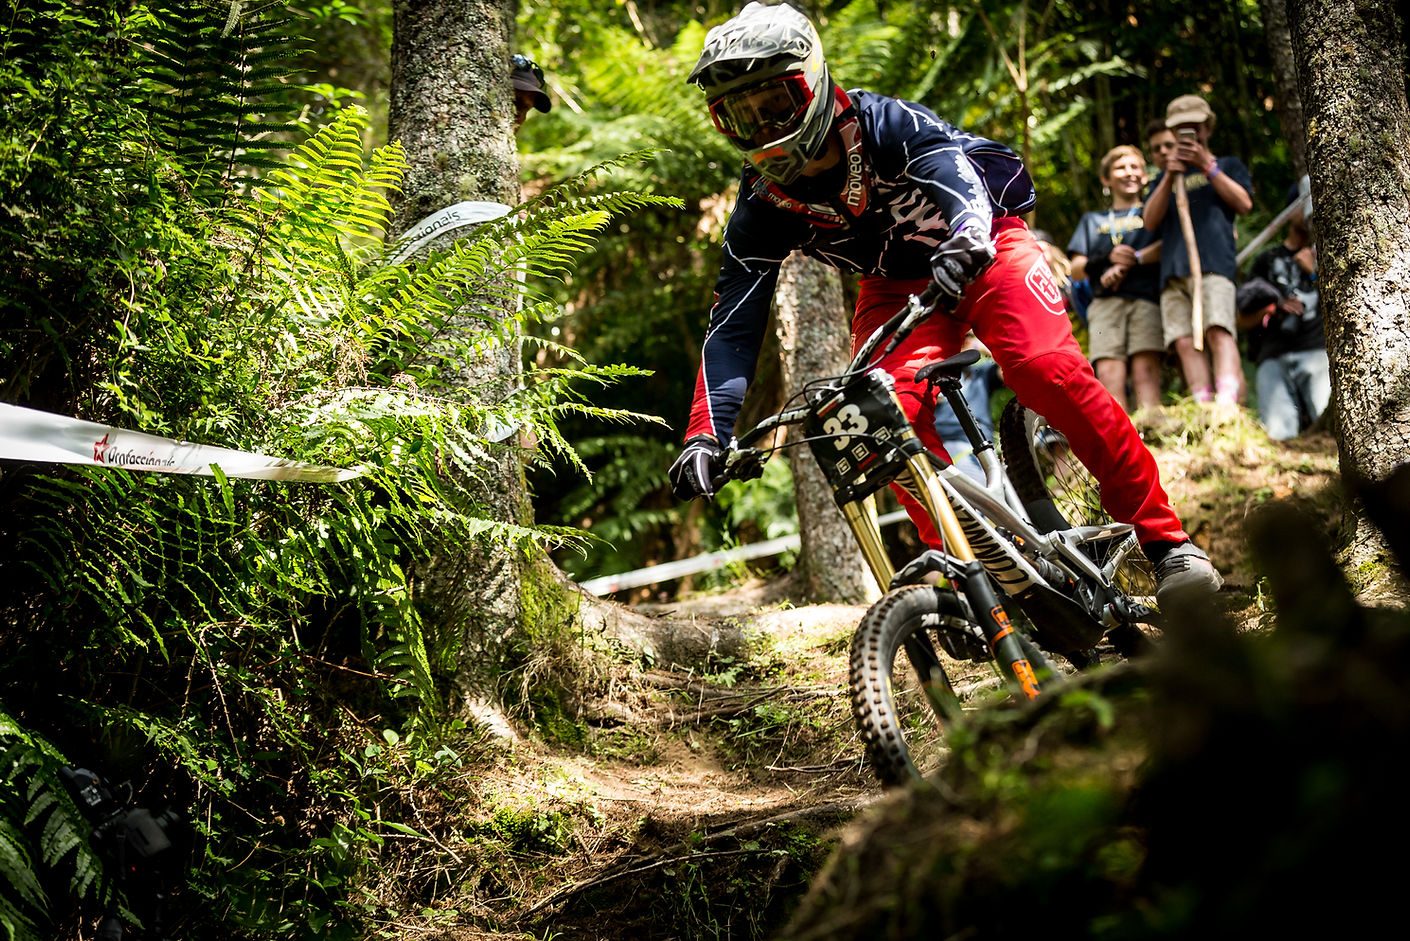
Story: Young Ones - Cam Beck
There must be downsides to life in a provincial town. Views of countryside and forests in all directions are all very well, but some of the opportunities available to big city kids are simply not there for their country cousins.
That cuts both ways, though, especially if the forest you can see at the edge of town is full of trails. Having a huge and growing trail network on your doorstep goes a long way towards making up for any lack of big-city amenities if your life goal is to be a great mountain biker.
Maybe your life goal gets that way because the trails are there? That’s a chicken and egg kind of discussion which really can’t be solved, but the procession of talented mountain bikers hailing from small town New Zealand is seemingly endless.
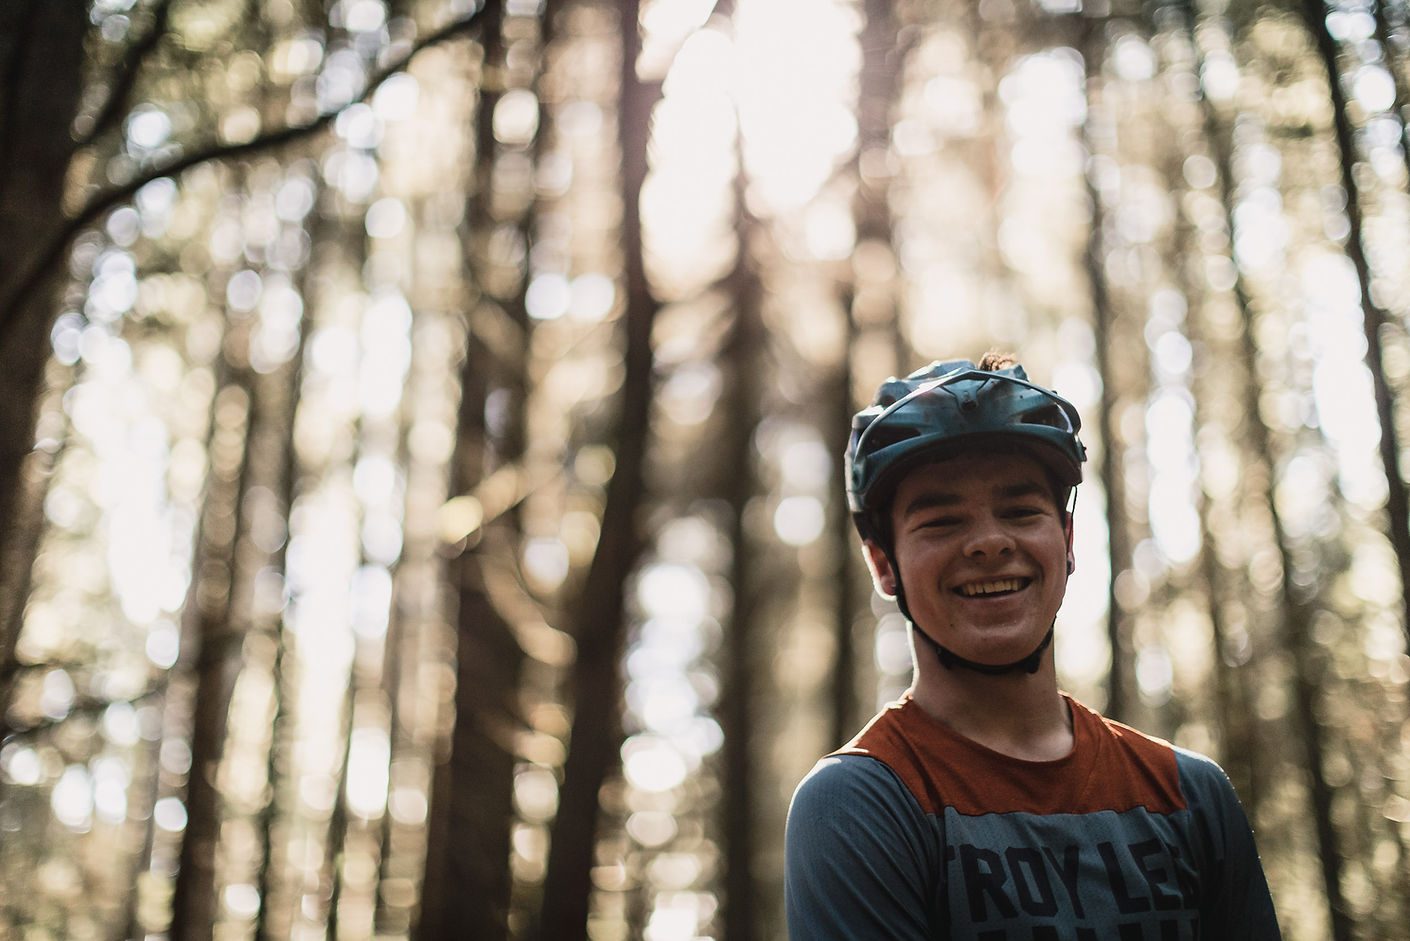
Cam Beck took his first ride in the Whakarewarewa Forest when he was eight years old, and he was hooked right then and there. Tagging along with his parents, he quickly caught the bug to test himself in events. Entering cross-country races from the age of ten didn’t result in instant success, but it didn’t put him off racing, either - it just set the hook a little deeper.
For the next few years, he honed his skills, and by his early teens he was well up in the field at any race he signed up for. As enduro events gained momentum, he gradually moved over to the gravity side of life. Each event was a learning opportunity, and small successes led to bigger ones. With every passing season, Cam became more determined to give the sport a real go.
Getting tight with a local bike shop is a key factor for anybody intent on competition. In terms of equipment, bike racing must be among the most complicated athletic endeavours there are - especially at the pointy end of mountain bike racing. So many elements need to be working at their best - besides the obvious one, which is the person on top of the machine. A relationship with a shop that has your back takes a while to establish, but once made it is a symbiotic thing of beauty. The shop gets a customer who will keep coming back, and the rider gets a team behind him to make sure everything runs sweet on race day. Nzo / Ride Central is a locally owned independent store with a comfy lounge-room aesthetic that Cam has called home base since he got started.
Cam’s home is a quarter of an hour southwest of Rotorua, in the heart of an area offering some of the best road riding anywhere, deep in the Waikite Valley. If the forest wasn’t so well-endowed with trails, Rotorua would attract people to ride the roads out there. Plenty of locals do just that; quiet tar seal leads riders through farmland and patches of forest - Cam makes use of the valley roads on a weekly basis. Gym work three days a week, and at least five rides in the forest, rounds out the workload under the watchful eye of coach Mark “Cabin” Leishman.
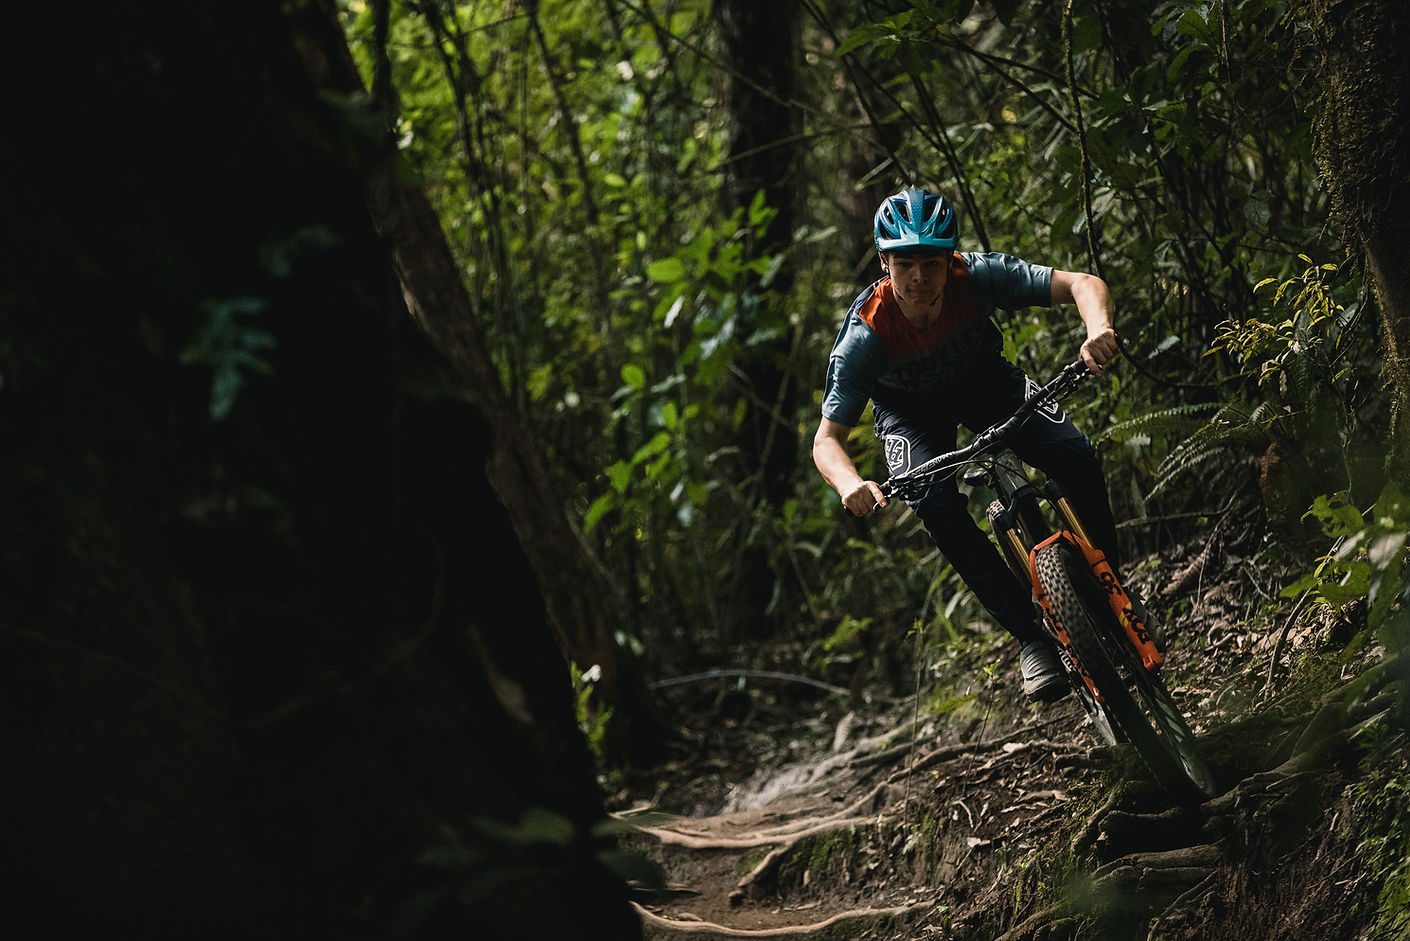
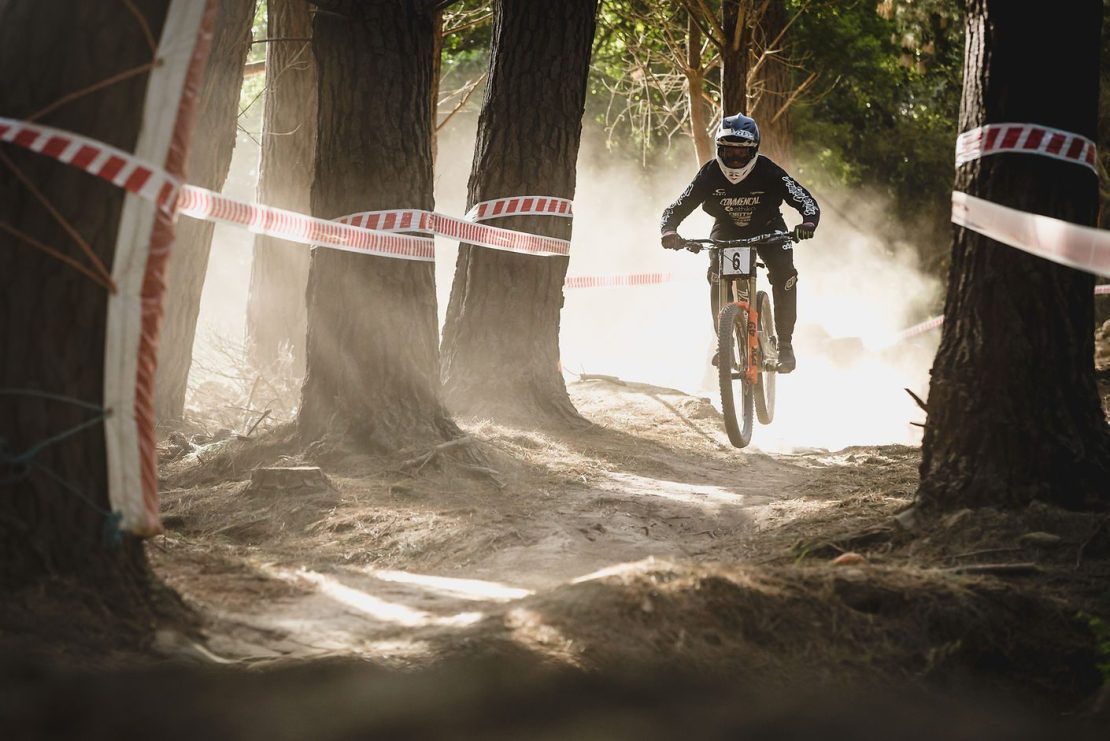
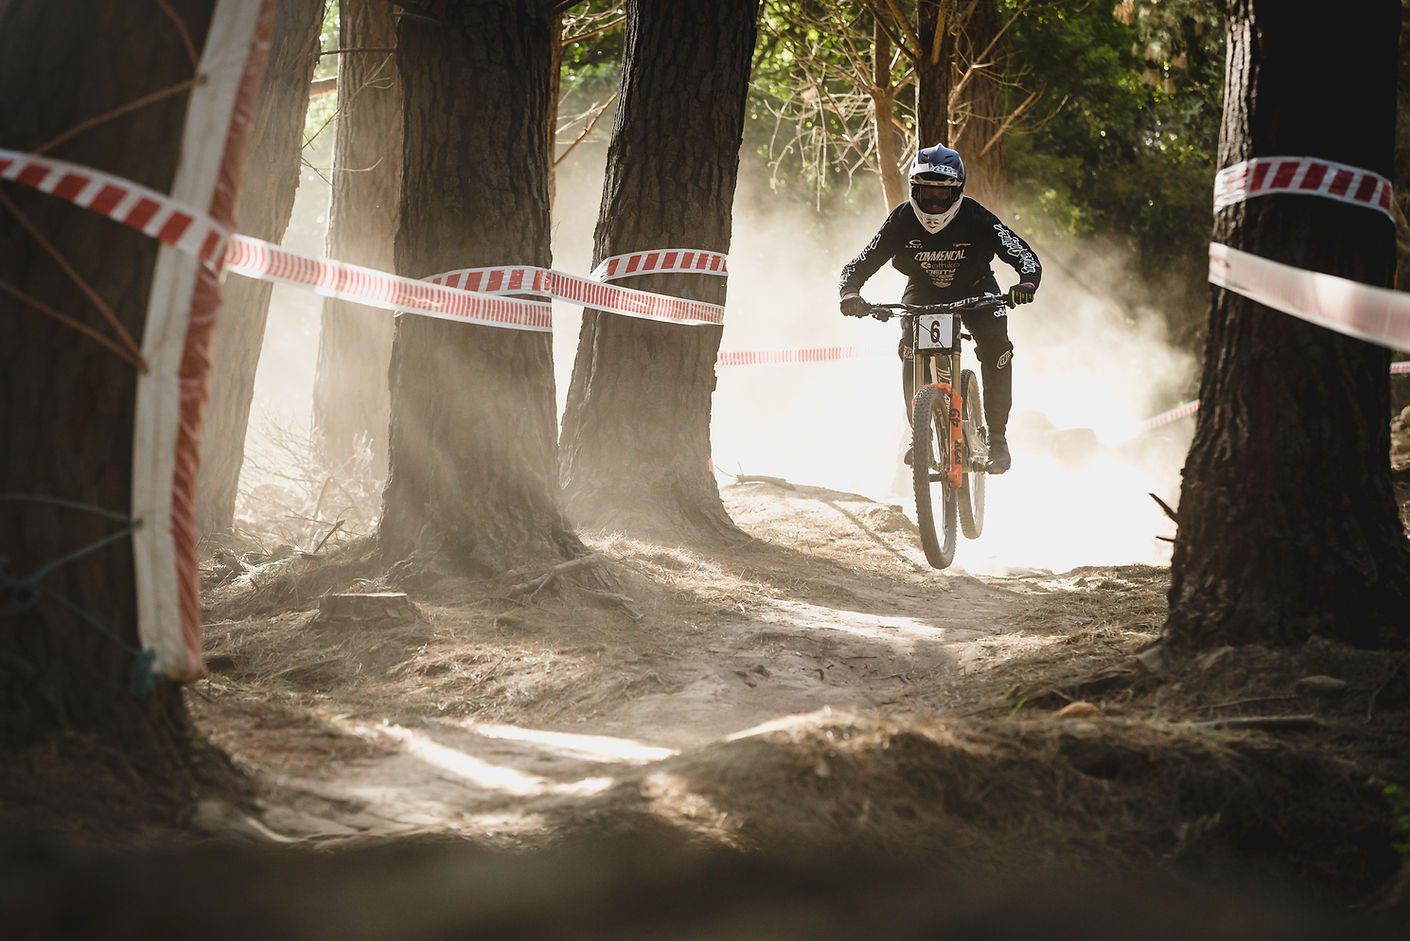
Mike and Sandra at Hyperformance Hardware gave him good deals on the bikes he rides; an Ibis Ripmo for enduro, and a Santa Cruz V10 for downhill races.
Cam has been able to get some great results under his belt, the best being a win in the Under 17 category of the 2020 edition of the Giant TOA Enduro at Crankworx Rotorua. That result would have put him second in the U21 bracket. He scored a second place in the Downhill in his age group at the same event, with a time that would have put him 13th overall.
Consistently finishing in the top three or four in National level races is a great start, but if you want to find out how good you are at any type of bike racing, you have to go overseas. That is as true for mountain biking as it is for any other facet of the sport.
Dozens of young New Zealanders have cut their teeth at the local, had some success at the races, and followed through with a go at a racing career by taking the trip to Europe. Most of them have what looks like a pretty good time, some of them stick at it for quite a few seasons, and a select half dozen or so “make it”.
This year, Cam had locked in the programme for his first foray offshore.
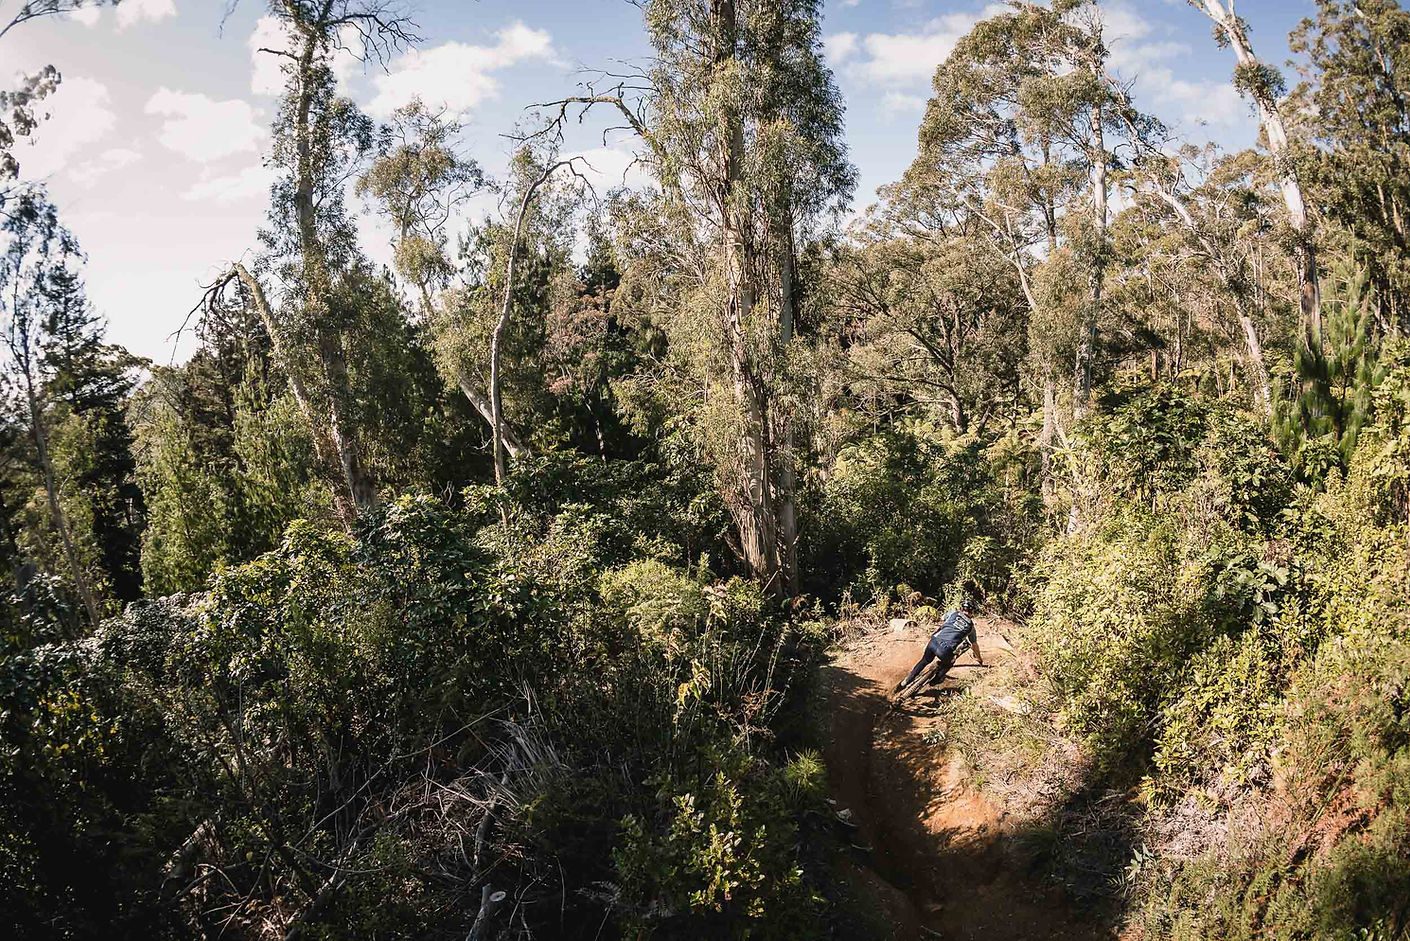
He is way ahead on his schoolwork, and the outline for this year was to take some time out to travel to Taiwan and Australia. An Asia-Pacific EWS round in Taiwan and an EWS qualifier at Falls Creek in the Victorian Alps would have been a great experience and hopefully provided handy points for future race entries. Some EWS rounds and a downhill World Cup round were the target in 2021, but things did not go to plan.

This year has not turned out like any of us expected it to, and Cam is no exception. The Coronavirus pandemic has made an international race programme difficult, if not impossible. Events have been canned, the risk of travel is much higher than usual and leaving New Zealand for a short racing trip to several countries is out of the question.
For Cam and other young kiwis on the brink of a serious go at a bike racing career, or the people already in the ranks of the professionals, it is a real challenge and a situation with many more unknowns than usual.
Planning a campaign is never easy. The broad outline for Cam still includes a red hot go at international racing after high school is behind him. Results will help him decide whether to put racing on the back burner until after uni or push further study back in favour of more racing.
Whatever the global situation dishes up, we are sure Cam Beck has a bright future in bike racing, when the time is right.
Words: Gary Sullivan
Images: Cameron Mackenzie
Story: Cut From a Different Cloth - Louis Hamilton
How about this for the start of a profile….
When Louis Hamilton was 11 years old, he rode sweeper at the ‘06 World Downhill Championships.
Did that get your attention?
The event was in his hometown of Rotorua and his father, Dave, had raced the course the year before, at the Oceania Championships. Dave Hamilton has been at the centre of most things downhill in Rotorua since the beginning of the century, and racing or organising events and courses have occupied many weekends for the Hamilton household over the last two decades. When Dave lined up at those Oceanias, Louis had watched from a vantage point up in the infamous ‘larches’, a particularly nasty part of the course, and the hook was set deep.
A year on, he owned a second-hand Specialised DH bike, and was already able to get down the course - so he got to be the sweep. A baptism of fire, for sure, but after making as many runs as he could over the week of racing, he ended up getting down the track only a minute slower than Sam Hill, who was World Champion that year.
It was only natural that Louis would take racing seriously after being immersed in an event like that.
Competition became his passion for the next decade; battling it out for the summer in New Zealand, and like so many of his colleagues, taking the trip to Europe and North America during our winter.
Racing the World Cup circuit for five years is a huge undertaking. Louis and his brother Connor visited many places they would never have gone to if not for bike racing. And testing yourself year in and year out, against the best in the world, is an opportunity few people get, and an education that escapes most.
Getting started so early had a nice by-product: when the time came to cut back on the racing life a little, Louis was still a young man and, while he cut his teeth in the construction arena, he started building the life he has now.
During a racing season a few years back, the Rotorua downhill organisation Descend Rotorua decided to run a coaching clinic for young riders. Louis and Connor put their hands up to lead it.
On the day, up in front of a group of hopefuls, they realised that while they both knew how to do the things they needed to be fast down a hill, they didn’t have the skills required to translate that knowledge for somebody else to grasp and execute.
That was a challenge for Louis, and he spent the best part of the next six months diligently analysing his methods - figuring out what he was doing so he could impart that knowledge to another rider. The methods he used to do that are proprietary information, and are to remain undisclosed, but be sure they were thorough and accurate.
Some of the things Louis discovered during this period of self-examination surprised him. They did address the challenges he faced back in that spur-of-the-moment clinic. He now knew what he was doing in a far more precise way.
And, he could break it down and deliver it to others.
By that time, he was ready to quit the day-job and launch his own business: Tuned.
In its second year, Tuned will take riders at any level and take them up a notch - or more.
Louis reports that his customers come from all points on the spectrum - complete beginners who want to get started correctly, old hands who have been doing it wrong for years, and pinners that need that extra one percent to elevate their performances.
All of them can benefit from a professional coach who is still able to mix it with the best in a race situation and has put in the study of his own methods to find out exactly what works.
At the same time as he has been developing his business, Louis has been building a family with his partner. Ashley Bond is a great rider, a handy person to have beside you in a business situation and has her finger on the pulse due to her involvement in another bike based operation. Together, they are kept busy with two-year-old Jayla, their daughter.
Recently, I was headed back to the car park at the end of an after-work pedal. I dropped into a clearing and found myself in the middle of a gang of very young riders, gathered around their mentors. Louis and his off-sider on this occasion, Cam Beck, were leading a Rotorua MTB Club youth coaching session.
Ten or so kids were obviously having a really great time, and enthusiastically following their coach’s instructions.
That Louis (and Cam for that matter) would devote an evening to help youngsters improve is clearly admirable but, in Louis’ case, it would have come after a day doing much the same for other customers. Yet, there he was, still out there, and looking to me as if he was really enjoying himself.
It crossed my mind then, that his charges were about the same age as he was when he rode that sweeper lap - a nice way to tie the whole thing into a neat circle.
Words: Gary Sullivan
Images: Cameron Mackenzie
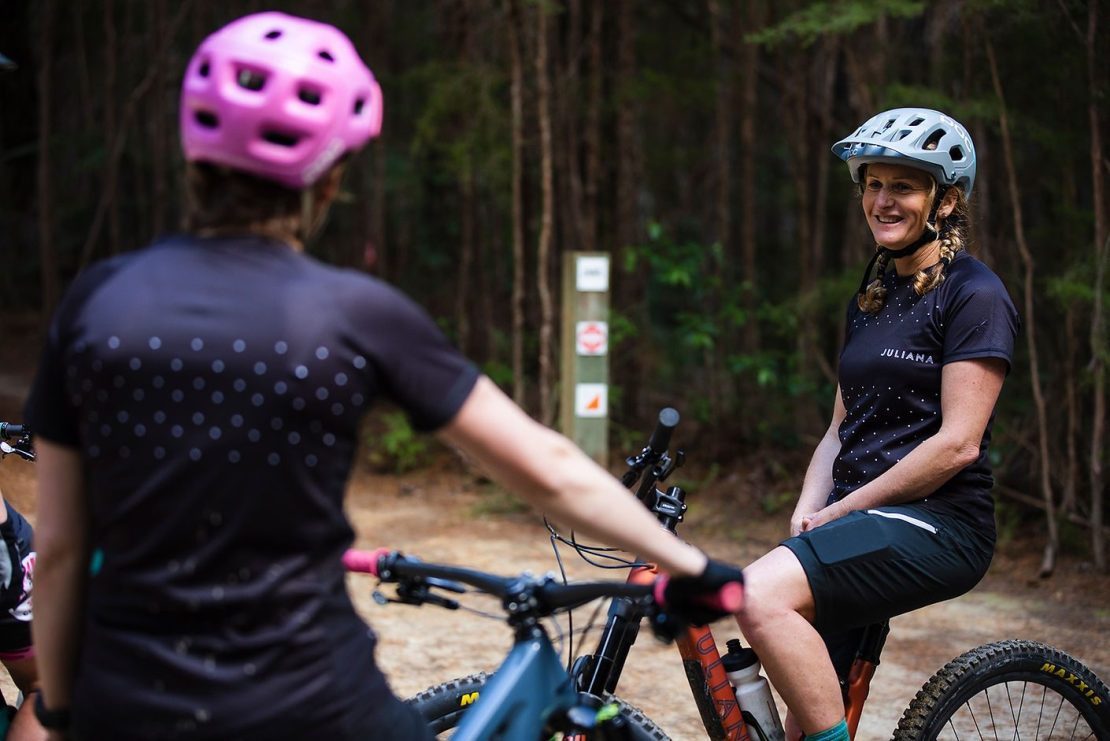
Story: Fueling the Collective Stoke
Becoming more and more entrenched in helping others improve their riding is just as addictive as improving your own, according to Emma Bawtree, former pro elite XC racer and founder of Wheel Woman and Krankin Kids in Nelson. “It’s all about the rush of seeing someone else discover their own love of a sport you love so much!” she says. Both organisations are committed to helping others improve their riding, with Wheel Women focused mostly on women, and Krankin Kids supporting the shredders of tomorrow. Despite her clear passion for encouraging others, Emma didn’t plan on a life of coaching. She was busy racing, running an adventure travel company and being a mum, when the idea of Wheel Woman was born, prompted by one of her friends.

“It all started in 2012, when a friend asked me to take her and some friends out and give them some tips,” explains Emma. “A few weeks later she said the ride had made such a difference to their confidence that they wanted to do it again. By the end of that second session she had pretty much convinced me to start a proper coaching business.”
Woman 1000
Fast forward eight years and Emma is getting close to an incredibly exciting milestone: coaching her 1000th woman! “It’s been quite the journey since that first conversation,” admits Emma. “I was excited about the idea but also nervous… you know, would I run out of women to coach?” As it turns out, the answer is a resounding “no”. Since Wheel Woman began, Nelson’s reputation as a mountain biking mecca - and the trail network it offers - has only grown and, with it, interest in the sport from women. “In the first few years, I could name every woman I’d coached and recognize her on the street. As we close in on 1000 women, that’s obviously a bit harder, but I suppose that’s a good thing!” says Emma. Not only has it grown in numbers, but also in scope and region – Wheel Woman now runs workshops in Blenheim, Christchurch, Hanmer Springs and even the West Coast, as well as the annual Dirt Queens MTB Weekend.
From the Ground up
Emma says she is still largely focused on the beginner-intermediate segment, and really enjoys seeing the leaps made at that level. She says it’s often mothers getting back into biking or starting for the first time once they have some free time, or others trying to keep up with their partners or kids.
“It’s just so heartwarming to see women who are often timid, sometimes even on the verge of tears, break down those mental barriers and feel so elated because of that,” explains Emma. “I often have a few coaching sessions with the same women, and seeing their confidence grow, both on and off the bike, is incredibly inspiring.”
Apparently, those receiving coaching are equally elated. As regular, Amber Bonny, puts it: “Emma tailors her sessions to each individual. She is patient, encouraging and really gauges where you are at and how best to challenge you. This enables you to build confidence and skill without being pushed way outside of your comfort zone, and you can really feel the benefits from the coaching in every ride thereafter. Whether as an individual or in a group session, she inspires you to keep building your skills and get out there on the trails to have a blast!”
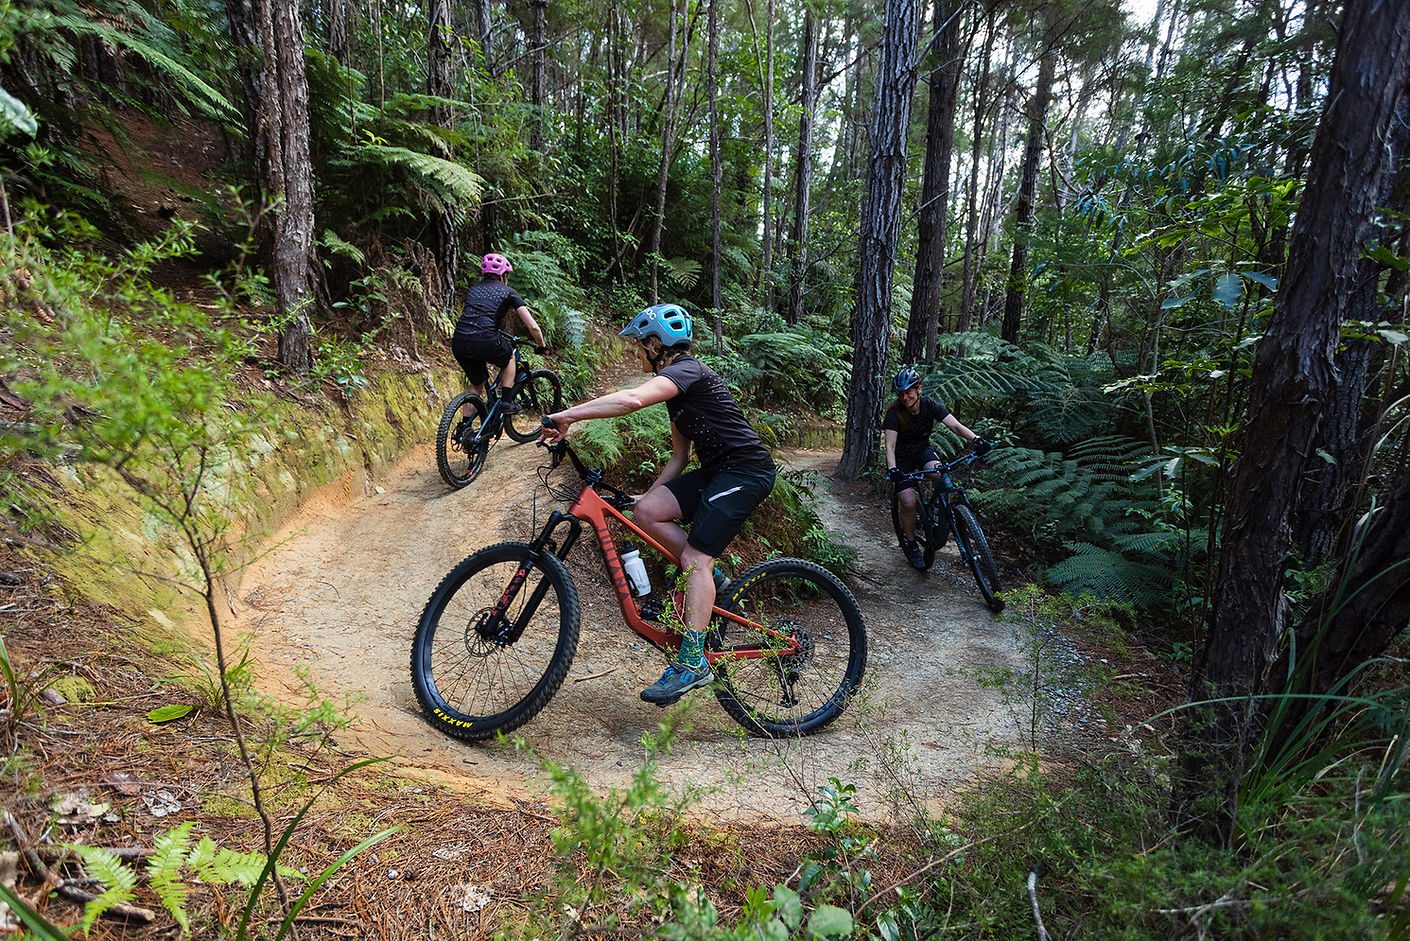
Emma says it’s really rewarding to see her coaching clients years later riding on a completely different level – something she had the chance to see firsthand recently when volunteering as a marshal, at the local Shred Like A Girl enduro. “There were 80 women racing and to turn up and see so many of the women I coached who have come so far, was just awesome.” When asked “why only women?” - Emma says it just seems to work. “In my experience, women seem to learn a lot more when you take away the testosterone,” she explains. “It’s still a very male-dominated sport so it can be intimidating for women, as most (not all!) are not as naturally confident. "They also just seem to have a lot in common, whether they’re moms or young and want to get outside. It’s all about giving them the tools and confidence to continue on their own and ride with whoever they want.”
Emma says feedback on her courses from the women, such as Louise, often reflects this: “Engaging, encouraging, confident and assertive in great balance. I found it really enjoyable, the format was perfect and it was super nice to share some collective stoke with other women in a non-judgmental space.”
The Next Generation
While coaching women is her passion, it garnered a lot of interest from parents who wanted similar coaching for their kids – thus inspiring Krankin Kids. “I got in touch with a teacher friend to work out some concepts and started with four or five coaches, one night a week, for ages 10 to 15. Now we run five days a week and coach 180 kids from ages 7 to 15 per term!” Like Wheel Woman, Krankin Kids is about growing a love for the sport and enhancing skills at the same time. Older kids who want to remain involved can do so through an apprenticeship coaching programme.

What’s Next?
Despite filling her time with coaching, being a mum and running a travel business, Emma practices what she preaches and is always looking to improve her offering. With fewer international visitors and bikepacking gaining popularity, she is looking at leading supported women-only backcountry trips on trails such as Old Ghost Road… and she promises there’s more to come!
Words: Meagan Robertson
Images: Henry Jaine
Story: Turbulent Travels
Last summer was going to be one of our shorter stints at home in Nelson, NZ. We arrived later than usual after a longer 2019 season, and the 2020 season’s work schedule was due to kick off earlier than ever before. It was still early in March - we were hosting EWS racers Ed Masters, Cole Lucas and Mark Scott for a bit of a training boot camp; some local racing then a few big rides and shuttles mixed with some beach time in and around Nelson and Marlborough - when things started to get pretty surreal.
COVID-19 was unfolding all around the world and we went from carefree summer fun on bikes to lots of uncertainty with the ever-changing situation. Strava and Trailforks apps were quickly replaced by a new set of maps, graphs, stats and figures that everyone checked hourly. After years of social media updates, TV news updates once again became more important. Nervous jokes turned into serious concerns. For our guests, daily ride plans were hastily replaced with ‘get me the hell home’ plans as lockdown loomed. A year’s worth of booked flights, accommodation and travel plans had to be cancelled and delayed; deposits and payments lost or deferred as the world came to grips with the impending crisis. My bike and bag was already packed for a visit to South Africa, as was Sven’s for the Portugal World Cup season opener. Needless to say we both had to unpack our bags again as we settled into the longest stint we’ve ever had at home, since moving to New Zealand. It would be our first winter in almost ten years.
Never in my wildest dreams could I have imagined something capable of causing worldwide paralysis in such a short time. We all did our bit, our team of five million. New Zealand, with its compassion and respect for fellow man and woman, fared better than most, if not all, other nations - and for this I’m both proud and thankful. Once the shock of being stranded sunk in, we genuinely enjoyed our extra time at home. I didn’t master the art of wheelies or become fluent in another language (despite best intentions) but we slowed down and enjoyed the quality time we had together. Autumn and winter in Nelson was a breeze, a mild one; I was happy to experience the settled weather, the shifting sunsets and sunrises - and the crisp, clear days were just fantastic. We re-established the veggie garden, adopted stray kittens and got to see our friends far longer than we ever do, which made us feel more part of the community than ever before. Everything was amazing – as if COVID didn’t exist. Even better – it didn’t exist in NZ, because we stopped the spread.
However, when the weeks turned to months, I began to feel isolated and even a little panicky. Immigrating to a new land is tough; leaving your whole family behind is a hard decision only made slightly easier by still being able to travel to see them whenever you choose. It’s been hard for everyone; we have all been affected by this in some way or another this year - work and livelihoods have been in jeopardy, or simply evaporated. An international travel ban is a bitter pill to swallow when a family member is diagnosed with a terminal illness. When Europe finally opened their borders to nations who had performed well in managing COVID, we jumped at the opportunity to salvage some work and get one step closer to seeing our families. People were baffled as to why on earth we would even consider leaving the COVID-safe NZ bubble for the crazy, scary, infected world out there! But, we really didn’t have a choice and to be honest, I am thankful for that - because the big, scary, infected world out there wasn’t so bad after all.
In Europe, the people were carrying on with their lives, building up their businesses again, boosting the economy and seeing loved ones. Yes, it was different: we had to wear masks, follow social distancing protocols, be super careful, wash our hands constantly, sanitize after everything and take numerous overly expensive and uncomfortable COVID tests, but at the end of the day - is that really so bad?! Shops and restaurants had their rules and at the busy beaches they cordoned off squares with ropes to safely distance people from on another. I felt totally naked without my mask, but if that’s all I had to do to carry on with work and my life, then I was more than happy to do that. The majority of people we saw, and the places we went, accepted and operated under this new norm so that at least some of this crazy year could be salvaged in a small way. It was wonderful to be back in Europe and the thought of not being allowed to travel again sends shivers down my spine.
Events were very different of course - no spectators, no access to pits or even the riders really - but the event organisers and regions managed to make it happen along with the race teams, and it was good to see how an entire industry - that had pretty much come to a complete standstill for over six months - could still continue (with precautionary measures) during a pandemic. Sven’s season went from the usual grueling 30 weeks of back-to-back events to a truncated five week season - better than nothing, but still quite frightening to see how a virus can change up your life just like that. Adapt or die, as they say.
Our usual six months in Europe was cut down to three. We had just settled into this new way of COVID living when it was time to leave again. Besides the work, our true intentions for being in Europe was for quick access to South Africa once their borders reopened. That announcement came on October 1st and, after some very complicated arrangements and a few more COVID tests, we were on a nearly empty plane heading back to Cape Town. Usually, that would be a very exciting flight for us - looking forward to reuniting with our families and friends - but this was a sad flight, as Sven’s mom had passed away just before we could get there to say goodbye, despite our best efforts. Sadly, we are not alone in having to go through this; thousands of others around the world, and in New Zealand too, have been separated by COVID in times of grief and need. So, it was onto another completely different world of worries in South Africa. Adapt, adjust and just keep your chin up.
From the very beginning of this outbreak, I was petrified for Africa and what this would do to the continent - a complete humanitarian disaster was what I had feared. There are (very) little to no subsidies for the poor, and social distancing is a luxury for some - simply not an option when you live in a shack or small house with ten other people. Telling people to wash their hands when some don’t even have running water in their homes is impossible, and with no work who has money for hand sanitizer? Often there is not even sufficient money for food. To my relief, they have done pretty well over here. Generally speaking, the people have stronger immune systems in Africa, and it is thought that widespread TB (Tuberculosis) vaccinations have somehow curbed a wildfire spread and kept the death rates surprisingly low. For the most part, people are abiding by the rules, wearing their masks and following protocols. So, once again, I’ve witnessed a country where people are now able to carry on with their lives. It is not without utter hardship, poverty and struggles, but they are carrying on trying to rebuild their lives and keep the economy from completely collapsing. The sheer scale of poverty here is mind blowing and it always takes us a little while longer to “get used to” the complete chaos over here. But, once we do, and we settle into the rhythm of the country, we appreciate it for all the amazing things it has to offer. You really do just adapt, adjust and soak up what this colourful, vibrant country contributes to life's tool belt.
Earlier this year, the media constantly portrayed a crazy, mad world outside of safe little old New Zealand, and yes, it was and still is - and to some extent this made me afraid of leaving New Zealand. I guess what I’m trying to say is that you shouldn’t believe all the media hype. Don’t let them scare you. We learn so much by traveling - from other cultures, languages, people and places. I felt alive again and cannot ever imagine a life lived in only one place.
As our time here in Cape Town comes to a close, I feel sad to leave. I’ve slipped back into this way of life again, but I’m excited to once again be going back home to New Zealand after five months away, with a whole new arsenal of experiences and adventures and insights into how the rest of the world is faring and coping in their different ways. I’m content - and ready to face another battery of eye-watering Covid tests and a hotel room (with windows which cannot open) for two weeks of confinement… but I’ll do it again and again if it means I can keep traveling, learning and growing from these experiences. Adapt, adjust and keep your chin up.
Just for the record though, I will be giving the USA a wide berth for the foreseeable future…
Words: Anka Martin
Images: Sven Martin

Story: Ride Welly - Part Two
Powered by 100%
Read Ride Welly - Part One here.
There’s a chill in the air as we enter into the darker months. Rain has been pelting the roof throughout the night, periodically waking me from my slumber. The wind, the seemingly ever-present wind, is pushing the rain in sideways against the windows. It doesn’t look like easing. Let’s go ride!
Wellington has a reputation for the kind of weather patterns outlined above, yet in the fourteen years I’ve lived here, I’ve decided that the reputation is not entirely true. Sure, there is a reason that New Zealand’s capital city is known as “Windy Welly”, but on the whole, the good days seem to outnumber the bad, at least to me. And a bit of wind and moisture never hurt anyone.
Described by the Lonely Planet travel guide as “the coolest little capital in the world”, Wellington can back up the claim with a vibrant café culture, a healthy live music and arts scene, world-class eateries, a compact central business district and some of the best riding in the country (which, by default, makes it some of the best in the world). The lay of the land makes trails accessible within minutes of the heart of the city in several directions, and there’s no real need to take the car to get to the dirt.
Mount Victoria
Mount Vic is a true blessing for Wellington. From the very heart of the city, if you look up you can see it sitting there, just begging you to come up and enjoy her goodness. The trails there are so good that a round of the XC World Cup was held there in 1997, and National series races are still held there to this day. There are nice and wide and accessible walking/riding tracks that suit all levels, but it’s when you start looking off the sides of the steep slopes that you discover the real gems. Riding these is best done with a local to guide you and warn of the impending drops, chutes and technical challenges that abound on trails like A, V, Damian’s and Boobies. There are, of course, stunning 360º views from the lookout at the top of the hill, which is also the start of the Super D track and the best place to commence each run down the various combinations. It’s easy to put together a half dozen different runs in a couple of hours, and then roll straight into the CBD to re-fuel at any of the myriad craft beer bars or pubs. It’s a lunchtime favourite too, as you can be out of your office and bombing world-class singletrack and back at the desk in the time it takes your colleagues to eat their sandwiches and read the paper. We are blessed by Mt Vic. Praise be.


Stay tuned for and in-depth article coming out in our forthcoming issue.
Words: Brett Kennedy
Images: Caleb Smith
Story: The (Everyday) Adventure Club
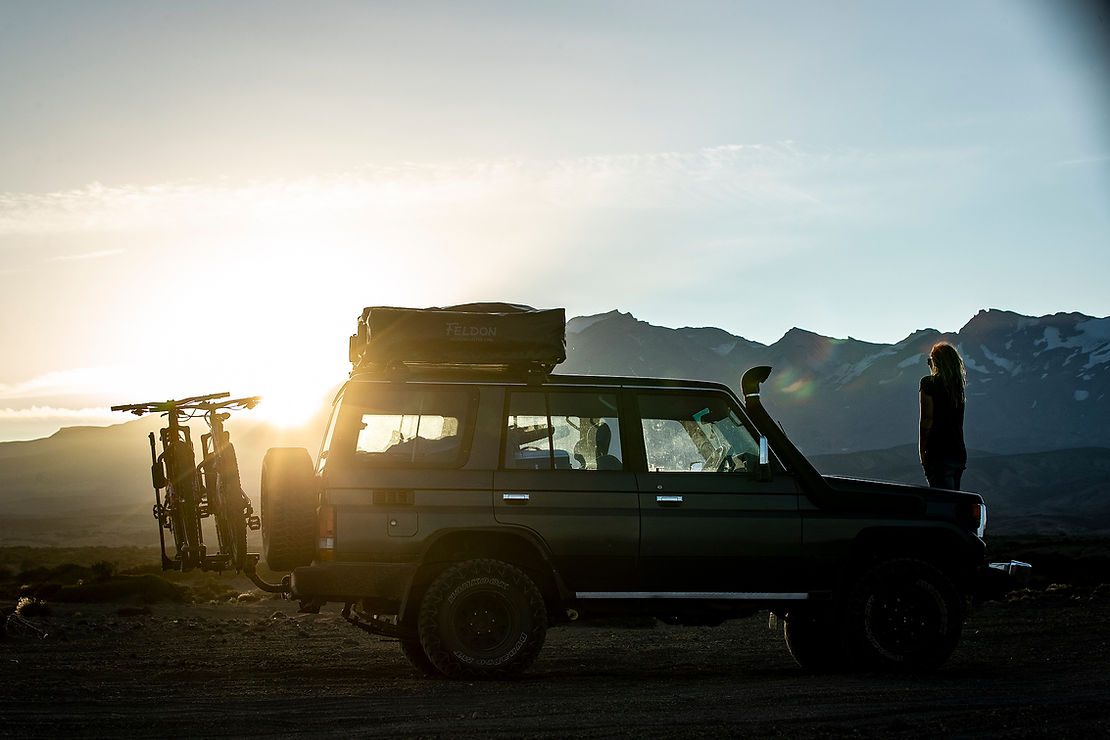
After a career in enduro racing that made him one of New Zealand’s most successful exponents, Jamie Nicoll turned his mind to adventures. The relationships he’d made with sponsors on the racing stage, were strong enough to convert into a new venture: come up with a plan for some sort of voyage into the unknown, and get it supported. Jamie Nicoll Adventures is the result.
A series of adventures have followed, to many points of the compass. His home is a bus he has owned for twenty years and rebuilt several times. Jamie has a pair of Toyota Landcruisers one of them he has outfitted with everything required to survive a trip across the deserts of Australia.
When his bike sponsor, Santa Cruz, were thinking about launching the latest version of the bike they call the Nomad, it made sense that Jamie would be doing it.

The Nomad is perhaps the flagship product in the Santa Cruz stable. Conceived as a bike for the big day out, the Nomad led the charge into what are today’s enduro bikes. It isn’t the brand’s enduro race bike, but it is well-capable. It’s a 27.5” wheel brawler that gets as close as the designers could manage to DH performance, while retaining trail-ready behaviour.
To launch the Nomad meant a field trip, a camping journey into the wilds of Marlborough, and a couple of days of varied trails to try the bike out on, with our photographer Cam on a Santa Cruz e-bike to document proceedings.
The idea was to get together in Nelson, then road-trip to Whites Bay, sample some more riding en route, and finish the trip by riding Wakamarina, a trail I have been hearing about for decades. The editor did not have to ask twice - I was ready to go in minutes. Our first stop was Whites Bay. A nice little beach with a bush-clad DoC camp sits in the lap of a steep range, with Mt Robertson at the top. We circled the wagons (both of Jamie’s Landcruisers) and got acquainted with the bikes.
To look at, the new Nomad is like a squared off, muscled up version of its predecessor. An angular look and a side profile featuring acres of Carbon frame give the bike its unique appearance: it looks like something dangerous crouching for a spring. A little bit of air in the suspension, otherwise it felt like home exactly as delivered.


Beginning a relationship with a bike is probably best done somewhere other than a 680m ascent. Even a three-day fling would probably turn out happier if there was a gentler start but, after checking the sign, we saw that a DoC walking track directly from the campsite was ok for bikes going up - and that was us, so up we went. The trail was a perfect singletrack climb, and the bike was completely up for it.
170mm of suspension can be a liability when pedalling skywards, but we commented between breaths how nailed modern bikes have become. Sitting in the ‘low’ suspension, and with the shock wide open, it still motored uphill as well as any mountain bike with me on top of it.
The Whites Bay trails are a nice little set: The Loop trail was our first target. When the climbing trail crossed the gravel road that takes traffic by an incredibly arduous route to Picton, it turned into a four-wheel-drive track. A steep one, with some sections near the top that were at the edge of what can be done under pedal power. You could be excused for thinking you are near the top at the trail entrance proper - you aren’t. Forsaking the downhill Double Eagle trail, we continued to climb. Another 500m - the majority of the overall altitude gain - happens on singletrack, in beautiful beech forest. It is probably all doable - on the occasional moments where I could see Jamie, it was clear he was riding, but it was too much for me. Repeated very steep, fairly technical sections put the idea of cleaning everything well out of mind - nothing to prove, plenty more hills to clamber up, save some energy for the next days.
Eventually we were at the summit as far as we were concerned, but enthusiasts can turn right and continue up to Mt Robertson’s lofty top, another 400m vertical and three difficult kilometres in the distance. We turned left and started down.
I am already scheming a return trip. About four kms of varied trail beckon me back. Roots, rock, ruts and flow are all there in abundance, as well as some excellent views out to the north and east over mountains and sea.
Already I had realised that the Nomad would eat up whatever I pointed it at. The Fox 38 up front was burly and compliant enough that with a bit of momentum I could clatter over very intimidating terrain without a bother. The back end was not even there - so supple and bottomless feeling that all my focus was on the trail and my aim.
The second course was a Landcruiser shuttle back to the top, then the Double Eagle. Another one on my ‘revisit sometime soon’ list. It will be a brilliant trail on the day I get back there, after a week or so of summer dryness, but for the one percenters I guess it actually was brilliant the day we rode it. For me, however, in the conditions, it was a struggle. Lots of rain made a layer of lubrication between the leaf litter and the solid dirt, which meant brakes were useless and the only way to ride it was the way Jamie does – with no brakes.
We repeated the performance on another trail of dubious legality - a really cool ridge running into a tight little valley. Jamie looking unfazed; I was hanging on for grim death.
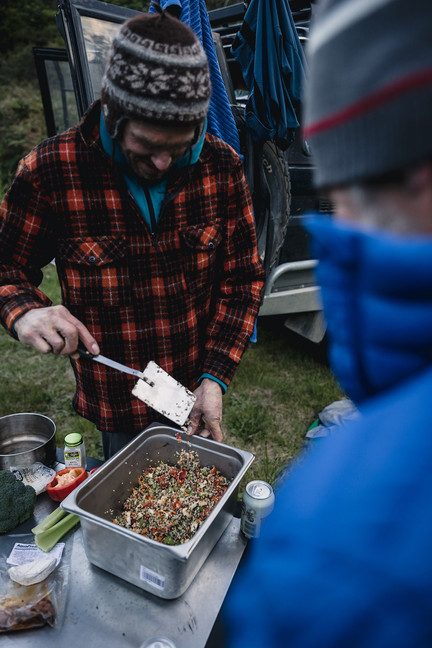
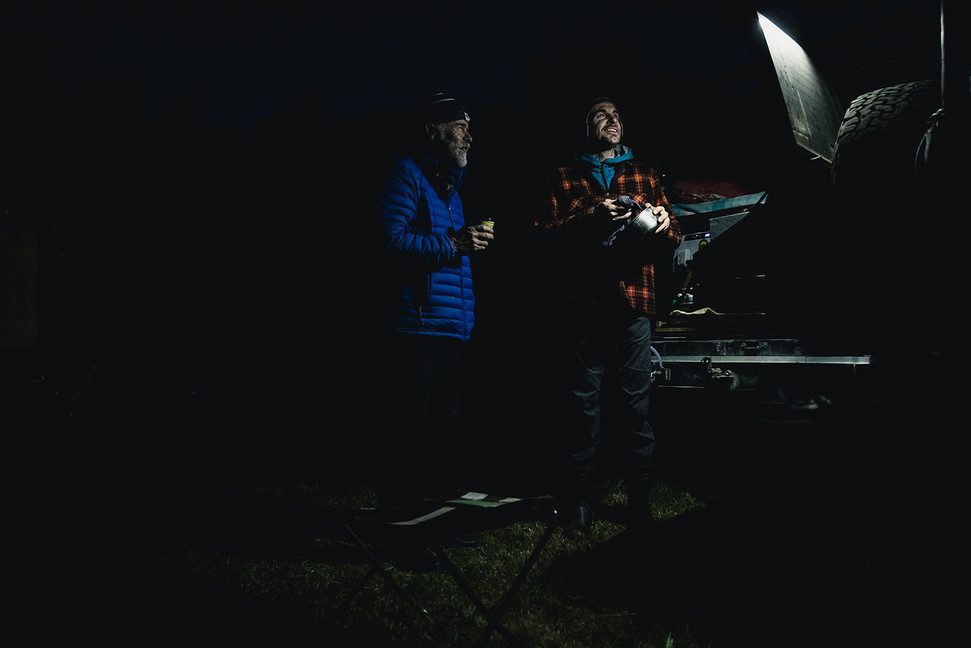
Even on a very short trip, campsite routine gets established early. The usual operation revolved around Jamie, as the host, pulling out the ingredients and implements, and setting to assembling a meal, while we offered small bits of assistance and discussed what we had seen and done, and what we were doing next. In our downtime we also marveled at the detail of the builds of the Landcruisers, especially the Australia Overlander it is bristling with clever, well-executed modifications, all completed by Jamie. In the morning, we headed over to the Jentree MTB Park, a private property owned and developed by Justin Leov and his partner Tory. Justin is one of New Zealand’s most successful pro downhillers, racing the World Cup circuit as part of a career spanning 16 years and really blazing the way for today’s young kiwi downhillers. Justin had several international podium finishes, and was a regular top ten world cup rider and multiple-time national title holder. After a failed attempt to retire, he followed up with a win and a third place overall in the Enduro World Series.
With racing behind him in 2017, the Leovs established Jentree MTB Park on a hill that had hosted downhill racing as far back as the 90s. We were keen to take a look and have a few runs.
It’s amazing what can be done with a relatively small piece of land and a lot of vision. A hundred acres packs in a lot of elevation - it is a 400m climb up a very steep track to the top of the property, and the start of an entertaining nest of trails. It felt like a well aimed rock could land on the Landcruiser parked way below. Even with such precipitous terrain, the trails are sustainably built to provide plenty of speed without creating places where hard braking would chop out the trail surface. A very inspiring project, and a great example of how to put a park together.


On the drive through to the Wakamarina River campsite, in Richmond Forest Park, we stopped for a bite to eat in Havelock. Whilst waiting for coffee, we consulted Trailforks and found a nearby trail called “Good-For-Nothing”. Allegedly dropping out of the bush a block or so from where we sat, it began on top of the ridge directly behind town. A bit more fossicking on Trailforks showed an access road not far away, so we loaded up one of the trucks and went to check it out.
After a nice rideable climb (mental note for future excursions) and another outstanding Marlborough view, we dropped into Good-For-Nothing.
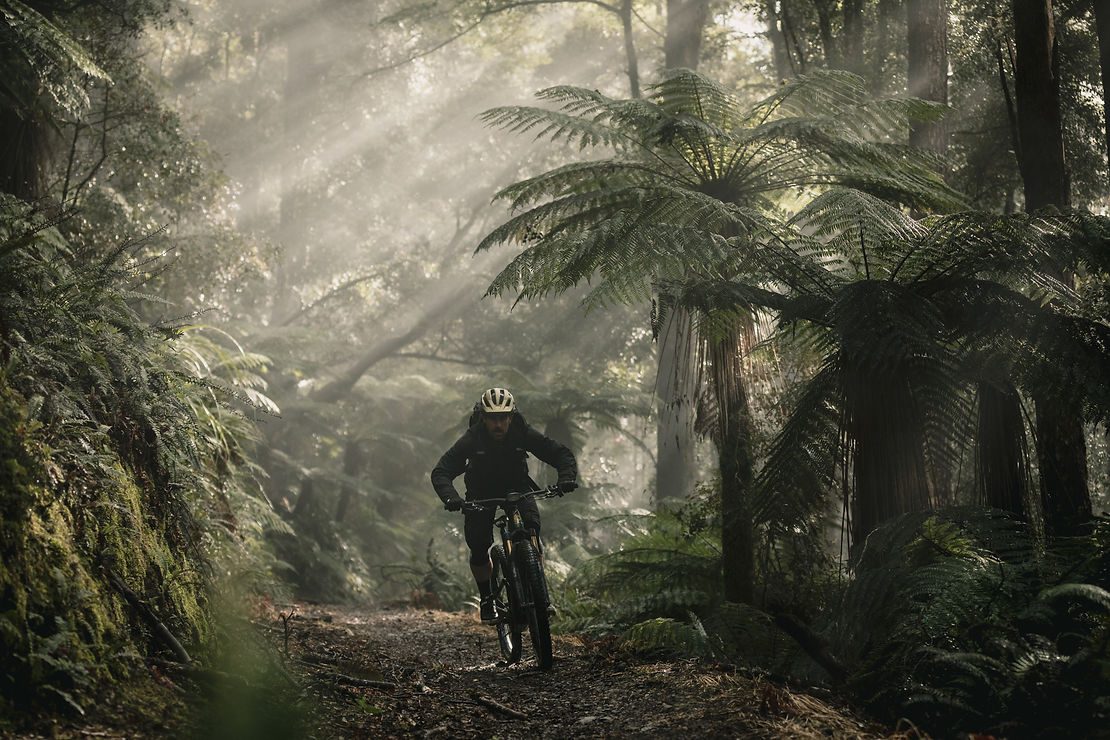
You can’t tell a book by its cover, and you can’t read too much into a name. This little trail is only a tad over three kilometres long, but it is close to perfection in my humble opinion. The good people of Havelock may not enjoy dozens of trails on their doorstep, but the one they have is worth doing dozens of times. Rocky and exposed at the top, rocky and deep in the woods on the way down, loamy and almost jungly at the bottom. Yeehaw.
The drive in to Wakamarina from Canvastown on the main highway, follows a classic New Zealand backroad. Wide and easy-going to begin, the road gradually narrows, coils itself up, and sheds its tarmac before delivering punters to the very end. Facing a mountainside draped in beech forest, the grassy fields for campers were deserted except for one lonesome little van. The Wakamarina River runs beneath the campsite, a rocky watercourse with crystal clear water in deep pools and gentle rapids. Jumping in was more or less compulsory after our hot and dusty day, and the water was as cold as it was clear. Just to make sure, we jumped in again, and learned that once was probably enough. Another idyllic night under the stars followed, with Jamie slinging veggie burgers and all of us conking out fairly soon after dinner.
The next morning started early. Riding Wakamarina South-East-to-West (the only logical way to do it - see below) requires a bit of logistical maneuvering. It is about an hour and twenty around to the south-eastern trailhead, and we figured we would take about five hours to get through, allowing for the time it takes to ride a few stretches twice (or more) for photographic purposes. My slot for leaving Nelson was 4:30, and Nelson was an hour and a half away... we reckoned we had to be back at camp by one. That meant a 7am pickup by the Blue Moon shuttle driver from Havelock.
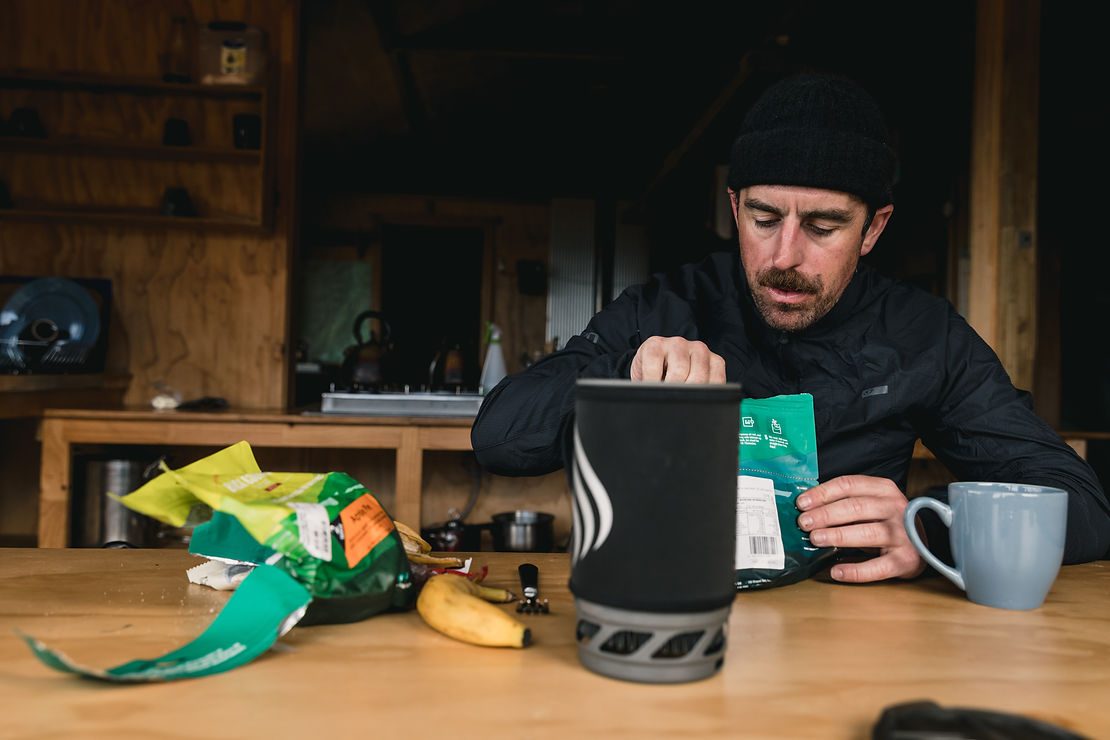
Excitement or sandflies saw us all out of the sleeping bags and into our kit by 6:15am. Even the knee pads were on .... sand-flies. A couple of stovetop coffees, morning ablutions, a bowl of Yum granola, and we were ready to hit the trail. The driver turned up on cue, and the big day started.
A note on the weather: it was perfect. Completely bluebird,but not really that hot. Lucky Strike #1. Lucky Strike #2 was being delivered right to the trailhead. The approach to the trail is through some forestry, and the word was that maybe it would be closed and we would be riding from about 6km short of the trailhead. That’s not far, but Wakamarina starts 600m above sea level. Having that 600m in the tank would be better than spending it getting started. Some of us had our own little lucky strikes along the way .... more on that later.
The trail sets out fairly flat, and even goes a little downhill, so we motored along feeling like the very lucky people we were. A few glimpses of the view were all we got, and soon enough the trail tipped up and we started to climb.
That first climb is only 5km or so, and gains about 500m - small numbers that do not reflect reality. It is hard! Stunningly beautiful trail has been carved out of the rock by miners in the 1800s and, in many places, it is much as it would have been then. The climb is unrelenting and follows a ridge to a saddle where a side trail leads up to a clearing at Fosters Hut.
The outlook from that point, over a kilometre above sea level, was spectacular.
The run back down to the saddle was followed by a long downhill with quite a few water crossings, which were slippery and exposed. That is where I had my Lucky Strike #3: coming into a section where the trail changed from a fairly well-formed surface to a V-shaped defile, with rough rocks on one side and a smooth sheet of rock rising up on the other. I should have stuck my front wheel into the bottom of the slot, but I had a go at the rock slab on the left. It was slipperier than it looked, and I fell hard onto it, landing on my hip, which still has a big lump on it. But, that was the only damage, from my only crash, so I was lucky. Actually, and more correctly, it was my only crash if you don’t count the other one.
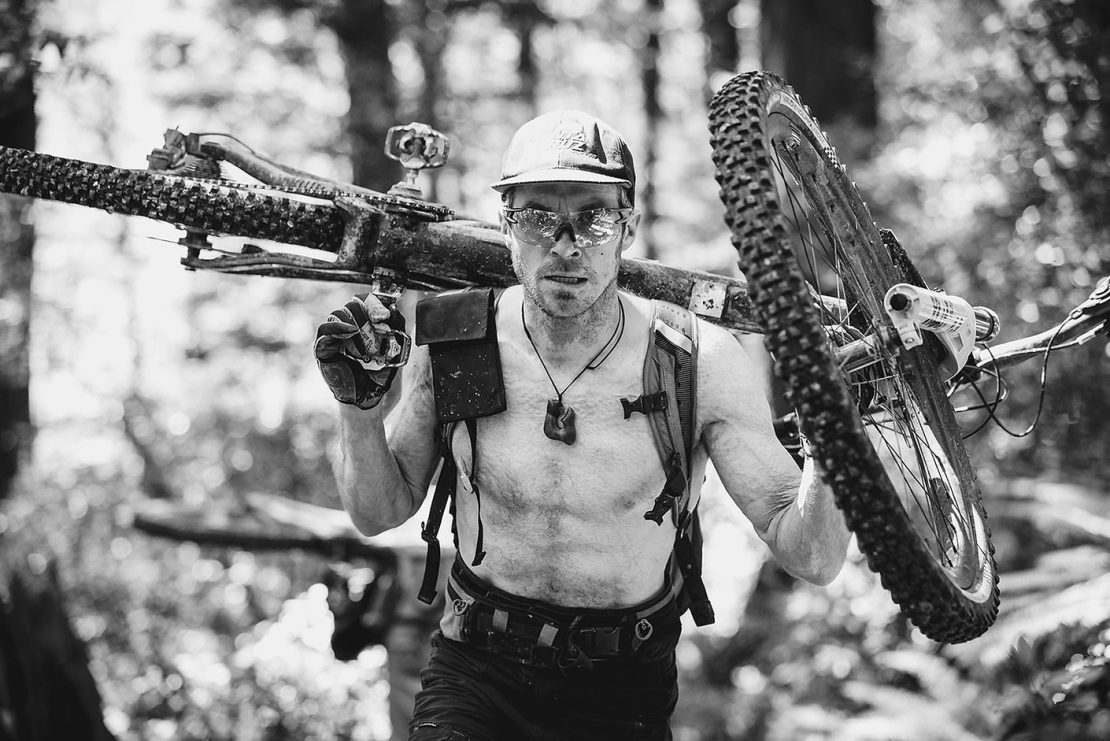
After the last drop into a watercourse, a steep and boulder strewn thing best left to the one percenters, the legendary Wakamarina Hike-A-Bike began.
Marlborough trails seem to condense distance and difficulty to rock-hard things that confuse the newcomer. The hike-a-bike is one and a half kilometres long, and only gains 290m. Some of it is actually rideable. The bits that aren’t really aren’t, they are barely walkable. At one point, as I wrestled my now completely useless pile of carbon and alloy technology around a fallen tree that was hung up at 45 degrees on a similarly angled slope, I seriously wondered if I had left this particular life goal too late. As in, will I get to the top - alive? How our photographer managed with his even more useless e-bike and a gigantic pack full of cameras is anybody’s guess, I certainly couldn’t have.
But the thing about sections of trail like that, is that sooner or later, they do end. And to be honest, every so often I stopped toiling upwards and looked around - it is a majestic place to walk a bicycle. We came to a ridge, which I stupidly assumed was the top of the climb - it wasn’t, we were just over halfway. Far ahead, I could see Jamie pedalling a steep trail. That inspired me to get aboard my machine again, but the bits I could ride were so short that the time and effort it took to stop, clamber on, pedal away, then dismount ten metres along the trail were more than what I lost by plodding along on foot.
Not far shy of the actual summit we were back on our bikes and crawling along in low gear. Cam got a stick in his derailleur and snapped the entire mechanism off. Not the hanger, which could arguably be fixable, but the derailleur itself.
He pushed to the top, where Jamie was sunning himself and eating a snack. The chain was removed, and a gravity sled was the result. Perfect for what lay in front of us: 800 metres of descending in 2.5 kilometres.
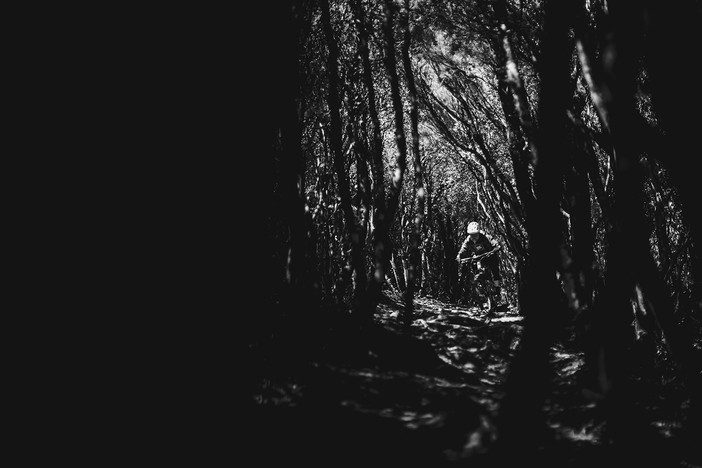
Once again, that contraction of time and space: two and a half kilometres that will be burned into my memory for ever I hope: dozens of switchbacks, seas of ground ferns, massive buttress root systems supporting huge black-trunked beech trees, and a constant need to pay attention to where you are going. It felt like a lot further, but it was over much too soon.
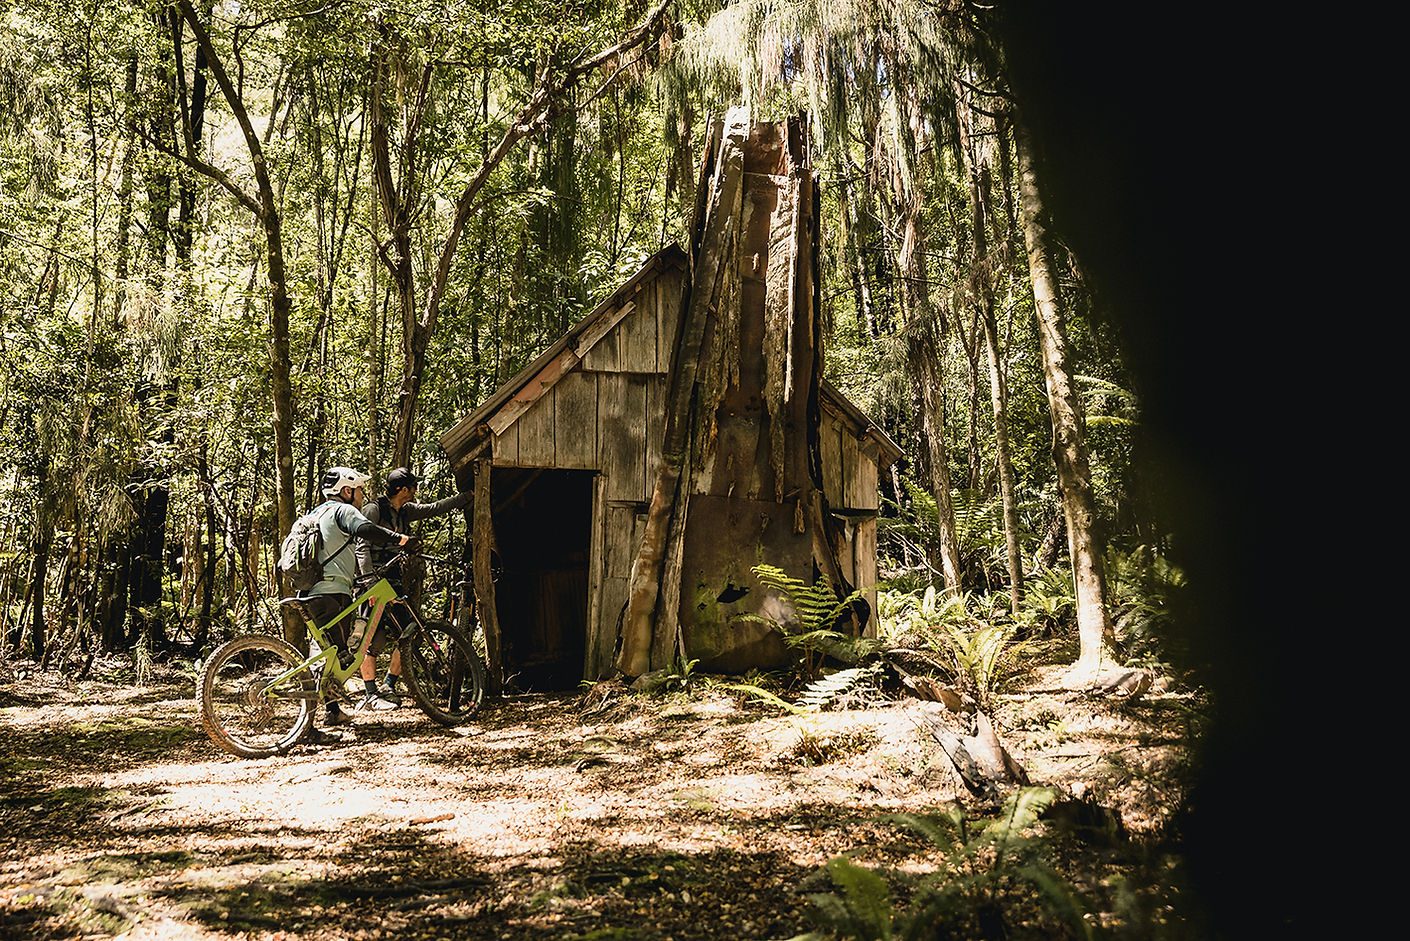
The trail out is relatively flat. But only relatively. After we checked out the historic old slab hut at Devils Creek, we were in for a lumpy six kilometre run back to the cars - with plenty of time, on an operational bike. But of course, one of the bikes was not operational. An e-bike with no chain is about 250watts worse than a regular bike with no chain.
Cam was pretty keen to create a single speed out of the e bike. Both Jamie and I were pretty sure it wouldn’t work - compounding a chain’s general tendency to shift gears by itself until it is so loose it falls off is the suspension bike’s tendency to stretch the chain as the suspension goes though its motions. And of course, chains don’t stretch.
There was a brief stand-off, while discussion was had about whether trying to fix the bike would ultimately gain or waste time. In the end Cam won, and the two of them worked together to make the repair. Jamie got the quick link undone by hand (not easy) and Cam riveted the thing back together at what he thought was the right tension - and off he went.
To our collective amazement, it held together long enough for the battery to go flat (it’s a big ride), and we got back right on schedule, something that never happens on a normal mountain bike ride, let alone with a giant traverse of a couple of ranges in a remote location, with a photographer.
At the end of three big days riding fresh trails, I had formed a trusting accord with the Nomad. It was there for me when I needed it, which was more often than not. It really lived up to its name. Rinsing off in the river was as lovely and brutal as it had been the day before. The three days on a Jamie Nicoll Adventure were over way too soon, but it felt like we had set out from Nelson a long time ago. That Marlborough time warp again.
Words: Gary Sullivan
Images: Cameron Mackenzie
Story: Outta Range on the Old Ghost Road - Presented by Bosch Pt. 3
8:50am/0kms/Full Battery.
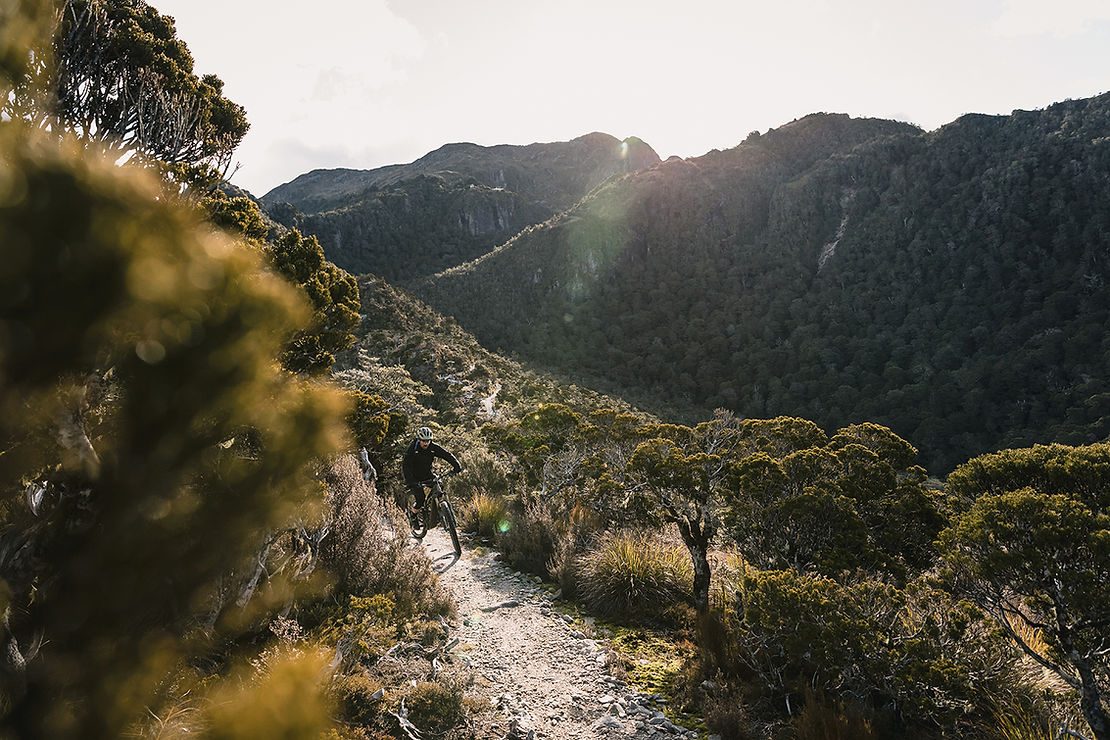
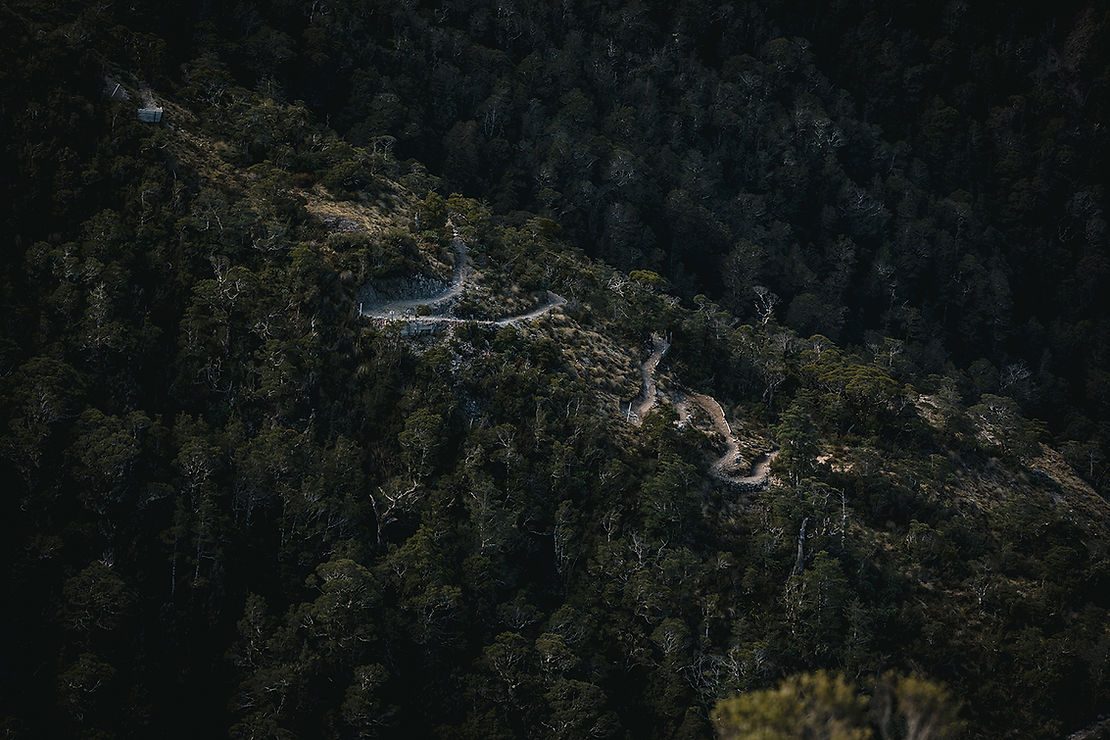
As soon as we entered the trail and attacked the long climb, the countdown began. This is one hell of a climb up to 1,456m, and it covers 28km in the process. Our estimates were that we’d have around half the battery by the time we reached the summit. The day dragged on and so did the bloody climb and the range anxiety only got stronger as we saw the battery status bars dropping. This was the reason behind our ever-growing stress about whether we’d make the whole trail or not. And, more importantly, what we’d do if we failed.
12:30pm/16kms/45% Battery.
The climb is steep for the first 10km, then flattens before ramping up again for the last 8km. Most of the last section is loose and soft which sucks a lot of energy. For the whole ride, we decided we’d use eco mode in order to conserve the battery. By this point we were pretty jaded so we munched on some lollies and tried to suppress the stress of the low percentage battery. It was evident that whatever happened, it would be a challenging afternoon.
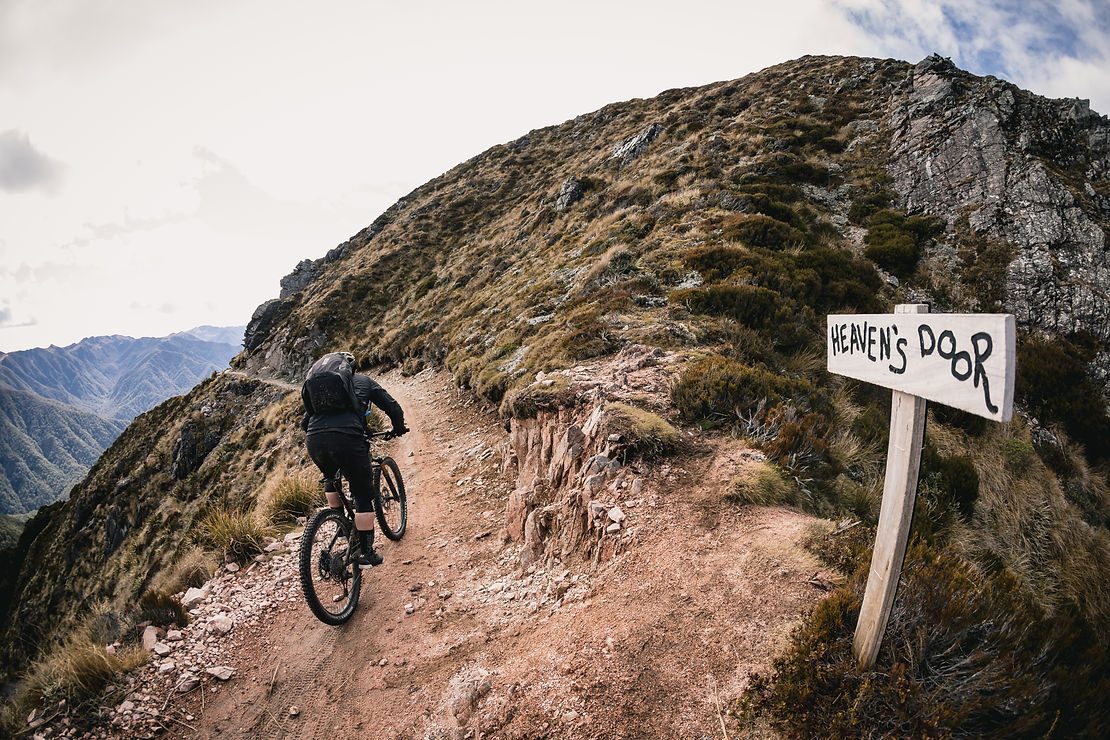
1:30pm/28kms/32% Battery.
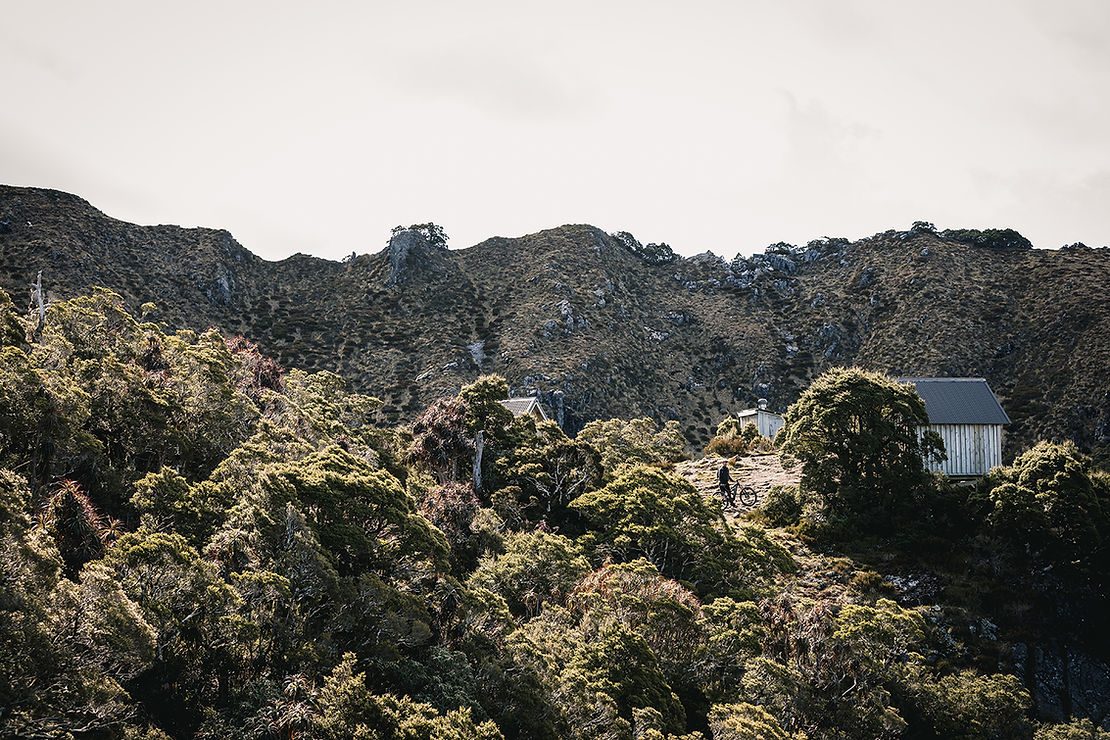
We finally reached Heavens Door and we could see bad weather coming in and the temperature was dropping. As we sat beside the trail eating some Scroggin, a few snow flurries came down and I had the sense of being a little more scared than worried. Some more food was consumed, then we rode the highest part of the trail which is super epic with views, but it has a ton of exposure. At this point, I turned the battery on/off whenever it was needed, in order to try and conserve it.
2:10pm/30kms/28% Battery.
Yes - slight relief! We made it to Old Ghost Lake hut for lunch and unpacked our grub. This is the beauty of mountain biking - it gives you access to remote parts that would otherwise go unseen. We were quite broken and needed a ton of food to replenish ourselves. They may be eMTBs but you still need to ride them. Even though the bikes have power assist, it still takes its toll. Whatever the rest of the day delivered, we were still super thankful to be in this incredible backcountry.
2:45pm/30kms/28% Battery.
After seeing the battery status pop up again on the Bosch Kiox and knowing we only had a few hours of daylight to play with, it was getting sketchy. We didn’t mind riding in the dark, but without battery assist the bikes would become very heavy. At this point a second battery would have been ideal. However, that wasn’t the case, and after some discussions about making a call whilst we had phone reception it was one of three options. One - ride out the best we could and, if we didn’t make it, find a hut to park in for the night (bearing in mind we didn’t have overnight clothes or enough food for two days and we’d still need to get out the next day - without electric assist). Two - ride back to the start point in Lyell then try and get someone to relocate the car back for us. Three - get a helicopter out of the trail and over to Seddonville; we opted for this option. This decision was made mainly thanks to my contacts at Murchison Heli Tours. I put the call to Ange and explained our situation - within an hour, Rob (the pilot) was in the air.
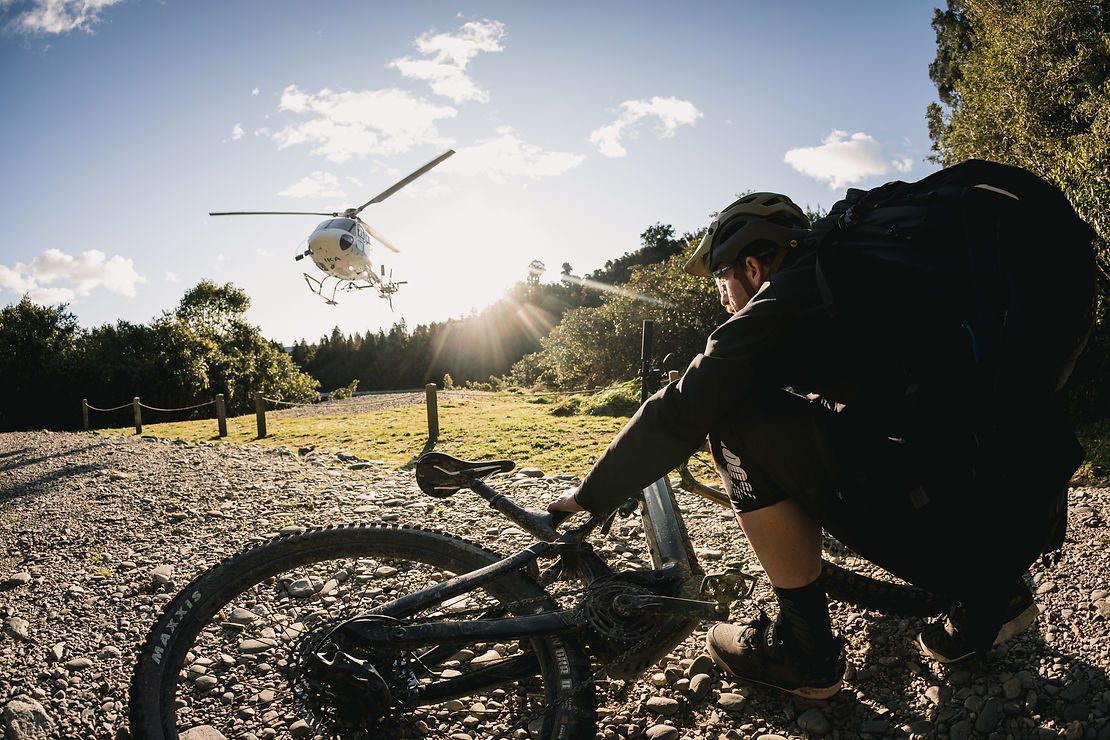
4:13pm/38kms/20% Battery.
The evacuation – Rob jumped out of the heli and shook my hand strongly, then laughed about the situation we’d found ourselves in. As we flew back across the incredibly rugged terrain, I was resentful that we didn’t get to ride out, however, we were both thankful to be getting out safely and there was relief after spending most of the day in a state of anxiousness. After landing, and thanking Rob and his crew, we met a couple who’d ridden it in one day on eBikes. Their story, however, was a little different: they both took - and needed - two batteries.
The Conclusion
A few pints of beer went down in the Seddonville Hotel whilst the locals sung songs. We yarned about what went wrong. How could we have done it better? Why did we use so much battery? Surely, we could have gone further. The long list of questions did get answered, but it opened up a new set of answered questions too. For
both of us, the thought of not completing the task was a hard pill to swallow. That said, I was thankful to be sitting in a warm pub sipping a cold beer, rather than out on the trial somewhere without any eBike battery assist.
Now, we must note, we were trying to find the limits of the eMTB Bosch Gen4 batteries - and as you’ve read, we did! But the trail can be (and should be) ridden with two eBike batteries. Of course, as technology evolves, so will the range. Whilst eBikes are quite advanced and offer great accessibility they, like most things, have their limitations. I for one can’t wait for the next era of eMTBs! Old Ghost Road on eMTBs will be revisited - and next time we will be more prepared - so stay tuned for the next episode!
Words: Liam Friary
Images: Cameron Mackenzie
Story: Outta Range on the Old Ghost Road - Presented by Bosch Pt. 2
The Mission
We wanted to ride the iconic Old Ghost Road in a day, on eMTBs. We knew this could be done with ‘acoustic’ bikes (or a bike that’s not e-assisted) but could it be done with eMTB’s with only one battery?! We packed our bikes, gear and cameras then took a road trip to the mighty West Coast. Anxiety, anticipation and mild stress was mulling over and rolling around in our heads. Could we make it? What would the day bring? Would we still be riding come nightfall? Would we have to walk the bikes out due to flat batteries? Plus a long list of other unanswered questions.
After a long time transferring from Christchurch, we bowled up on Seddonville Hotel. It’s deep and remote but has damn fine hospitality, cosy rooms, a roaring fire, wooden bar and eclectic bunch of people. In preparation for the mission we ordered pints of Speights and ribeye steak with fries - proper west coast food! After that, we hustled to get everything sorted for the next day’s adventure.
The first thing we did was charge the batteries on both bikes. We had a Cannondale Moterra and Trek Rail, both using the Bosch Performance Line CX with 625wh batteries. Bosch has a range finder on their website and we both ran it for the bikes, our weight and the trail conditions. It was spitting out around 75-81km for battery range across Old Ghost Road for both of us. Either way we knew it’d be touch and go. We threw all the essentials into our backpacks; I took the food, first aid kit, PLB (personal locater beacon) and 3L of water, whilst Cameron had to lug his cameras up the trail. I roughly estimated around 7kg for my bag and probably around 9kg for Cam’s camera bag.
We finally hit the sack. As I lay in bed, the few beers helped the anxiety somewhat but I was still a little nervous. The next day dawned; I pulled back the covers and flicked on the jug. It felt cold and as I pulled the curtains back, they were stuck to the ranch-slider due to the moisture. I looked outside and there wasn’t a cloud in sight. The moon was shining its light over the quiet valley and the hills were still in darkness. The outside temperature was around two degrees. We downed some warm porridge and coffee, and rustled our packs before we jumped in the Ute and hauled round to the trail head in Lyell. The drive over had sunrise on offer, the layers of colour were incredible. Miners wearing hi-vis vests lined the roadside in the small towns of Buller’s coast, waiting for their shuttle pick-ups whilst we zoomed past. It was an incredibly clear day - hoots and hollers rang out between us about the day we’d scored. However, as we entered the Lower Buller Gorge, the mist and cloud began to hug the mountain ranges. As we ventured further on the road inland it got thicker. There was an eerie feeling about it, and again the anticipation of what lay ahead boiled up inside me.
Words: Liam Friary
Images: Cameron Mackenzie