Aeroe Spider Handlebar Cradle
Words Lester Perry
Images Henry Jaine
RRP $129
Distributor Southern Approach
With our Mt Starveall mission penned in the calendar, I began pulling gear together for the trip. Sorting through my stuff, it was obvious none of my existing bikepacking gear was quite ideal for a trip like this – my regular strap-on bags just wouldn’t cut the mustard on technical and rough trails; I needed something stable and secure.
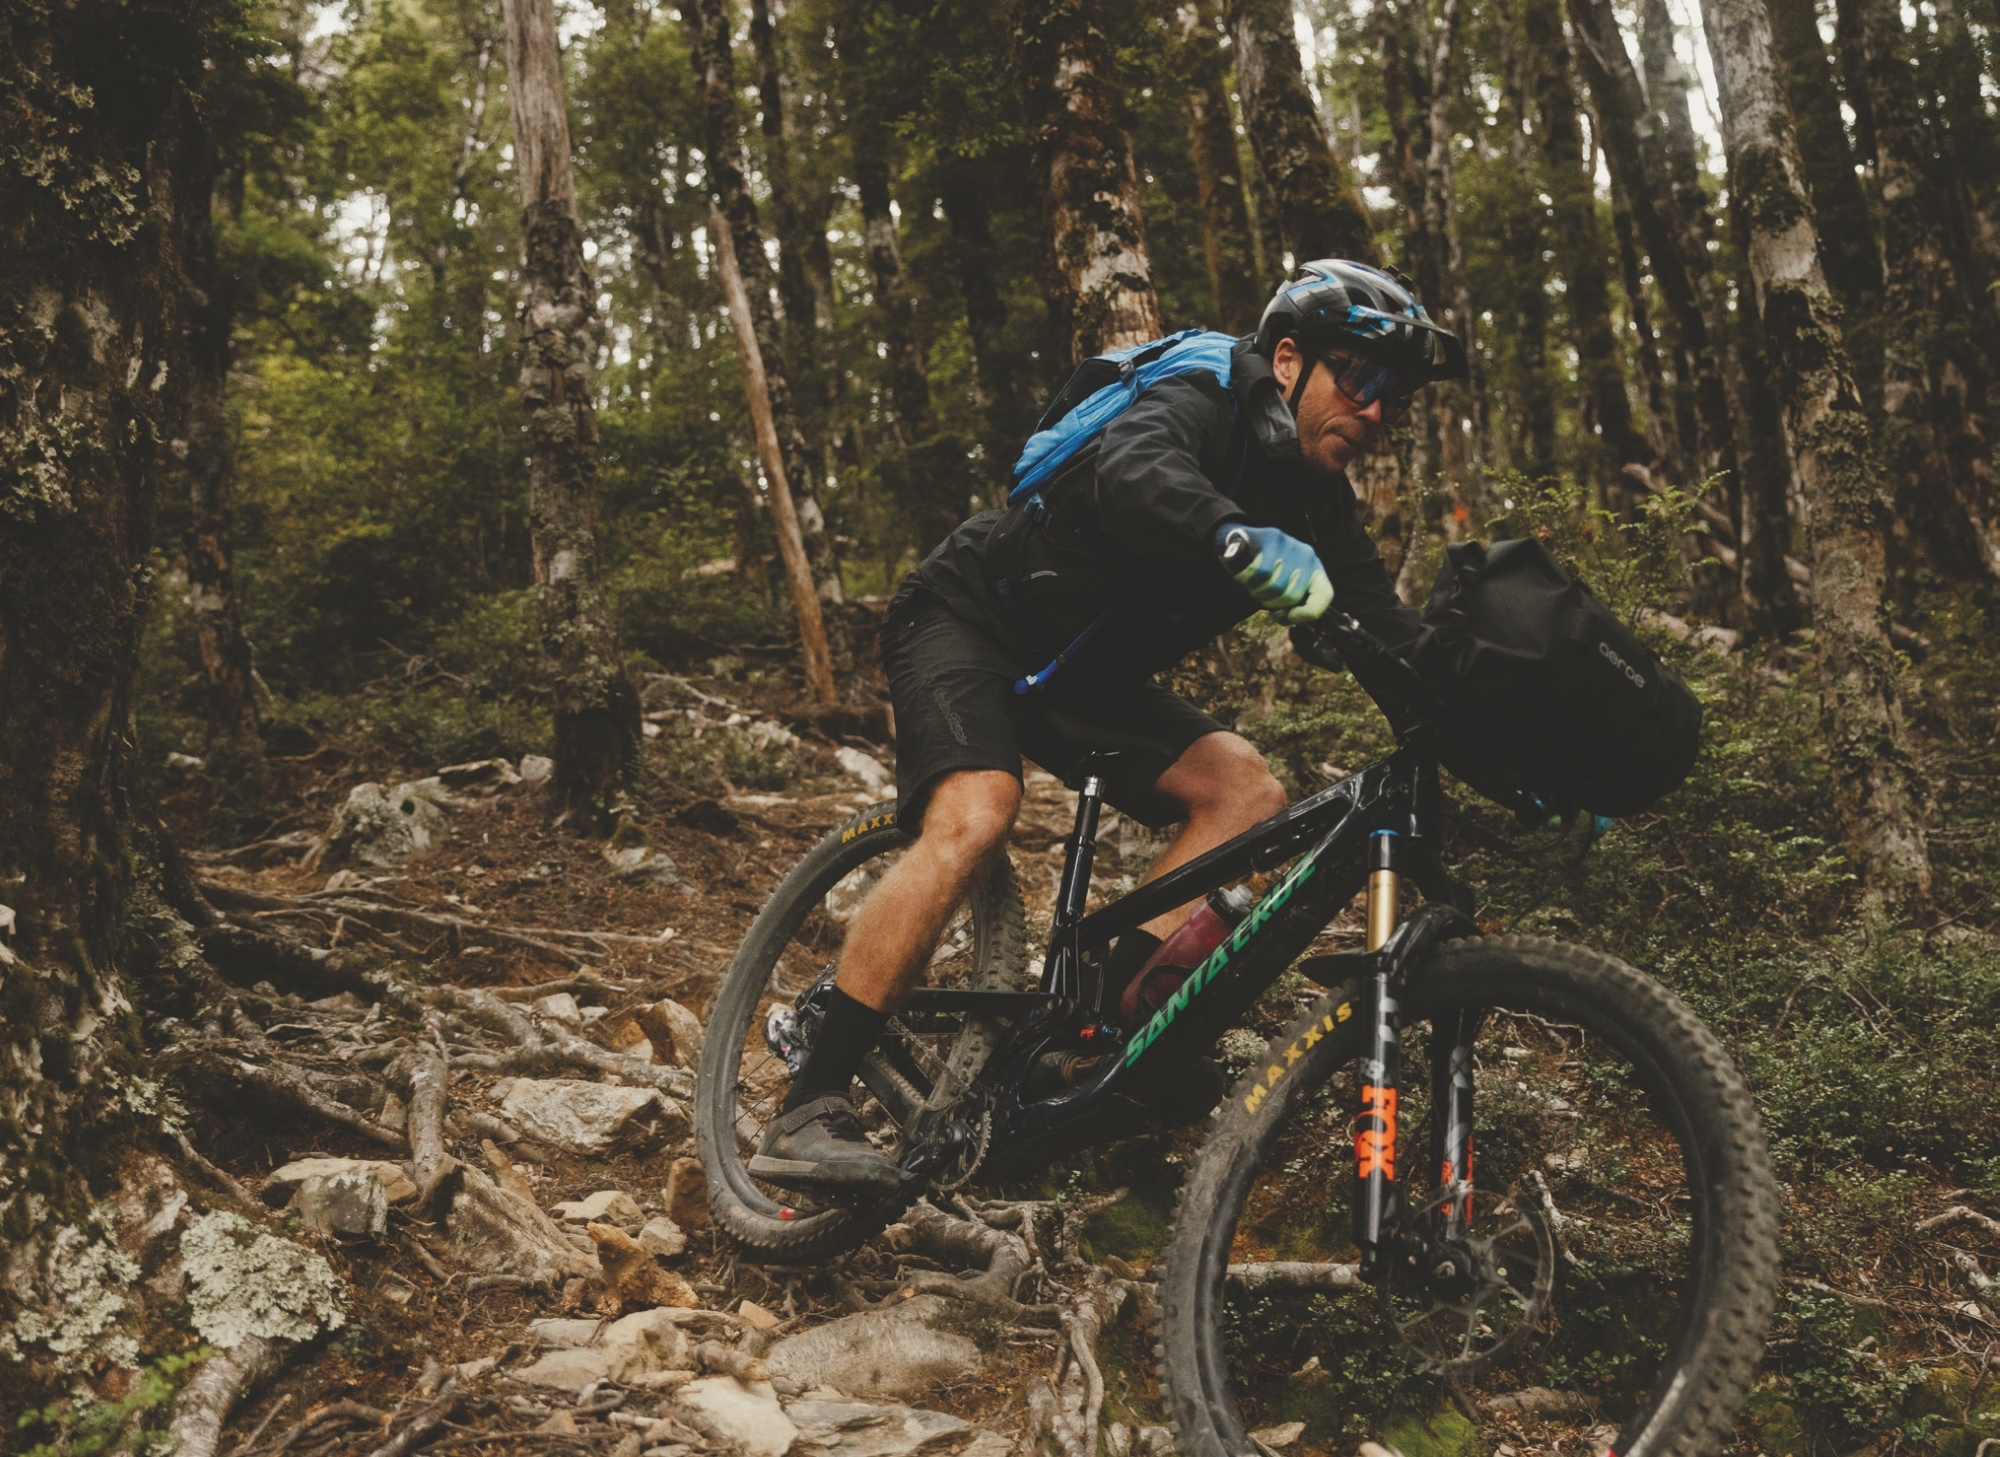
Aeroe came to the party and sent me out a Spider Handlebar Cradle and dry bag, and an equivalent setup for Kieran, my mission companion for the trip.
Aeroe set out to create a simple-to-use system for carting gear on your bike, initially developing ‘The Freeload Rack’, which they ultimately sold to Thule in 2011. Not long after the sale, they began quietly working on a new gear-carrying system, presumably waiting until after restraint of trade agreements lapsed to launch under the Aeroe brand. Designed for every mission, from a two-block commute to work to a two-month, multi-country epic, it’s a pretty versatile system – so can be used any time you need to carry gear on your bike, bringing down the cost per use. The entire system consists of the handlebar-mounted Spider Cradle we used during our trip, the Spider Rear Rack, and the more recently introduced Spider Pannier Rack, with the associated dry bags. The entire system is modular, meaning parts of each rack can be swapped over, allowing multiple mounting configurations and helping you to balance the load, or separate gear however you like. The cradle can also be attached to a fork, throwing open the possibilities for how much cargo you can carry.
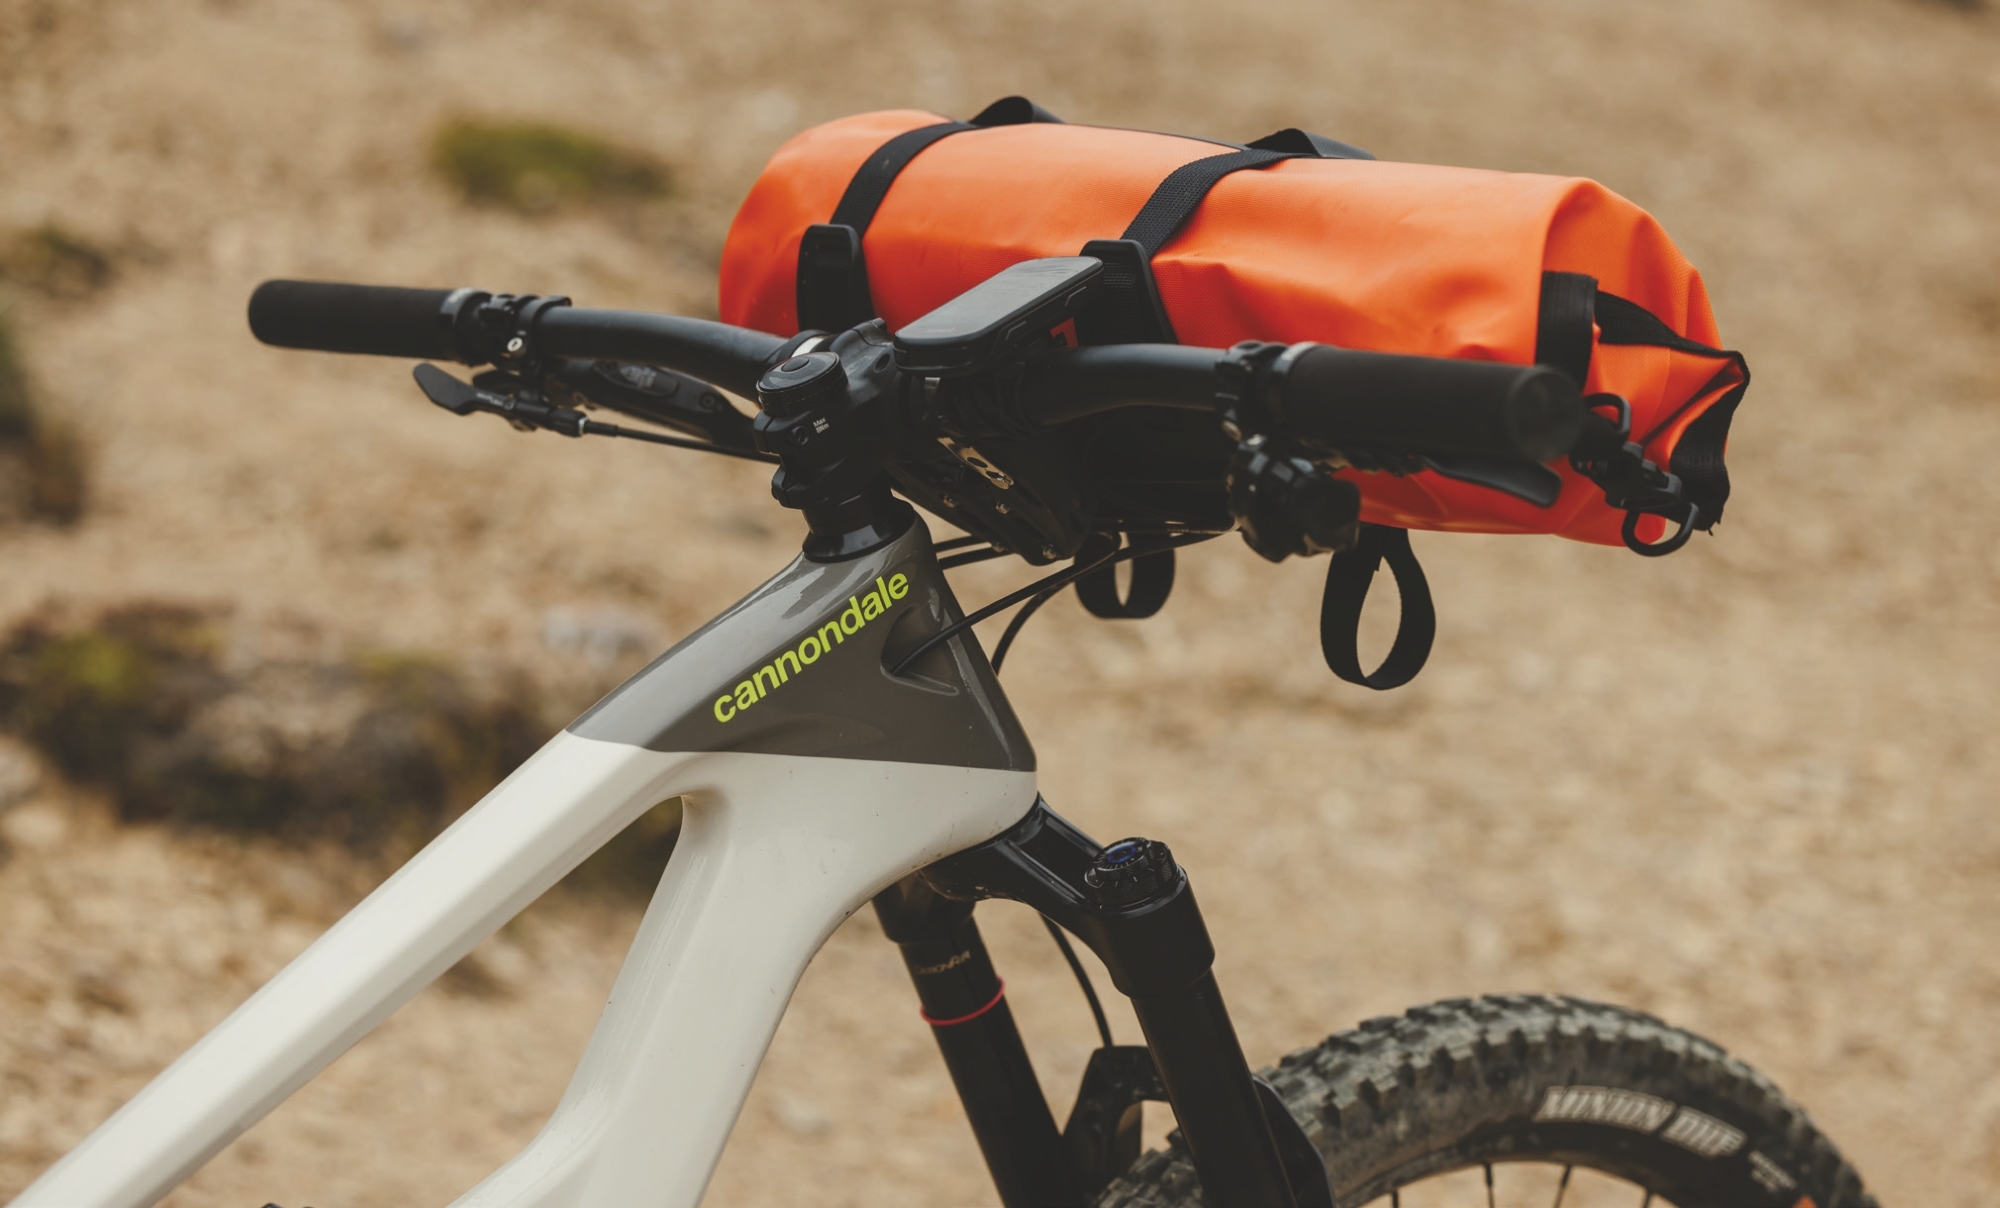
Compatible with almost any bike, the Spider Cradle was simple to fit to the handlebars. The cradle arrived ready to strap the dry bag on at right angles to the bars (ideal configuration for a fork). I wanted the bag parallel to them so, after a quick disassembly to get the configuration right, I attached the two straps, one on either side of the stem, and tightened up the two 5mm bolts – a quick and stress-free process. There are loads of adjustments on offer, so regardless of the diameter or shape of your handlebars, the cradle should be compatible, even if the handlebar or fork is not completely round. The ease of installation and removal makes switching between bikes or putting away after a mission a cinch.
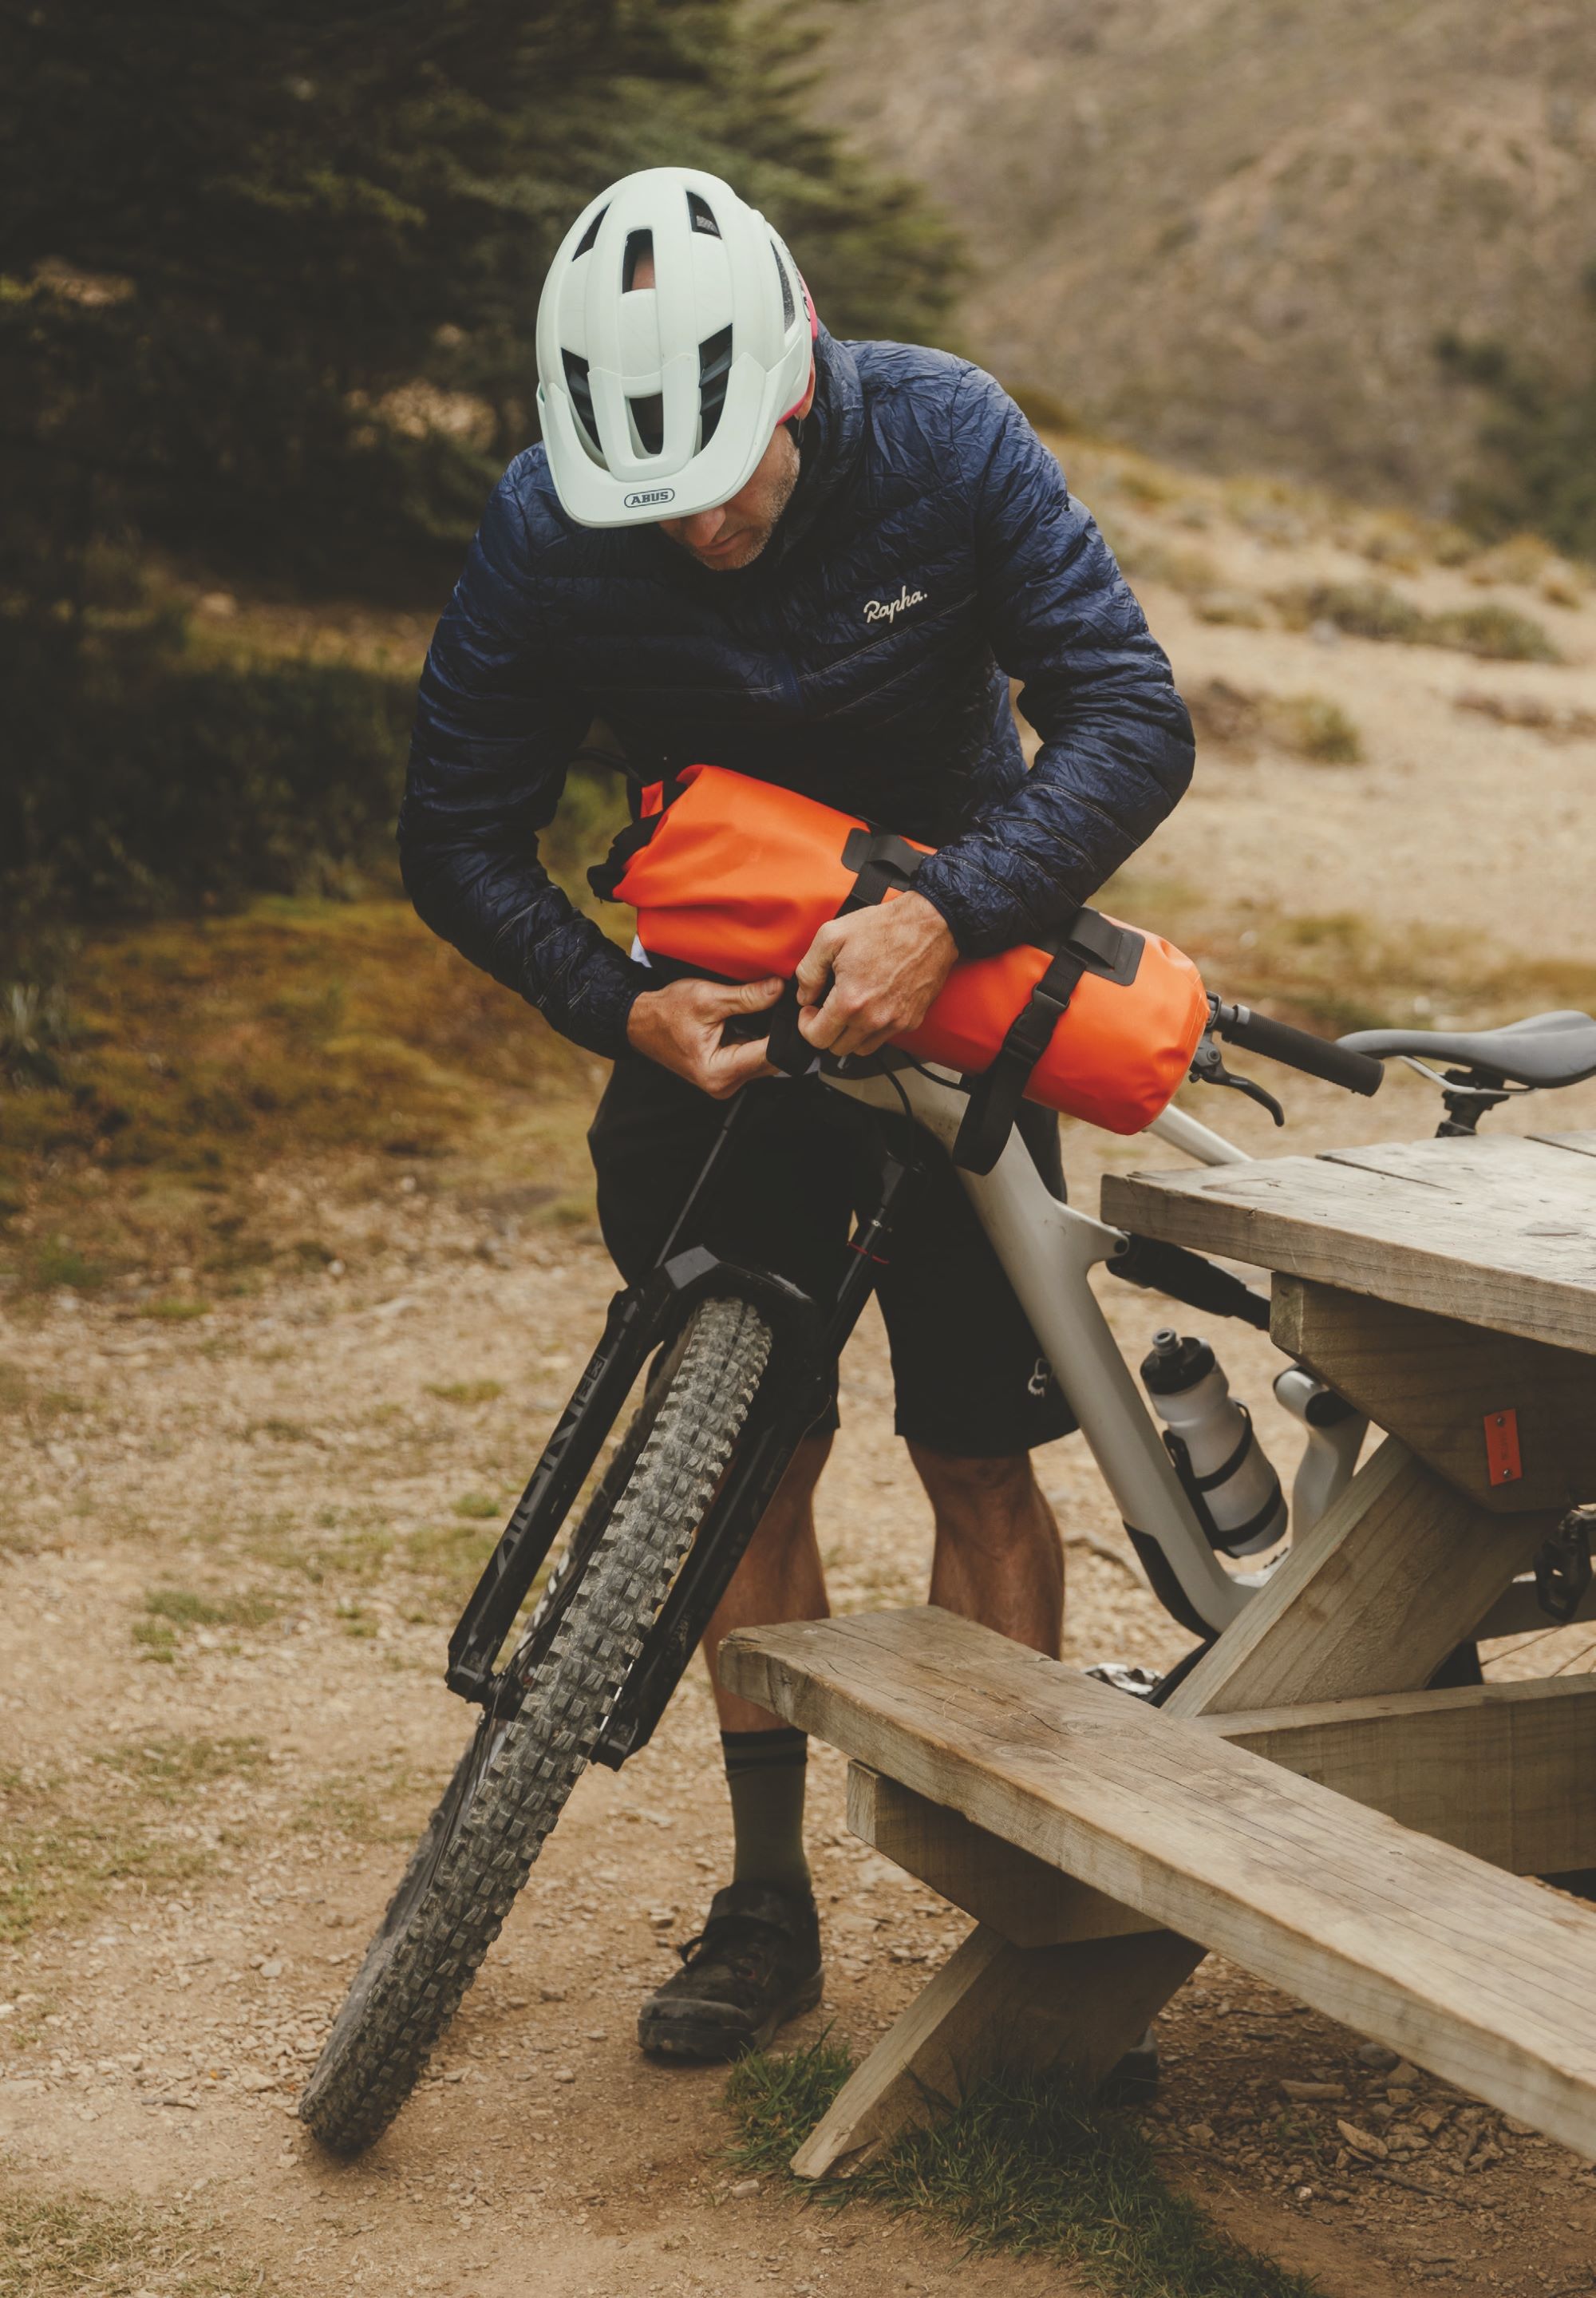
Access to the bolt heads is limited, so I’d recommend a standard L shaped Allen-key to speed up the process (although a multi-tool does the trick, but isn’t ideal). If you run a stem with a particularly wide face plate, it’s worth a quick measure-up to check the cradle will sit comfortably over it. The cradle feet barely had room to fit over Kieran’s stem – let’s just say it was an ’interference’ fit and required a bit more persuasion to fit correctly than on my marginally narrower, more regular stem.
Constructed from glass-reinforced nylon, the Spider Cradle system weighs in at 464g and can carry up to 5kg of additional load. There are two standard dry bags offered by Aeroe; the 8-litre I used, and the 12-litre used by Kieran. The sturdy bags are made with small sleeves to allow the cradle straps to be fed through them, keeping the whole load stable and secure. Any old bag could be used, but I doubt it would be as secure – or offer the same peace of mind – as the Aeroe bags. The beauty of using a roll-top dry bag is the ease of access – depending on how tightly packed it is, there’s no need to remove the bag from the cradle – just unroll the end for easy access.
After being rattled and bumped around during a solid couple of days out on the trail, the bags show very little sign of use and I can’t see them having any issues, provided they’re strapped securely; it’s doubtful the bag would ever wear out.
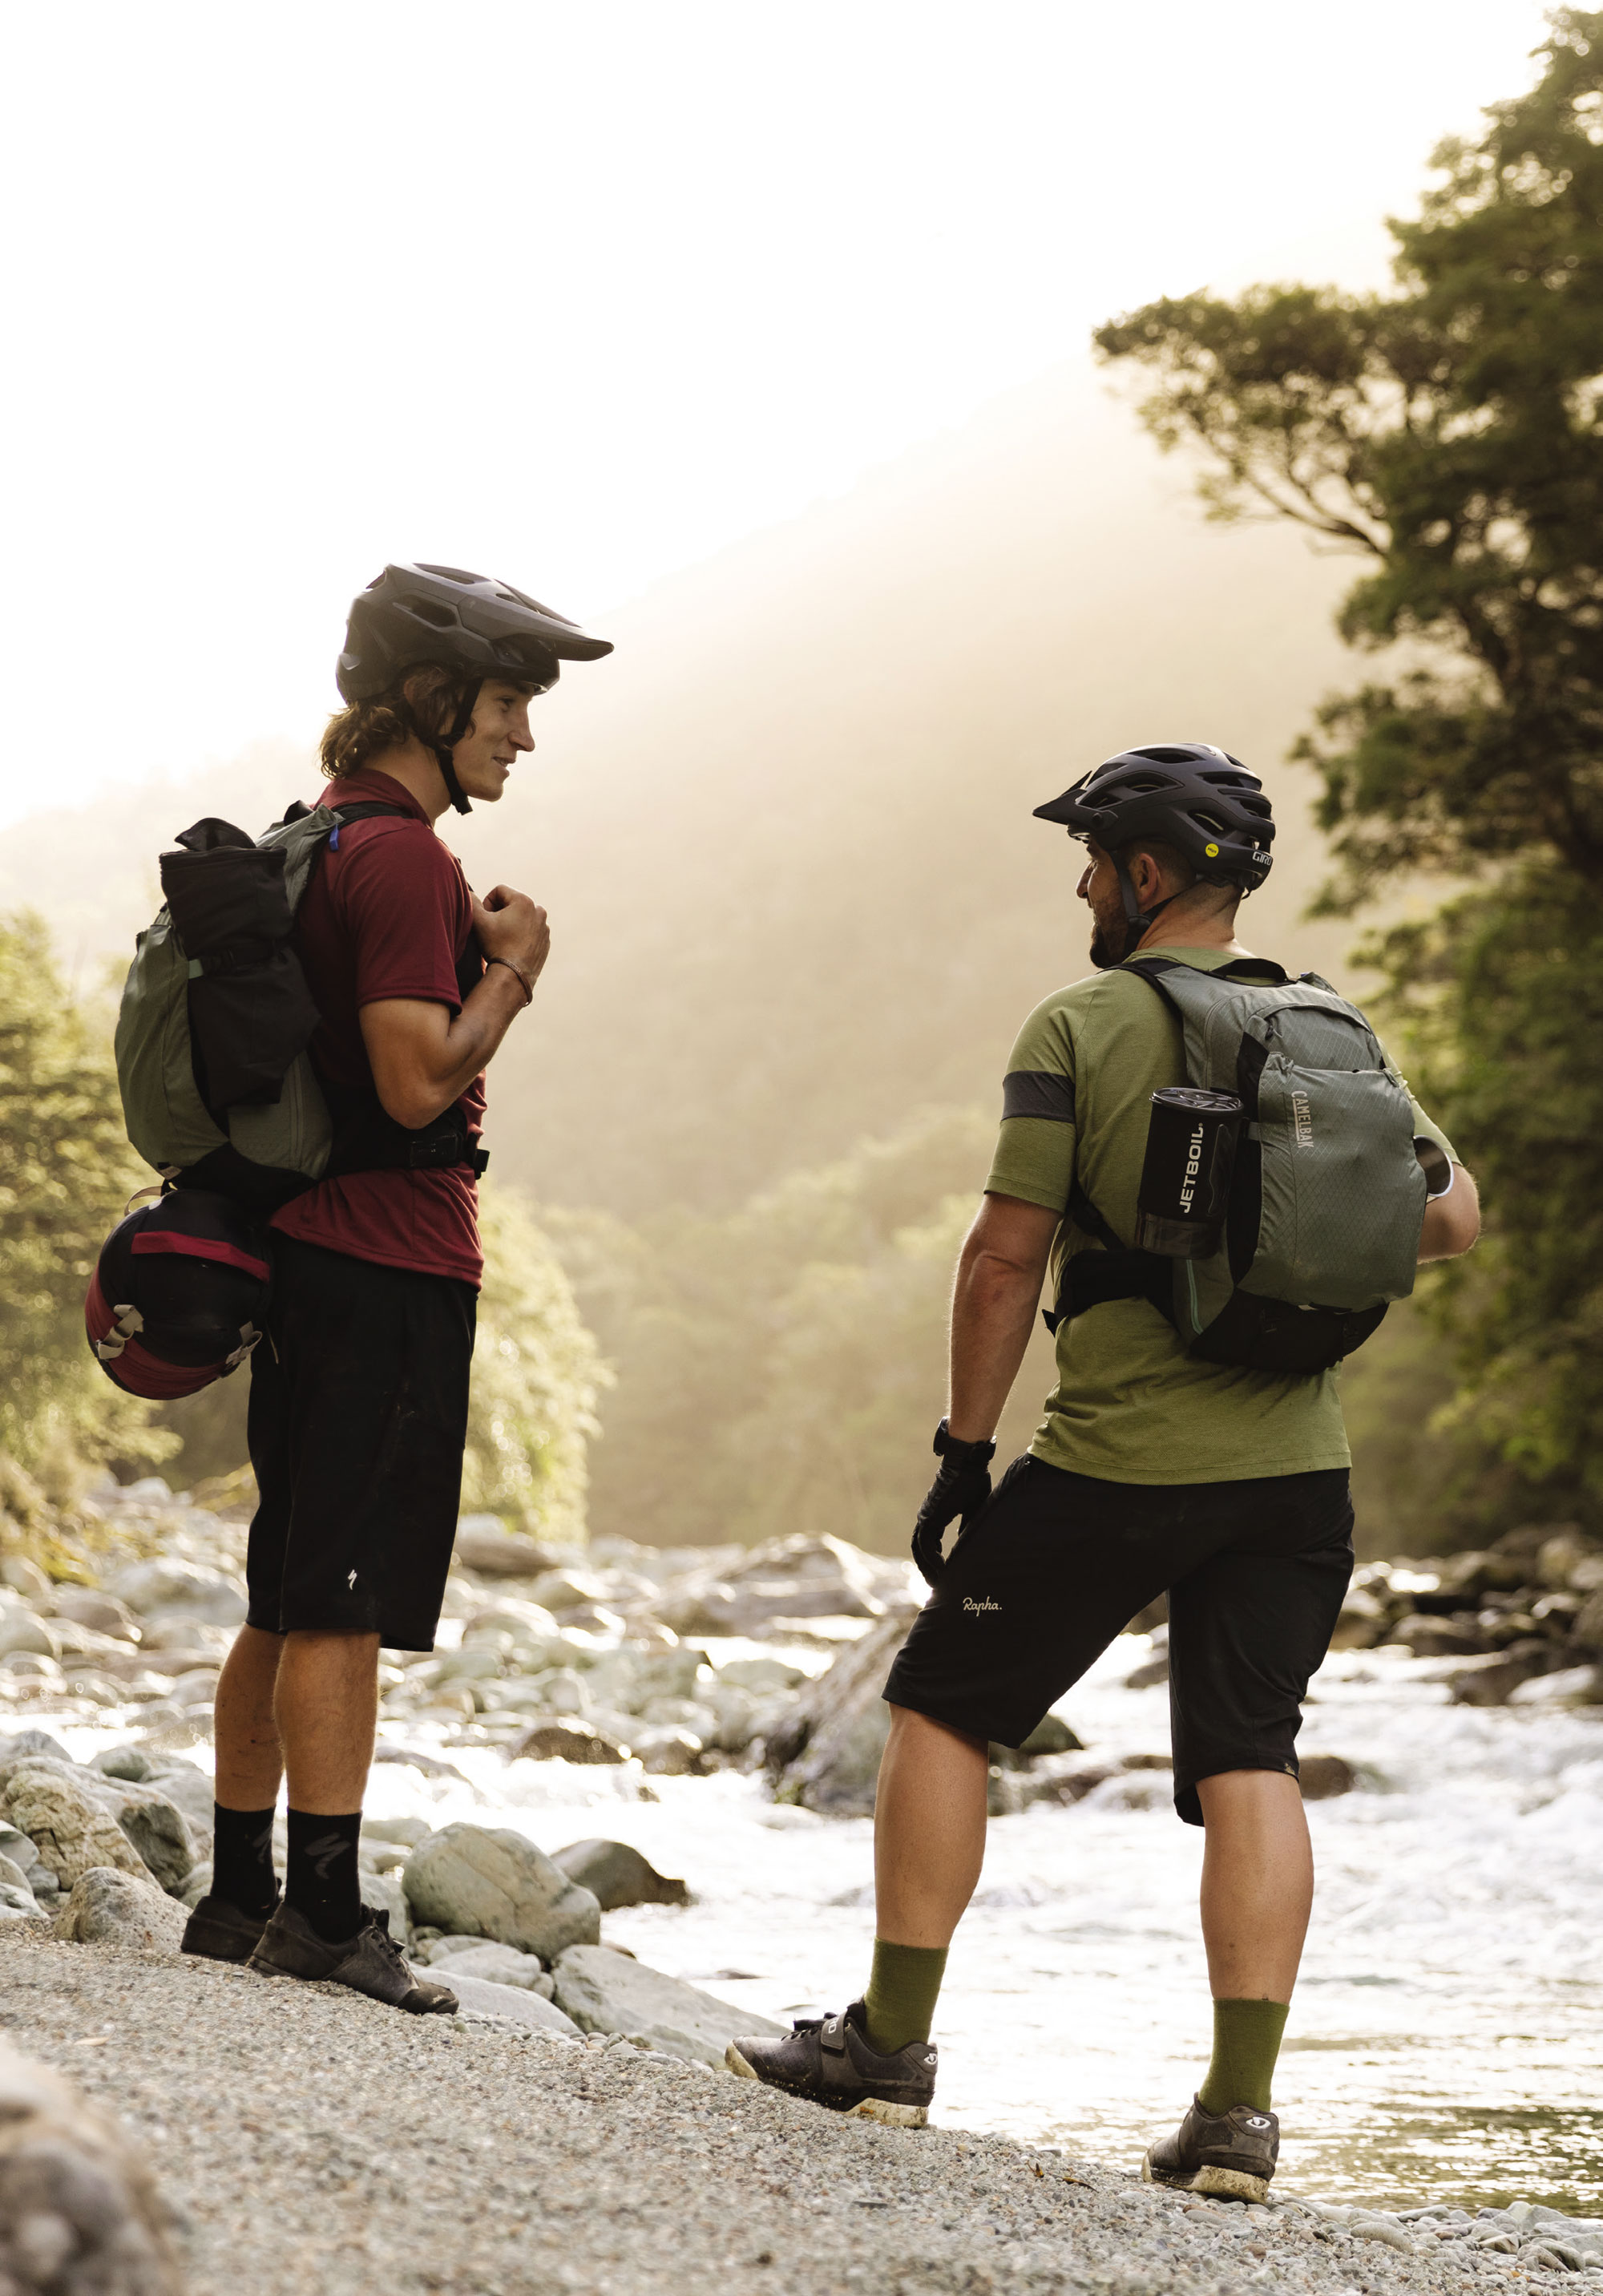
My Aeroe bag was crammed full with a bivvy bag, sleeping bag and Jetboil style cooker… no room for snacks in there! Kieran’s Aeroe bag had a sleeping bag, sleeping mat, and large jacket – with room for more. To keep our bikes as light as possible – and knowing we were in for a lot of hike-a-bike – we put the remainder of our gear into CamelBak packs. Our setup worked well, and I think we could have scraped through two nights away with no resupply of food given how light we were travelling. Any more nights and we would have needed additional space for food, maybe using the Rear Spider Rack and an additional bag just for food and snacks.
Some gear just works like it should and it’s obvious the designers have thought through multiple different scenarios, solved problems and answered questions.
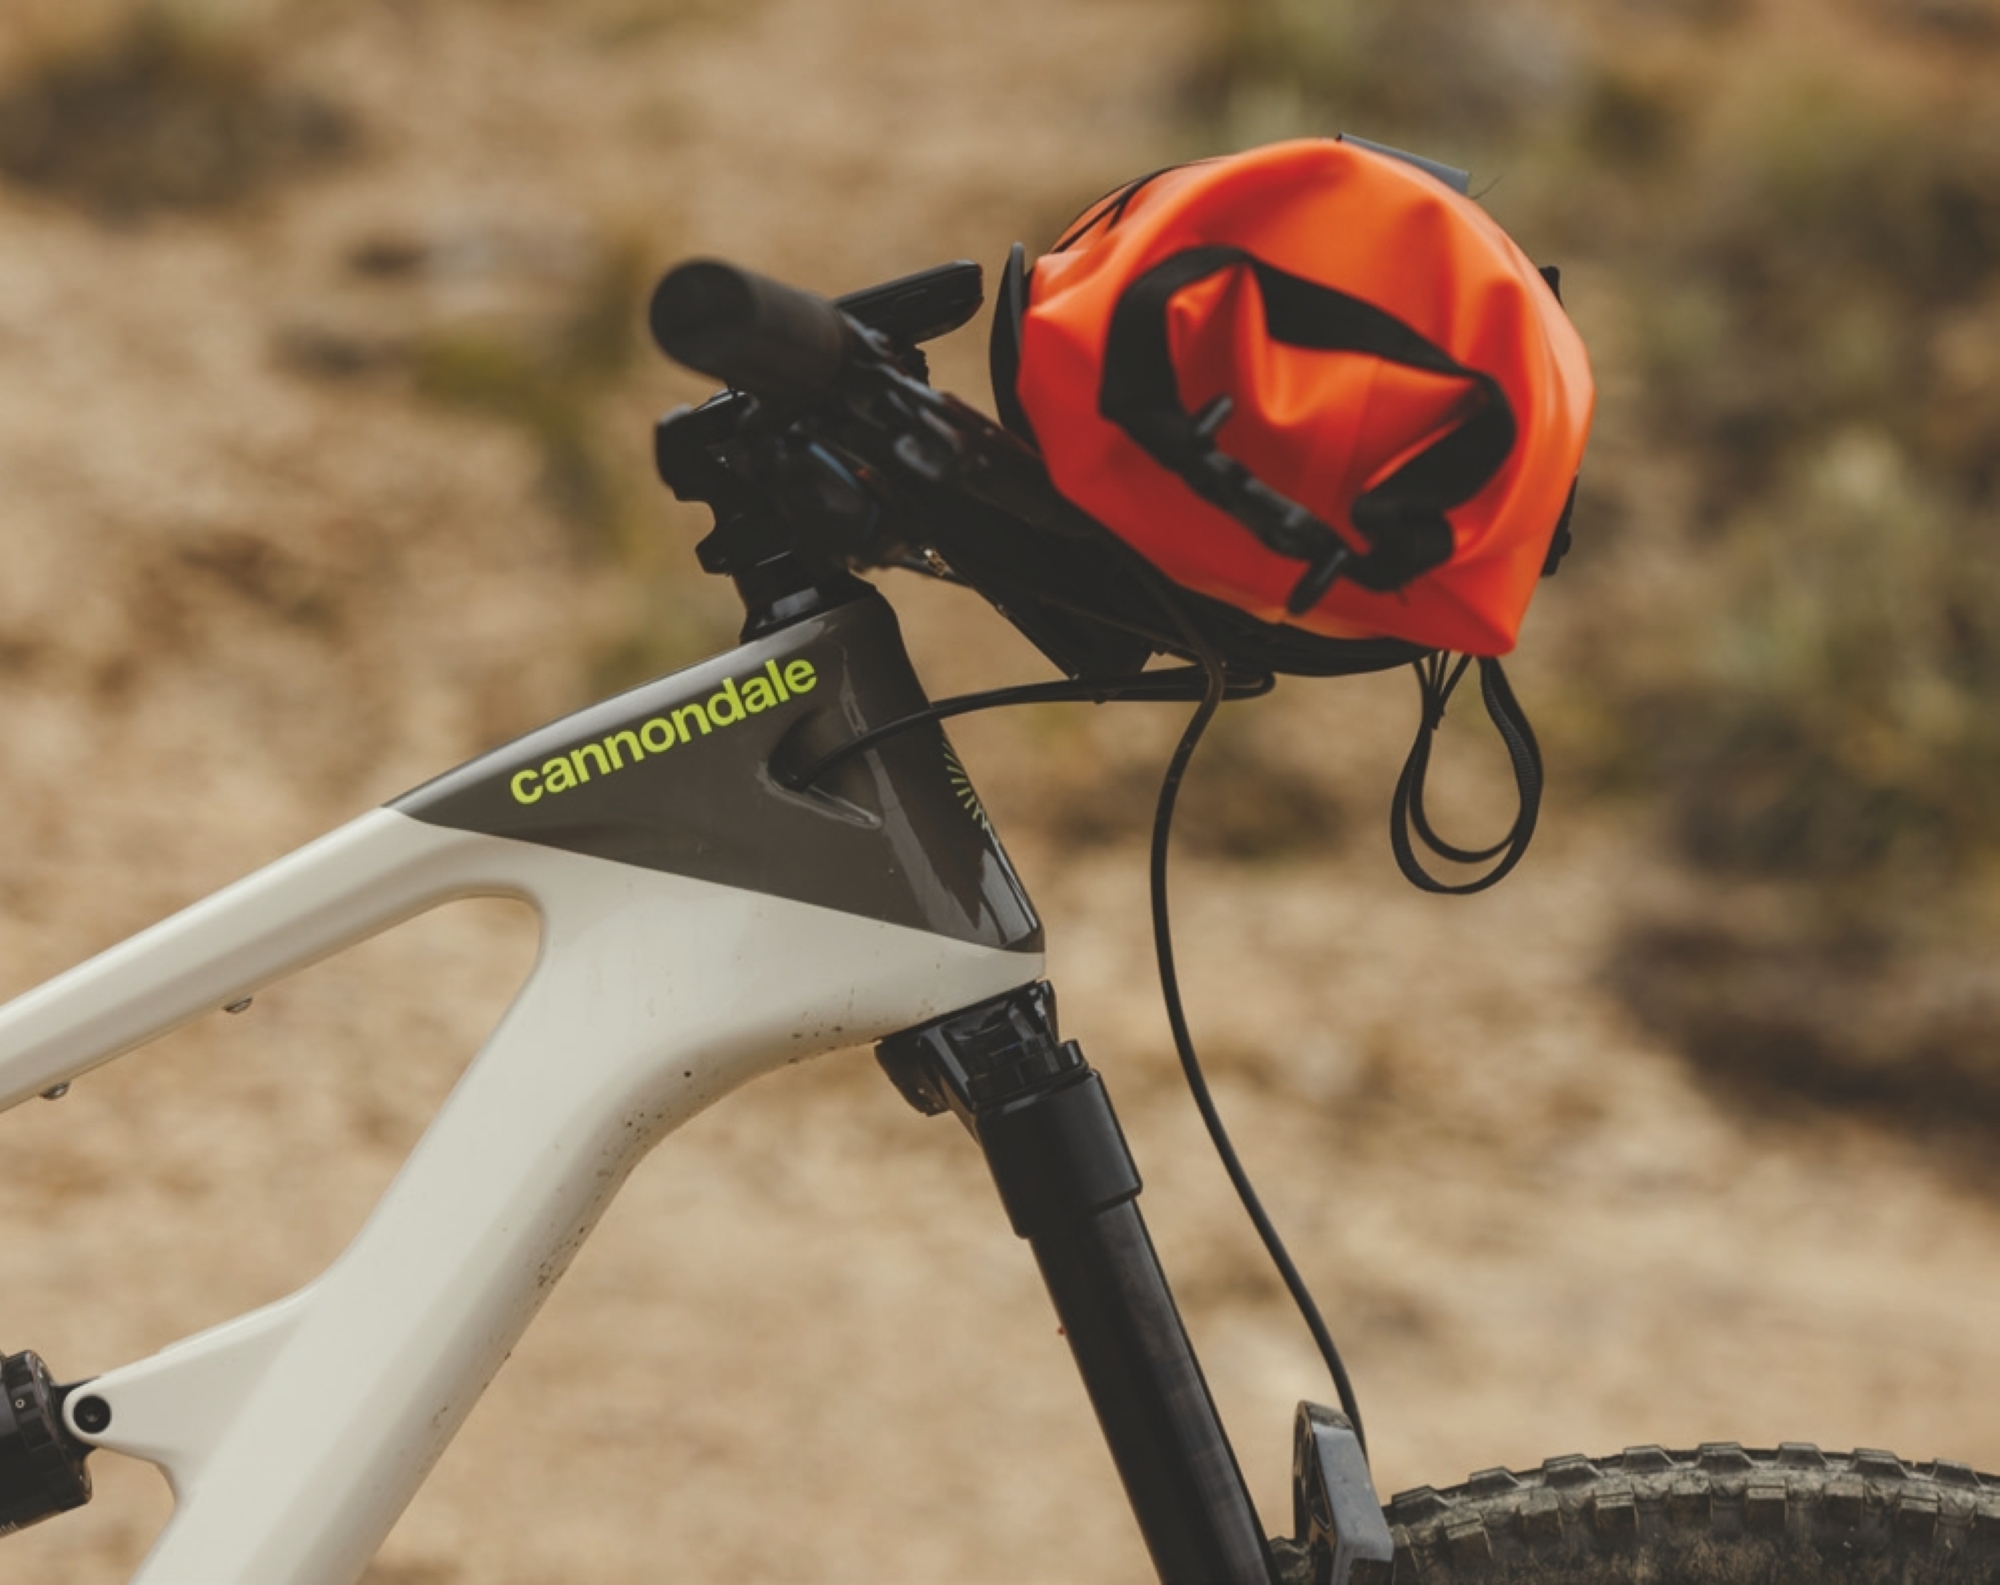
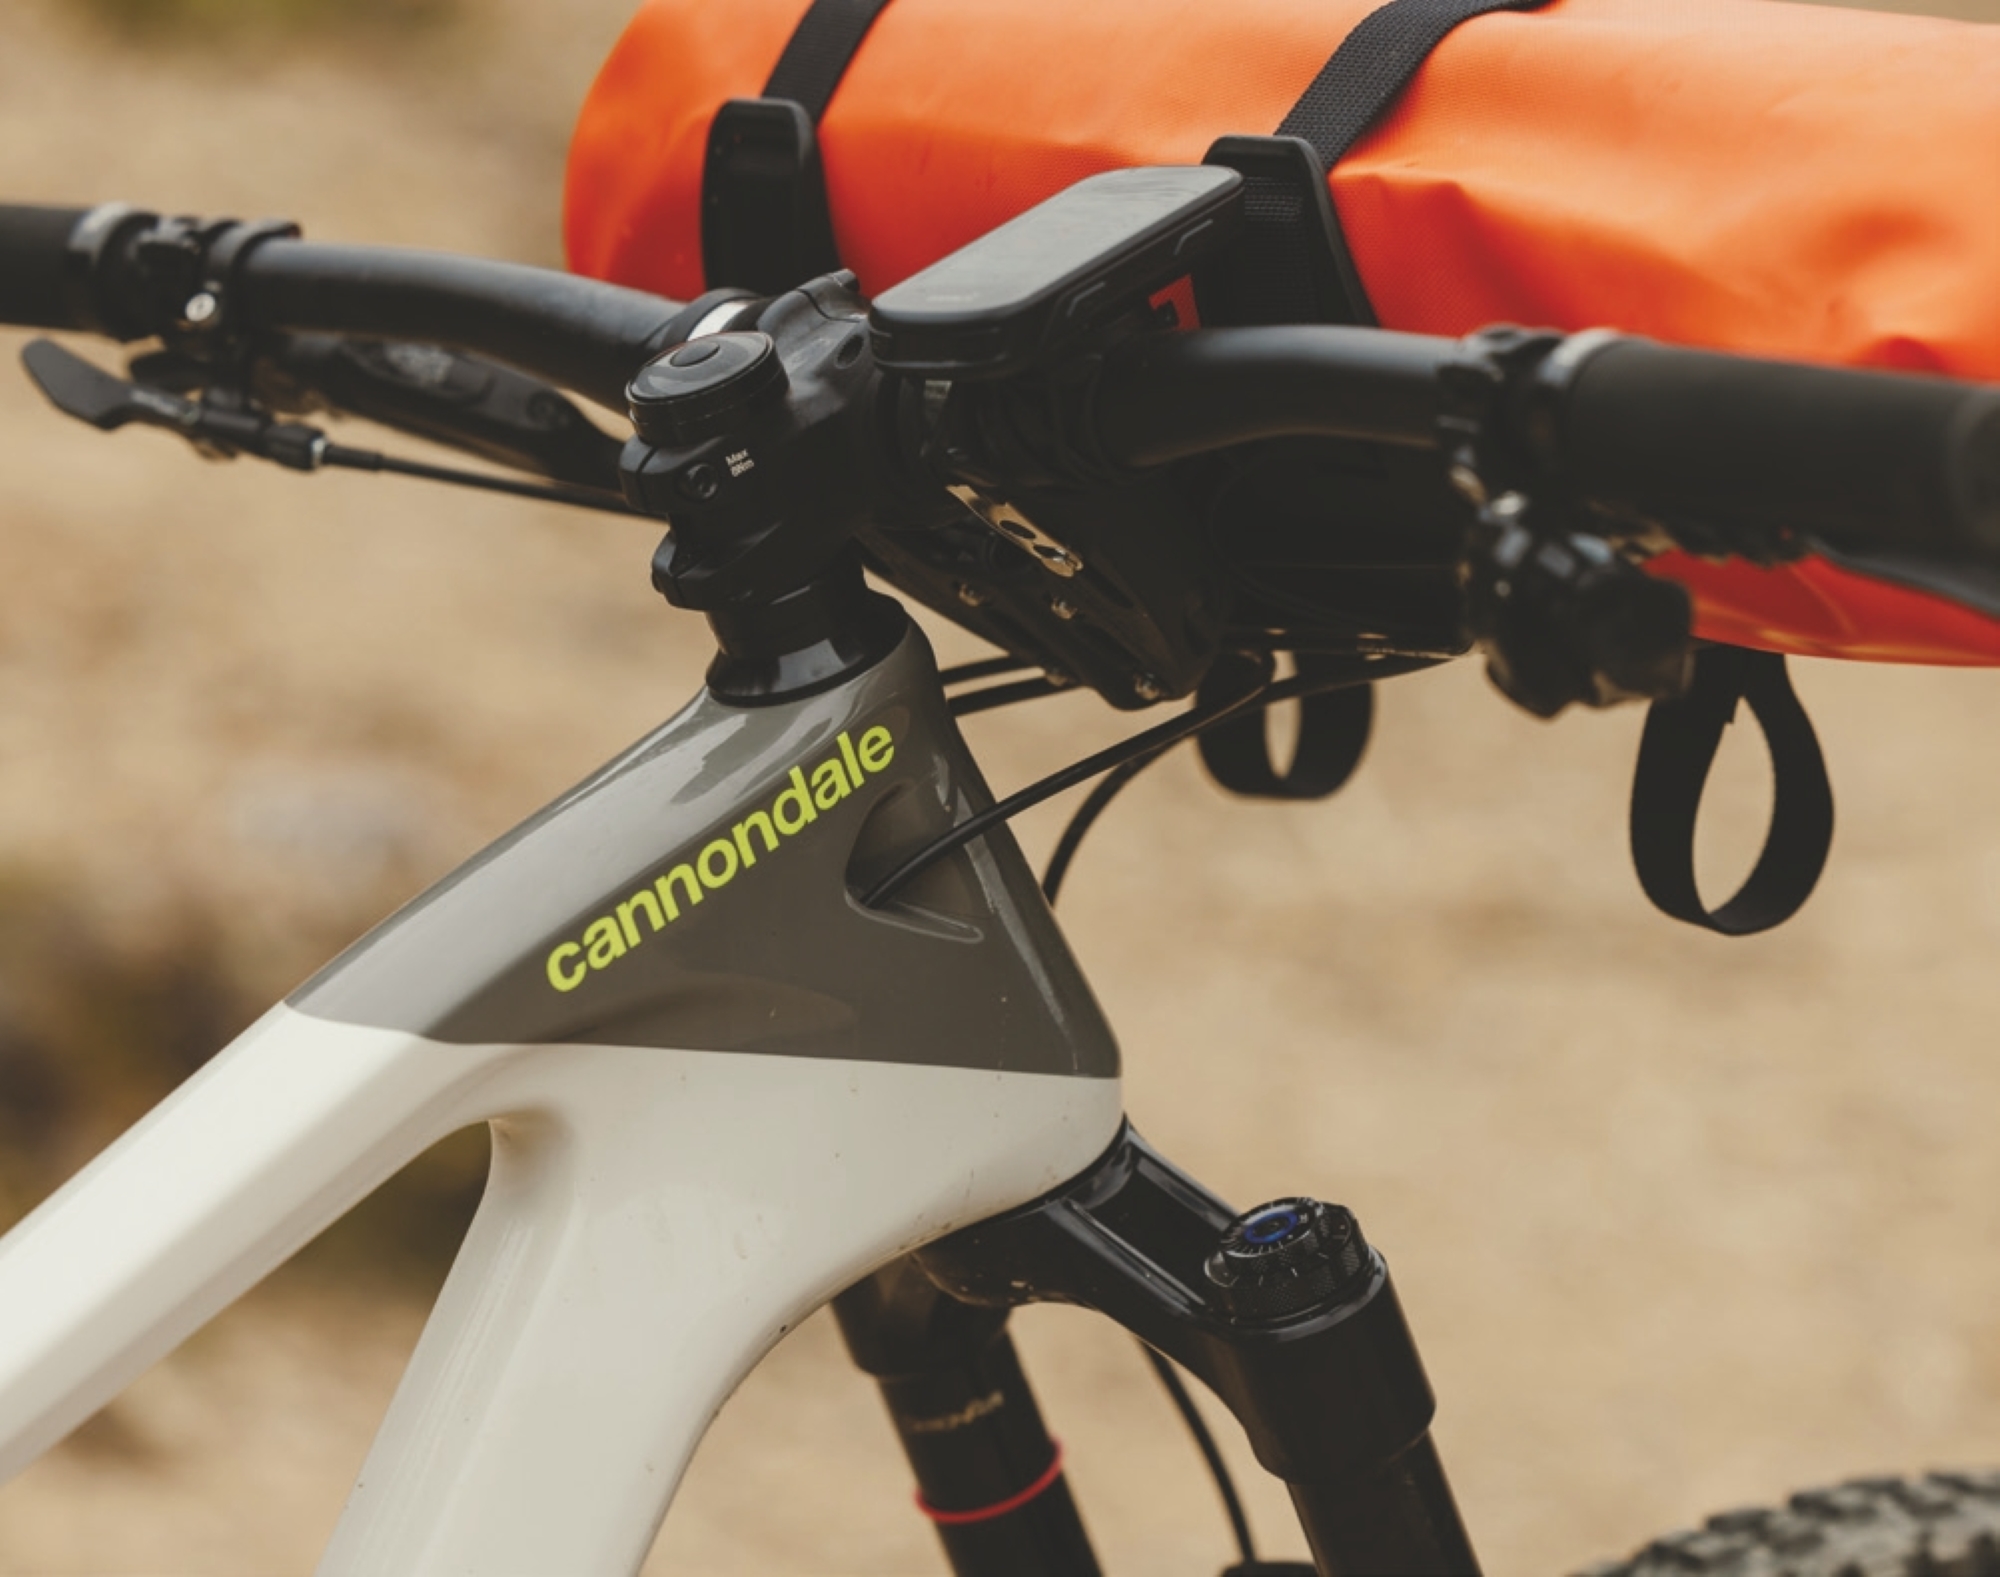
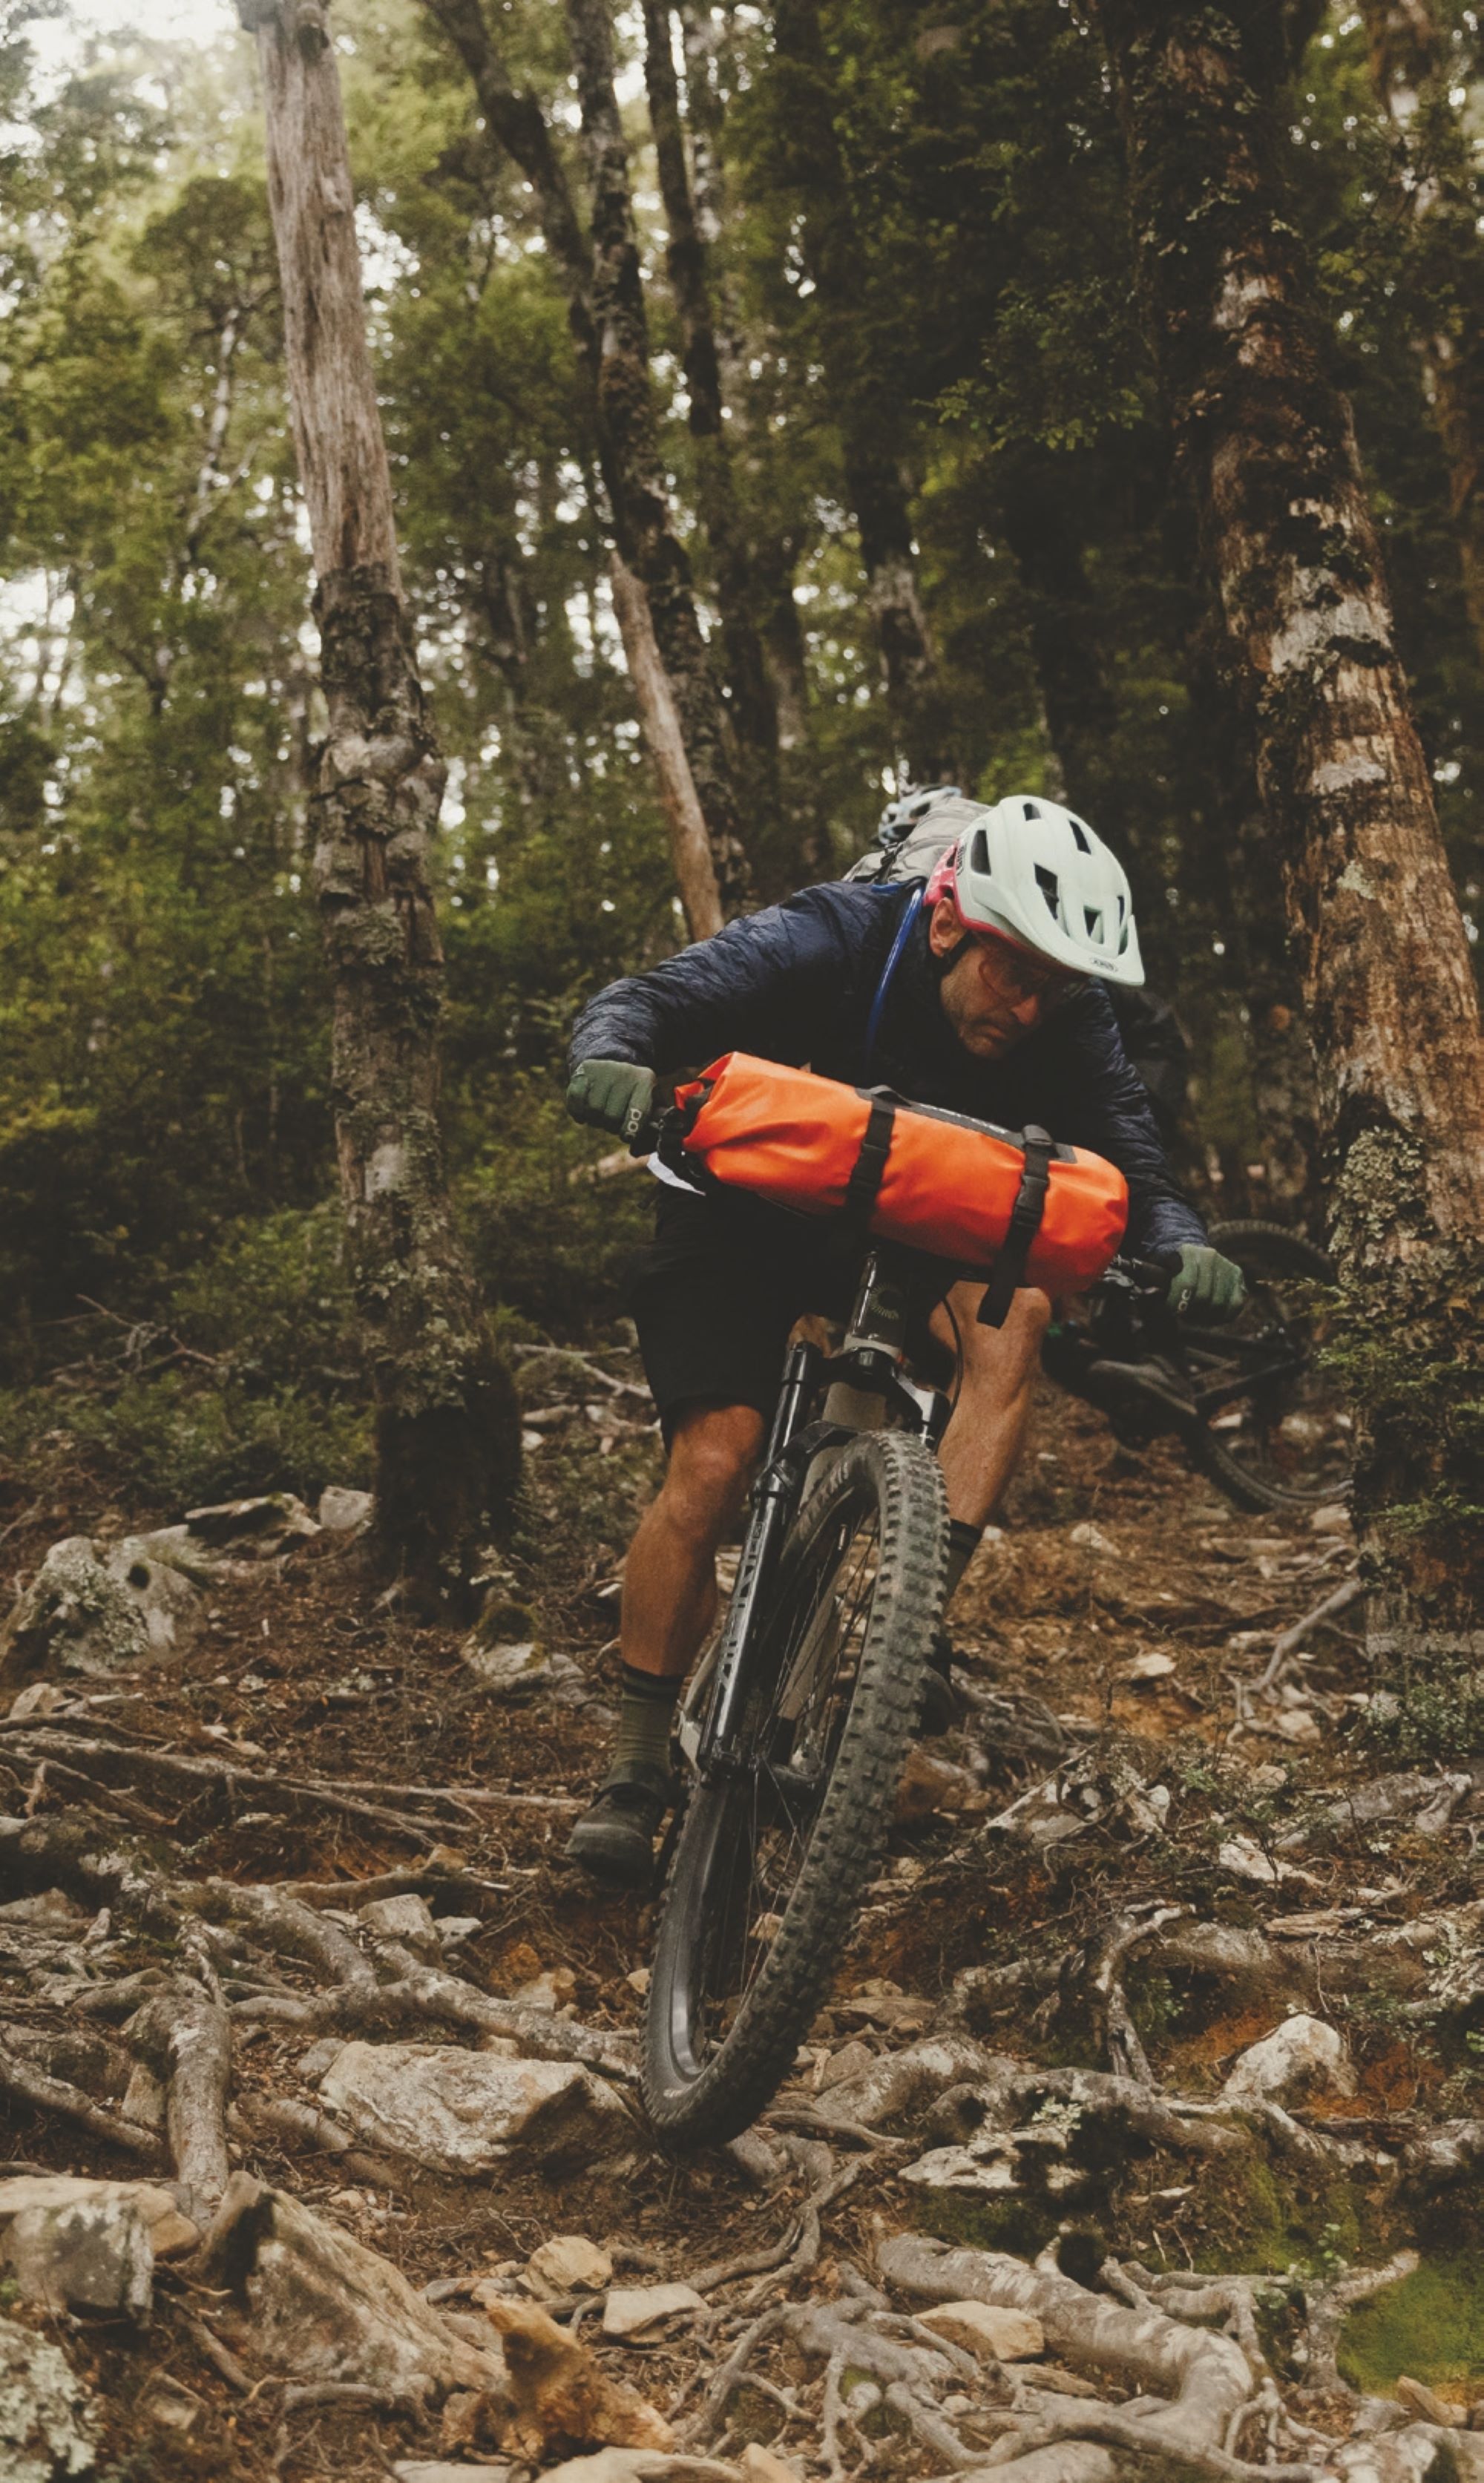
I was pleasantly surprised at how solid the cradle was, even under some heavy impacts, stutter bumps and cased jumps – it stayed put, right where I’d attached it, with no noticeable movement or slippage.
The extra weight on the front wheel was noticeable to begin with, when cornering, but after just minutes in we’d adapted and it didn’t detract from the ride – until we tried to lift our bikes onto our backs for a hike-a-bike for the 20th time! So much additional weight on the front wheel made jumps feel a bit weird and nose heavy. Again, we adapted to the feeling, but it was still noticeable. What was amazing was how much extra front wheel traction the weight gave us – so confidence-inspiring and not something we expected at all!
I haven’t tried the Spider Cradle on a drop bar bike yet, but would assume it will work fine, although depending on how cables are routed; they may foul with the cradle mounting straps, but only time will tell.
Some gear just works like it should and it’s obvious the designers have thought through multiple different scenarios, solved problems and answered questions. The Aeroe Spider Cradle is one such item; I can’t fault it, it does what it says on the tin and stands up to some abuse. I’d recommend this setup for anyone looking to cart gear on their bike, particularly if you’re riding technical MTB trails – I’d be surprised if other systems would be quite as solid. I can’t wait to take the setup out on some more missions!
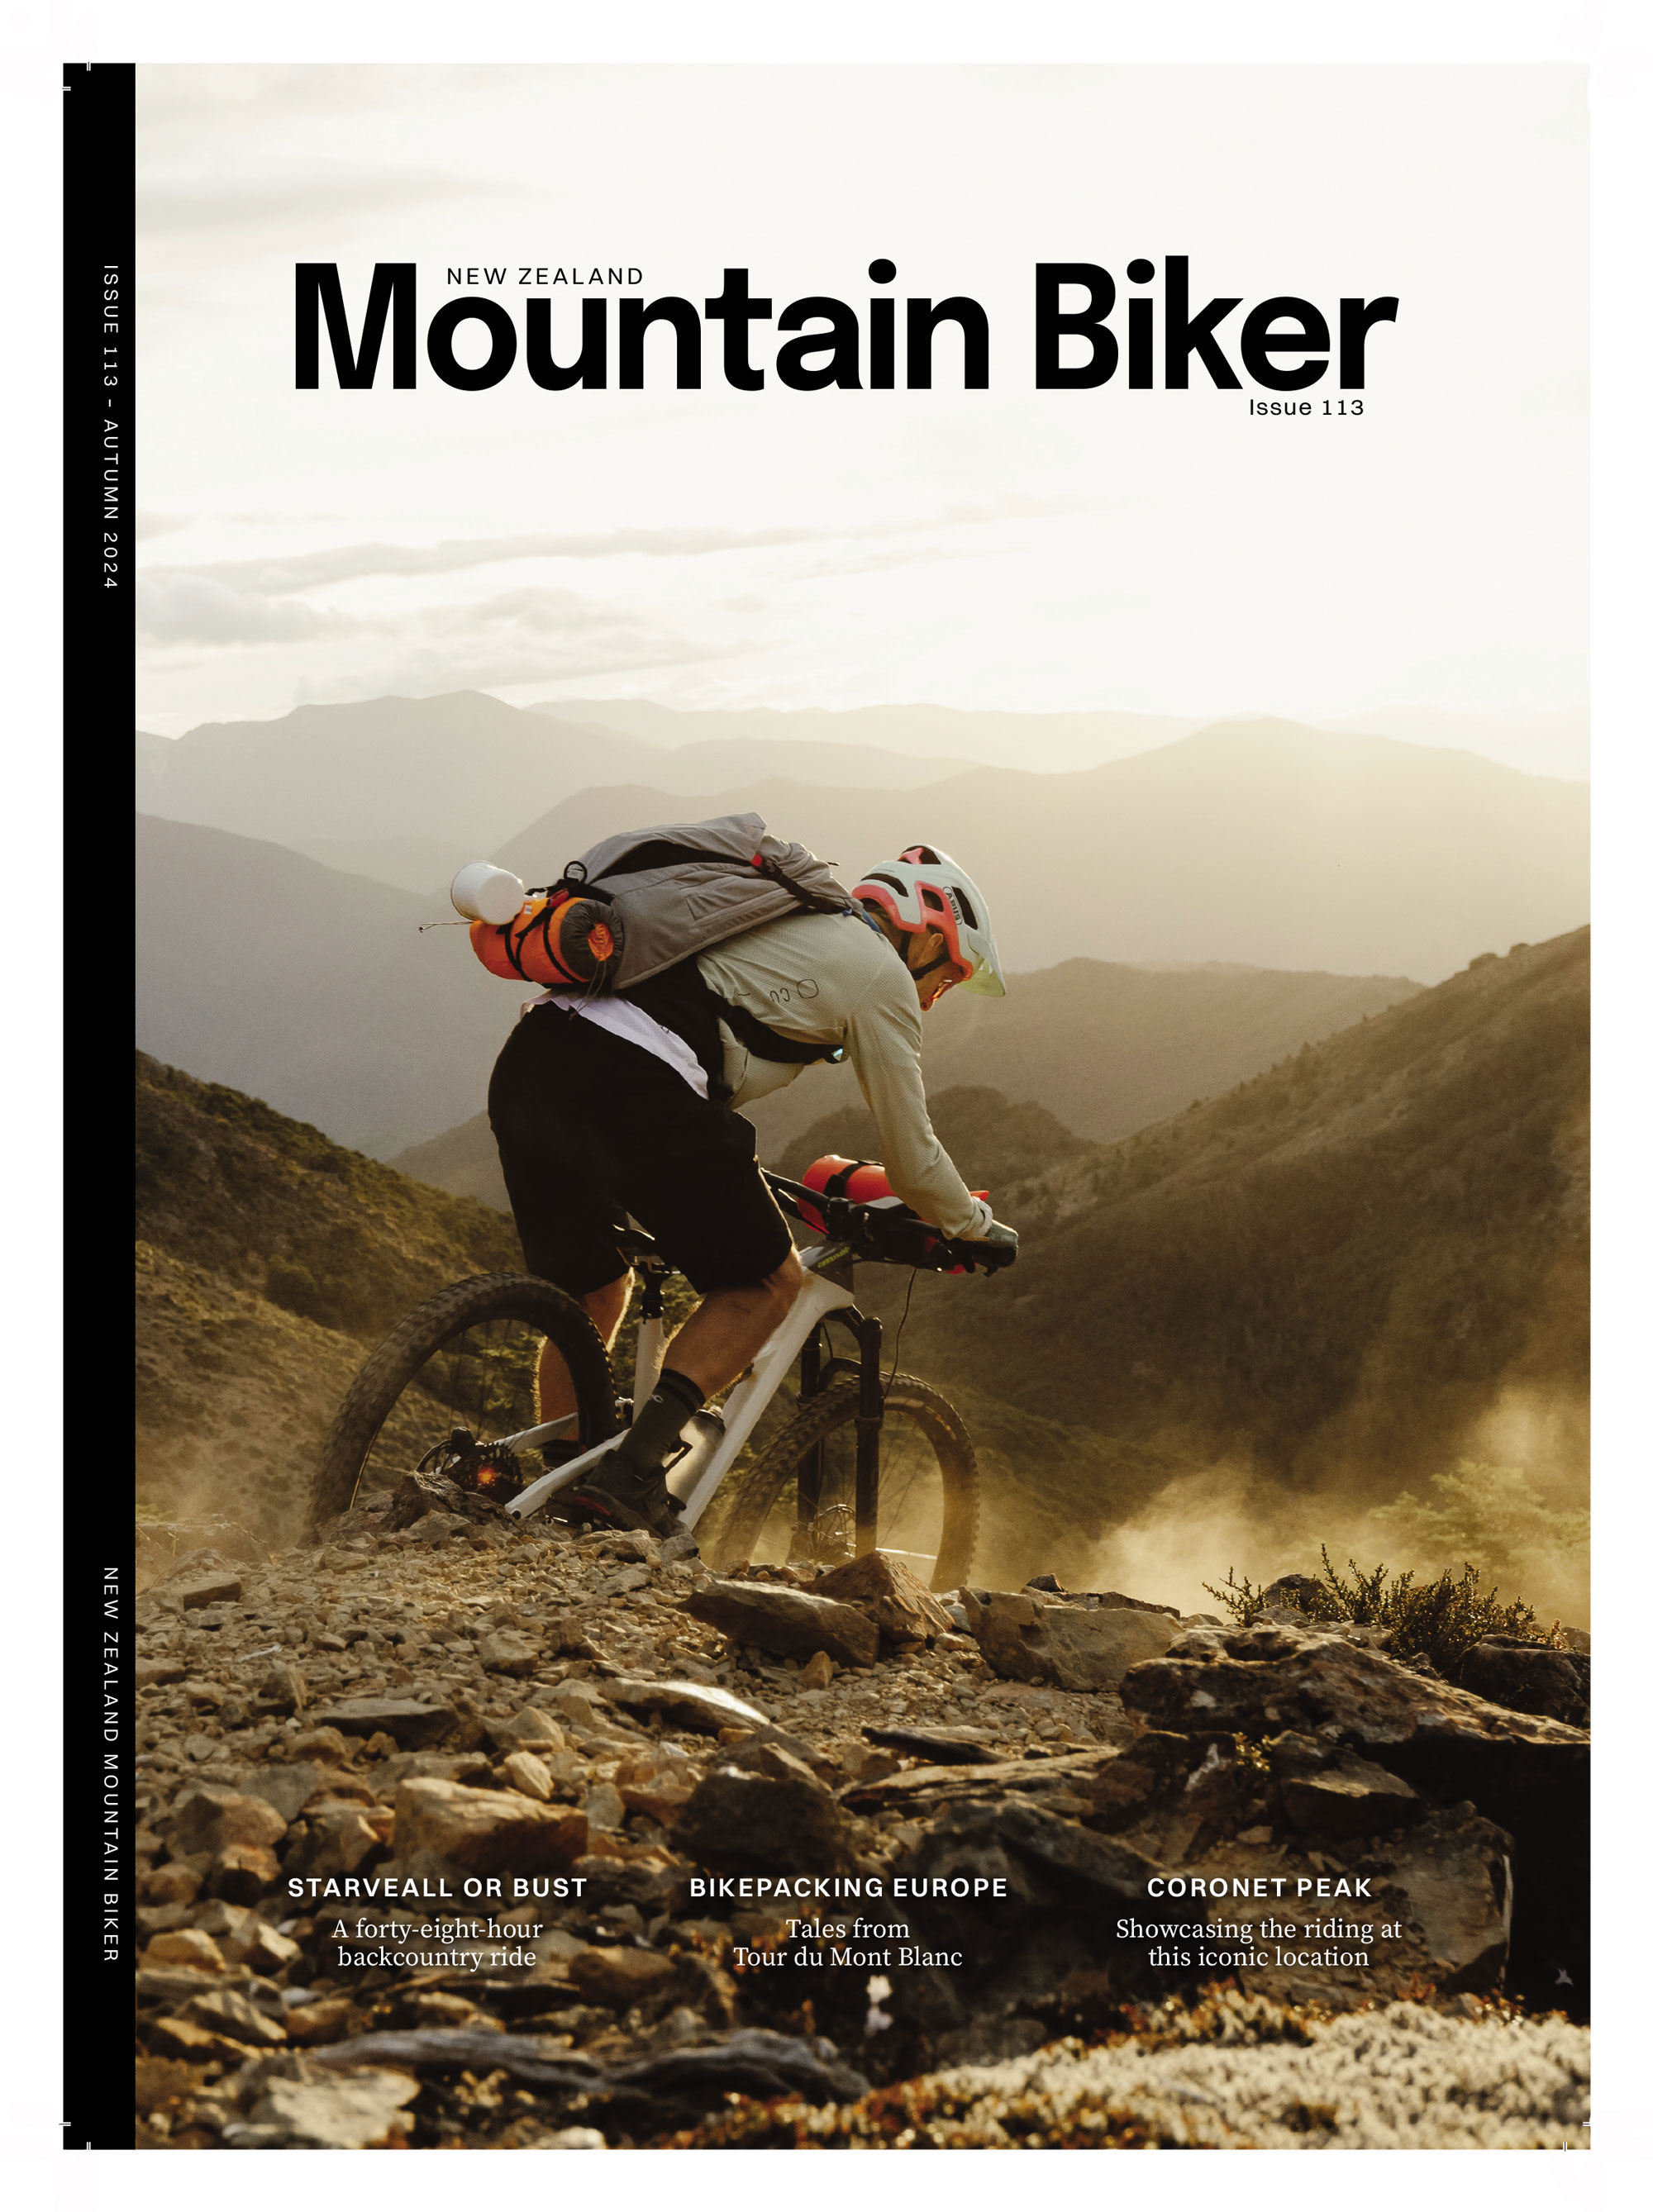
Starveall or bust
Words by Lester Perry
Images by Henry Jaine
WHILE ON A PREVIOUS TRIP, NELSON LOCAL, KIERAN BENNETT, AND I HAD DISCUSSED THE CHALLENGE OF DOING MULTI-DAY MISSIONS, OR SIMPLY EVEN SOLO OVERNIGHT TRIPS, WHILE JUGGLING WORK AND FAMILY COMMITMENTS. LET ALONE TRYING TO LINE OUR CALENDARS UP TO DO THEM WITH SOMEONE ELSE WHO WAS LIKELY IN THE SAME BOAT. SINGLE- DAY RIDES WERE GREAT, BUT REGARDLESS OF HOW EPIC THEY ARE – OR AREN’T – AN OVERNIGHTER HAS A CERTAIN ALLURE. WE TOSSED AROUND THE IDEA OF ME ARRIVING ON AN EARLY FLIGHT, DOING A FULL-DAY RIDE FROM NELSON AIRPORT TO A DOC HUT FOR THE NIGHT, THEN DEPARTING ON A FLIGHT LATE THE FOLLOWING DAY, AS A QUICKFIRE WAY TO PULL OFF AN OVERNIGHT BACKCOUNTRY MISSION.
Chatting with Kieran, he reckoned Mt Starveall and the Starveall track could be a worthy option, but details were scarce.
I’d heard rumours of people riding Mt Starveall in the past, so went on a hunt for more info. Indeed, people helicopter up to the summit and descend to the Hackett car park. Judging by the couple of aged YouTube videos I came across, it looked like a proper backcountry descent; things were looking positive. The internet offered up further details from people who had done the descent after accessing the trail from deeper in the Richmond Range, although only one blog post gave confirmation that people had actually clambered their way up the Starveall track before descending back down. Without a heli drop, an ascent on Starveall sounded like it may turn into some sort of twisted cross-fit style bike-carrying mission. But there was only one way to be sure: to physically take it on.
Dates were locked in, flights booked, and the route confirmed – there was no bailing out now. Late January, I spied a Strava ride from a friend; a heli drop from the top of Starveall. A few messages backwards and forwards confirmed it was a worthy trip, but also that we were deranged to be considering the hike-a-bike to the top.
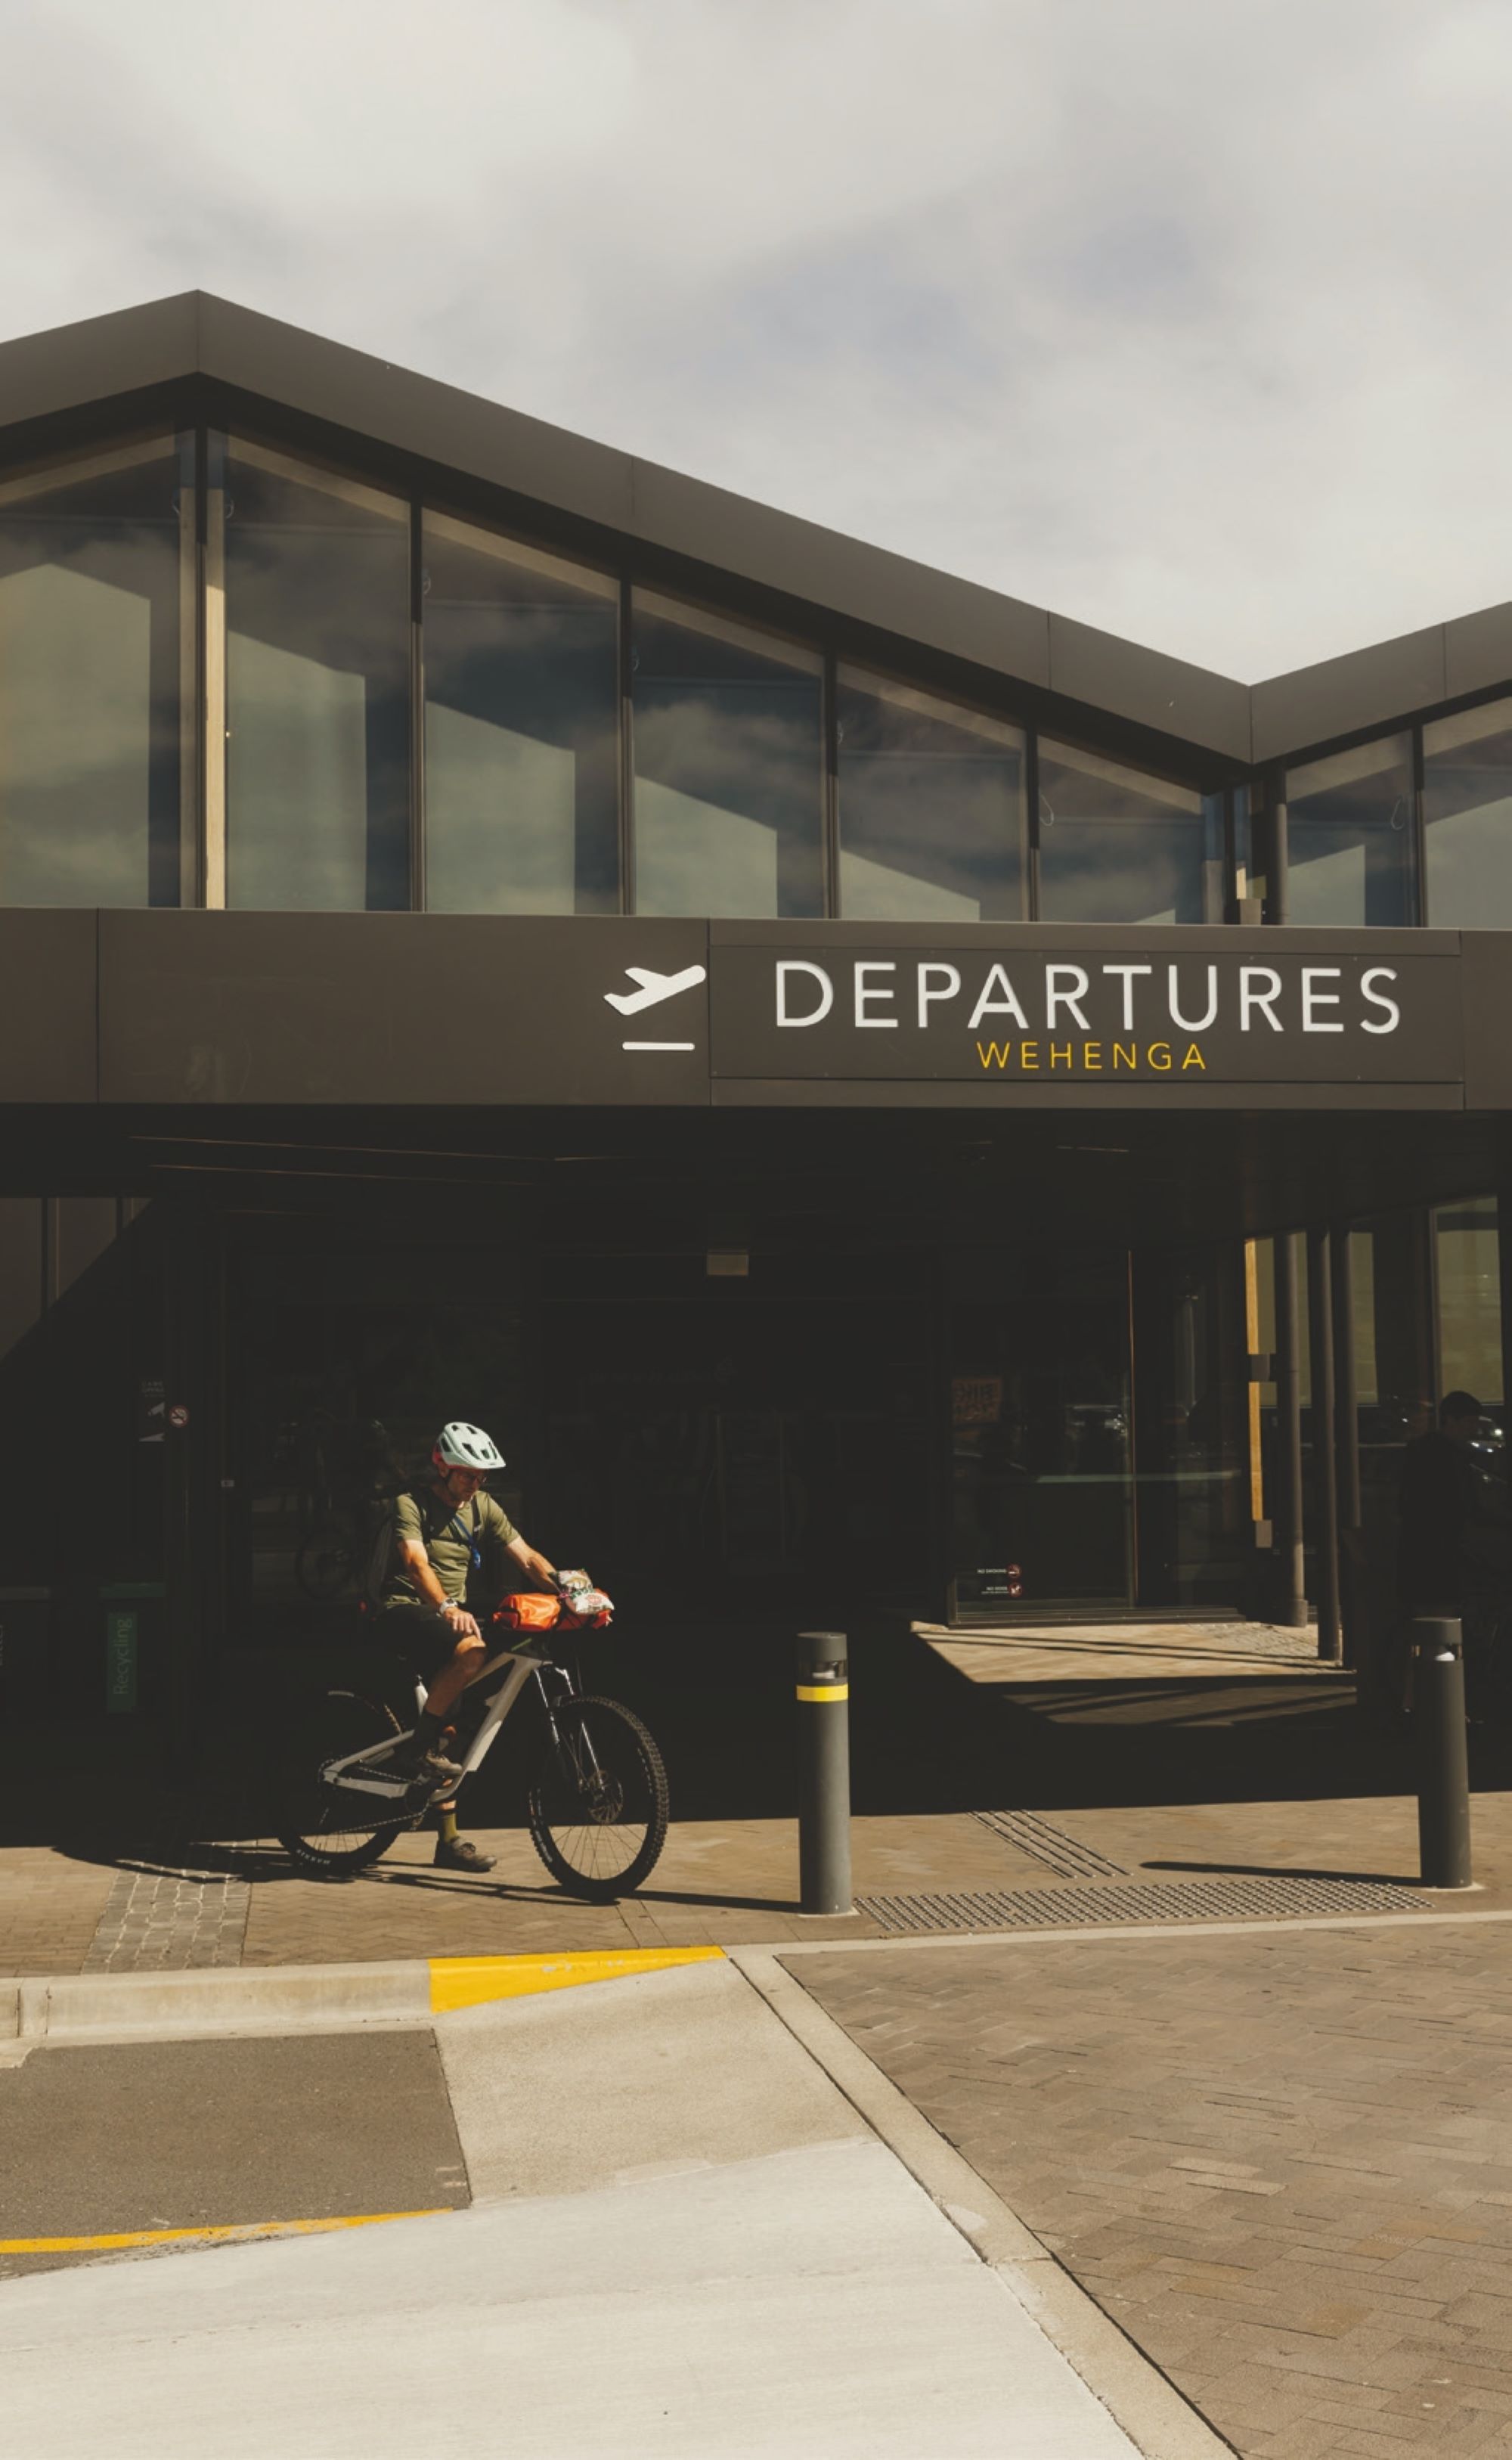
Four-twenty in the morning is not a fun time to be woken for any reason, but needs must. By 4:30am I was dressed and had prepared a bottle of hydration mix and a quad shot of strong espresso to get me through the nearly two-hour drive to Auckland Airport. How ridiculous is it that it’s cheaper by a few hundred dollars – and almost quicker! – to drive nearly two hours, pay for gas and parking, and fly to Nelson from Auckland, than from my local Hamilton airport?! An overcooked breakfast muffin and a flat white; the obligatory Cookie Time and black coffee onboard, and after spinning for an hour and a half, the ATR 72’s props came to a shuddering stop outside the Nelson terminal.
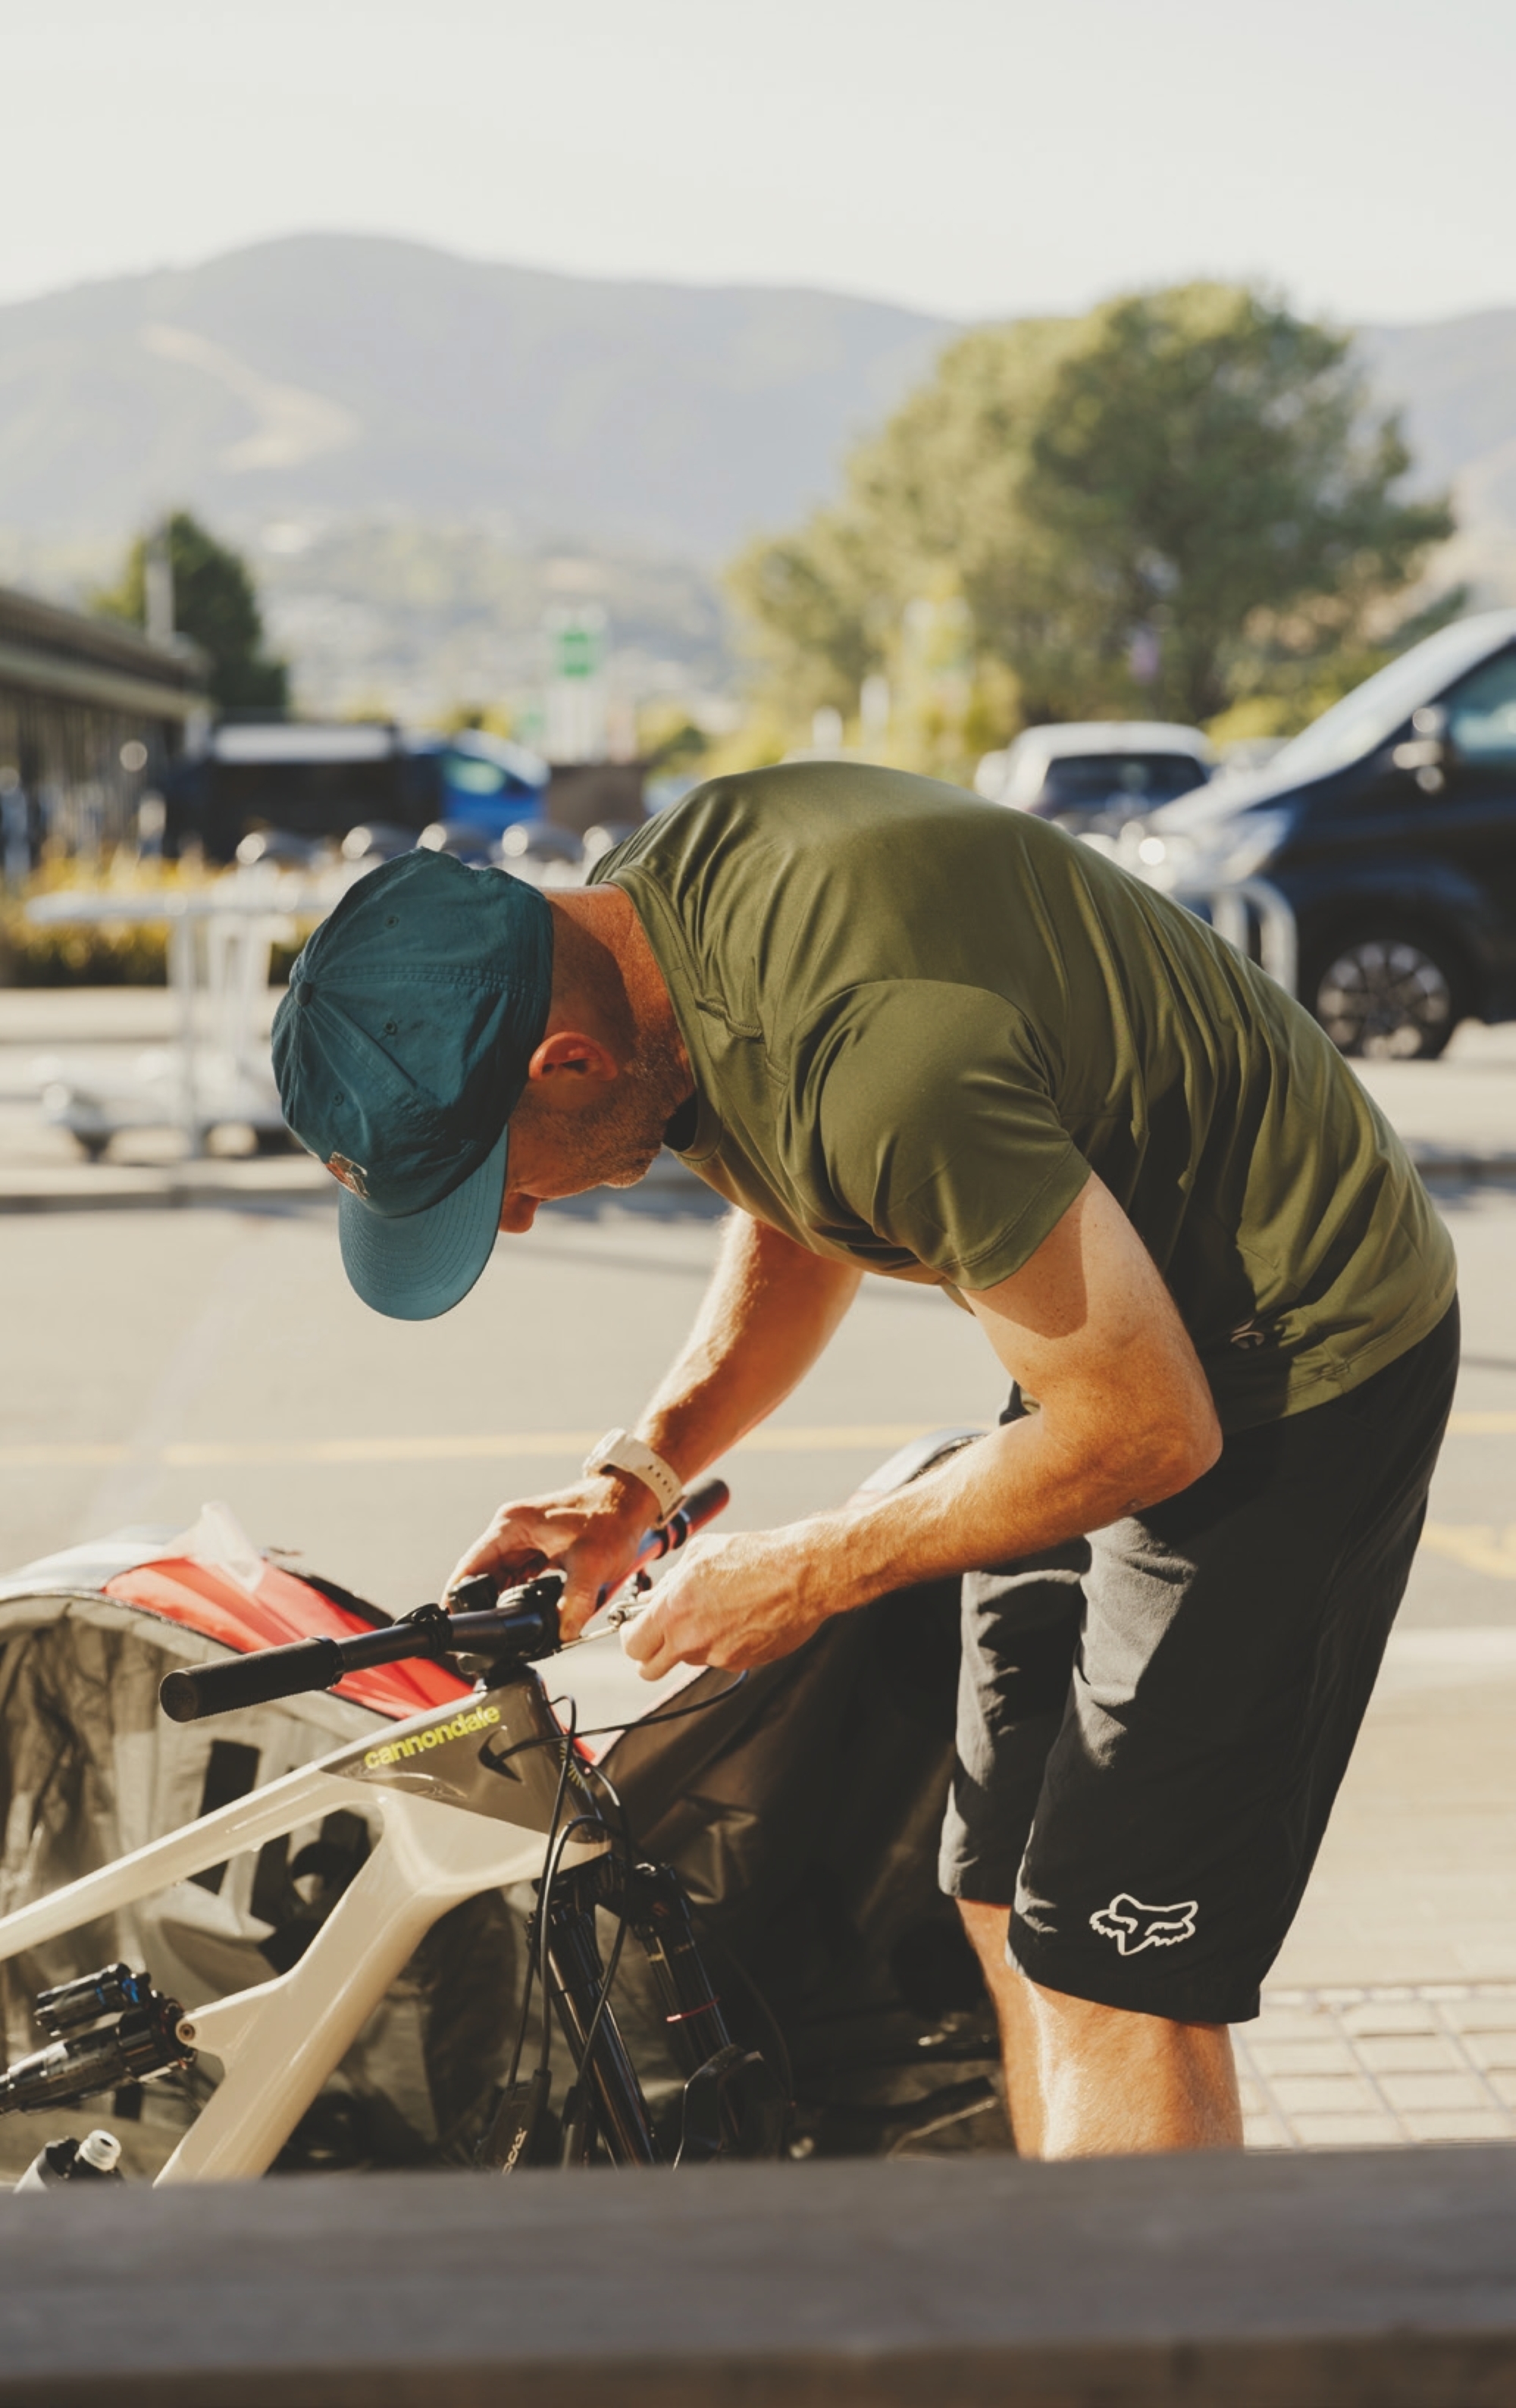
With Kieran Bennett laying the initial foundation for my route, it was only fitting that he came along; stupid ideas are best shared with friends and if it all went bad then I had someone to share the blame with. After a few minutes of spinning Allen keys, my bike was assembled. Once again, I attempted to whittle down my gear for the trip; necessities and nice-to-haves. Space was tight and we wanted to travel light. I stuffed what I could into a handlebar-mounted Aeroe drybag, filled every nook and cranny of a CamelBak HAWG Pro backpack with the remaining gear, and we were good to go.
By 10:30 am we were ready to roll, but first; coffee and a butane canister. Butane for cooking, nothing nefarious. A quick stop at Bunnings ticked the final boxes on the admin list, providing the gas for the cooker and coffee for the body. It was game on. Continuing on the bike path, we began the mellow climb towards Silvan MTB Park. The day was warming up and the sun was out. It was here I remembered my sunscreen was still sitting at home.
Winding our way up through the forest of Silvan, our chat was flowing thick and fast. We calculated and theorised how long we’d take to reach our destination: Starveall Hut. It was getting hot and I was already sweating what felt like litres, yet we’d barely put a dent in the day. How long would my three and a half litres last me? If I kept drinking at the rate I was, not long!
As we reached the top of Silvan, we made the first of many snack stops. Half a sleeve of Oreos between us, a muesli bar and some mixed lollies. Over fistfuls of sugar, we broke out the maps again and were speculating how long the day would be. One thing was becoming apparent by this point: we had no accurate idea.
The quest for a route to suit the timeframe, began by spending time in my trusty Topo Map app. Focusing on the Richmond Range, I was hopeful I’d find a hut we could ride to directly from the airport. Tracing hiking routes on the map, cross-referencing with DOC information, Strava heat maps and the Nelson Trails website, there were a few options on the table, but I needed some local knowledge.
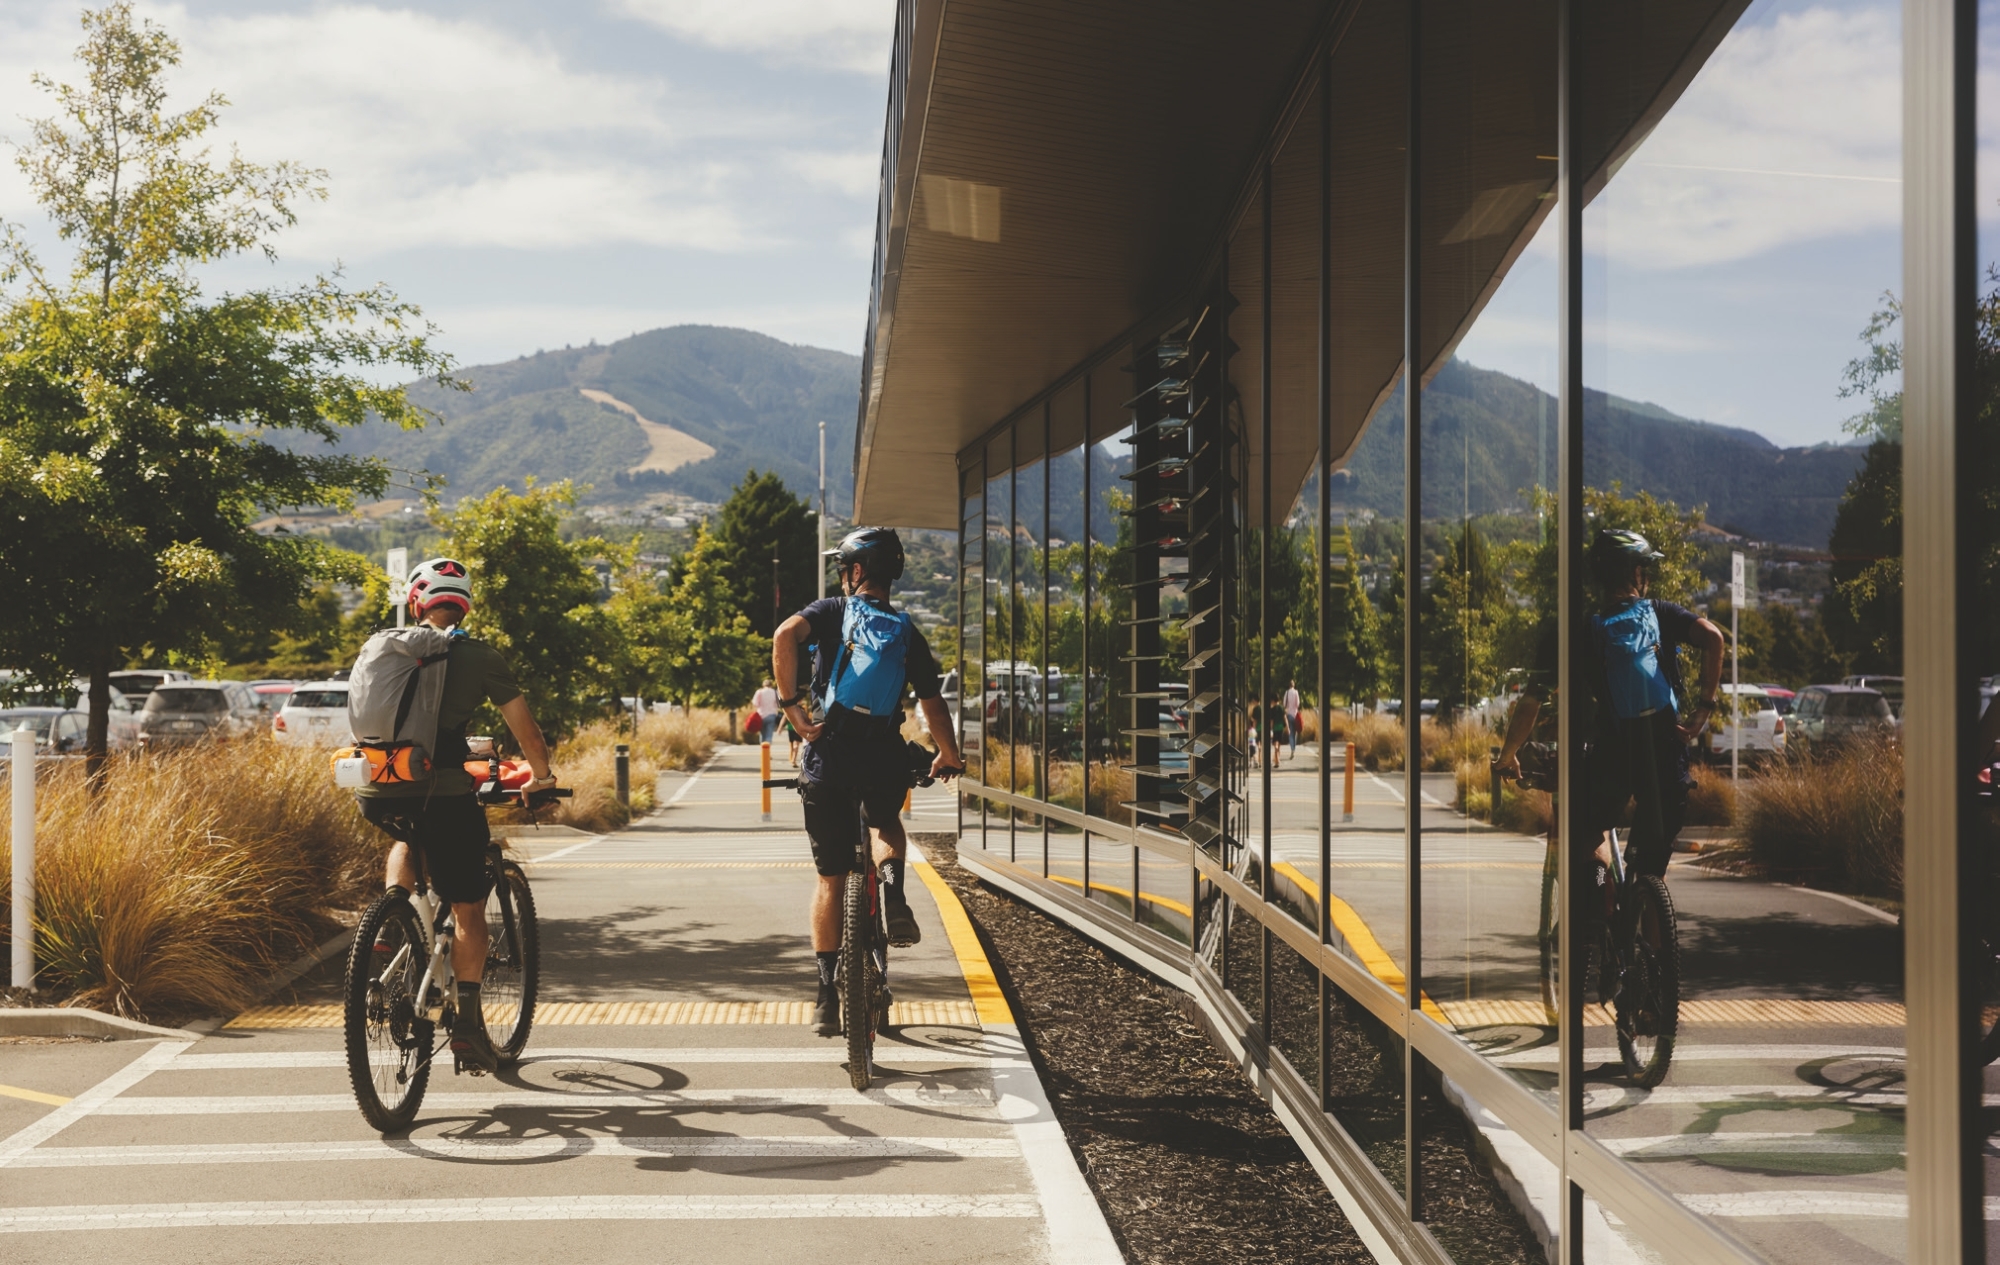
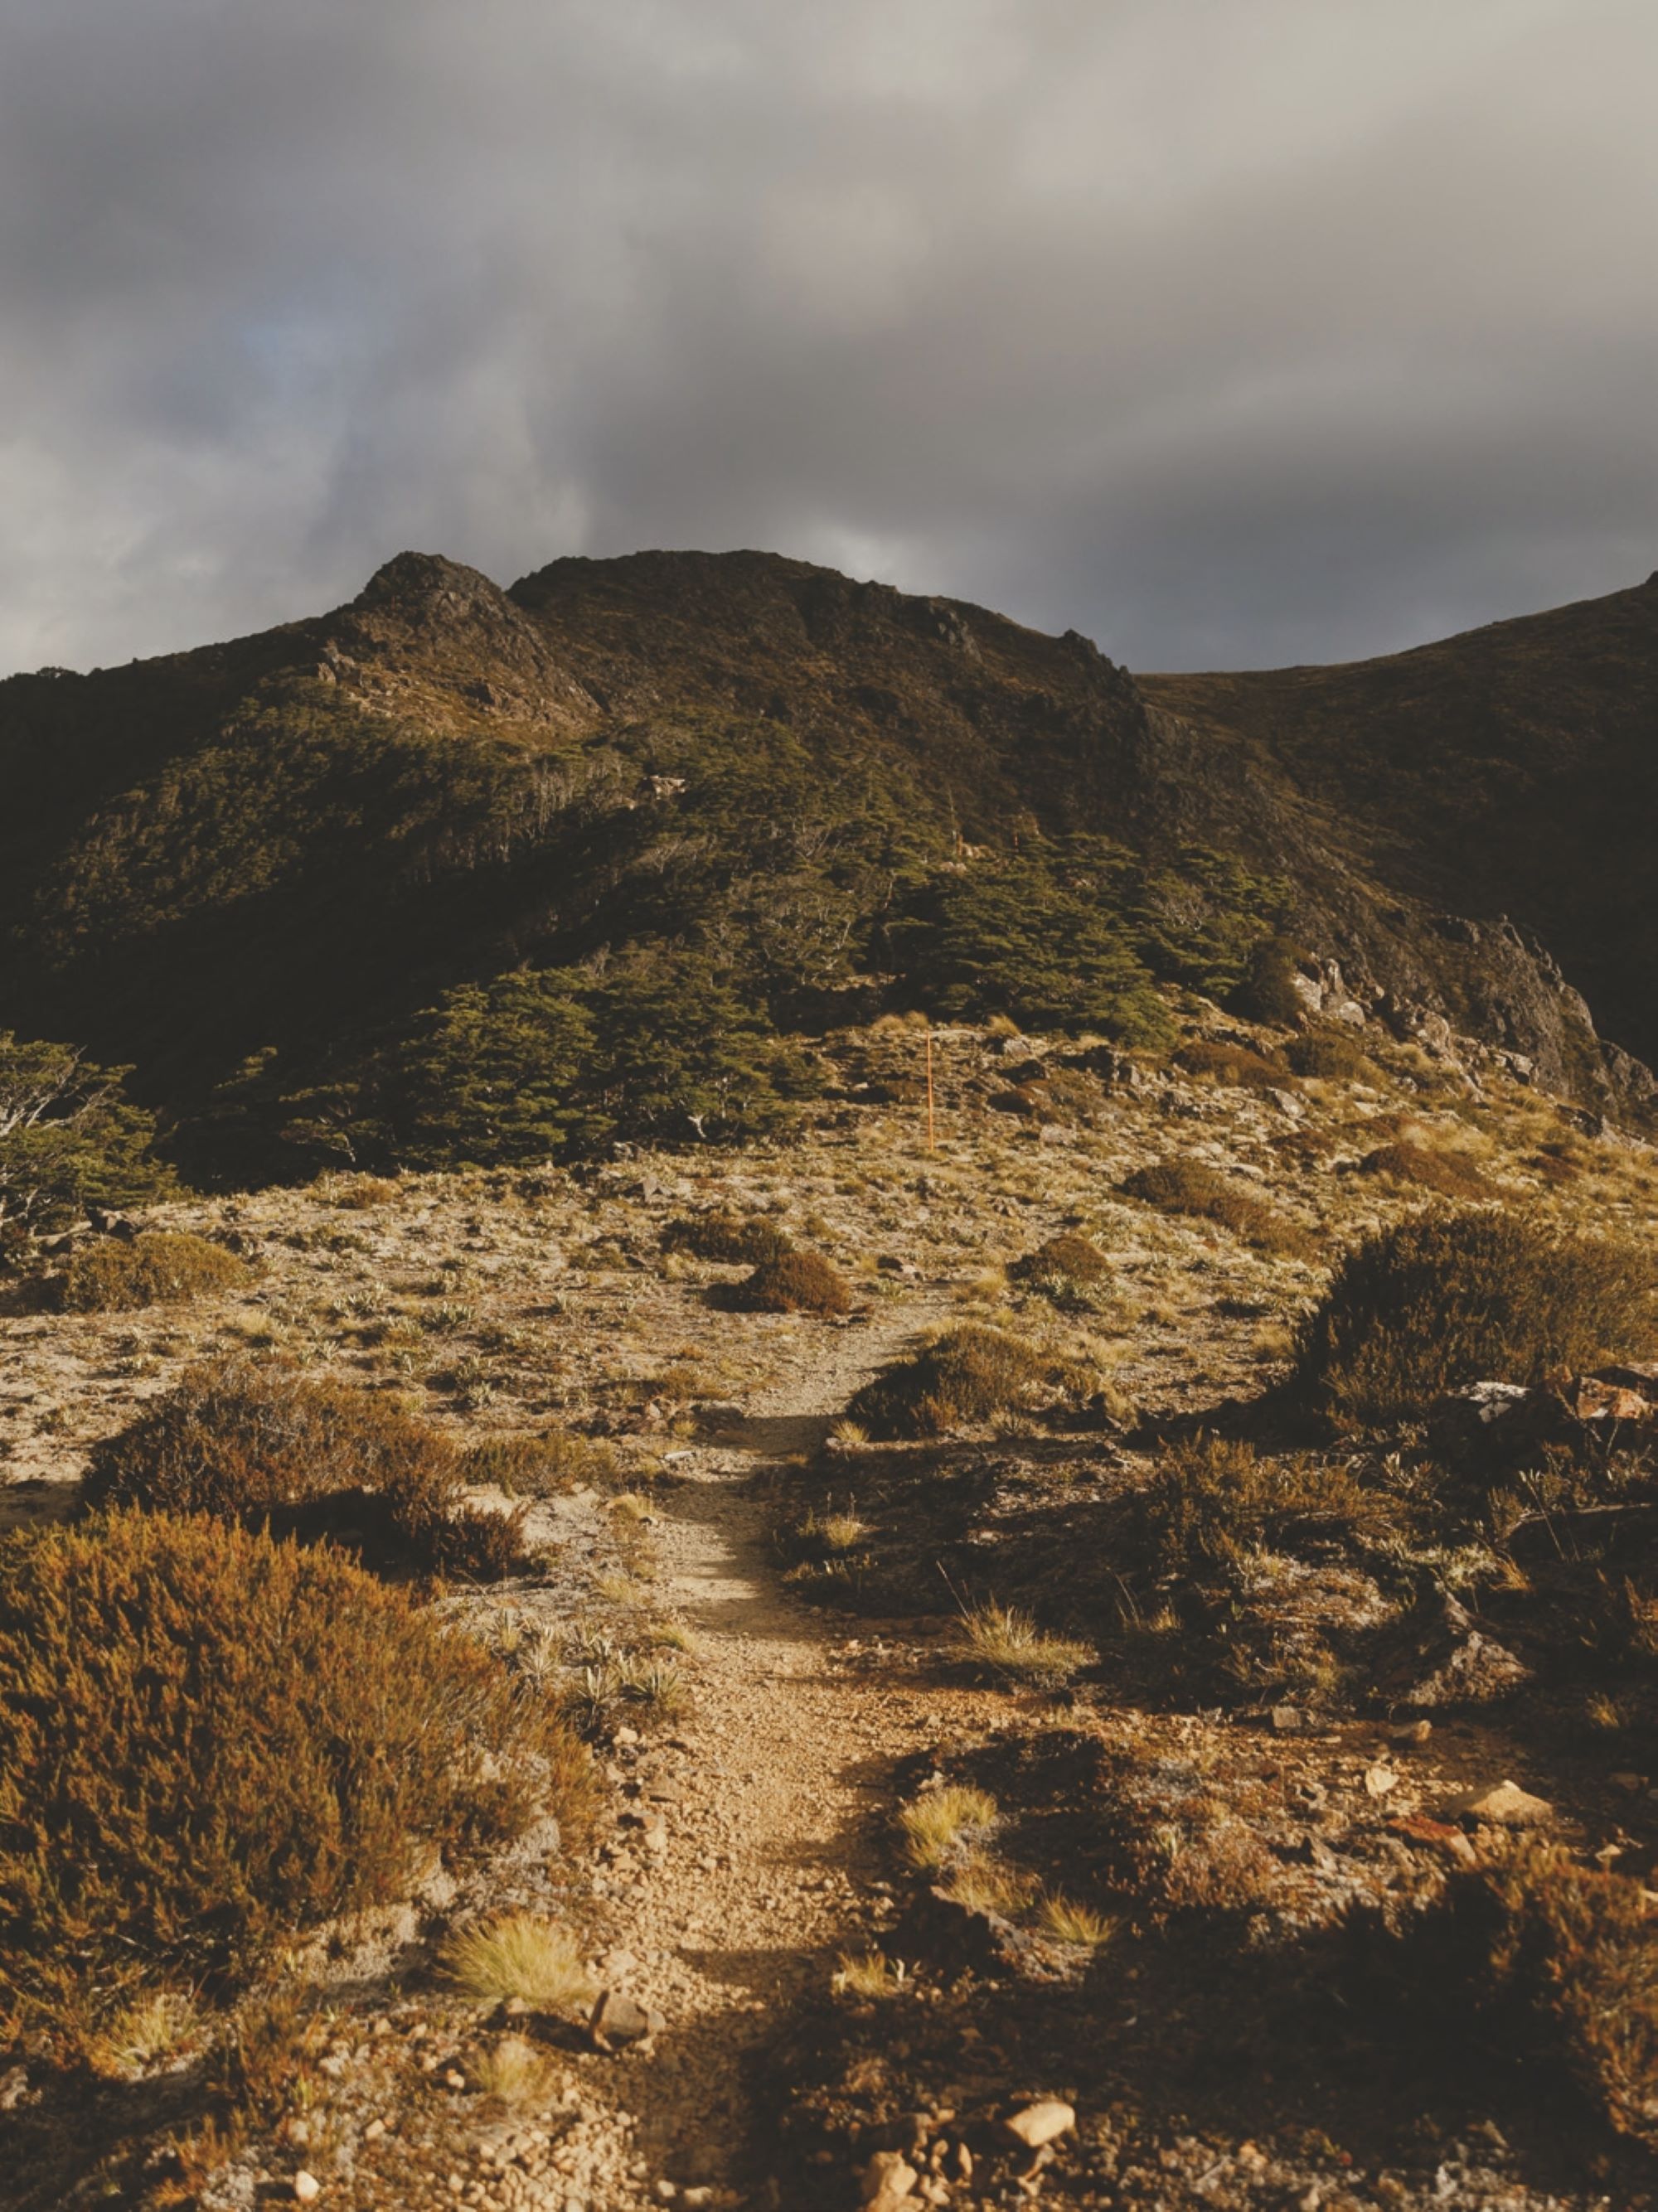
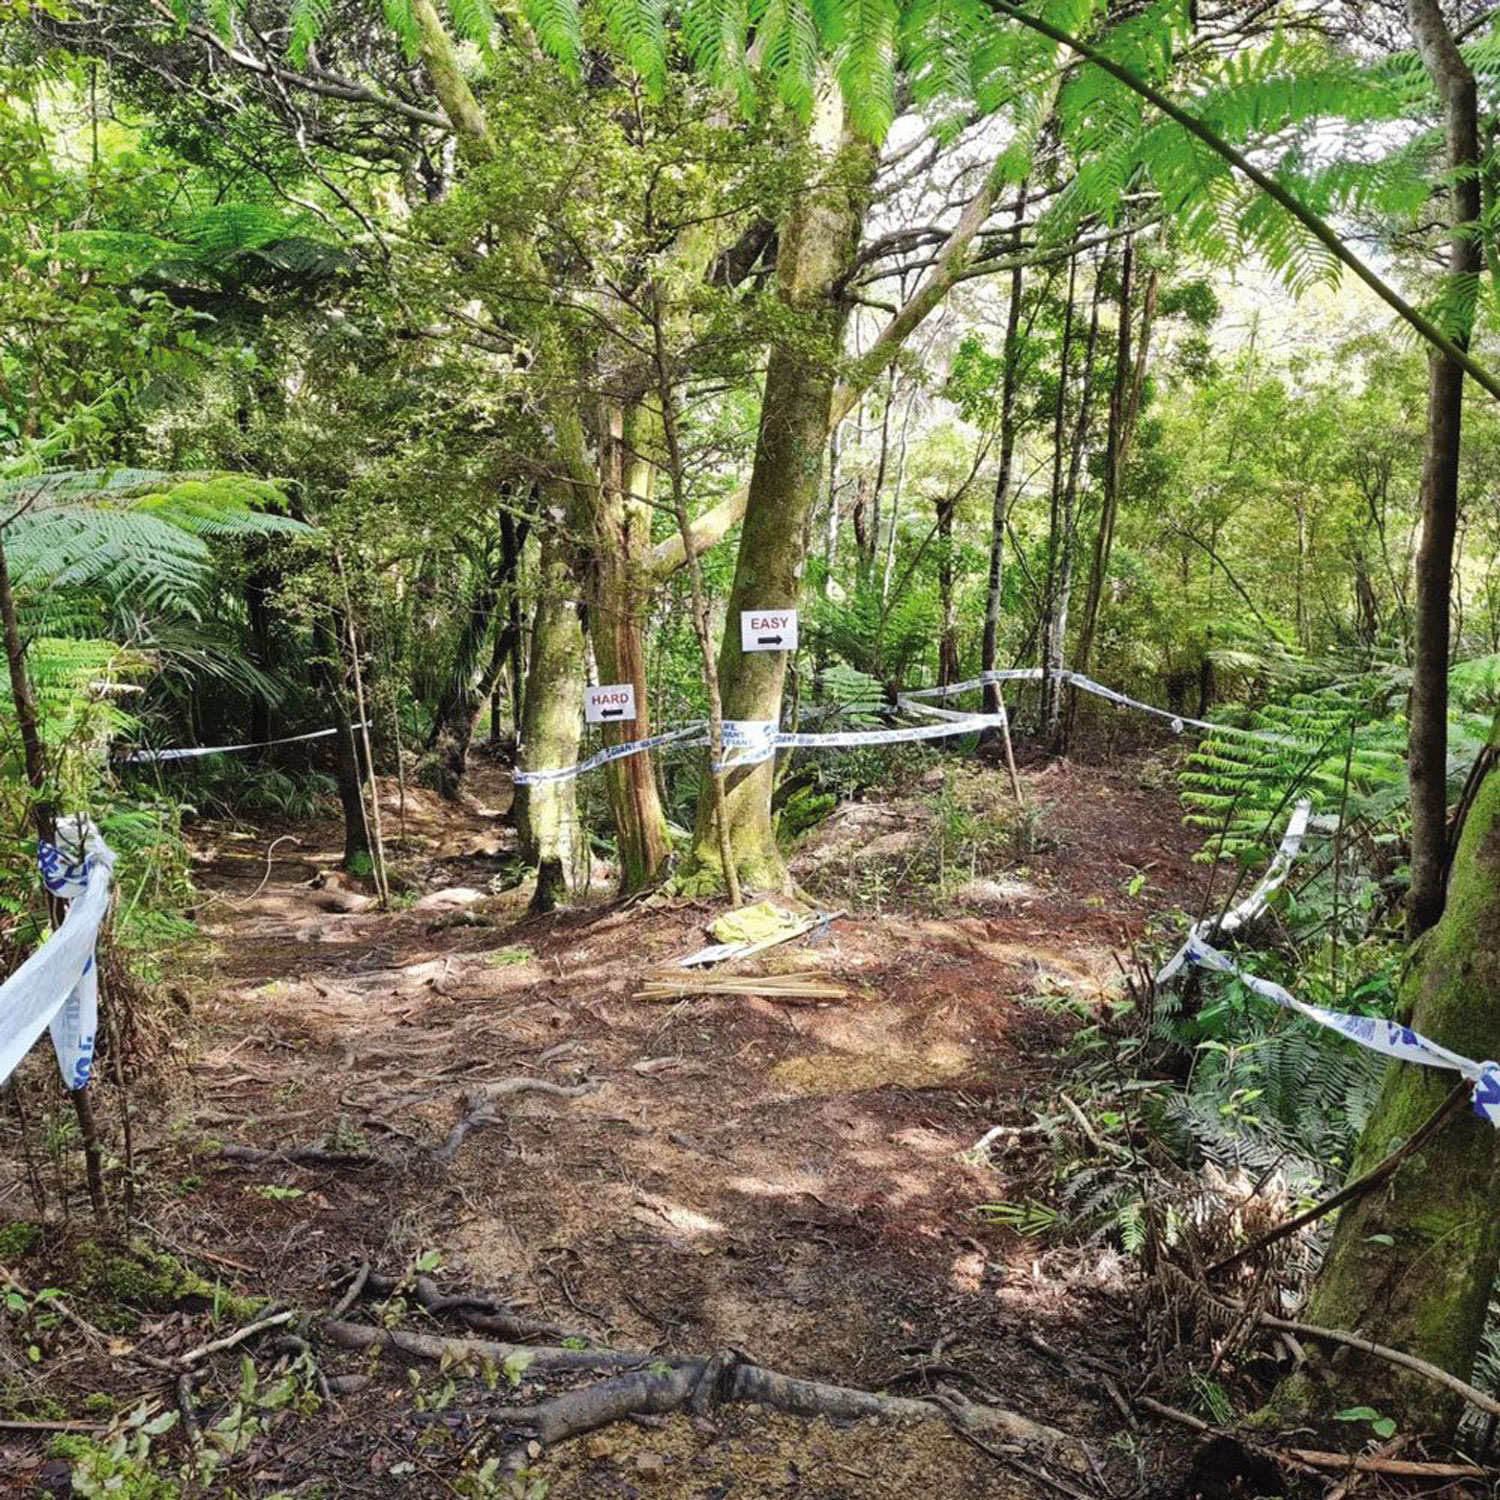
We dropped over the back of Silvan, descending gravel roads into Aniseed Valley towards Hackett carpark and the beginning of Hackett track. The track was a mostly mellow, well-formed affair and, aside from a couple of chunky sections for a few metres, it would be passable on a gravel bike. The track winds its way beside Hackett Creek for 5.8km, then spits you out in a grass clearing at the Hackett Hut. I’m sure the gas cooker and the half-tub of Vaseline that remain in the Hut have some tales to tell. With places to be and bikes to carry up hills, we pressed on. We left the hut and went from the mellow comfort of the gravel trail, to the unkempt wilds of the Starveall Track.
The story goes that Mt Starveall gained its name in the 1800’s after a stockman was looking for a route to drive his sheep from Nelson to Wairau Valley, attempting to dissect the Richmond Ranges rather than take a longer, albeit easier route around the valleys. Reaching the summit of what we now know as Mt. Starveall, he found there was no suitable feed for his sheep. Dismayed, he proclaimed the mountain would “starve all” his flock. Seems the name stuck.
I’m no stockman, and we had no sheep to take anywhere, but as Kieran and I were crossing the river for a third time in only a couple of hundred metres, I was wishing we could “starve all” the people who decided the trail needed to cross the river some nine, or maybe it was ten, times in a kilometre of track. Halfway across the river at one point, we met a hiker descending; a foreigner on his quest to complete the Te Araroa trail (which Starveall track is part of). The look of confusion on his face said it all: he seriously thought we’d lost the plot and was verging on visibly distressed that we were about to carry our bikes up this mountain. We silently wondered if maybe he was right.
I’m still surprised, after so many stream crossings and hundreds of footsteps sketchily balanced atop rocks that were at times smaller than a foot, that – thanks to grippy-soled, modern riding shoes, and us having the balance of ballerinas – we both managed to keep our feet dry!
Leaving the prospect of falling in a stream behind us, the gradient of the trail pitched up. Not just a bit but, for a period, a lot. Picture ‘climbing a hundred-metre-long staircase with your bike on your back’ sort of steep. We were into the meat and potatoes of our mission.
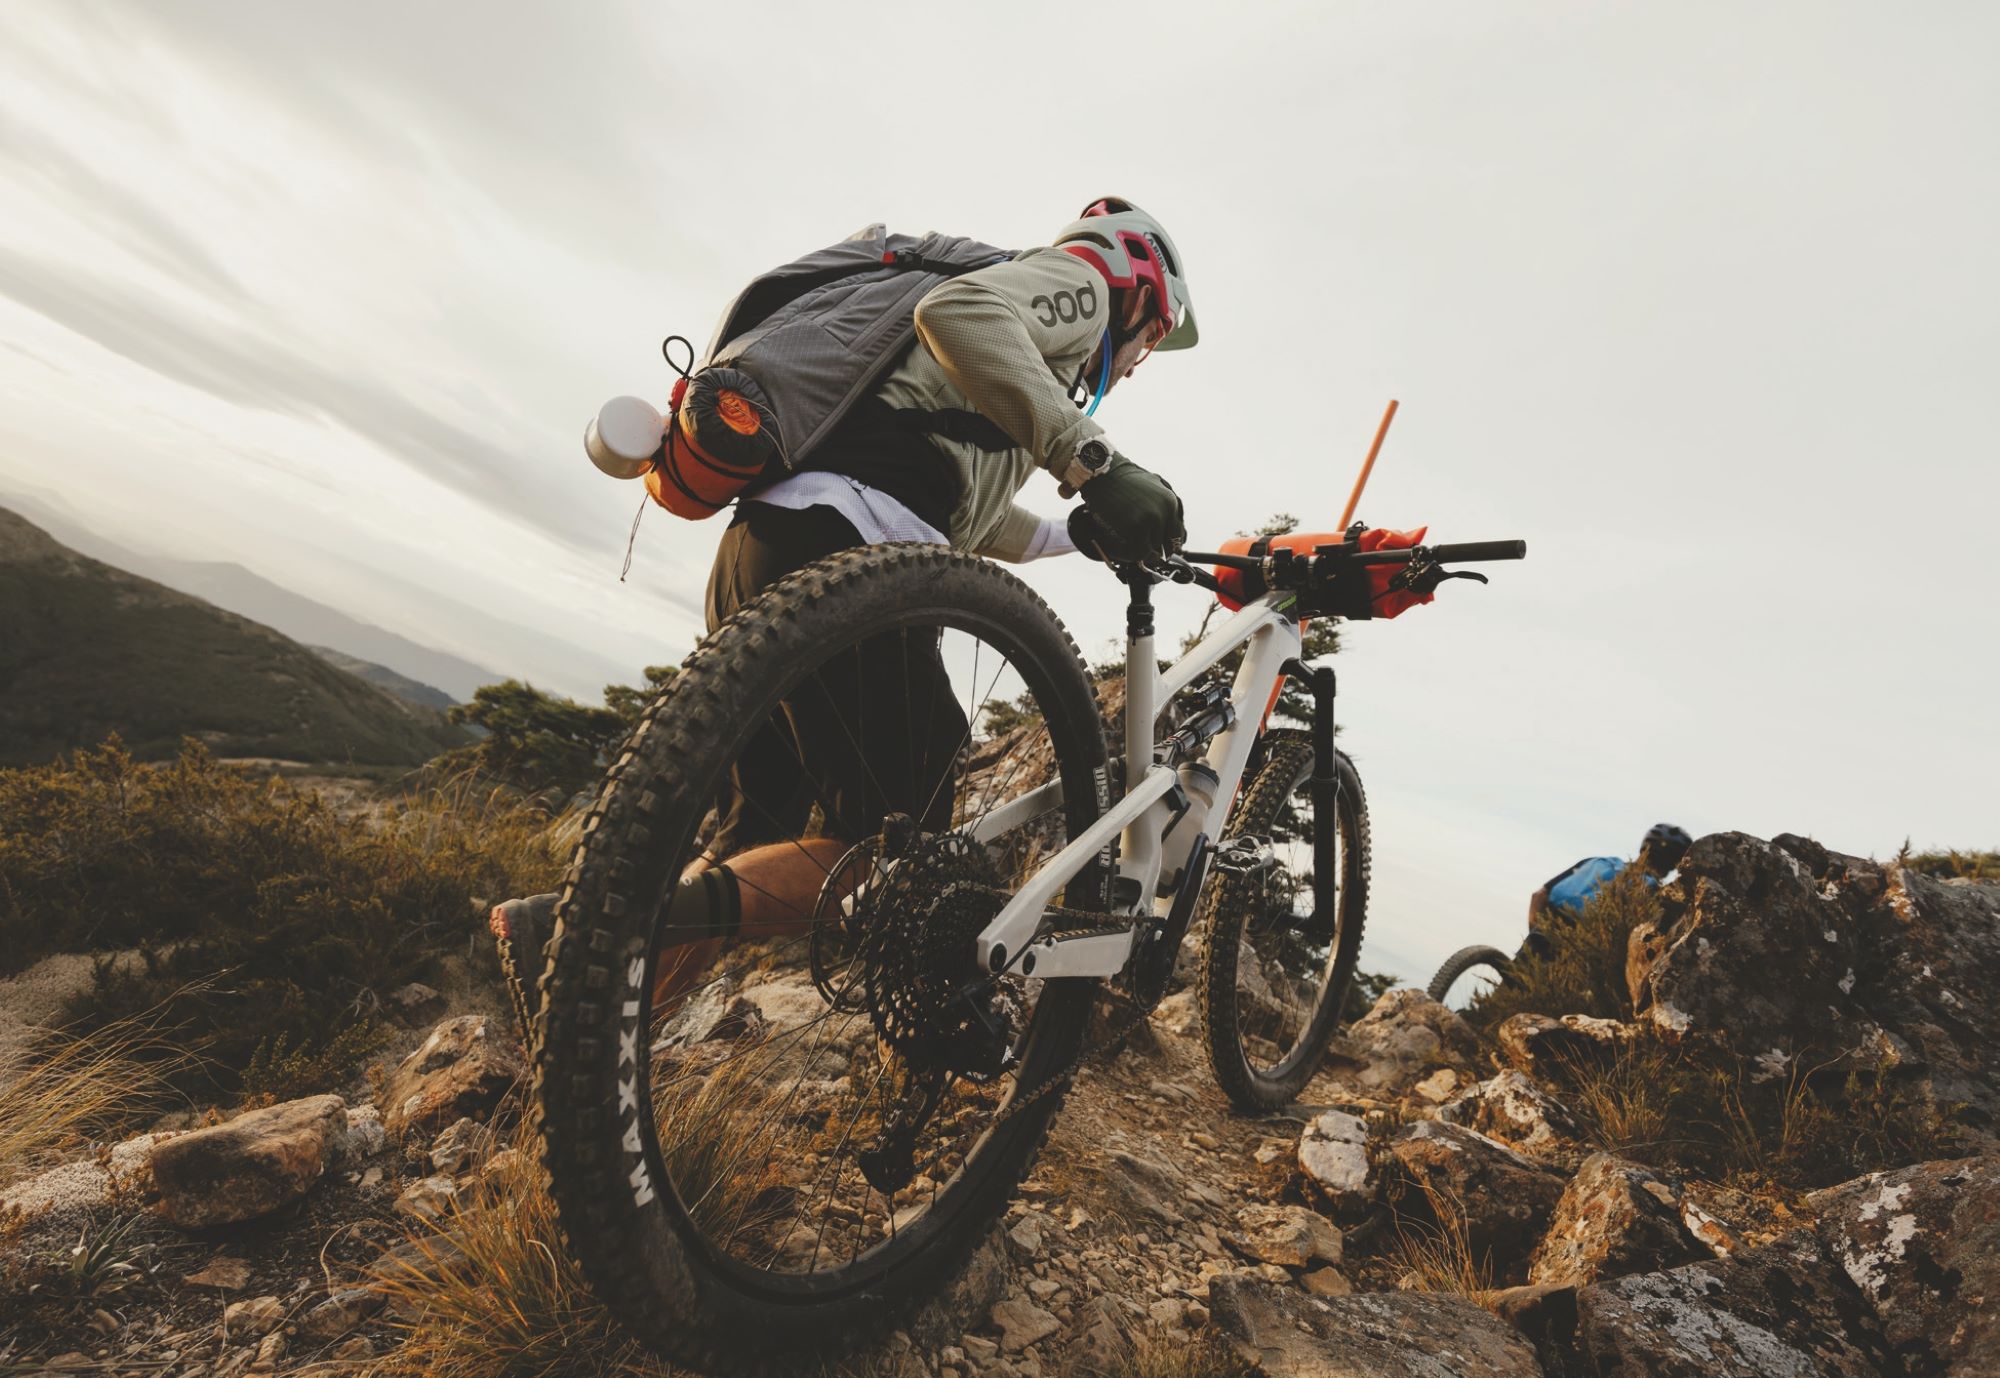
Leaving the prospect of falling in a stream behind us, the gradient of the trail pitched up. Not just a bit but, for a period, a lot. Picture ‘climbing a hundred-metre-long staircase with your bike on your back’ sort of steep. We were into the meat and potatoes of our mission.
One foot in front of the other, we plodded our way up the hill. Our progress was slow – so slow that our Garmins no longer considered us as “moving”. For all intents and purposes, we were stationary. Forward movement was a mix of pushing our bikes, carrying them under an arm, or hoisting them overhead and carrying them on our shoulders. Early in the hike-a-bike, this hoist overhead was quick and easy, a rapid snap of the hips, and almost an Olympic Power Clean to get the loaded rig up to our shoulders, however, two hours into it our bodies were tiring. What was once a fluid, smooth hoist of the bike became a full-body effort, recruiting every muscle and ounce of strength to get it done. It seemed the higher we got in altitude, the heavier our bikes became. Fatigue sapped our dexterity and we were getting ourselves in all kinds of strife while trying to lower our bikes down once our shoulders had done their dash. Handlebars tangled in our packs, I somehow got the nose of my saddle caught under my helmet, and more than once we needed help to untangle ourselves from our bikes. Stopping for a second and surveying the map again, we wondered where Pyramid Rock was. The map showed it should be somewhere to our left, but we couldn’t see it. “Can’t be too exciting I guess…” we decided. Five minutes later, we spotted a break in the bush ahead and were greeted with a full view of the rock. It protruded from the end of the ridge we’d just come up, one side bush, the other an almost sheer rock face. It was a sight to behold and unique amongst the surrounding terrain. Again, we surveyed the map. We figured that in two hours we’d come two kilometres up the hill, and there was about two kilometres to go. Those salt and vinegar chips strapped to my handlebar bag were looking mighty fine at about that point. We cracked another One Square Meal and agreed the chips were our reward once we’d reached the hut.
At some stage, Kieran and I unleashed some brutal honesty. “How much of this are we even going to be able to ride on the way back down?” “This looks pretty gnarly, this better be worth the effort!” Fortunately, each time we looked back down the trail we’d just passed, it looked like – although some of it would be sketchy at best – we’d likely be able to ride a majority of it on our return journey. Sections, however, would remain untouched by our tyres.
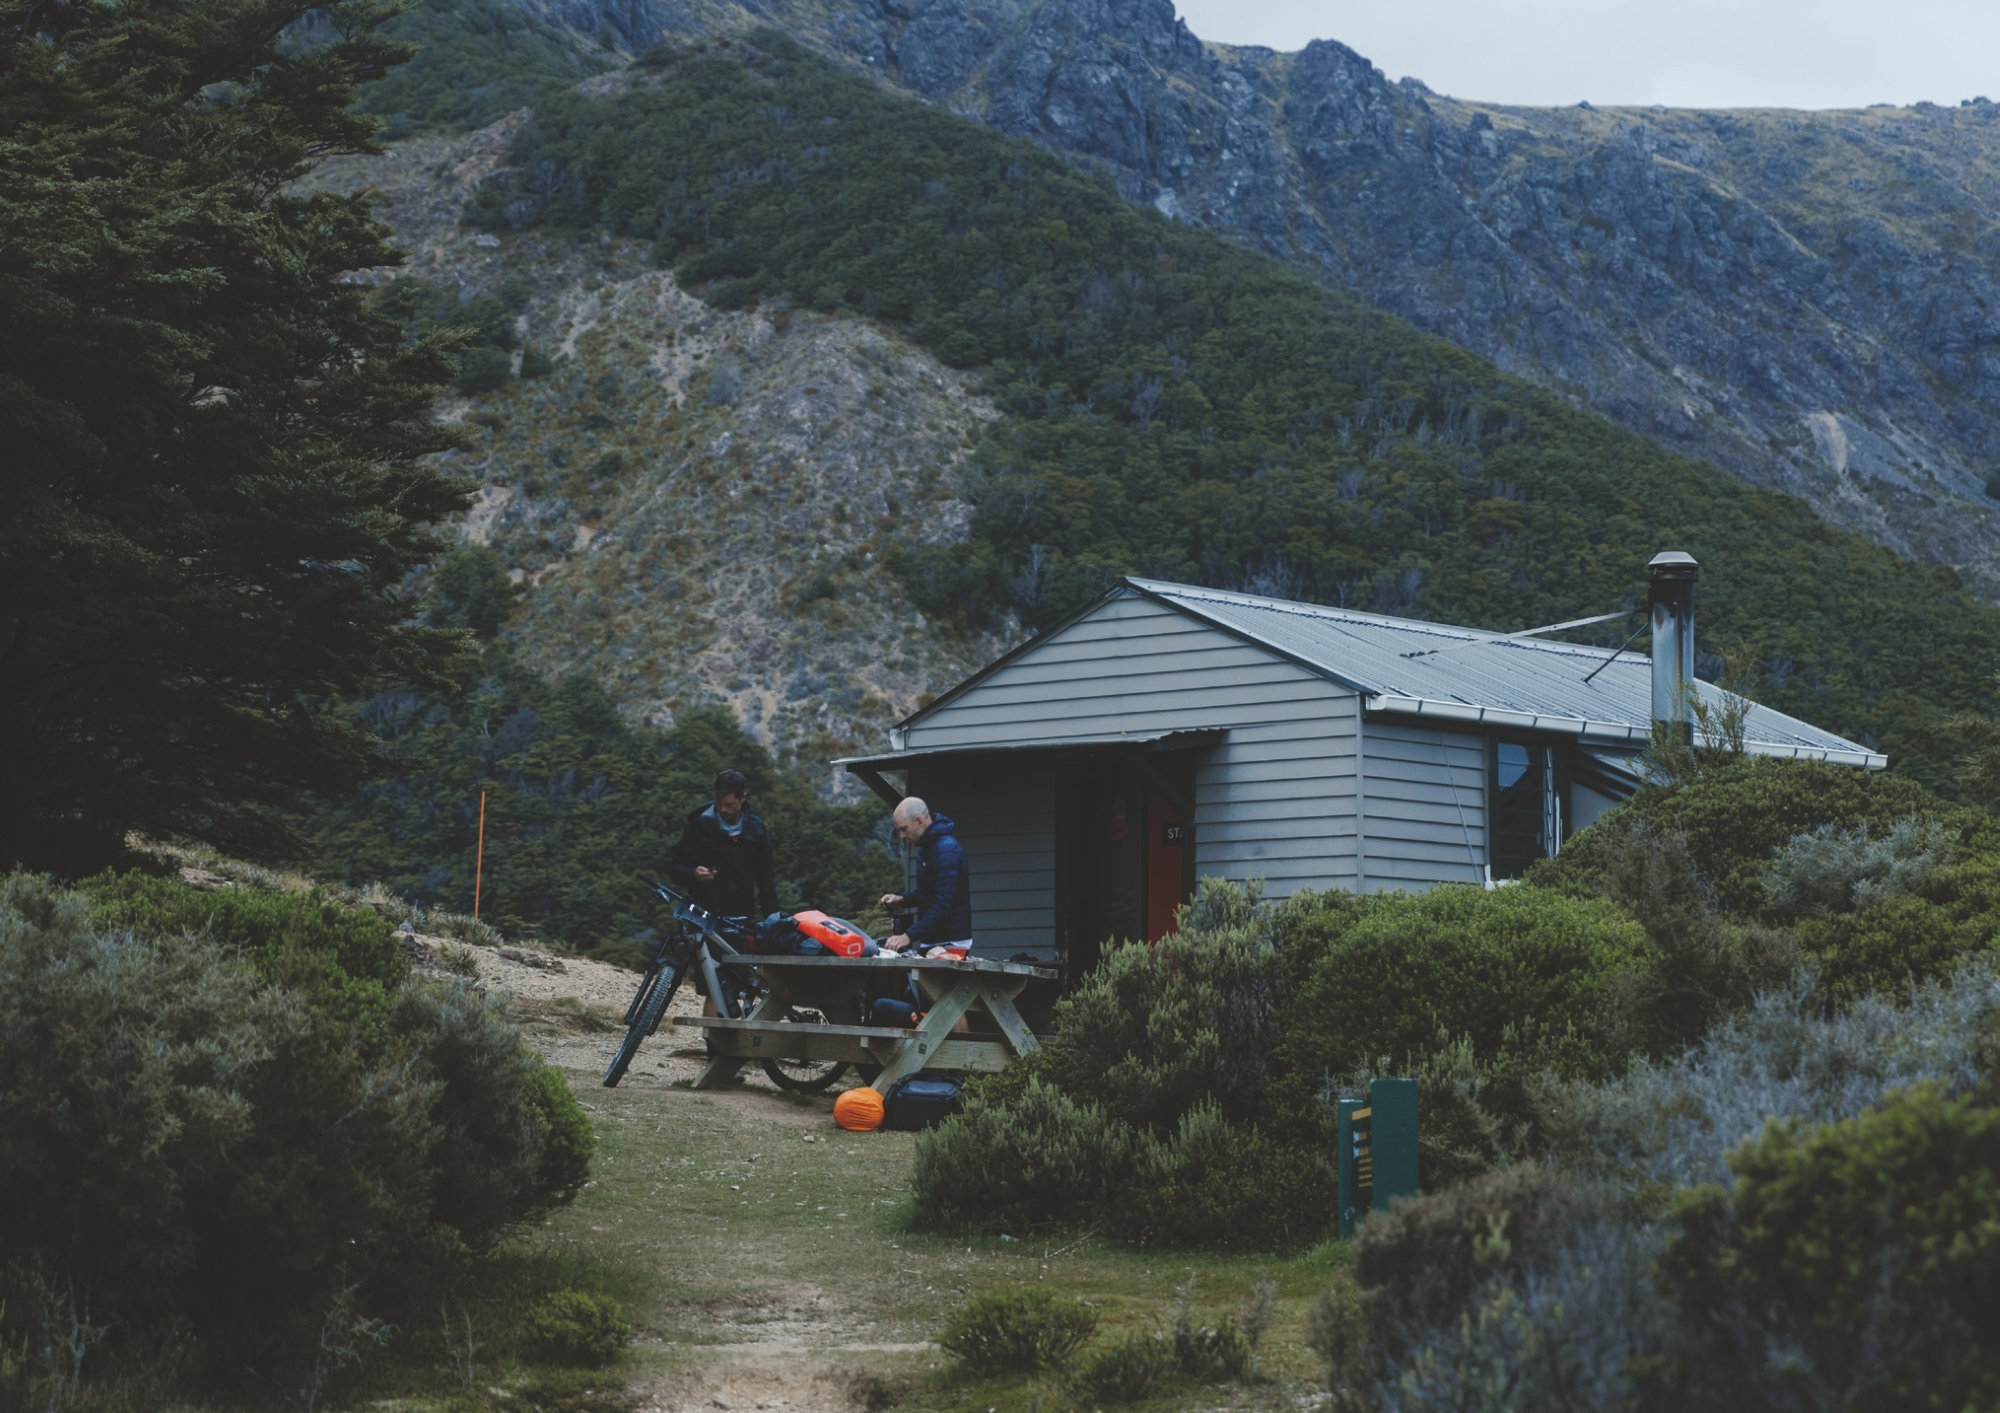
Kieran was up the trail a little from me as we neared the end of a janky-looking rock section when all of a sudden there was a change of tone, electricity in the air, and the exclamation: ‘‘There she is, there’s the hut!’’. Seven-and-a-half hours after we left the airport, we’d reached our destination; near on four hours of that was hike-a-bike.
Our rapid chat from earlier in the day had become stunted; small, solitary sentences and single statements rather than conversation. I’ve never been much of a classic hiker or bushwalker, but I sure would’ve loved to be one at that exact moment. Trade my stiff-soled shoes for some hiking boots, and swap the bike for some walking poles. That would’ve been amazing. As we shouldered our bikes to clamber up another steep pitch, we traded complaints about how the balls of our feet and our big toes felt as though they’d be blistered by day’s end.
We were pushing on but could only put so much effort in or we’d risk a complete meltdown. At times, it felt like there was a competition between my glutes, hamstrings, and quads for which one would be the first to snap like an over-stretched rubber band, or burst forth from my skin. I pondered this and draped my arms over my handlebars during a quick breather, hoping to shake the niggle of cramp in my right arm. It was a cramp like I hadn’t felt before; maybe it was a special breed of hike-a-bikers cramp, one that shows up only after hours of carrying one’s bike.
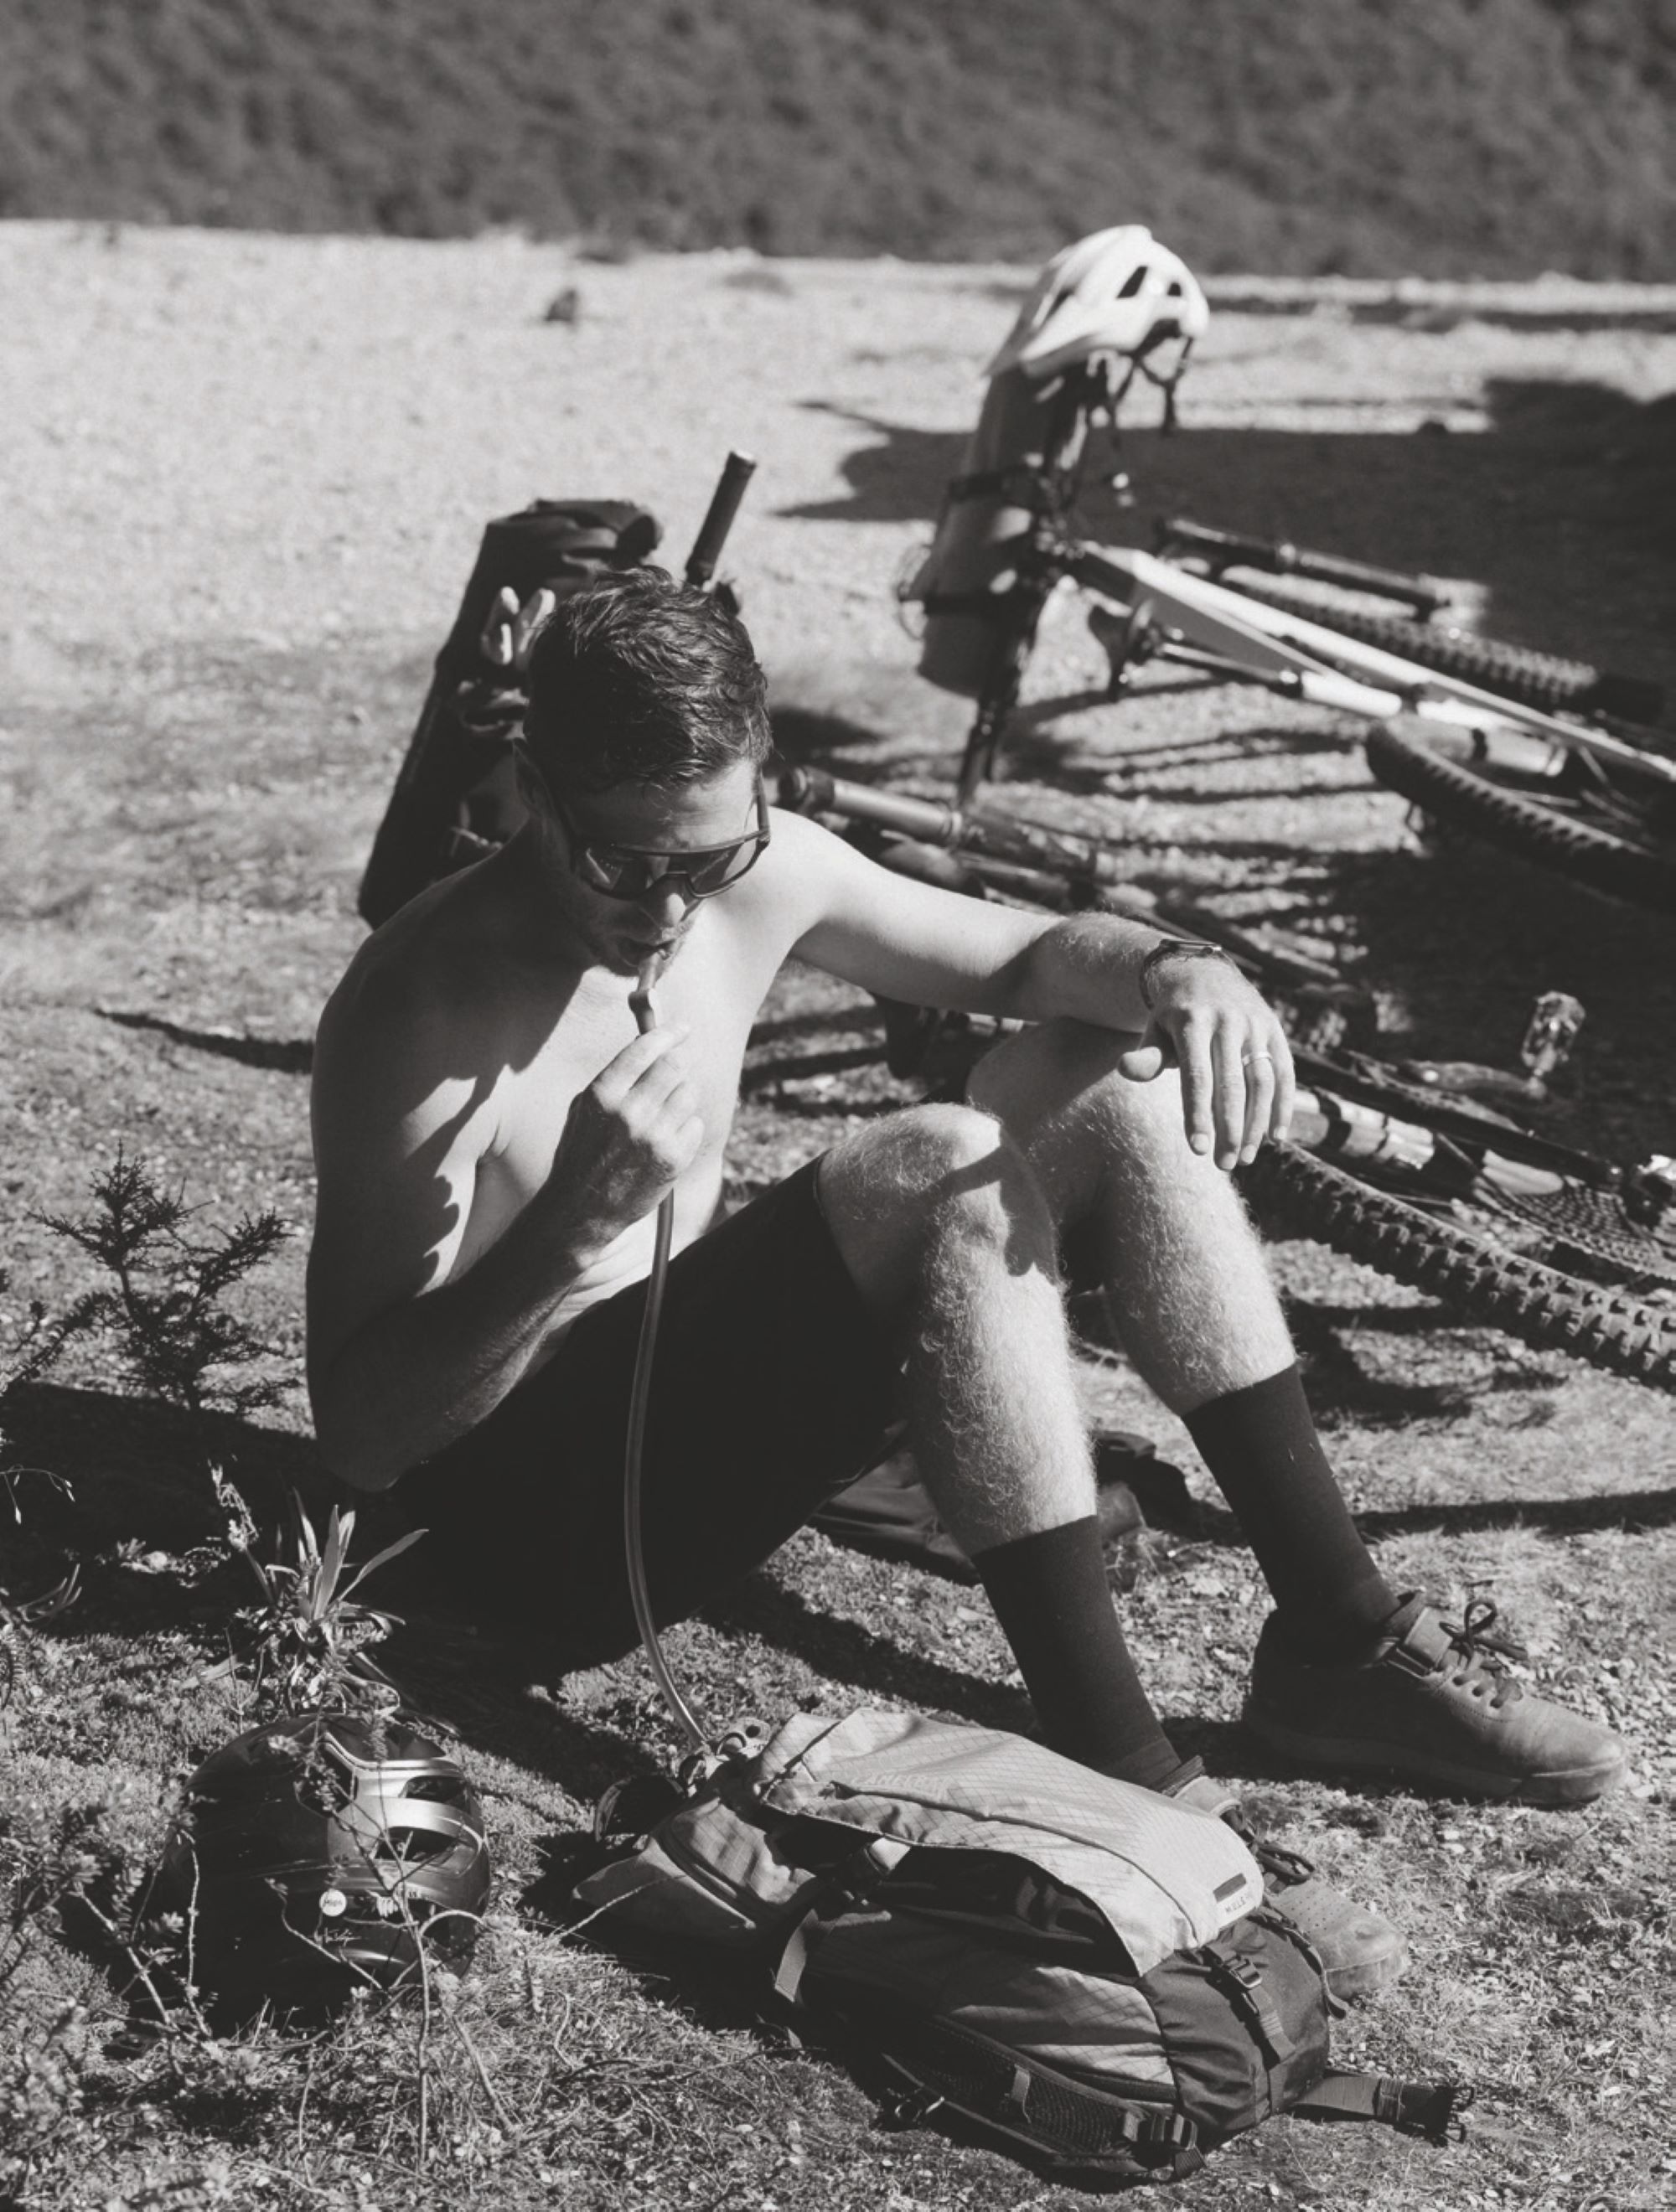
I was slowly cooking. It was hot and muggy and I’d already syphoned through most of the three litres in my CamelBak before we left the river crossings earlier in the day. I was verging on being the sweatiest I’d ever been – at times looking like I’d just stepped out from the shower! Experience told me to never leave a water source without supplies topped off unless I know where the next water source is. Fortunately, I’d refilled from the last of the streams earlier in the day. I was nervous we might arrive at Starveall Hut to find empty water tanks, drained by over-eager Te Araroa Trail walkers, and although I had read that DOC had installed an additional tank recently to help avoid the hut supply running dry, I still wasn’t 100% confident, so was keen to arrive with as much water onboard as possible. As it ended up, I blew through that refilled 3-litre bladder, and another bottle, arriving empty at the hut.
Our stops were becoming more frequent, and our snack supply was getting low. Conscious we had to ride out the following day, I didn’t want to devour all our food. Silently, in my mind, I tried to justify eating just one more mini Snickers and another few lollies; “If I eat them now, I’ll be better recovered for tomorrow and won’t need them then anyway”. Makes sense, right? Shouldering the bike after each break was becoming increasingly difficult but I managed “just one more” and we’d set off again. Kieran was up the trail a little from me as we neared the end of a janky-looking rock section when all of a sudden there was a change of tone, electricity in the air, and the exclamation: “There she is, there’s the hut!”. Seven-and-a-half hours after we left the airport, we’d reached our destination; near on four hours of that was hike-a-bike.
We downed the bag of salt and vinegar chips and nabbed ourselves a bed before the six-bed hut was filled with hikers. After blitzing all my water en route, I headed to the water tank for a refill. “The water here will be sweet straight out of the tank, no need for a filter” I was reliably informed by a hiker who’d arrived hours earlier. Filling my bottle, I thought I’d seen something drop from the tap – on closer inspection there was something. “A fish?” someone shouted, tongue-in-cheek. It did look like a fish, albeit a very small three or four-millimetre-long one. It seems it was some sort of strange bug or large parasite. Tipping my water on the ground I pulled out my trusty water filter and swore to filter everything from then on.
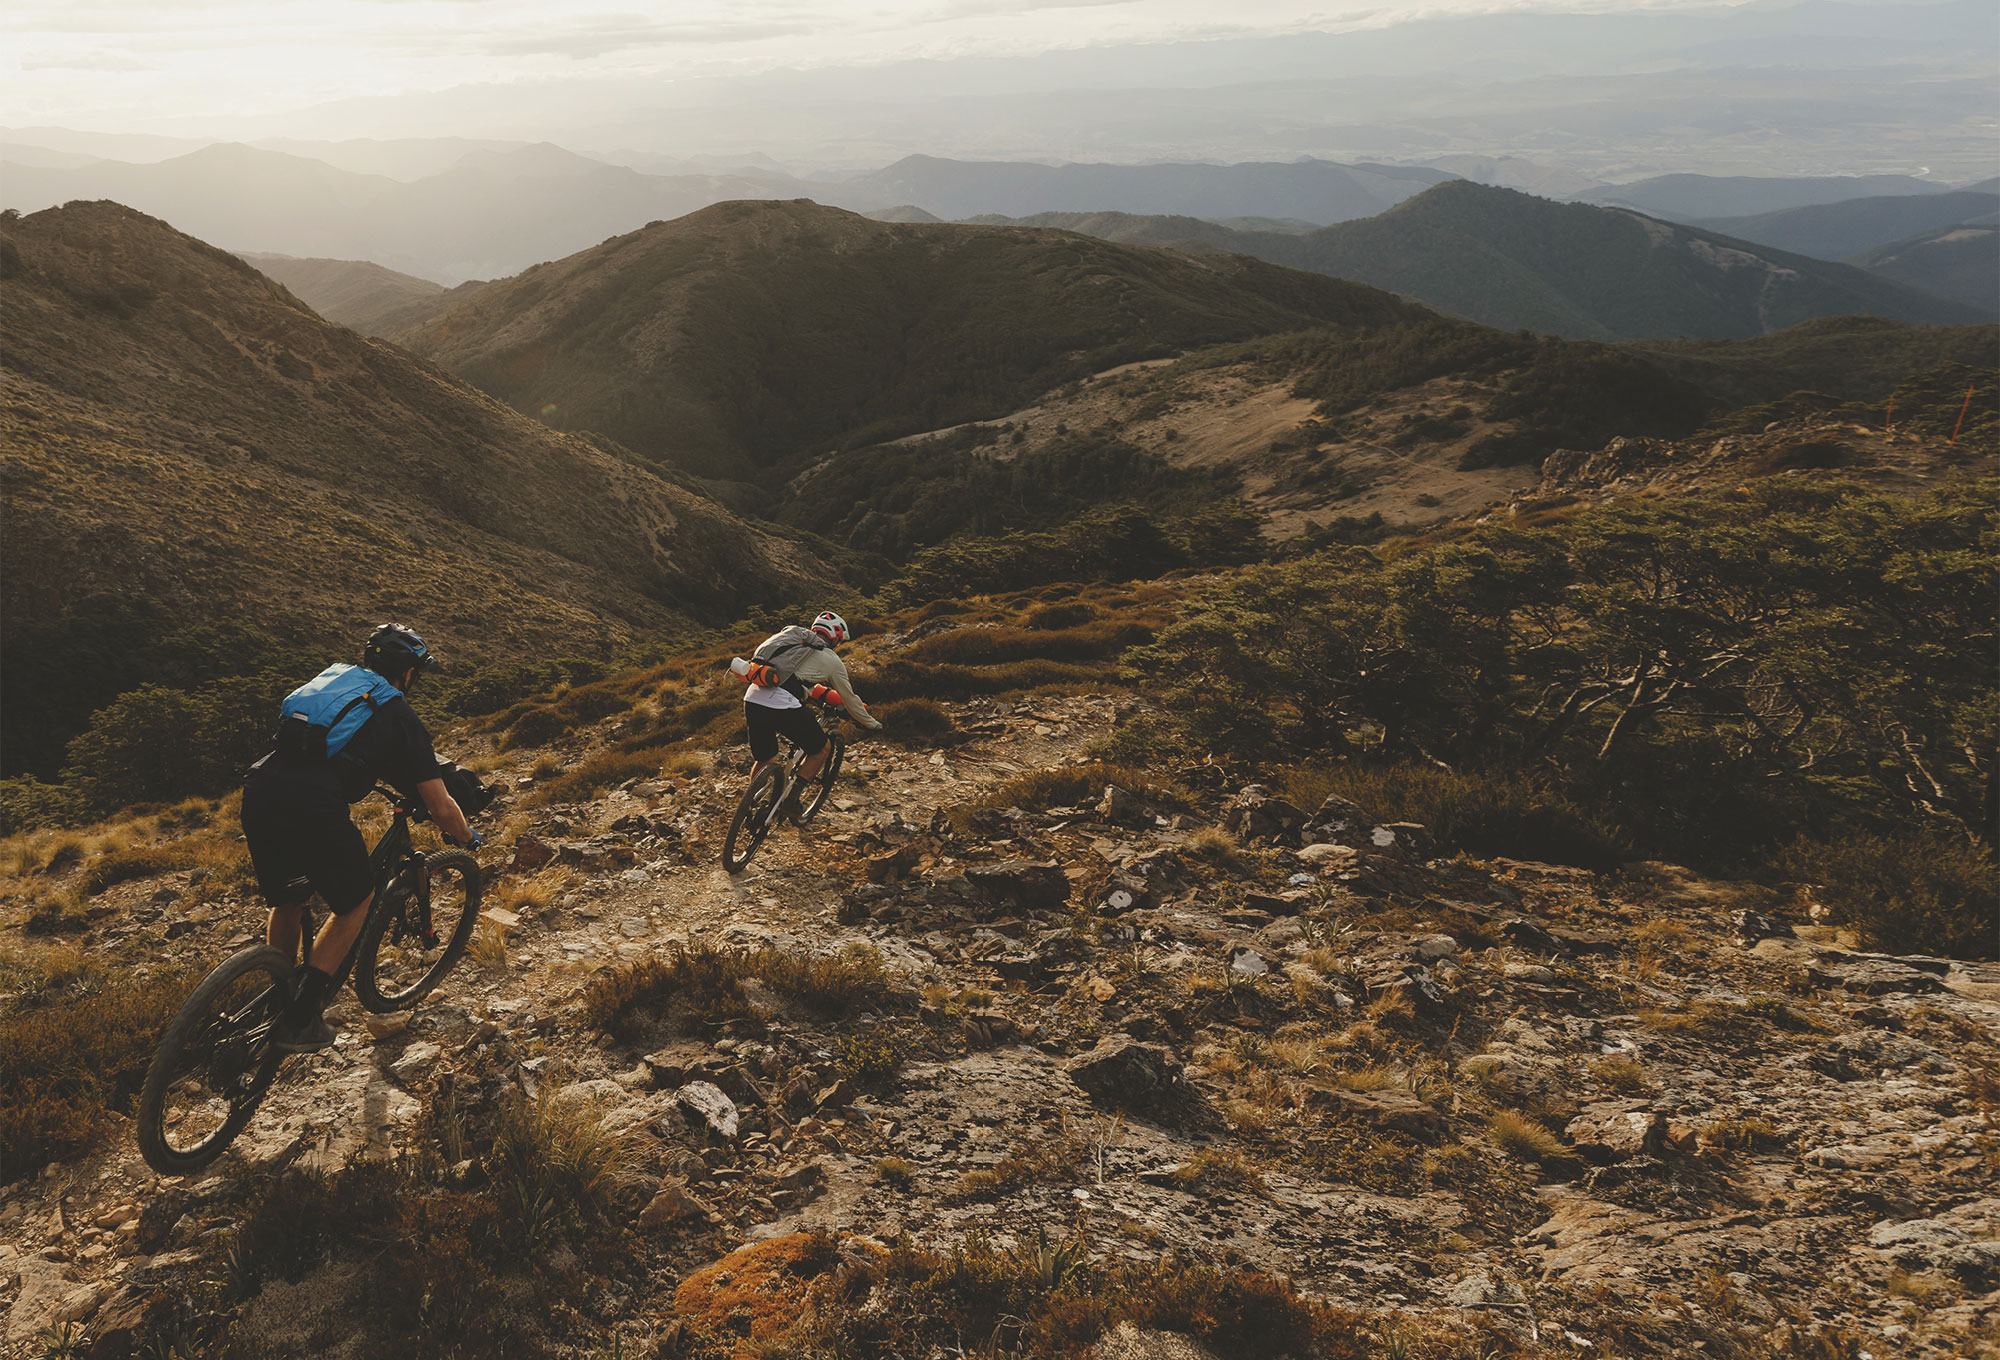
Hoping to score some golden evening hues and ’God Rays’, we headed uphill towards Starveall’s summit. Reaching what was essentially a cliff face, we decided enough was enough and parked our bikes at the foot of it. The views from on top (although not quite the Starveall summit) were amazing. Lush native bush as far as the eye could see, only broken by the highest peaks, scarred by their lack of vegetation. Such was the expanse before us, I struggled to grasp the true scale of the peaks and valleys around me. Our sunset party was almost ruined; the only gold we got was in the gaps between clouds passing overhead. Regardless, it was a magical evening I’ll never forget.
All too quickly, we popped out to Hackett Creek and all its crossings. Knowing wet weather was on the way in only a few hours, we theorised how high the river may get, relieved to still have plenty of stepping stones to cross dry-footed. Had we drawn our morning out while up at the hut, things could have been very different.
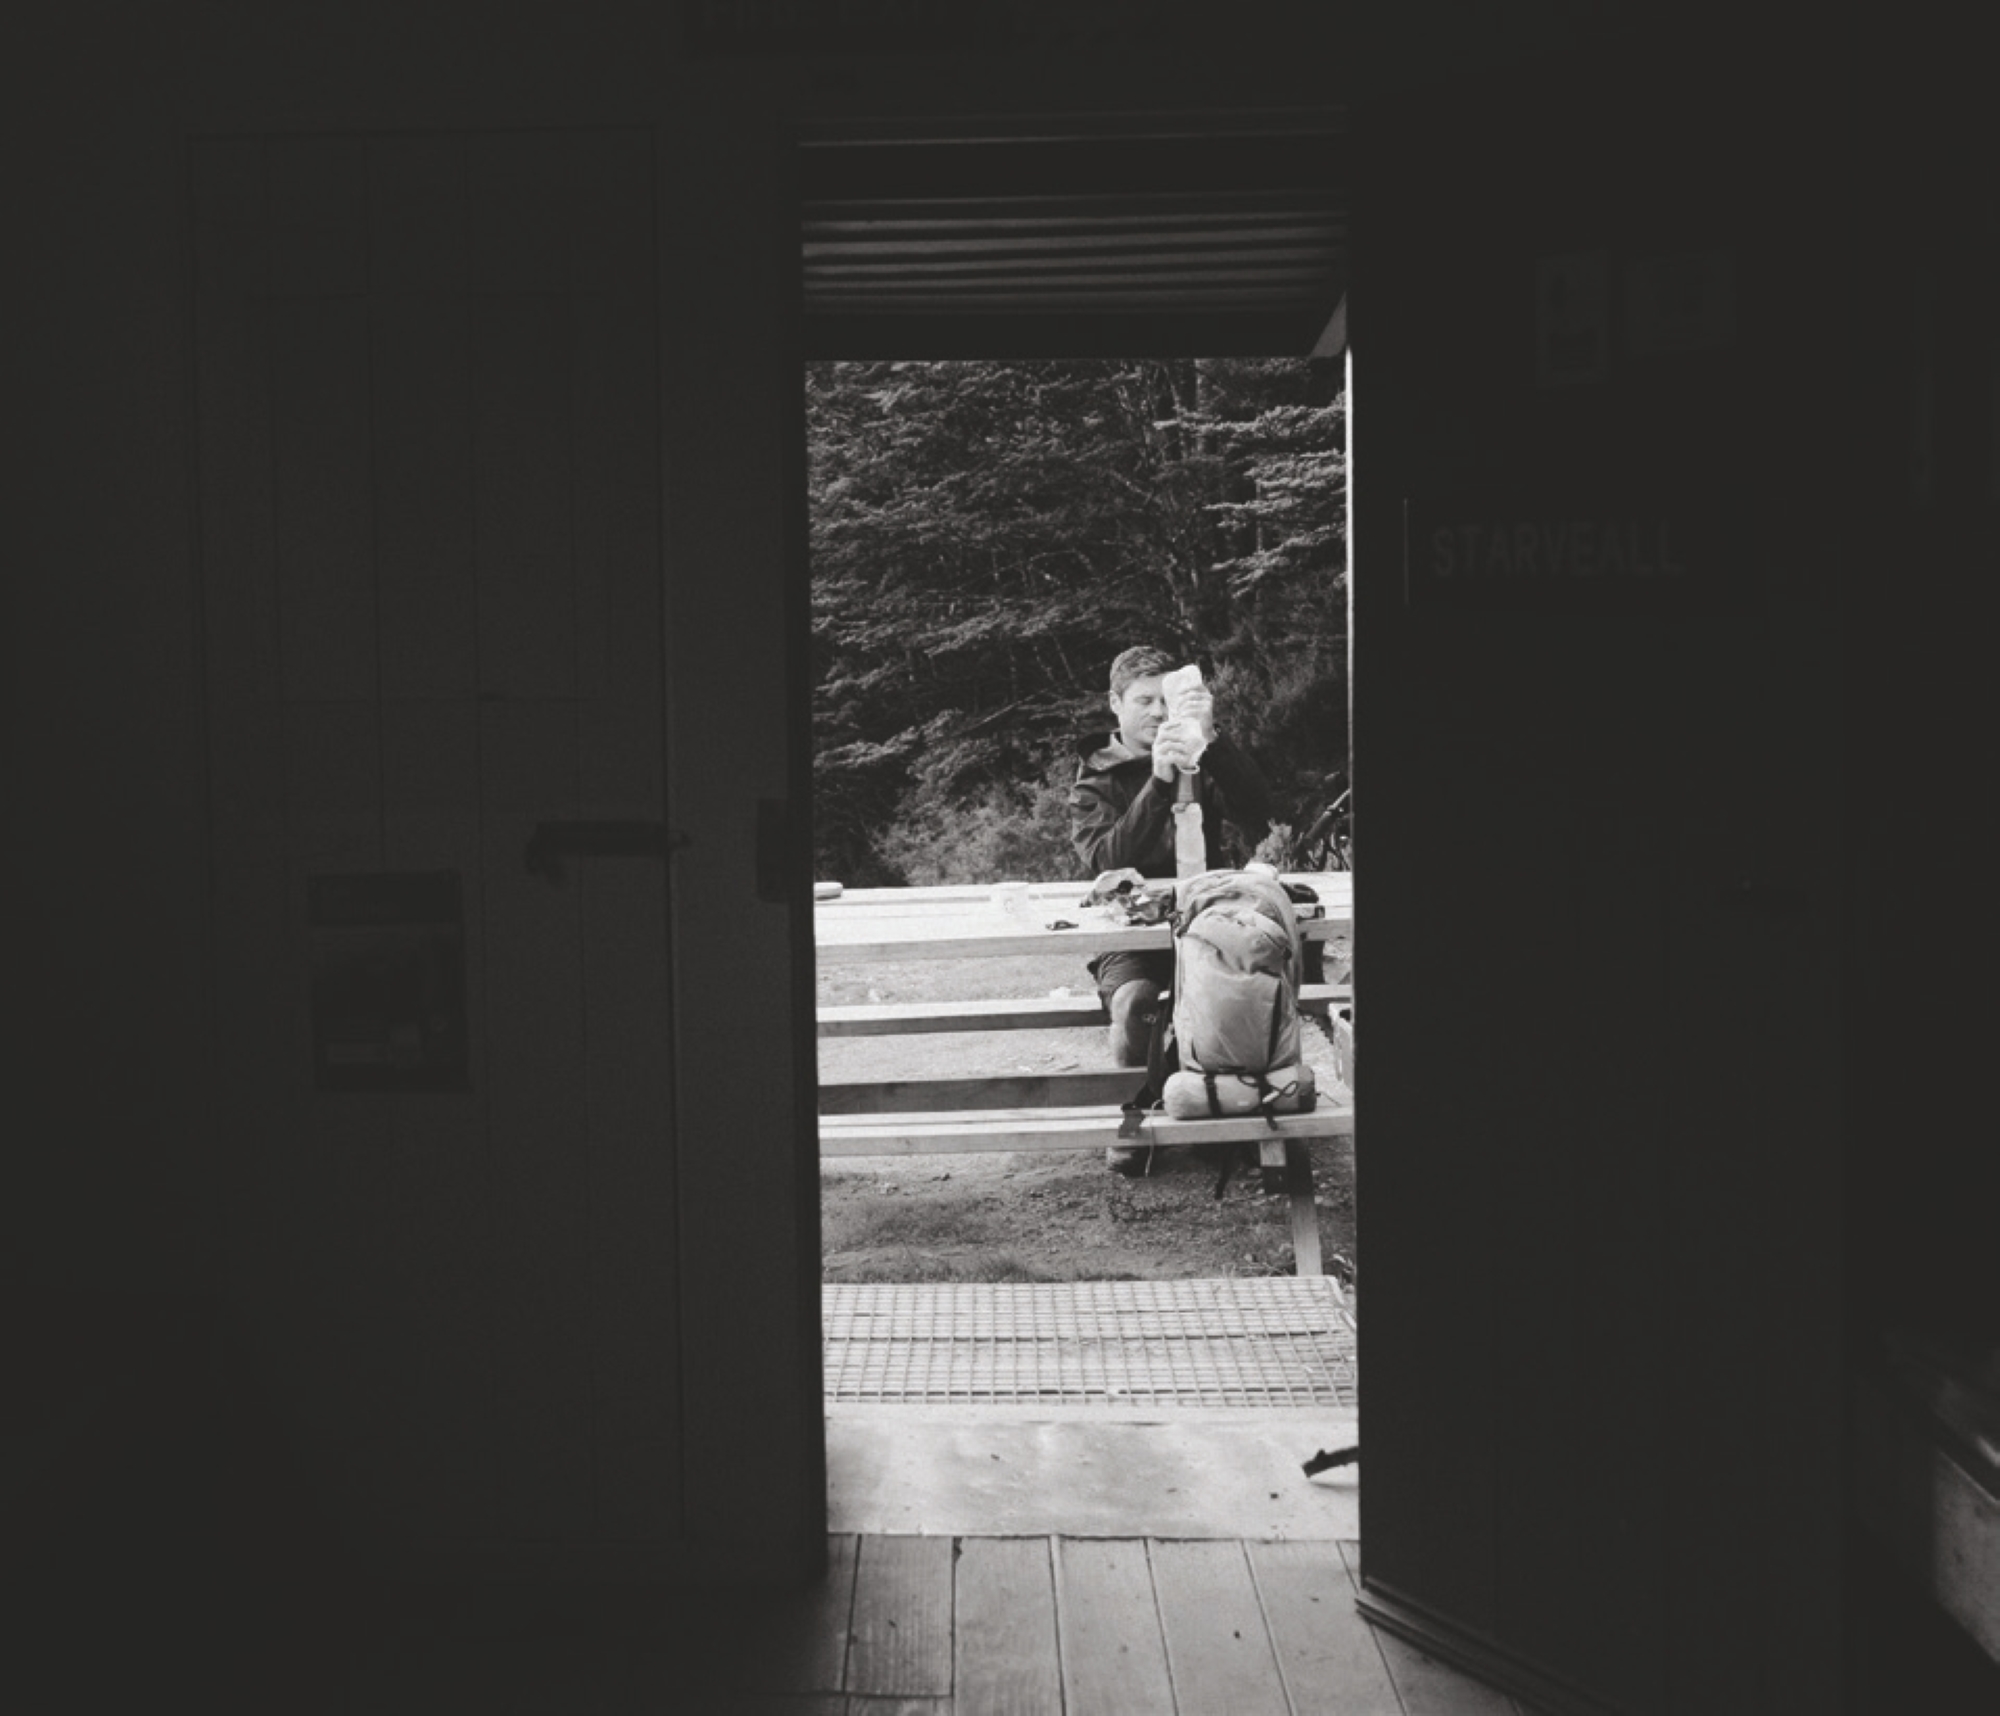
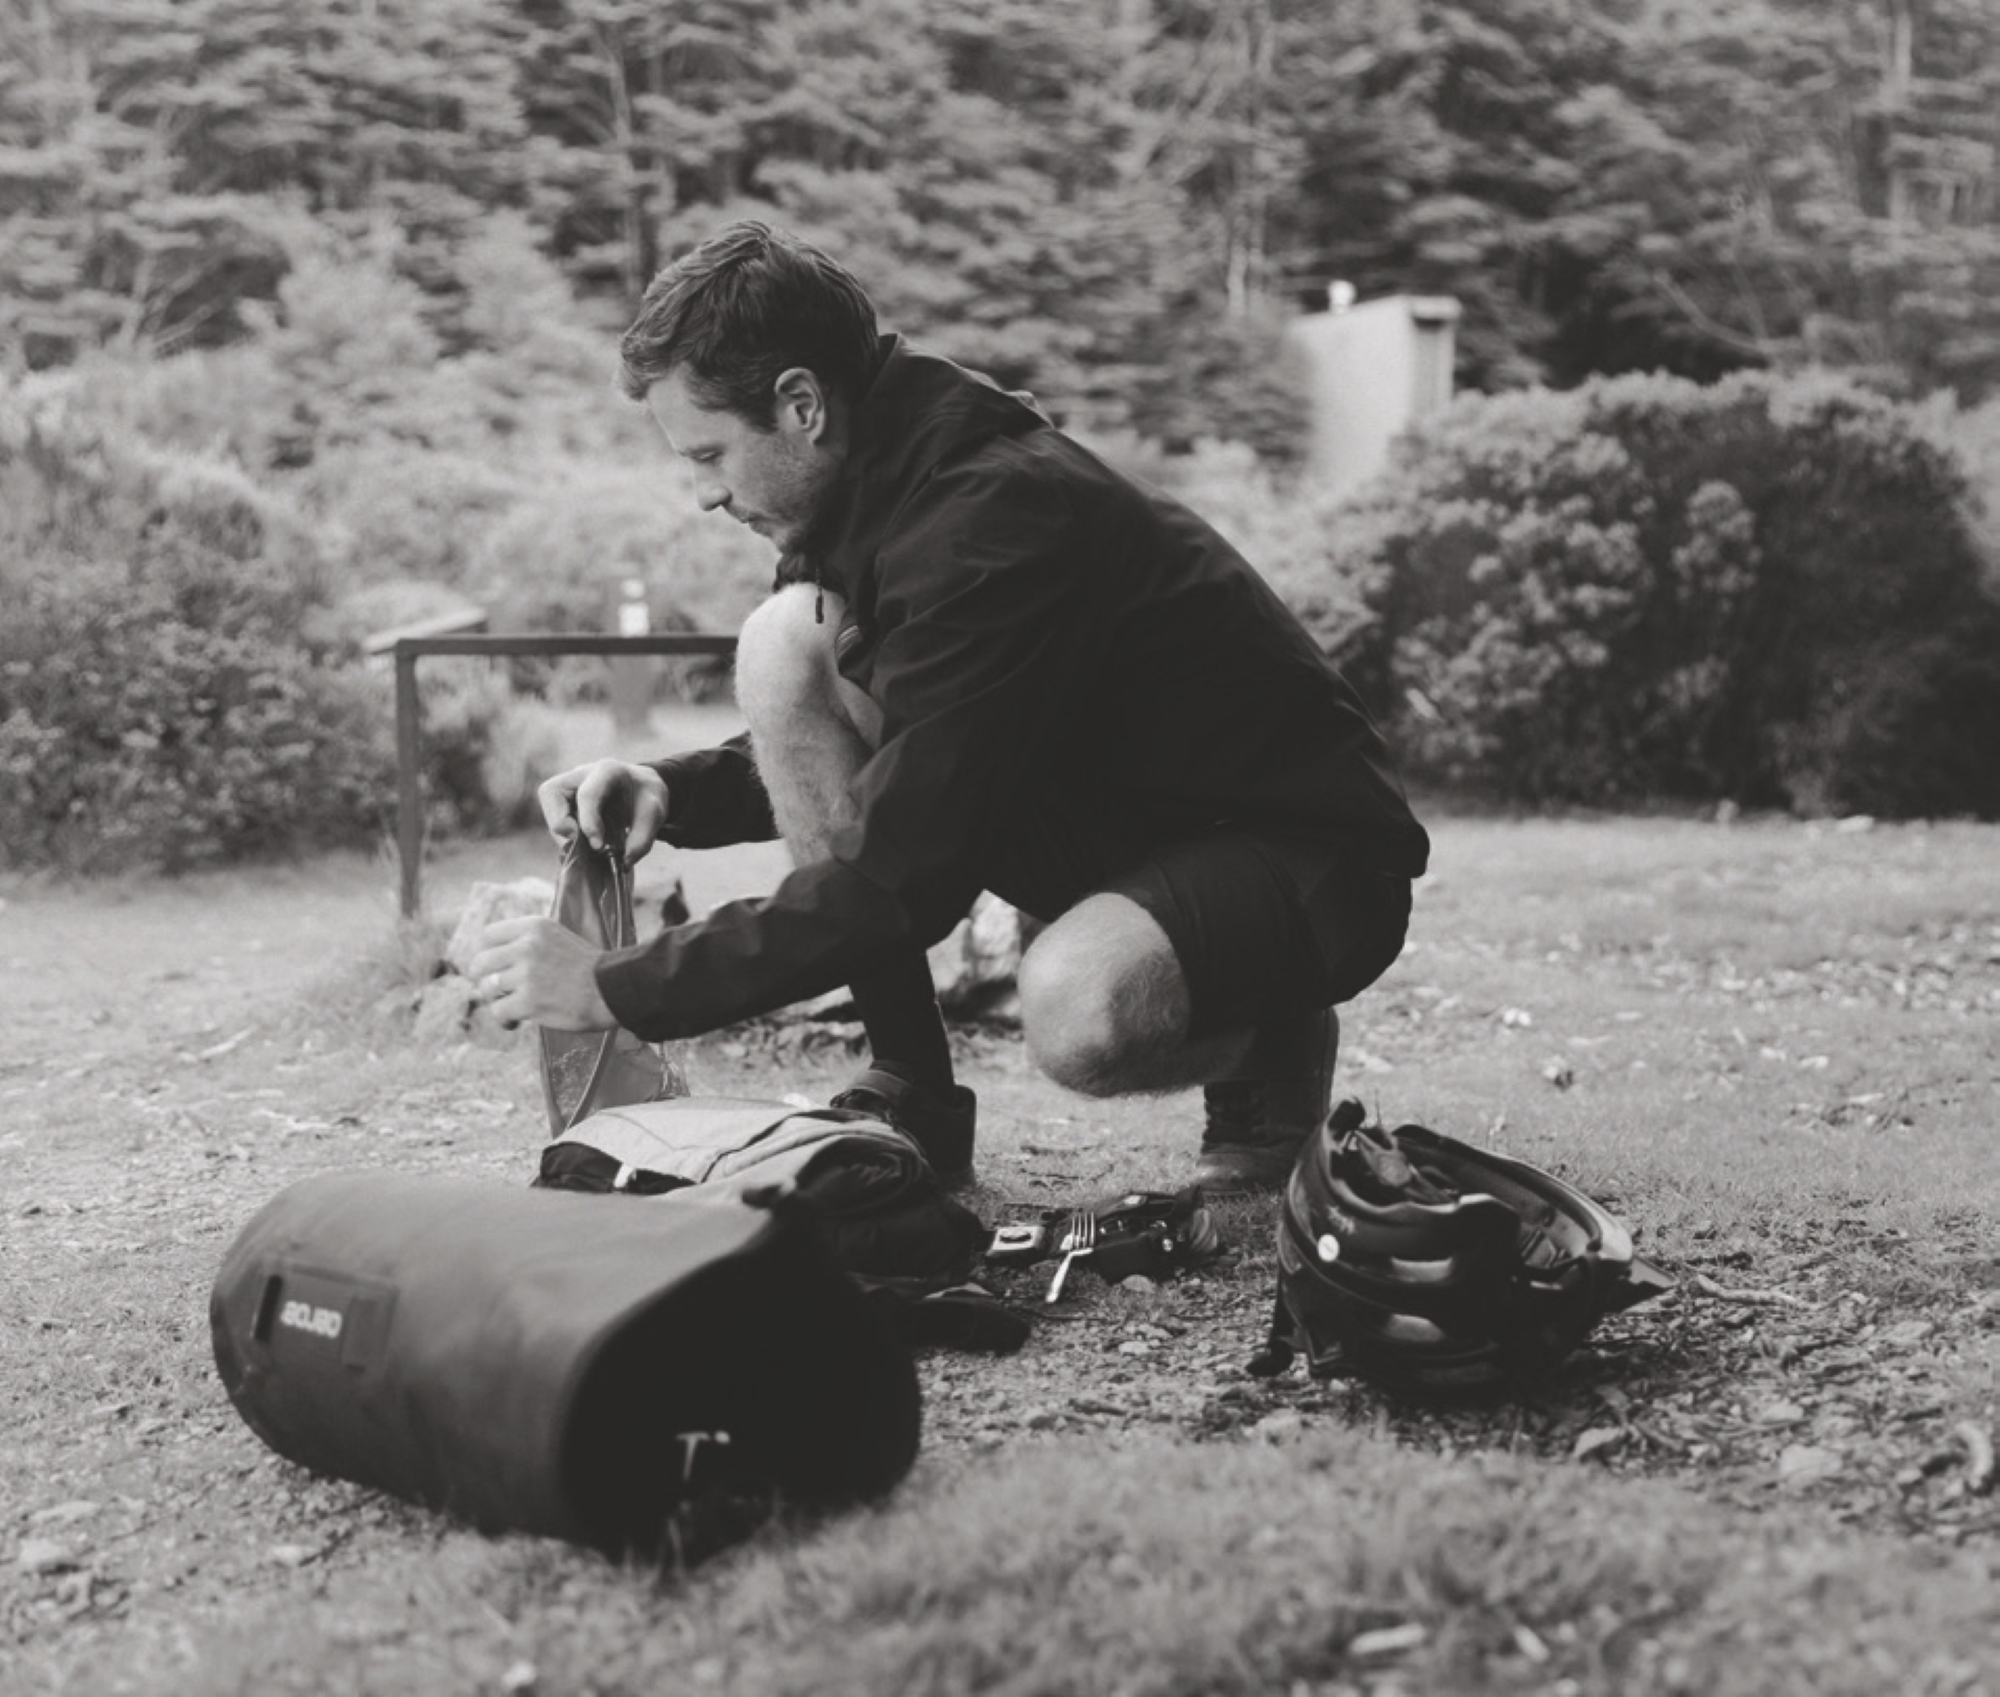
Climbing the ladder to my bunk polished off my remaining energy; figuring out how to flatten my sleeping bag out while turning around under the low ceiling polished off any remaining enthusiasm I had for the day. Sleep was needed. As I drifted off, I could hear a gnawing sound. Thinking there was a rodent in my bag, and fuelled purely by adrenalin, I slipped out of the fart sack, down the ladder and grabbed my bag. No rodent. Remembering I had earplugs, I grabbed those; if I can’t hear a mouse, it doesn’t exist – right? It wasn’t until I was home and sorting through gear from the trip, I discovered a bag of nuts with a hole the size of a mouse’s head chewed right through the side of it!
Woken by a dull ray of light trickling through the louvred window across from me, I tried to move. Creaking and groaning, I managed to get my body off the bed and contort myself down the ladder, heading outside to see if we needed to scramble to shoot the sunrise. We didn’t. I stood in the one square metre where we were able to get phone signal; the latest weather maps told me the wind had increased and the weather previously due to arrive late in the day, looked like it would now hit around lunchtime. Great.
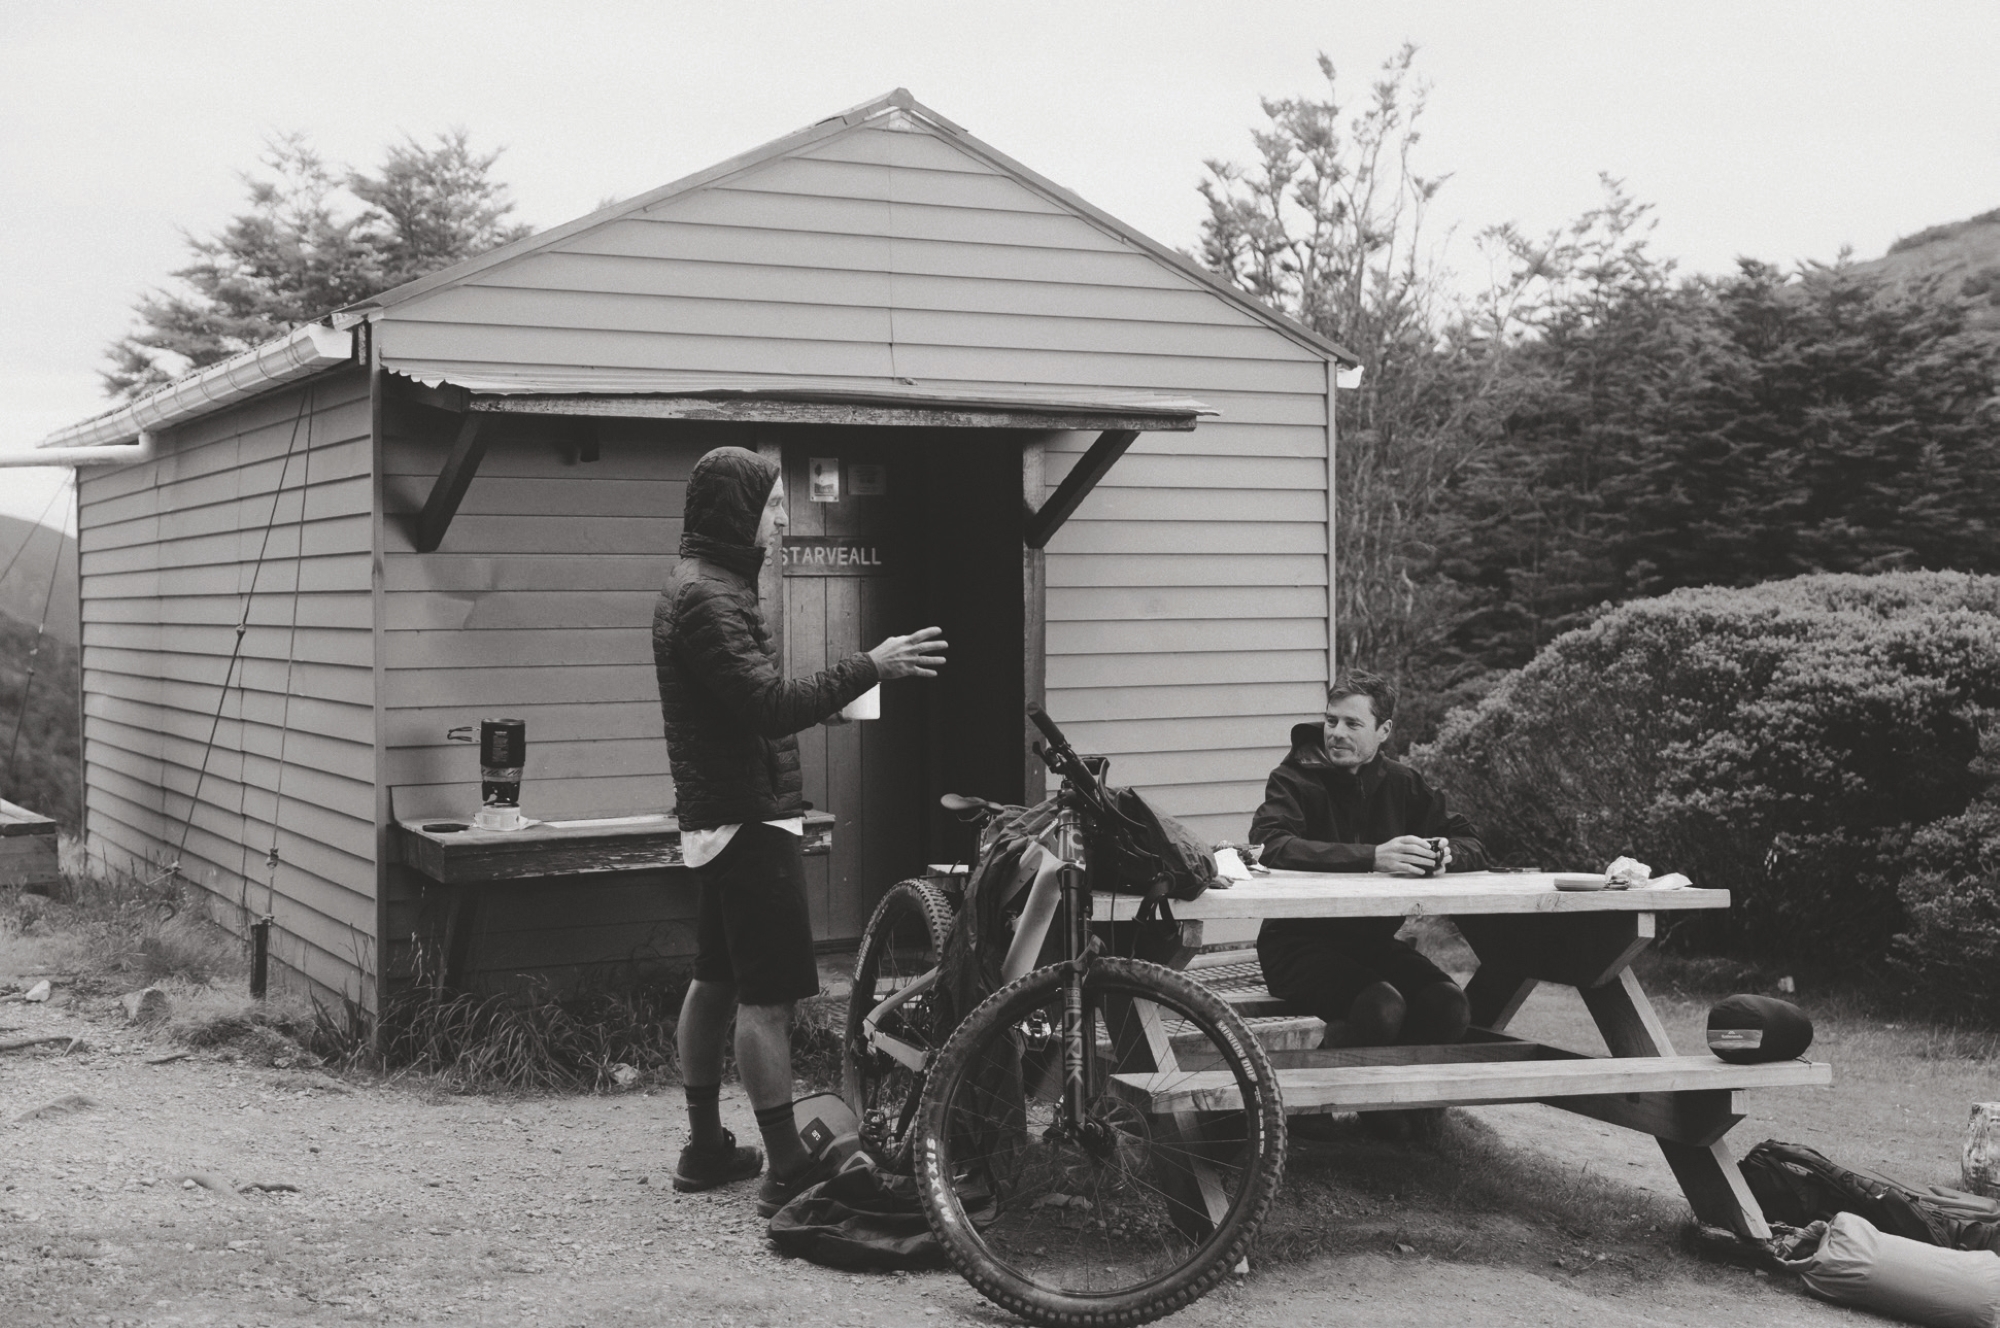
The lads rose from the crypt, drawn from their cocoons by the smell of coffee and porridge wafting their way. We devoured cups of porridge complete with mini Snickers melted into them, and we were set for the day. It was right about then I realised I hadn’t brought a skerrick of toilet paper with me and everyone else was down to the bare minimum. Thankfully the porridge I’d just cooked came in six little paper packets!
We were eager to get off the mountain before the weather hit so crammed our bags with our gear and set off for phase one of our transit back to the airport. From the hut, we rolled straight into the lush beech forest. Within metres, we were dealing with a chute of shifting rock and sketchy roots; a heck of a way to wake the body up. Kieran and I were both surprised by how ridable most of the terrain was. During the hike up, sections looked like we’d be doing as much walking down as we did up, but we were cleaning most of them with relative ease.
Careful to keep our speed in check, we continued down; a hop over roots here, a Scandi’ into a corner there, a foot out to stay upright and a few “oh crap” almost over the bars moments. We were loving it. There were a few sections it would have been plain irresponsible to ride – the risk simply not worth the reward – other sections were comfortably ridable, although strewn with rocks, roots, moss and beech leaves, meaning we had to be vigilant.
As with the climb up, there were some challenging sections on our descent. Picking our way down, the trail would slowly tip steeper to the point it felt near vertical, heading straight into a ravine where a stream lay. Keeping our wits about us, we made sure we didn’t stay on the bike too deep into these sections, ensuring we shut down our speed and came to a comfortable stop before we slid our way off the side of the hill, into a stream. Had we got this all wrong, an extraction would have been tricky or near impossible.
All too quickly, we popped out to Hackett Creek and all its crossings. Knowing wet weather was on the way in only a few hours, we theorised how high the river may get, relieved to still have plenty of stepping stones to cross dry-footed. Had we drawn our morning out while up at the hut, things could have been very different.
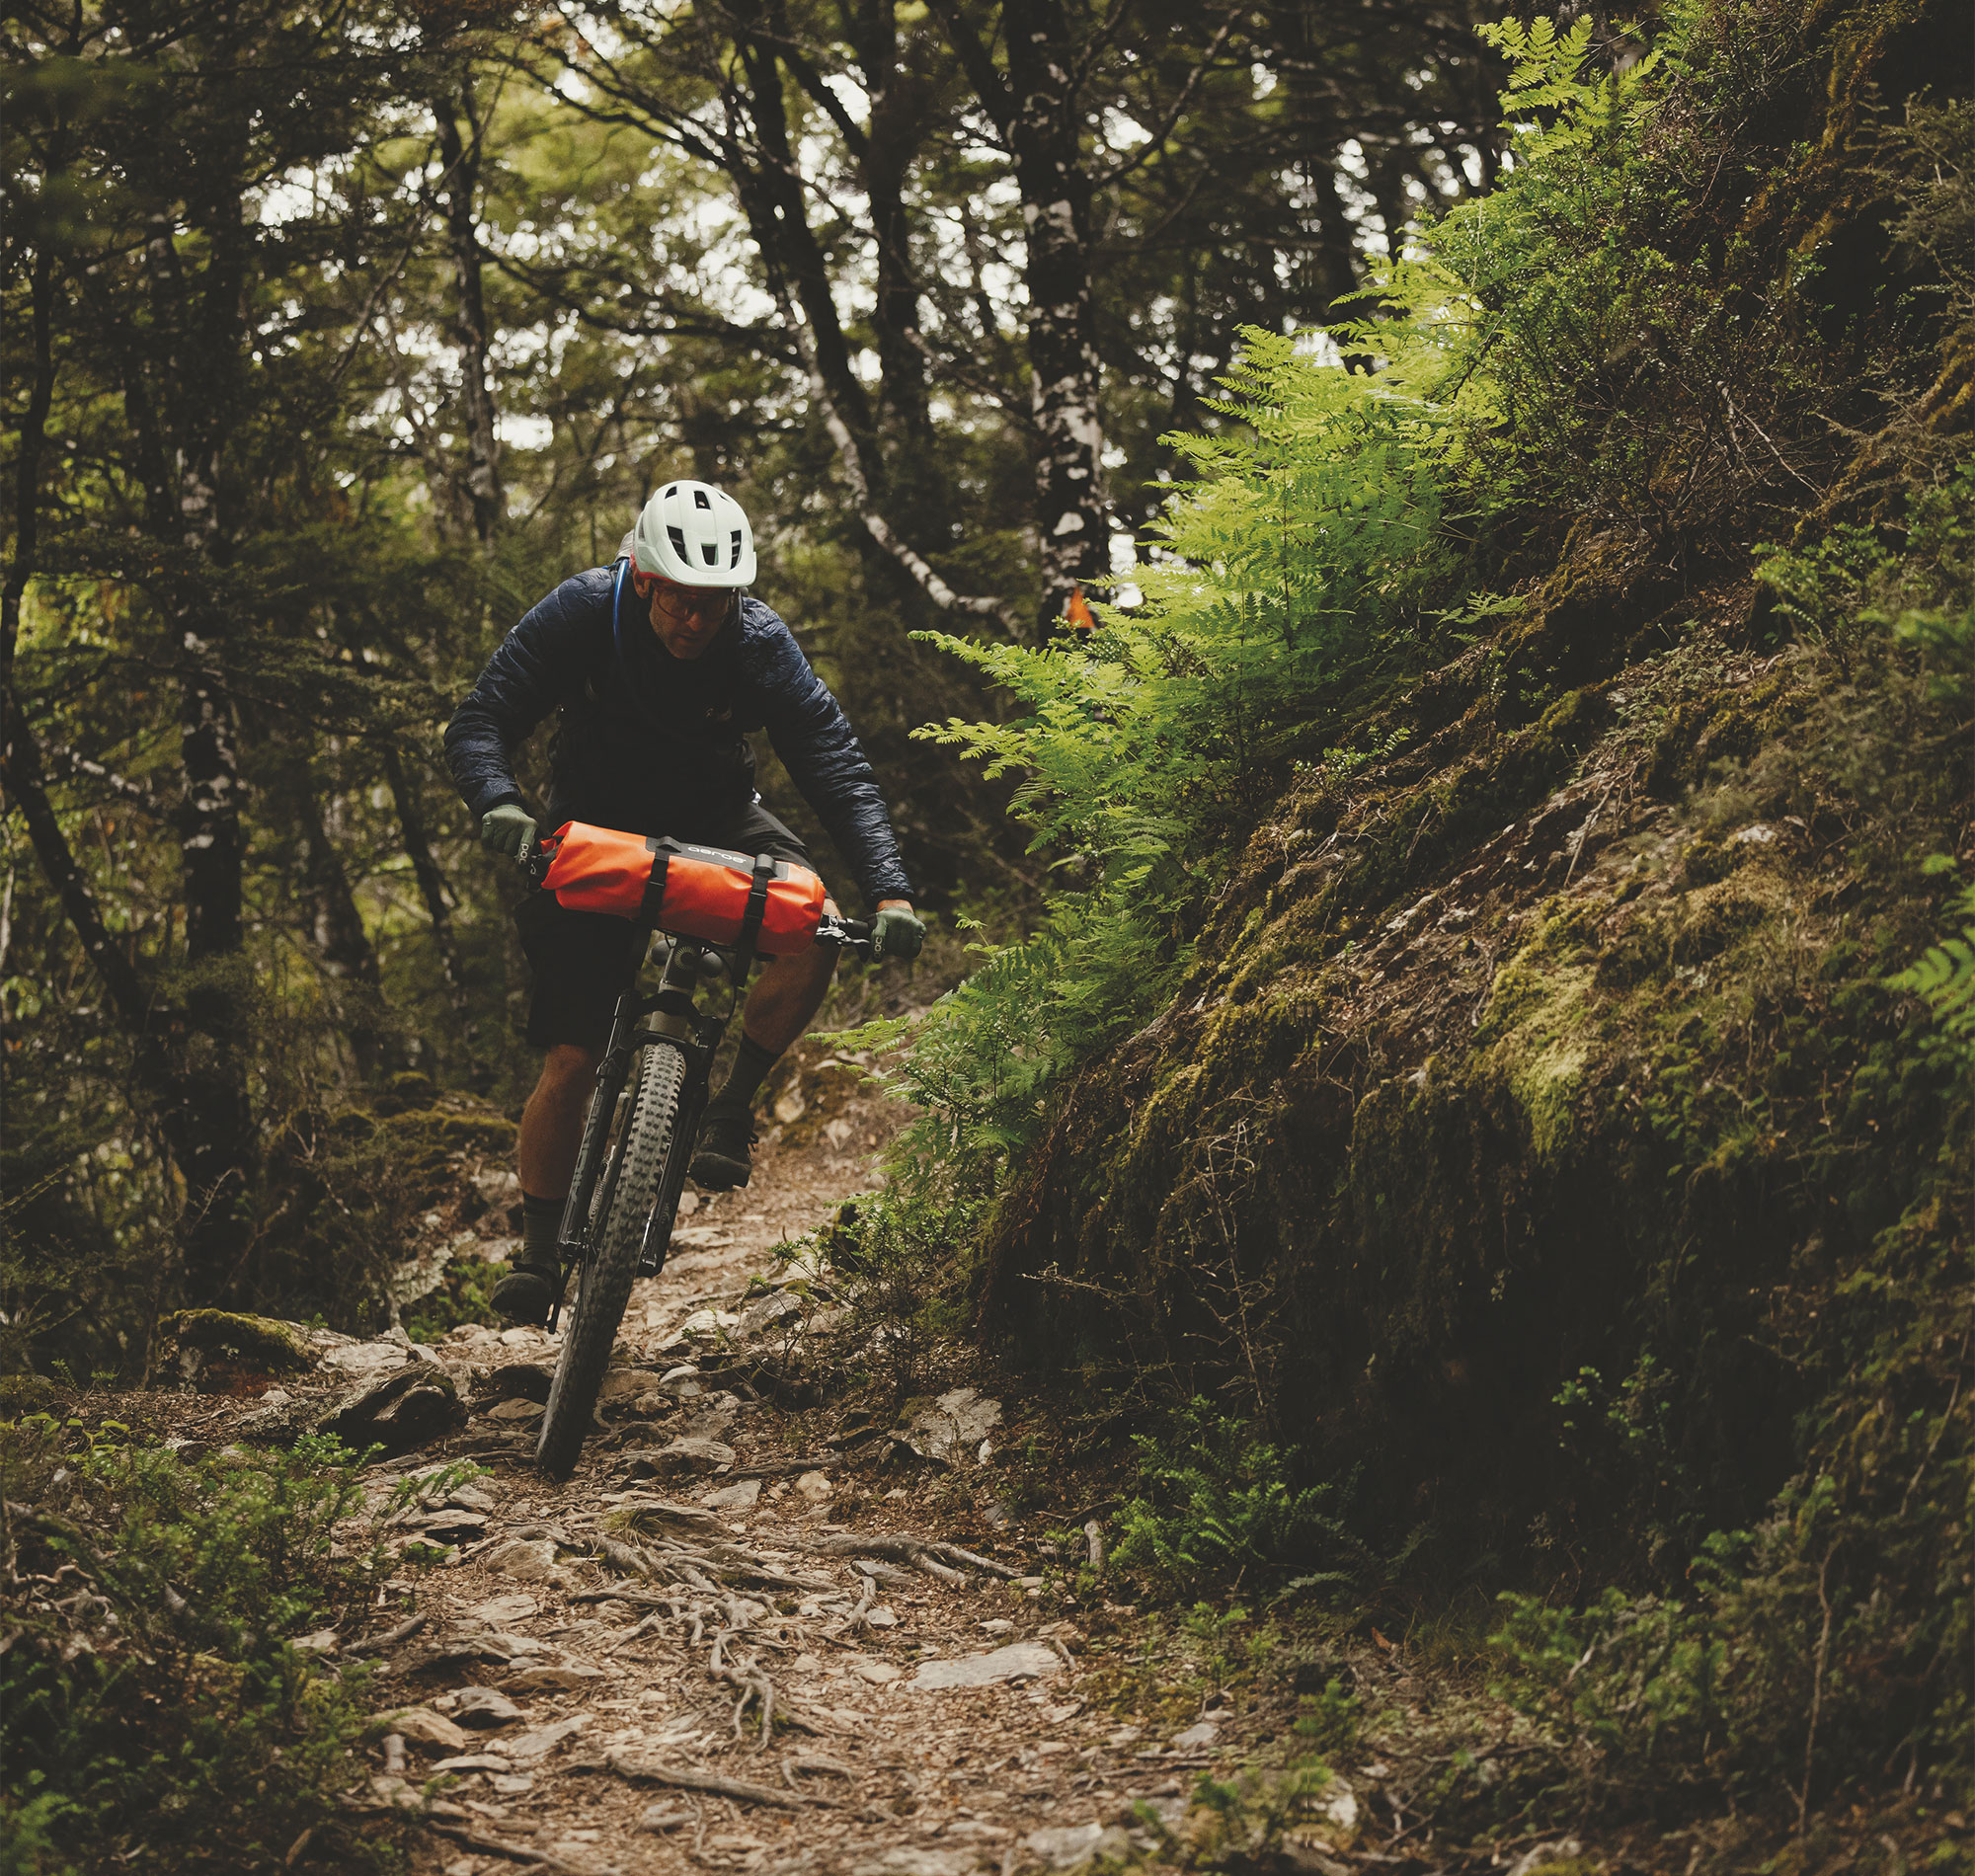
We reached the top of Silvan just as the weather hit. What felt like teaspoon-sized raindrops blew in from the south-west. Of course, I packed my jacket right at the bottom of my pack.
Arriving at the car park to the sound of a saxophone blaring, we spied a local gent taking advantage of the acoustics of the area. We paused and listened for a time; he was no Kenny G, but he was a whole lot better than I was when I was trying to learn at age 12.
Minutes into the grind back over to Silvan, we were starting to see the weather move in. The odd rain spot fell and the wind was getting up, the signs of things to come. Conversation had dried up by this point; we were getting tired and, knowing this was the final ascent of the day, we were focused on the task at hand.
We reached the top of Silvan just as the weather hit. What felt like teaspoon-sized raindrops blew in from the south-west. Of course, I packed my jacket right at the bottom of my pack. I emptied the bag and while trying to stop its contents from blowing away, eventually retrieved the jacket and battled with the wind to get it on.
We started the descent on a sensible trail, People’s Choice. It was a far cry from the tech of hours earlier, but a welcome change given the weather. Barely pedalling, we pumped our way down several of Silvan’s digger-built flow trails. Kieran’s ease of generating speed, fluid style, and effortless cornering reflect his previous years’ racing downhill around the globe, only this time he had a heavily loaded handlebar bag and backpack. Towards the exit, and on familiar trails, Kieran lets the speed run. Regardless of the fully loaded bike, he was gapping doubles, jumping out of wallrides and coming into corners faster than he should have – a casual masterclass in descending and bike control.
Leaving Silvan’s gates, we were stoked – what a time the last couple of days had been. The remaining ride from there was merely a formality, or so we thought. A pizza and a brew at Eddy Line Brewing satisfied our cravings and prepared us for the last few kilometres to the airport. Fed and back on the bikes, the storm was starting to show itself; winds were swirling, branches and leaves were flying, and rain sporadically smashed us from all directions. The wind, oh the wind. It felt like we were riding up a hill as we headed along the pan-flat bike path to our destination. With Kieran half a wheel ahead, the roadie in me had quietly picked the downwind side of him, I managed some shelter from the crosswind, easing the strain a little.
Some 37 hours after I’d left my car, I arrived home, having conquered a mission from Te Awamutu to Auckland, onto Nelson, up Mt Starveall, and back again. Mission complete and many memories banked.
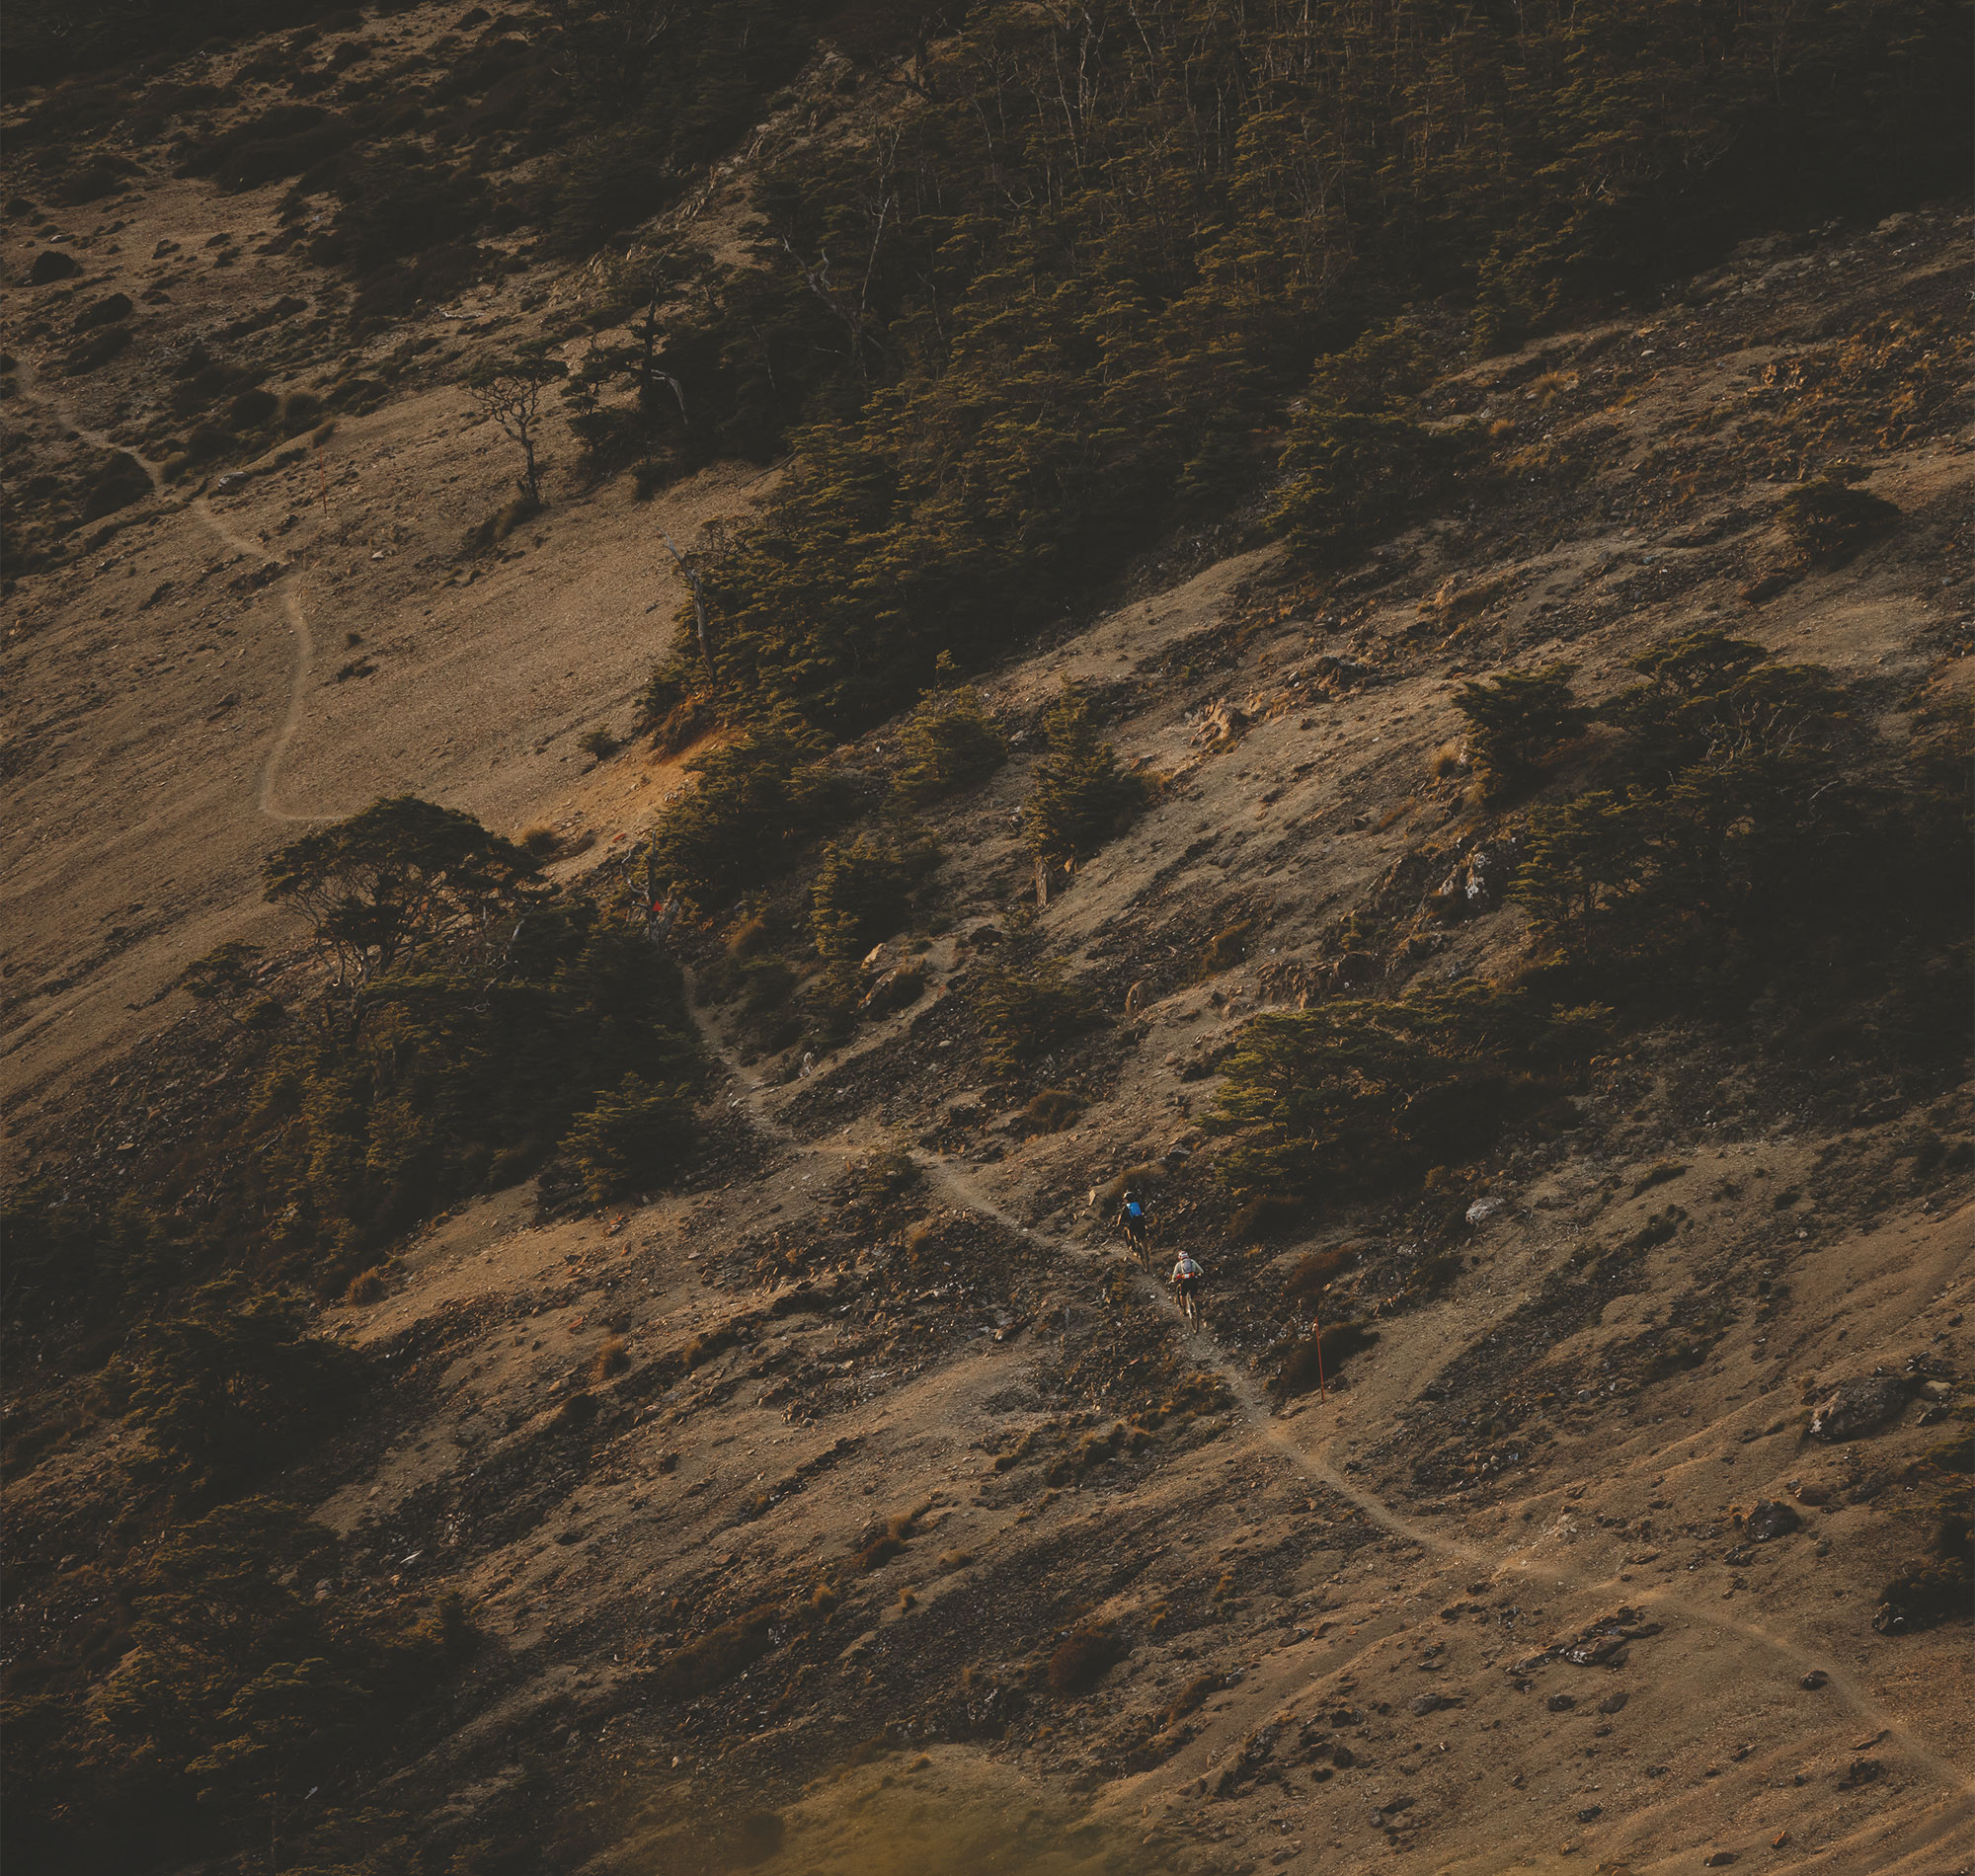
The rain held off just long enough for me to pack my bike in its bag. As I closed the final zip, the heavens opened. A short dash to the terminal doors 50 metres away and I was properly damp. I removed my filthy shoes and socks, stashed them in my backpack and checked in for my flight.
I took a step back from the flight attendant as I paid my excess baggage charges, hoping she couldn’t smell me after two days of sweaty riding. My bike rode the conveyor through the gate and I walked off, only to be chased by the attendant. “What did I leave in my bag?” But she was simply confirming I did have shoes for the flight. I’m surprised she wasn’t checking I was going to shower before boarding; which is exactly what I was headed to do. Thankfully, for my fellow passengers, Nelson Airport has a shower, so I wouldn’t be taking my stench on the plane! Warm water blasted away the sticky dirt of the previous days, but didn’t take care of the biddy bids stuck to my legs, those required some manual labour.
Hosed, but not quite home, I boarded my flight back to Auckland; the memories of the previous two days all blended together, one day now barely distinguishable from the other. My aches and pains seemed to remain on the tarmac as we lifted off, although I knew they’d return when I woke the following morning.
Some 37 hours after I’d left my car, I arrived home, having conquered a mission from Te Awamutu to Auckland, onto Nelson, up Mt Starveall, and back again. Mission complete and many memories banked.

The outdoor pursuit
Words Liam Friary
Image Henry Jaine
There’s something to be said for the simple pleasure of going for a ride with your buddies. It always reminds me that bikes are just so bloody good. They help you connect with all types of people. These people help you stay enthused and keep you in the riding scene. As they say, surround yourself with good people. For me, this is no more evident than in biking culture. As the years go by (faster than I’d like), I meet more and more riders who all have an immense passion for bikes. It’s the thing that ties us together and often leads to other adventures, rides, or even catch-ups off the bike. These people are some of my closest friends these days. I think in the digital world, we’re not just looking but yearning for more IRL (in real life) activities.
Strava have found the same in their recent trend report. ‘Strava athletes say their number one reason for exercising with others is social connection. Over half of Strava athletes say they’re most motivated by friends or family members who exercise.’ And despite what you may think about the younger generations, ‘Gen Z is also the most social, being 29% more likely than Millennials to workout with another person at least some of the time.’ So, next time you’re going out for a ride, invite someone! Or, if you’re the one being invited, don’t turn down that offer. As you can see from some of the findings – we all inspire each other. And that’s one of the overall objectives of this print publication: to document riding adventures which hopefully provide inspiration.
I’m keeping my tradition of writing this editorial piece right on deadline. It seems I need to get my house in order (i.e this magazine) before I can sit down and write this. It’s not without its drama – my designer and proofreader would much prefer this ahead of time! But, here I am again because, instead of doing this indoor work, I was doing the outdoor work of riding my bike with some test products of course. It’s the outdoor pursuit that often gives me the clarity I need to complete the indoor work. I have so much gratitude that I can put together a publication in a sport that I’m so passionate about. And to those who surround me, I am forever grateful for your endless enthusiasm.

Tales from the Trails: Wyn’s Race Tales
Words: Wyn Masters
Photography: John Fernandes
“I checked flights and made the decision to head to Madeira for a week of racing...”
So my road to Madeira for the Trans Madeira race — a race that wasn’t even on my radar for 2022 — wasn’t such a clear one. I had managed to contract the dreaded Covid, and tested positive for the second time in 2022, at the final World Cup downhill of the year, in Val di Sol, Italy. This meant an extended stay in Italy to recover and then finally fly home. Not really the end to the ‘22 season I was after.
Then, the following week, back at my current home in the UK, I met up with Phil Atwill who was home for a bit to visit family as he now lives in Greece. He mentioned to me he was heading to Madeira on the following Monday for the Trans Madeira event. Not even knowing it was on, I quickly checked flights and made the decision that morning to head to Madeira for a week of racing, which would at least end my season on a better note. I was on an EasyJet flight the following Monday afternoon, direct to Madeira and arriving at 6PM.
Arriving in Madeira, I met Phil at the airport. He had taken a flight with a connection in Lisbon, and the airline had managed to lose his bike. Apparently, ‘22 was the year for losing luggage — I had it happen a few times myself. Luckily, with my direct flight, I had no such issue. We were picked up by a driver who took us to the base camp, which was set up on a beach, with 100 odd tents for all the riders and a big tent which served as the dining hall. We arrived as the sun was setting, so I got to work throwing my bike together and getting it ready as the race was set to start at 8 o’ clock the next morning.
To anyone planning on doing so, I would suggest not arriving the night before a race. Setting everything up — including the tent and so on — in the dark kinda sucks but, somehow, myself and Phil managed, and a local kid even agreed for Phil to use his 2016 Propain, as that’s the brand he rides for. All in all we managed pretty well considering.
The next morning, we were up early and in the shuttle on the windy long road to the top of the mountain for the 8am start. This became the daily routine for the next five days. Madeira’s mountains are in the centre of the island and stand up to around 1800m. This means that, often, the weather at the beach can be hot and sunny and, up the top, it can be a lot cooler and more damp. This really makes this event, as we cover a large amount of the trails on the island and get such a wide range of conditions and soil types.
Anyway, I kicked off Stage One for the week, following Phil on his borrowed/rental bike. Surprisingly, that didn’t last long, as 100 metres in he was on the side of the trail trying to pull the derailleur out of the wheel, not the best start to Stage One of a 30 stage (yes, 30 stage) blind Enduro race. For me, racing ‘blind’ — or without practice — is the truest form of Enduro racing, and probably the most fun too as you really have to be ready for anything and have a mental state of alertness. Pushing hard and going fast without knowing what’s coming up is quite a cool feeling.
The first stage went off without a hitch. It was quite physical and, as the day went on, it got better and better. Stage Two was quite wet and super techy with a lot of roots. I actually had one of my only crashes for the week at the bottom, when one of the photographers was cheering so I sent this blind jump and proceeded to miss the catch section after. Lesson learnt for the week: don’t let the “Kodak courage” take over. Keep it smooth! Stage Three was one of my favourites and also one we did in the EWS race back in 2018.
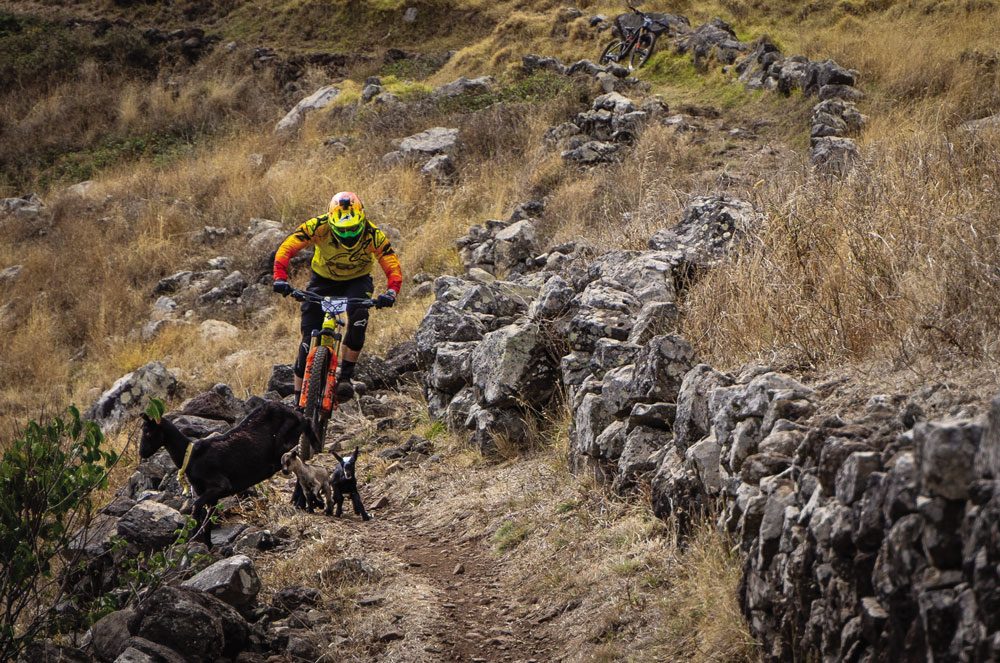
“The trail down was what the locals referred to as the ‘Madeiran Massage’, as it consisted of 10,000 stairs, and rattled whatever wasn’t already loose on the bike, loose!”
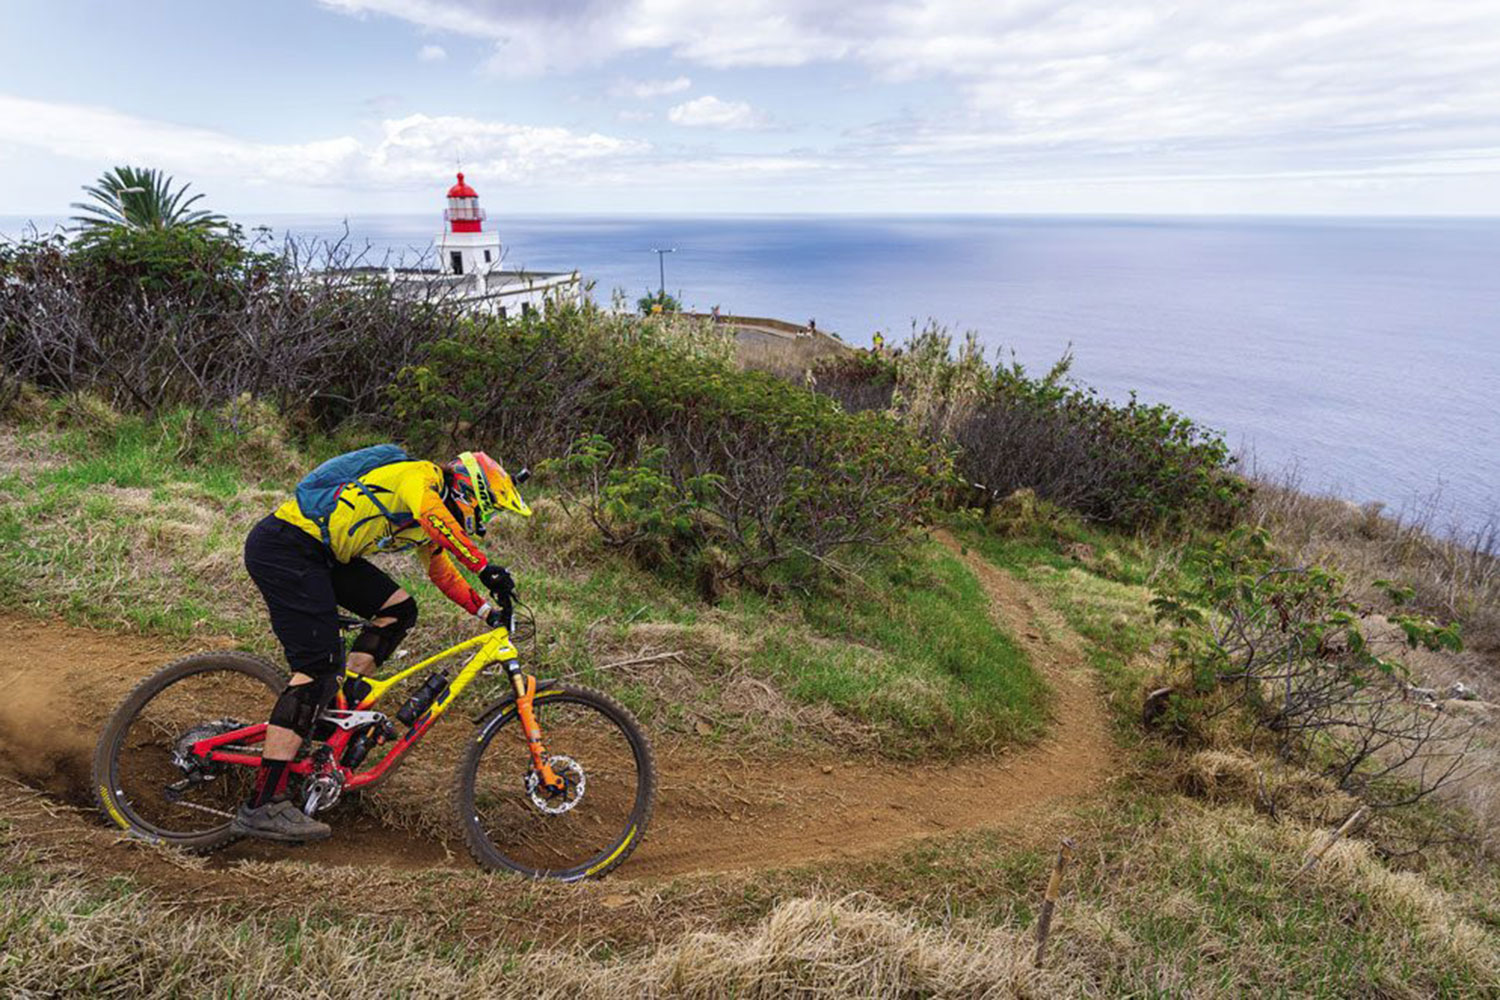
Dusty and flowing with heaps of drifty corners. We rolled back down to sea level before beginning the climb to Stage 4. It was super hot, maybe 35 odd degrees, and there was nowhere to hide from the sun. Still, we made it up to Stage Four which was super rocky — I nearly killed a family of three goats that were walking on the trail as I came around a corner. Definitely made for a bit of excitement!
From there, it was a shuttle followed by long pedal along the Levadas — the ancient waterways that make up the island’s irrigation system. They channel all over the island and are pretty impressive to see. By the end of the week you truly realise how many of them there are — we spent a lot of time riding along them that week, that’s for sure. I think there is over 1000km of them on the island, with 40km of tunnels too. Anyway, day one turned out to be pretty big with 65km on the bike and quite a bit of climbing too, even with all the shuttles. There were plenty of tired and hungry riders arriving back at the camp area afterwards — luckily, the food the event puts on every day is pretty good. You also get a beer each day on arrival, which is nice. This was where I was surprised, as this event isn’t so much aimed at the pro riders but more the full range of riders, offering them a chance to see the majority of the riding in Madeira in a week. Physically, it wasn’t much less than an EWS day and we still had four more days of it to go. At the same time, I was stoked too, as more racing and bigger days is something I enjoy and something I think the EWS has lost a bit in past years.
Since I don’t quite have time to outline every single day of the week, I will run over my highlights. Day two was another big one, with such a range of different trails and conditions.
We finished off with 50 odd switchback berms which made for an epic way to end the day — especially with Phil chasing me down, still on the rental bike as his never arrived! Then, day three was the one the event staff had been telling us about all week: the big hike-a-bike day. Due to the longer day, we had to be up for breakfast at 5.30am. At this point, we were definitely starting to feel the previous couple of days and, after a one hour bus ride to the top of the mountain, we were greeted with thick clouds and rain. I can say for sure no one was super keen to get out of the bus in a hurry but, luckily, after about 25 minutes of pedalling and pushing we arrived to see the clouds burning off to some of the most epic views all week at the start of the stage. It was definitely bucket list stuff. We then had two open and fast stages through some rocky and loamy stuff followed by a 40 minute climb on a road to reach a trail taking us to the first feed zone of the day. The trail down was what the locals referred to as the ‘Madeiran Massage’, as it consisted of probably 10,000 stairs, and rattled whatever wasn’t already loose on the bike, loose!
Then came the long hike. Phil and I had been pushing our bikes for about 40 minutes when we got to a sign telling us we had 11km to go to the next feed zone. It definitely didn’t excite us but, once up on the ridge, it was much better going with some amazing views of the valley around. It was also a relief to finally arrive at the feed zone and have some food — that was probably the hungriest I’d been all week. From there, we rode and pushed along a Levada and through some long, dark tunnels for a while. We were told, on the event information sheet, to bring a head torch — and now we knew why. After the two long and narrow tunnels, we arrived to a trail that two local kids at the start had told us is the best on the island. I can say they definitely weren’t wrong — it looked slippery to begin with, that kind of wet, volcanic dirt, but after two corners I realised how much grip there was and got into it. It was probably the most flowy trail all week, with all the corners banked in. It had so much grip. After that, we’d definitely forgotten the big hike to get there and I don’t think I saw anyone not smiling after that! We headed to a cool campsite below a big rock face on the coast for some much needed dinner.
The final two days kind of flew by as, after four days, the routine starts to set in, and you get used to the early starts. The nights in the tent also get easier. On day four we had a sweet campsite on a small beach; and by day five, the final day, everyone was pretty smoked. We were also stoked to make it to the end of the race and, after another solid day’s racing, we got to ditch the tents for the night and were put up in a five star hotel with a big buffet dinner and prizegiving for all the riders, which was a bloody good time. I managed to take the win over ex WC DH rider, Marcelo Gutierrez, from Colombia — not that it really mattered, it was more about the experiences we’d had along the way.
This is an event that I wouldn’t even so much label as a race, but more as an experience. I would definitely recommend it to anyone who has yet to go to Madeira, as it will show you more than you ever could see on the island without a guide, plus you get to ride/race with 100 other people all having a great time too. For me, it definitely was the best event I did in 2022 and my favourite week of riding too. It was the end to the season that I didn’t know I was looking for, but one of the best ways to finish off the year. So yeah, if you haven’t already, I would recommend adding it to the bucket list! One of the best parts is that a lot of the profits from the event are reinvested back into funding more trail building and maintenance on the island, too.
Cheers to the whole crew at Trans Madeira for an epic week!
Trail Builder: Support Stretches North to South
Words: Meagan Robertson.
Photographs: Peter Stoneham and Andy MacDonald.
The latest round of Trail Fund grants – supported by generous donations from Specialized – helps build new trail networks from Northland to Southland. Thanks to an incredible $17,850 donation from Specialized New Zealand, Trail Fund’s spring funding round was bigger than ever this time around, with four grants of $4,000 up for grabs! The increased number of grants on offer saw the biggest number of applicants in years, with 26 trail building groups vying for the funding.
“This was a really tough round for funding decisions as there were so many quality applicants,” said Advisory Board member, Peter Mora. “After much consideration, we chose our top four, but we want to acknowledge the incredible amount of good work being put in by volunteers up and down the country, and the quality of the applications we received.”
The funding is already being put to work by four deserving trail building groups around the country: Ruapehu MTB Club; Waikaia Trails Trust; Cromwell MTB Club; and Kerikeri MTB Club.
Riding in Ruapehu – Ruapehu MTB Club
For those who have spent non-ski days riding everything they thought the Ruapehu region had to offer – Old Coach Road, 42nd Traverse, Fisher’s Track, Tree Trunk Gorge – it turns out there’s more!
Opened late in 2018, Uenuku Pines was the first mountain biking park in the Ruapehu region, set in Waikune Forest, on the edge of National Park Village.
The opening of the park saw a series of ‘unofficial’ trails – built and maintained by local volunteers –finally made ‘official’, thanks to the co-operation of forestry managers. With 15km of trails, ranging from Grades 2 to 5, the park grew quickly in popularity – as did Ruapehu MTB Club membership.
In 2021, a large section of the park needed to be felled, which stemmed the growth the club had worked hard for. However, the numbers have started to increase again with the redevelopment of the trail network – this time, working in tandem with the forestry company and Crown to avoid future felling impacting the trails.
Building momentum should speed up this summer, thanks to Trail Fund’s $4,000 donation to the purely volunteer-run club. “We’re really excited about the rebuild and reigniting the passion that was building in the area with working bees, weekly social rides, kid’s programs and a women’s riding group,” said club president, Greg Prouse. “The funding help will expedite the construction of new tracks and usage in some difficult terrain, bringing us closer to our goal of once again providing a regional riding facility for riders and their families.”
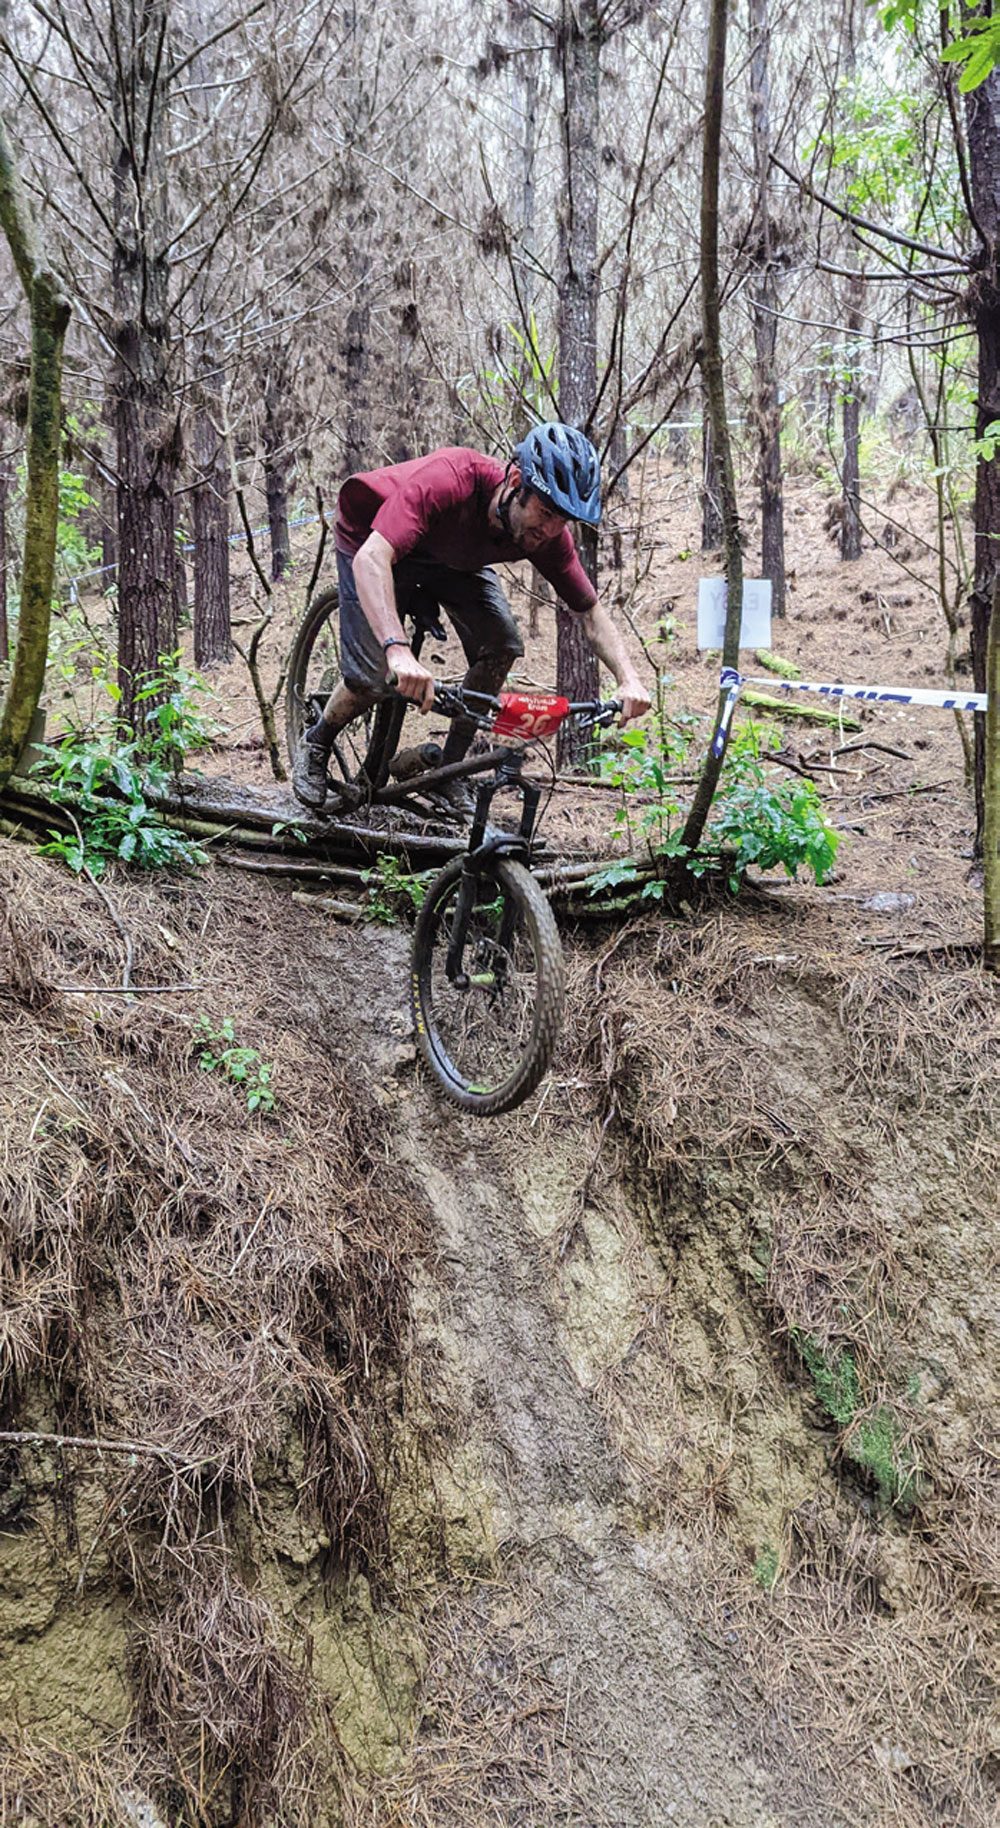
Why Waikaia? Pure passion – Waikaia Trails Trust
As Margaret Mead so aptly put it: “Never doubt that a small group of thoughtful, committed citizens can change the world; indeed, it’s the only thing that ever has.”
And while the Waikaia Trails Trust might not be looking to change the world, this small town of 150 people is looking to add another string – and a good one – to Southland’s growing mountain biking scene.
As with most good changes, it didn’t happen quickly. An opportunity to develop mountain bike trails in Waikaia Forest, located immediately to the west of Waikaia in the north of Southland, was identified by the mountain bike community, in 2020. The site, which is a 700-hectare forest with approximately 110m of elevation, is owned by Southland District Council (SDC) and there was no public access at this time.
Not to be dissuaded, the instigators had the Ardlussa Community Board (ACB) lead the first stage of investigation, starting with receiving 100% support and permission from the Council to use the forestry block for this project.
“Once permission was granted to investigate, we commissioned a concept plan, including a feasibility study, then a master plan, then set up the Waikaia Trails Trust to lead the project in collaboration with SDC, Ardlussa Community Board and Southland Mountain Bike Club,” explains trust chairperson, Hilary Kelso.
From there, the Trust worked to finalise a Memorandum of Understanding, Access Agreement and License to Occupy with the Southland District Council. This included securing insurance, including $20m liability, and completing a Health and Safety Plan and Overlapping Duties document between the Trust, SDC and IFS (Invercargill Forestry Services). All parties involved have the up-to-date harvesting plan to ensure best use of the area for trail sustainability.
“It’s taken significant effort to get to this point, but we are thrilled to be ready to begin,” says Kelso.
“Our aim is to create an excellent trail experience based on quality, which complements and enhances mountain biking in Southland and caters for all riders, with an emphasis on introduction to, and progression within, the sport.”
Development of the proposed 25km network is divided into stages, and the Trail Fund grant will go towards the development of the park entrance and two initial trails – one beginner and one intermediate. While the Trust is focused on catering to its own residents and neighbours, it also sees the park as an opportunity to add recreational tourism to a town known largely for its railway and mining history.
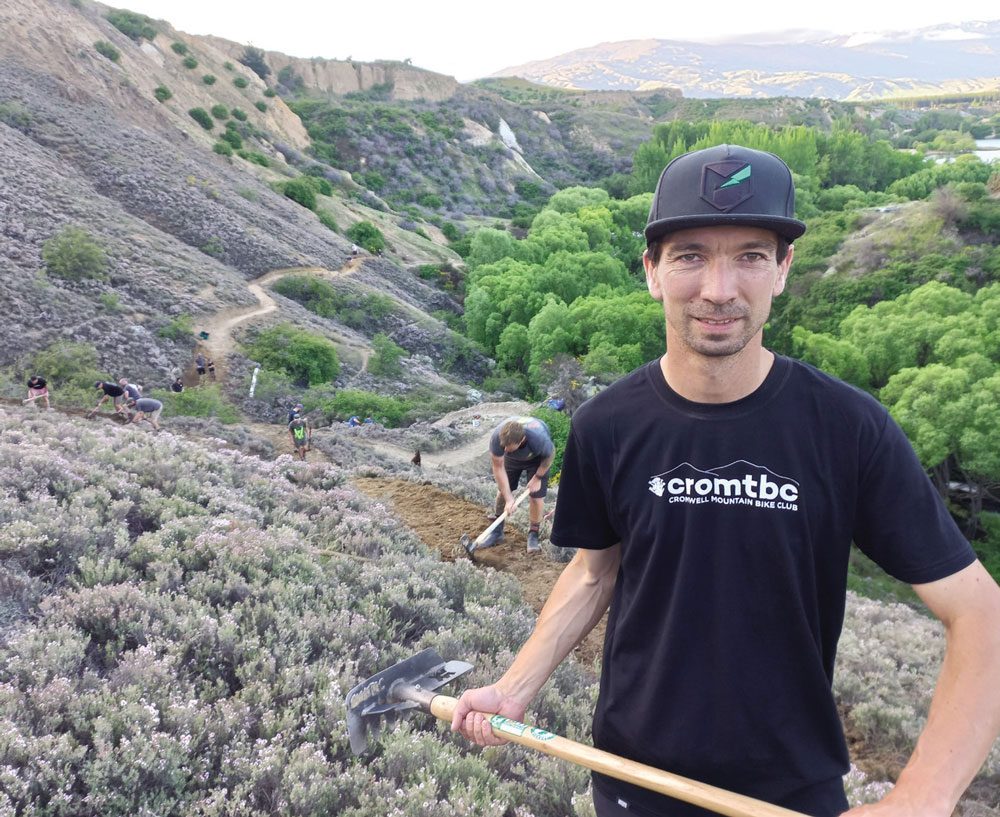
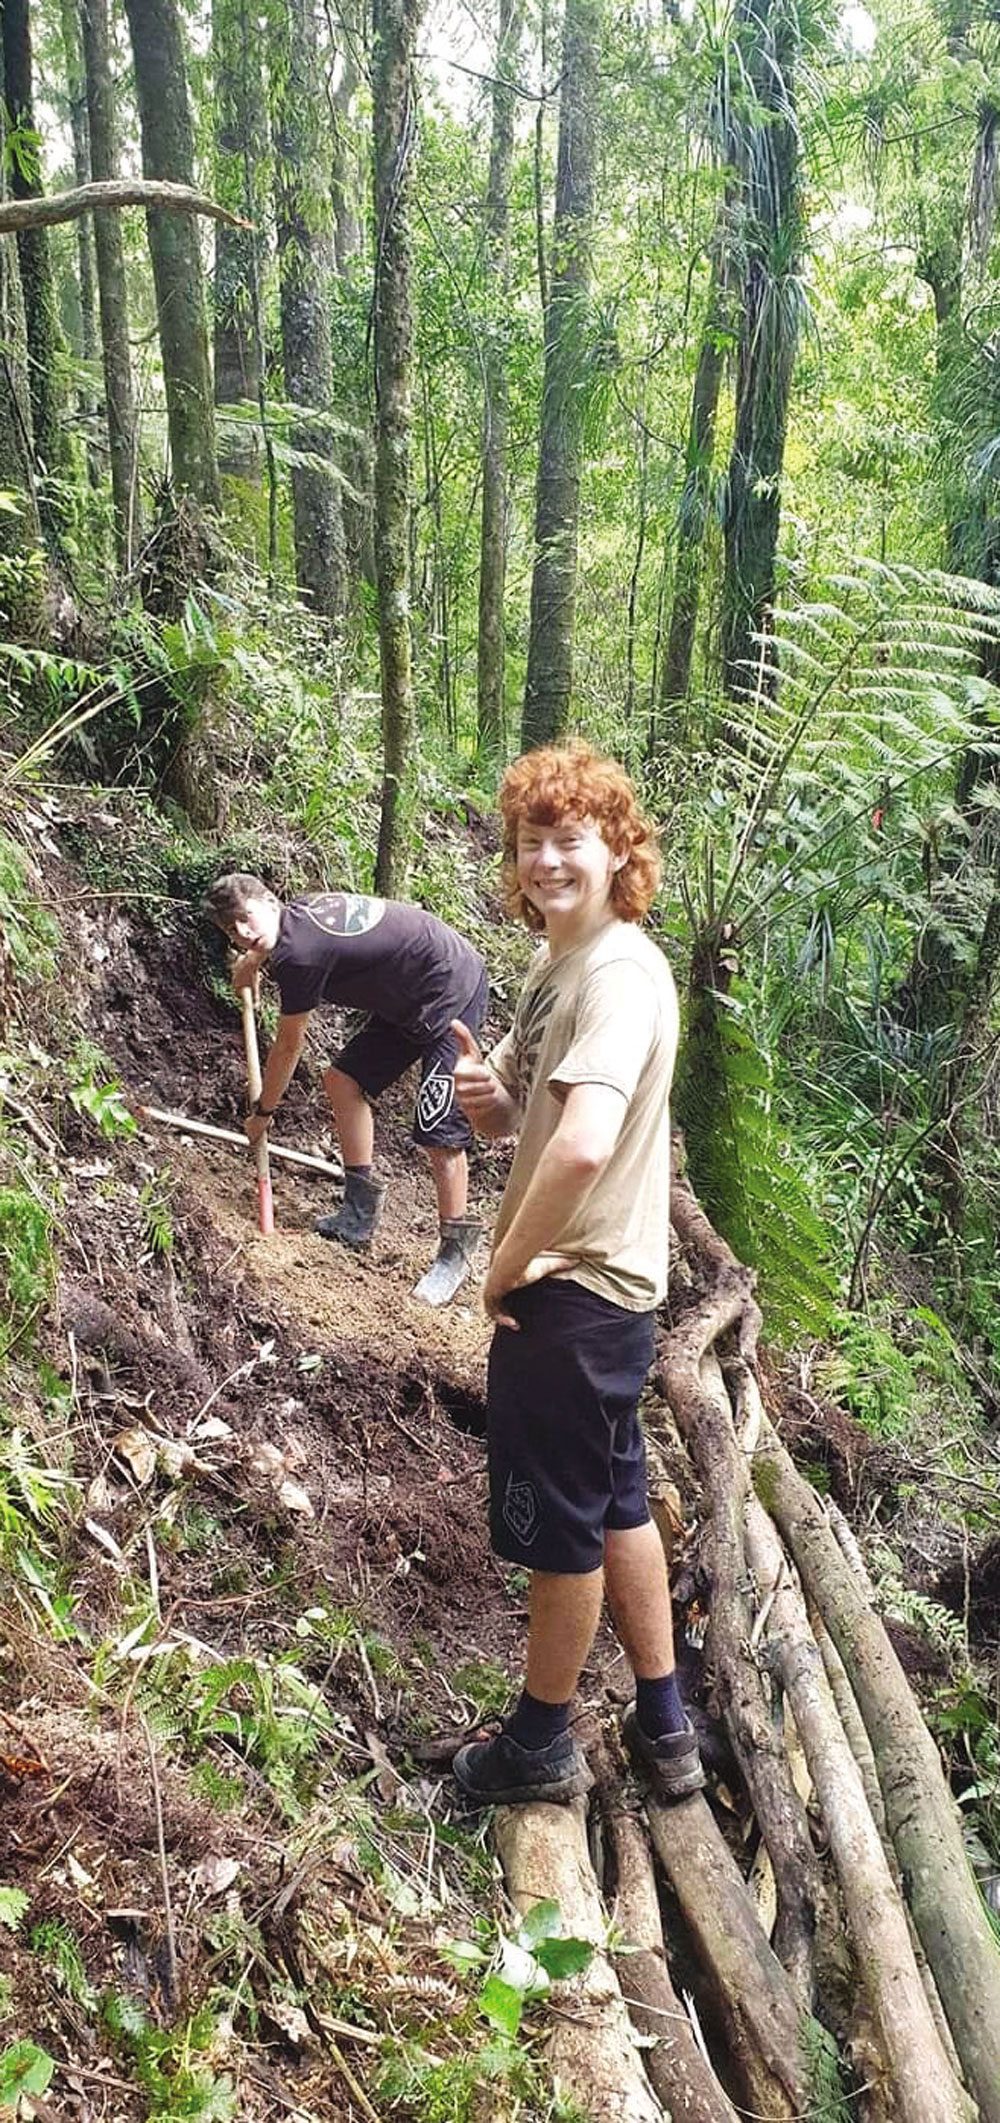
Cromwell MTB Club working on a new trail in Bannockburn.
Caught in the middle – Cromwell MTB Club
Nestled between a trio of top mountain bike destinations, one might think Cromwell mountain bikers were spoilt for choice. However, as epic as their neighbouring destinations may be, until recently they had no local mountain bike specific trails, and no suitable land to build them on.
That all changed early in 2022, when the Cromwell MTB Club – a newly formed club committed to building free, permanent trails around Cromwell – were granted access to suitable land in Bannockburn, where work on their first trail started soon after.
“We’ve actually been a committee for just more than four years but, until now, the club had been a ‘committee only’ entity because we didn’t want to seek paying members until there was a solid project to be involved in.
Now we have that, and trail work well underway in Bannockburn, where trails will be built purely by club members and other volunteers,” says Cromwell Mountain Bike Club president, Alex Bartrum.
He was thrilled to receive the funding for tool sand irrigation pipes from Trail Fund, and is confident Cromwell residents and visitors will reap the benefits.
“The funding will go a long way to help a fledgling club turn an area that currently has no trails, into a biking hotspot,” Bartrum says. “We are very much an inclusive, community focused club. Our first trails will be accessible to riders of all levels and, once those are built, we will look to build more technical and difficult trails.”
The club is also very close to building more trails at a second location, Shannon Farm, which would pave the way for world class, mountain bike-specific trails within riding distance of Cromwell town, according to Bartrum.
“We are just waiting for final approval from the council and are currently in the process of seeking funding as the first trail here will be professionally built. We are so thrilled to finally be able to put our shovels in the dirt!”
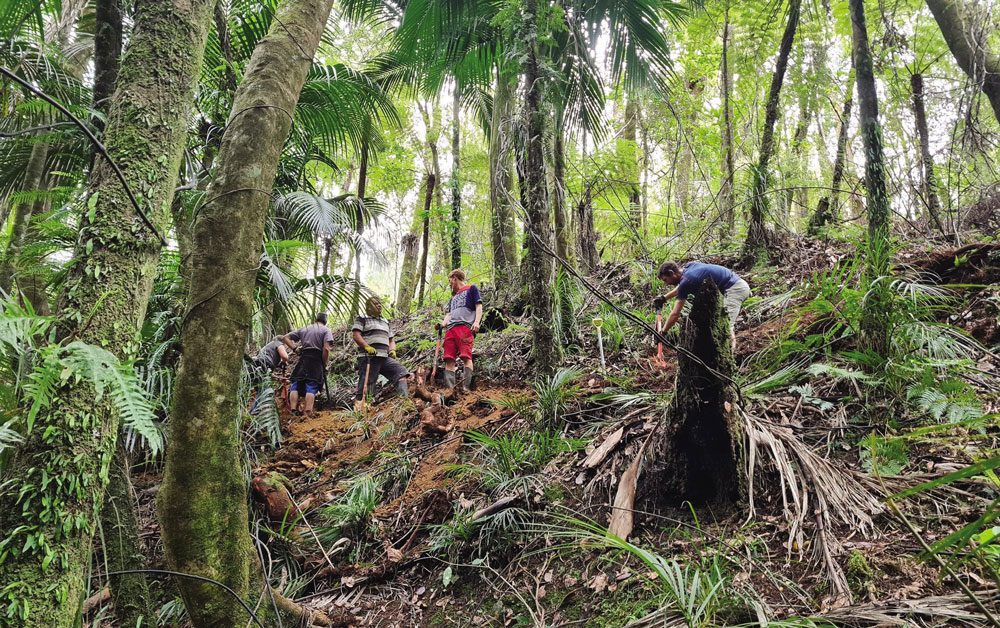
Whitehills Forest, located 8km north of Waipapa, offers a diverse range of terrain.
More than pedal power needed – Kerikeri MTB Club
A long-established Bay of Islands based club, the Kerikeri MTB Club has taken on many projects over the years and has a keen following in the area.
“We have excellent knowledge of local mountain biking opportunities, and our members help to build a vibrant MTB community in the Bay of Islands,” says club president, Richard Pilling. “We foster skills development, with encouragement and challenge in a social environment.
We build and maintain a network of hand-crafted tracks in local forests, and host weekly group rides, events and activities.”
The current focus for the club is Whitehills Forest, located 8km north of Waipapa, which offers a diverse range of terrain, including plantation forest, native bush, gentle rolling areas and steep gullies – with more than 200m of descent to play with.
“Thanks to outstanding support from Summit Forests, the club has been developing the riding area for the past two years,” says club secretary, Odette Yates.
“Volunteer effort and local sponsorship has enabled us to build more than 16 interconnecting tracks covering a range of terrain, which have been embraced enthusiastically by local mountain bike riders.”
With a combination of hand-crafted and machine-built tracks suited for intermediate to expert riders, Kerikeri MTB Club says its goal is to offer the best riding experience north of Rotorua
According to Odette, this is now the only mountain bike area of its kind in Northland, as the existing club tracks in the Waitangi Forest – which had been built over the past 10 years – have largely been destroyed by ongoing forest harvest.
With the project well underway, Kerikeri MTB Club knew what it wanted from its Trail Fund application – a power barrow of its own!
“We have found moving materials, dirt, gravel and timber around on the steep terrain so challenging that we’ve hired and borrowed power barrows on several occasions, and we recently gained permission to extend into another area of the forest, which is further from the main road,” explained Odette in the club application.
“Borrowing and hiring power barrows has made us aware of how much more efficiently we could work if we had access to this kind of machinery on a permanent basis.”
With a power barrow now on hand, Trail Fund looks forward to seeing what will be accomplished by the committed club members for years to come!

Product Review: Rapha Trail ¾ Sleeve Jersey
REVIEW: LIAM FRIARY
DISTRIBUTOR: IRIDE / RAPHA
RRP: $155
“The jersey comes with a neat little repair kit with colour-match iron-on patches. You can also get a full repair service from Rapha, should you need it.”
Riding jerseys have come a long way. I think they still have some way to go, but we’re in a good place right now. An interesting observation is that we have gone full cycle, with young shredders now wearing baggy cotton tees. I’m not one of them but do like the appeal of a baggy tee, however, not the gross sweat that lingers on said cotton afterwards.
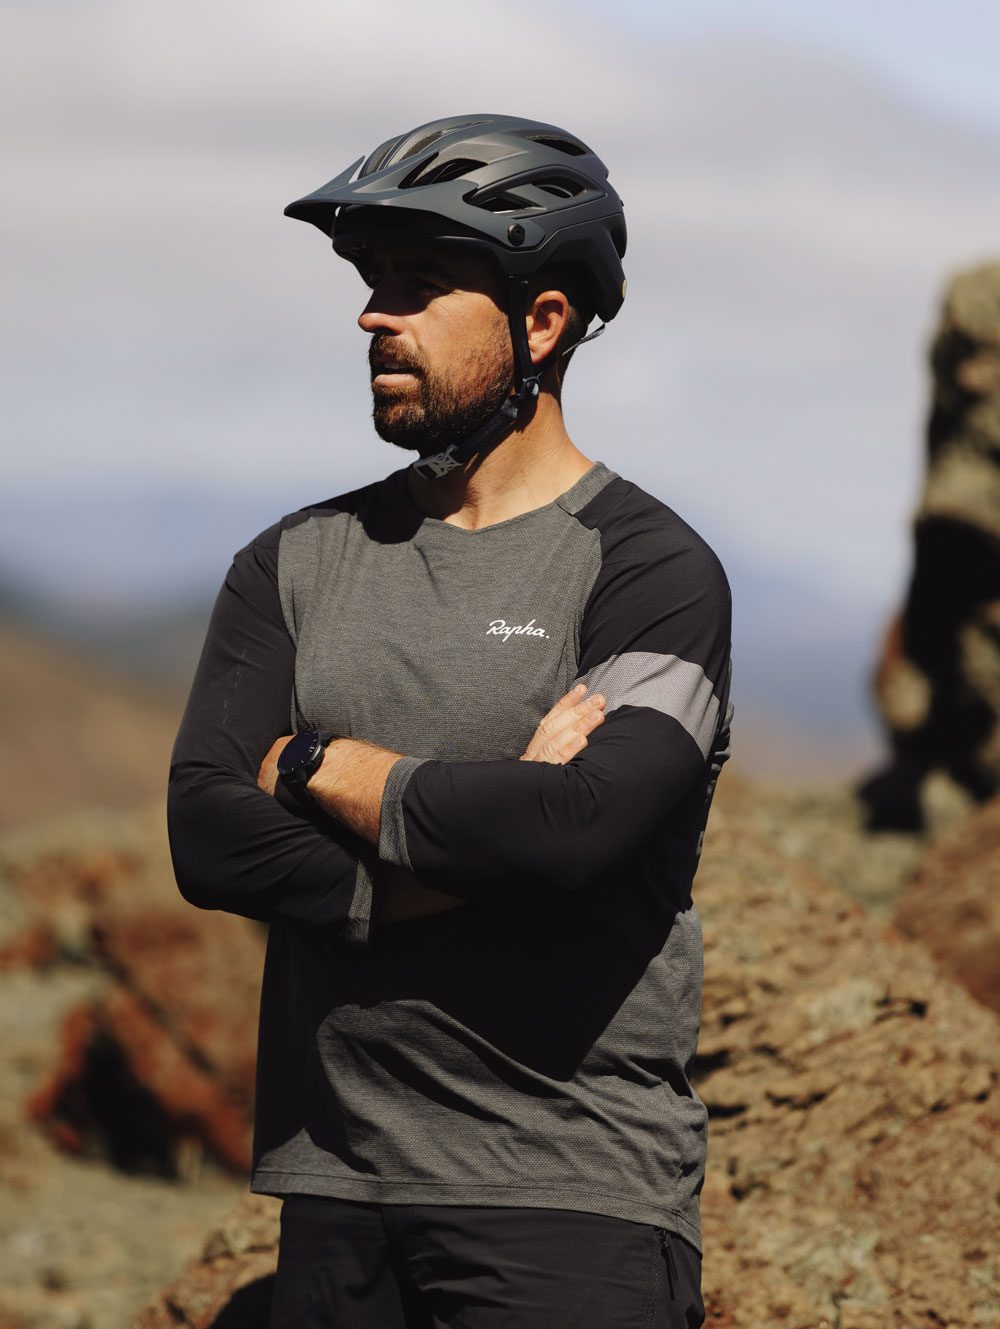
With that said, let’s talk about the construction of the Rapha Trail ¾ Sleeve Jersey. The main body area is constructed from 100% polyester, 68% of which is recycled. The sleeves are woven from a more durable blend of nylon, polyester and spandex, resulting in a thicker fabric that still retains a degree of stretch. This blend of woven material has been specially developed to add abrasion protection from rogue foliage, branches and involuntary trail lie-downs. The whole garment is finished with an antibacterial treatment, specifically for sweating. Another nifty feature is that the jersey is accompanied by a neat little repair kit with colour-match iron-on patches, for any wear and tear your jersey might suffer from. You can also get a full repair service from Rapha, should you need it. Today, having longevity in the apparel you purchase is super appealing.
The jersey fit is very good; it’s certainly form fitting, so you’ll want to be in good shape. I personally like a bit of room between me and a garment, however, nothing binds or pulls and there is little in the way of extra fabric flapping in the wind. As with most of their garments, Rapha have designed this piece with material that is breathable and feels so bloody nice against the skin. Heck, it still feels good even when you’re a hot, sweaty mess from climbing, or soaking wet from an unexpected rain shower. I’ve got large shoulders and arms, which have been growing over the past wee while – thanks to getting jacked in the gym – so the arms felt a bit tight; and the cuff has been tight since before the jacking programme. They are so slim fit that they pull on the rest of the sleeve when riding. For me, they’re better pulled up nearer the elbow, but could also offer better manoeuvrability. Whilst the body of the jersey is super breathable the sleeves don’t offer the same feature. I would even make some sacrifice for ‘less durable’ but ‘more breathable’ sleeves.
With the cost of living at an all-time high, the RRP does seem like quite a bit for a riding jersey. However, it’s a quality, made-to-last garment, constructed with high attention to detail; it’s comfortable, has subtle style and comes from a prominent and prestigious name within the cycling industry. What’s more, the repair kit means it offers future-proofness, which means a lot in this day and age.

New video guide Sheds light on the iconic Old Ghost Road
Words: NZ Safety Council
Photography: Quite Nice Films & Cameron Mackenzie
Its vision of ‘safer places, safer activities, safer people’ is supported by years of in-depth insights. This means NZ Mountain Safety Council (MSC) knows where, how and why people get into trouble, and how to prevent these incidents.
The organisation has been encouraging safe participation in all land-based outdoor recreation for almost 60 years. That’s anything from hiking to backcountry skiing and climbing, to mountain biking and trail running. These insights clearly show that preventable incidents are occurring across Aotearoa.
By analysing these insights, MSC realised that the best way to encourage outdoor enthusiasts to change their behaviour was to make planning and preparation as easy and robust as possible. This preparation is a vital part of a fun and safe adventure, whether it’s a short walk in a regional park, a multi-day tramp in the Southern Alps, or a backcountry mountain bike ride. This saw the shift in messaging tactics from highlighting what not to do before an excursion, to positive messaging on how to plan correctly.
Over recent years, MSC has created a suite of videos covering safety tips and how-to style content. Its latest, and first mountain biking video, is a new ride-through safety guide on the Old Ghost Road trail, and has been added to the suite of Tramping Safety video series. From the Milford Track to Canterbury’s Mt Somers Track, up to the Coromandel’s Kauaeranga Kauri Trail Pinnacles Walk, the series covers the country’s most popular tracks, where data revealed preventable safety incidents which could be reduced by a target video.
These videos highlight each track’s common risks and hazards, outlines key decision-making points, and offers guidance on walking times, essential clothing and gear items, important weather factors and other track-specific advice.
In 2021, the research behind this ongoing series won the ‘Insights Communication’ award at the 2021 Research Associations Effectiveness Awards. According to the research findings, 76% of people who watched the video said they would make changes to their plans because of it, and 90% of those people did. Furthermore, 95% said they learned something new, with 82% saying their knowledge of hazards along the track had improved; 85% said their overall understanding of the track had increased.
The Old Ghost Road video aims to help mountain bikers prepare for the epic West Coast backcountry trail. One of the esteemed Great Rides of New Zealand, the 85km-long Old Ghost Road is Aotearoa’s longest single-track backcountry trail, and one of the most incredible multi-day backcountry experiences in the country. The adventure takes riders and trampers back in time along a shared-use and long-forgotten goldminer’s road.
This impressive trail weaves through ancient forests and diverse, rugged alpine environments. The infamous West Coast weather – frequent heavy rain, strong winds, snow, and freezing temperatures, even in the height of summer – means the Old Ghost Road is a true adventure.
The video highlights the varied conditions mountain bikers can expect, covering important tips including how to pack a balanced bike, a suggested packing list, the common risks and hazards, and key decision-making points and pit stops.
MSC Chief Executive, Mike Daisley, said the new mountain biking video was the first of what MSC planned to deliver as part of a growing library of backcountry mountain biking video resources. To deliver the stunning cinematography and capture the essence of the trail required a new filming approach and very careful planning and preparation, he said.
“We’re incredibly excited to launch this video and support riders as they tackle what is a truly spectacular, but hazardous, backcountry adventure.” Mokihinui-Lyell Backcountry Trust chair, Phil Rossiter, said the new video significantly extends the tools and resources available to help users plan for their trip. The Trust was set up in 2008 by volunteers who wanted to bring the Old Ghost Road to life and now, having done just that, it acts as the entity that operates and maintains the trail. The Old Ghost Road, a Ngā Haerenga NZ Cycle Trail Great Ride, is a destination trail with many unique elements that draw in an average of more than 6500 riders and 5000 trampers each year. There is one key underlying theme that draws mountain bikers and trampers to the trail, Rossiter said. “It’s the rejuvenation of the soul and mind that comes with time immersed in nature and stunning landscapes, away from distractions and the noise of everyday life, and made all the better by the physical exertion required and the company the experience is shared with.”
“Video is a more powerful way of communicating information than just written text. The ability to combine important safety and preparation details with actual imagery from on the trail is a very helpful step forward. Combined with the professionalism and quality of the safety videos that the MSC produces, it wasn’t a difficult decision to get on board,” he said. Plan My Walk by MSC can help those planning to tackle the Old Ghost Road by providing weather forecasts, alerts, a gear list and then create a trip plan to share with a trusted contact. •
• The video can be found on NZ Mountain Safety Council YouTube and Plan My Walk. The video, other useful resources and hut booking info can be found at oldghostroad.org.nz

The new fast: eMTB racing is powering up
Words: Alex Stevens
Photography: Seb Schiek
The latest breakthrough is once again led by Bosch, who unleashed their new drive unit for the last race of the Enduro World Series (EWS-E) in Finale Ligure, Italy, in September. The results speak for themselves. The entire women’s podium of Florencia Espineira (Orbea Fox Enduro Team), Harriet Harnden (Trek Factory Racing), and Tracy Moseley (Trek), along with the winner of the men’s category, Adrien Dailly (Lapierre Zipp Collective), and half of the men’s top 10, were powered by the Bosch Performance Line CX Race Limited Edition.
Fair to say, Bosch are experienced players in the sport of eMTB racing. Bosch-powered bikes claimed more than 60 podium finishes in eMTB races around the world this season alone. In the EWS-E overall team competition, Orbea Fox Enduro Team took the win, with Miranda Factory Team in second and Pole Enduro Race Team in third, all running Bosch systems.
The future of eMTB racing is looking fast. Not only is the sport experiencing a rapid uptake, but the technology behind it is also finding more speed, giving professional riders the competitive edge they need when podium spots are decided by fractions of a second.
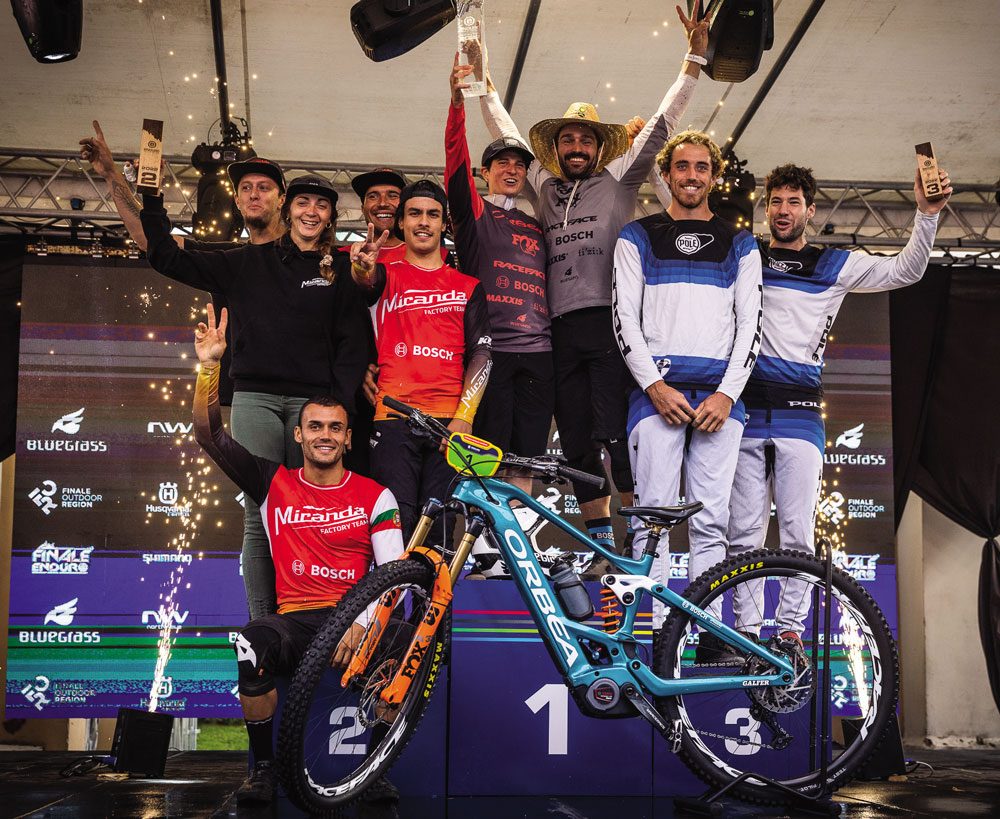
Bosch have been leading the field for over a decade, ever since one of the first eMTBs was equipped with their drive system, back in 2010. Since then, the company has consistently developed more products for eMTB riders. The Performance Line, CX, was the first eBike drive specifically designed for eMTB in 2014, and the 2018 eMTB mode continues to set the standard today.
So, what does the new CX Race Limited Edition bring to the table? The specially developed Race mode, uncompromised support and low weight are the key ingredients when it comes to setting new record times.
The Performance Line CX Race Limited Edition is an exclusive evolution of the Performance Line CX. The new Race mode offers direct support, with up to 400% of the rider’s own pedal power, compared to 340% in Turbo mode with the Performance Line CX motor. This means riders reach top speed faster, and can stay there for longer.
The Extended Boost of the eMTB mode has also had an upgrade, giving it even more grunt in Race mode and making it easier to tackle large boulders, roots or steps. Race mode can be adjusted in the eBike Flow app, where you can tweak the strength of support, dynamics, maximum speed and maximum torque.
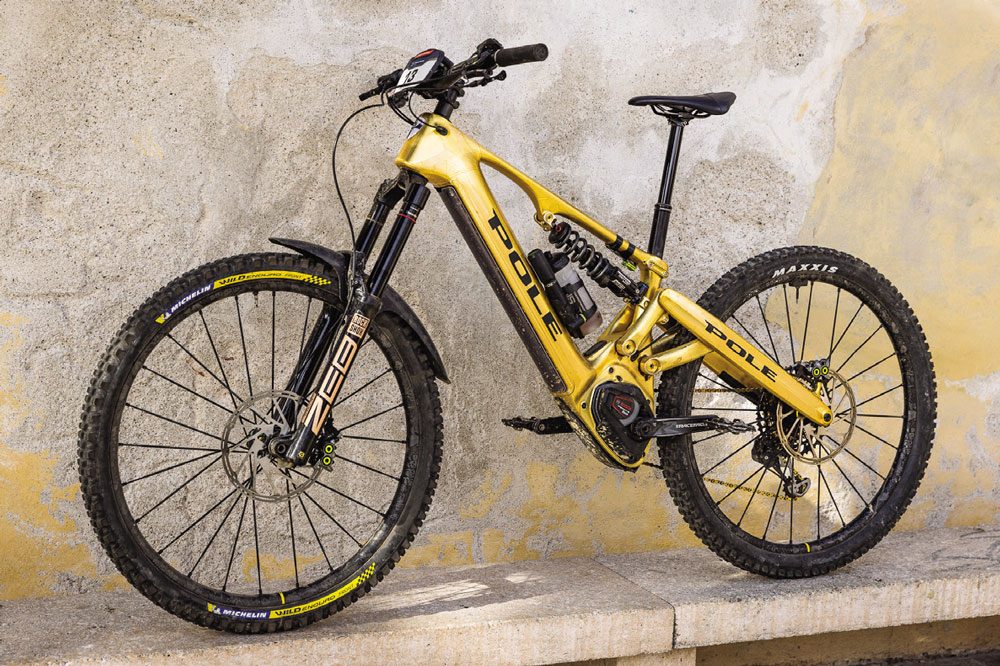
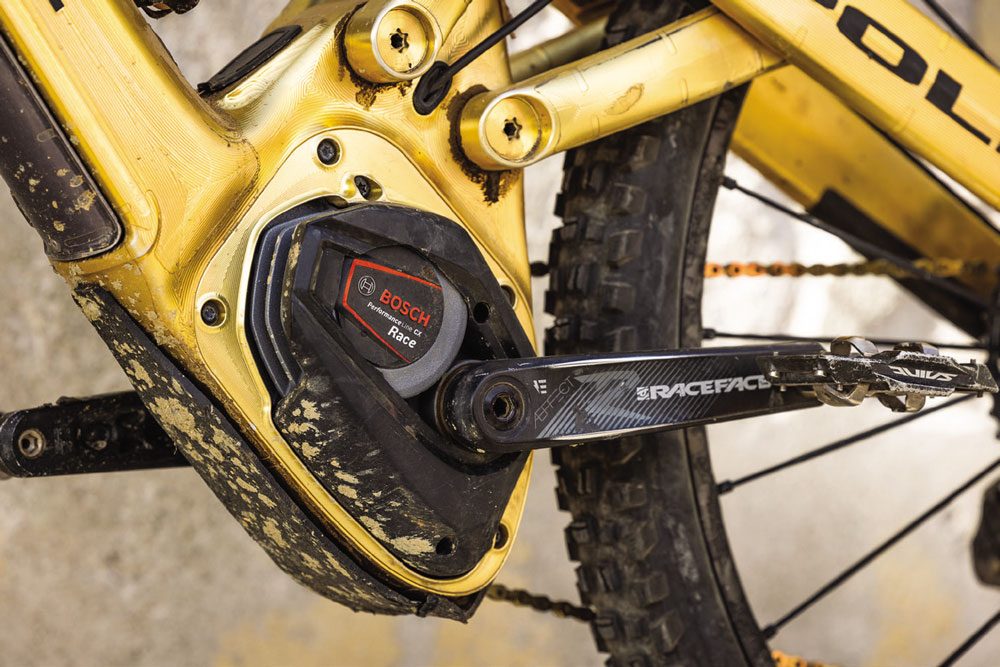
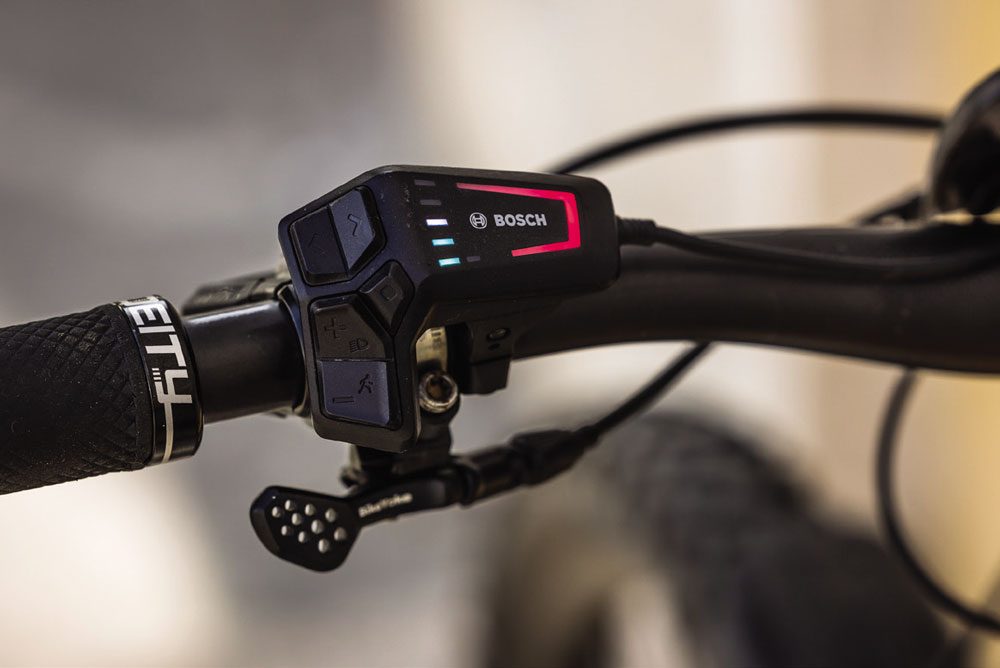
At 2.75 kg, the new drive unit is the lightest drive in the entire Bosch portfolio. This reduces the weight of the bikes equipped with it and optimises the handling on demanding trails. But, with 85 Newton meters of torque, it still offers maximum power for acceleration out of tight corners, which can be a decisive competitive advantage. Even at cadences over 120 rpm, the powerful motor provides explosive support so aggressive that riding over long stages and fast sprints are possible.
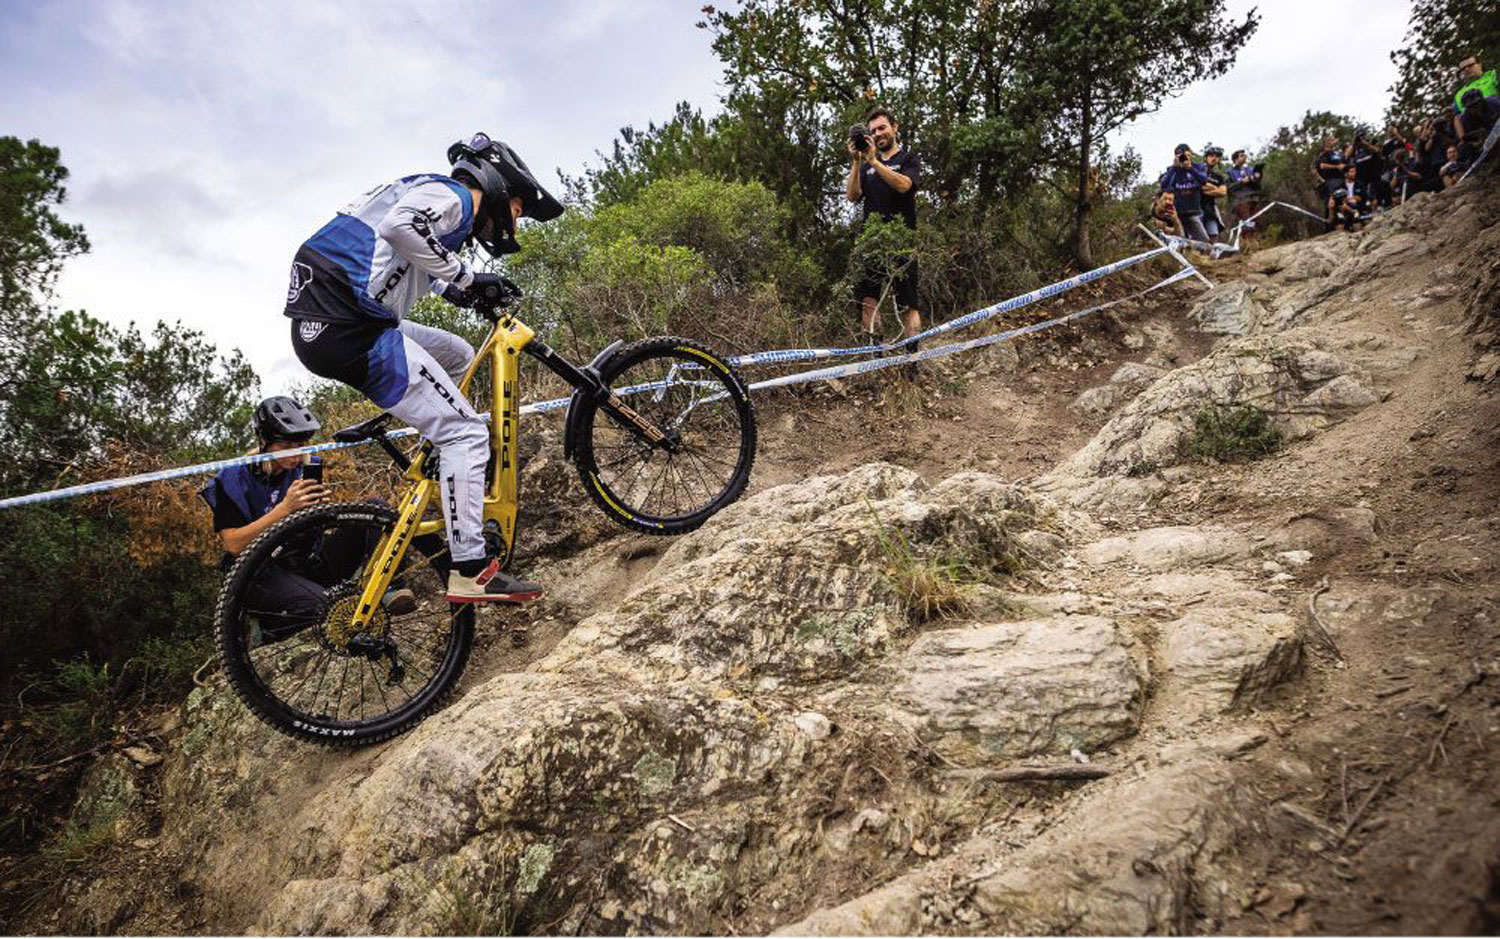
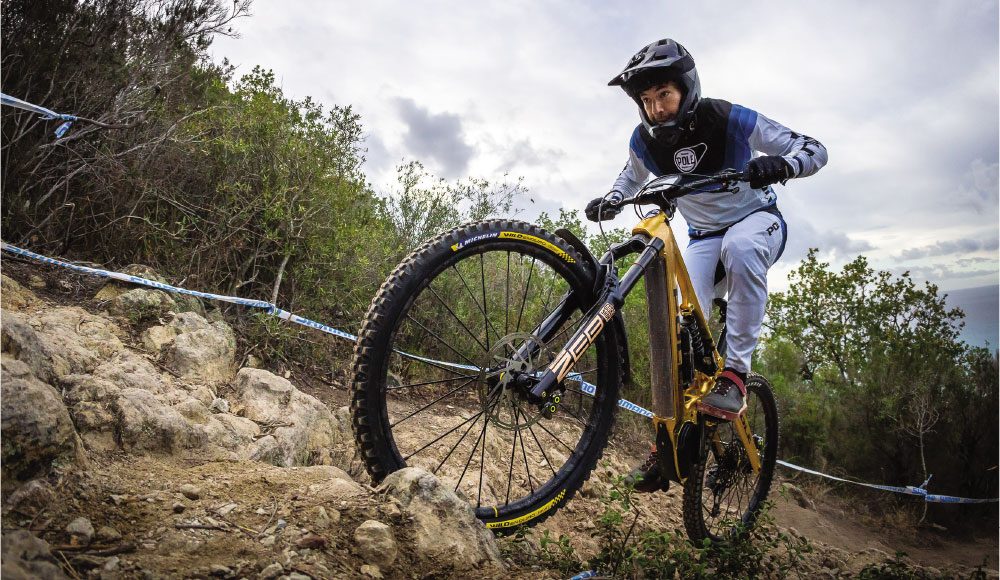
The CX-R is designed for tough, technical routes, steep uphills and gnarly descents, which is exactly what the course looked like at the EWS-E in Finale Ligure. NZ’s Joe Nation, riding for Pole, got to experience it first-hand.
“It was great to be on the CX-R in Finale,” says Joe. “The first power stage was a steep uphill with some monster boulders which the extended power boost made light work of. As weight is a pretty big deal – in both bike and body – for eBike racing, saving over 100 grams is a big gain too.”
Joe, who made the switch to EWS-E just this season, finished 22nd in Finale and 12th in the overall season standings. Not a bad result considering he only got hold of his eBike three weeks out from the first race of the season and had a massive learning curve mastering the nuances of racing eBikes. He’s back in New Zealand for the summer and plans on returning to Europe next season, fitter and more competitive than ever. It’ll be exciting to see what he can do after a full off-season spent training with the CX-R.
The new Race mode offers direct support, with up to 400% of the rider’s own pedal power, compared to 340% in Turbo mode with the Performance Line CX motor. This means riders reach top speed faster, and can stay there for longer.
“A lot of the competitors who weren’t using a Bosch motor were definitely curious about the update, especially as the current CX motor is already top of the line,” he says. The new drive unit requires some pretty precise skills to control the direct response and power of the Race mode. In Tracy Moseley’s words; “It is like taming a bit of a wild horse at times, but it’s just learning its characteristics, learning how to ride it, pre-empting some of it, making sure you’re in a good body position, making sure you’re riding aggressively, and then it’s awesome. If you’re a bit, sort of, resting on your laurels, out for a cruise, it can definitely take you for a ride.”
The Bosch Performance Line CX Race is currently only available to professional riders on Bosch powered brands, and as a limited edition on some eMTB models. Some CXR equipped bikes may well make it to our shores for a lucky few. So, while most of us won’t get to experience this game changing tech for ourselves (for a while) it’s going to be fascinating to see what it brings to the race scene and how riders like Tracy Moseley and Joe Nation use it to its potential in the future. This could change the nature of eMTB racing, from the trails ridden to the approach taken by riders.

Las Cholitas
Words: Jess Dickinson
Photography: Keenan DesPlanques
We picked a line and dodged our way down to our day one camp and a hot meal from Rocky, our gold-toothed cook. An altitude-induced throbbing head and uneasy stomach had come with me to camp, so I took myself away to sleep off the little voice inside that said I shouldn’t be up there.
The Little Idea
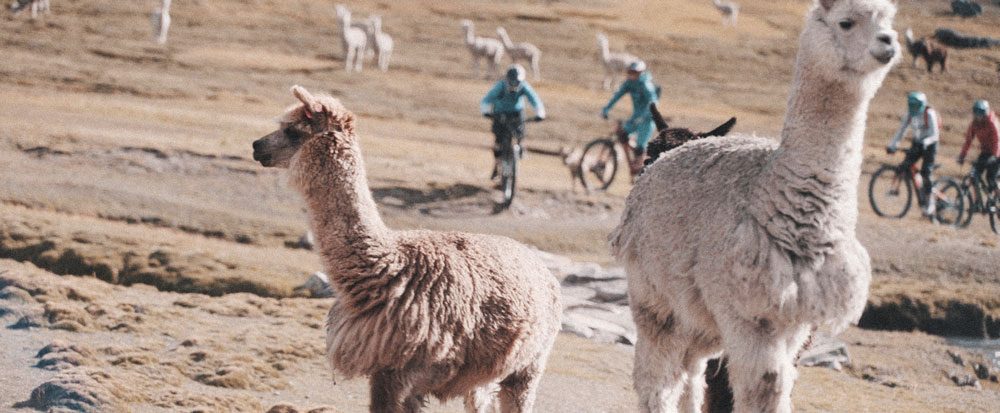
It ended with four women, one baby, a dog and a dead alpaca. Not exactly what we’d pictured as Claire and I piled ourselves, nervously laughing, onto a plane in New Zealand. Our plan was pretty simple: ride the best singletracks in South America; make friends; drink beer. A good plan. What we found was an ever-strong group of women, three days of backcountry free riding under the shadow of Mount Ausangate, in the Peruvian Andes, and a wee reminder that from little ideas, big things can grow. Mt Ausangate lured us in from day one. Wherever we went, there she was, our backdrop to Cusco, beguiling us into looking beyond our simple plan of just riding some trails. Whispers of the amazing scree fields, wild views and wonderfully lonely ridges were described. We had been messaging Nicole and her buddy Emily. Nicole runs Haku Expeditions, a bike tour company out of Cusco, specialising in taking people down fatigue-inducing, arm pumping singletracks for a living. Cusco singletracks are distinguished by their twenty- five kilometre stretches of uninterrupted downhill, occasionally broken by ancient Inca staircases or a few alpacas to dodge. This is where Nicole guides every day. The Ausangate fire was lit. Like a weird biking version of Tinder, we made plans to meet up for a ‘test ride’ to see if we all got along. In Peru, women who are of the mountains are called la cholitas. It was evident after our first ride together that our little idea had grown into us venturing up there and following the local cholitas who had walked before us. Nicole described our trip as a hike-a-bike without air. At a maximum of 4800m, pedalling in any direction was going to be hard. And this trip would have a lot of climbing. We had Emily, America’s collegial cross country, ST and omnium champion, to rally at the front; Claire, the ever- enthusiastic Scotswoman, to keep us in high spirits; and Nicole’s baby, Joachim, with his own nanny Iris who, as a local to the area was a mountain woman in her own right. We were also bringing Simon, a trail dog and, as we later discovered, an overly enthusiastic alpaca herder. Add a few pack horses and our mish mash of a team was formed.
AFTER PHOTOS WERE TAKEN, HUGS WERE GIVEN AND MOMENTS OF AWE WERE EXPERIENCED, WE FOCUSED ON RIDING THE RIDGELINE. RIDING THE RIDGE WAS A GREAT IDEA. BUT THE MOUNTAIN HAD PILED ITSELF WITH BOULDERS.
The Big Traverse.
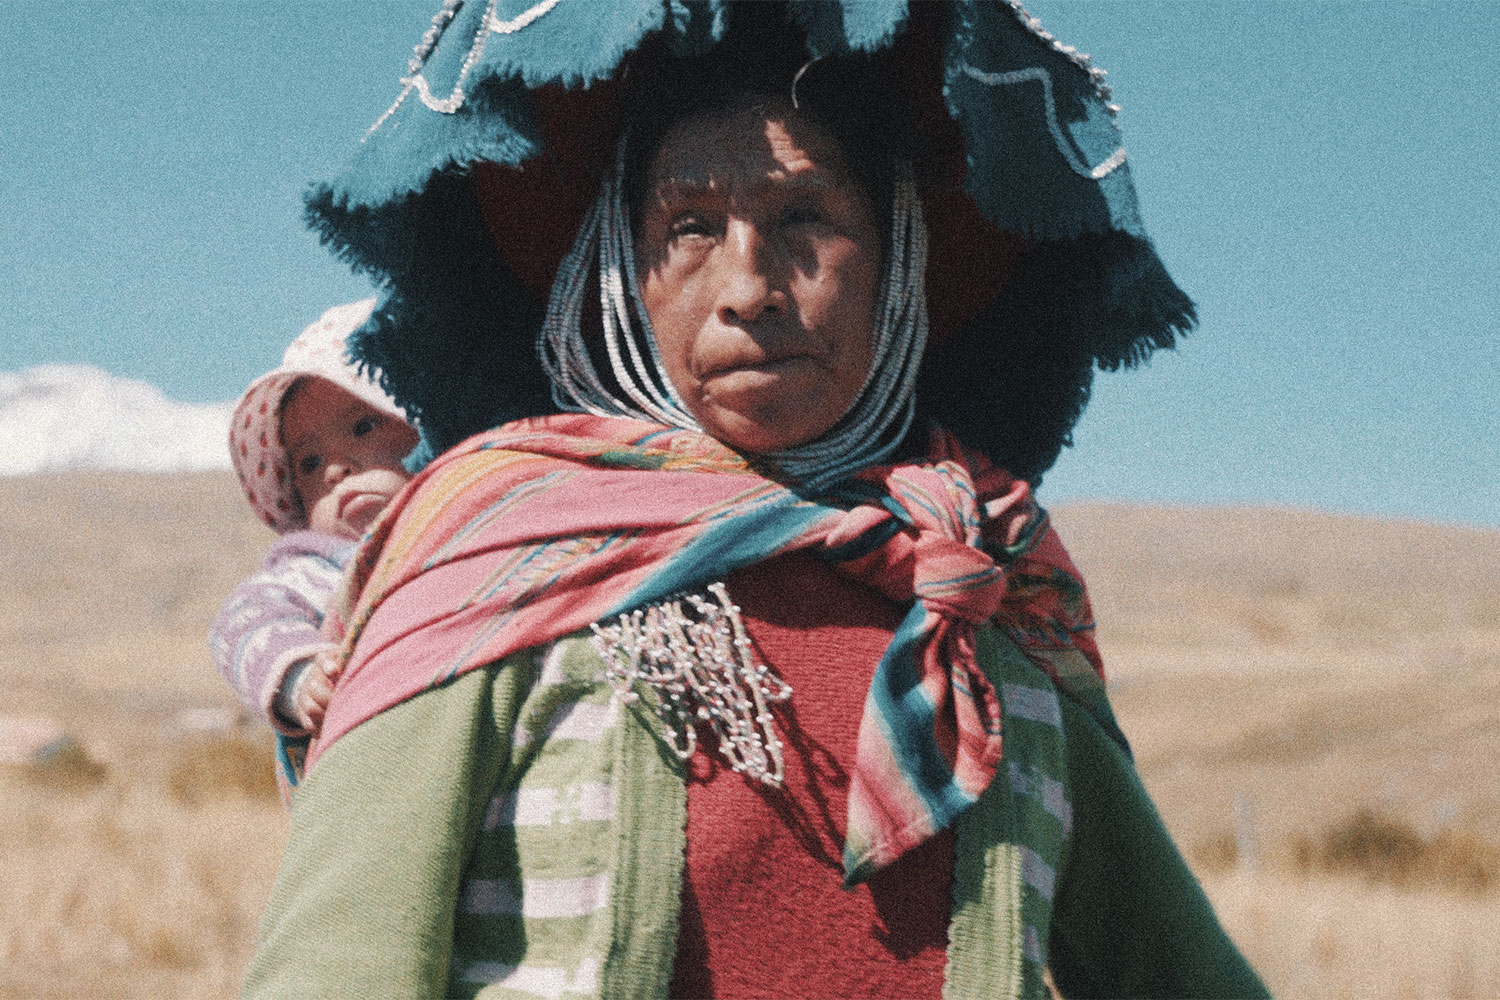
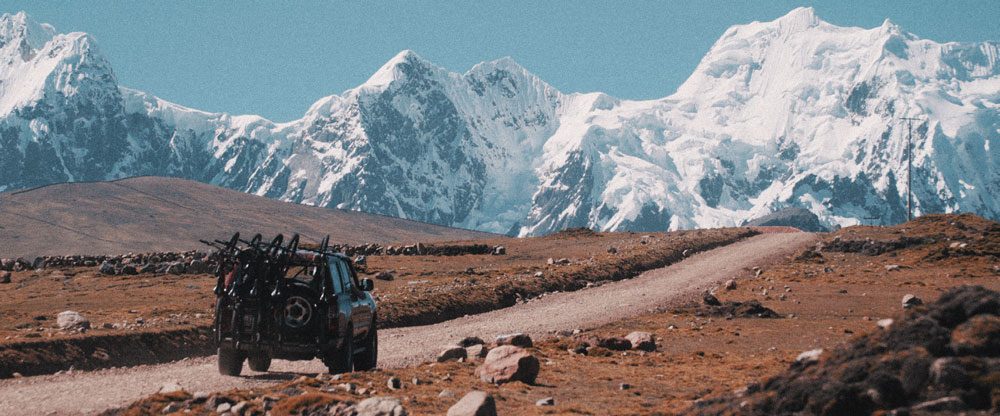
It was a 3am start from Cusco to our starting point, where we’d rendezvous with the horsemen and helpers we’d hired to help lug bikes. Late morning saw us starting along a rocky walking path, bouncing around rocks and alongside creeks, before the only path we would see for two days ended and the inevitable uphill loomed. Soon the rocks were too thick to ride through. We were already at 4200m when we started the climb. Our helpers, long-time friends of the mountain, grabbed our bikes and took off ahead. We took turns pushing Emily’s bike up, taking five minute turns. But, as we went up in altitude, it turned into counting out ten steps before the next person took over. Soon I was having trouble catching my breath and was reassigned the responsibility of carrying the camp soccer ball. Altitude requires patience. Patience to go slow and patience to breathe. Each pedal up tested that. Pulling up on the ridgeline on day one to see the valley unfold below us will be one of those completely happy moments I will cherish forever, mixed with undertones of queasy high-altitude breathlessness. We were so pleased to be living in that moment in time, despite the spattering of sleet. Our trail off the ridge was absent. It was straight down, pick-a-line freeriding through a boulder park. It plunged us into high alpine scree fields, needle sharp grass, steep descents and icy blue creeks, dotted with the occasional farmer’s hut. Day two began easily enough, riding a meandering alpaca path through a valley. Our route was set to a fairly easy pass up ahead. This was until Claire hatched the great idea that the ridge framing us to the left would make for great riding. So we climbed, first to the false horizon, and be one of those completely happy moments I will cherish forever, mixed with undertones of queasy high-altitude breathlessness. We were so pleased to be living in that moment in time, despite the spattering of sleet. Our trail off the ridge was absent. It was straight down, pick-a-line freeriding through a boulder park. It plunged us into high alpine scree fields, needle sharp grass, steep descents and icy blue creeks, dotted with the occasional farmer’s hut. Day two began easily enough, riding a meandering alpaca path through a valley. Our route was set to a fairly easy pass up ahead. This was until Claire hatched the great idea that the ridge framing us to the left would make for great riding. So we climbed, first to the false horizon, and finally reaching the highest point of 4800m. Claire was in her element. Emily bounced around taking product shots for various sponsors. I, however, lay behind a boulder trying to find my breath. From behind my boulder I remembered this had all evolved from a little idea about riding some bikes, yet here I was standing (or, at that point, lying) higher than I’d ever been, on an unbelievable mountain mission, with an amazing bunch of women. After photos were taken, hugs were given and moments of awe were experienced, we focused on riding the ridgeline. Riding the ridge was a great idea. But the mountain had piled itself with boulders. So, instead, we carried bikes along the ridge towards the pass. It was hard riding for the next few hours. With no trail to follow and boulders thick on the ground, a lapse in concentration ended in pedals colliding with rocks or a dead stop. Hours of rock hopping lead us down to the lip of a giant bowl, with rough tracks peeling off left and right to the lake and camp below. It was steep, technical, off camber and exposed. I was mildly terrified as I dropped over the lip. At the bottom of each steep section was a ridiculous switchback framed with cactus on one side and a cliff on the other. Ill-timed braking sent my back tyre sliding towards a drop off and I tensed knowing things were going to hurt. By some miracle I pushed out of it only to crash, amid cheers, on the next switchback. When we reached the end of the rock garden, we were welcomed with wide, steep, grassy fields to gleefully freeride down to camp, with Simon leading the way. This is where Simon, our trail dog, took centre stage. He was our fearless leader. Our mascot. Our guardian from all things hairy. But Simon had taken to chasing alpacas. Despite continuous scolding, Simon could not help himself and chased a group of less-than-timid alpacas. All twenty of them chased him back. Simon became somewhat less fearless and hid behind Nicole and her bike as the group of rather angry alpaca surrounded them both. The standoff lasted twenty minutes or so, with Simon whimpering behind Nicole. The rest of us watched from the ridge above, consoling Nicole on the radio but assuring her that nope, we were not coming down to help. Twenty minutes later, the alpacas, in synchrony, turned and walked away. We were almost at camp, incident free. But Simon again charged off into a group of alpacas that were grazing just away from camp. He chased one young alpaca into the rocks and the alpaca broke its leg. After a little discussion between the head herder and Nicole, an exchange of money and a large apology, the alpaca ended up on our dinner plates. A pachamanca, a tepee shaped BBQ furnace, was prepared by Rocky and a few of our horsemen. The whole camp was fed and, I’m sorry to say, alpaca is delicious. There is something so joyful about the simple act of riding a bike. Day three was that day. It was one of those sunshiney days that make you happy to put your smelly bike socks on for the third day in a row. Or maybe we were just giddy from breathing oxygenated air again. The ride out was framed by the lake we had camped along the night before and led us to a river crossing. Claire and I opted for the shoes off, cold but drama free, wading approach. Nicole and Emily, however, decided to use the bridge up ahead. A three-rickety-pipes-tied- together-to-make-a-bridge-above-a-rather-large-and- rocky-drop later and everyone was across and on the final stretch for the homecoming downhill flow. The trail guided us through farms that rested on the side of the valley and wound its way back to our pickup point.
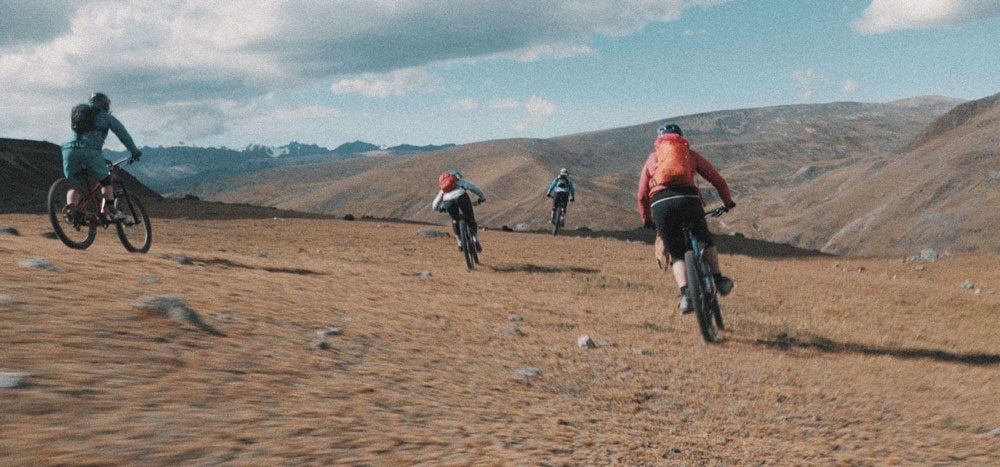

THAT LITTLE IDEA TO RIDE BIKES IN SOUTH AMERICA SEEMED SO FAR FROM WHERE WE’D ENDED UP. MAYBE IT WAS THE UNENDING ENTHUSIASM AND DESIRE TO PUSH OURSELVES THAT DROVE US UP THE MOUNTAIN. OR MAYBE IT WAS A SIMPLE FALLING INTO PLACE WITH THE RIGHT PEOPLE.
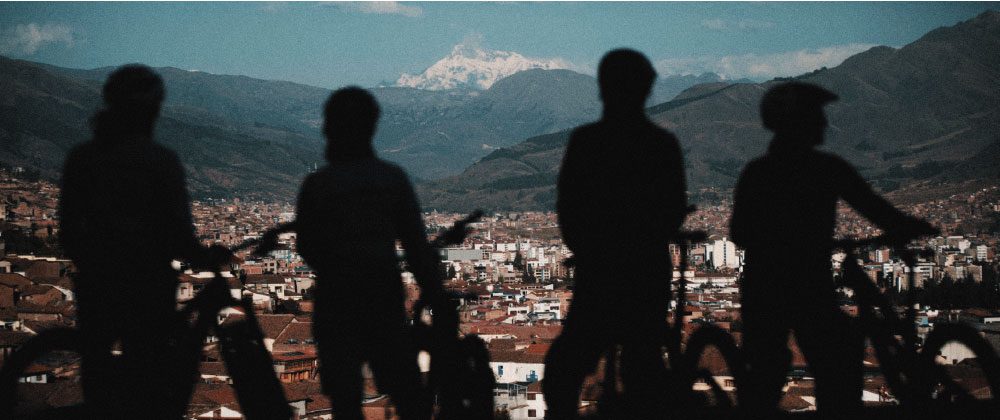
Journey’s End.
In Inca lore, Mt Ausangate is an Apu, the mother mountain spirit; the source of all good things and a caretaker to her land. She looked after us. That night, we reminisced back in Cusco over beers and burgers. That little idea to ride bikes in South America seemed so far from where we’d ended up. Maybe it was the unending enthusiasm and desire to push ourselves that drove us up the mountain. Or maybe it was a simple falling into place with the right people. The mountain let us make our little ideas evolve into something more; that we could grow a team that pushed each other when we needed, supported when necessary and cheered each personal accomplishment with wild abandon. It allowed us to connect with women who identified as moms, pro bikers and wilful wanderers. Our mish mash group of girls had taken a little idea and grown it into our own mountain adventure. As simply as we had come together, we were about to disband. I talked about a wee rest on a nice low-altitude beach somewhere. That was until Nicole let it drop that Haku Expeditions had organised a riding trip with Brett Tippie the next week…. But, that’s another story.

Musings Issue 109
Words and illustration by Gaz Sullivan
“I got hooked up somehow, spat over the bars and into the thicket of manuka that was trailside…”
I worked out recently that 2023 is something of a milestone: I have been riding mountain bikes for 40 years. If practice makes perfect, I should be very good by now. That premise doesn’t necessarily prove to be correct, though. In approximately half a dozen outings so far this year, I have crashed during almost every one.
The first — the one that will require physio — was performed on a short, flat section of a very steep climb. Even with electrical assistance the climb rendered me briefly cross-eyed, and I misjudged a corner. Slight back sprain, but nothing serious. I did knock the control button doofer off its little mounting bracket, but I wrapped it neatly around the brake and dropper cabling and made for the nearest set of Allen keys, down at the car park.
The next bail was executed at a standstill, and involved more pain but less long-lasting consequences. Exiting a favourite trail requires crossing a steep little gully which contains another trail. The procedure is: slow down, check nobody is coming, drop down a bank to get enough momentum to clear the other side. I have done it many times but, for no valid reason, I stalled at the top of the far side. I couldn’t get my foot out of my pedal and toppled over an ancient piece of gnarled wood that is a feature of that section, thus jamming my leg between the wondrous-but-hefty e-bike I am supposed to be reviewing, and the gnarled old log, leaving most of my carcass occupying the trail I was trying to cross, almost upside down. The gigantic battery I like emptying was now making itself felt and, as my foot was still securely clipped-in under the thing, I was sort of stuck. I had to make my biggest effort in living memory to get free before a train of groms ran me over. Lower leg looks worse for wear. Dignity shattered. No other damage.
The best ride of the new year, so far, was out in a jungle I had never entered before, in the company of a gang of very good riders. Here is where the modest skillset I have accumulated after four decades of trying to ride mountain bikes, really jumped into focus. It was a tricky set of trails, most of which I loved. There were a few sections that were well outside my comfort zone. I don’t actually recall any particular crash, but I am sure there was at least one. To demonstrate that falling over from a standing start is my new reality, I made sure nobody missed the next episode. A group ride in Auckland on the roadie was a complete success except for my hard landing. We rode over 50 kilometres in brilliant sunshine, most of it on cycleways or gravel paths on the edge of the Manukau Harbour. Part of that section was a muddy but entertaining bit of singletrack that let us get around a fallen tree, and also filled my roadie shoes and pedals with dirt. We opted for an excellent lunchtime burger in Mangere Village, and I coasted to a halt on the sidewalk in full view of my colleagues and the assembled citizens, and toppled onto the tarmac, feet securely trapped in the pedals. To add to my humiliation I needed assistance to get detached. The consistency of the Ambury Park mud was the perfect roadie pedal glue.
We got back to base a few minutes before Auckland turned on a tropical-style deluge. Rain is never as nice as when it is dodged by a tight margin.
The next day was a bottler, with bright sunshine and high fluffy clouds, making the Rotorua caldera look like the introduction of The Simpsons. There haven’t been two days in a row like that since last year, so bike riding was on the menu again. That jungle I visited needed another look, so I went there again. It was a great excursion, at least as good as the first time. I didn’t crash in any of the difficult bits, but I was steaming along an innocuous stretch on the homeward leg when I made a spilt-second (delusional) decision to get myself out of a rut that had developed in the centre of the trail. I got hooked up somehow, spat over the bars and into the thicket of manuka that was trailside. It bent to accommodate most of me and some of the bike, and I was wedged securely into the landscape, the flexible young manuka trunks were spring loaded and popped in between legs, feet, cranks, frame and wheels, pinning me in position. The prickly foliage was a nice extra feature of that incident, magically distributing itself between my outfit and my skin.
I was tempted to give up and maybe have a nap. I wasn’t uncomfortable really and it seemed like an easier option than trying to extricate myself. But the remains of the trail beckoned, and nothing felt broken, so I wriggled out of the scrub and brushed off the evidence.
Today is Friday 13th. The sun is out, and I am going to push my luck.


