

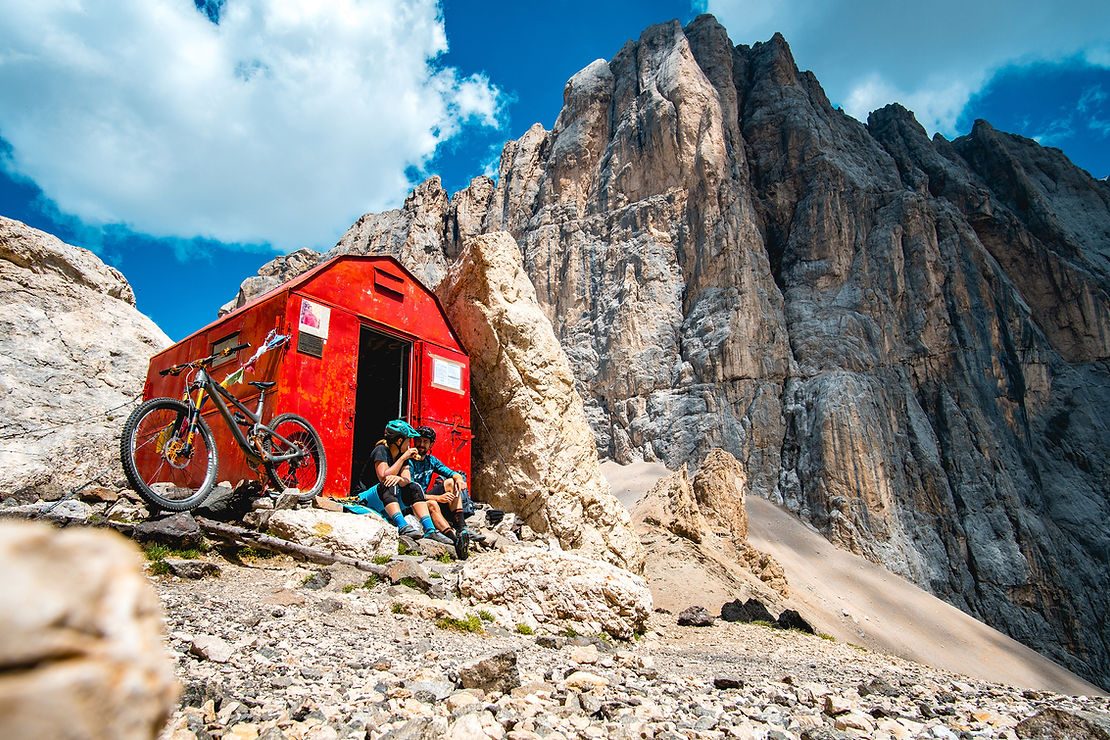
Story: Heli's & eBikes?
I can see how this headline might raise a few eyebrows, but please, bear with me.
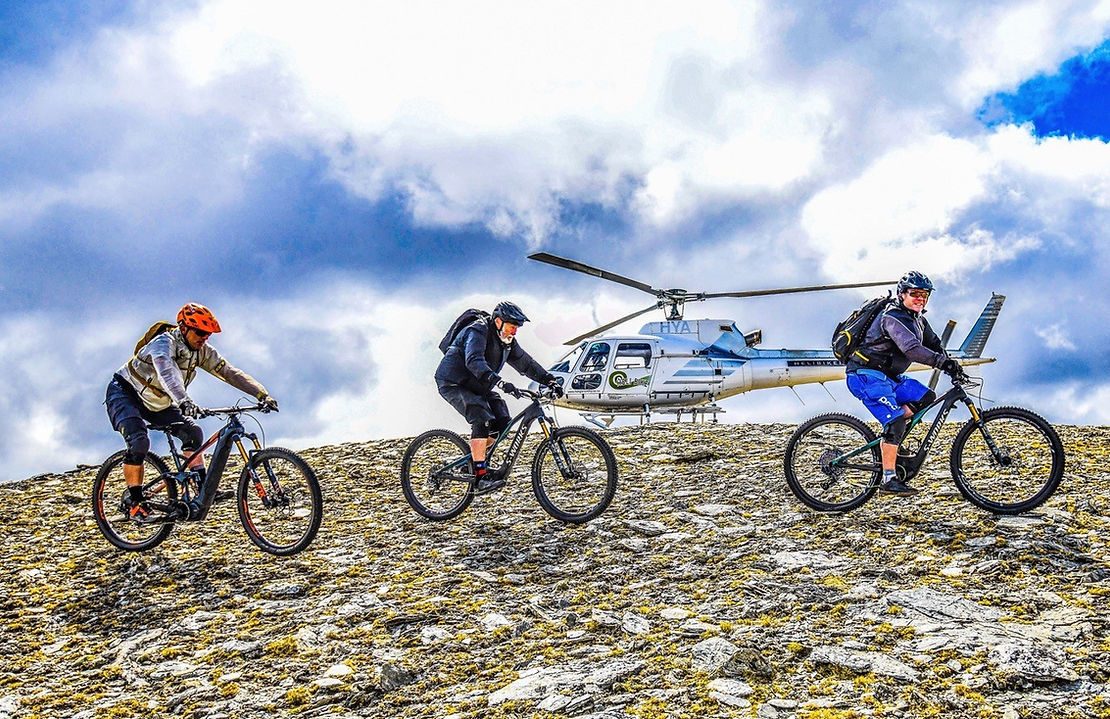
In November of 2019 I met up with two old friends from the Southern Hemisphere in Queenstown, New Zealand, where Henry van Ash lives. He is one of the people that invented/commercialized Bungy Jumping and made it a global thing and one of New Zealand biggest tourist attractions. He has also been a long time and passionate mountain biker with one of the most impressive bike collections he’s built up over the years. Recently he started a heli-bike company that transports adventurous mountain bikers to the remote back country.
Mountain Bike Hall of Famer, Glen Jacobs, was the other bloke who joined myself and my wife Carmen on this visit. Glen is from Australia and one of the most influential people in the world of mountain biking. His trail design company, ‘World Trail’ has over 60 employees and has built and developed some of the best bike destinations in the world, including Blue Derby amongst countless others. All three of us were equipped with pedal assist eBikes, not so much because we are lazy or old, but because of the fun factor, because of the different ways of riding and experiencing adventure, and new possibilities like riding longer, further, steeper terrain that’s hard to do or simply impossible on pedal bikes.

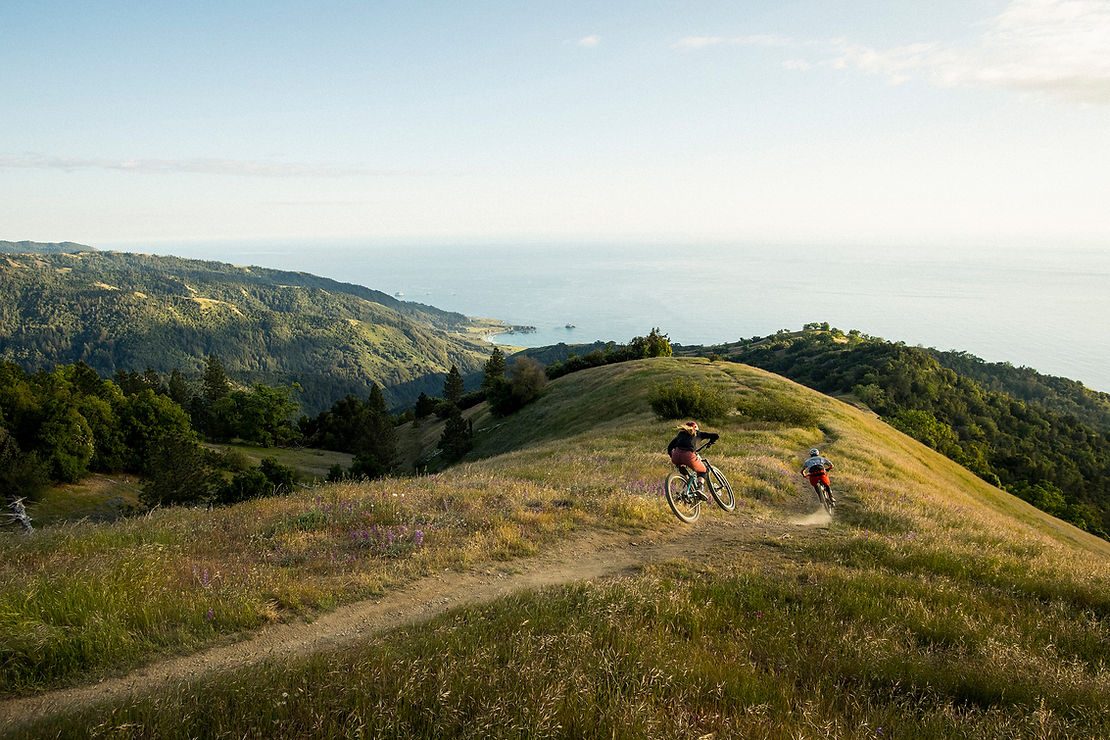
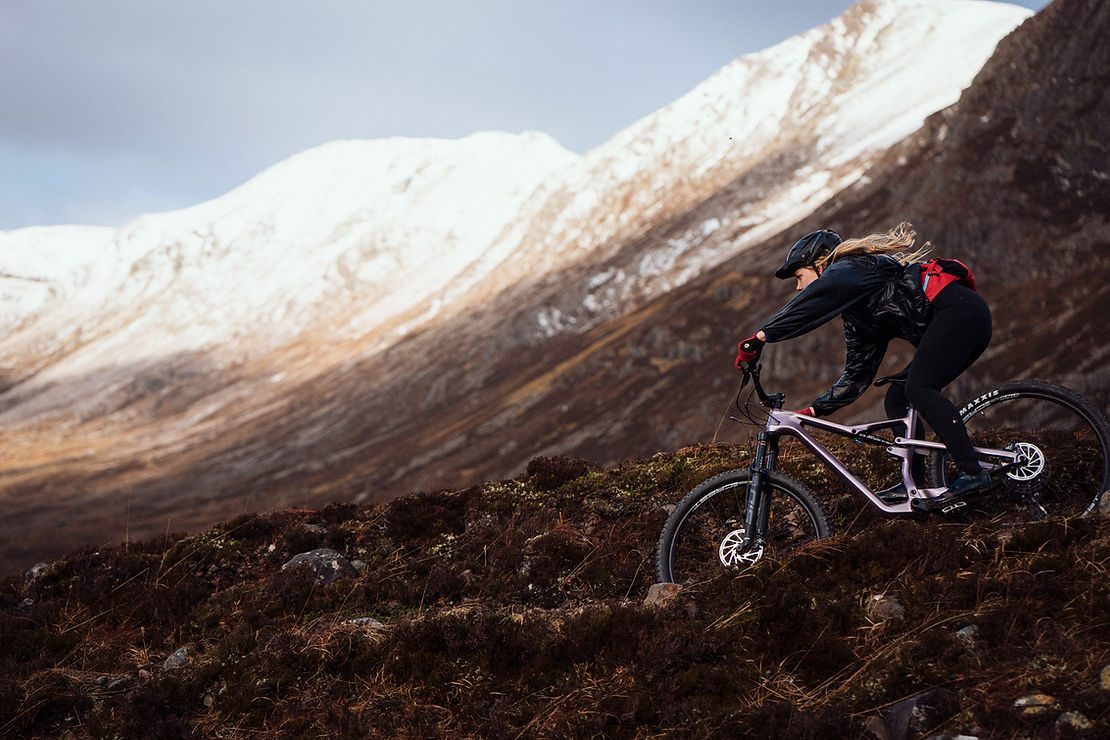
So why using a helicopter, you may ask? Well, because we had the opportunity and invitation, and to explore the remote backcountry that would be hard to access on regular bikes or eBikes unless dropped off. Outings like this, would normally require multi-days, which would mean we had to bring tents, sleeping bags, food, etc. We have all done traditional multi-day adventures before and they are always lots of fun, but the helicopter allowed us to be dropped off at pretty much any point and then pedal back home, especially in the alpine environment with overgrown and rocky terrain. The harsh alpine grass, rock fields and snow field would hardly be ridable or fun on a regular bike, but on an eBike it is possible to keep momentum in the rough terrain.
A workout was guaranteed, despite the category 1 electric pedal assist bikes; one was wise to conserve battery power along the way, especially when riding a route that hasn’t been ridden before or with the danger of getting lost and having to backtrack which could deplete valuable power from the battery and could leave you in a sticky situation if your battery runs out before the trail does. Full suspension bikes are a must in such technical terrain and the big tyres allow for better traction, not only because they have a bigger footprint/contact area on the ground, but also because they can be run with lower air pressure. One of the most underrated facts about eBike set up is the perfect tyre pressure, which depends on many factors, 1 or 2 psi can make all the difference. I can only encourage riders to experiment with their tyre pressures to find their own sweet spot, which will vary from terrain to terrain and riding style. Highspeed bike park berms and jumps require more pressure than slow and bumpy back country outings.
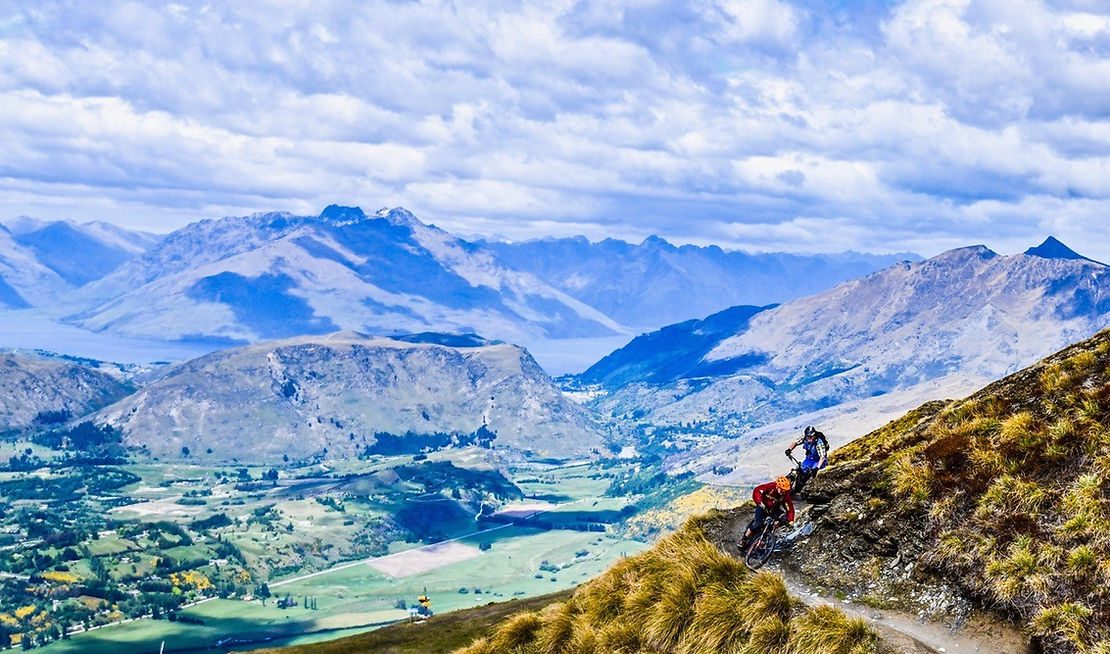
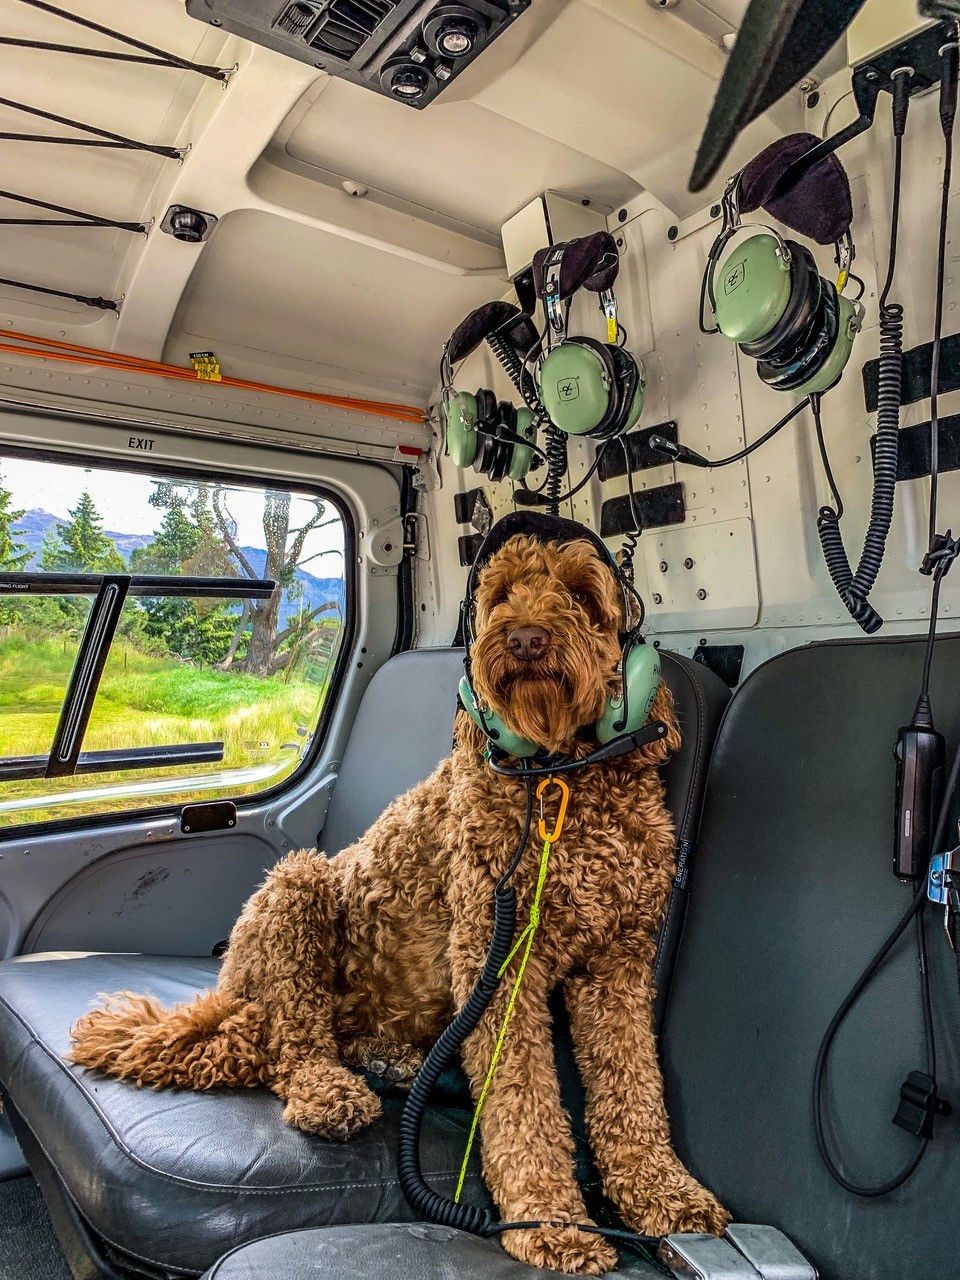
Queenstown is the adventure sports capital of New Zealand. The town, with its population of 42,000, sits on the shores of the South Island’s Lake Wakatipu. Set amongst the dramatic Southern Alps, it’s surrounded by pure nature and wild mountains. Many tourists come here every year, to enjoy the thrills of extreme and adventure activities. They also have a renowned bike park and nearby mountain resorts with world class bike trails. We went on three different outings with the helicopter while we were there. One can preview the route and pick lines as we fly over it. We would scout the terrain from the air, to find the best trails or valley’s that wouldn’t lead to a dead end or unpassable river. I have to say sometimes it’s nice to have ‘friends with benefits, and it felt pretty amazing to have a helicopter at your private service without time restrains - “can we first fly over there and look at the other options” or “can you pick us up half way down the ridge and meet us with lunch” or “how about a quick detour to fly over the famous Milford Sound Fiord”. Trust me these are not regular occurrences or options on any of my normal trips or rides. Travelling this way opened the doors for possibilities that I had not experienced before. My favourite day was when we were accompanied by Henry’s dog, Alfi, who joined us and loved running alongside us, always minding and respecting the bikes. He was a very tired dog at the end of that day.
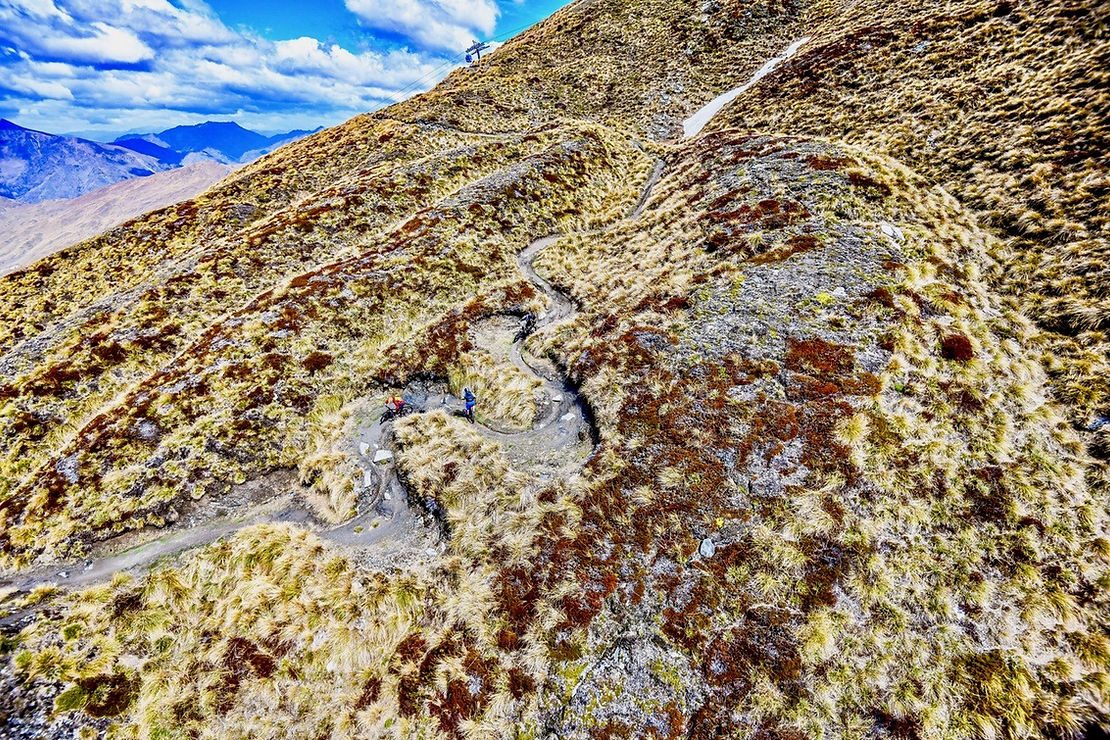
Riding along endless ridges with breathtaking views with hardly any signs of civilization in sight. We came across some old mining sites and ghost towns, from the days of the gold and copper rush. Some of the old mining trails make great biking trails some 140 years later. On another day we were dropped off on top of an alpine mountain with no trails in sight, we had to navigate and pick our lines through rough rock sections and spree fields, patches of snow and endless ridges that would eventually join some old dirt roads or trails.
On day 3 Henry called the operators at Coronet Ski Resorts, since the bike park and gondola hadn’t opened for the summer season yet, we got permission to fly to the top and put first tracks on the freshly groomed flow trails. These trails are eye-candy and snake down the mountain side with one roller, jump or berm after the other.
Definitely an extravagant experience to get to participate in such a special trip and a great way to catch up with some good old mates.
Words: Hans Rey
Images: Carmen Rey
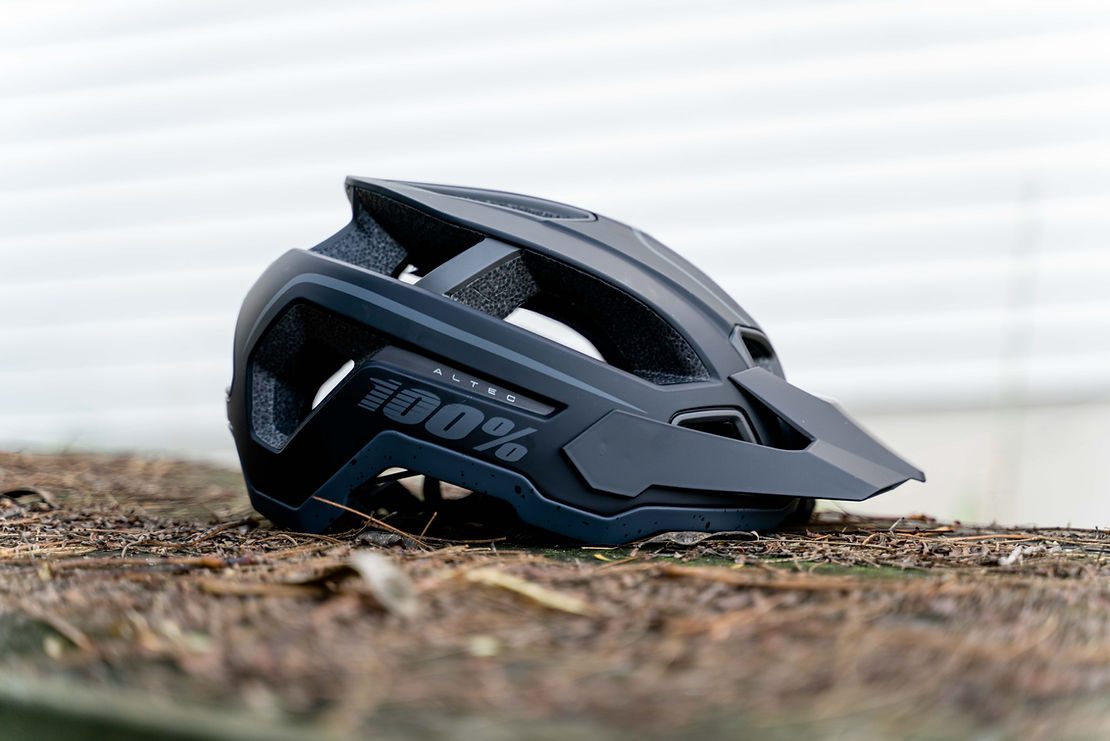
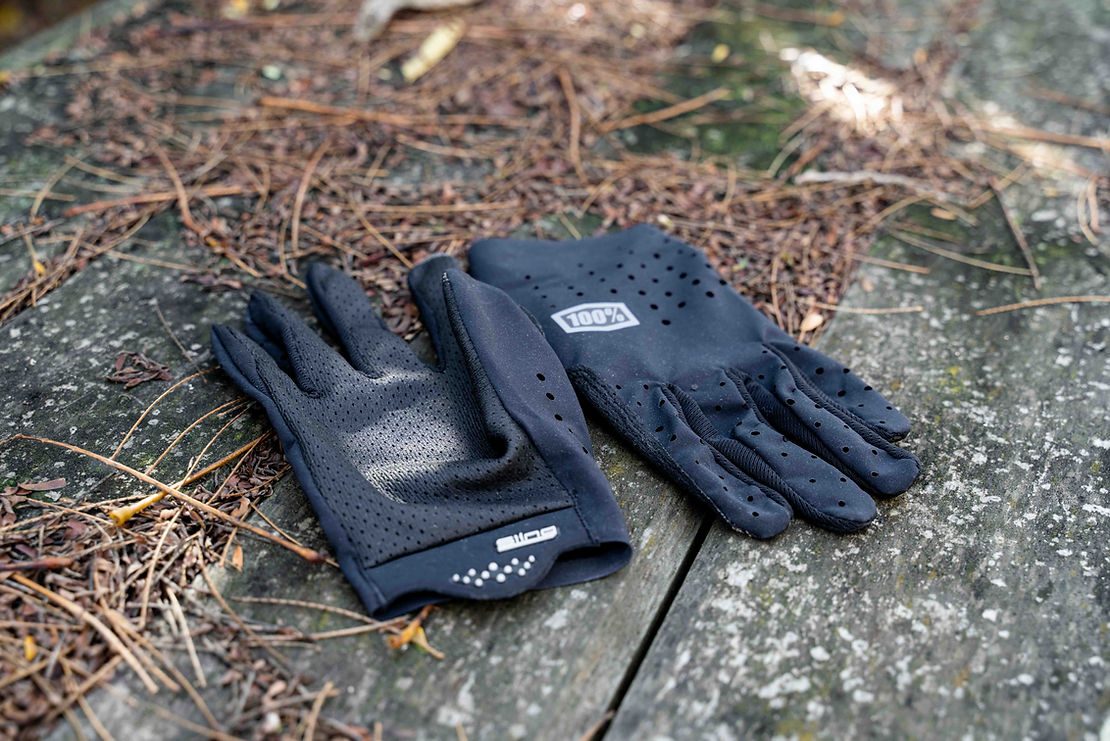
Arrival: 100% Altec Helmet and Sling Gloves
I won't lie, I'm a sucker for anything 100%, and so I was stoked to have their Altec Trail helmet and Sling gloves show up in the post.
The Altec features 100%'s Smartshock System, which is essentially their take on MIPS. The helmet feels lightweight when it's one, and fits nicely too. From looks alone, I'd say it's fairly safe to assume the helmet will vent well, but I haven't put in a big enough ride with it yet to confirm. Stay tuned for a review...
The Sling gloves are a minimal glove, featuring a perforated top and palm, with mesh finger gussets for maximum airflow. Whilst they don't offer any padding, they'll keep your hands from getting cut up if you crash and I'd say with the amount of vents they'd be perfect for summer if you're hunting for a little extra grip. Will also have a review on these coming soon.
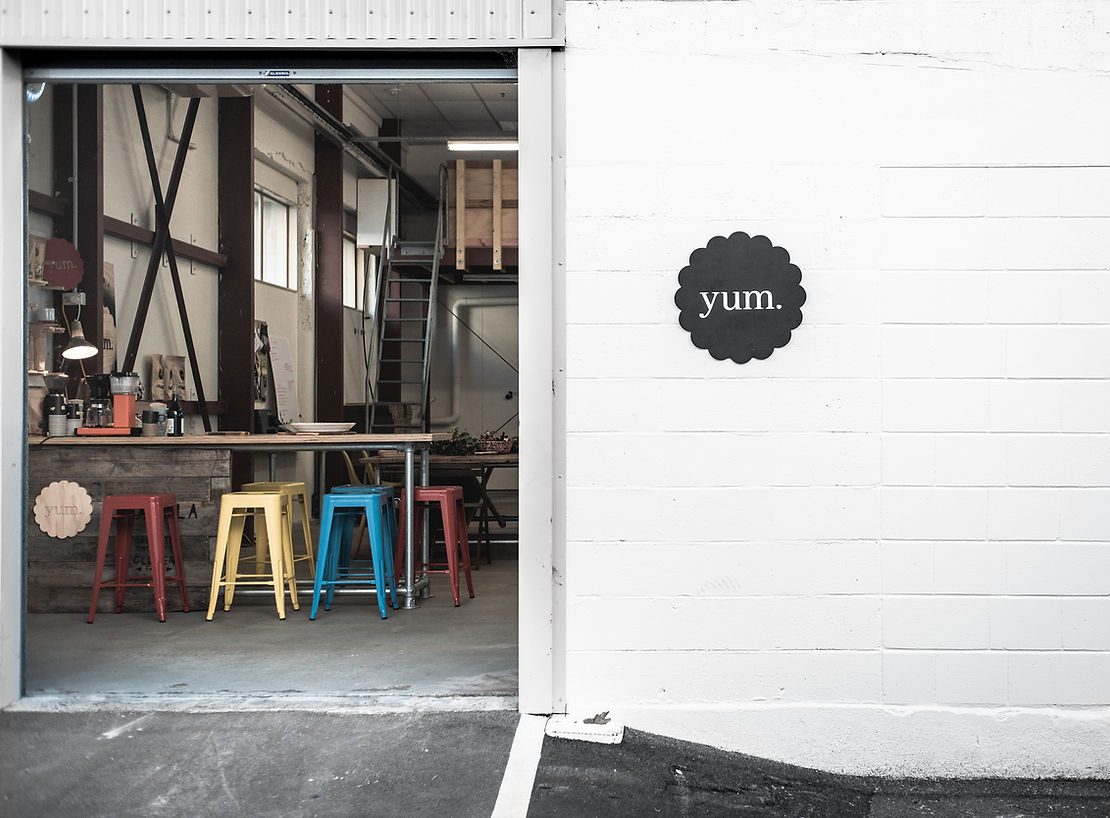
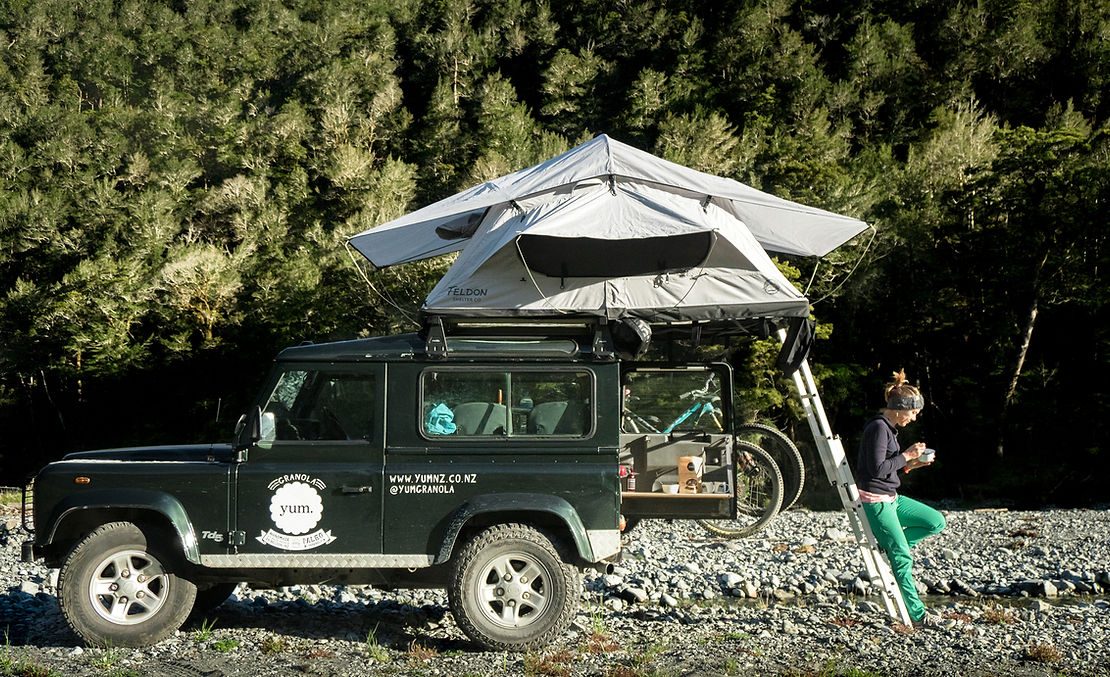
Locking Down Pt. 2 | YUM Granola
The people behind YUM Granola are as good as any, and they're a business I'm stoked we're friendly with not only because they make delicious granola and mountain bike, but because Sarah, Mike and their team do so much to give back, whether that be by operating a certified Climate-Positive business or by donating granola to local food banks. We caught up with Sarah to get an insight into YUM, and to find out how Covid-19 has affected them.
Tell us a little bit about YUM Granola, what you do and your ties to mountain biking.
We make YUM Granola here in Nelson, which includes everything from creating our own recipes, sourcing the ingredients, baking the product, photos, website and online content creation, packaging design, and distribution across the country. Mike and I started YUM down in Wanaka about 5 years ago when we were living there, and it really took off at the local market. Watching it grow on its own at the beginning was quite impressive. I've always believed when you do something you love and that fires you up, the finished product is noticeably different, and that’s one of the main reasons I believe YUM tastes as good as it does. We take it one step further and are conscious on every level of how what we do is affecting our footprint and how we can make it better.
While we are a small company, we punch above our weight on so many fronts - sustainability, contributions/donations, minimising packaging waste, paying living wage, eliminating the use of plastics. For us, it is the right way to do business and the only way to do business. We see other companies receiving awards for just being in business and it's always a bit disappointing because it would be nice to see how (or if) they are giving back to their community and the planet, not just looking after their own image and bottom line. So, we focus on what we do best and stick to our values, which is thoughtful to the whole process and keeps us tracking in a (somewhat) straight line.
YUM and mountain biking go hand and hand for us! We both are addicted to riding in our own ways. YUM was created initially to fuel our own adventures. Then, more and more people wanted it and we wanted to share its goodness. Funnily enough, the first delivery of YUM was on my Yeti SB95 from Lake Hawea to Wanaka. We are lucky in that YUM provides us a lifestyle now where we ride pretty consistently. We moved to Nelson a few years ago because of the riding. We knew the move would be good for YUM too but at the end of the day it is the getting out on the trails that brings balance (and breathing) to our lives. We've also just been able to ride together again. I had forgotten how much fun Mike is to ride with, so we have been getting out weekly again which feels like a treat. There have been times when YUM needs every minute of our waking days, and in the beginning there were no free weekends and little free time, but we now work pretty normal hours with the ability to go ride Nelson's amazing trails when the sun is out. YUM HQ is right in downtown Nelson, so just a few minutes ride to all the trails which we are stoked on.
What challenges have you faced over the past couple of months? From our entry into level four, to our move to level three and where we sit now, in level 2.
The night before lockdown I had a huge meltdown! It wasn't about the unknown of what was going to happen, it was more the fact we felt spread thin already and I couldn't imagine that on top of having Rai home from kindy all day every day. I knew it would be bonus quality time to be with her but having less time to drive YUM scared me to be honest. The irony was that Mike seemed happier and more relaxed than ever! This is why we are a good team😊 I asked him why and he said that he is always stressed about YUM and now it felt a little better because everyone was in it together. I guess for me, I feel that if you’ve started your own company , you find yourself in the red sometimes, but if you do it right, you learn how to be lean, agile, and smart. We know other companies who work with a lot of capital and because of that they just throw ideas and money in the air to see what will stick. We've never been able to afford to have that mentality and because of that I believe we have good general resilience.
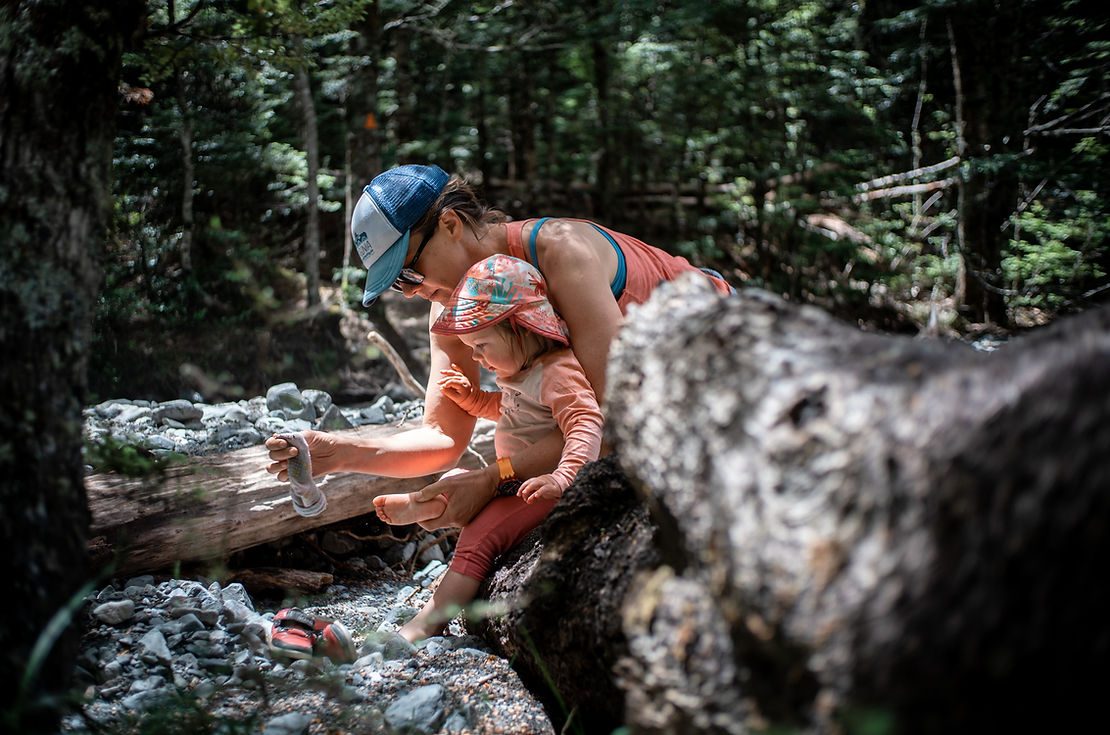
We were super grateful to be an essential supplier to supermarkets and to be able to continue producing YUM through the entire lockdown. I remember the first day going to work in Level 4, riding my bike to YUM downtown and it was eerie. It felt like every person and every business had vanished in a way, virtually overnight. There was no one on the streets and it really left me feeling sad for all the people who had lost their jobs and the business owners that didn't know how or if their businesses were going to be able to continue. After a couple weeks at Level 4 while our supermarket sales had dropped a bit, our online sales were through the roof. We were essentially doing more production with half the staff in a fraction the time. I had to reprioritize and condense my role down to what was essential and only do a couple hours of work a day while Rai was sleeping. Mike was wrapping his days up by mid-afternoon, to come home and relieve me a bit with Rai. The irony was that because we weren't allowed to ride our mountain bikes during lockdown here in Nelson, we were forced to relax and breathe in different ways, and it felt pretty good to not feel guilty about not getting out. We just changed gears and did more hikes with Rai and found other ways to get out into the bush.
At Level 2, I came back to work at YUM HQ along with Rachel who helps us with all our store support. It felt really good to have the team back under one roof! Rai was probably equally happy to be back in kindy playing with other little people again.
Has/how has COVID-19 affected your plans for the year?
It's really interesting because just this week I went back to our Strategy Plan that we were working off pre-Covid. It was only a couple months ago and I have little memory of it. The world is a different place now, with shopping habits changing overnight as well. I am hopeful that some of the good habits we had over lockdown will continue. We've always commuted to and from work on our bikes and the amount of smelly cars on the road again are kind of a bummer. We've been asking ourselves what worked for us over lockdown and then taking that forward into planning for the rest of the year.
Tell us about how you’ve been supporting food banks around the country over the past few months
I remember getting to YUM the first day Level 4 was being discussed on the radio and Mike said, "I've worked the numbers and I think we can donate 1 x 400g retail bag for every 1kg purchased on our website". "What… Really?!" Our margins are already really slim compared to our competitors because of the organic ingredients we use, so I was pretty shocked at this coming from the guy who is pretty stressed on a daily basis around YUM's finances. He went on to explain that a lot of people were going to be out of jobs and not be able to afford the basics and it would be good for us to think of those people and help them. We had no idea how our business turnover would be through lockdown, but we knew this would help us maintain our focus and feel good about being able to continue baking YUM. So, that day we launched YUM's Breaky Drive and now we’ve donated over 500 bags to local and national food banks which is over 4,000 YUM servings to keep people going, and still growing. It has been pretty awesome to see how well received it has been from people and it makes us even more proud of YUM.
A lot of businesses, including us, have been able to put energy into projects that had been sitting on the backburner before Covid hit. Have you been working on anything over the lock down period, or has it been business as usual?
There was a lot of business as usual but one of the other silver linings to lockdown was that my creativity really kicked into gear and I came up with a couple new YUM recipes, as well as finishing a couple more. So, those are now new products in the queue for moving ahead which is pretty exciting in our world. We still get very excited for new YUM products as they are our own unique creations. Over lockdown we finished our audit with EKOS and received our certification for being Carbon Zero + Climate Positive, which really feels great as we don't know of anyone else in our category that has a similar commitment to sustainability. It also offsets our carbon by 120% with regenerative native plantings in Takaka, just over the hill from us.
Finally, what’s in store for YUM over the rest of 2020?
So much goodness! We have just started working with a group on the North Island who are going to help us grow YUM into more supermarkets which will grow our market share. This combined with our plan to switch over our entire retail line of YUM into home compostable packaging will mean that the more market share we have, the more packaging waste we will be eliminating, which is something we feel pretty strong about. We have switched all our 1kg bags already to home compostable packaging, but it is a large project for the retail line. We have wanted to do it for some time, but it was cost prohibitive. However, now it is looking more like a reality. We are going to roll our newest flavour, The Mighty Fig, out into retail packages as well as it really took off with our trial of it in 1kg bags. One of the recipes I came up with over the lockdown, will come out in the next couple weeks on our website and it is unlike anything out there as it will be from 100% NZ grown ingredients. It was a bit of a scavenger hunt to see what NZ grows and how we could create a granola with it. In a way the rest of the year will be continuing to get YUM out into the world while ensuring we are leaving the best footprint as its legacy.
Words: Cam Baker & Sarah Hedger
Images: Sarah Hedger & Mike Cowlin
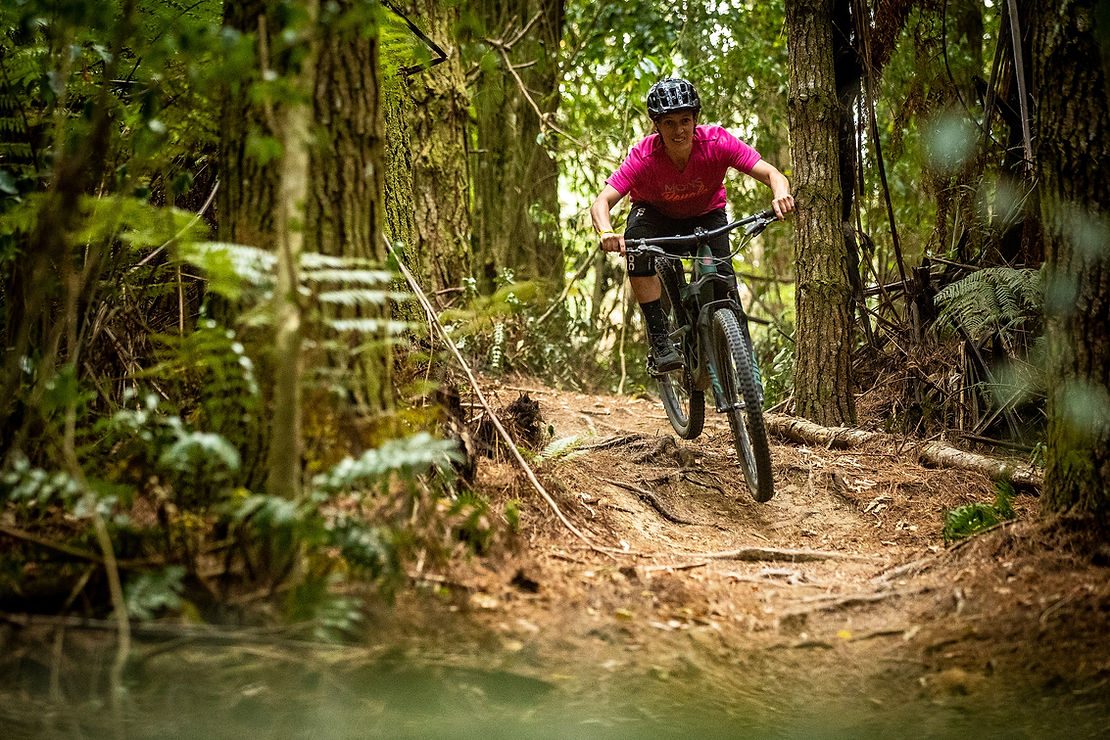
Story: A weekend away with Juliana's Joplin
I got my first peek at Juliana’s new Joplin at the Maverick launch, in the middle of last year. It looked very similar to the Maverick, with a little less beef. When the time came to ride it in real life I was lucky enough to be chosen again. The top CC X01 RSV build was sent and I set to work getting it dialled in.
Initially, the idea was to go for a ride with Juliana Ambassador Anka Martin; to take the Joplin on a meandering overnight journey on the Paparoa Track. Unfortunately for West Coast residents, a devastating storm had ripped through and, as well as blocking people from movement momentarily, it caused a slip midway through the track that wouldn’t be cleared fully by the time we were planning to ride it.
So, with the Paparoa track now on a growing list of New Zealand trails I will ‘one day ride’, we had to make other plans. Unconventional timetables aligned on the weekend following Valentine's Day. This timing also happened to align with Jamie Nicoll’s North Island Nomadic Weekend at 440 MTB Park (and the final round of the National DH series). So, I farewelled my Valentine and headed north, through scorched pastures with cows nibbling on dehydrated blades of grass; past the many signs selling seaweed fertiliser and up to the coast, with beautiful turquoise waters and white sand beaches abruptly turning to a beautiful rocky mess.
Thoughts ran back and forth through my head as I drove, casting doubt on whether a bike park would be the ideal weekend riding away with the Joplin - a bike which has its origins in the cross-country realm of the Juliana range. Turns out, the worries were all in vain.
I had told people I was off to Auckland for the weekend, however, in small town terms, 440 is so far away from Auckland it may as well be in another town. It’s about an hours’ drive to get there from the city. Not quite far enough to escape the glow of the city at night, but more than enough to escape into the peace and quiet of nature. The stars twinkled in the sky regardless and the expected winds came, rhythmically whipping the straps of the bike rack into the boot of my car. Not rhythmically enough to send me to sleep, though, so I hauled myself out of my back seat bedroom to end the tapping.
In the morning, we rolled out of the campsite to get our spots in the shuttle. From the drop off, we climbed a short while and took in the spectacular views of the Firth of Thames and islands sitting off to the east of Auckland, then headed into Doozas. This pine forest trail was fun and fast with its looseness and a few chunky roots chucked in; the kind of stuff the Joplin loves to float along.
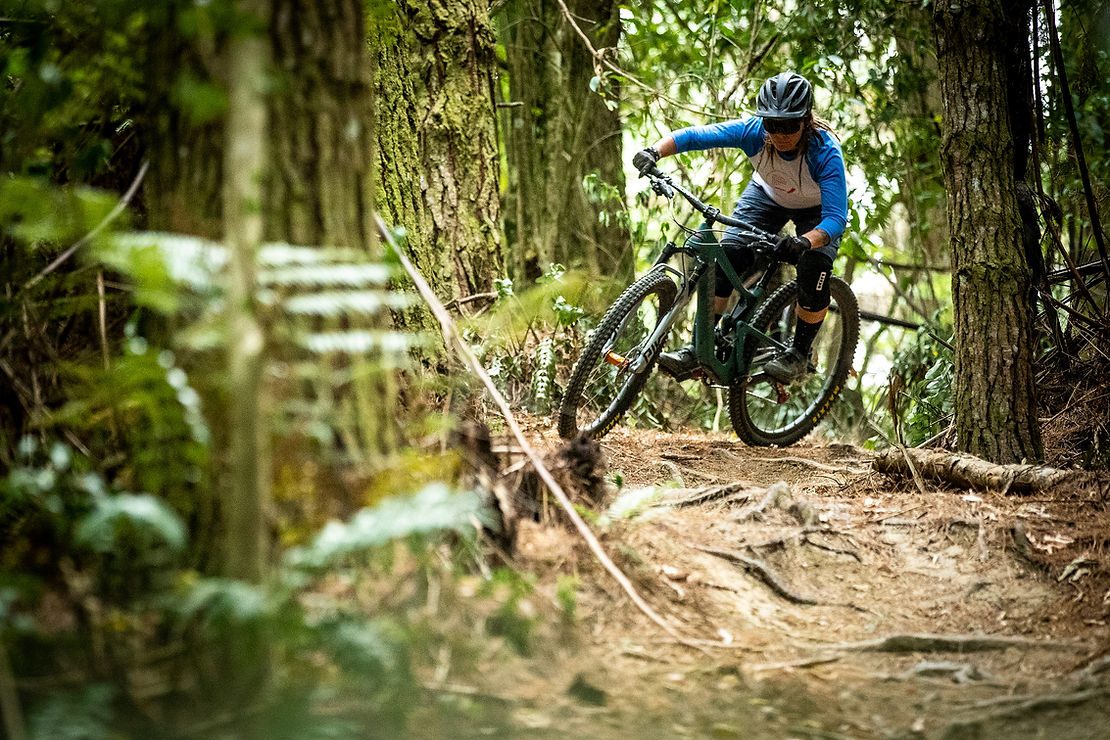
It helped that I’d managed to ride the bike for over a month on trails I was really familiar with at home in Rotorua, which were a bit like this. This meant that I had the setup pretty much perfect for my style of riding. I did find it took longer to get there though, with much more tweaking required. I put this down to the shorter travel and needing to find the right balance of suppleness and firmness, while still getting full travel out of the suspension. It took more finesse to set up the suspension, just like it required a little more finesse on the trails heading down. It’s not a point and shoot bike and I found myself picking my lines more carefully to find patches in the trail to unweight, in order to loft over the rougher stuff.
Initially, I was dubious about the capabilities of myself on such a short travelled bike. If I hadn't already known it had 120mm rear and 130mm front suspension, I might not have ever realised - it certainly didn't feel like your average short travel. I felt like Marie Kondo had come along and gotten rid of what I truly didn't need, which left me riding with only the necessities of suspension. The short travel isn’t an issue when the trail gets a bit hairy, thanks to the ‘longer, lower, slacker (and steeper)’ mantra of modern day bicycle designers. This significantly updated version gets a 20mm longer reach, 2.3° slacker head angle and a 3.7° steeper seat angle, compared to the previous one from a few years ago.
Like the Santa Cruz equivalent, the Tallboy, the shock mount drops down to the seat tube tunnel of love. This lower link VPP platform felt supportive when pedalling and I couldn’t feel it bottom out, even though the O-ring indicated I definitely had. On the shock mount there’s the ability to tweak the bike with a high/low flip chip. I had already felt a bit of pedal whack with my big, old, clumsy flat pedals in the high setting, so I was a little nervous dropping the bottom bracket a touch further (3mm) towards rocks and stumps. I gave it a go anyway. Is it ok to say I didn’t really feel much of a difference between the two settings? Yes, I think it is. The angles don’t change heaps, moving from a 65.7° head tube to a 65.5°, and the seat tube gets about 0.3° slacker too.

Another adjustment that can be made to the frame is out the back, at the chainstay. A second flip chip lengthens the 430mm stay out to 440m. Again, I had a preconceived thought that I would prefer the shorter, more ‘playful’ option, but I found the extra length added a little more stability for not much sacrifice in liveliness. I could still get off the ground when I wanted to. And I wanted to - a lot - with this bike. It’s light, and just mauling through chatter doesn't work the same on the Joplin compared with a bigger travel bike. On longer rides, where I was too fatigued to work the trail over rougher terrain, I felt myself becoming a bit of a passenger. But as Janis would say; “You got to triiieeeiieeieeiy (just a little bit harder)”. It was only on these longer, more technical rides, with some really rough stuff in the way, where I found myself thinking that a few more millimetres would be handy. Riding the bike, 98% of the time it was 100% within its limits. The 2% where it was not was, coincidently, was where I was also reaching mine.
We then headed up again to one of the patches of native flora. Kauri, nikau and ponga trees enclose the Damn Native trail. Clay soil has been sculpted into berms, winding you down into the creek and out the fire road on the other side of the valley, necessitating some climbing. Even on these mellower roads, the blue lever on the FOX Float Performance Elite DPS shock stayed in the full open position. There was some movement in the shock, but it was firm enough not to lose pedalling efficiency.
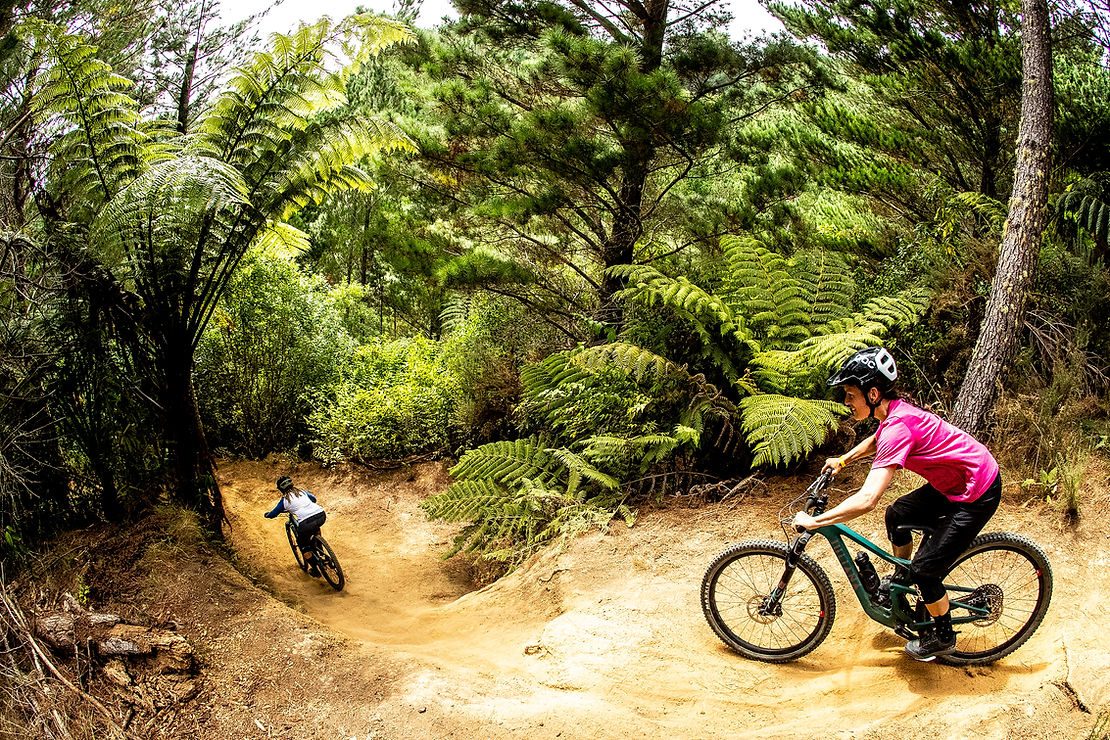
On steeper, more technical pinches back home in Whakarewarewa - like the ones lurking out in the native bush of Tuhoto Ariki - it felt easy to manoeuvre over steep obstacles with a bit of momentum. The climbing abilities came through in faster speeds up hill. On flowing single track I felt like an ewok who had stolen a speeder bike, zooming through the trees. It helps being almost a kilo lighter than the other 29er in the Juliana lineout, the Maverick, too.
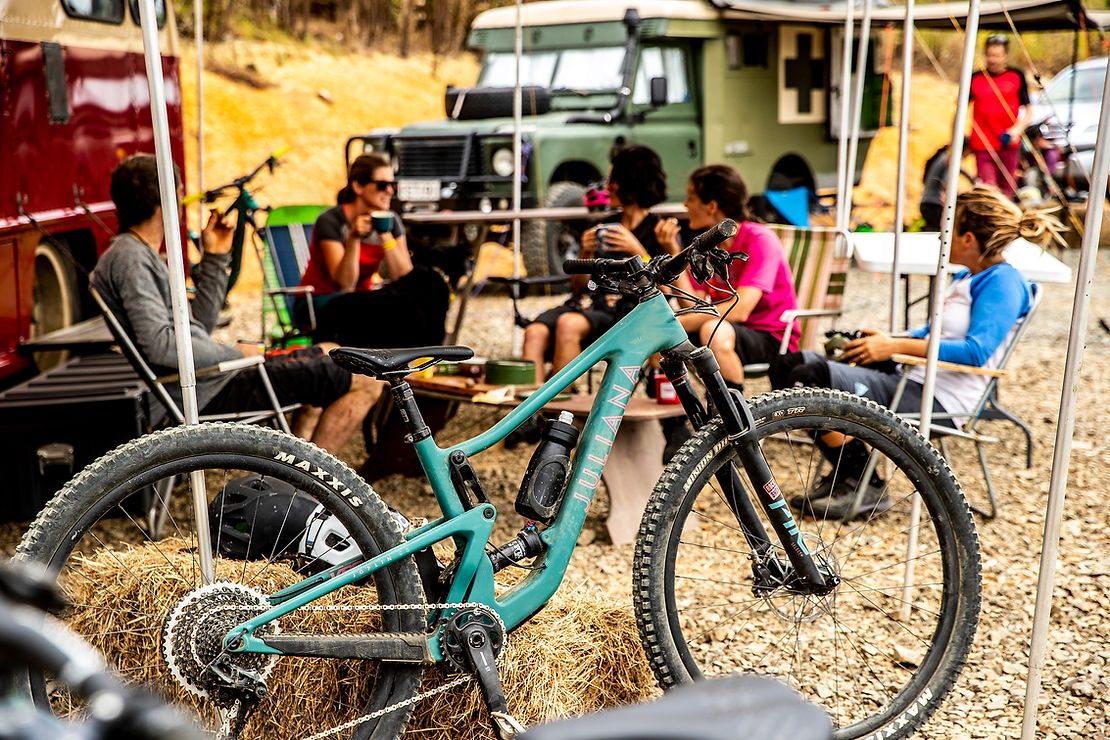
More shuttles were met with more nice flowy, techy and dusty routes down. A post ride cool down and wash is a short walk across the road, in a swimming hole in the creek that flows down to the sea. Saturday evening came, and we were treated to a home cooked curry, rice and naan - this was paired nicely with generously donated Parrot Dog beers. Hungry trail dogs waited impatiently to lick any last remaining scraps from bowls and a couple of turkeys ran up the track across from the campsite. At dusk, we all sat around a dusty projector listening to tales of the past and future, inspired by crazy schemes. Jamie spoke of travels to communities, not just to tear through them, but to engage with the people who live in them. What he’s got planned is equally impressive: he’s modifying an old Toyota Land Cruiser, fit to transport him and his bike over land and sea to Europe. Writing that sentence makes it seem so easy, but looking on the map with him puts into perspective what an immense feat it will be.
Next up was Anka, to show us what she did in her 2019. It’s crazy to think that everything she showed us happened in one year! The part that stood out for me was her time in Roma, Lesotho. Anka, along with Claudio Caluori from Velosolutions - who had previously built a world-class pump track there - ran the Red Bull pump track qualifier. Along with the win came the opportunity to compete in the World Championship in Switzerland. Anka helped the local riders - one of them winning by marginally beating a guy from South Africa who had travelled there in hope of an easy entry. These acts enrich communities, bringing them together. And there are plenty of places to go to right in front of us, living here in Aotearoa. This was especially apparent when we watched the slide show of amazing locations, many of which looked like they could have belonged in New Zealand. It was really good to get to know Anka a bit more than knowing of her through watching her rad videos. While listening to Anka and Jamie I didn't feel too much like a nomad, but I enjoyed listening to nomadic tales from people who live their lives as travellers of the world.
On Sunday morning, Friday’s smell of freshly laid asphalt had disappeared and the newly sealed pump track was ready to use. The Nomadic Weekend culminated in ‘musical pump track’, a game very loosely based on musical chairs. Underneath the gumtree filled with a variety of birds, and a drone hovering nearby, and a confused dog barking, everyone piled onto the track to ride around until the music stopped. The winner was whoever ended up closest to the speaker. I was far from the first winner and came away with a sweet Ground Effect jacket; the greatest prize, however, was a set of Santa Cruz Reserve wheels. Lucky Chris!
It was great getting to know the Joplin, and to make new connections with some of the people who make this brand what it is. It’s a bike that can be as versatile as the rider. The riders I've talked to who love their Joplins and Tallboys and ride them hard - and exclusively - have up-forked them themselves, to 140mm in the front. For the Pike Select+ this requires a new air spring getting fitted, which seems an easy upgrade if that's the style of riding the bike is being used for. To further beef the bike up, the stock Maxxis Minion DHF/R 2.3’s could get fattened. The frame also allows 2.6’s when the rear axle flip chip is in the longer position. I liked the feel of the 2.3s on the trails I rode, but it’s nice knowing you have other options. On the other hand, it’s also a bike longing for a backcountry adventure - heck, it's even got two bottle mounts! As for the middle ground, those every day riding missions, it’s a heap of fun.
Words: Rachel Reynolds
Images: Sven Martin
News: Pirelli Launch new Scorpion XC RC Tyres
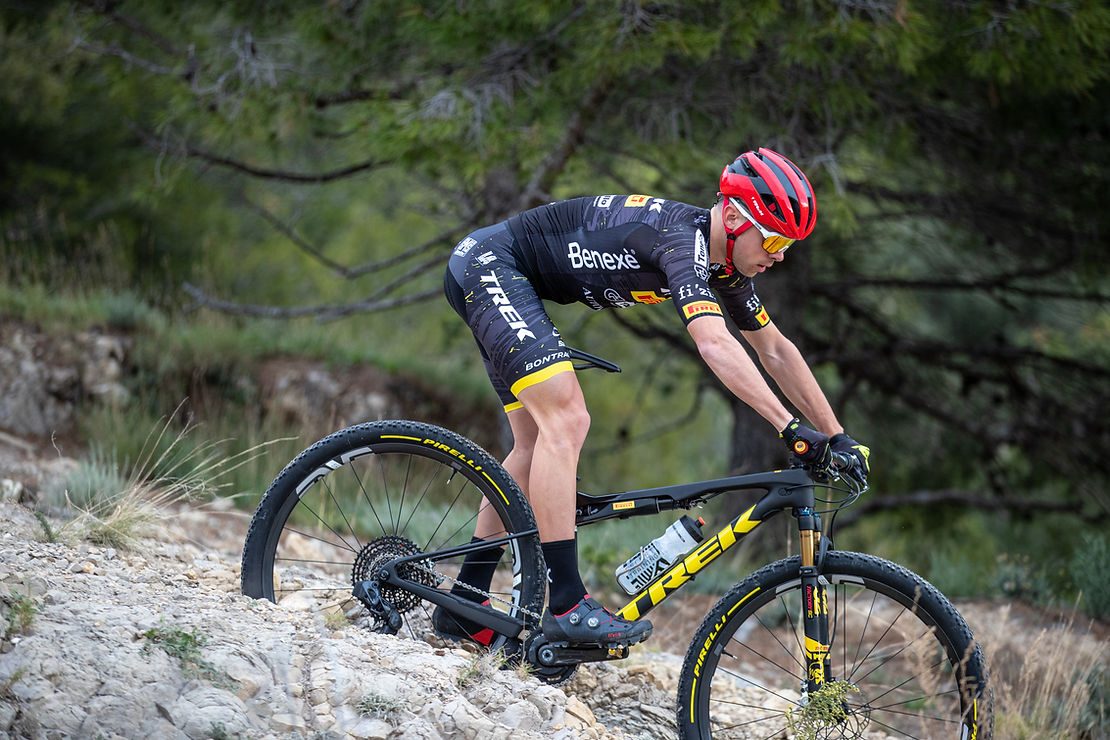
Pirelli carry some pretty heavy clout when it comes to making tyres, being the supplier for Formula 1. We've been fans of everything they've done in the mountain biking space since their return in 2019, and they've just launched their latest MTB line: the Scorpion XC RC tyre. Developed with the Trek Pirelli XC team, the Scorpion XC RC is designed 100% for racing.
"Developed at the specific request of TREK PIRELLI athletes, the new tyre is a 100% racing product. It’s created to meet the high performance needs of riders of the caliber of Vlad Dascalu, a European Champion, World Champion and World Cup winner XCO U23, and Samuele Porro, an Italian National Champion, silver medal at the European Championships and bronze at the World Championships in the XCM category.
Samuele Porro had asked Pirelli engineers for a new tyre more oriented towards the Olympic Cross- Country races but also with excellent performance in the XCM events. The company technicians have therefore developed a racing product of the highest profile, capable of offering lightness, super smoothness and good grip. Thus, the Scorpion XC RC was born.
A VERY FAST RUBBER, FOR RACES
A few months later, in October 2019, Samuele Porro and his teammates received the first prototypes. The new tyres with the "Prototype" label were tested during the team's training camp in Calpe (Spain). Porro also tested them in a training session on the track of the grueling Cape Epic in South Africa. The baptism of the tyres took place in the first calendar races, including the Mediterranean Epic and the Andalucia Bike Race.
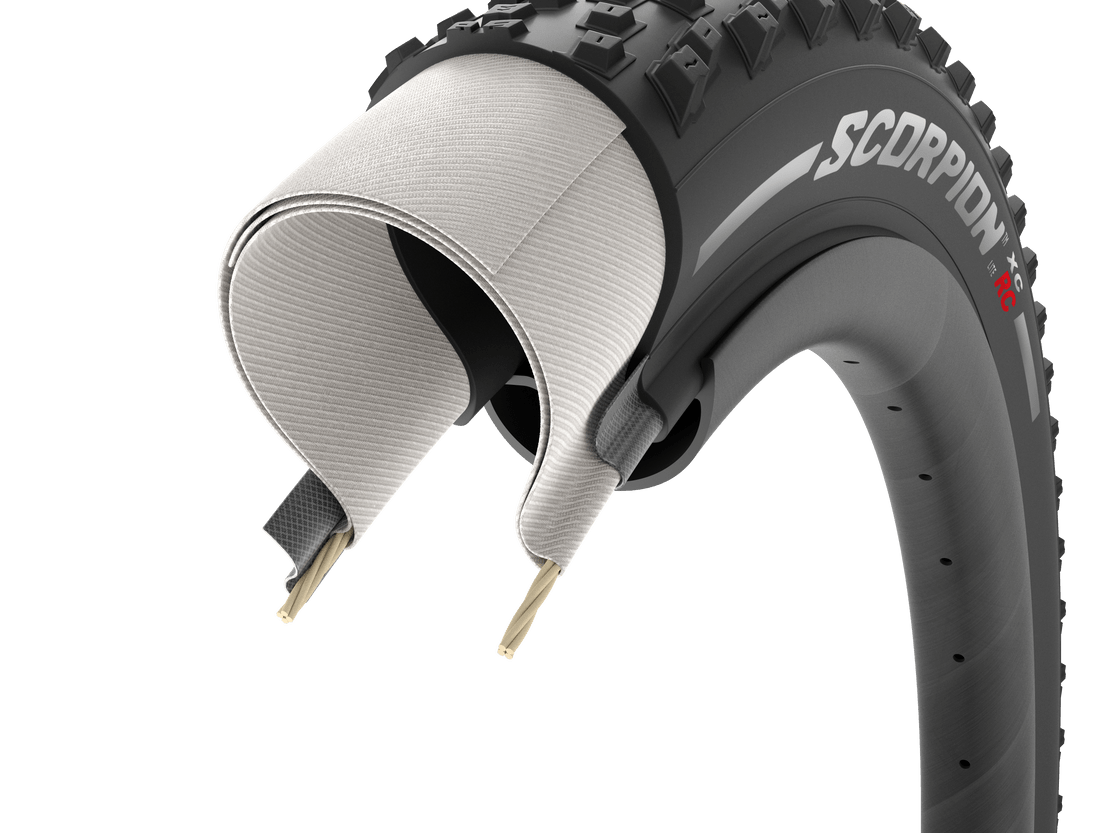
From a technical point of view, the new XC RCs are Tubeless Ready tyres with a 120 TPI Nylon casing construction. Available in LITE and ProWALL versions, for increased puncture protection, they combine Pirelli's proprietary technologies already found in the Scorpion MTB range, starting with the innovative SmartGRIP Compound. Derived from Pirelli's experience in Motorsport, SmartGRIP Compound is a mono-compound with high mechanical strength which, despite the increased smoothness and lightness of the new XC RC tyres, offers excellent stability, long life and, above all, optimal grip on all terrain. Pirelli paid particular attention to the tread design, which incorporates characteristics deriving from both the Scorpion XC H (Hard) and the Scorpion XC M (Mixed), re-engineered to have more direct and precise handling. The blocks in the center of the tread clearly resemble the Scorpion XC H profile but are lower and closer to improve the smoothness on straight sections. And the half-fold and lateral blocks have the shape and sharp angle of the Scorpion XC M profile. These revisions were made to maximize grip at different lean angles. The profile with more aggressive sides and a smoother center makes the Scorpion XC RC the perfect weapon to conquer the modern Olympic Cross-Country tracks that are very technical.
This is Vlad Dascalu’s comment on the new tyres: “the Scorpion XC RC is perfect for me, because it is designed for the most modern XC courses, where the alternation of natural trails and artificial sections is increasingly common, in addition to an increased racing average speed that’s augmenting year by year. Thanks to the new design I know exactly where I can put the tyre, I can follow the most difficult lines and I can set the curves with more aggression, but also save energy, thanks to the improved smoothness and lightness (of the tyre - editor's note) ".
“Scorpion XC RC is a perfect tyre for XC competitions - commented Samuele Porro - Smooth and precise in high speed corners. The new, higher, side block ensures optimal grip when driving to the limit "
The new Scorpion XC RC is already available in the best cycling shops, in the 29”x 2.2 version, also in the “Team” color variant (with yellow logos)."
News: Roval's new Control SL Team Wheels
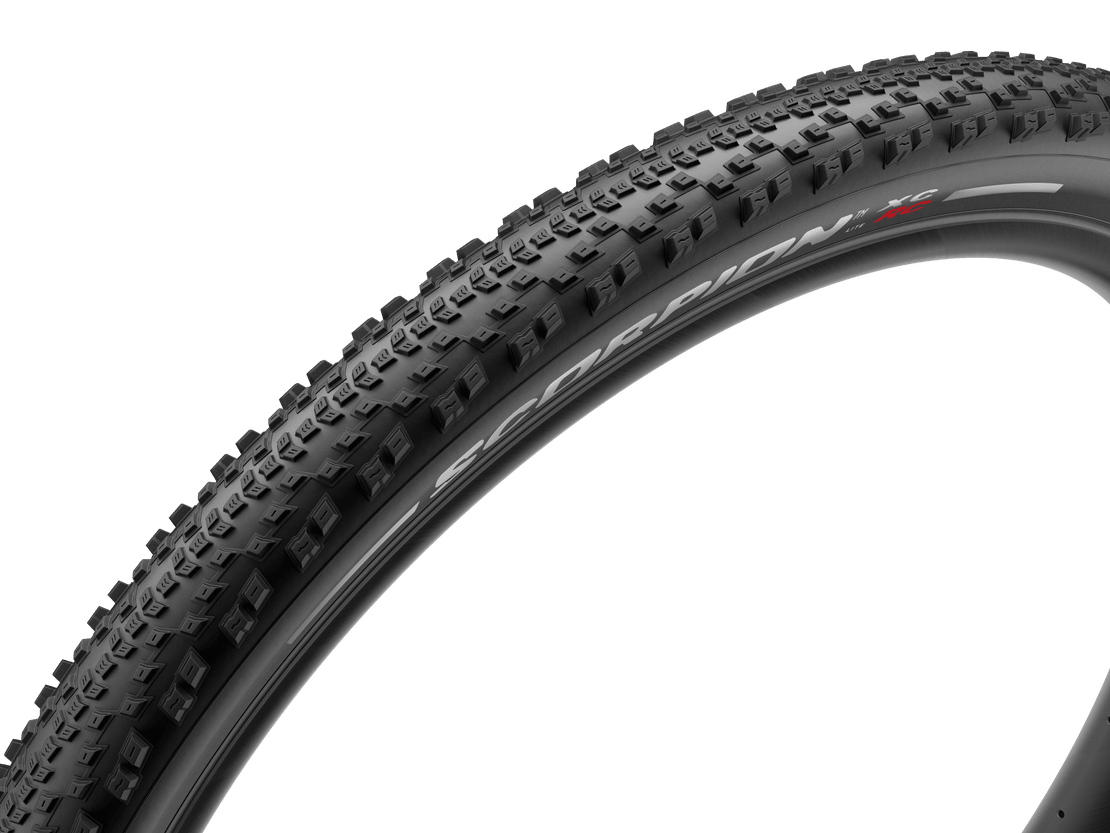
Cross Country racing is pretty exciting these days, with super tight racing on some courses that are pretty technical, compared with the courses of years gone. Roval's new Control SL Team Wheelset are designed to meet the needs of modern XC. They come in at a claimed weight of 1240g for a complete set, and a nice, wide 29mm internal width for plenty of traction and a little more cushion. Keep reading for the full release from Roval.
"Bringing the new Control wheels to life involved a rigorous cross-examination of everything we’ve ever done, and ultimately led us to develop an entirely new wheelset from axle to rim. The new Control is an exercise in radical design, no-holds barred engineering, and state of the art production.
Weight is always going to be a paramount concern when it comes to XC wheels. Every single gram counts when hunting podiums or personal bests. Rotational mass is the enemy of speed; it dulls handling and saps precious watts. Being heavier than other light wheels doesn’t win races. Being the lightest might. At 1240 grams per set, the new Control SL Team Issue is the one of the lightest mountain bike wheelsets on the market. It’s also lighter than most road wheelsets.
Durability matters. Having the lightest wheels used to be good enough for bragging rights, no matter how questionable the longevity. Those days are gone. The lightest wheels on the market aren’t worth much if they can’t deliver you to the finish line, or if they leave you stranded miles from the nearest road. Through rigorous prototyping and a grueling series of testing protocols — both in the test lab and in the real world — the new Control delivers a toughness and durability exceeding that of many much heavier all-mountain wheels.
Ride quality is tailored to the demands of modern XC and trail riding. The shape of the new Control rim is carefully designed and laid up to be laterally stiff so that they track with precision, yet vertically compliant enough to deaden trail buzz and deliver a smooth ride. This ensures razor sharp handling without harsh side effects, ultimately reducing rider fatigue and improving lap times.
Pinch protection is something that most people don’t talk about. Meanwhile, the single biggest time loss in XC racing is due to flat tires. So it makes sense that if the goal is getting from point A to point B as fast as humanly possible, then something should be done to reduce the risk of flat tires.
Notice the top of the rim wall on the new Control rim. See how it’s wider than usual? We stopped accepting the status quo and decided to do something about pinch flats. That rim top is 4mm wide, and this width and specifically designed shape means that it takes 22% more force to pinch a tire than before. Rider can now ride harder, on lighter tires, at lower pressures, with fewer flats. Beyond any talk of gains made by less rotational weight or improved ride quality, reducing the risk of flat tires GUARANTEES a faster wheel.
-
Fewer flats: 4mm flat-top requires 22% greater force to pinch-flat
-
Greater durability: System approach of combining asymmetrical rim with custom designed hubs which help balance spoke tension and allow single spoke length assembly
-
More control: 29mm internal rim-width reduces squirm and increases tire volume
-
Better ride: Double the vertical compliance with 29% more impact strength keeps you on line and maintains grip and speed
Instant classic, limited edition
1240 grams is an obscenely light weight when talking about mountain bike wheelsets, the kind of weight that XC racers dream about. But light weight alone is no longer enough. So, we sweated the details and engineered the new Control SL Team Issue wheels to be sharp handling, smooth riding, extra durable, and less likely to pinch-flat your tires, in addition to being some of the lightest weight production wheels on the planet.
No punches were pulled. These wheels use the lightest hubs Roval has ever made, period, along with a rim that has been designed from the ground up to meet the rigors of modern high-performance XC riding and racing. This is a very limited production run, carefully hand-built and finished with a special graphic treatment.
Control SL Team Hub
To build the lightest wheels, you have to consider every single component that goes into those wheels. The hubs on the Control SL Team Issue are a prime example of that detailed scrutiny. They are the lightest Roval hubs ever made. Straight pull spokes use slightly less material than j-bends, so they were used here. The spoke holes are drilled at a precise angle to match the rims directly without any undue stress.
The freehub utilizes DT Swiss’ EXP mechanism; 54t engagement, fewer moving parts than before, less drag, and outboard bearing placement all work to ensure that these wheels deliver strength and durability without any excess flab.
Asymmetry begets symmetry
The asymmetric design of the Control rim offers some subtle but important benefits. With the spokes offset to one side of the rim, this allows us to reduce the spoke offset that usually occurs at the hub. In turn, this means we can generate greater bracing angles for the spokes between the hub and rim, while also minimizing the spoke tension differential that often occurs between drive and non-drive side spokes. The end result is a wheel that is stronger, laterally stiffer, more durable, and in the case of the Control, allows us to utilize the same length spoke throughout the whole wheelset.
Testing:
Design. Prototype. Test. Test again. Every step of the Control design and prototyping process leads to this. Control field testing included a deep pool of critical and talented riders around the globe, who punished our work in all conditions, from World Cup races to crushing backcountry miles. They made it their mission to sniff out weaknesses and expose them. Sometimes they sent us back to the drawing board, and we thanked them every time. Control wheels also endured thousands of hours of gruelling lab tests—simulating exaggerated real world forces – generating relevant data regarding strength, stiffness, weight, and other critical measures. We compared the test data to all the relevant wheels we’ve made in the past, and to every respected wheel in the market.
The result? Control wheels excel in both qualitative and quantitative test results."
News: Trek's #GoByBike
Over lockdown, I’m sure many of you turned to your bikes for to let off some steam and to enjoy the outdoors. Whilst most of us weren’t able to ride trails, just going for a pedal around the block made a huge difference to my days and no doubt helped keep me sane.
Riding helps keep us healthy, but it also helps our planet if you’re able to make a trip by bike, that you’d usually make by car. Trek’s #GoByBike movement encourages you to take at least one trip by bike, a week, that you’d usually make by car. Now’s the perfect time to be making lifestyle changes, or continuing new habits, especially when they can make a positive impact on you and the planet we call home. For more, read Trek’s press-release below.
"There’s never been a better time to hop on a bike and go for a ride – and, whether it’s for essential travel, exercise, to let off some steam or to reduce your own personal carbon footprint, the benefits for you, your family, your community and your planet are clear. Trek Bicycle is creating sweeping collective action across the world with #GoByBike, a movement encouraging people to choose to ride a bike at least one trip a week, replacing other modes of transportation, with the goal of reaching 10 million trips for a healthier planet and population. While society is still social distancing, there’s never been a better time to support climate action and form new habits, inspiring people to choose a bike trip over a car trip as often as possible. “Now is the time to adjust our behaviors for the better and co-design a new normal that will have lasting impact on our people and planet,” says Trek Bicycle President John Burke.
For the planet, biking is climate action. Between rising global temperatures, melting ice caps, air pollution, and working to heal a delicate ozone layer, among other things, the world was in a tough spot before the global COVID-19 pandemic. It’s still in a tough spot. Air pollution contributes to 7 million deaths a year globally, according to the World Health Organization. It’s clear, though, that collective action can drive change. Cities, for example, that traditionally suffer from the world’s worst air pollution have seen reductions of air pollution by up to 60 percent from the previous year, during a three-week pandemic lockdown period. Replacing trips made by a car, bus, train or subway with a bike trip can reduce emissions and in turn impact our environment in a positive way.
“At Trek, we are moving fast on climate change. We have hundreds of action items we are taking to reduce our environmental impact, but the biggest thing we can do is to get more people to actually ride their bikes,” says Burke. “This is bigger than just an environmental crisis—it’s a health crisis, and in many places a congestion crisis, which will only continue to get worse as people opt to drive personal cars more in an effort to avoid public transportation and social distance. It is our hope that by encouraging the #GoByBike movement, everyone can look back together and be able to say they played their part in shaping a better future for themselves, their family, their community, and generations to come.”"
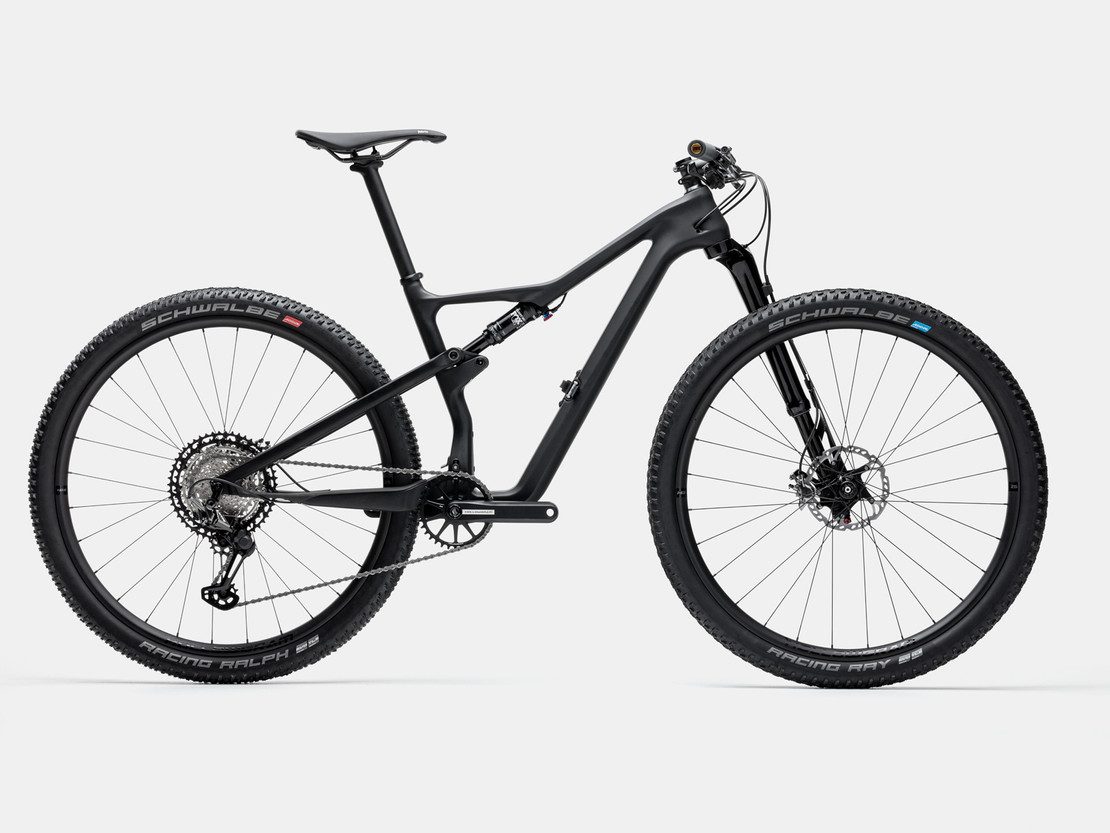
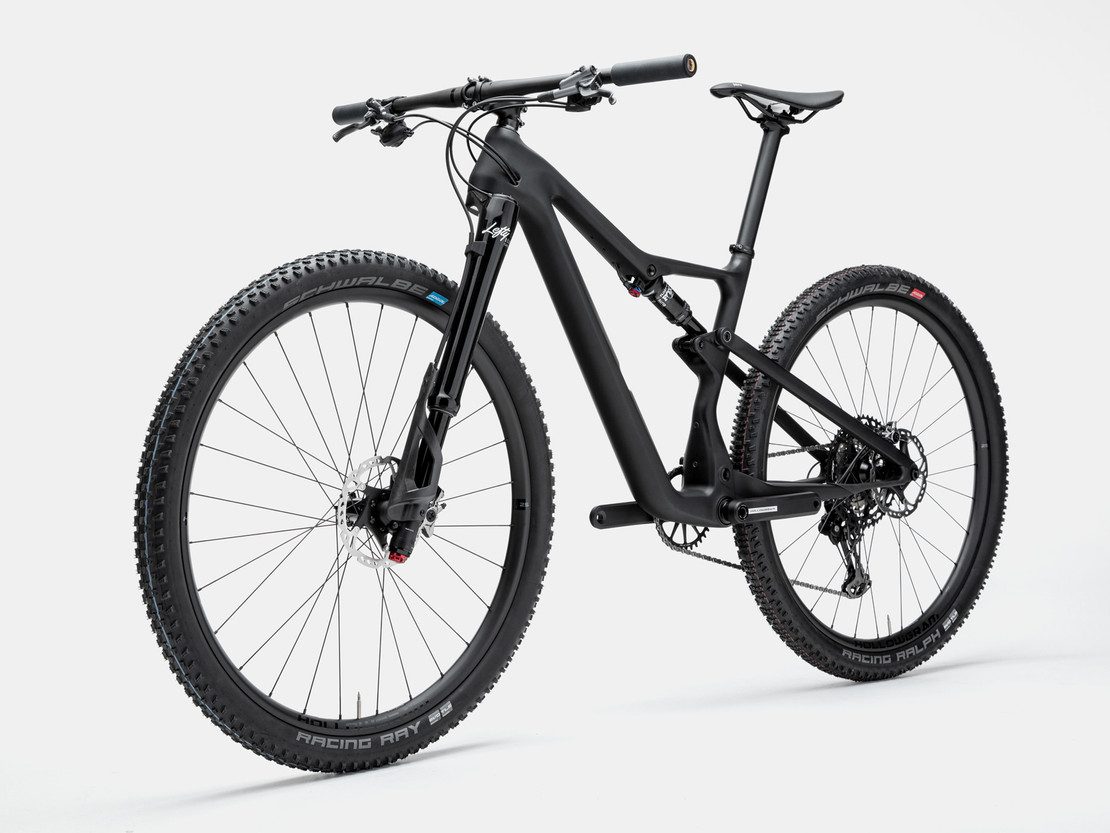
News: Cannondale's new Scalpel & Scalpel SE
Cannondale's new Scalpel is here! As with most bikes, the whole longer-lower-slacker-lighter thing rings true with the new Scalpel, with a longer reach, longer wheelbase and slacker head angle than the previous generation, and a frame that's 200g lighter. The Scalpel features 100mm travel, whilst the Scalpel SE features 120mm. Other highlights include a new suspension platform and integrated storage. Keep reading for the full release from Cannondale!
"The new Scalpel is one of the lightest full-suspension mountain bikes on the market, but that’s not even the best feature of the bike. The key to the Scalpel’s incredible performance is Cannondale’s new four-bar FlexPivot suspension. Patented durable carbon fiber flex zones act just like a Horst link pivot without the weight or flex of bolts and bearings. This also allows the bike’s suspension and overall frame-feel to be custom-tuned, by size, via Cannondale’s Proportional Response construction techniques. While others sacrifice performance to save weight, FlexPivot suspension delivers both – providing a ride that is ultra-light, with incredible grip, acceleration and control.
At just over 1900 grams complete with shock, the new Scalpel frame is one of the absolute lightest dual suspension MTB frames ever made. Cannondale’s Ai offset drivetrain delivers clearance for big 2.4” tires while keeping the chainstays short for traction and agility. Scalpel’s progressive geometry has evolved even further to a headtube angle that is a full degree and a half slacker and seat tube angle that is one-degree steeper compared to the outgoing bike. This, combined with Lefty’s extra-long fork offset, creates the latest version of Cannondale’s OutFront geometry giving riders more stability and confidence when things get rough, while keeping the steering responsive everywhere else.
For the ultimate marathon racer and high-speed trail slayer, there is the Scalpel SE version. It takes Scalpel’s trail capability and kicks it up a few notches bumping the travel from 100mm (front and rear) to a plush 120mm (front and rear) and slacking out the headtube angle even further. Larger volume 29” tires and a dropper post combine to deliver incredible speed and all-around capability. It’s the perfect machine for riders who prefer a superlight trail bike.
While suspension is the hero of the Scalpel story, the bikes also get Cannondale’s new STASH Kit. Built into the downtube under the water bottle mount, the STASH kit has everything needed for fast trailside repairs including a Fabric 8-in-1 mini tool in a quick-draw holster, a Dynaplug tubeless plug kit, and a place for a CO2 inflator or small mini pump."


Story: Waitangi Mountain Bike Park
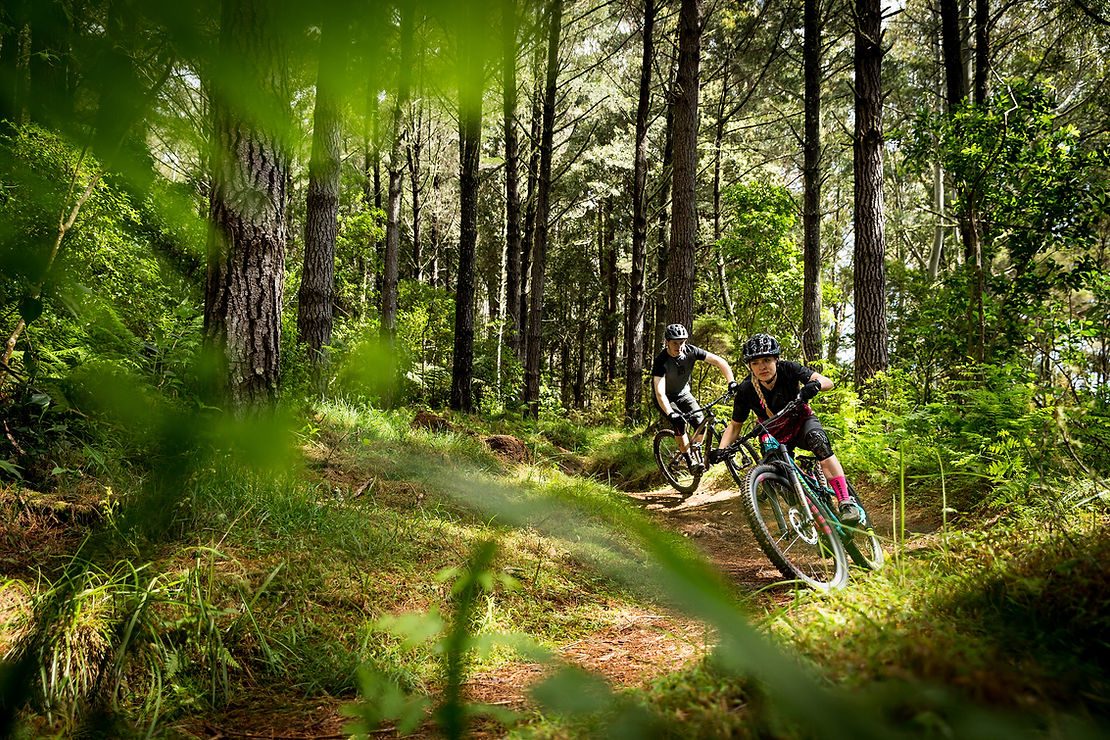
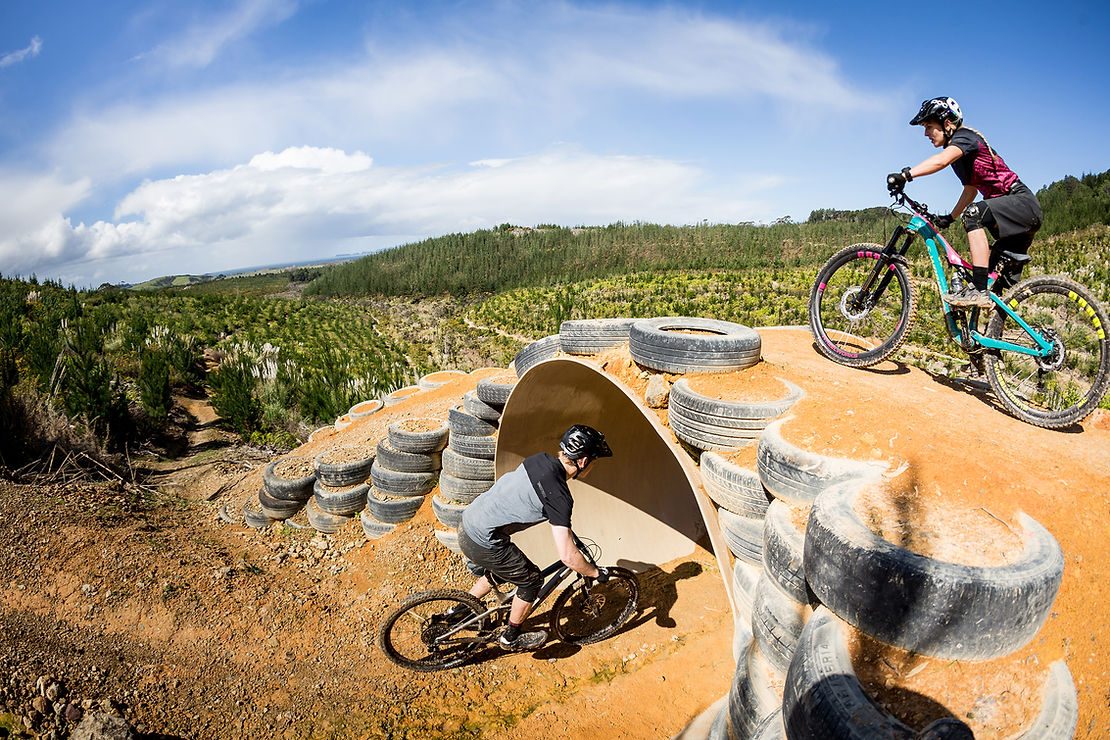
When we think of Waitangi, the birthplace of our nation, we tend to remember the TV broadcasts and headlines reporting the cultural politics that surrounds Waitangi Day each February. For those of us who have visited Waitangi, we also marvel at its stunning beaches and its never-ending farmland. Nowadays, the old lawlessness of the nearby early settler ports has been replaced by a thriving tourist industry. Yet few people know that Waitangi Mountain Bike Park is nestled beneath the tall pines of the Waitangi Endowment Forest, offering riders some 40kms of smooth, feature-filled flowy trails built by Southstar Trails and Ryan Lovett.
In early October I, along with a couple of mates, ventured up to the picturesque Bay of Islands to investigate what this new park has to offer. Although mother nature wasn’t on our side that weekend, the rain didn’t hinder our enthusiasm and eagerness to get out and try riding every trail in the park within the two days we had. Our overall assessment: the little-known Waitangi MTB Park deserves to be on every mountain-biker’s radar.
Location, Location, Location
Waitangi is only a brief three-hour drive north of Auckland. This is pretty much the same amount of time that it takes most Aucklanders to drive to Rotorua, which many mountain-bikers do weekend after weekend. For the same travel time, a trip up to the so-called winterless north is well worth it.
Once we arrived at Paihia we were instantly captured by the slow pace of the place and we quickly adapted to the beach lifestyle. It felt so much like we were on holiday that we almost forgot we had our bikes to ride. Almost.
Me and my mates — John and Amy — are no human compasses as we never have any idea which way is north. If it wasn’t for Johnny, the operator of Paihia Mountain Bike Rentals, we would’ve got completely lost. Johnny was quick to provide the key information we needed, including which were the ‘up’ trails and other important places within the park, as well as recommending which trails were worth riding first.
With Paihia township only ten minutes down the road, we had all the coffee, food and accommodation we needed to get and keep going. The park is well sign posted and easy to find. There is plenty of parking, which is all situated around a highly informative and striking hub / base map station.
The Riding Experience
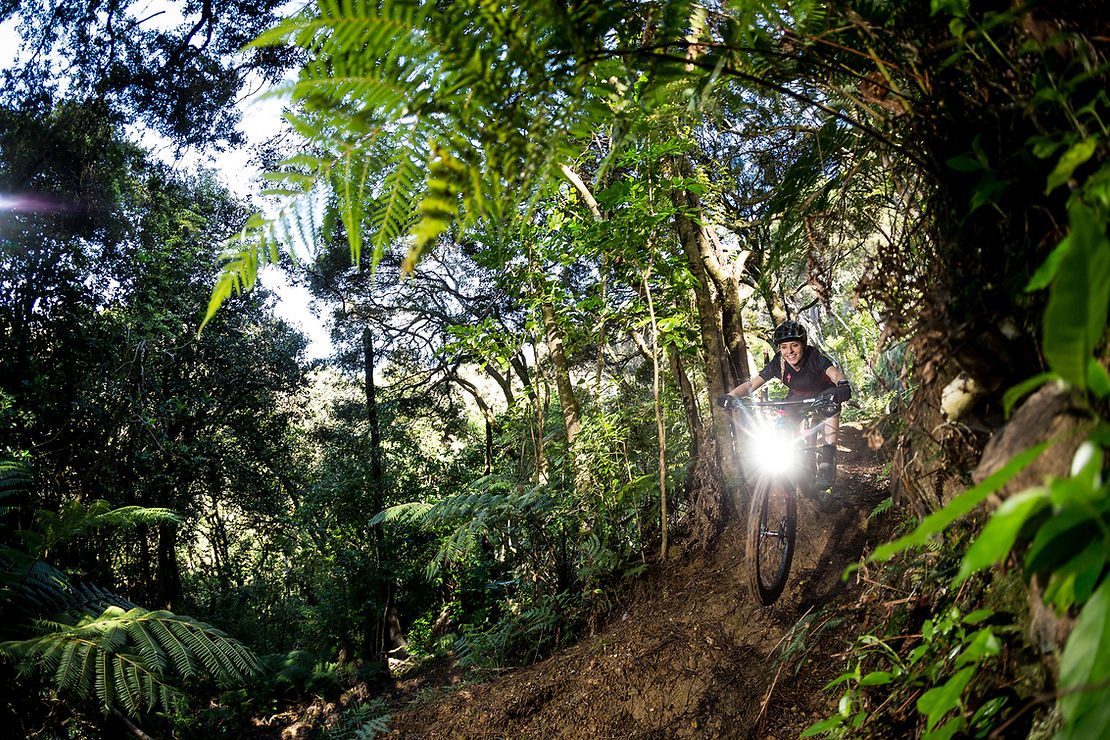
Although primarily clay-based, the lower parts of the trail network sit on a volcanic shelf, which makes for highly contrasting terrain as we climbed our way through the park. Starting off by meandering through gum trees and rolling over rocks, we then ventured up through young pine and into small pockets of native bush, erupting in bird song.
The park is divided into five zones, each with a different flavour and unique style of trail. Zones 1-3 were the first to be developed and feature 85% of the park’s trails. Luckily for us Zone 5 opened the day we got there: we had the honour of being the first riders to roll tyres over it. Situated at the very back of the park, and within the oldest pines on the property, these trails are built natural, rough and with minimal man-made features. While the trail surface was too soft and young for us to be able to really ride at pace, these mostly Grade 4 trails do have great potential for challenging riders on something other than a ‘bermed’ highway.
Zone 4 is yet to be developed, but is a primarily flat. Sitting on the same volcanic shelf as the lower trails of Zone 1, development will be slow and expensive, as trail building is incredibly laborious through all the rock. Their plans are to focus on building more grade 1-2 family loops and a skills park in due course.
Starting from the feet of the Pouwhenua, we rode through the gentle link trails of zone 1, up into the first trail forks of zone 2. Here, we began to wind our way up via a timid grade 2, 2km climb into the upper areas before dropping down into a section for grade 2 and 3 flow trails, or looping out and around Holland Days, a gentle XC loop than spans the lower, flatter areas of both zone 2 & 3.
Zone 3 is where the serious rider will spend most of their time. Littered with a myriad of fast, flow trails, with native sections and plenty of jumps, it is quite the playground. With all the trails in this zone linking back to the main climb, Te Rangi Hononga, it is easy to crank out laps without getting overly fatigued. Pakonga is the golden child within the park, a grade 4 jump trail that features large table tops and deep berms perched on the edge of a ridgeline. I also recommend riding Hookioi for the best mix of everything.
A Special Place
What really makes Waitangi Mountain Bike Park so special is the fact that it has been 100% community funded. Tiff Holland has really managed to rally the troops and unite the community to bring the park to life. The local ITM supplied all the timber for fencing and the hub area. The local jail provided prisoners to help clear trail, develop the grounds and do construction work. Tiff’s good friend provided a large amount of architecture and consulting free of charge. Everything for nothing — and all because they saw the same goal of creating something special for the local community.
It all started with a family trip to Rotorua some four years ago. The experience and epic trails captured Tiff so much (like it has for many of us), that her husband, Robin, exclaimed “How can we get one of these?” That quick remark set in motion the wheels on the Waitangi Mountain Bike Park project. Like anything in life, though, if it’s easy, then it probably isn’t worth the effort. Over the next few years, Tiff, who is the main driving force and front women for the project, set about scouting the perfect block of land, negotiating with several parties, including the land owners, local iwi, Department of Conservation, forestry management and Kiwi conservationists before starting the all-important fundraising efforts.

Final Reflections of a Happy Traveller
The quality of the park impressed me most. From trail design to signage, from drainage to dirt type, the park has been well thought out. We had to be strategic with our timing when venturing out from under tree cover due to the rain, but not once did we find the trails were drastically effected. Slippery in the odd spot, sure, but still plenty of fun with lots of grip and a big clean-up job after the ride - damn clay! The park does lack big elevation, though thanks to smart trail building, even the series rider will want to keep coming back. The trails are perfect for the family too, and even better for a brief holiday, giving yourself time for off the bike activities also.
Finally, I must say a big ‘thank you’ to Sauce Pizza Bar Paihia, The Scenic Hotels, Duke of Marlborough and Focus Paihia, as well as Tiff and Johnny for hosting us with a genuine friendliness which has always been a regional trait encountered by travellers heading North.
Words & Images: Cameron Mackenzie

Tech: Suspension 101
Ahh, suspension. It’s revolutionised our sport and taken us to new heights (literally). With a bit of tuning it can turn an ‘okay’ bike into a rocket-ship, assuming of course you’ve got the skills to keep up. In my eyes, your suspension system is probably the component group most worthy of your extra coin, but it’s probably also the most difficult thing on a mountain bike to wrap your head around and understand. Today I’ll give you a rundown on what does what so the next time you carry out a trail-side suspension tune-up you’re not aimlessly twisting the dials. Bear in mind, this is an introductory piece, so if you’re already a suspension guru you probably won’t take much away from this.
What is a damper and what is a spring?
To keep things simple, the spring is what offers resistance and supports your weight, while the damper controls how the spring acts. Essentially, the spring dictates how much force is required to compress your suspension, while the damper controls how quickly (or slowly) the suspension travels throughout its stroke, via compression and rebound adjustments.
Imagine a compressed spring. If you removed the force keeping it compressed, it would decompress and launch into the air uncontrollably. If that spring had a damper, it would dictate the speed at which the spring could decompress when you removed the compressing force. Finding the right suspension setup is a matter of balancing your spring rate and damper adjustments until everything acts in unison.
Air Springs vs Coil Springs
There are two main types of springs when it comes to mountain bike forks: air springs and coil springs. Air springs are a pressurized chamber within your fork or shock that can be pumped up via a shock pump. The biggest benefit to an air spring is tunability. With a shock pump you can add or remove air pressure in seconds to make the spring harder or softer and, with internal volume spacers, you can adjust your spring curve (we’ll touch on spring curves in a second). Air springs require more seals, and more seals mean more friction, affecting small bump sensitivity. More seals also mean more maintenance.
Coil springs are mechanical springs, the same as you’d expect to see on a car or most downhill bikes. They have a much more linear spring curve. Coil springs are heavier than air, but with less seals there’s less maintenance and they’re a lot more supple over small bumps. Coil springs are simpler to maintain and don’t have the overheating issues that can plague some air shocks on long descents. The biggest downside to coil springs, is that they don’t fit some frames and you’ll probably have to buy an extra spring suited to your weight, versus an air spring which can just be pumped up.
Put simply, spring curves are the relationship between the amount of force needed to compress your suspension versus the amount of travel used. A linear spring curve, for example, might take 40kg to compress it through half of its travel and 80kg to fully compress it, versus a progressive spring curve which might take 40kg to compress it halfway and 120kg to fully compress it. A linear spring will feel the same regardless of how much travel you’ve used, whereas a progressive spring will feel firmer the further through the travel you get.
The benefits to a linear spring curve are; plenty of traction at lower speeds and suspension that feels the same through the entire stroke, while sacrificing bottom-out resistance without upping spring rates. The benefits to a progressive spring rate are; a supply top stroke with plenty more bottom-out resistance, but too much progression can make it difficult to use all of your travel, particularly if you’re not an aggressive rider. The key thing to consider here, though, is that every full suspension bike’s linkage system will have its own characteristics that lean towards one of the two spring curves.
Rebound and Compression
Your damper controls two things: rebound and compression. Rebound controls how quickly your fork re-extends after being compressed, with compression controlling how quickly your fork compresses under load – go figure. Most forks and shocks feature a rebound adjustment dial and some sort of compression adjustment. Both adjustments have two options: high-speed and low-speed, however, it’s more common to see high-speed and low-speed compression adjustments than high and low speed rebound adjustments on suspension components. Speed is in reference to your shaft speed, as in how quickly your suspension is moving through its travel. A high-speed compression for example, would be when you hit a drop and the rear shock quickly has to absorb the impact. A low speed compression would be when you get on your front brakes and the fork compresses a little, in a relatively controlled manner before supporting your weight. Rebound is much the same, but most external rebound adjustments are for low-speed rebound, as this circuit is responsible for about two thirds of your travel, where your fork should spend most of its time working.
Wrap Up
I’ve just thrown a ton of information your way, so we’ll call it quits for this class. Next time round, we’ll look at how to set up your suspension and how to start diagnosing problems on the trail, to get you one step closer to a suspension system that floats over the rough and still gets your power down when you need.
Words: Cam Baker
Image: Cameron Mackenzie