It’s not about the bike
Words & llustration Gary Sullivan
This week I completed an experiment. It wasn’t scientific and it proves nothing, yet I still think the result is worth sharing.
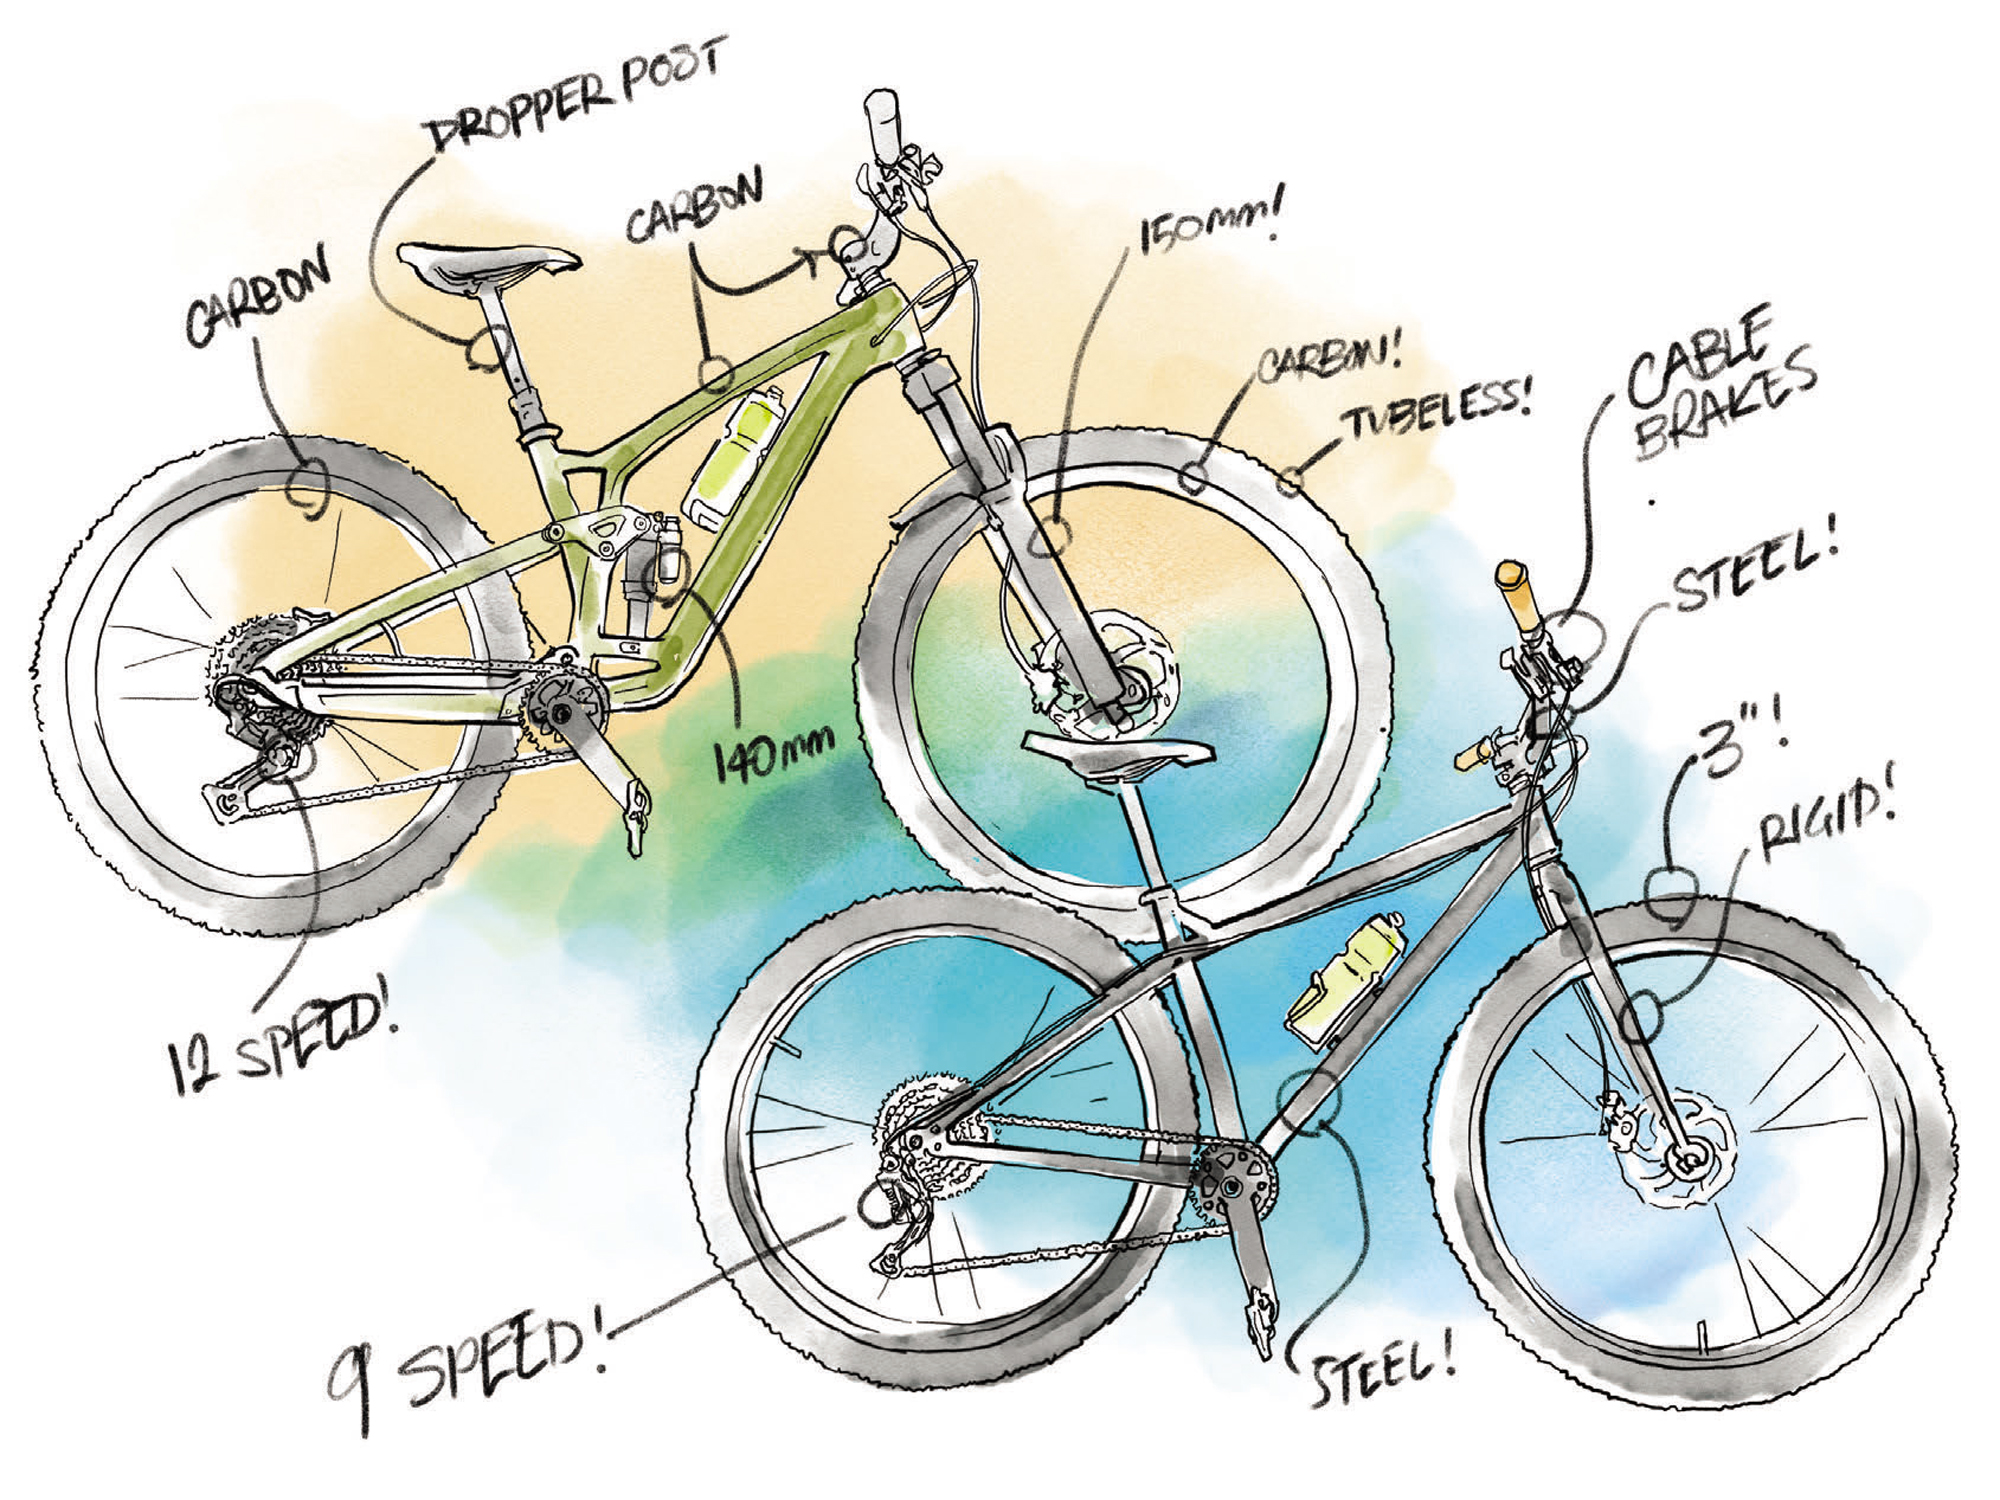
The weather has been iffy. In the first instalment of the experiment, I rode a thing called the Forest Loop on my Surly Krampus.
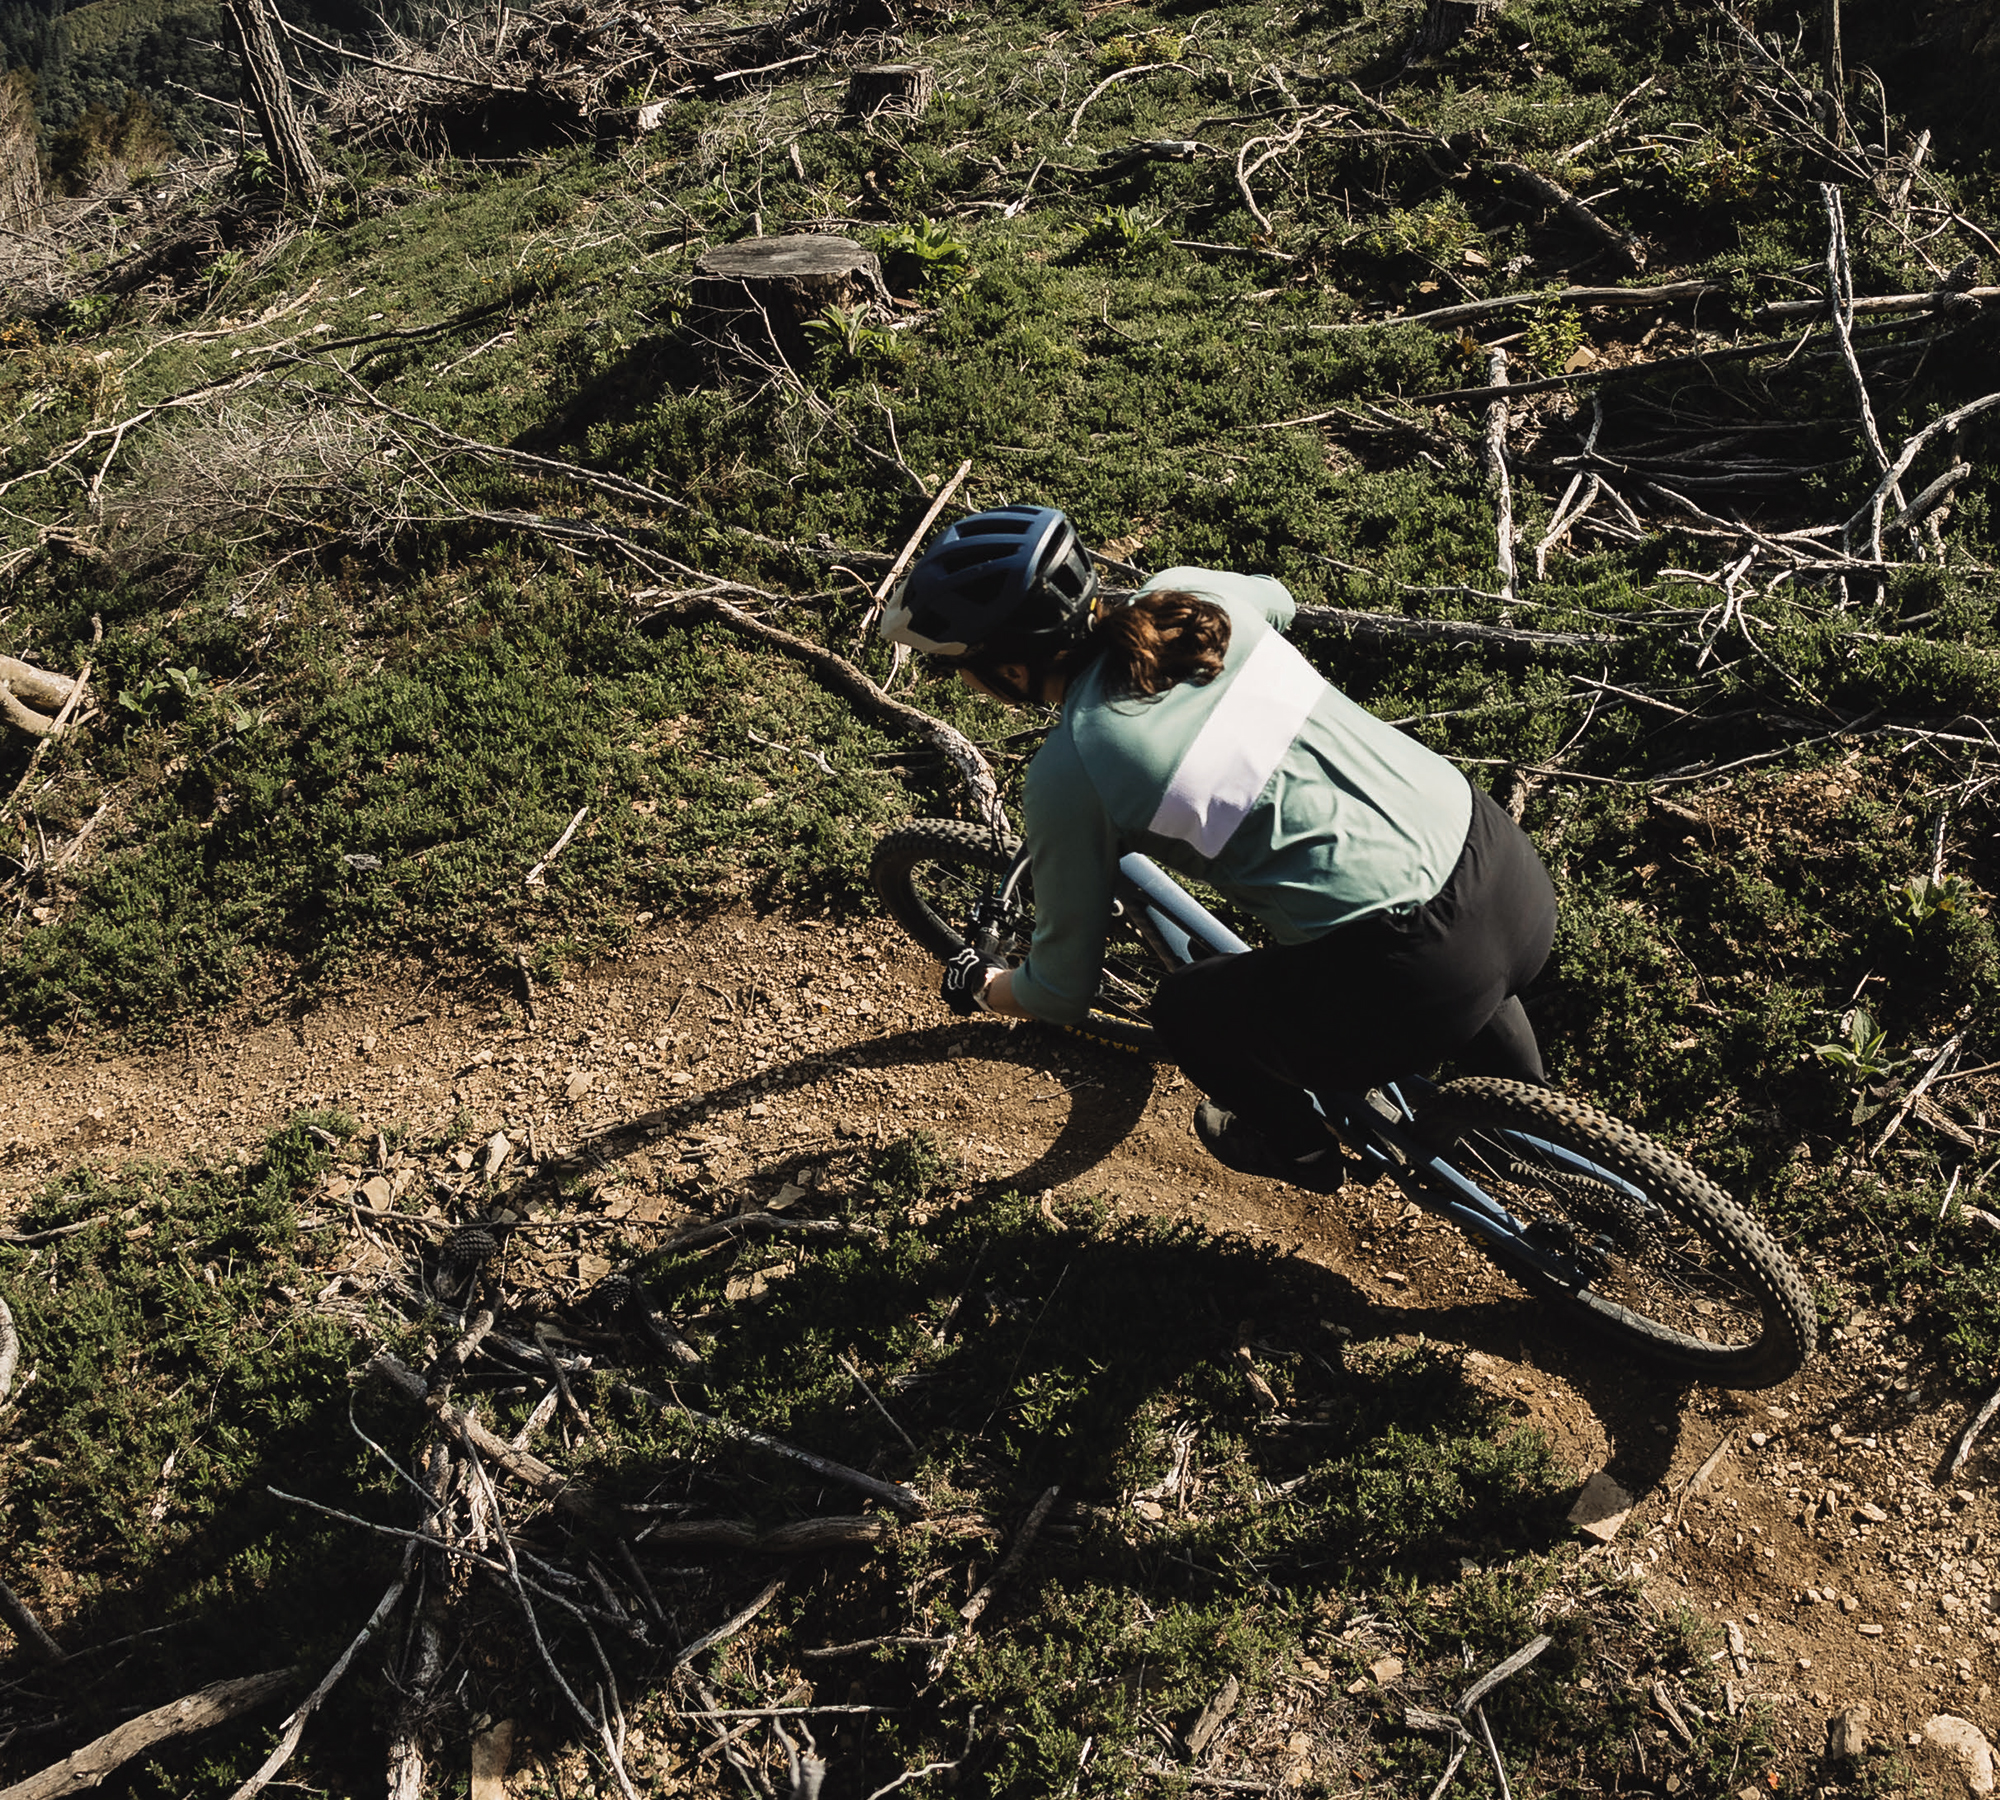
The Forest Loop is a thing that has been developed in my home town of Rotorua which gives more or less anybody a decent serve of the splendours of the location without being particularly challenging. It is what we call Grade 2 which, around here, means a metre wide path with very few roots or rocks, no drop-offs or anything very steep, and pretty well weather proof. It provides a nice view of three lakes, a variety of forest and 34 kilometres of rolling trail. There are countless ways to adjust the route for personal preference, but the official version is very well signposted so it would be difficult to get lost. It serves two useful purposes for me. Firstly, any newcomers to town who want a ride, can be sent on it. Before the Forest Loop, it was almost impossible to send an initiate into the woods without a guide. Maps are useful, but Whakarewarewa is a complex place. Now, it is simple – just follow the signs. The second benefit for me, is that it provides a good outing when it’s too wet to go into the rest of the trails.
When it’s raining, but I want to rack up some kilometres, the Forest Loop is a good, tried and true choice.
The Krampus is a machine I acquired to do a long bike packing tour on, which, for various lame reasons has not yet happened. Meanwhile, the bike is fun for some applications, on certain days. It’s the original version of a concept Surly more or less invented, 29+. The wheels are 29 inch, and carry three inch tyres.
No suspension, simple and inexpensive running gear, no dropper post, not that much to wear out or worry about. I have added and subtracted a few things over the years but, currently, it sports some bars which are very wide, have a lot of rise, and a cross brace like an old school motocross example.
Once again, when it’s raining but I want to rack up some kilometres, it’s a good choice.
Mostly out of habit, I started my GPS recording device and beetled off up the first climb.
It turned out to be a pretty decent day; the rain was light and stopped a few times, and there was even a brief appearance from the sun.
My route ended up following the Forest Loop until the last section, which is a boring concrete path down the side of the highway. I took a bit of singletrack and a couple of forestry roads to stay on dirt, in the trees. To my surprise, I got back to the van in a hair over two hours. That represents an average speed of 17kph. That’s a good chunk faster than my usual mountain bike ride, but I figured that was because my usual rides involve going up several long, steep climbs where I am going so slow that my GPS device sometimes pauses because it thinks I am stationary. The Forest Loop has a total of 600-odd metres of climbing, but it is never very steep – and is widely distributed over 34km. Still, pretty fast by my standards.
That’s why, a couple of weeks later, I decided to take the same route; this time aboard my late model, comparatively sophisticated, trail bike.
I tried to emulate all the variables. It was a fairly crappy day, but maybe a bit nicer than the first example. Breakfast was matched exactly, coffees calibrated to be of equal quantities and strength. Same outfit, different print on the cotton T.
My ride was very nice, although I confess I was maybe trying a bit harder: the first outing didn’t become part of any performance experiment until after it was completed. This time, I knew there was a sort of race on.
I got back to the van in a time that was faster than the first one. By a minute. Well, a minute and 13 seconds if you want the details. Heart rate, a measurement I sometimes wish I didn’t know about, was fairly evenly matched, and top speed showed only 2kph of difference.
OK, there are dozens of places in the woods I wouldn’t even try to ride on the Krampus that are fun and light work for the Fuel. But still, I’m amazed by how two rides that felt so utterly different to complete were more or less the same in terms of how long they took.
Big Timber: Where would we be without it?
Words Lester Perry
Image Cameron Mackenzie
Once upon a time, Aotearoa was covered mainly by a blanket of native bush. You know the stuff? It’s what most mountain bikers love to ride: large trunks, matts of roots dispersed with fertile dirt, and leaf litter (Beech leaves if you’re lucky).
And this bush was the habitat of many native NZ species. Early Maori cleared what land they needed for agriculture and living space, but it wasn’t until European settlers came ashore in the early 1800s that the axes really got swinging. In the space of roughly 200 years, we (humans as a whole) have cleared a fair chunk of NZ’s land mass, leaving just 24% of it covered in native bush. Forty percent of this lump of land we call home is now pastoral farmland, and 6% is commercial forest, which is also home to a large percentage of NZ’s mountain bike trails. As sustainable as commercial forestry operations now aim to be, there’s no denying that this – combined with pastoral farming – has altered NZ’s ecosystem permanently.
While driving the black band of road that dissects farmland throughout this fine country, I often wonder: what would NZ be like if it were still fully forested and, more specifically, what would mountain biking be like if it were?
Anyone who’s spent time on the end of a spade digging a trail in the native bush would agree it’s hard graft, and working the earth through native bush with a digger is a chore requiring time-consuming finesse and, unless you’re comfortable destroying native roots and eco- systems, then it’s all but impossible. With diggers off the trail builder’s menu when they’re working in native, the speed of trail building would be slow, and the extensive networks we currently see would be a figment of imagination.
If, theoretically, all our trails were in native bush – and given the time necessary to build them by hand – the cost of a build would render them basically out of reach financially, and trail building companies, of which NZ has a number, would be almost non-existent. A lack of professional builders would mean volunteer builds would rule. Lord knows how difficult it is to get a regular crew of keen volunteers to commit to a build under the canopy of pines, let alone the challenges native bush brings.
Native trails are my favourites; their environment and the fact they’re generally hand built give them an inherited technicality and often unique style of flow. It would be amazing to be riding native trails every time we went for a ride. Digger-built flow trails – be gone!
I’m not a hater, though; pine plantation trail networks have enabled NZ’s MTB scene and industry to boom, thanks to their accessible, well-groomed, quickly-built trails. The trail is less directed by the lay of the land or preservation of native trees and more by wherever the digger driver points their machine. With only a small number of roots to dodge, or undergrowth to clear, these trails come easy. On many trails, pine needles help protect the surface through winter and, come spring, a leaf blower and a rake can help rejuvenate much of the trail surface. No one likes losing their favourite trail to logging. Still, with commercial forests running on a 25 – 35 year logging cycle (usually the shorter), it’s inevitable that at some point, one of your favourites will be gone. Once trees are felled, there’s a relatively clean canvas to work on, the opportunity for new trails, and the commercial operations that usually build them. But let’s not forget all the logging slash that’s caused significant problems in the last few years, or that trails built in clear fell generally take much more upkeep and are often terrible to ride due to erosion through a wet winter.
Although I’d love to see a country blanketed in native bush again, I can’t imagine NZ would be such a mountain bike mecca if it was. It’s a little Yin and Yang but, ultimately, big timber will continue to thrive with or without MTB trails. I fear that, without it, the growth and popularity of MTB trails in NZ would be stifled, and we wouldn’t be the global destination we are.

CamelBak H.A.W.G Pro 20
Words Lester Perry
Images Henry Jaine
RRP $299
Distributor Southern Approach
There’s a particular style of trip where bike bags strapped to your frame either aren’t suitable for the route you’re attempting or simply don’t provide enough capacity for the required gear.
When Kieran Bennett and I took on our ‘Starevall or Bust’ two-day mission in the summer of 2024, we had an Aeroe handlebar cradle and dry bag each. That was handy — but with the trail being steep and technical in many places, the option for a rear rack was off the cards, and frame bags would have had to be custom made for our full-suspension rigs (and even then, wouldn’t provide the capacity we needed). CamelBak’s range of Packs was the answer — in my case, the H.A.W.G Pro 20, while Kieran went with a similar, but smaller, MULE Pro 14.
The H.A.W.G pack is designed precisely with missions like ours in mind. Twenty litres capacity, supplied with a 3-litre bladder, and room for another if needed. I opted for a single 3L bladder and a water filter, which, if you’ve read the trip report, you’ll know was a necessity!
Stowage is split into three main areas; nearest to the body is the hydration bladder sleeve. Outside of this, another large ‘full’ pocket features two large internal pockets, one of which is designed to hold a spare eBike battery if you’re that way inclined. In this section, there was enough capacity for me to stow a dry Merino top, a pair of shorts and a couple of freeze-dried meals. A smaller zipped pocket is on the left side of the back panel, down near the waist belt, although I didn’t use it on our trip. It would be ideal for smaller bits you may need to take with you but do not necessarily need easy access to — for example, a wallet or passport.
The next layer out has a medium-sized pocket featuring a couple of smaller zipped mesh pockets to store little items — in my case, tools and spares behind the zips, and some snacks in the main compartment. Across the top, there’s a fleece-lined pocket that is ideal for stowing glasses – and is large enough for goggles.
The outside of the pack features a stretch compartment, ideal for items that you might need quick access to — in my case, a jacket and bag of trail mix, and a First Aid Kit that we fortunately never required. The clips on either side have small hooks to clip helmet straps to for carrying.
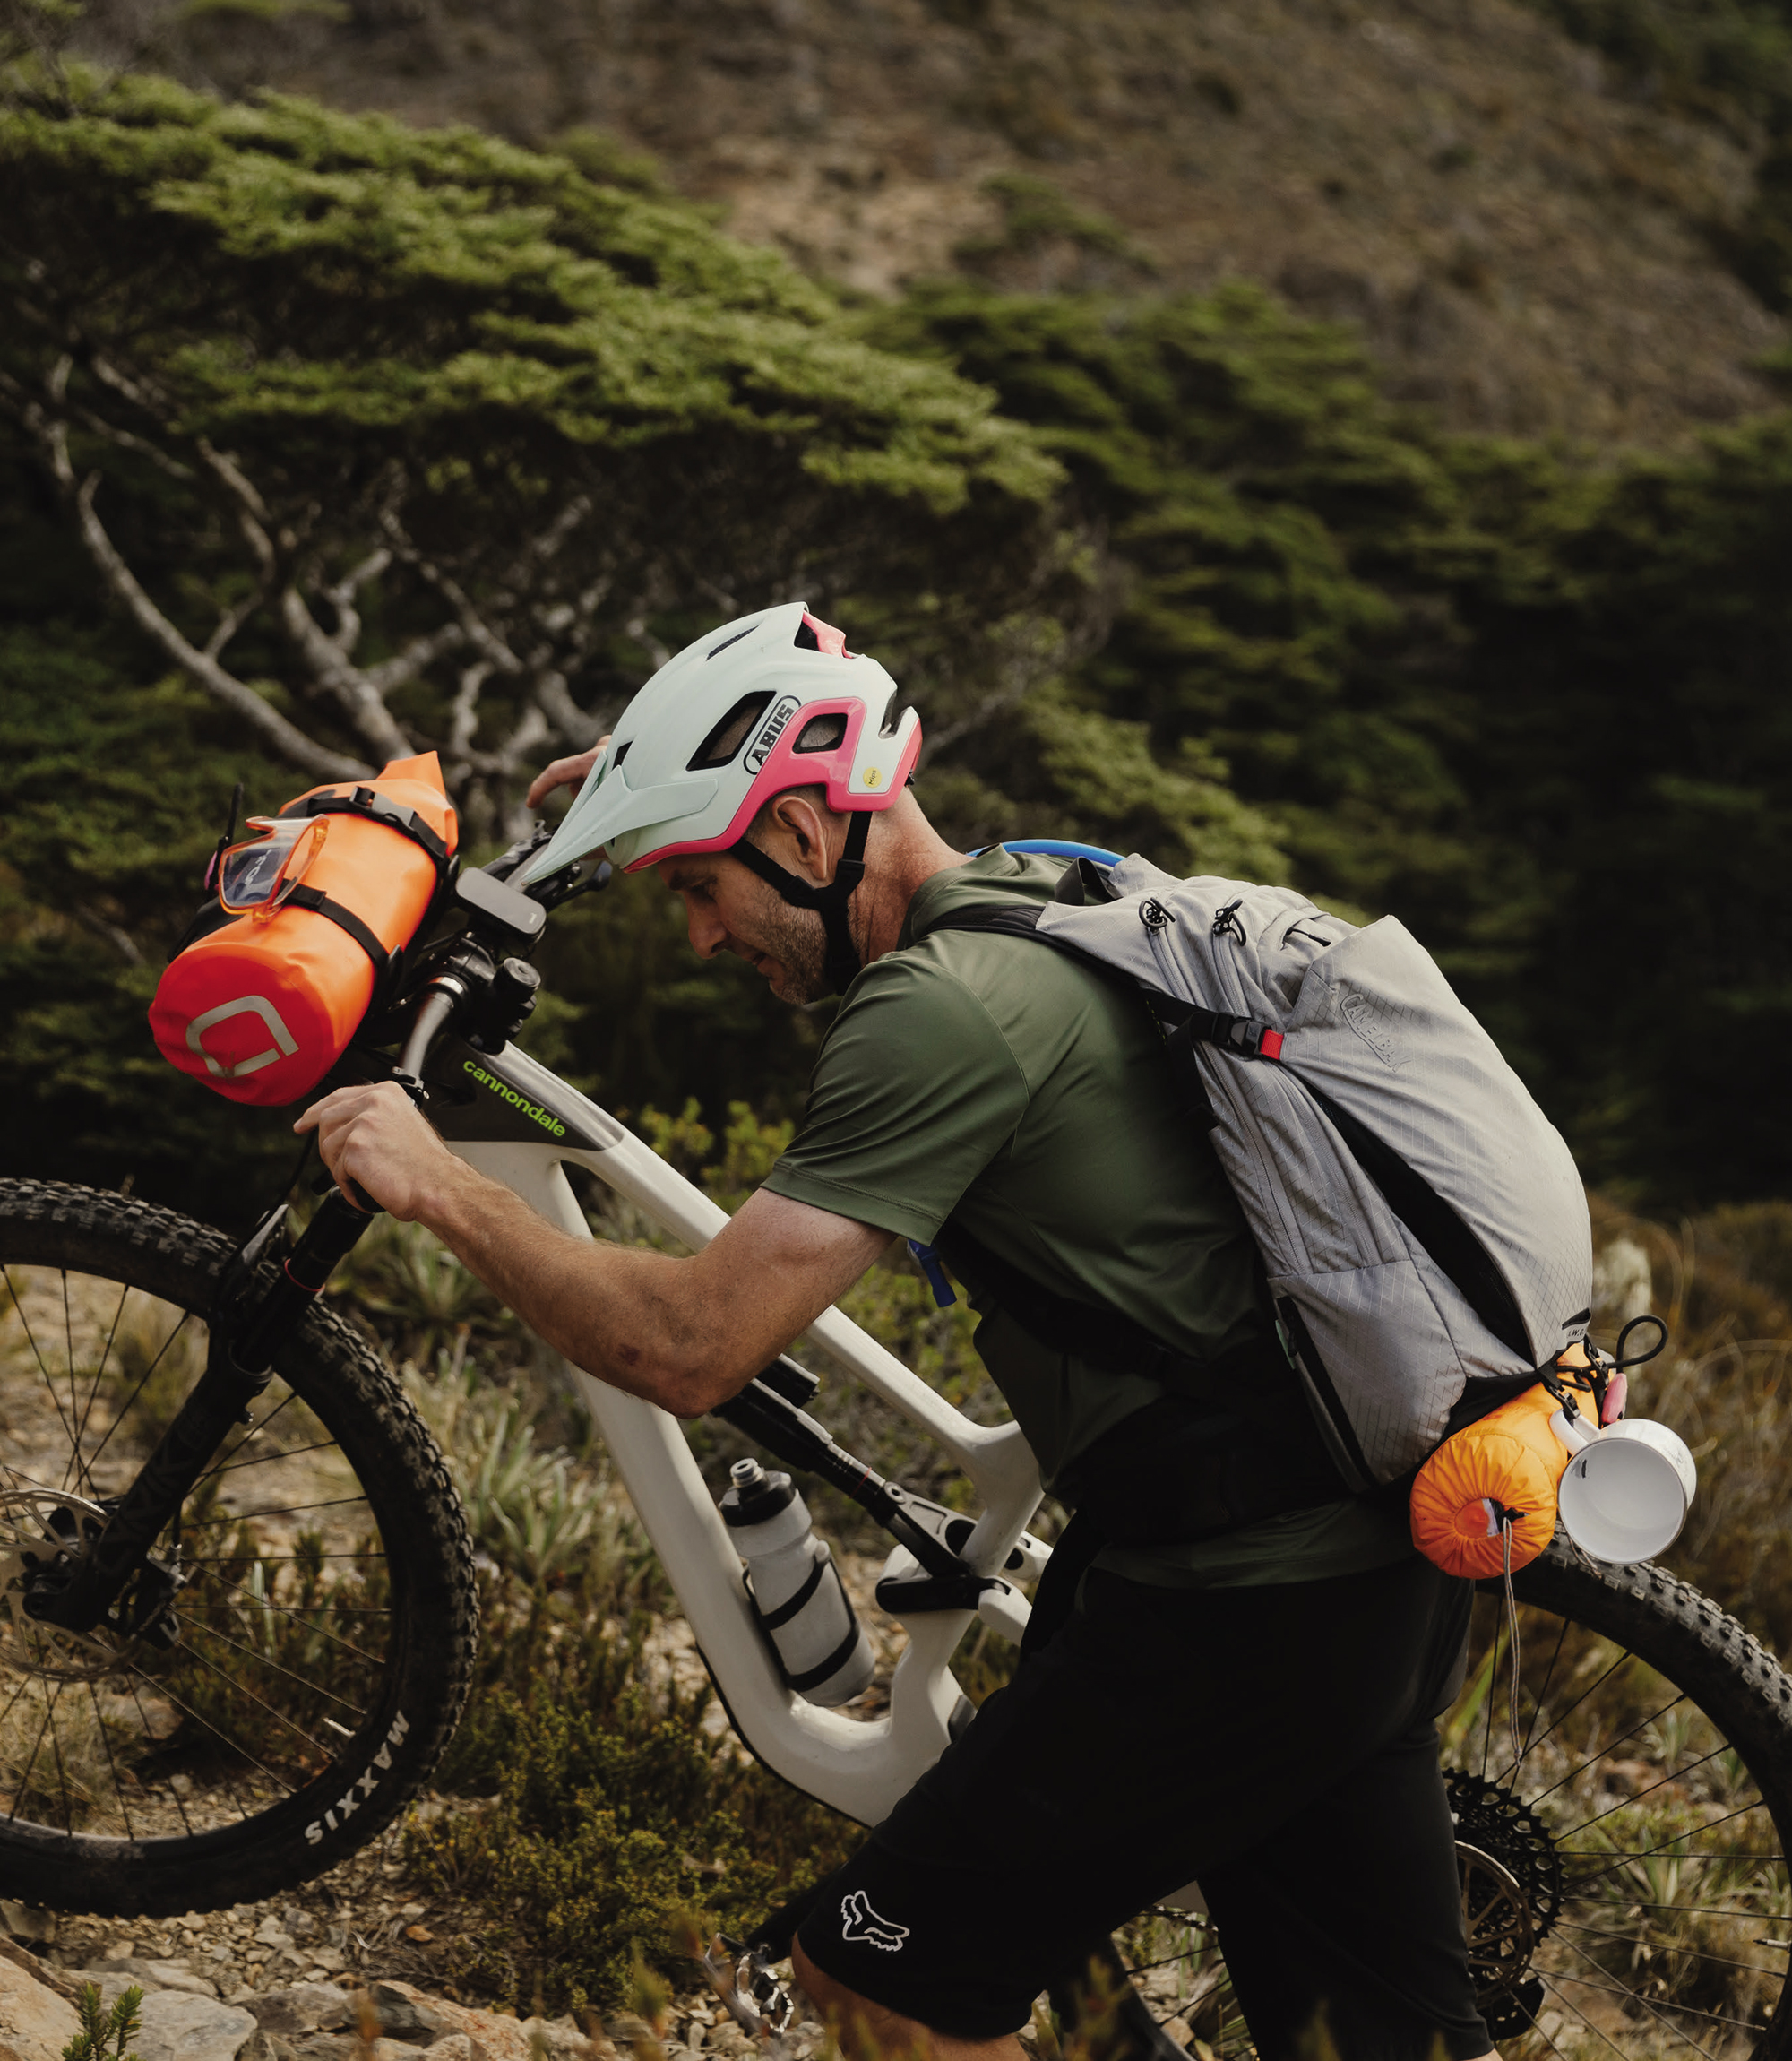
Weight is supported on the hips with a sturdy waist belt and, handily, there’s a zipped pocket on each side for quick access to gear when you don’t want to remove the pack to access. There’s a good amount of room in these pockets. I stashed a disposable camera on the left side for quick access and, on the right, I had some lollies, a multi-tool and a tyre plugger.
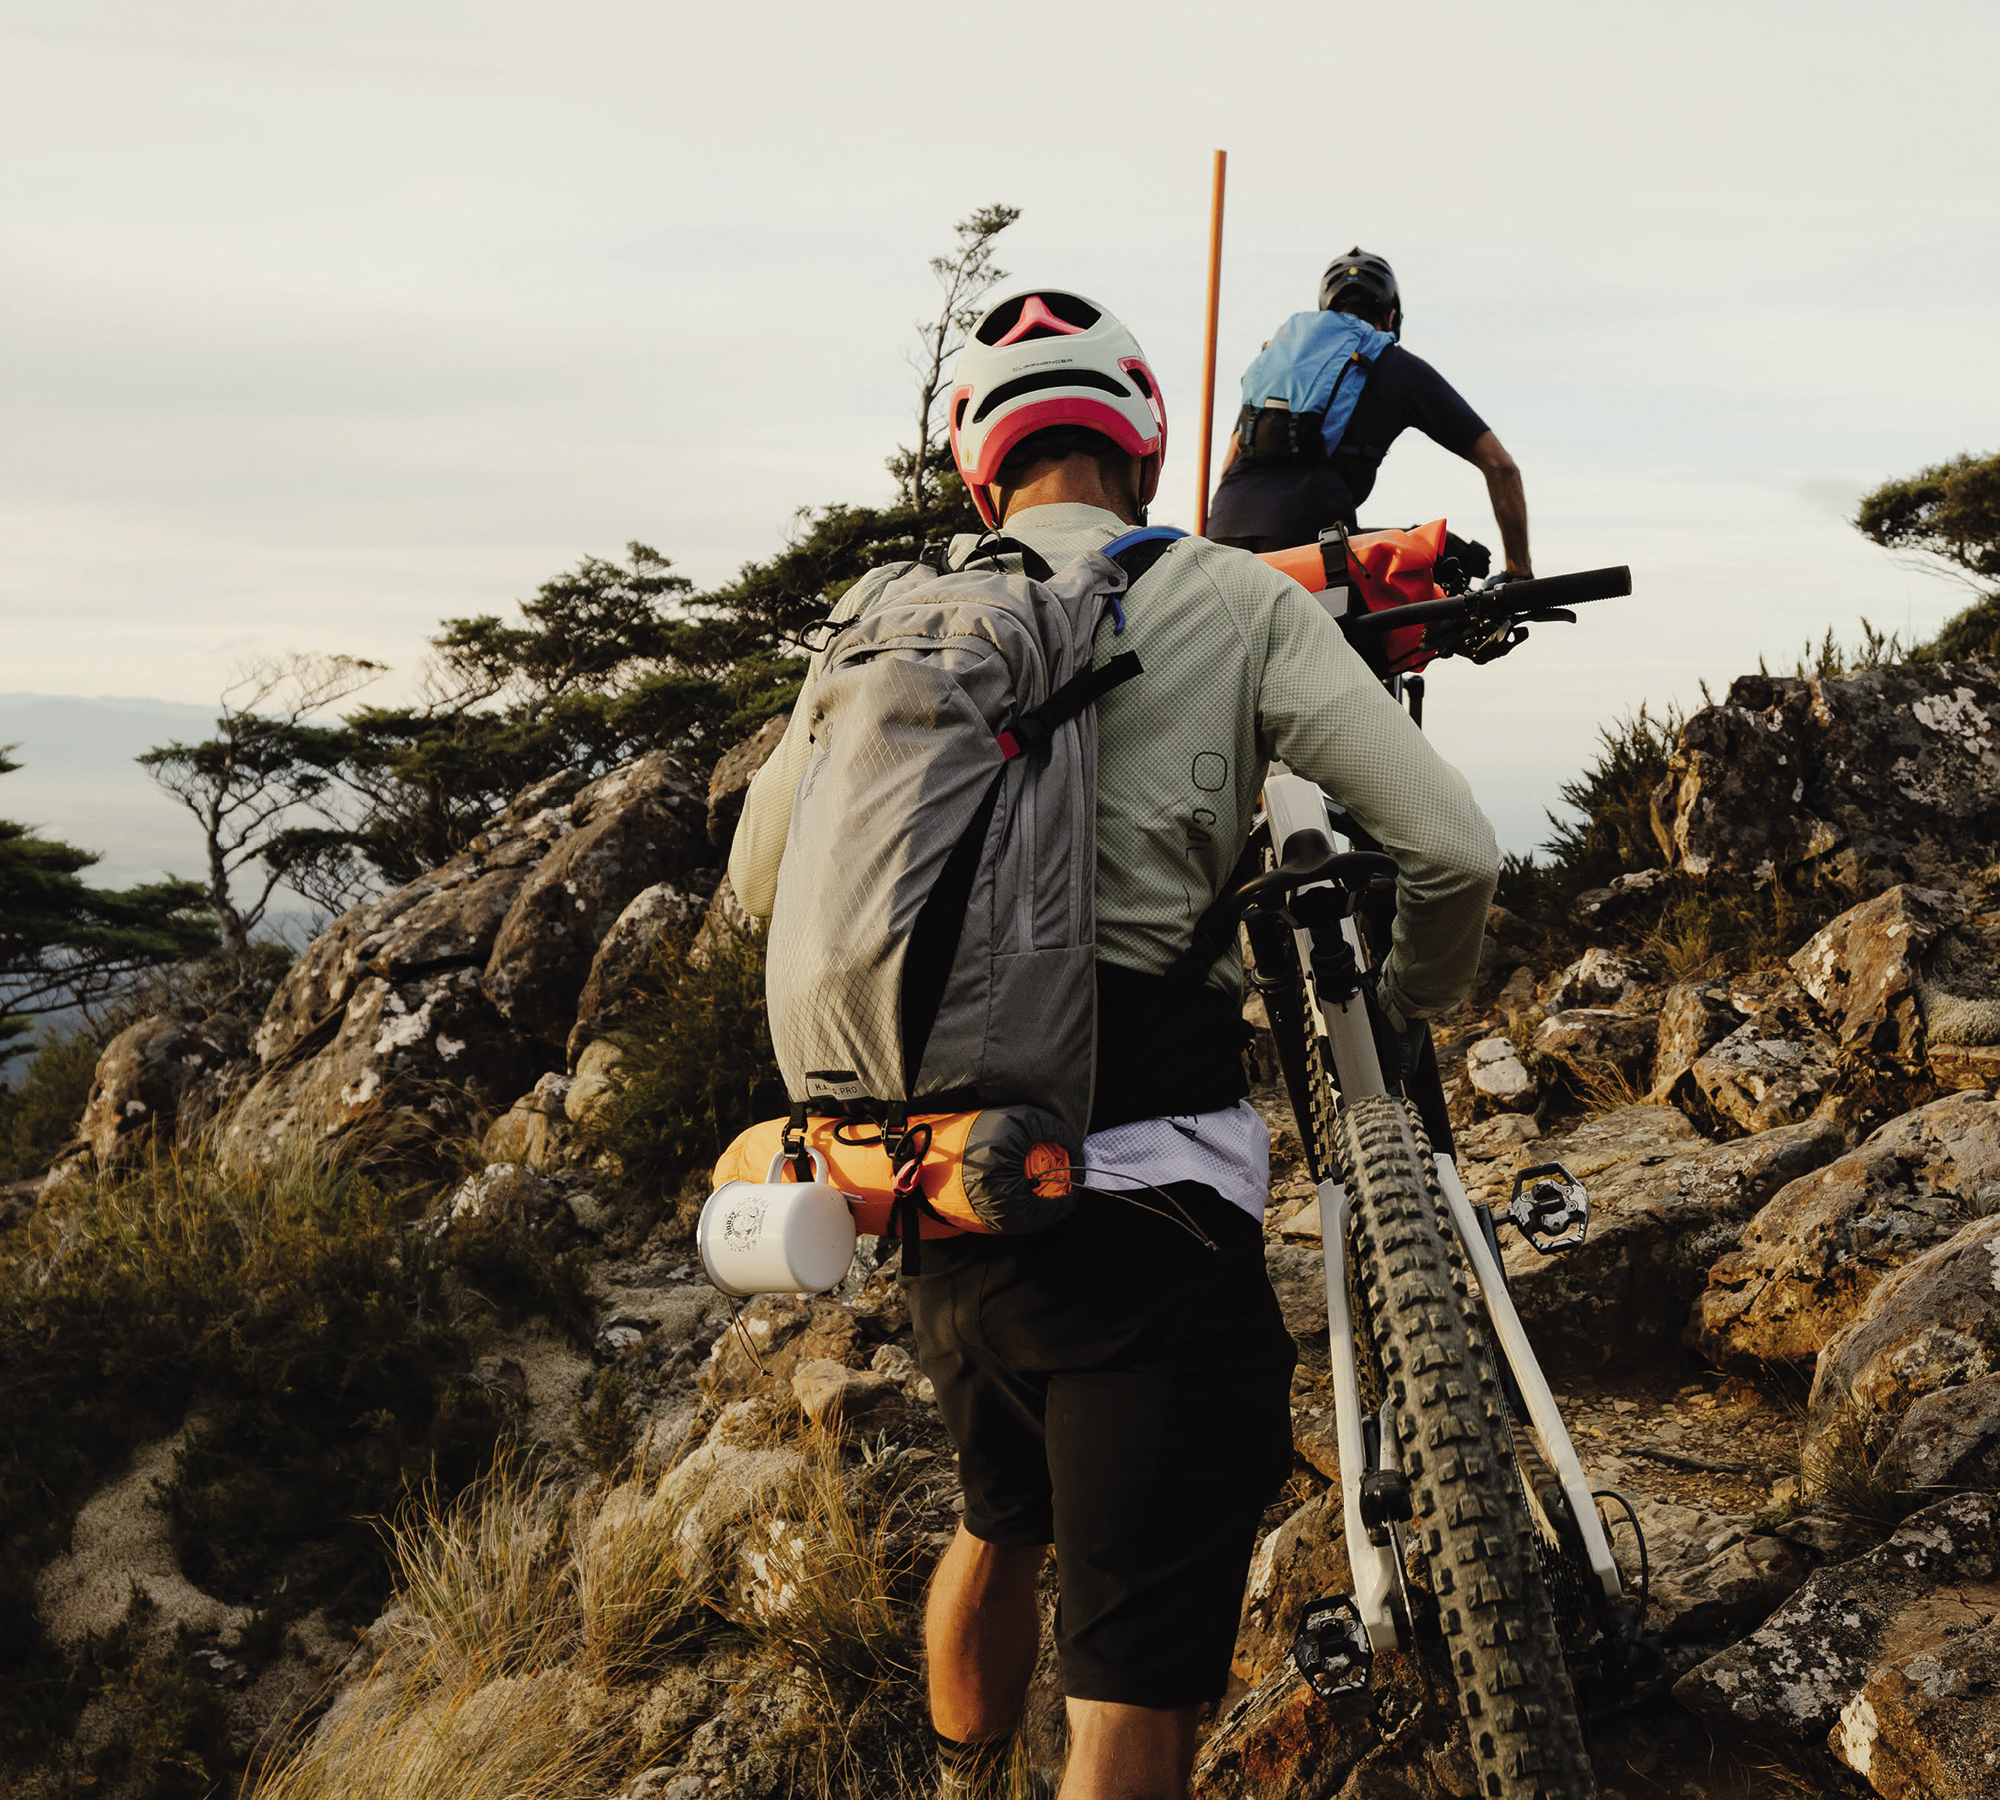
The H.A.W.G Pro is the first pack I’ve used with the Air Support Pro Back Panel — a 3D mesh back and harness that supports the bulk of the pack, holding it away from your body as much as is feasible, allowing for maximal airflow between the wearer and the pack. Although it’s still noticeably warmer than no pack, thanks to the Air Support back panel, it feels much cooler than some smaller, more traditional packs I’ve used. The back panel provides a level of rigidity to the whole system and, combined with the harness setup (including the sternum strap), secures the entire pack nicely. It’s well supported, even while fully loaded and tackling rough terrain. Thanks to the secure fit and rigidity, the top of the pack works well for resting the bike on while carrying over hike-a-bike sections — something we spent hours doing while hiking up Mt Starveall.
Two straps wrap around the base of the pack and, once cinched down, they help compress the load, helping keep everything in place; handily, they’re long enough to strap on more gear. In my case, I secured my Thermarest Sleeping Mat to the base and saved valuable volume in the pack itself. There’s myriad uses for these simple straps: tent poles, rolled-up jackets, or (most importantly) baguettes — the possibilities are endless.
The pack is supplied with a snazzy little tool roll and, while it’s great in theory, I found I couldn’t get my preferred selection of tools and bits to play nicely with it. The tool roll stayed home while on the Starveall mission, and I brought my small tool bag along.
As far as hydration goes, I can’t fault the 3-litre ‘Crux’ bladder. Although I’m not a super fan of the huge screw top, it does the trick and is long forgotten once it’s tucked safely into the pack. CamelBak redeemed themselves with their market-leading (in my opinion) bite valve and “magnetic tube trap” that keeps the drinking hose nicely secure when not in use, and snaps easily back into place.
The only niggle I’ve found with the H.A.W.G is on the outer stretch compartment. The clips that secure each side and help compress the load are not a traditional bag clip design, I assume, to allow for the helmet hooks. More than once, I had issues getting the clip to close correctly on my first attempt; unless the clips are aligned perfectly, one side can stick out and not be clicked into place correctly. This led to the clips popping open a few times on our trip. It’s annoying but not the end of the world. With some attention, they work fine and are secure when clipped correctly.
When all’s said and done, I’m a big fan of the CamelBak H.A.W.G and its versatility. It’s large enough for an overnighter, and once cinched down, it’s compact and lightweight enough for just a few hours in the backcountry without feeling like you’re carrying a flappy, half empty pack.

Inno Tire Hold HD Rack
Words & Images Cameron Mackenzie
RRP $1249
Distributor Racks NZ
The concept of a platform bike rack is nothing new, with many of today’s mainstay manufacturers producing several different models each.
Whilst common, there’s seems to be a new brand on the block every other month, each offering a bigger, beefier and “better” option than the other guy – and Inno’s no exception. Up until recently, Inno is a brand I’d not heard of, let alone knew was available in the local market, but I quickly took notice when I stumbled upon their latest Tire Hold HD rack, offering what looked to be a significantly sturdier rack than anything else I’d seen thus far.
Bike racks have been a pain point of mine over the last few years – never seeming to get more than two years out of a Yakima rack before it bends, breaks and/or rusts past the point of safe use. Whilst the way I use it – leaving it attached to the back of my truck year-round and lapping the country in search of the perfect MTB photo – may be a hard life for a rack, they’re a tool, and I expect more. I mean, who has the time or strength to be lifting their 25+kg rack on and off the car and into the garage for storage between weekend Woodhill trips?
Inno’s latest offering, the Tire Hold HD rack, steps things up, offering large weight carrying capabilities, a wide range of tyre size compatibility, and a design that removes any frame contact – one which, up until 2015, was unavailable on a rack outside of the US.
Fitting Inno’s rack onto my truck was a relatively straightforward affair, although, it did require a few small mods to make it all play nice. The rack features a little depth stopper that helps hold the hitch in the same place – presumably for easy alignment as you take it in and out – which I had to remove in order to get the pin holes to align. Their locking pin has a moulded plastic handle, but is of such a size that it prevented it from being able to be threaded in. Removing the plastic handle from the bolt (albeit forcefully) sorted the problem, and it now threads in easily utilising the 8mm hex key head.
As my bike quiver has evolved, so too have my requirements for a bike rack, so the idea of a rack built largely out of aluminium, with the ability to carry up to 34kgs per bike, hold strong and handle off-road use held big appeal.
The strength of the rack is clear when looking at the size of the hardware and pivots featured throughout. The main pivot, which allows the rack to fold, features no-play and is actuated by a smooth and easily accessed grab-handle at the further-most end of the rack. Whilst elements of the plastic components used throughout make me a little nervous, the cowling encasing the main pivot is a welcome sight, helping to keep a lot of the nasty road grime and dust away from one of the key parts of this system.
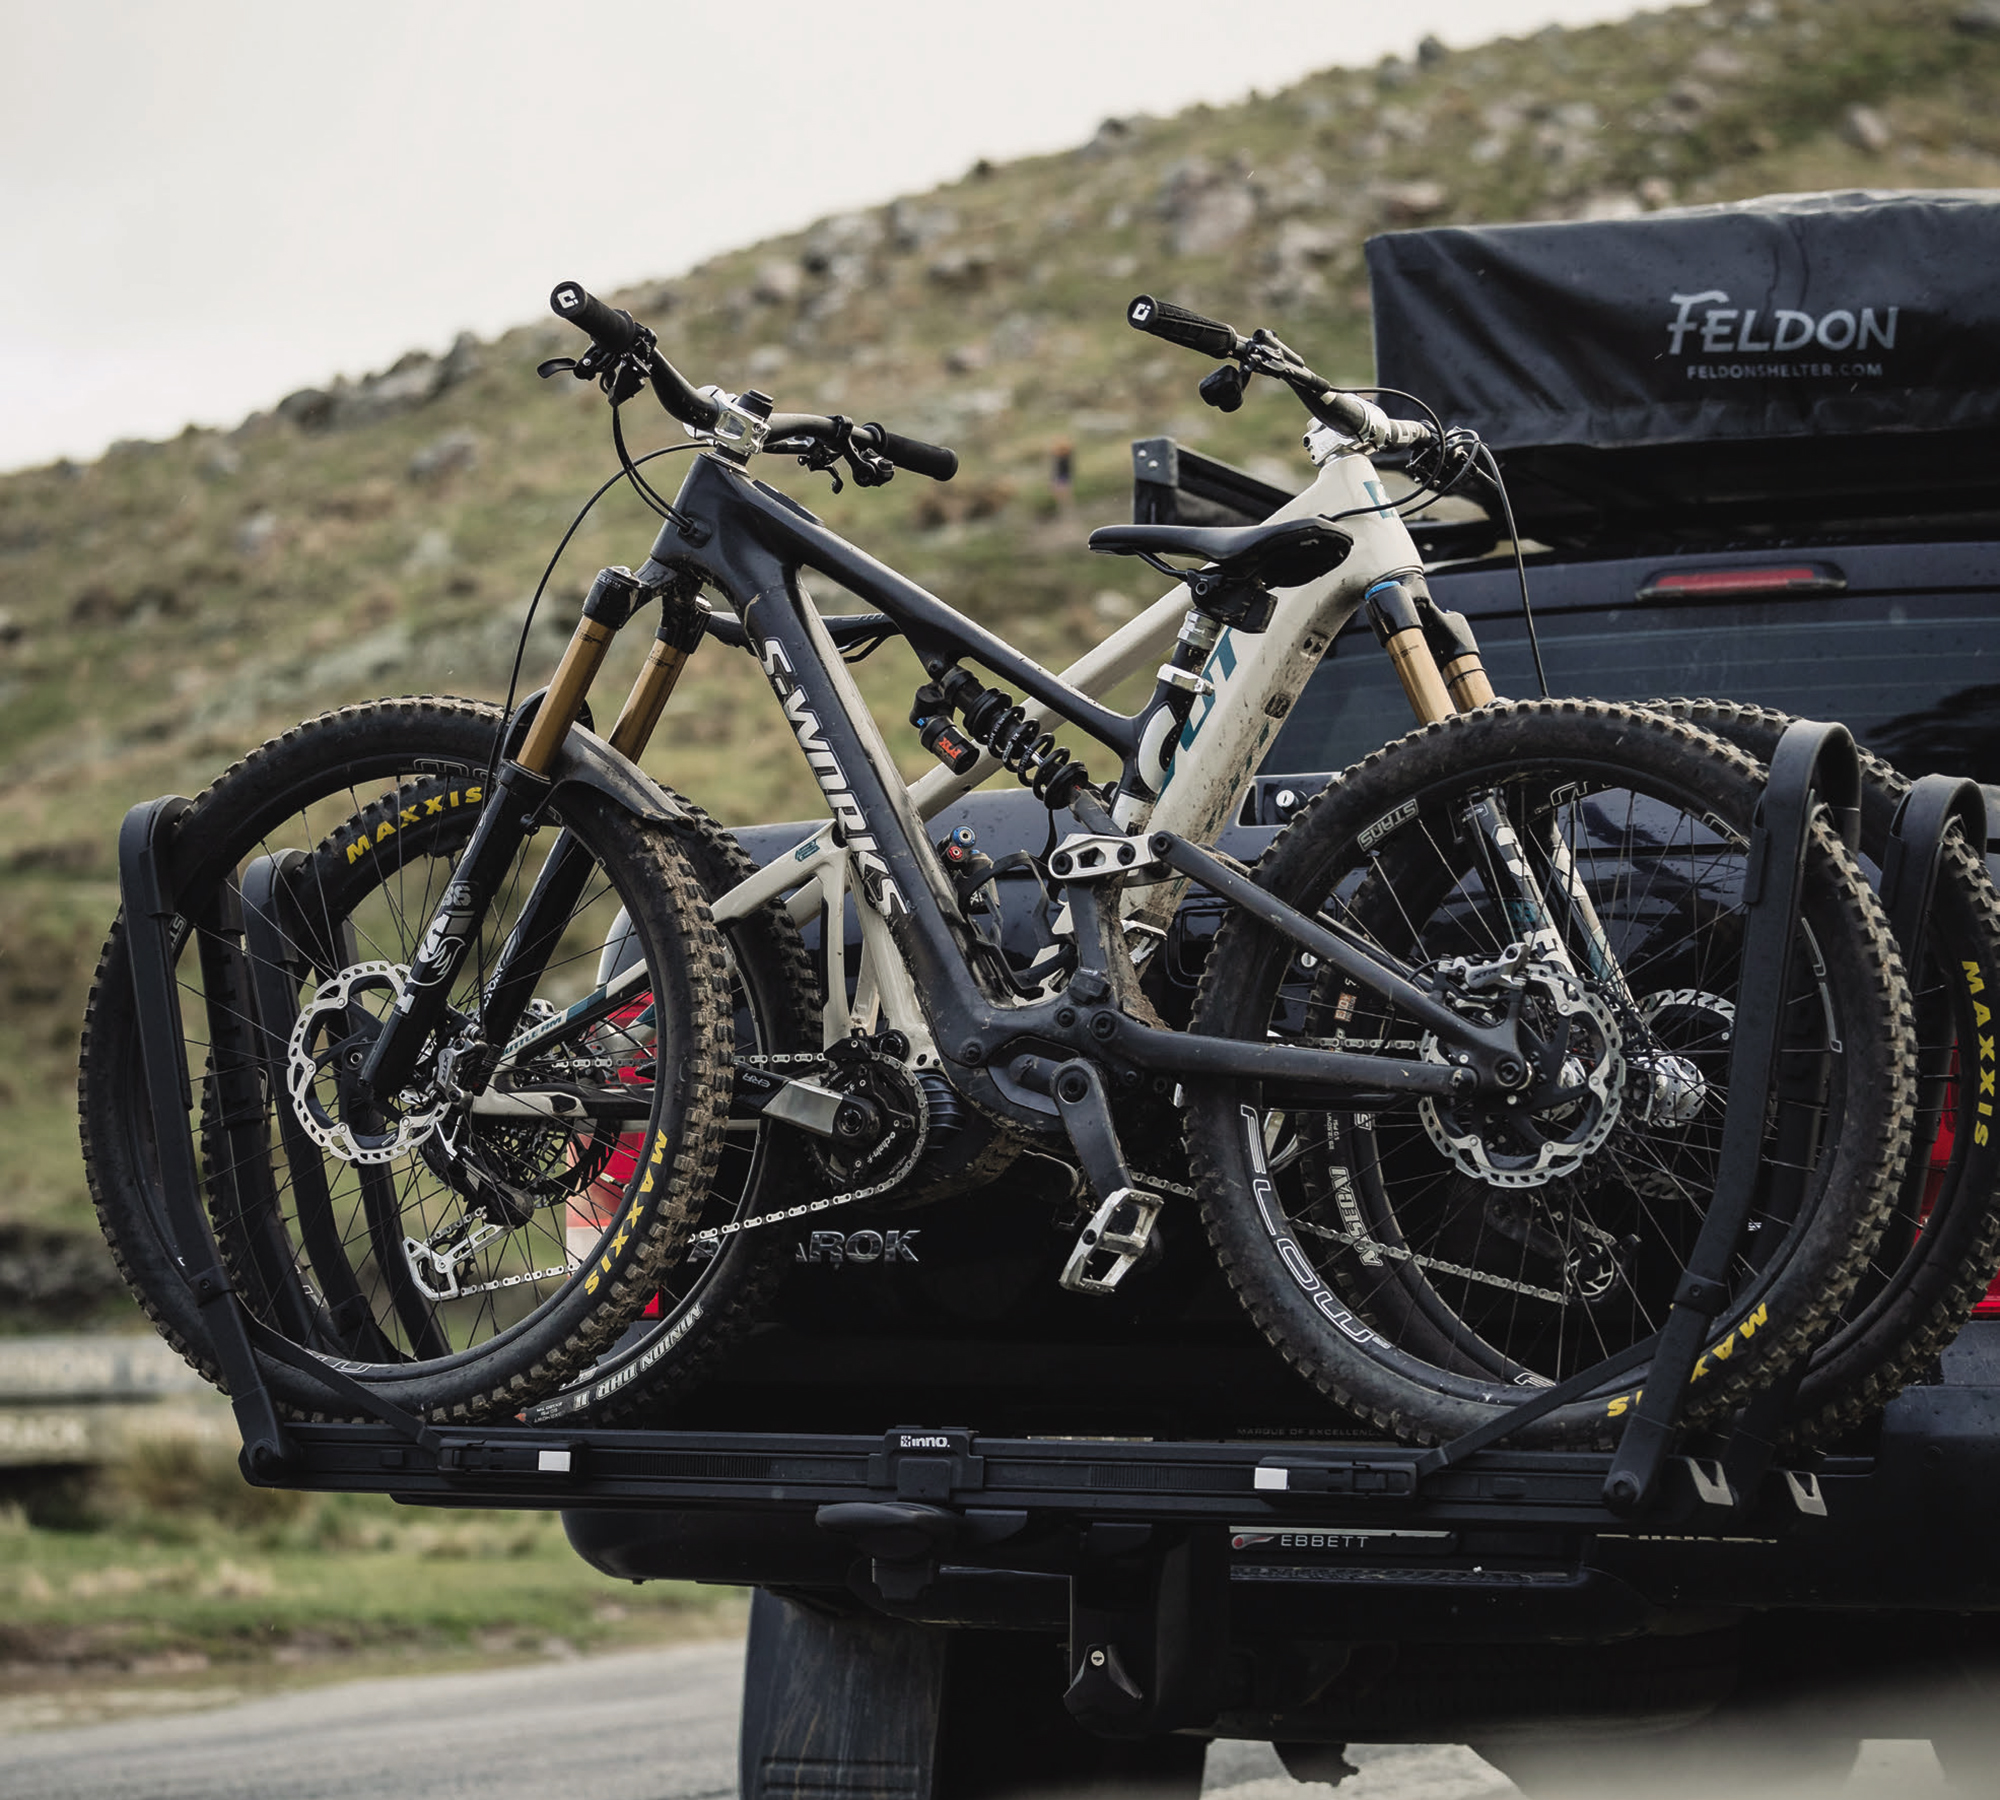
Loading bikes is where this system shines. With the way in which the ratcheting arms work, the arms stay put once extended, allowing for one arm to be set in position, a bike rolled or placed up against said arm, and the last arm folded up and tensioned using one hand.
Unloading requires a little more coordination and the use of both hands. I find you need to pull the arm back towards the centre of your bike to take the pressure off of the ratchet, and have your other hand depress the release switch on the tray. My only gripe with this is that the ratchet mechanism requires you to keep the level pressed in whilst you slide the arm back, at times leading to you ending up in some creative body positions.
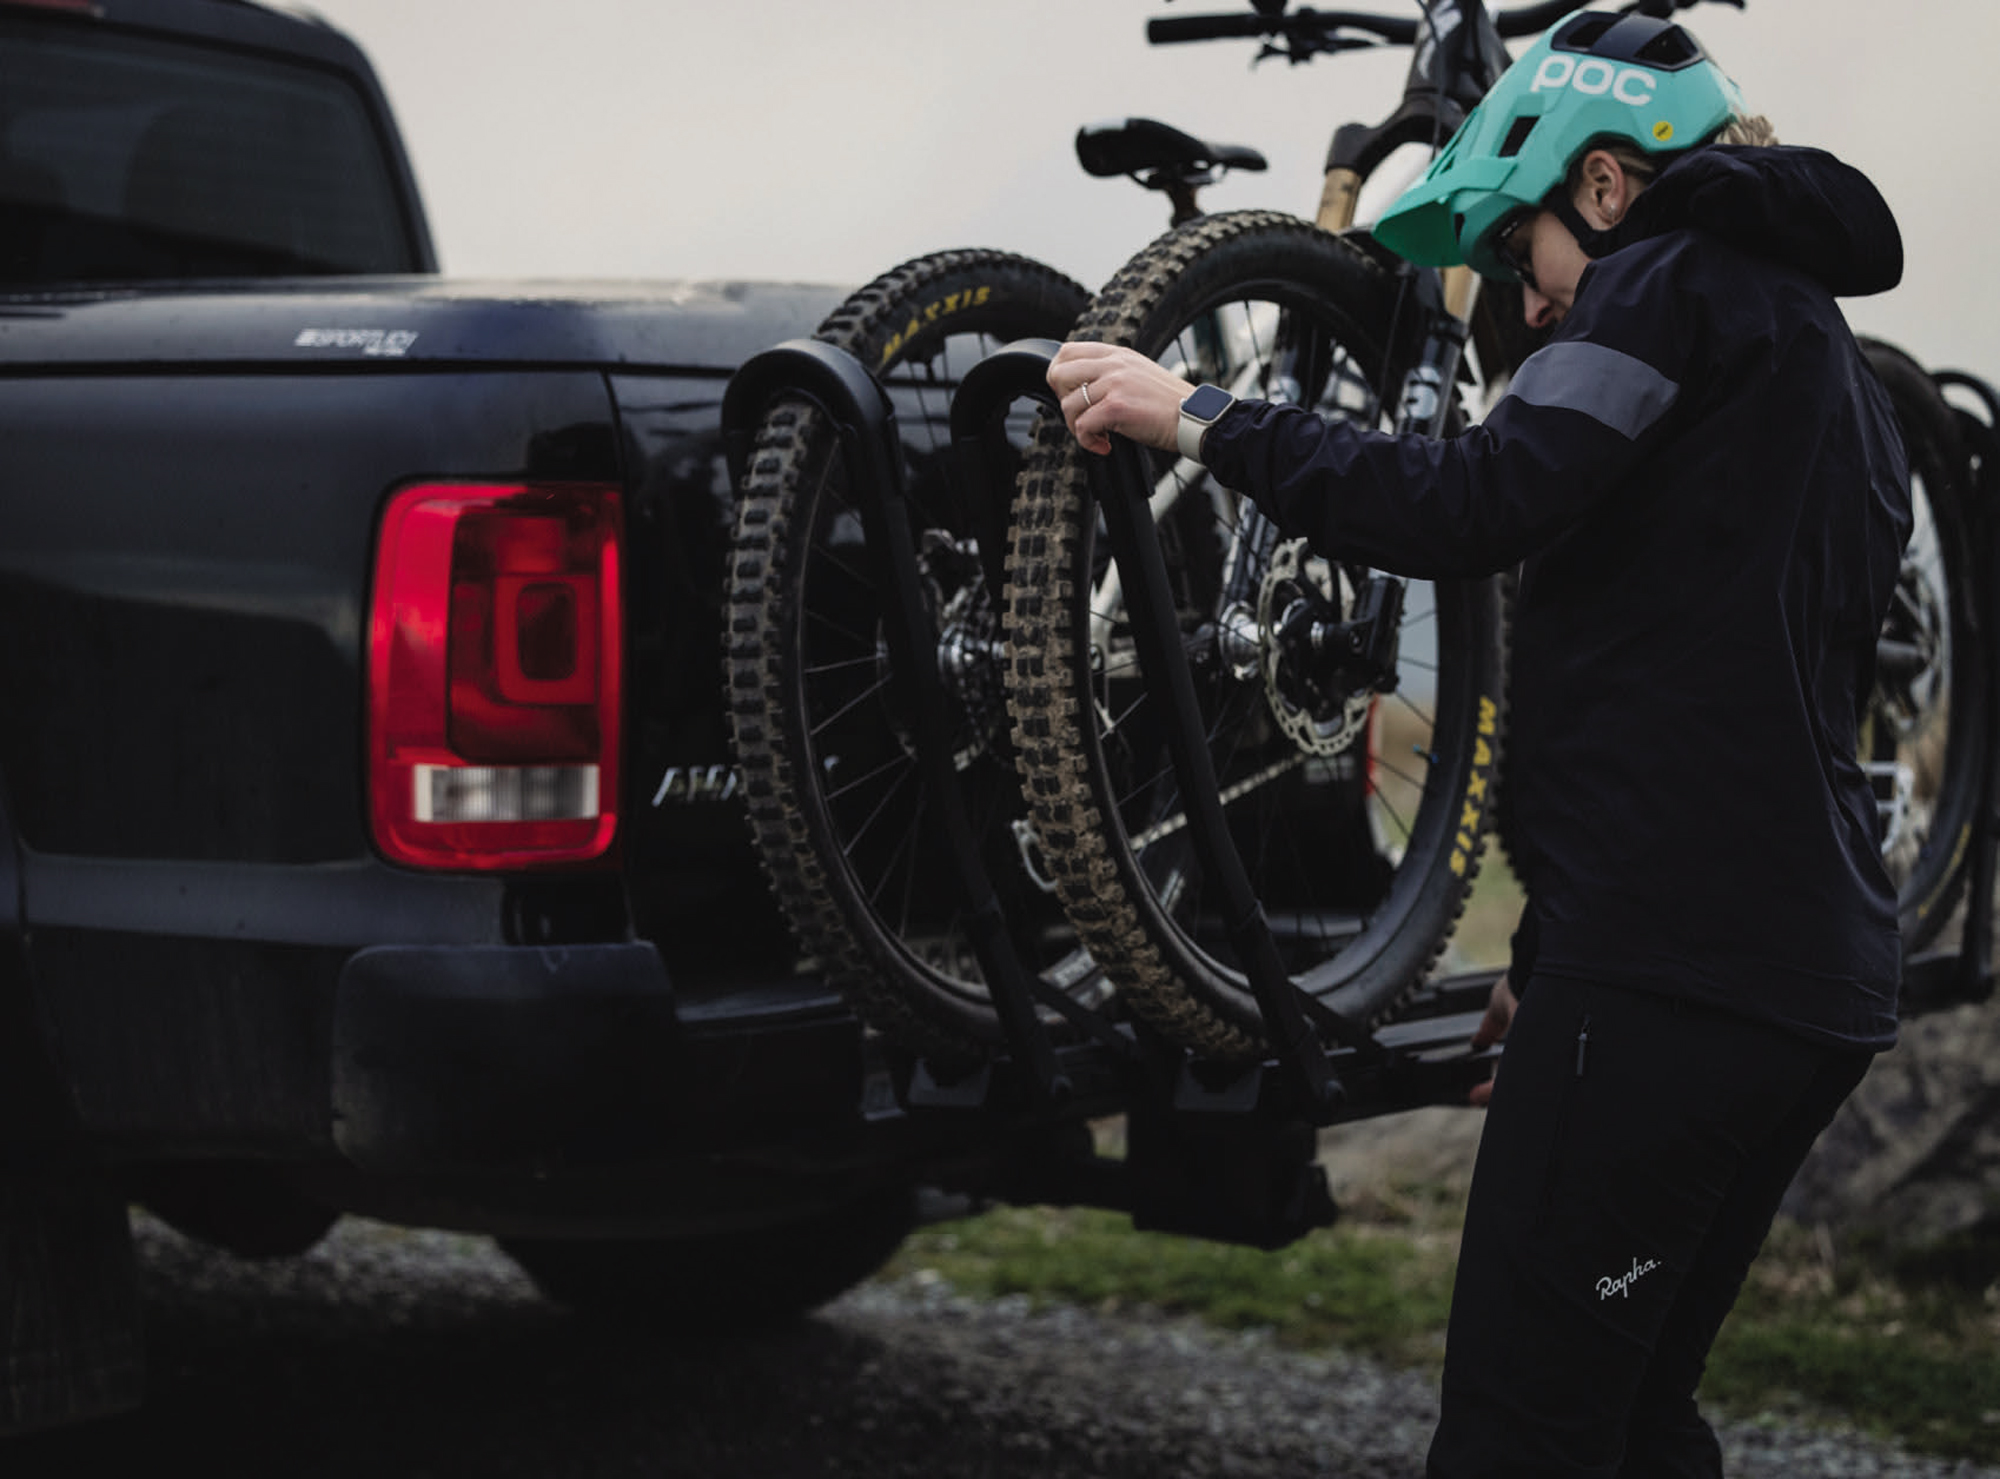
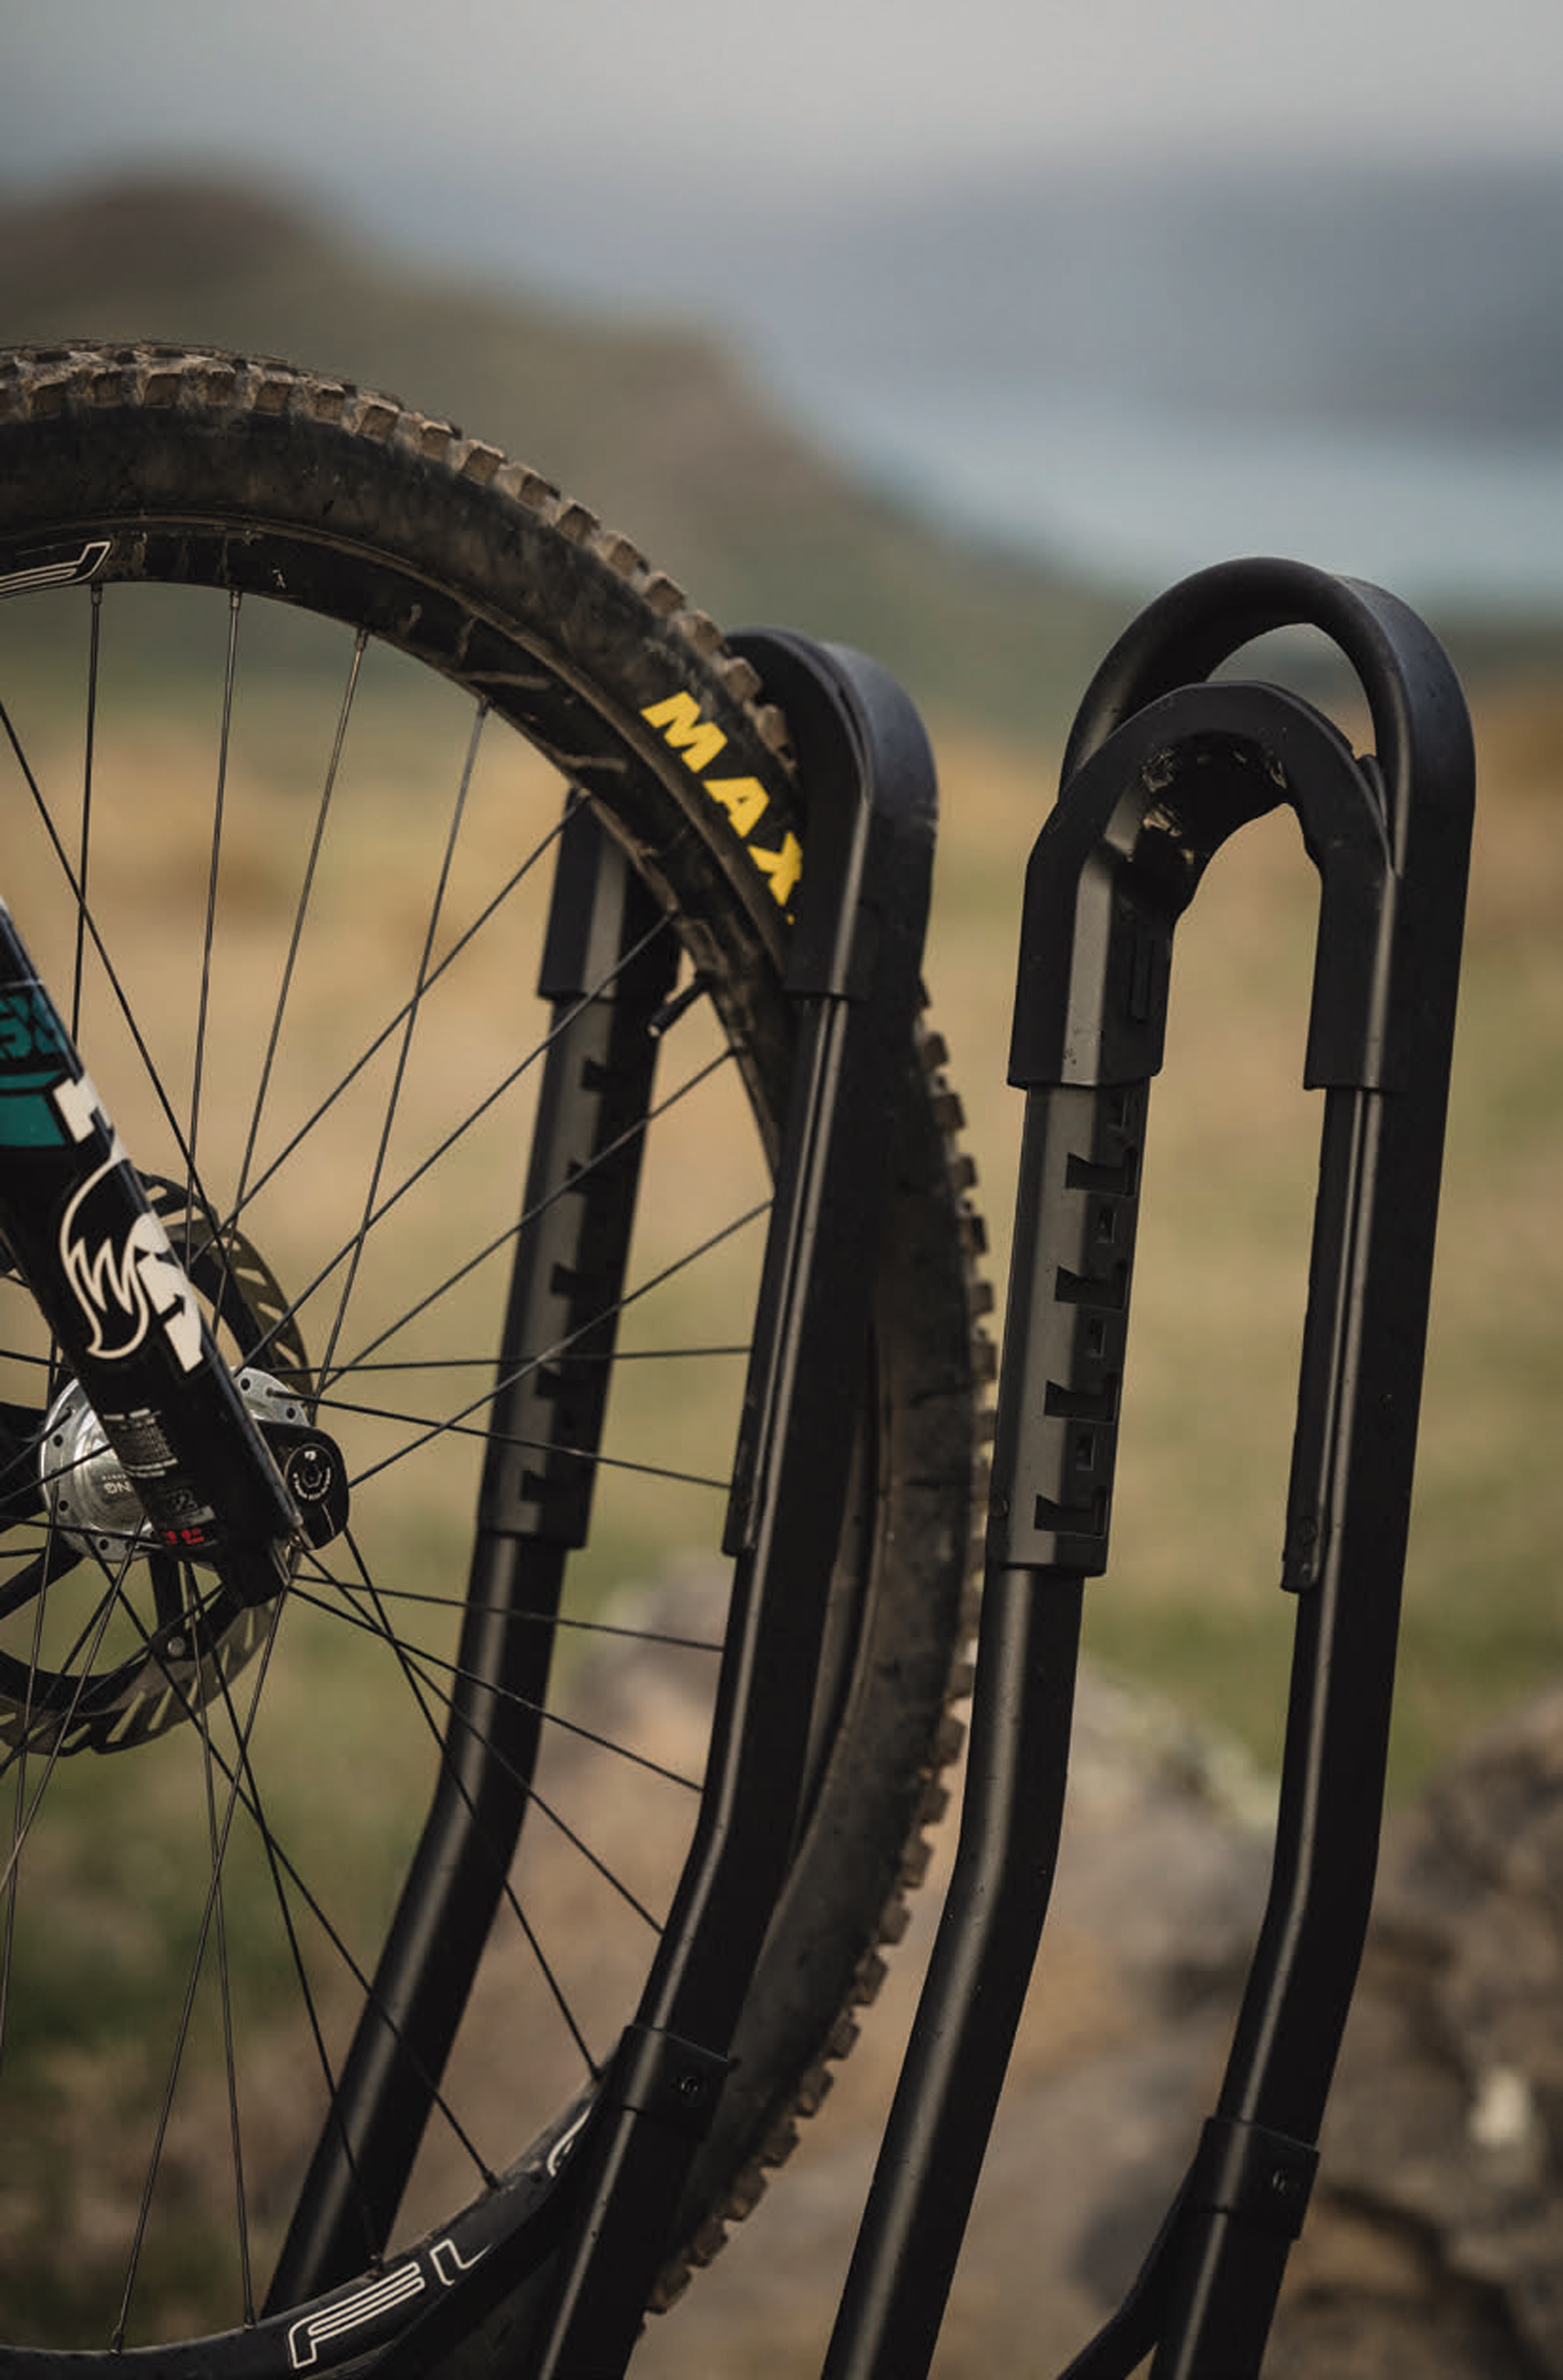
The tyre holders/arms feature a hard-plastic cup which acts as the key point of contact against the tyres and needs to be adjusted depending on the size of your wheels. Doing so is straightforward, but isn’t something you’d want to be doing each time you load your bike. As in our case, if you have a mullet-wheeled bike, or ‘his and hers’ with varying wheel sizes, you find yourself placing the bikes on the rack in the same order and orientation each time to avoid any hassle.
Each carrier bolts onto the main arm of the rack using a t-track style system (similar to what you’d find on roof rack type bike carriers), which allows for close to 30cm of fore-aft adjustment. This range of movement in pairing with the ability to place your bike anywhere on the carrier and adjust the balance of the arms to affect its position means the days of bikes mating is all but over.
Where other racks would creak and rattle, Inno’s HD rack hasn’t made a peep. Even with 45kgs of carbon and lithium swinging off the back down rough, corrugated gravel roads and mild 4×4 tracks, the bikes held rock solid and would barely wobble even, as the truck bounced around. Long journeys are much the same – hassle free and without movement.
The Tire Hold HD is designed exclusively around a 2-Inch hitch, so for those using a smaller hitch receiver or a tow ball, you’re out of luck when it comes to running this heavy-duty bit of kit. Inno offer similar models using a lot of the same materials and construction, but only for those whose vehicles don either a 1-1/4” or 2” hitch. For the towballer’s, sadly you’ll be needing to look elsewhere for the time being.
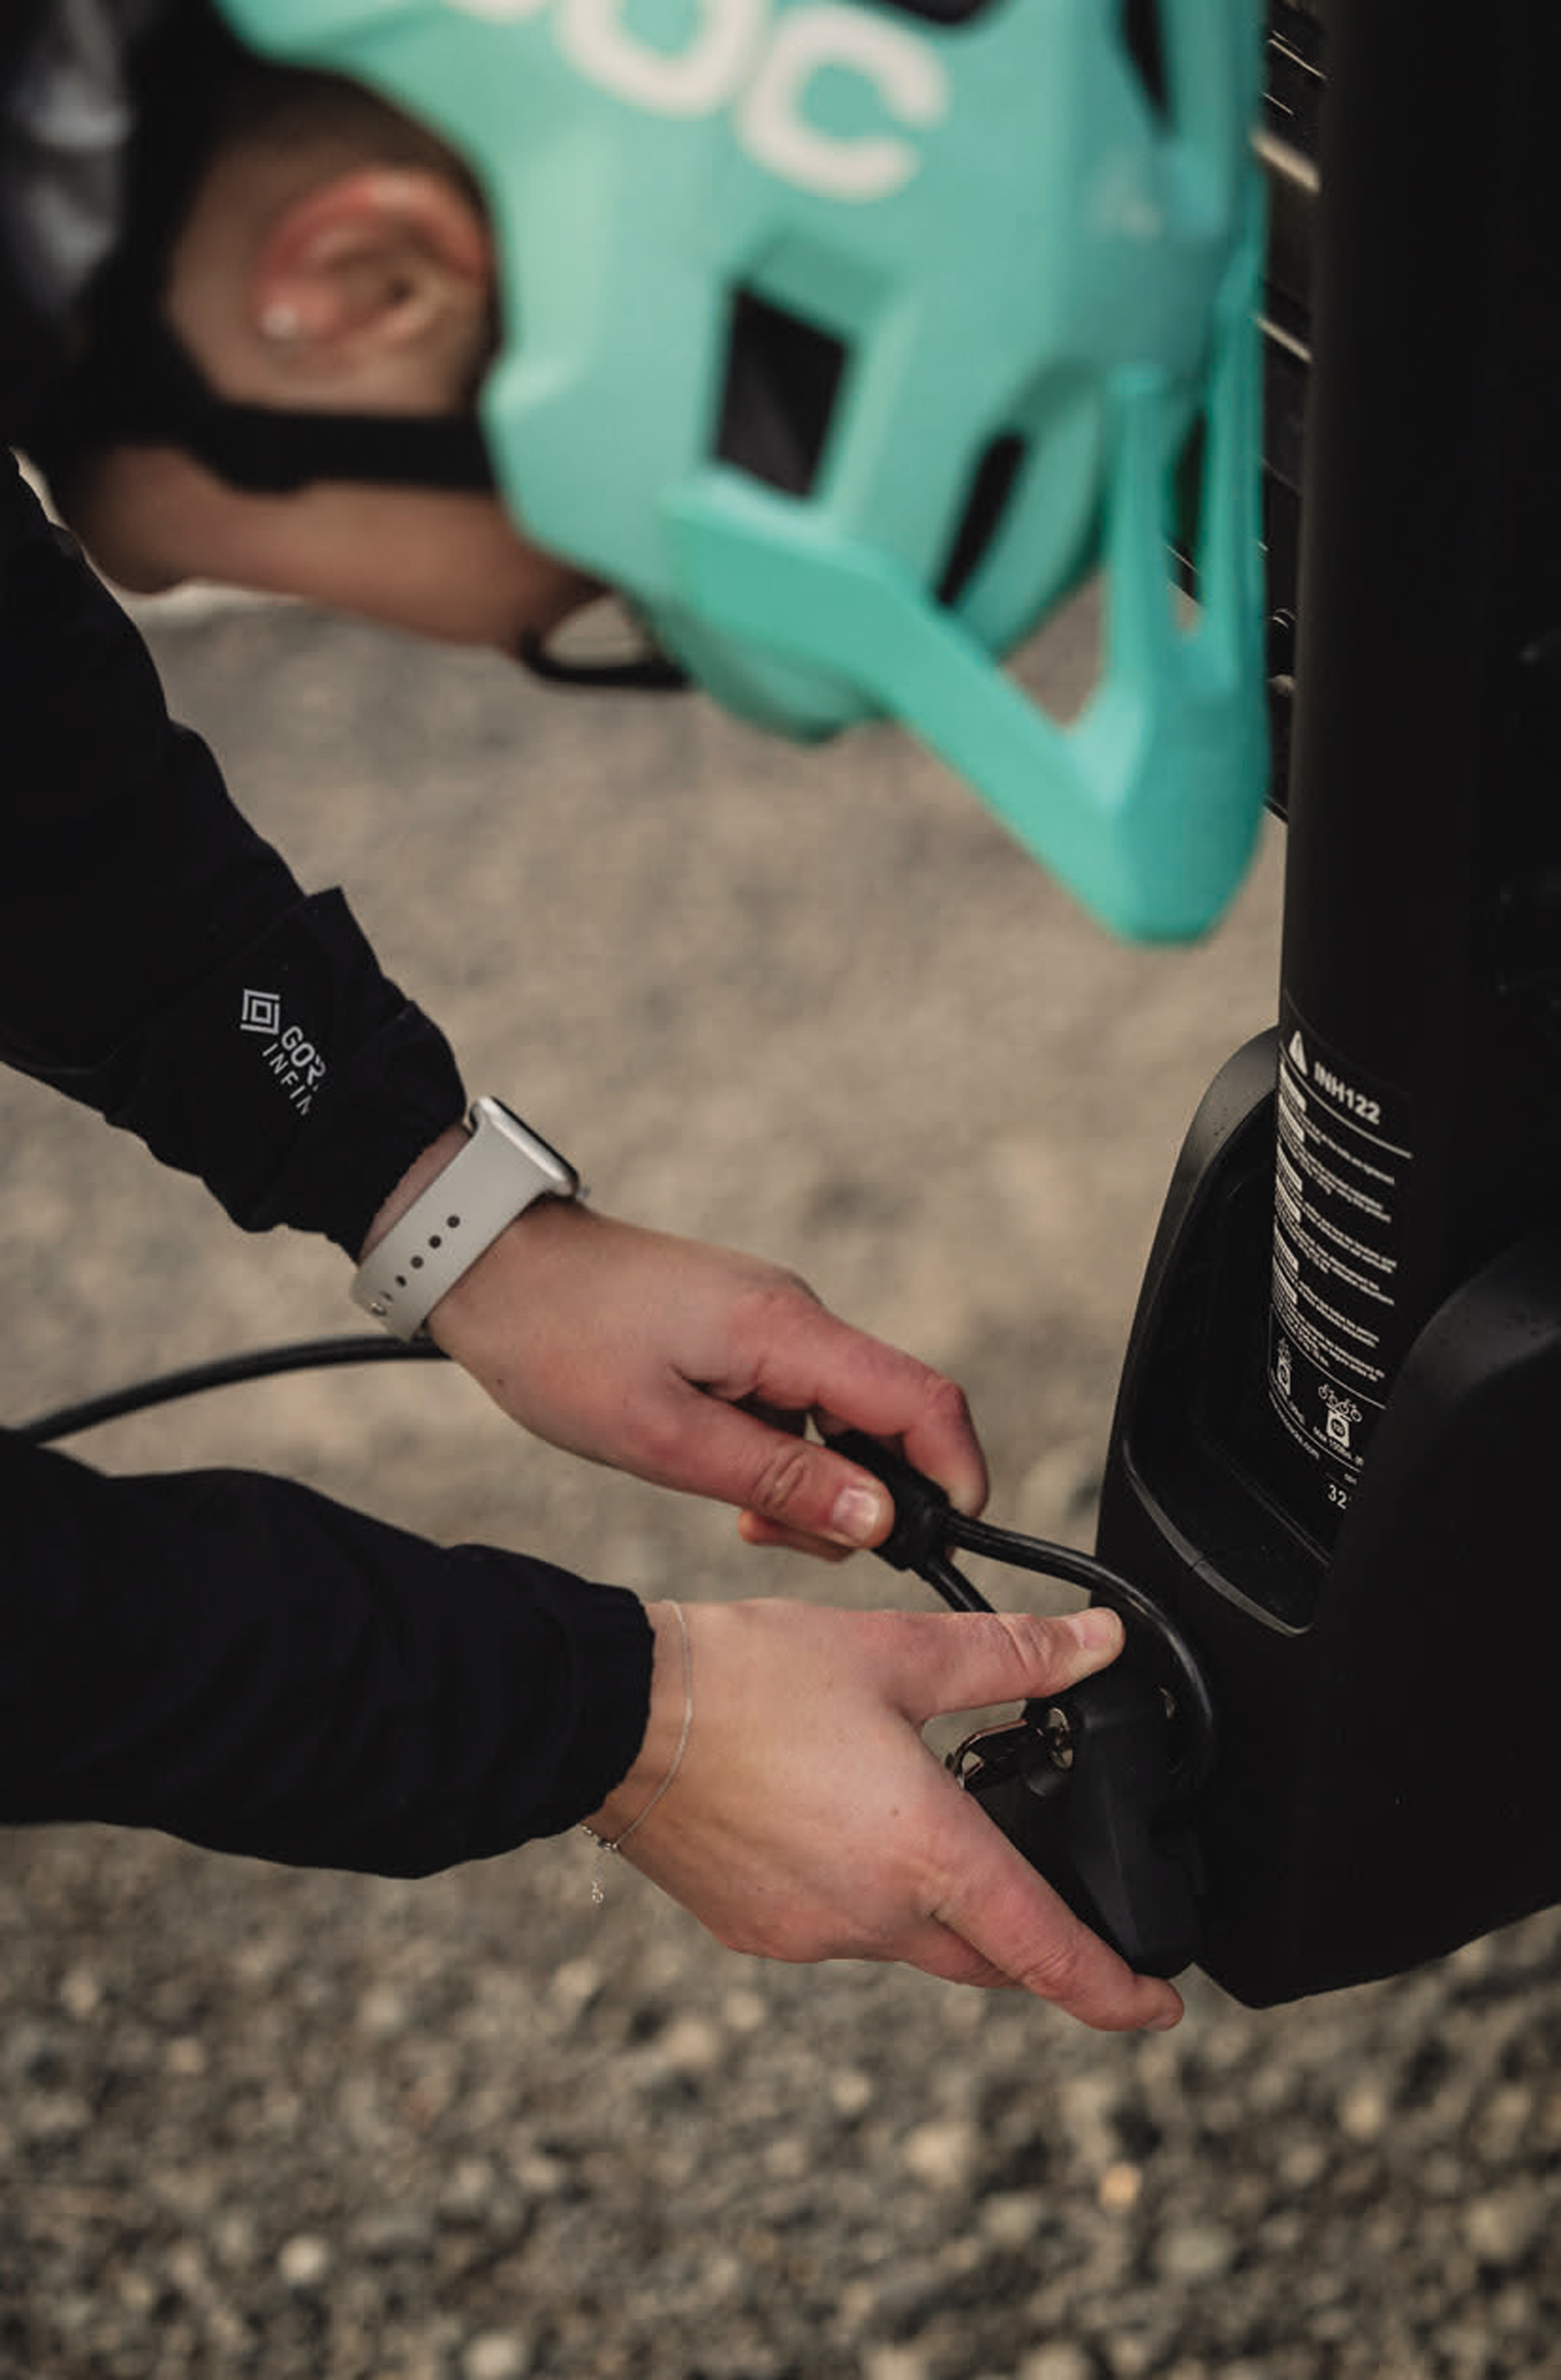
The ability to lock your bikes onto your rack is a feature you tend not to utilise all that often, but is one which you want to be well thought out and reliable when you need it. Unfortunately for the Tire Hold HD rack, the locking solution is the one feature which really lets it down. Their solution to security is a basic double-loop cable which requires being fed through itself on one end, and the other being clamped down by the hitch’s expanding wedge handle. The cable itself is something out of a primary school bike rack and wouldn’t take much to cut through or pull out of the locked handle. With the bike rack loaded, locking the cable in place would require you reach underneath the rack and fiddle around with a small key, realigning the handle on a small spline, and clamping said cable loop in place.
An easy solution would be to buy an aftermarket bike-lock and chain the bikes together, but for $1249, you’d hope they could come up with a better solution – perhaps wheels locks like the ones found on the Rocky Mounts or 1Up models.
My only other peeve of Inno’s rack is the inability to expand the carrying capacity after the fact. The Tire Hold HD is available in a two or four bike model, but neither option can be changed with the purchase or removal of an extension. Having that ability is helpful both ways – being able to shorten it for around town when it’s just you, or being able to take a car full of friends on riding trips, without the need to have two racks sitting in the garage.
Time will tell how well the Inno rack lasts but, for now, I’ll be keeping this one fitted, at least until I need to carry more than two bikes – and will be carrying my own lock.


