


Review: Granite Stash Steerer Tool
OneUp Components pioneered the world of steerer tube tools. In fact, their EDC tool took the mountain biking world by storm when it was released. The OneUp tool requires threading your steerer tube, which can void your fork’s warranty, although you can now also purchase OneUp’s EDC Stem which negates this. If you don’t want to splash out on a stem and multi-tool, but still wanna stash tools inside your steerer, Granite Design’s Stash Tool may just be the ticket.
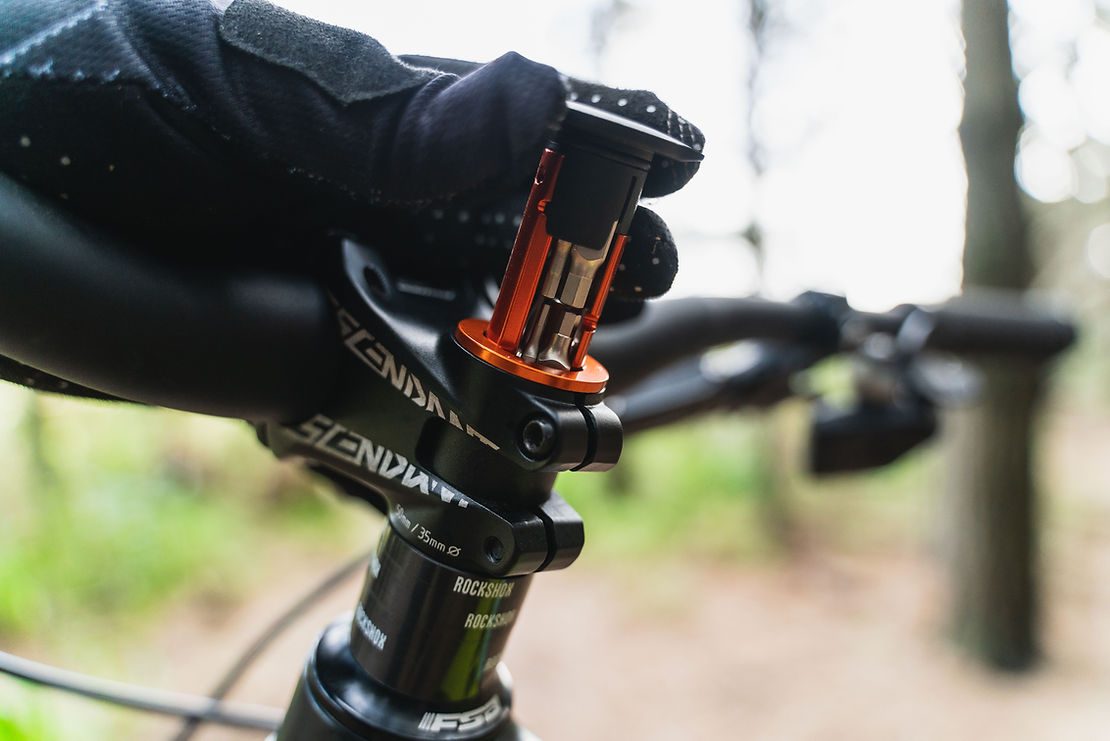
The Stash Tool mounts cleverly inside your steerer, without the need for threading your steerer tube. Instead, the Stash includes two pieces, a tool housing and a threaded plug, that go inside your steerer tube and thread together via a bolt. Remove your existing star nut (or simply don’t install it if it’s a new fork), install the tool housing in the top of your fork not steerer – making sure it’s either sitting on a headset spacer or the top of your stem – and then drop the included bolt down your tool housing and pinch it up ‘til your headset is secure and there’s no play. Drop the multi-tool into the tool housing, press it in and you’re good to go.
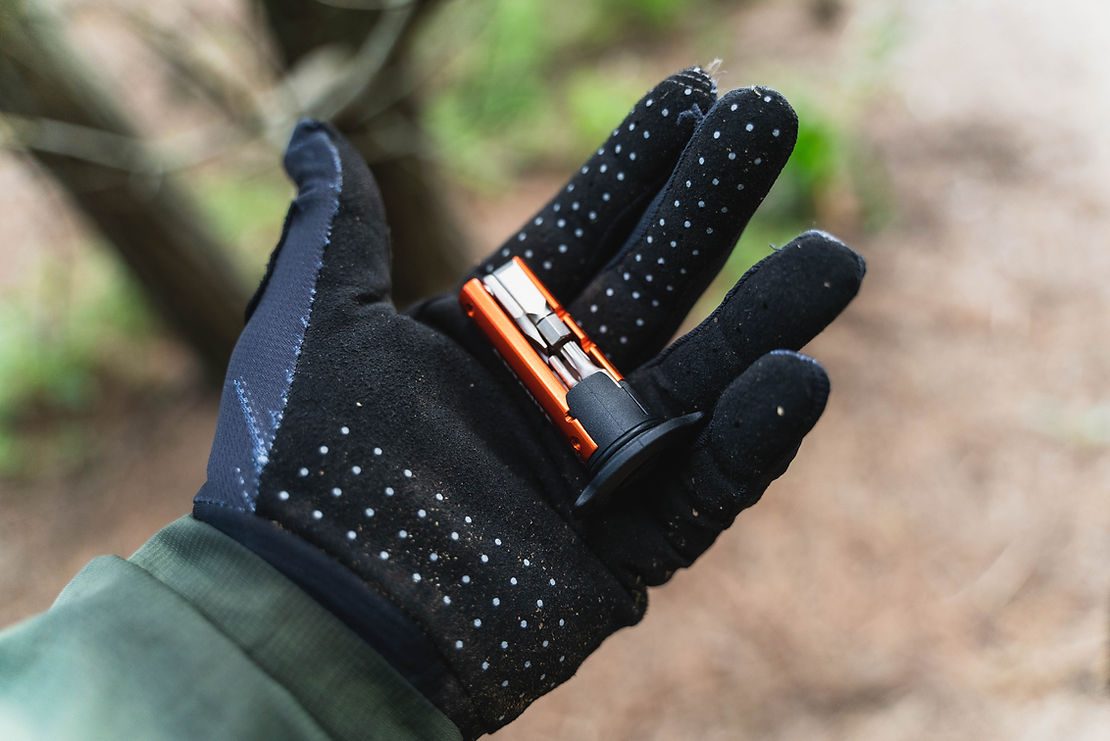
The multi-tool itself consists of a 2mm, 2.5mm, 3mm, 4mm, 5mm and 6mm hex key, along with a flat-blade screwdriver and a T25 Torx key. The tool also includes a 0, 1, 2, 3 and 4 size spoke key, that can remove valve cores. The tools are well made, durable, and all fit their corresponding snuggly without risk of damaging the heads. If orange isn’t your vibe, the tool is also offered in black.
I’ve already made the comparison to the EDC tool, and no doubt that’s what you’ll be comparing the Stash to as well. As far as quality goes, both are much-of-a-muchness, but when it comes to usage I’d say the EDC has a slight edge, with a little bit more leverage and a bit more reach on each tool. In practice, this doesn’t make a huge difference, but for that odd bolt that’s seized, or perhaps a recessed derailleur bolt, this could make a difference out on the trails. The Stash wins points back on ease of installation, considering there is no threading, and the fact that you don’t have to worry about warranty issues. It also comes in at a cheaper price, when you consider that with the EDC tool you’ll either have to buy the tap for your steerer (if you don’t have a buddy with one), pay a bike shop to tap your steerer for you, or fork out additional money for the EDC stem.
The Granite Design Stash is a great way to carry tools out on the trail, especially when combined with the Stash Chain Tool (also reviewed in this issue) and the Stash Tyre Plug kit. Installation is trouble-free and I haven’t had the headset loosen once. The tool stashes away securely and doesn’t rattle loose. All in all, a set-and-forget experience.
Words & Images: Cam Baker

News: The all-new Vorsprung Secus
Vorsprung have made a name for themselves in the world of mountain bike suspension, offering tuning, servicing and aftermarket parts for forks and rear shocks. In the pursuit of an air spring with "coil-like" sensitivity, Vorsprung have released their all-new Secus air spring for your fork, which they claim actually has a BETTER spring curve than a coil. Read more below...
"Yeah, we know - “coil-like feel” from air springs has been marketed for years now, including by us. And over the years, air springs have mostly gotten closer to that predictable, plush feel coils give. But while the easy adjustability of pressure and end-stroke ramp have always been significant advantages for air springs, even our market-leading Luftkappe and Corset air springs never quite matched the linearity of coil springs for bump compliance, particularly in the early and mid travel. The reason for this is because whenever the initial stroke stiffness was reduced, the ending stroke progression was increased - eventually creating a practical limit on negative chamber size. We looked carefully at the limitations of traditional fork air springs to work out how to overcome those obstacles, and we’re excited about what we were able to achieve.
For the first time, we created an air spring with a truly better spring rate curve than a coil, without it actually being worse in any part of the travel.
Yes, you read that correctly.
Yes, it’s a big claim.
Yes, we can back it up.
It’s called the Secus.
Three Stages of Control
Initial stroke - enlarged negative air spring chamber delivers a soft, supple initial stroke for ultimate small bump compliance
Mid stroke - where traditional air spring rates drop off in the midstroke, our proprietary Midstroke Support Valve technology boosts the midstroke spring rate to maintain linearity, for support, predictability, ride height and compliance
End stroke - enlarged lower leg volume reduces overall progression even at higher pressures and allows for a wider range of end-stroke ramp options to be utilised with standard fork volume spacers.
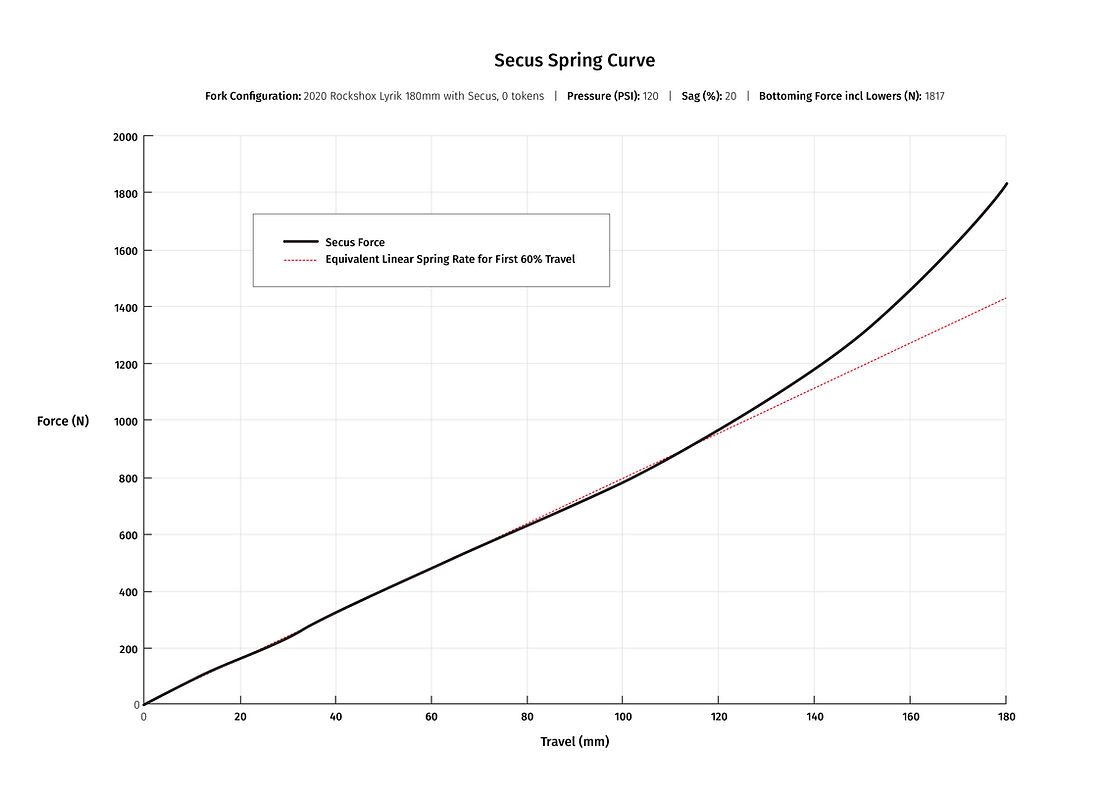
What’s it all mean? The Secus upgrade attaches to your factory air shaft assembly to deliver the first and only air spring system to really come indistinguishably close to the linear spring rate of a coil fork for the entire first 2/3rds of its travel, with the advantage of a gentle end stroke progression to prevent bottoming without the “wall of force” harshness that excessively progressive springs create.
By independently optimising the beginning, middle and end portions of the stroke, the Secus gives you the linear-to-progressive spring rate that coil springs and traditional air springs alike wish they had.
Secus Advantages:
• Distinctly improved small bump compliance, particularly in the early travel (yes, even compared to the Luftkappe)
• Midstroke Support Valve improves predictability and support beyond the sag point
• Reduced lower leg pneumatic ramp means better scalability of the air spring, particularly for light riders who previously struggled to use full travel
• Plush and predictable like a coil, bottomless like an air spring
• Allows full use of travel in both directions - fully extends to topout without any quibbles (including on Debonair B1 air springs) and fully compresses without excessive ramp
• Considerably lighter than coil conversions - adds approximately 130g
• Allows more lower leg bath oil to be used for superior lubrication
• Simple setup - inflate fork, bounce on it a few times, press MSV charge button, go ride
• Compatible with OEM volume spacers for end-stroke progression adjustment
• Compatible with other aftermarket top-cap systems such as DSD Runt and MRP Ramp Control
• Lower compression ratios mean a more consistent spring rate
• Transferrable between any Secus-compatible forks with only a footstud to change at most
Secus Disadvantages:
• Costs more money than not having it
• 130g is still more than 0g
• Can be damaged if you have it, can’t be damaged if you don’t
• Still has seal friction like any air spring - since we use the factory moving seals, friction is unchanged
• Bottom out control is not externally adjustable - need to use volume spacers which still entails removing the top cap
**12 Month Crash Replacement Guarantee**
We will replace any damage to your Secus in the event of a crash or accident for the first 12 months of ownership - no questions asked. Just email us a photo of what’s damaged and your proof of purchase and we’ll do the rest.
Compatible Forks
• Most Fox forks with Float NA2/Evol air springs (except StepCast forks or forks with footbolts recessed in the lowers). 32/34/36 available immediately, 38 and 40 fitments coming soon.
• Most Rockshox Debonair 2019-21 forks or prior year forks updated with 2019-20 Debonair air shafts. Pike, Revelation, Lyrik, Yari available immediately, Boxxer fitments coming soon.
• Not currently recommended for use with 2021 Debonair C1 shafts due to inadequate topout control and incorrect overall length - 2021 forks need to be retrofitted with the Debonair B1 air shaft assemblies from 2019-20.
• For full compatibility information, see our website.
Air or Coil? Secus or Smashpot?
We aren’t purists on the air vs coil debate - we offer the Smashpot coil conversion as well, because while this is flat out the best performing air spring on the market, air springs still have moving seals and the friction and service requirements associated with that. Likewise, coil springs work extremely well and have no friction, but are less adjustable in their spring rate and heavier."

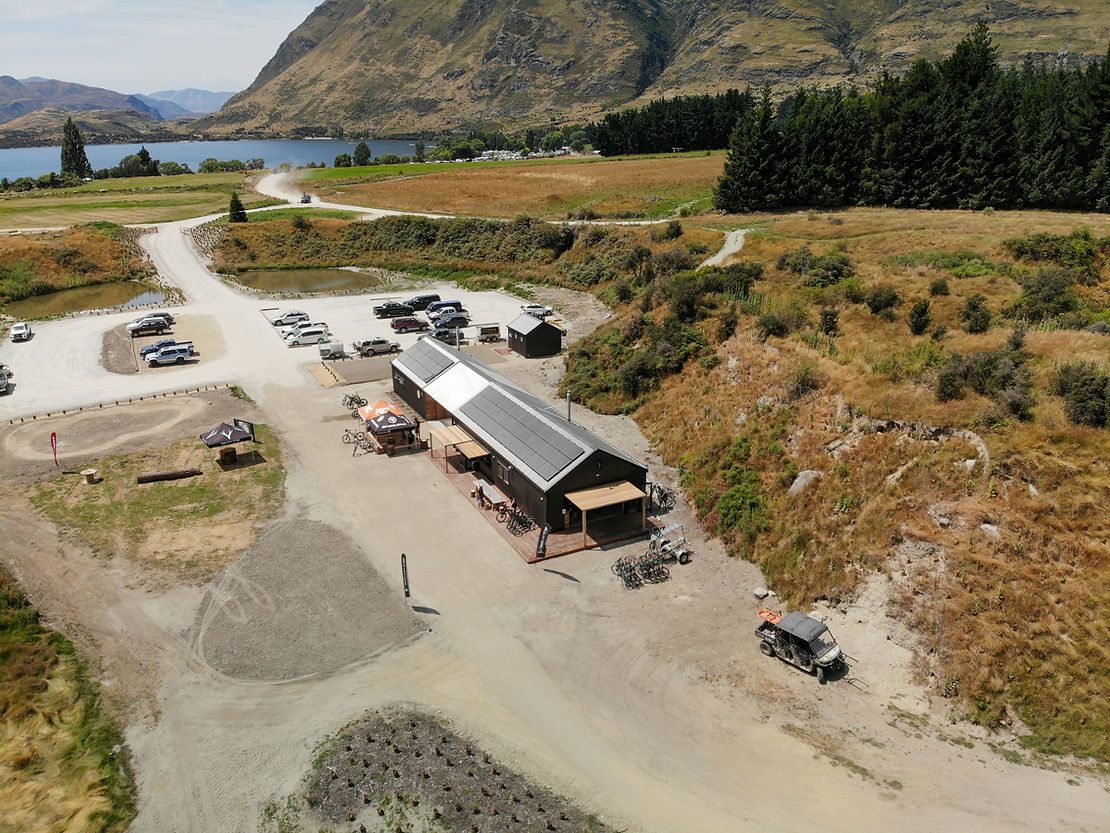
Story: Bike Glendhu - Wanaka's Newest Riding Destination
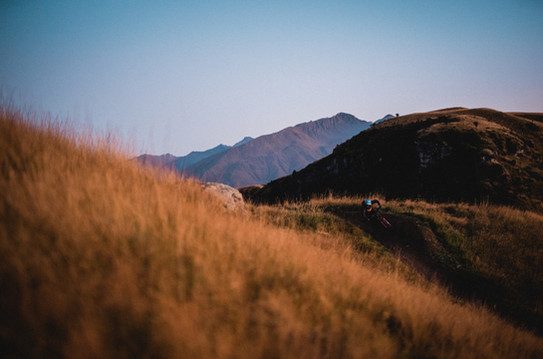
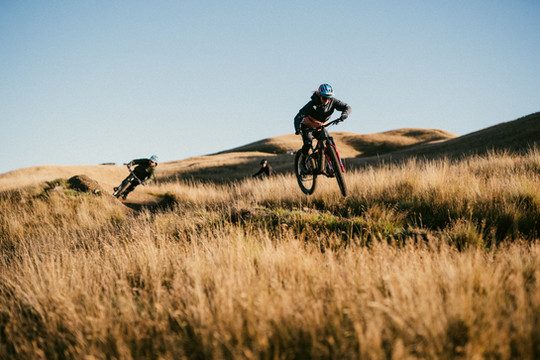
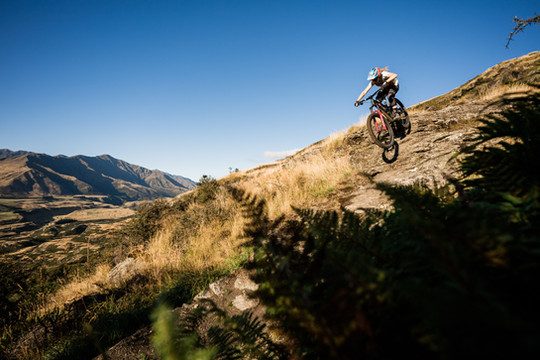
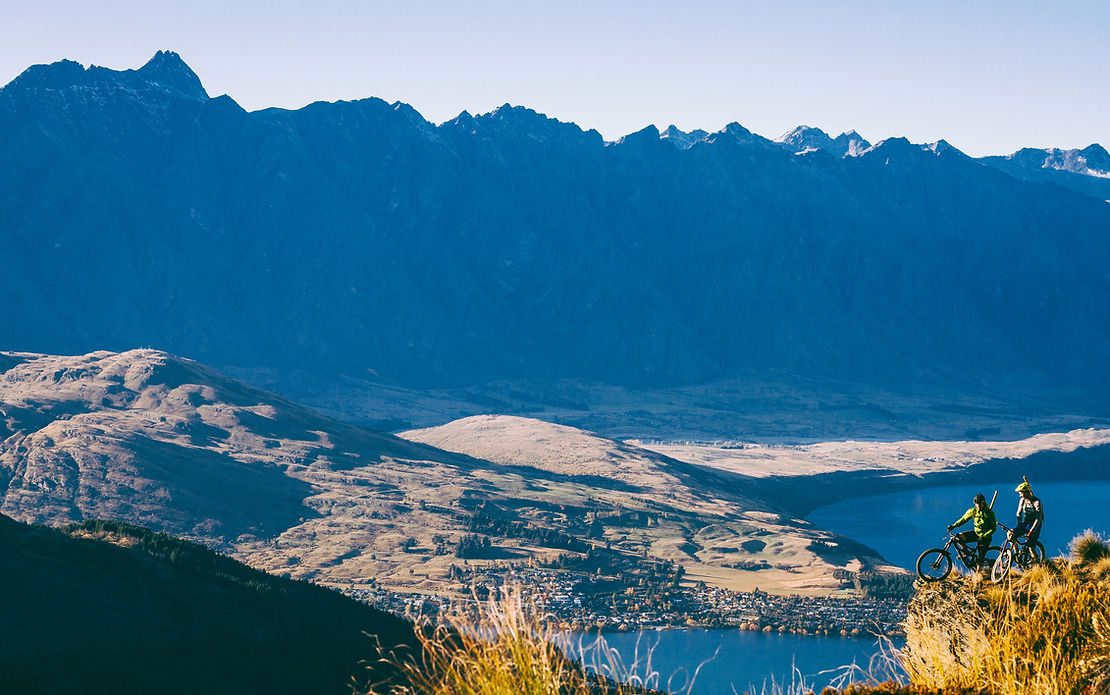
The South Island is instantly recognisable and home to some of the best riding in the world. Trails like Rude Rock snake along the tussock-riddled slopes of Coronet Peak, and on any summer’s day you’ll no doubt find some of the big names of our sport on the lift at Skyline Queenstown. Bike Glendhu is the latest addition to the South’s arsenal of riding destination.
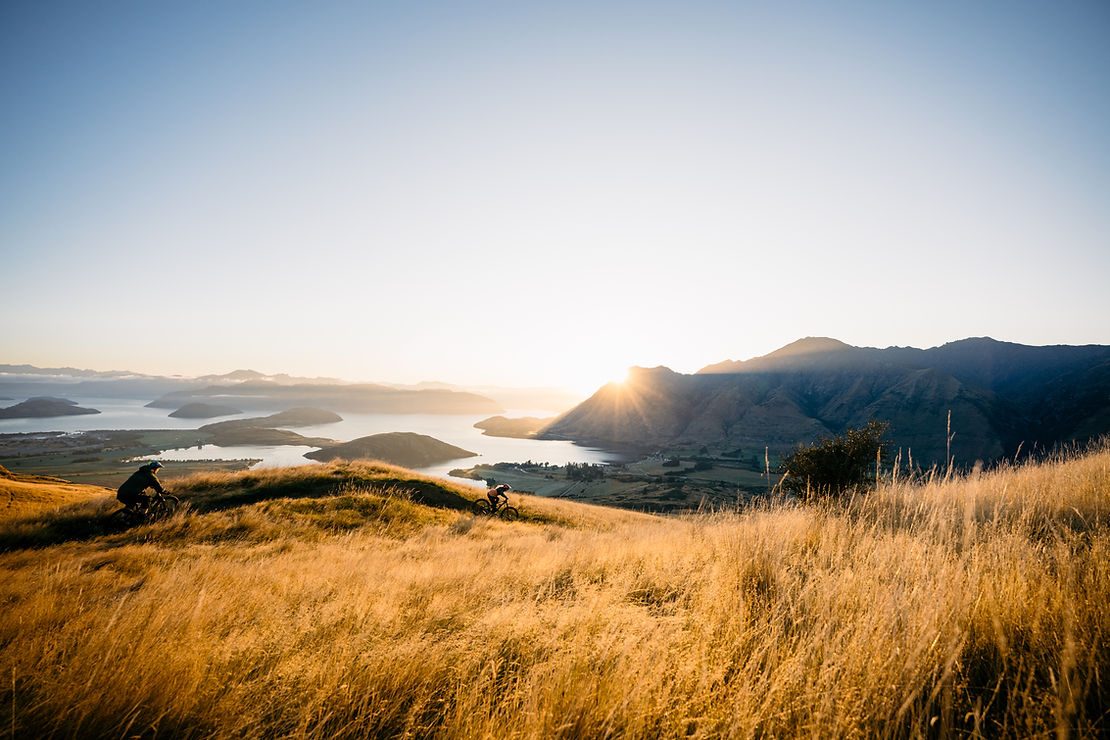
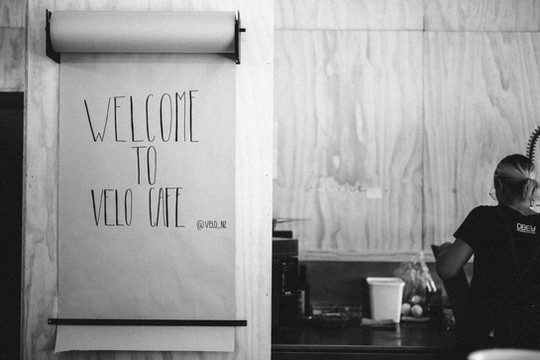
Bike Glendhu, located in Glendhu Bay, is Wanaka’s newest riding destination, opened in January 2020 after a couple of years of development. John McRae, whose family has owned and farmed Glendhu Station for three generations, wanted to create a more sustainable farming experience for his family’s future generations. He partnered with Wanaka local, John Wilson, to build Bike Glendhu on 1000 hectares of the Glendhu Station. The big picture goal was to create a bike park that’s self-sufficient, both in terms of how they generate resources like power, and in the sense of having a positive impact on the land the park is built upon. The base is rad, with an on-site mechanic, bike rentals and a café (more on the café later) all built on the same ethos of preserving the natural landscape, whilst providing an awesome ride experience. When it comes to preserving and restoring, the land Glendhu’s built upon, they’ve already planted 4,500 native trees, with the goal of planting 30,000 total by 2025. The bike park also don’t print single-use trail maps, don’t sell single-use bottles or coffee cups and don’t print throwaway marketing material, instead opting to go for digital solutions like videos and supplying tablets to places like accommodation providers to showcase the bike park.
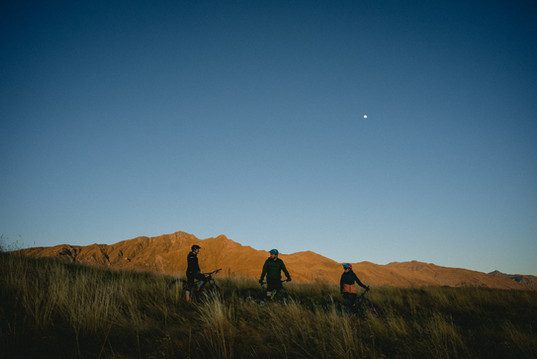
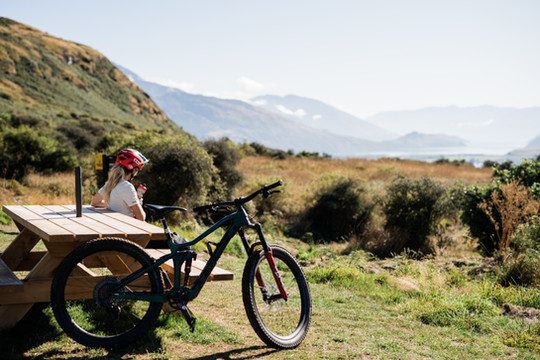
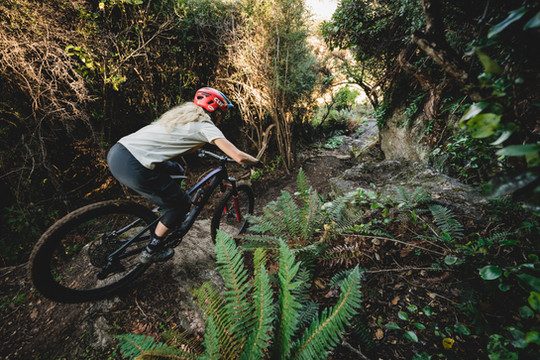
Glendhu has two ‘hubs’ in their network: Jack’s Point, which is halfway up the hill, and Falcon’s Nest, located at the very top. The thing that makes Glendhu a little different to some of it’s South Island counterparts, though, is that (for now) you’ve got to work for your reward – no chairlift, no shuttles it’s all pedal power in the bay! With that said, it’s about a 45-minute climb to the very top at an easy pace, and the team has done an exceptional job of building a climb that meanders gently up the hillside so that you’re not too tired once you arrive. The lower half of the hill consists of flow trails, with the two I heard most about being Jairolla and Hare Time; Glendhu’s jump line. Every. Single. Person. I spoke to about Glendhu raved about Jairolla and Hare Time, and for good reason. Jairolla swoops down the hillside with flowy berms, some easy roll-able jumps and of course stunning views out over Lake Wanaka. Hare Time starts off small and slowly gets bigger and bigger the further down the hillside you progress and features hips, table-tops berms and rollers. Everything is roll-able, so it’s perfect for working on your jumping skills, because if the jumps get too big, or you want to try hit something bigger than you have before, it’s easy enough to roll it, or come up short, without paying a big price. You’ve also got a green trail down, along with a light blue so that your friends and family who don’t ride can still come along and have some fun. I think one of the things I appreciated most about Glendhu was simply the fact that the trails are built with a wide skill range in mind, so if you’re riding with a group with a range of skill levels, you can all ride the same trails (for the most part) and have fun.
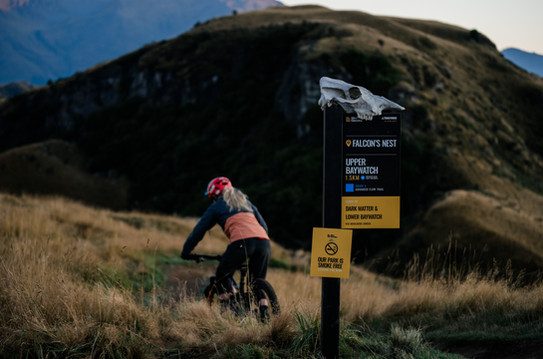

Something I really like about Glendhu, is that the trails aren’t ‘grouped’ by difficulty. It can be tough riding with a group with mixed abilities; what starts as a day with intentions of riding as a group can quickly end up with your group broken up as people go off to ride the trails that are more appealing to them and you go the whole day without seeing your buddies. At Glendhu, the climb offers the ability to ride with your buddies and tell your tales from the trails, before breaking up and heading down the trails that call your name once you’re backup to the top.
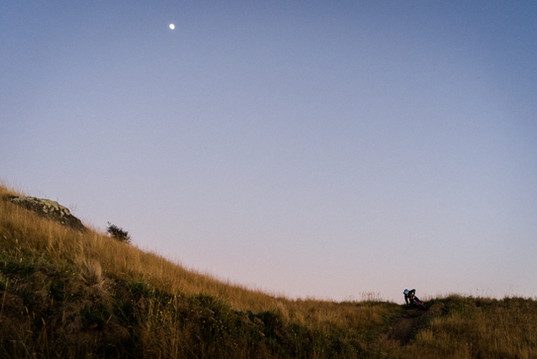
It goes without saying that I plan on getting back down to Bike Glendhu ASAP, and this time with the goal of spending a couple of days exploring the park. If you’re passing through the South, or have been wondering whether it’s worth making the trip into Glendhu, I can tell you it’s 100% worth it. For the next couple of weeks, up to the 14th August, Bike Glendhu season passes are available at an early bird rate. The goal is to open for the last two weekends of August, and then to extend hours into September.
Words: Cam Baker
Images: Callum Wood & Chris Wright
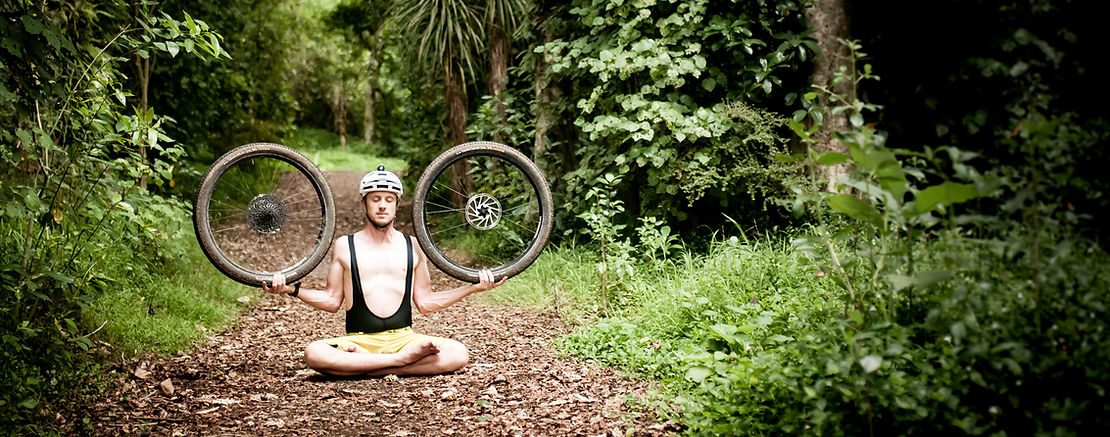
Story: The Zen and Art of Bikepacking
In retail they say convenience is king. That’s what global retail giant Amazon built its brand around. It bet that if it could make shopping more convenient it would trump almost all other factors. When it comes to bike-packing my mantra is this - comfort is king. I’m fast discovering that you can conquer almost anything and ride for almost any distance if you can just stay comfortable, and so Tour Aotearoa preparation for me has become less focussed on grinding out miles with the goal of building leg strength, but grinding out enough miles to trigger the next factor of discomfort.
Take your average beginner cyclist. They get on a bike having never ridden before, and likely it’s a cheap bike with a nasty seat. Within five minutes they are complaining about a sore bum. That’s typical, and they have triggered the first round of discomfort that they need to conquer before they can move forward. They can either suffer till they get well-formed callouses on their butt-cheeks, or they can buy a pair of padded bike shorts. If you’re interested in long distance bike-packing such as the Tour Aotearoa, you have probably been around bikes long enough that you have accumulated a few items that can help keep the comfort levels high on your normal one to two-hour ride, but what I’m finding surprising is the strange things that start to crop up when you start to go for extended time in the saddle.
That good seat you bought that was comfortable for two hours of mountain biking turns to agony at the three-hour mark. Those SPD shoes that have kept you going for the last eight years force shooting pains in to your feet after the 100km mark. Your hands go numb, your shorts chafe and your helmet feels like an oven.
You can conquer almost anything if you can just stay comfortable, but that is no easy task in this game. Going in to this I had read up about people finding their hands going numb. This sounded a bit strange. After all, I had been mountain-biking for 20 years and surely the rough jarring of mountain bike terrain would be harder on your hands than anything else? We didn’t even have suspension then! But sure enough, my hands started to go numb too during training rides. A switch to the Jones Bar, a set of aero bars, and an extra layer of bar tape over the grips seems to have solved this problem. Next thing to tackle was the chafing. Riding for one day was no trouble at all in the chafe department, but only an hour into a second day and all of a sudden it’s like my lycra is lined with sandpaper. Strange. The aptly name Butt Butter quickly sorted this out, but no sooner has one irritation gone away than another seems to arise. The last two training rides I went out for were a perfect example of this. For some reason at the 40km mark my left foot started to get intense shooting, cramp-like pains. I had to get off the bike, take the shoe off, and wriggle my toes for five minutes before I could continue. Strange. It came on with no warning, and went away just as fast. A few days later out on another ride and as I look down at my speedo tick over from 39.9km to 40.0, all of a sudden the same shooting pains return. I was off the bike in the grass wiggling my toes in the exact same middle of nowhere spot as the time before. Weird. On top of this you have the strange way sleeping in a tent on a one-inch mattress can leaving you feeling as stiff as a plank, and now you’ve got to get dressed and jump on the bike for another eight hours. A little yoga and stretching goes a long way as it turns out!
And this is what has surprised me most about all of this. I am far from being at any sort of extraordinary level of fitness, but I’m surprised at just how many kilometres I can crank out if I can just stay comfortable. When I talk to people and tell them I’m riding the length of the country, they have this kind of astounded look on their face like I am some sort of Olympic athlete or something. Actually maybe the astounded look is because they look at me, sum up my mediocre-at-best physique, the combination of the task and the distinctly average human specimen they see before them. Maybe it’s more of a quizzical ‘has he actually gone a bit mad’, extrapolating out the five minutes of pain they felt last time they sat on a bike seat out over 25 days continuously. But I soon find out that they don’t know what I know. You can conquer anything if you can just stay comfortable.
So right now I’m actually in this kind of sadistic training mode. Literally. Yes, I’m trying to get a little bit of tone, a little bit of definition in the calf muscles, but more than that I’m actively looking to ride long enough, far enough simply to trigger the next round of pain, the next round of discomfort. Because at this stage of the Tour I can do something about it. I can buy Butt Butter, I can fit aero bars, I can tweak and adjust and make minute alterations in the hope of creating the ultimate Zen bike set up upon which all riding is good, all riding is calm, all riding is at peace.
Of course then I might start to notice that my legs are actually really really sore.
Words & Photography: Lance Pilbrow
Trail Builder: Backcountry Trust - Trail Fund Tells All
A few years ago, the Department of Conservation approached Trail Fund with an unprecedented query – would we be interested in collaborating with trampers and hunters in maintaining huts and tracks on public conservation land?
It was a bit of a leap for everyone involved but also the start of something great. Trail Fund was a relatively new organization, albeit with experienced people, and mountain bikers and trampers hadn’t always seen eye-to-eye on how tracks should be used. It’s safe to say there was a little suspicion on all sides.
The result of this, after many meetings and e-mails along the way, was the Outdoor Recreation Consortium – a partnership between Trail Fund NZ, Federated Mountain Clubs (FMC) and the New Zealand Deerstalkers’ Association (NZDA). The creation of this new entity was key to obtaining funding from the Community Conservation Partnership Fund, and it received a significant amount. Through that, Trail Fund has been able to distribute and manage funding of many mountain bike projects, from the Missing Link project above Queenstown, to the Craigieburn Trails west of Christchurch, to Te Iringa track in the mid-North Island.
“Along the way, links between our organisations have grown and deepened,” says Trail Fund secretary and co-founder Nessa Lynch, who worked closely with FMC and NZDA on application and allocation processes. “We’ve realised that trampers, hunters, alpine recreationalists, and mountain bikers have more in common than we do differences.
“Many, if not all of us, are multi-recreationalists and, as a result, there’s been learning on all sides.”
The three partners have now moved to establish the Backcountry Trust, which formalises the relationship between Trail Fund, NZDA and FMC in facilitating and supporting volunteer-led maintenance of huts and tracks on public conservation land. This will allow centralised administration and management of grants.
Nessa Lynch and Guy Wynn-Williams (Christchurch- Ground Effect) will represent Trail Fund’s interests on the Trust. Three years of funding has been secured from the Department of Conservation.
What does this mean for volunteers? Trail Fund will continue its core business of funding, volunteer support and advocacy. This Backcountry Trust funding will be available for projects on public conservation land. The Backcountry Trust’s first funding round will be in February 2018, and existing grants are transitioning to the Trust structure.
Have a project in mind?
Start thinking about any projects you might have on public conservation (DOC) land. The focus is generally on maintenance and upgrade of existing tracks rather than new builds, but the Trust is keen to hear about any ideas you might have. We’d love to hear from mountain bikers who would be keen to look after huts, as well as tracks. The vision of the Trust is that groups in an area would collaborate on projects.
In related news, Trail Fund has also made the decision this year to affiliate to Federated Mountain Clubs. This affords us access to advocacy and representation on issues such as land access, and gives mountain bikers a voice in the wider outdoor recreation community.
We are keen to advance opportunities for mountain bike access on public conservation land, and happy to hear of any ideas or issues that you have. Email us on grants@trailfund.org.nz
Words: Meagan Robertson
Images: Callum Wood